
Berthil
-
Posts
1,151 -
Joined
-
Last visited
Content Type
Profiles
Forums
Gallery
Everything posted by Berthil
-

[MOC] KTM X-Bow
Berthil replied to Jurss's topic in LEGO Technic, Mindstorms, Model Team and Scale Modeling
Why are so many parts Red in the .lxf and also in the BOM, am I doing something wrong? LDD and brick library is up to date (on a Mac). Bricklink parts list would be very welcome please. Building this for a friend who owns a 500 bhp Xbow and he took me for a ride, amazing.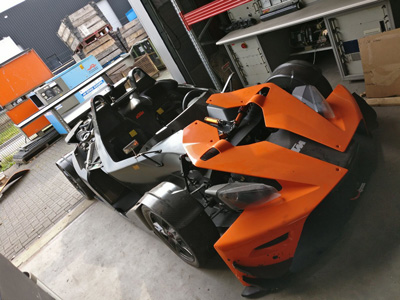
-
Rainbow Wave GBC
Berthil replied to Berthil's topic in LEGO Technic, Mindstorms, Model Team and Scale Modeling
I don't have the friction problem, please make sure all your 10L axles are straight and all blocks are fully pressed upon axles. All Lego blocks should have some space between them. Try turning the blocks on quarter around, also LEGO has tolerances, may be somewhat slightly bigger blocks are used. Especially on the 1x2 blocks where 2x2 are not available in that color. If you can't solve it small amounts of silicon oil or PTFE may help but should not be needed. What may show as friction may not be friction, if the offset between two pistons is two teeth instead of one the 1x2 liftarms of the 'crank' touch each other. I don't recognize the 24 teeth wheels coming off and even pushing the bushes off. As said, mine has run for 7 days without problems. This typically happens on larger forces, may be it is solved when you solve the friction between the blocks. -
Rainbow Wave GBC
Berthil replied to Berthil's topic in LEGO Technic, Mindstorms, Model Team and Scale Modeling
Thanks for the video, also a very good building sequence and synchronizing the groups afterwards. -
Rainbow Wave GBC
Berthil replied to Berthil's topic in LEGO Technic, Mindstorms, Model Team and Scale Modeling
Hi Luca, this sounds like the 'force' repeaters are not 100% in sync, so the five 24 teeth gears on the side driven by the center axle. It should be possible to move them a few millimeters to left and right when finished the build, this indicates there is no stress on them and the 'groups' do not have friction between them. This when of course when the wave is also synced. The repeaters are there because the 8 teeth gears have a lot of room between the teeth and will get stuck if more than a wave is powered. You indicate you now test every part on friction while building which is very good. Please make sure the Technic plates are fully pressed and all used 10L axles are 100% straight. Or are you trying to run the gears without the repeaters? It's not possible to move more than 15 gears without the repeaters because of the room between the 8 teeth so please don't try to do that. I have run the Rainbow Wave for 7 days 7 hours a day during Lego World Utrecht without problems. The Rainbow Wave should run smooth without lubricant but once you have it running smooth applying some silicon or PTFE spray on the gears may help to reduce wear, but only if it also runs smooth without lubricant. Hope the above helps. And thanks for the improvement, I've done the same after Lego World :) -
[GBC] Ball Shooter Marble Run
Berthil replied to Berthil's topic in LEGO Technic, Mindstorms, Model Team and Scale Modeling
Here is a photo of the bottom of the stepper, hope that helps: Basicly it is the stepper from the Cup to Cup V2 and altered to have more steps. -
Thanks Laurent, very helpful for the ones who want to build it. Meanwhile I made some changes to the invisible lift after running it for 6 days at Lego World Utrecht. It's a stunning machine but it does drop a lot of balls, I had to solve some jams and lift the machine 3 times per day to remove about 150 balls lying under it. So I've made a compartment under the feeder with reclining surface to guide the dropped balls to the side thus preventing jamming up the mechanism and necessary cleaning: The ball feed I also improved because when handling the machine during transport and removing the balls, the ball feed proved to be very fragile. Also the balls got jammed sometimes when high amount off balls were feeded. I've made a new feed that is less fragile and no jamming of balls:
-
I've uploade all photos, full photo album with all 34 floors on Flickr:https://www.flickr.com/photos/r53/albums/72157691043568266
-
I have tiled all floors and stairs of all 12 modulars including custom interiors for the 3 first modulars. For this no changes are necessary to the original modulars. Hope you like it:
-
[GBC] Ball Shooter Marble Run
Berthil replied to Berthil's topic in LEGO Technic, Mindstorms, Model Team and Scale Modeling
I took the launch pad out and made some detailed shots. I wanted to have the drive motor under the wheel to keep the top as clean as possible, as you can see this was a challenge together with the launch pad but I'm very pleased with the result. Launchpad with two rubber connector to ensure good grip when launching the ball with the wheel, at the right the two axles that keep the launch pad in place when mounted: Bottom of launch pad with two neck braces to create a good ball entry/exit and wedge shape under the wheel so the wheel 'eats' the ball always: The row of rubber connectors where the launch pad sits on, the launch pad can go nowhere when everything is mounted: Shot from other angle where also the axle is visible that runs up to the wheel through two smooth joint pin connectors (48496) on both sides: Here the launch pad has been dropped in with the neck braces on the exit side to create the wedge shape, the yellow axle with 4 rubber connectors hold the launch pad down: Bottom with gearing and two axles going up through the smooth joint pin connectors (48496): Side without the liftarm holding the wheel down showing the 4 pins of the 2 smooth joint pin connectors (48496): Now that I see the pictures it could be I will try using 1x4 thin liftarms to place the 4 rubber connectors upwards under the launching pad for more damping :) -
[GBC] Ball Shooter Marble Run
Berthil replied to Berthil's topic in LEGO Technic, Mindstorms, Model Team and Scale Modeling
Just finished building it so no instructions for it, sorry. The previous version had almost 16 meters of 3mm tube, this one probably a bit less I think. -
[GBC] Ball Shooter Marble Run
Berthil replied to Berthil's topic in LEGO Technic, Mindstorms, Model Team and Scale Modeling
Thanks. There is no residu on the balls and very little wear on the tire. I've tested the previous GBC with the same concept during Lego World for a few days and it should be okay for longer periods of time. The launching pad is entirely embedded in rubber (45590) to compensate for tolerances in dimensions to avoid too high forces. -
[GBC] Ball Shooter Marble Run
Berthil replied to Berthil's topic in LEGO Technic, Mindstorms, Model Team and Scale Modeling
A 1x4 plate and two Plate, Modified 1 x 1 with Clip Vertical, that's the tube clamping method I kept from the Akiyuki design because that cannot be improved and doesn't need to be improved. -
For who's interested, I did a complete rebuild of my stand alone Akiyuki Marble Run after my experiences during the week at Lego World Utrecht.
-
After my experiences at the full week of Lego World Utrecht I decided to do a complete redesign and rebuild of my stand alone GBC version of the Akiyuki based marble run. Only the method of clamping the tubes as tracks is the same as in the previous version. The ball shooter had proven it's reliability during Lego World and because of the improved design only one shooter is used. Very pleased with the now reliable result. https://www.youtube.com/watch?v=olx4JmtnVq4
-
[GBC] Ball Catcher
Berthil replied to Berthil's topic in LEGO Technic, Mindstorms, Model Team and Scale Modeling
Thanks! It was just wear and tear and the remotes each gave up after 2,5 days. They did well. The switches were worn and kept transmitting on both broken remotes. The batteries in the remotes lasted almost 4 days. The mouse with 9V rechargeable battery lasted almost 4 hours. They switch off after 2 hours even when constantly in use. I had three with me but 2 would also have been enough. -
[GBC] Ball Catcher
Berthil replied to Berthil's topic in LEGO Technic, Mindstorms, Model Team and Scale Modeling
I'm happy to report the Ball Catcher did very well at Lego World Utrecht and was operated from opening hour to closing time for 7 days with every 2 minutes another kid operating the PF controls. That means almost 1500 kids. The PF remote did well but 2 remote's didn't survive. Kids were very concentrated and sometimes applied a bit too much force in their enthousiasme. Here the movie of all my modules including Ball Catcher: -
I do not have that problem. The train (without the switching tracks) has run without problems for 7 days 7hours a day and lasted 1,5 day on alkaline batteries. Did you take the remark of Courbet in account about the old and new 24 teeth gears in combination with the bent liftarm? Apparently the new wheels run too tight there causing too much friction. I must admit I sanded down a new gear a little bit because they are stronger and had it running all night with a light abrasive (metal polisher).
-
Sorry, I have no instructions. May be in the future but I have lots of plans for other projects, especially after the 7 days of LEGO World. But the Bucket Wheel ran flawlessly for 7 days. Here by the way a video of my modules during Lego World:
-
Thanks! Yes, a 1/2 offset achieved with 1x1 technic brick or the 1x2 with two holes did not work, it needed something between that. These are the 60 teeth turntables. Thanks! Newer parts may be but the 56 teeth turntable is already available for 13 years ;) But indeed, the 18492 gear rack I used is available for 2 years now. My other two attempts to create it with a 64681 gear rack resulted in a somewhat jerky movement or too much friction.
-
You mean that black square? I don't like that black square, it think it looks bulky and hides the balls, I also left it out on the version 2 train. You're right, I have a lot of the 64179, I already did a tryout to make some kind of 3D maze out of them and use it as a 3D pinball in a new module. I could not get the right distance with the 64179 because the distance between the turntables to intermesh is not 1/2 offset but 1/4 which can be achieved with the two neck braces. I'll add the photos to my original post. You are right, I just meant the overall design is totally new and has no resemblance with any of the Akiyuki cup to cup versions apart from the cup itself :) I like my version best of course :) looks smoother and the diameter of the turntables and overall ball travel is 7 studs instead of 3 studs of the Akiyuki version 1, for me this enhances the already nice cup to cup effect much more. The turntables enables an open structure without being cluttered with gears.
-
Thanks! And very well noticed but I guess you have checked out the Flickr foto's of the back or have you developed such skills to recognize the thickness of a neckbrace as offset to make the turntable gears intermesh from the video only? :)
-
My version of the Cup to Cup using turntables. The only brick that is the same with the Akiyuki version is the cup itself and nothing else.
-
[GBC] Ball Catcher
Berthil replied to Berthil's topic in LEGO Technic, Mindstorms, Model Team and Scale Modeling
Here some pictures of the splitter itself. It already runs fast enough on three (hence 3 on switch) so if it needs to run on maximum another 50% downgearing is needed. -
I've added an own design interior to the 2nd and 3rd floor of my bricklinked Green Grocer. Only two very minor changes to the GG needed, everything else is kept original. It wasn't easy because the GGs small rooms with odd shape and placement of stairs. Tiled the stairs in the design of the already present hallway floor. 2nd floor with living room and kitchen. The kitchen where one 1x8 tan brick is replaced by plates for the kitchen shelf and upper cupboard. You might recognize the refrigerator, it's from the Parisian Restaurant. Living room with book cabinet. 3rd floor with bedroom and bathroom in one room. Towel rack at the left, shower at the right. Dress boy. Trouser rack. I hope you like it.
-
[GBC] Ball Catcher
Berthil replied to Berthil's topic in LEGO Technic, Mindstorms, Model Team and Scale Modeling
I will take some pictures soon, I'm almost done with adding an interior to the Green Grocer so I will set up my studio soon. Basicly it is the input for the Invisible Lift but I have mirrored and changed it putting the motor on the other side (under the inbox) to keep the switch as flat against the platform as possible. I was thinking about making it remote controlled with PF functions but that is something for after Lego World.