
mortesv
-
Posts
774 -
Joined
-
Last visited
Content Type
Profiles
Forums
Gallery
Everything posted by mortesv
-
Both cleavage and cheeks - no matter the sex a Fett always comes well equipped ;) Great Concept and well thought out build, keep them coming :)
-
Hehe, is it possible to use pneumatic T-bars and technic pin connectors? Dont know if that would hold though, but you would still at 5 pieces :) Or taps and technic half pins :)
-
I believe you are using bracket 99207 for attaching the doors on the Xwing? That doesnt come in white, but lbg should do fine though :)
-
The top of the spine is 5 wide, the bridge is a bit narrower, but as far as I remember 3 would be too narrow, and yes 4 is so much better to work with :)
-
On the SW, blu-ray the is a 360 camera turn of the entire ship. It is that I have used to get to the proportions of my suggestion. If the pod is only 7 long it would be 1/20 the ships length. That is too short as far as I can tell :)
-
Any progress on the cockpit? I think the proportions and front of the design I suggested could be used, but the rest should be more curved, perhaps using some shallow arches
-
This is genius! I was completely stuck trying to design x-wings in the right scale to my new Nebulon B moc, and the I see this elegant solution - thanks mate! ;) This is genius! I was completely stuck trying to design x-wings in the right scale to my new Nebulon B moc, and the I see this elegant solution - thanks mate! ;)
-
[MOC] UCS Nebulon B - Medical Frigate 'Redemption'
mortesv replied to mortesv's topic in LEGO Star Wars
Thanks L! I must say that I think you own model is pretty detailed as well :) I dont usually buy play sets but your moc is truly a great combination of detail and playability - I have already supported it on cuusoo and will buy it day one! ;) -
[MOC] UCS Nebulon B - Medical Frigate 'Redemption'
mortesv replied to mortesv's topic in LEGO Star Wars
@Bob, I think it cost me around 700€ in the end -
[MOC] UCS Nebulon B - Medical Frigate 'Redemption'
mortesv replied to mortesv's topic in LEGO Star Wars
The stand discussion is very interesting. There is a lot of viable solutions, but I guess it comes down to personal preference. Since I dont actually have a cat, the stand I have made is sturdy enough for my needs ;) Save for hanging it in wires, it is the most discreet stand I could think of, and I think it almost gives the sense of the ship is floating - at least when I look at it using my Mark I eyeball ;) -
[MOC] UCS Nebulon B - Medical Frigate 'Redemption'
mortesv replied to mortesv's topic in LEGO Star Wars
Hi Bob :) The colours I have used are sand green, sand blue, tan, dark tan, dark red and a little bit of dark brown. They are the most subdued colours I could find and are even more subtle that some of the colours found on the movie prop - which has hints of pink :) The reason for the stand under the water tank is that if the model rest on the fin, the centre of gravity is directly above its resting place. This result in the model getting terrible balance. With stand on each side of the fin, the fin works as a pendulum stabilising the entire model. The tiny 'foot' under the fin doesn't hold any weight but is there to keep the pendulum from swinging too much if the model is pushed :) I'll look into building a micro x-wing - to be in scale it has to be even smaller that the one that came with the 2011 advent calendar - which is even smaller than the recent planet series set :) Thanks for the kind words :) -
Great progress! I think this bridge could be useful: Also more obvious vertical bands would add a lot, and give the model a better sense of scale. Tiling everything over sound interesting, but I wouldn't go overboard. With my recent moc I wanted a section to look more dirty and I tiled it about 50% in random patches. Your proportions, spine and engines are all spot on
-
flickr Find Untitled...but awesome...Clone Wars Diorama
mortesv replied to Brickdoctor's topic in LEGO Star Wars
At first I couldn't make heads or tails of this one, until I understood how frikkin big it is. Those minifigs looks like ants and the stock walker looks completely dwarfed by the installation. I'm also a big fan of the snotted floor. Thumbs up to the builder! -
[MOC] UCS Nebulon B - Medical Frigate 'Redemption'
mortesv replied to mortesv's topic in LEGO Star Wars
The Nebulon itself is just over 4k, then there is the stand and the falcon which are about 130 combined I havent weighed it, but I think over 3kg - but I really have no idea, it could be more. Regarding the stand, I opted for transparent so it doest conflict with the model. Even though it could be held in the middle it wouldn't be very sturdy and having 3 black stands to support it would not be the prettiest I think - but I am open to suggestions -
[MOC] UCS Nebulon B - Medical Frigate 'Redemption'
mortesv replied to mortesv's topic in LEGO Star Wars
Thanks! Actually the brick count is more than 4000 :) -
[MOC] UCS Nebulon B - Medical Frigate 'Redemption'
mortesv replied to mortesv's topic in LEGO Star Wars
Well, it is not the sturdiest stand, but I have used the ship's inherent design to stabilise it. The model does not rest on the fin which mean that it serves to "pull down" the centre of gravity between the two cylinders. You can push the model lightly with a finger, but if you cat jumps onto the window sill, well then you are in trouble... :) -
[MOC] UCS Nebulon B - Medical Frigate 'Redemption'
mortesv replied to mortesv's topic in LEGO Star Wars
Actually the model can be held in one hand in the center spine - so it is swooshable in way The spine consists of 1x16 technic bricks and 2x16 plates -
[MOC] UCS Nebulon B - Medical Frigate 'Redemption'
mortesv replied to mortesv's topic in LEGO Star Wars
Thanks mate, the transparent stands are the best feature, but I tried to downplay them in my description as to not steal focus from the moc itself And thanks to you too Brickdoctor and congratulations with your must desserved promotion! Just added another picture btw -
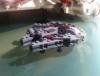
Every year I look forward to seeing what new collectors model(s) TLG will release. When the X-wing was announced I was somewhat disappointed (and mildly annoyed). I wanted something new! But instead of crying about it, I thought about which ship I wanted to build the most… I have been modding UCS sets for a long time now - to the extent of more or less completely redesigning some of them. Thus I felt the lack of a new exiting set was my cue to design and build my very first UCS scale MOC. The ship I chose to build was the Nebulon B. The model’s obscure and complex design has always intrigued me and I thought it was a good place to begin with the model I wanted the most. I began looking at other mocs of the ship, large and small, when out of nowhere L-DI-EGO posted his excellent moc. However, I wanted the set to be at least 80 cm long but not more than 90cm - a good size for a UCS frigate class ship. Then I began designing… LDD Since my brick collection was limited I turned to LDD. I had used LDD before when constructing Cavegod’s AT-AT, but I hadn’t really constructed anything using the program. Using LDD suddenly bricks were free and I let my imagination fly. I turned to modellersmagic.com for reference shots of the movie model and began fleshing out proportions, constructing a sturdy technic skeleton and throwing on all the details I could see. What I didn’t notice was that when tweaking the proportions my model began to slowly grow. I was confident I was over 80cm, but then I had a second look and my preliminary calculations showed the model would end up at 97,6cm… Ok, I might get above my 2500 brick budget - so 3000 was my new target. When I had made the first version I still wasn’t satisfied with the model and began tweaking it further. Cavegod offered a few suggestions and some of them even made sense… Which reminds me; I should be sure to make a note that it was Cavegod who came up with the ingenious use of barrels for the housing of the static discharge vanes :) When I was finally the done the model had surpassed 1m in length and the brick count was looong past 3000 and even 4000.... The Model So here is what the finished model looks like: The Nebulon is a feature rich and detailed ship. Even though it is symmetrical down the spine, it is interesting to see that different designers has sat on different sides of the ship and added kit bashed details using their own unique styles. I have tried to recapture these distinctive features on my model. This is apparent in the area leading up to the engine section. Here the designer has added one large and one smaller tube and a single row of larger ‘windows’: On the mirror side the design is based several rows of smaller windows: Another place showing different styles is the two sides of the neck: The other side sports the iconic viewport. Also the scale Falcon can be seen here: The front ‘fin’ of the ship hold several interchangeable pods. I may not be apparent in the film but these pods are distinctively colored. Thus I grabbed the chance of putting some color on my model -grey can get a little boring :) Again the detailing is a bit different on the other side – underlining the ship’s almost organic look. Building these pods was like building a bunch of separate smaller models, and a lot of fun! The green pod houses the command module: The rear of the ship showing the engines is one of my favorite parts of the Nebulon B (I have a thing for starship engines). I have tried to capture the angles and details of this section as closely as possible while still improvising a bit. Besides adding so many rows of plates in between the engines the real challenge was when I discovered that none of these angles slope at 45degrees – making the technic skeleton a little less straight forward. Here is the whole thing from different angles: Lastly, another shot of the Falcon: I hope you like it, please comment! And thanks to Cavegod and his other half for their feedback!
-
No, I am NOT sending you any more sets!! Fool me once...
-
Welcome to Ameribricks.com - Major Changes Coming!
mortesv replied to Shadows's topic in Forum Information and Help
PHEW!! It was just blind luck I checked in this morning! Was just about to go down to the local tattoo parlour to get the Eurobricks logo done across my shoulders. But then I saw this and changed it to the new Ameribricks logo. I have just gotten the outline done today. Tomorrow they will fill in the colours. Cant wait! -
Hi everyone, this is my first review, so bear with me if everything is not up to the usual high standards of this forum. Having been an avid UCS fan for a long time I was very surprised to learn that I had completely missed the 10246 UCS AT-AT. To my luck there was just one left on Bricklink, which I bought really cheap – around 1000euros. Most of the bricks were even brand new! Getting the 6700 bricks took just over a month – here is a chunk of them lying on my home office floor: In terms of parting out there is a LOT of LBG if you are into building castles, and there are a few exotic pieces as well. To my surprise the instructions were a simple LDD file. But even more surprising was the fact that the instructions only showed part of the alternate model: The UCS Nebulon B! I love the fact that alternate models once again are part of the UCS line. To my knowledge the only other UCS with an alternate was the TIE Interceptor and that alternate was baaaaaaad. One could argue that the Nebulon should have its own set, but I am not complaining. The tricky part was to disassemble the alternate LDD model and making the AT-AT using ALL the pieces. I began with constructing the feet and legs: Quick note – remember these tires: or else THIS happens: This is the legs with the body frame attached: Everything else is cleverly attached to the body frame – thumbs up to the designer! Sides attached – each side is held in place by only two pins: Here I experimented with attaching the head. The head is exquisitely detailed and constructed quite nicely – without the sides the model has a 'skinny dog' look: (the head and the neck weighs almost 1kg! – over two pounds) Finally some shots of the finished model: Luke is AT it again... (get it???) Together with the little brother – 7129: All in all the model took about 25 minutes to assemble. More experienced builders will have it done in around 10 minutes I guess. I have heard of people (possibly named Dave) taking several months to build this thing, but I guess that must be an urban legend… As with many other UCS sets the 10246 comes with a scale model. In this case it is a very detailed Snowspeeder, consisting of more than 400 bricks distributed over more than 130 types. Conclusion: Parts: 10/10 if your like LBG - 1/10 if you don’t Design: 10/10 if you like accurate UCS models – subtract 15 from this score if you want your UCS models to have minifigs and play features Build: 10/10 - although it was almost too easy to follow the instructions Price: Like REALLY cheap Minifigures: None – so 10/10 and shut up! Playablity: Use you imagination Overall: 6000,5 - I like it A LOT! Have a great April guys!
-
I have a room filled with UCS sets - 18 I think. They do take up a lot of space, but when I dust them off - every other day - I really enjoy it :)
-
49cm between the edges of the stands and 34cm width
-
UCS 10221 Mod Episode II: The Modder Strikes Bottom
mortesv replied to mortesv's topic in LEGO Star Wars
Hi Jamil, thanks for the nice comments . The list is (more or less) what I bought for the bottom plates on Bricklink - the list is rough though. Removing the old bottom and attaching the new plates is the tricky part, but with a little experimentation it can be done (if you remove too much it wont hold, and removing too little makes the new bottom hard to apply). As you can see I have further detailed the ship (especially the engines) using a lot of bricks not on the list. But the additional decoration is just s personal preference - as long as the ship has a bottom it looks much more complete