
Coal Fired Bricks
-
Posts
114 -
Joined
-
Last visited
Content Type
Profiles
Forums
Gallery
Everything posted by Coal Fired Bricks
-
Soviet/Checoslovakian electric passenger loco CHS2
Coal Fired Bricks replied to KvadratGnezdo's topic in LEGO Train Tech
these look great. Love their nickname. -
Mallard Steam Train - Critic and Support
Coal Fired Bricks replied to CabbageFace's topic in LEGO Train Tech
I believe a saw this somewhere on Facebook. I can't seem to find it but I believe it was on Lego rail or Amazing lego train World Wide groups. I know these are hard but if you build them in the real world you may be able to use a little friend called Dr. unPUREIST(aka the amazing work of Karle Mahler). Please note the hoods on the deisals and the cab roof of the PA Unit(it think that is the one on the far right), they are made from built-up styrene. His work is amazing as he has taken the model maker approach rather than lego, so he uses styrene, paper, wire, etc. To make his models more realistic. if you do some hunting on FB you may find how he made the cabs. This could solve the shovel nose problem as it solved the PA unit problem. EDIT: I found how he did it on the Gas Turbine(center left) https://www.facebook.com/karle.mahler.3?__tn__=%2CdC-R-R&eid=ARBZEmtmxaB_tN_No7-VYJnCiMT3nwPVD5YSPZG0LUFiUPDVe2j9WohZe1wu4IlL_EbOM49ZQMiEL0DY&hc_ref=ARQOaoqgHFZ-vNnkZ_oCNjYnCcg8tKnKzO2lMAh4-QClHaBTerTOk5UmBDjyqLobgpY&fref=nf. The link is to his Facebook page, Look for the yellow gas turbine and it is in the comments. -
BrickTracks: different curves, PF/9V compatible
Coal Fired Bricks replied to JopieK's topic in LEGO Train Tech
@coaster I have 3 questions. 1.)Are the ballasts of the r104a and r104b curves any different than regular r104 curves? 2.) Will we be able to buy individual switches as for some of me and a few of the other New England builders we need more of one switch, or 10 left turnouts. 3.) Would we be able to just buy on an individual part at a time, ex. just a base A or just an A and B. I was just wondering because I am excellent at dropping things or losing things, etc and I don't want to buy another $40 switch set because I broke one part. I so want to buy 1000 switches. -Conner -
Again I didn't ever build an O gauge train BUT, I have a few ideas. You could try to sand down the flanges to make them smaller. And make sure to test them on switches as the flanges must be a certain height to go through them. It may take some time but you could make a setup with a wheel attaches to an XL motor and on the side of it sand paper attached to some springs. This would allow you to let it run for hours without watching the wheel and assuring to get a round(ish) finnish.
-
Wow looks amazing
-
This looks great. An idea, you could put this system under a road and put some magnets in the pin holes and on the top of the road you could have magnet driven vehicles that are powered by the chain
-
[MOC] NYC J3A 20th Century Limited Hudson (v2)
Coal Fired Bricks replied to SavaTheAggie's topic in LEGO Train Tech
Wow looks great will you be doing a valve gear? -
[moc] Virginian AE 2-10-10-2 Mallet
Coal Fired Bricks replied to SteamSewnEmpire's topic in LEGO Train Tech
Tender power? Cale did it with this y6b's and em1(and one other one that I can't remember) The loco looks fantastic -
I would say a moderate switching speed not super fast. For the switching mechanism is used the below to test it the way you want to I would suggest sticking the tiles in plates.
-
Is anyone selling ME Models Rails
Coal Fired Bricks replied to Coal Fired Bricks's topic in LEGO Train Tech
Sadly I'm from the US I was thinking around $50-$60 and I would pay to ship. I don't know what you would be thinking. r104 would be preferable. -
Not sure is this is agent the rules or not if it is you can delete in. I have for a long time been looking to get some high radii curves but I'm conserved about price. I'm wondering would anyone here mind selling a loop of r104 or r88 Me Models rails for a reasonable price. I know they are bad but if I can get them at a good price I will buy them(they are injection molded). -Conner and Cole
-
Yes I did, I have tested the concept to make narrow gauge switches and it works well. I think the main reason to do this is so you can build switches as there are no 3rd party options for that gauge of track. The other thing you can do is keep lego track and build at a larger scale but this may feel strange next to your other locomotives.
-
Northern Pacific Z-6 Challenger
Coal Fired Bricks replied to Craig Strader's topic in LEGO Train Tech
Welcome to the forums. Jeffsenlaw(spelling) created a Z-6 you may be able to take inspiration from that. Nice build -
@zephyr1934 ha. I'm not saying this is a great model and I could do it myself, to do this myself it would take years to reverse engineer every part of this and as I think it can be done it would take a looooooooooooooooong time to do so. I understand how hard it is to do this stuff and at times it is not fun. Also the expense of this product is 100% justifiable. $500.00 parts $100.00 custom stuff $20 instruction booklet $60 loop of r104(yes I know it costs $120 to buy it but that is not the cost to make it so I am going off of of 50% margins which is standard in manufacturing) Right there is $680 and he has to still make a profit so I think $1250 is justifiable with 50% margens. And add in your time and this could easily have been sold for more, look at BMR's T1 that was sold for $2000 and the S100 from Brickmania for the same price as the Christmas set, I think this has a better value then the S100. Surprisingly I do think that way(the bottom part) I want to build stuff for commission or buy 3 hogwarts express locos in 10 years $$$$. I have thought of making instructions to sell. But to build for commision I want to make a name for myself first, I want to be known as a great builder before I ask people for their money. Also have you read the form on New England BrickWorks that is still in the works, and I know about the time and effort that goes into designing things and looking at cost. -Conner and Cole
-
[moc] Great Northern K-1S 4-4-2 WITH CABOOSE
Coal Fired Bricks replied to SteamSewnEmpire's topic in LEGO Train Tech
Looks great I really like the update. I just feel like there is something on top of the back truck, something like a bracket or a support and the cow catcher on the pilot looks way too big. Other then that this would look great with rods in real bricks. One thing, I think you should import this into Studio then you would be able to download all of the needed custom parts so you could see it rendered in XXL/XL wheels and an MS(I think) wheel on the trailing truck, and you could put rods on it. -
Wow looks really nice, great build. Looks nearly like a ho model.
-
Not the modern stuff
-
A quick question for @coaster, will you be coming out with a Ldraw file for the r104 switches soon?
-
The loco looks 100% amazing, but for me, an 18 year old $1250 is a bit too pricy. Even my 15 year old brother loves it but the cost is way too high for us. I agree with @SteamSewnEmpire that this may be better as an instructions kit. Also I think if you put custom rods in it would look better and may justify the price more. Lastly do you have any upcoming sales on BT as I'm looking to get a loop of r104 from you but I don't want to buy when it is $120. Is there any chance you may be lowering price also, I know your margins my not allow it but I just can't afford the $120 for just one loop of track, well mainly my 14 year old brother who wants them. Will you be doing any discount on the tracks at all as I want them so bad but right now they are out of our price range. Or can you do any discount special for young TFOL's -Conner and Cole
-
[MOC] REAL BRICKS - PRR class E44
Coal Fired Bricks replied to RickyWasAYoungBoy's topic in LEGO Train Tech
Here are some numbers: I hope this ends the truck size dispute so the measurements here can be scaled to test model accuracy. For 8-wide f=foot s=scale studs: f*0.8=s -
I love the loco. Just to let you know if you look through my faves on my flickr page(link in signature) there is a great looking brick built custom track which includes switches, curves and streght track.
-
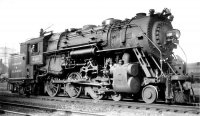
[MOC] Boston and Albany D1a 4-6-6t
Coal Fired Bricks replied to Coal Fired Bricks's topic in LEGO Train Tech
There is some more info here: https://sites.google.com/site/bostonalbanyrailroad/home/0-6-0/0-8-0/2-8-0/2-8-2/2-8-4/4-4-0/4-6-0/tank Also this may help: There were five locos of this class but information on it it hard to come by other than the tidbit on the above website and on Lionel(which is already copy and pasted into the original post). I based the model on the above table and the mechanical drawing in the American Locos book. Hope this helps @monai with your information hut on this Loco. -Conner -
Wow Wow Wow. This is my favorite model you have created. Hands down when I saw this model I 100% loved it, the updated one looks even better. I would love to see this one in real bricks one day(or at least in a render) more than any of your other builds. This is just stunning.
-
[MOC] Boston and Albany D1a 4-6-6t
Coal Fired Bricks replied to Coal Fired Bricks's topic in LEGO Train Tech
Thanks for the link, I have been looking for a digital copy of the book as the 60 year old book has seen it's better days and I don't want to ruin it. How did you find the book that fast? I've been looking for months for it. -
[moc] Reading Camelback 0-4-0
Coal Fired Bricks replied to SteamSewnEmpire's topic in LEGO Train Tech
Here is what I found on Wikipedia(USA) The Camelback's cab astride the boiler design raised concerns for its crew. The engineer was perched above the side-rods of the locomotive, vulnerable to swinging and flying metal if anything rotating below should break. In addition, the fireman was exposed to the elements at the rear. The Interstate Commerce Commission finally banned further construction of Camelbacks but gave exceptions to allow those under construction to be completed. In 1927, further orders were completely prohibited. The Philadelphia and Reading's crews referred to these locomotives as Mother Hubbards. The B & O crews, who had co-use of the Reading's line from Philadelphia to Bound Brook NJ (the Reading's junction with the Central RR of New Jersey's line to Jersey City across from New York City) called the Camelbacks "Snappers" in reference to a possible side rod snapping and flailing into the cab.[2] Many Camelbacks were converted into end-cab locomotives. The advent of the mechanical stoker which moved coal from the tender to the locomotive and its associated underfloor machinery placed cab floors and tender decks higher, and from that vantage point the engineer was safe. This is he;;pful but in my mind not super definitive.