
Berthil
-
Posts
1,162 -
Joined
-
Last visited


.thumb.jpg.52b70fbe8eda38d4e4b15e892ea4ff5b.jpg)


-
 You are right. I thought it would be easier to create a shaped tube chassis (not only 90 degree angles) with the new connectors. But still adding and subtracting the connector angles from the desired structure angles did not work. Compensating for length differences was also not easy. There are some small gaps and some parts have little bit of stress, but not enough to deform them. The stress actually helps in creating the rigid structure and I expect the gaps will go away when the build is on wheels and weight is added to the structure. Some gaps are also there because I used LBG frictionless pins to color match the tube chassis. Frictionless pins leave more wiggle room.
 -
It was a long time wish for me to build a Monster Truck with a tube frame. Doing it for [TC31] seems the right time, also because of new Connector types issued lately. I took inspiration from the Tamiya TXT-1 Monster Truck, rather than trying to build a real world model. Although I started just a few days ago when the competition was announced, I was already able to build the tube chassis with a steering motor and connection points for the axles. The shock absorbers are mounted as in the Tamiya model, although a bit different because of design and space restrictions. The tubes are more or less part of the structure, so not entirely 'faux'. The suspension is working. It feels solid as a brick, but not so heavy. Next is designing the axles with power and 4 wheel steering. The motor will be on the axles. Since I like to keep everything 100% LEGO, I'm using PoweredUp. So it will not be high powered like the original Tamiya model, but more like a crawler. If there is room I want to add a manual diff lock. But another route could be using genuine black LEGO RC motors if they fit better as I have some. Not sure yet. As for the body design I was thinking of a removable and minimalistic Unimog design. I like the GT7 version but studless dark green will be out of the question. If that gets too heavy, I might revert to a smaller classic and clean two-tone pickup truck design.
-
Very nice build with good textures and details in a compact space!
-
[TC31] Uncommitted
Berthil replied to MangaNOID's topic in LEGO Technic, Mindstorms, Model Team and Scale Modeling
Looks great! I was also planning to use the long shocks (for looks) on my entry for a typical monster truck look, but it hasn't shaped in my head sufficiently yet to build something and enter. -
Since (real) monster trucks generally have lots of stickers/decals, maybe it should be clarified if (custom) stickers are permitted? But since it says 'no other restrictions', I guess they are permitted and up to the voters what is acceptable?
-
Bricklink Studio is the tool at the moment. It can load sets with parts palette (not build) and knows part availability with (Bricklink) prices. It is also possible to import parts lists as a parts palette. It can make renders and building instructions. All parts in the Pick a Brick store are available in Studio anyway. TLG is the owner of Bricklink, Bricklink Studio and of course the PaB. It can also load LDraw parts and make your own parts with the Parts Designer. I'm assuming the position of an AI here, because if you would have asked an AI, you would have had the same answer.
-
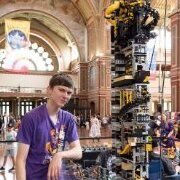
Here's my collection. The plan is to have an attic ready this year to display more as still a lot is in boxes. What's not in the picture is about 20 GBC machines. The classic F1 cars were designed by RoscoPC. The more than 40 modulars are all official sets, Brickative designs and my own
-
https://rebrickable.com/mocs/MOC-211814/Berthil/sar-queen-helicopter/#details
-
I only have worked a year for CaDa as a designer, so my remarks relate to that. I have also worked with Mould King as a designer for about 5 years, and CaDa is much more professional and honest in their approach. With the remarks from the other CaDa designers, it seems CaDa is finding a good balance between novel parts and compatibility with the LEGO Technic universe with respect for patents.
-
I'm a designer for CaDa, busy on my second project and the first will be published soon (not car related). In my situation, the development of custom parts by CaDa depends a lot on the input of the designer. If a designer has ideas about a new parts and it really contributes to the design, CaDa will make it. So CaDa seems to rely on the designer to come up with new parts, apart from finding solutions for patented parts. So in the case of the Audi, if @T Lego would have come up with novel ideas about a reusable grill piece, I'm pretty sure CaDa would have made it. But since a set designer is not a parts designer, and does not get compensated for bringing new parts to the table, chances are small CaDa will come with novel parts.
-
Modular Building Sets - Rumours and Discussion
Berthil replied to The Jersey Brick Guy's topic in LEGO Town
Thanks, good to hear you enjoyed it! -
I've already added four of my own digital model files to Rebrickable, which I created for my own research. Great way to centralise these! If you have created digital files of sets, do the same!
-
Looks great, nice to see where these great models are designed and captured. Here's my room, under the table are also drawers. The desk can rise. All the GBC machines are stored on the attic. At the right a lof of F1 models from Luca (RoscoPC), unfortunately no longer with us. Some day I hope to make a picture in the dark where all the houses are lit.
-
I printed and the studs are still too small. Plates clutch better but tiles just fall off.
-
@Stereo That's quick and looks good! I will print one when another print (LEGO sorting trays) is done. With 'support for critical ereas only' enabled, there are only 3 extra supports on the 2nd opening of the 2 x 4 areas between the tracks (looking at it with the ends facing downwards). There seems to be a small irregularity between stud opening 2 and 3 when slicing the part, I can send a screenshot if you need one. The DBG filament is on order so will print them all soon. Thank you again! Edit, uploaded the screenshot with area marked here. I see these are probably caused by the radius indication as in your example.