Search the Community
Showing results for tags 'counter'.
Found 9 results
-
 A MOC modular binary counter is presented and used to measure the RPM of a large Technic motor. The counter is constructed of a series of 4 sides reels each representing 2 bits. These are held at neat 90 degree angle multiples by a micro stepper mechanism. The overflow bits are carried to the next reel using a 4 knob wheel pushed by a small lever arm from the previous reel. The design is modular such that multiple modules can be combined to create a larger counter. The counter demonstrated is made from 3 modules and can count from 0 to 4095 in binary. Enjoy!
 -
Hi Everyone, Here are the instructions on Rebrickable for the modular binary counter MOC I made a while ago. https://rebrickable.com/mocs/MOC-43585/TechnicBrickPower/modular-binary-counter/ Thanks to 1963Maniac for creating the instructions - great work as always and much appreciated. This is the youtube video showing how the model works:
-
 Posted to rebrick.com, so also details here Final model Details in 4th reply Finally decided what to build for lego official contest. It will be distance counter - automatic, as it is about some automation. Started with 3 level counter - cm, dm and m. First level is continious, other to discret with 10 steps.
 -
 All mechanical and 100% LEGO Ball Counter. Numbers do not always line up perfectly because of backlash in LEGO gears but it counts every ball. I tried to minimize amount of gears but as many of you know, backlash is almost unavoidable. The wheels can be taken out the GBC to set to zero. 1:10 ratio mechanism by Parax77.
 -
-
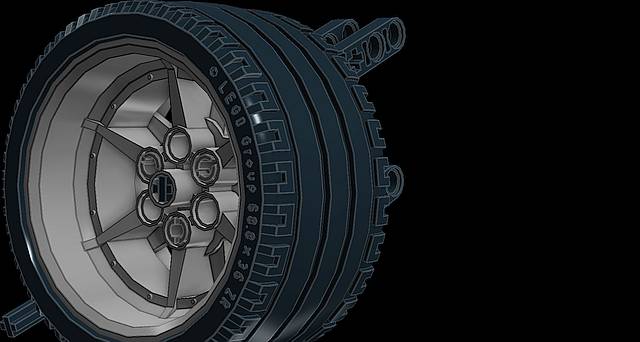
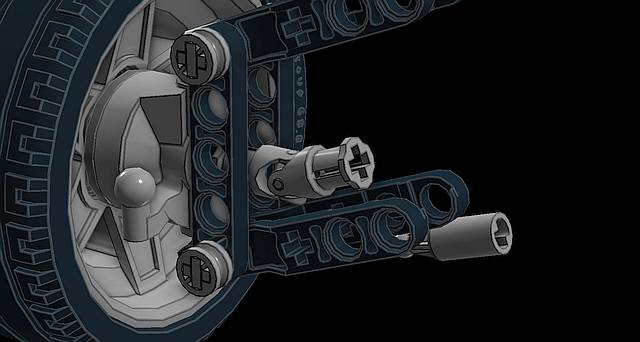
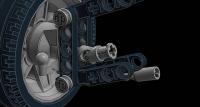
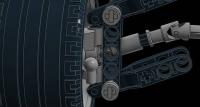
 Hi there! In short: I want that topic for all the people that need an example of how to use a part IN or FOR or wonder how to use it correct. I'll start: I wonder why they made a totally USELESS: 1. WheelBearing 2. 3SnapGearBlok 3. LTCardanBall Can somebody explain to me please. My problem here is: If i use a CrossAxle 5M and Unuversal Joint = flexible suspension + rotation OK / but no steering If I use the LT Cardan Ball its either a working suspension OR steering... and only rotation IF there is NO angle but a straight in line with the 3Snap Gear Blok So why or what for did they make these parts for? It could not be for a good wheel suspension with a combo of steering/suspension/drive train! Im soooo confused! I used to build the 1994 Super Car 8880 suspension. But these parts are not yet included in the LDD. Any ideas? Maybe I'm stupid... but I can not see how to build a steer/suspension/drivetrain combo with these parts, like in the 1994 8880 model. Here are some pictures to help with the imagination and a link to a very good explaination on the 8880. Essentials of the wheel suspension: All three action possible, (steering+suspension+rotation). ---------------------------------------------------------------------------------------------------------- Thanks for reading. Best regards HAL
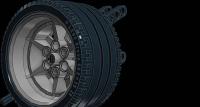
-
Hi. This is an Ice Cream Counter stall I built with my daughter for our Horse Show Layout. Let me know what you think. Mike
-
Hi guys, I want to have a tachometer to test my MOCs RPM and I am considering four options: Building it with LEGO (I have seen videos of LEGO tachometers (Nico71 is a great example) and they worked quite well but centrifugal tachometers are big and not really accurate, because you have to calibrate it yourself). Buying some sort of RC tachometer (I can't find any at a good price that could be attached to my MOCs. Buying the LEGO speed computer. Use gear ratio calculators and not buy or build anything (I will need to switch on the computer each time I want to know something, because I don't think there is any mobile app for Android to calculate LEGO gear ratios or at least I couldn't find it). What should I do? Any advice of which one to buy if you choose second option? Thank you in advance and sorry for my poor English, I hope you can understand it. EDIT: 5th option: Making it using Arduino but I think it's quite difficult/expensive to make it work as accurate as a "real" tachometer.
-
Acknowledgements I’ll start this post with two call-outs to Nico71. Firstly, he posted images of his ball counting GBC module (refer to text further below) which provided a substantial foundation on which to base my module design. Secondly, he was gracious in giving me permission to post the building instructions for my module online. I wanted to obtain his approval given my module is, ultimately, a derivation of his original work. Module video and Building related files Firstly, a video of the module and links to the building instructions, parts list and LDraw file. Building instructions: PDF Parts list: BrickStock BSX file LDraw MPD file Context I had a desire to have a ball counting GBC module as part of the GBC display for the upcoming 2017 Auckland Brick Show. The primary features of the module were that it would; be a mechanical device i.e. no electronics in the module have discrete digits to indicate the count preferably rotate all digits in the same direction Development I was aware that Nico71 had built a GBC Ball Counter and had posted both photos and a video of it running. It seemed a sensible place to start so, after studying the photos and video, I reverse engineered the module to help me to understand how it worked. I knew that Nico71’s module was not using discrete positioning for digits but I was also aware of Parax77’s video and building instructions of his Chain Holonomic Drive, which I thought I could use in place of the wheel dials in Nico71’s model. Using the Chain Holonomic Drive however proved to be too unreliable. While I could get it to work reliably with two digits (the ones and tens) I couldn’t get the required reliability for the subsequent three digits. I subsequently discovered another video of a GBC counter by Nicky Fitzgerald and a second video providing more information about the build. I attempted to adapt the counting mechanism to replace the wheel dials but this was unsuccessful. The counting mechanism uses the "Technic, Axle Pin with Friction Ridges Lengthwise" in what appears to be a means to prevent the “hammer” from falling due to gravity. I found the amount of friction when attempting to turn multiple dials concurrently (e.g. 99, 999, …) too great for the upper clutch mechanism. However, Nicky Fitzgerald’s design did point me in the direction of the solution I ended up implementing in my module. Module Design Commonality and Differences The following image uses a coarsely grained colouring to identify the main elements of the module. The input bin is coloured red, the primary ball moving mechanism is coloured black and the counting mechanism grey. The primary ball moving mechanism (black) is pretty much the same mechanism as in Nico71’s original module. There are a couple of minor tweaks but nothing that is too significant. The input bin (red) differs in the following ways; it is larger, the agitator mechanism is different (and driven via the addition of a chain) and it contains a mechanism to restrict the balls to drop into the primary ball moving mechanism one-at-a-time and in time with said mechanism. The counting mechanism (grey) is a “plug compatible” replacement for the original, displaying a discrete count of the number of balls. Next Steps and Additional References I have used this module in test mode. It occasionally seems to spin a dial a bit too far but then the next ball moves the same dial less. I won’t get to use the module “in anger” until late October. In the meantime, if someone else elects to build this module and has any suggestions for improvements to the design, you are more than welcome to post back to this thread. Should someone be interested in exploring more about the counter mechanism built by Nick Fitzgerald, in the last couple of days I came across two related videos. Of course, you could always reverse engineer that module and post the building instructions (although after checking with Nicky). Regards, David