

steph77
-
Posts
925 -
Joined
-
Last visited
Content Type
Profiles
Forums
Gallery
Everything posted by steph77
-
 Thanks! About the front axle : you are 100% right. The most important part in in is the tan 20T gear in the front. This one is mandatory to get some stability in the differential rotation. Even if this differential is not 'correctly' holded, the system works absolutyely fine and event under charge (i out a motor in a previous attempt to motorized it), it doesn't crack or disengaged at all. The connection between the différential and the cv-joint is made by using a 2L axle and a little part of pneumatic tube (about 2-3mm) that i pushed in the bottom of the cv-joint to avoid the 2L axle to pop out. For the tires, As i stated it the model is developped for both configuration of tires. There was a slide in the design process. I've been designing a ladder truck at first and then move to the offroad truck. It makes these tires in the shorter range for the model, but i find it still works. On another hand, this trucks fits my 3 previous ones with these tires :) S. Thanks!
 -
Sure. The articulation is working like this: Basically. I use an intermediate arm and a virtual pivot point for this one. The actuator acts on the central linkage witch is a 5l one. The articulation point is on the fourth stud. The black 3l beam go one stud further to the rear vs the articulation point and is used as a mechanical lock.see below. This first 5 l arm is articulated on its end at the second main section of the arm. This one is attached at the 5l moving beam only at it's third stud. In the same time the first stud of the second main section of the arm is connected at the fixed first main section. This combined create a virtual pivot point with a large action range. Here under the maximum range of the arm. Here under you can see two black 1L tube with a 4 axle wit stop. Located in the axle of the new blacks frames. The red bushes you see in the front are sliding under them in hooklift mode. This way, the first section of the arm stays close to the chassis as the second one rotates. The dumping mode is now activated. The 3L axle with red bushes has move to the front. The main arm can lift. Nota: on the front end of the sliding lock is a 3 stud beam. The sliding parts comes by under it and lock the articulation. Take a look at the 8052 set that use barely the same system. The articulation is obviously quiet more complex here. But the lock is the same. Not sure this is clear enough....tell me
-
Hi everyone, I've not post that much these last time. The fault at to much labour's at work. But this is not a reason to avoid the eurobricks contest . So. My thought about this model were guided by a few basic ideas. All along the past years I build lots of model and particularly with these specific wheels and rims. All the models were oriented on a maximum of functions packed in the compactness model as possible. This turned out to a sort of race were I had to do more and more each time. Time has passed. An retrospectively, the better models,those who are still on the shelf,those who were the most successful near kids and friends, where not specially the most complex or technically wow. So for this contest I've tried to keep it simple. A simple truck. A good driver and a tool on it and this is it. Simple. Playable. Reliable. I first oriented my choice on a fire truck with a ladder. As @jeroen . I've even build a cool outrigger system that worked well but I quickly understood how complicated this would end. I didn't wanted to build a Gaz factory. I next oriented my choice on a 6×6 chassis, lightweight, and an ampliroll system on it. This is what I gets after two weeks of work on this concept: The truck is driven manually and through a pneumatic system for the tool. The arm presents two possibilities: used as a dump truck or used as an ampliroll truck to unload the container. The switching between these two modes is pneumatically realised as well as the hood locking. The chassis presented for the contest is the allroad version. The chassis is realized in such a way that the tires of 56×26mm are also compatible with it. Some other pictures And a last one for today, with my other contest models S.
-
Did they say the car runs faster than ever or did they say the car's conception has been the fasted ever?
-
42172 - McLaren P1
steph77 replied to Ngoc Nguyen's topic in LEGO Technic, Mindstorms, Model Team and Scale Modeling
I see an immediate alternate use in helicopters rotor control. Exactly the part I needed. -
I find this set more appealling than the mclaren and the Mercedes g wagon. No need to push 400 euro to have great sets.
-
Steph77's Moc corner - EW160E
steph77 replied to steph77's topic in LEGO Technic, Mindstorms, Model Team and Scale Modeling
Some news on this one! New windshild,front mudgards and hood. -
Steph77's Moc corner - EW160E
steph77 replied to steph77's topic in LEGO Technic, Mindstorms, Model Team and Scale Modeling
Thanks, unfortunately i 'am not able to give or produce instructions...sorry for that Thanks for kind comments. When i say i swap the shiffter, maybe i do not used the right terms. In fact i 've tryed to place a stepper inside of it, but it took too much place for a final results that was not convincing. I so decided to take the stepper out and place a simple knob that rotate and switch the gears. Finally, it is a simple solution that work very well and keep the build and the interior clean. You can see it here: The 12T gear in between the seats. The lever you see is the DNR selector and the 2L liftarm on the gearbox selector in the rear of the seats, next to the gearbox compartment, act as a and of course limitator so you can not switch from 4th gear to first gear. to lock the gear and keep it selected i've build a simple system that lock softly the rotation by 90°. It is base on connector assembly tensed by a rubber: S. -
Steph77's Moc corner - EW160E
steph77 replied to steph77's topic in LEGO Technic, Mindstorms, Model Team and Scale Modeling
Hello everyone! This is it! 2024 - Porsche Nine-Eleven I'd like to present my latest project, a Porsche 911 based on the inventory of two 42154 sets with a few complementary parts, but not many. The starting point of the model was to attempt to build this car on the basis of the tires available in the original set. I quickly came up against the fact that these don't work well with the wheel arches. I therefore switched to the higher tire model, i.e. the 68.8 mm diameter wheels. These wheels make it impossible to use a conventional steering system. The tires touch the wheel arches, so I had to resort to another system. So I built a system of links to create a virtual point of rotation. Thanks to the geometry, the tires retract a few millimeters inwards, and the rotation combined with forward and backward movement means that the wheel no longer touches the wheel arch. The downside is that the turning radius is, on the one hand, a little small and, on the other, I've had to abandon any suspension system. After all, it doesn't make much sense to design a suspension system with a travel shorter than one stud. The advantage, however, is that I've saved a lot of space for inserting the dummy engine and transmission. The latter is incredibly smooth. It works smoothly and without friction. Functions include: - Opening doors and hood, - Rear hood also opens, - Steering - D-N-R selector - In D position, a 4-speed sequential gearbox completes the transmission. In terms of design, this is the first model I've ever been satisfied with, when it comes to building a car. The design is fluid and, I think, captures the spirit of the 911. Some photos: First impression, this car (the real one i mean) is recognizable between thousand other, and i've tryed to translate it into lego parts... It even has fake working front lights, due to the use made of the glow in the dark part that hold the front dishes doors largely opens and ther is a credible interior I've tryed to keep it clean all along the conception process No loos parts here, everything is hold in place, like the rear wing Overall view of the full opened model: interrior with sport seats, the DNR selector sits between the two seats Here it is next to the 12T knob who selct the gears in drive mode. I finaly swap the stepper and the palets commands to keep the build clean. I've had a hard time building and designing the rear section, the junction between doours, B pilar and rear curve is quiet challenging on this car. The rear section has the rear light well integrated, and still a view on the fake engine. Boxter 6, as the real thing. I hope you'll like it! S. -
Steph77's Moc corner - EW160E
steph77 replied to steph77's topic in LEGO Technic, Mindstorms, Model Team and Scale Modeling
Chinook i my 'Madeleine de Proust' and it is so complex (to build, according my own criteria) that i often feel tired of it. It will be back a day or another. No plan for it now. The yesterday session on the Nine-Eleven has been dedicated to the paddle shifter of the beast. I made a step further but it has still a lot to be done. -
Steph77's Moc corner - EW160E
steph77 replied to steph77's topic in LEGO Technic, Mindstorms, Model Team and Scale Modeling
Comming soon ... -
Questions for LEGO Engineers
steph77 replied to a topic in LEGO Technic, Mindstorms, Model Team and Scale Modeling
OK, try into some contribution to this interresting topic. I alway begin by shaping the overall model in real life with real parts. No care of any functunal aspect at this moment. This milestone allows me to evaluate the real free space into the overall model in wich i can place mechanics. Then i define a strategy, wich results in the main choices. Motorized or not? Place for the batteries? mechanics or pneumatics? All functions motorized or some of them manual? etc.. Next come the second step. This step is made using the first mocup that still stay build. The reference model is usefull to keep proportions, main form, etc.. In this step i usually place the main functionalities as direction, suspensions and essentially, when concerned, the gearbox distribution. The following step, with the previous model still build, consist in a full rebuild of the model trying to enhance each and every aspect as look, proportion, technical efficiency. This step is the time when a strong optimisation of al aspect is done. I do it in this way because it is at this third step that i begin to have in mind all the specific constraints of the model. Then : Repeat of the previous step as often as neccecary until i state the model is finished. Nota: Potentially, a model never finish... You can have a look et my katana supersport topic as a reference of my explaination. The process is clearly illustarted. KATANA SUPERSPORT Have a nice build! -
Congratulation to the winner! I am happy with the concept that win this compétition. A brillant idea well executed ! On a personal pov, I am fine with my result. Now I am impatient to see next contest!
-
Time for some teasing on the prizes, no?
-
I do vote. I fond as well this should be mandatory. BTW when will be the vote closed?
-
Agree with @Seasider curious to see how many people have voted. I find that the vote process has less visibility. Maybe a banner at the top of the topic listing?
-
[TC26] Arctic Walker
steph77 replied to Seasider's topic in LEGO Technic, Mindstorms, Model Team and Scale Modeling
This is the second model that fits the sprit of the contest in my opinion. Would have kill to buy this in the 90' Well done! -
[TC26] Snow Patrol
steph77 replied to Thirdwigg's topic in LEGO Technic, Mindstorms, Model Team and Scale Modeling
Not sure that the width of it could make it compatible with my station? The only way to know it is to build it, True? I'll try to do so this evening Because i found this build in the right spirit of this contest and becaus i like it -
[TC26] Polar station 8680 MK2
steph77 replied to steph77's topic in LEGO Technic, Mindstorms, Model Team and Scale Modeling
-
Entry of steph77: POLAR STATION 8680 MKII Building of a play set based on the 8680 official set. Summary of the functionalities: - RC -Simplke and logic organisation of function to play with, - Drive, steering, front ramp and liftable deck motorized by two medium motors - Modular build - Lots of accessories as ULM helicopter, sleigh, rope, technic figurs, skies, etc - Lots of openable elements The video: The discussion topic:
-
[TC26] Polar station 8680 MK2
steph77 replied to steph77's topic in LEGO Technic, Mindstorms, Model Team and Scale Modeling
[TC26] POLAR STATION 8680 MKII This is the end result of my work on this contest project. Concept I do pass the last ours on this contest to optimize the build but also i tryed to have a complete reflexion on the concept. The main modification i introduce in this last iteration is the notion of a front and a rear end to this polar station. Thinking at it, it appeared as a non-sense that once the front door is closed, it was impossible to drive the machine as it was impossible to look frontwards...quiet dangerous to drive. Even like this, i mean after adding a piloting area in the front, sometimes unexpected things happend... The concept is based entirely on the memory of the exceptional playing quality of the original set. From then on, I focused on the realization of functions and accessories, all coordinated with a view to obtaining the most complete gaming support possible. For example, I installed a winch under the lifting platform at the rear. This winch enables objects to be loaded from the ground onto the low floor of the polar station. These objects can then be transported on the roof or inside the station. I paid attention at every detail i could. As an exemple, i wondered about the cable length of this winch, for example. By choosing a very long cable, once the rear platform is in the up position, this cable can be deployed across the station, and the helicopter or train can be winched up the front ramp. These are the whole accesories embeded in the station - an u.l.m. helicopter - a sleigh - a camera and two accessory boxes - two pairs of skis and poles - extra rope - four seals - a tool kit, always indispensable in the far northern Overall view of the model: From the technical realisation point of view. The build is modular. they are threee principal parts: - The undercarrier, - The station's floor - The upper body. Lets have a look at the undercarrier who is the most technical part of the model as it received the main gearbox that power the two upper structure functions and the propulsion and direction mechanism. The gearbox is a dual clutch one. The two clutches move together and it results in a two couple of functions that are grouped like this: - Direction and propulsion - Opening ramp and lifting deck This setup is the best combo i find to optimize the gaming experience. The two medium motors are located on the two outside ends and they are RC commanded based on the power function system. This offers a physical command that is absolutely mandatory in my mind and in the present play set build. The model is also colored as it is not strictly symetrical. The tracks are the small ones. These tracks offer a way smoother run on flat surfaces. Speeking of this, the station is 4X4 powered, but it has no crossing abilities. I made this choice in order to have a reliable build. The steering radius is quiet good without beeing exeptional. The model embed the crab drive possibilities, by moving the 24T black knob visible on the upper axle on the picture below The undercarrier is very sturdy, all mechanism are packed into frames and they are no cracking gears here. Viewed from the top, the main structure is visible with the use of oblique support beams. The rear deck lifting is build as it is visible below: The rotation is transfered from the gearbox to the lateral side where it will be transfered to the roof and it's linear actuator. I tryed to used as many differents building technics to transfer the movement. The original set used pneumatics, worm gear and racks. I made use of worm gears, gearboxes, racks and gears, originals 90° gear orientations, clutch gears in original use, etc... The final room inside ended as very limited, but i managed to squeeze all the functions in a very efficient and clean build. Some other views of the finished model: openable roof for easier acces: lateral door and ladder Pilot place and extra rope I hope you enjoyed it. The madatory video: -
[TC26] Polar station 8680 MK2
steph77 replied to steph77's topic in LEGO Technic, Mindstorms, Model Team and Scale Modeling
Tanks. The HD video is uploading. I'll replace the 360 dpi as soon the hd is online. edit: done -
[TC26] Polar station 8680 MK2
steph77 replied to steph77's topic in LEGO Technic, Mindstorms, Model Team and Scale Modeling
Tanks. Here you go: s. -
[TC26] Polar station 8680 MK2
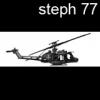
steph77 replied to steph77's topic in LEGO Technic, Mindstorms, Model Team and Scale Modeling
Yesterday build session wasn't that productive, However i managed to realize some things. First, i finalized the direction system. As it is motorized and use the standard racks and gear system, i had to insert a clutch in the power line. I finished wit a solution with two clutches, (the new ones - inline clutches), one for each steering racks front and rear. I add a small knob on the outter side and managed so to realized a build in crab mode for the direction. You can actualy turn the gear and the tracks will steer manually, place theme in a crab mode and have fun. The reset is automatically reallized if you let the motor turn, the two pairs of rack re-align due to the and-of-course clutches. Cool function. Second i had a look at the little helicopter wich is now sturdy and fiabilized: Third, i relocalized the battery box for more convenient acces and begin to search a solution for a proper integretion of leds. Some night taken pictures, (sorry for that) the heli: The battle field late night: And as i was working on the station, the crew has begin it's observation work of the environnement: