

ClassicLook
-
Posts
166 -
Joined
-
Last visited
Content Type
Profiles
Forums
Gallery
Everything posted by ClassicLook
-
I've seen that list, just wanted to see, how they look like on the finished model. Do you have some pictues of them?
-
Can you show the swapped parts on the final model?
-
Hi everyone, Let me share with you my cockpit MOD. It's not so special, I used many ideas from this forum, but I guess it's still custom. I faced with the problem, that many of you described earlier, that if you want to integrate four seats, it's almost impossible to fit all the minifigs (especially Chewie, because of his enlarged size). It seems that the cockpit is not correctly minifigure-sized. @Lock came out with a clever solution with acceptable compromises. However, I realised meanwhile, that I only want to display Han and Chewie in the cockpit, so I was focusing mainly on the control panels and the front seats. I modified the back of the cockpit as well to transform it to a more cleaner interior. It is still possible to sit all the minifigs, only you have to remove the front seats (so there's no seats left). Here's the result: Cockpit by Gyula Herr, on Flickr Cockpit2 by Gyula Herr, on Flickr Cockpit3 by Gyula Herr, on Flickr Cockpit-minifigures by Gyula Herr, on Flickr The only problem is, that there are no printed "30 1x1 2/3' and "45 2x1" slopes in dark bluish gray for the panel between the seats. I don't like stickers, so I think I'm going to use these light bluish gray parts: 54200pb083.original by Gyula Herr, on Flickr 3040pb010 by Gyula Herr, on Flickr I'm starting to bricklink the parts now.
-
Hey Guys, I've just finished my second modification on my MF. I modyfied the panels according to @Lock's design to make the vents turnable. However, I kept the original panel shape on the right, since I'm not planning to work on the 'empty room' (it's not necessary to access that area well). It was a bit challenging to keep the original panel design - some wedge pieces aren't so stable as on the original modell and the arrengement of the tiles aren't perfectly identical - but the end result is more than acceptable. I was trying to reduce the disturbing effect of the "stair formation" at some specified points by using studs instead of tiles. The build is uploaded to Bricklink's Studio Gallery: https://www.bricklink.com/v3/studio/gallery.page?idModel=75628 IMG_20190121_103726 másolat másolat by Gyula Herr, on Flickr Left front panel: Right front panel: Jobb elülső panel by Gyula Herr, on Flickr Left rear panel: Bal hátsó panel by Gyula Herr, on Flickr Right rear panel: Jobb hátsó panel by Gyula Herr, on Flickr
-
Here is my quick solution to hold this panel on place: 1x1 plate plus a 1x1 "cheese" slope piece. IMG_20190104_185049 másolat by Gyula Herr, on Flickr It does its job, but I'm trying to find an invisible method.
-
Wow, that's the coolest coffee table I've ever seen. I wish someday I could build something like this for me. However, why did you use first order stormtroopers? If it's the death star, classic troopers would be accurate. My other question is: how can you open it? Which glass is removable?
-
Hey Guys, Does anyone have a solution for this gap caused by the gravity when the falcon stands vertical? IMG_20181227_175416 másolat by Gyula Herr, on Flickr
-
I think you can place the lights right after you've build the engine. I bought an USB LED lights set, because I wanted to run it the by powerbank hidden in the "empty space" on the right back side of the MF, but then I throw the idea. In my oppinion, white light is also appropriate, if it's built behind transparent blue bricks/hoses. Mostly I choose white light instead of blue. I recommend you to use a radiofrekvency controller. My light has an integrated IR controller, which locates under the panels of the Falcon, so it can be funny to switch on the lights!
-
Hi, I've just made my first modification on my Falcon based on the build of @Noob91 However, I've made some minor changes. I've replaced the orange 1x1 plates to dark tan. I've used a "Technic, Axle Pin with Friction Ridges Lengthwise" to connect the ring to the base. Thus I can adjust the right angle easier (It's a bit fragile construction). To achieve this, I had to replace the "Brick, Round 2 x 2 with Axle Hole" to a 2x1 Technic brick. Here it is:IMG_20181223_173816 másolat by Gyula Herr, on Flickr IMG_20181223_173516 másolat by Gyula Herr, on Flickr IMG_20181223_173504 másolat by Gyula Herr, on Flickr IMG_20181223_084953 másolat by Gyula Herr, on Flickr The only parts I don't have are the "Container, Bucket 1 x 1 x 1 Handle / Scooter Stand". They are quite hard to find in light bluish grey and I need 4 of them. Maybe I'm going to get them in tan or gold colour.
-

AFOL designer program
ClassicLook replied to anothergol's topic in Digital LEGO: Tools, Techniques, and Projects
It's working! Thanks! -
AFOL designer program
ClassicLook replied to anothergol's topic in Digital LEGO: Tools, Techniques, and Projects
Thank you for this detalied description. It seems a bit difficult for the first reading, but I'm trying to do this. -
AFOL designer program
ClassicLook replied to anothergol's topic in Digital LEGO: Tools, Techniques, and Projects
Hi Everyone, I've just started to design with the Studio 2.0 software and I really like it. I have a problem with the instruction maker feature. I have model, which have identical parts on both side. Is it possible to show these "submodels" only once in the instructions with a multiplier (for ex. "x2")? Currently, I have to create the steps of these parts twice... -
-
Thank you for the detailed pictures! I will probably make this!
-
Yes, that room. I didn't get any useful informations, but I've solved already my engine lighting. The LEDs run by an 5V adapter connected to the wall outlet. First, I wanted to integrate a power supply into the ship, but later I've found it unnecessary. Since the Falcon stands on a high cabinet, I could hide the cable. I would like to grab the opportunity to thank @efferman his great work on the vertical stand! The Falcon stands really stable on it! It was applied after bag 10 and luckily I could manage it on my own! IMG_20181107_110420 by Gyula Herr, on Flickr I am very proud to finally completed this set! I didn't make any modifications yet, but I probably will do the vents, the cockpit and fix the big panel behind the antenna.
-
Really impressive solutions there! Can anyone measure the right back empty area of the original set for me, please?
-
Thank you for your help! It seems that the sceleton of the Falcon is strong enough to keep it in this position for a long time.
-
Hi Everyone, Does anyone notice some damages in the structure of the Falcon using the "Efferman stand"? I've just got the Falcon and I wanted to be sure, that it's safe in the vertical position. My other quastion is: what is the exact size of the right back area? I'd like to build in a power source there to run the LEDs.
-
Thanks for your kind words. I was doing some research before bricklinking the parts, and the light bluish grey seemed to be the best choice for color. The sand blue would be also nice, but they are more difficult to get and there are no accessories (for ex. the hatch piece) in that color either. I've also built it in LDD to see, how the modifications work, so I came up with this version. The only thing that frustrates me is the consol pieces in the cockpit, which are "regular" light and dark grey, but you can't notice them from outside. Share if you have any other modifications or better solutions! Maybe we could change building techniques. Good luck for your project!
-
Thanks! The inverted slope is just simply glued directly to the backboard. To achieve it, the "poster" is cut out below the slope like this: https://www.eurobricks.com/forum/index.php?/forums/topic/153500-picture-frame-as-minifigure-display/&tab=comments#comment-2842838
-
Hi Everyone, Let me share with you my latest creation. I designed it to my brother for his birthday. He's a big Monty Python fan. It's the the Black Knight from the Monty Python and the Holy Grail movie. The knight is a simple black figure (with black head) with a custom printed torso. I've placed it into an IKEA Ribba picture frame. Hope you like it!
-
[PRESS RELEASE] 75192 - UCS Millennium Falcon 2017
ClassicLook replied to Jim's topic in LEGO Star Wars
That's a very good question... -
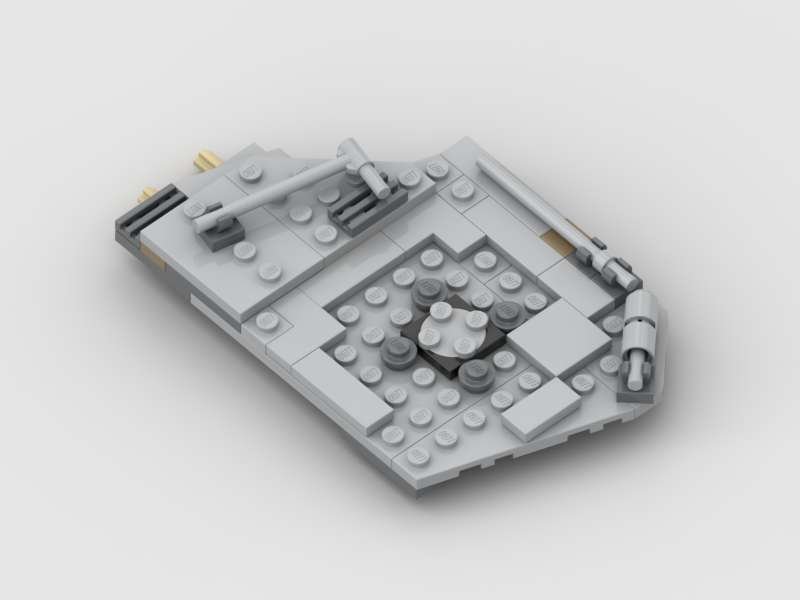
Nice collection! Is it a modyfied TIE Fighter? Its wings looks smaller than the official one.
-
Picture frame as minifigure display
ClassicLook replied to ClassicLook's topic in General LEGO Discussion
I could imagine a nice display them too. You can display only a few minifigs as well. Like this: I was collecting these minifigures from the beginning to display them this way. I've seen many similar good solutions on the web that inspired me to create my own. I like Star Wars too, but there are so many minifigs, that would be too expensive and frustrating to collect. Anyway, If I had a SW collection, I would definitely build a custom display stand for them. I found a good compromise with the LOTR line. They are not too many to collect and display on the wall. To be honest, The Avengers are still on my list. I could display them in a same picture frame with a nice background... -
Hi Everyone, I haven't seen any posts about displaying minifigures in picture frames recently, so I thought I share with you my version. I made these 5 display frames for my Lord of the Rings/Hobbit minifigure collection. It doesn't contain all the minifigs from the themes, I deninitely wanted to create a nice display instead. The 5 frames are: Elves, Orcs (including 1 goblin soldier), Wizards (=Istari, incl. 2 blue wizards from other themes), Dwarfs (+Bilbo) and the fellowship of the ring (incl. Gandalf the White, King Theoden, Elrond and Gollum). I can place some bigger minifigs (for ex. Goblin King) on the top of the frames. I've used IKEA Ribba frames (23x23 cm). I've edited special backrounds for the individual displays. The minifigs are standing on 2x4 bricks, which are glued to the background. These bricks allowed me to apply stickers to sign the minifigs and to add extra parts (for ex. the arkenstone for Thorin). Unfortunatey, I couldn't use the glass of the original frame, because there wasn't enough space due to the equipments of the minifigs. Thus, I can't prevent them from dust... Creation process: As you can see, the bricks aren't glued on the photo, they are connected directly to the board. The final result: Thanks for stopped by!