

cehnot
-
Posts
436 -
Joined
-
Last visited
Content Type
Profiles
Forums
Gallery
Everything posted by cehnot
-
I took a break to get back to focusing on my job. I just finished with getting my stickers for my mack 5, echo 1, bttf deloreans and plan to add them onto my models first. I did, however get all my parts in for this build and about half way done with the fuselage. I have not started this, but I did get all the parts to build it. I am using going to start by using a x-acto box cutter knife, super fine sand paper to smooth down the edges and superglue the parts. I want to build a rough one first, then the final. I will post pictures of the build first, then update my concepts and work on the canopy. Sorry for the major delays.
-
 I am waiting for several parts to arrive in aluminum from chrome block city and stickers to be made. I put up a WIP back in December. I am reworking the rear to lower the time traveling side panels the run from the roof, down the side and over the wheel well. I want it lowered a bit and to lower the 3 red bars. Trying new parts that recently released as well. I am so behind on doing my model updates.
 -
Always amazing work. Did you do an interior for the car? If so, would you be willing to post a picture of it? Have you ever thought of tackling the BTTF delorean or even a regular DMC 12? I am always amazed by your scale cars and I would love to see how you would tackle that iconic car. I cannot get it to look right without staying true to a 7 wide body. And after the add ons with the wires and wheel wells it fits inside a 8-stude width. I only have seen Misterzumbi handle it with a 6 stud wide body, but I am sure with all the new parts somebody could try doing this size in 2017. I may attempt it after I release my 7 stud wide version, but I surely would love to see what you would do with it.
-
I got about halfway into the fuselage steps and realized I never ordered a large chunk of pieces. They should be arriving soon. I did worry about the wing construction. I am debating on making a mod where they are with larger white tiles instead of red tiles representing the red 2, 5 etc markings. this may help. Though it would mean the red markings would be stickers. Sorry for the delay. If I come up with a better solution I will post it and update my LDD file. I have already been modifying the side panels near the cockpit. Mainly for durability. I will post pictures soon.
-
I am using 2 mini fig hands. The build is slowly coming along. I deleted the wings just to focus on building the main fuselage section. I can understand wanting to make it more durable. I am doing the wings last. I think you need to post your updates on this. I am building via LDD build mode. I am about 1/2 done with the fuselage. Even with all the grouped file parts, I wish it would help make the generated instructions work better. I have a lot of random parts built. I may spend a whole day later this week to work on it. When you have time could you post photos and show us the issues after you work on the shuttle? Right now I am working on mine. Hoping to have it done over the next week. I think I know where you may be having stability issues. I will post pics soon.
-
I just got my last order a few days ago. I bought parts to build both versions. I will construct them and test it and then share my results. My guess is the gears will hold up just fine even though I prefer the back of the xwing non gear version. I got my stickers from various models as well so the cockpitpit should look full as well ago the removed panels inside the ship. Spent way too much money on sticker sheets for various upcoming star war model builds.
-
I will sometime this month. I just got my last order for my X-Wing.
-
that is why I need to get the parts to test it. I worry about that as well.
-
Thanks. Never thought of using the hinge you used. Anyways, thanks for sharing. The cockpit mod works well for those wanting to keep a brick shape closer to the real model. I will build mine soon and then work on the custom canopy.
-
I think the 1x2 plate with 1 center stud fits were, just not legal That whole are is suppose to line up, but I think it will be a very tight fit. My plan is to shove a plate in that space. That is why there is one laying on the file below it.
-
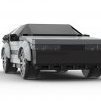
No I do not. The width of the interior is 8 studs wide. I believe parts of the car is wider. I think displaying it side by side will be fine. You may need to replace the side walls with 2x4x3 panals to get it to fit. My car will actually fit on the lego railroad tracks. I know that ideally the delorean should be 6 studs wide to match 1 stud per foot ratio. The issue is all my vehicles are more closer to a 1:44 ratio. The ecto-1 is 26 studs long, should be 22 studs. The X-Wing is 51 studs long instead of 46. I try to maintain shape and proportions more. Since Ecto-1 is 8-9 studs wide when you account for the stuff hanging off the side, the tiny Delorean needs to be 7 studs wide to maintain the approximate proportions. Ecto-1 is 7 feed wide and the Delorean is 6 feet wide. Those come close to each other when you add a stud wider. Looking at a lot of great vehicle mocs I think i will maintain my 7 to 8 stud wide cars. I could get the van down to 8 studs wide if I make the delorean 6 studs wide but there isn't a windscreen for that size. Right now the van looks huge and I would love to build it 8 studs wide if I could get the car to slide in it. The wheel wells stick out to 8 studs wide. Looking at the Dimensions game, the truck doesn't feel too large, but then again when you look at the movie truck and see Marty next to it, the vehicle towers over him.
-
I tried to make it smooth like Gray Mouser did, the huge issue is strength. I wanted to have it not sag or bend as you hold it. I admit, once I get all the parts in from my brick link orders I will post photos of the final build. I have 3 or 4 part orders to arrive.made it as smooth as possible. It now has a completely enclosed bottom. I agree about the fact it doesn't slope upward and I use the height of actual plates to show the slope, but the bottom was my least concern. I achieved making an entirely enclosed bottom by accident. It also allows me to make the front landing gear function as an alternative option. I won't., and will just keep it as a separate attachment like the back since I have a few ideas on how to display the ship. Within the next month or so I should have the model done and plenty of photos. Care to share your LDD file?
-
I am not a LEGO Purist. I used LEGO brand parts, but I also used custom parts as well as other brand parts to finish this piece. Brick arms makes awesome clips that made this possible. My current build is missing one 2x2 tile or a 1x6 tile. I somehow misordered from Chrome Block City. I cannot decide whether I should place a 1x6 over the windscreen piece or keep two 1x2 tiles on the sides and a 2x2 tile in the middle. Twin Pines time machine premiere scene. 1. Doc Brown's Value Van 2. Libian's VW van based on LEGO Dimensions version. 3. Diarama for them based on LEGO Dimensions scene. I built my own Doc Brown Value Van. The van is based on the LEGO Dimensions version, except I fixed the proportions and included a movie accurate interior based on movie scene stills. My van is 2 studs longer and the interior is lowered to how the real van looks. Since we never see directly inside the van in focus, there is great scene where Mary and Doc are playing RC car with it and the van is behind them. Only problem, its out of focus. There is a ramp inside the van to go over the wheel wells. The Time Machine sits inside perfectly. There are two tool chests inside with some sort of canisters on top. Not sure what they are since we never see inside it, just from quick stills I saw. The van is 10 studs wide. Feels huge, but since I built the car at 7 studs wide, the vehicle will look great next to it. For accurate proportions, I used this modified Value Van P-60 food truck as proportion reference. Otherwise, for actual Brown's van I used the movie. Before you ask, Yes I flipped the wheels intentionally. The front rims always stick out towards the side, rear wheels almost always are inverted on large trucks and semi trucks. Fun fact, I used a GMC P-60 spec sheet to figure out its bottom steering column and frame. There is plenty of room inside the engine area if I ever want to make the steering actually work, but I decided its for display only. LDD File: LDD FILE for Doc Brown's Value Van 12/26/16 Hill Valley Square: I plan on doing the hill valley square someday, so that may look sweet. Orion Pax did one and I need a place to sit my model. He also did other cars and such, which I may do as well. I already want to recreate the Libian's scene. LEGO Dimensions did a great job on the model and I want to build that version and place the all on a baseplate diorama for scenery. LDD File: LDD FILE Time Machine DeLorean Package 12/27/16 The Time Machine: Chrome Block City: Aluminum coated LEGO parts. My most expensive model ever. Brickarms: Just like my Ghostbusters ECTO-1 I used their Double sided clips and 1 bar clips to fit into those very tight spots and get my look just right. MEGA Blok: Side mirrors and 1x1 plate with side knob Stickers: For now I modified my file in the physical brick form to fit the official Flux Capacitor brick LEGO printed. I am replacing it with my proposed 2x2 tile option as you see in the sticker page. I plan on making a small print run of these with my Ecto-1 and Speed Racer Mach 5 stickers. 1. Mr Fusion 2 sizes. One to fit on the LEGO bar clip. One to fit on a regular round 1x1 brick. 2. Flux Capacitor idea, 1 printed sticker, or 2 stickers and make the box part transparent sticker sheet so it has depth and the Flux wires on a 2x2 black plate wth center knob behind the clear tile. Note: Clear tile is rare and was costly. I bought 2. 3. The touch number at the bottom left of the sticker sheet would fit on a 2x1 cheese wedge located below the time circuit. 4. The dashboard would be fit with a bottom cut around the center knob. I think i need to redesign it so the speedometer is smaller and up higher. Or get rid of the DMC and shift the speedometer over so the center peg isn't doing anything to the black area. Onto the LDD files photos. You can make a DMC-12, Time machine from BTTF 1, 2 or even 3. I have built the model to be quite easy to modify from each section with not a whole lot of changes. And most parts are used somewhere else so there isn't a ton of extra parts. Dark bluish gray 1x1 cheese wedge is not placed on anything, I used an off brand transparent red plate with side knob: WHAT? MEGA Bloks makes this. DMC- 12 BTTF 1: The whole back is modified to make up the different parts. But the delorean from here is similar for 2 and 3. BTTF 2: Driving mode. Mr Fusion, on my model. I cut off the clip and sanded it down to a smooth finish. What? I destroyed a lego piece to make it look sweet! Flight Mode: You have to cut down some of the rigid black hoses so they fit about 2 studs long. The transparent plates on this option will not stay unless you either have a person in the seat or for display purposes, place a tile on the floor to hold them in place. BTTF 3: You can see the alternative Mr Fusion idea. The white wheel idea may not work, because I think it stretches the tires out too much and makes the wheels not rotate. I am using white plastic wheel wells if I mod my model for this. Look at those red batteries! No Idea what they are, but some how it helps make time travel happen. I want to do glo wire for the model, like I saw before on the lit up one another Eurobricks forum. Doc Brown does;'t actually fit inside the car. His hair prevents the door fro closing. Marty's hair causes the other door to not close, yet when you place him in the driver side, he fits. Look at those teal green things! My favorite part is the fins coming out of the exhaust cheese wedge. Those are clips from Brickarms and a LEGO robot arm. The arms hold the wedge in place. I also want to resolve how the hose connects instead of just sitting there. This model uses the 1x6 black tile. I want to get that darn 1x1 dark blueish gray these wedge in place on the back, but not using a 2x2 bracket because it makes the back 8 studs wide instead of 7. You will see this in a few other pictures I took. Until I figure out how to do the glow wire and get my last aluminum part from Chrome Block City, I won't touch it for a while.
-
This is the right size ship I was thinking about doing. I look forward to seeing the interior
-
Personally I think the set is too short. I think the ship needs to be about 20 to 30 studs longer. I think that would fix a lot of stuff. The thrusters, if used to measure the ship would be 4 studs wide and I would enlarge the image to see what would fit that. My guess is the ship is 60 studs long.
-
I know it works for the other TIE fighters I seen use this technique, but the center was thicker. I may have sacrificed strength. Cockpit is similar to my updated one I did on All in the Reflexes model. I placed that link on my. Bricksafe page as well. I like fitting my basic cockpit design in it, just uncertain about the strength of it. The roomy feel inside is gone since I needed the sides to build the strength for the pylons. It's really weird how the ball is held together. The brackets and 1x1 with knobs are what hold it all together. The brackets inside the cockpit lock the top and bottom together as well as the 2x3 plates on the back. LEGO needs 2 sided knobs for their plates. That would ensure all the strength I need. I am fairly happy with it, just need to build it and test. But first my X-Wing parts are almost all here and I need to get that completed.
-
In the pursuit of modifying my TIE Fighter I decided to completely redo it from the ground up. I wanted to streamline the ball and round pillars connecting the wings and ball cockpit. How I made the cockpit: The whole piece is a mirror of itself. That makes it completely centered. This also allowed me to do the ion cannons at the bottom tighter to the body and allowed for the "curved bottom instead of a rectangle shape. Stability and durability is unsure as of now. Feel free to check it out and let me know if I am doing something that greatly hinders the durability. TIE Fighter LDD file 12/23/16 I am not happy with the wings. I do like the connections and how it's shape now mirrors the hexagon wing.
-
I used to make models as a hobby and I think i could use super glue for acrylic and brush it on lightly. I don't know how it will hold up yet. before I even glue it I need to x-acto the shapes. I think I could do it in a day. In order for it to glue, I need to make sure that all edges are completely smooth and flush to the other pieces. You brush it very lightly on the one side nd apply pressure. Hold for a few seconds and let it set for a few minutes. To maintain the correct shape, I plan on propping the canopy on the 2x6 angle plates when I get the right shape and use them to keep the correct angle. The sides and front need to go on first. Then the top and then the hinge. You use the top without glue to keep the rectangular shape and resistance from it warping. Any excess glue gets sanded down with super fine sand paper. That keeps it flush to the plastic. Then you clean it and should be okay. If I could get somebody to make the 3d model then I could see what it costs for a low run production on canopies. If it a few hundred dollars then I could kickstarter the project for interest. I am sure I could sell a few dozen, not sure a few hundred.
-
One side note: The angle of the back bottom cut should be more like the official canopy for correct shape. I cannot decide in my files whether it should slope down 1 stud instead of 2. As you see int he early stage side shot, the angle is correct, and would allow me to basically keep the same x-wing. I just guess I may do the 1 stud, after all that fudging in photoshop. No Idea how to do the back angle to get it to 3 studs if I do this. The place of the hatch in the model goes with the current final proposal art you see above. Or I could ask you all for options: Please feel free to chime in for suggestions.
-
I had a few requests to see what my proposed canopy would look like so I rendered a few parts in BlueRender and finished the job in photoshop. This will work. I swear. I really would lie this madly somebody professionally. I think we all would buy it, even if it cost us $10-$20 for just 1 part. The height of the whole thing is 4 plates tall, just like most car canopies. The height of their official one is 5 plates tall. I think it would hold together in the family. The front of the canopy is based on a 2x6 angle plate. The top is a standard 3 plate wide and it slopes down 2 plates like a normal cheese wedge. The bottom "cute" angle is based on the same angle as the larger canopy, so it moves 2 plates forward. The hinge rests on the the side of the 3rd plate like a regular 1x2 plate modified with a bar similar to the official part. I may only make my canopy with a smooth top, instead of the stud one. How will I make my mockup part? Cut apart 3 different larger canopies and hope for the best. 1. Large canopy: Cut off the 4 stud long top. and cut it into a 3 stud wide x 1 stud wide. 2. Use the two sides and cut along the edge. 3. Cut the long triangle shape 4. Use the scrap and cut the short 4 sided shape 5. Use the front of the large canopy and cut out the front shape. 6. Place the sides onto two 2x6 angle plates to get the correct angle and sand down the edges smoothly. 7. Cut the grooves in the same spots as the angle plates 8. I figure if I keep the base straight edges for the front and sides then all I need to do is cut the appropriate angle on the edges meeting the top and then poof, done. 9. Cut the back off the smaller canopy and attach it to the other. 10 Cut UCS X-Wing stickers to fit the canopy and like a model, hide edges and I got myself a canopy. I may need to use 800-1200 grit sand paper to make it smooth and not scratched. Maybe add some model polisher to keep off any scratches. Why 3 large canopies? In case I screw up the first one I have extras. If all goes well, I may need to call this a prototype and see if anybody would make this.
-
Thank you. I am pretty new to it myself. Started on it last year with my 74 Stud long Ghostbusters Firehouse around this time. I just got all those pieces in this week and plan on building that in the coming months. If I don't see an UC Millennium Falcon LDD with full interiors I think that will be my next major project. Now with the new interior scenes from the recent film and Star Wars Land coming to Disney World, I expect to see the rest of the set locations inside the Falcon. I think this will be my ultimate gift to Eurobricks if nobody else approaches it. If you come up with a better way to fit the console in there by all means share the images and LDD here. The angles from the plates cause it to be the way it is. I plan on building the console out of 2 1x3 tiles now that I bought an Ultimate Collectors X-Wing sticker sheet. It was placed on a wedge that is about the same surface area and I think that will go nicely in that area. If I can get an acrylic top to match the actual one in spare Canopy pieces I plan on cutting, gluing and modeling my own and then place on stickers from the UC x-wing sticker sheet, cut and resize to fit. I think that process will involve using the new 2x6 angle plates to get the right shape down for the base and model the acrylic canopy parts to fit it. Should be 2 studies wide at the front, 4 studs wide at the back. 3 studs wide at the top.
-
I looked into that bracket and tried to get it to work. It breaks the whole system with the wings open to their specific opening. Sure, I could not have them open as wide, but it would not match the ILM model. I also would have to completely rethink the back and right now, it would break 2 areas that hinder strength. I think I will build the geared wings and consider opening them from the bottom from a stand for now. I may try the build without a physical working gear and only need to fix the back at a later date. That way it will look great from the back since there is only 4 total pieces I think making the back different on them. The gears currently rest between the wings without a gear chamber. So my only 2 options are bottom or back. I won't mess with the top.
-
Got the file fixed in my post above. 1 letter wrong and the whole thing breaks. I always post my most current LDD on brick safe with my images in a folder for that project. If you ever need files, check there by clicking on the images and it should take you to the folder.
-
I wanted to share this on your page first. I did my own cockpit design based on the actual model. Attached is the LDD in case you wanted to modify your collection. EDITED UPDATE: CORRECT LDD FILE: 121516 LDD for Cockpit 12/15/16 Fixed Link
-
Thanks. I really do like the back of the non gear version better. I am thinking of drilling a hole in a 2x2 gray tile slightly off center to accommodate for the technic part. Then drill a X through the center of a 2x2 round tile for the gear axle. Seems very sad to do LEGO, but it would allow me to keep the look. Until LEGO creates a square tile with a round hole, this may be my only option. This along with the custom canopy I plan on making, would basically be the only 2 altered places. I think of it as using custom lego parts. Thanks for the view. I now need a proper build of it to test. Only complaint I have, like I said in my first post is the lack of 2 plate heigh slopes and inverted slopes. MEGA Bloks has them and I may use one for the first landing gear. There are a lot of pieces MEGA Bloks has that LEGO needs to jump on.