

Hoexbroe
-
Posts
452 -
Joined
-
Last visited
Content Type
Profiles
Forums
Gallery
Everything posted by Hoexbroe
-
Some newies questions about LDD 4.2.5
Hoexbroe replied to Hoexbroe's topic in Digital LEGO: Tools, Techniques, and Projects
Okay, I´ve made two tools, and it works as some of you guys has already demonstrated here. Thanks! (A bit troublesome, but the result cant be denied. Cool!) Not understod. Maybe I´m a bit dim... Do you mean; Leaving a gap between them causes LDD to consider that the pieces are NOT conected, and will therefore NOT crash when you try to move them¿? First off; According to what you are saying, I think that what I have is already almost 4 degrees, so what I need is much more, like 6-8 degrees. *** Okay, I tried what you describe and it works! It will be quite a job to adjust, because each angle are normally NOT the same on boat-hulls! -But at least it gives me something to work from. I´ll try some more! Thanks! *** Oh, the horror! Once I begin to mix different pieces into the curved section, it runs comletly off track... Boat-hulls are seldom as regular as castle-walls ;-) Thanks, I get it now! :-) I *did* try this before, but didnt work, so maybe I wasnt PRECISE enough. I needed to do it with great care. Plate into clips are done the same way¿? -
Some newies questions about LDD 4.2.5
Hoexbroe replied to Hoexbroe's topic in Digital LEGO: Tools, Techniques, and Projects
Hi guys, Thanks for your comments. This second round of answers certainly raises my spirit more. -And the image shown by bbqqq returns my faith and will to keep trying! ;-) Re. Screwdriver instead of antenna; I will try, but the idea is for the anetnna to insert into the grille element. I use it all the time in r/l! Re. 2x1 tile on one stud; HOW do I "freeplace"¿? As this is probably a FAQ, a link would be very much appreciated. Re. "Free move" tool import from "Templates"; I´ve taken a look at pictures in the link provided. Am I supposed to make the tool consisting of the Technic-parts myself¿? Re. "Floating the tile". WHAT does it mean to "float" a piece¿? Re. Studs in Technic holes; Unfortunatly the "opposite" does not seem to be possible; A single 1x1 Technic brick will NOT attach to a bigger than 1x1 plate or brick. Re. Pony-ears; @zinfinion; How did YOU make these pony-ears? Are tehre more ways? *** New problems; Re. Angle of car. Good idea with the hinge. Will try. Last night I achieved to turn the WHOLE car around one of the axles, but the result isnt perfect; In another car, some SNOT windows in the middle are "imprisoned" parts; not held by any stud-connection, but held in place by other means. When moving/turning the model, this part is considered "detached" by the program, limiting movement/turn of the rest of the model, unless you move it so far away that the imprisoned part no longer is in the way; -I dont even KNOW what and how to ask, in order to solve this problem... :-/ Also; Continuing my exploration in LDD, I also want to make "curved walls" of bricks. Many people use this tecnique for making houses and castels, but I need also it for making boat-hulls; Real life; LDD; It seems like LDD limits the angle to 2º. -But sometimes only permits 1.91º and sometimes even only 1º (???). While the program is probably right regarding permisible tolerance, I need a somewhat bigger angle. Maybe 3º. I suppose I have no hope of doing this in LDD, eevn if I have done it numerous times in r/l, and my bricks are still alive and healthy...¿? *** In the end, I will probably have to make use of Superkalles advice about LDraw, as indeed what I am looking for is DOCUMENTING existing constructions. So I thank you (Takk!) for this, and will try to install this software soon. Again, thanks for your answers and comments! -
LDD 4.2.5 Bugs
Hoexbroe replied to Zerobricks's topic in Digital LEGO: Tools, Techniques, and Projects
Kewl. So now you have pins that work! ROFLMAO -
Some newies questions about LDD 4.2.5
Hoexbroe replied to Hoexbroe's topic in Digital LEGO: Tools, Techniques, and Projects
Thanks for your comments! Is there another program better than LDD, wich will allow even "illegal" methods¿? I have this document. From my tests it seems that LDD wont even do the "legal" combinations... So plates in clips are legal¿? -
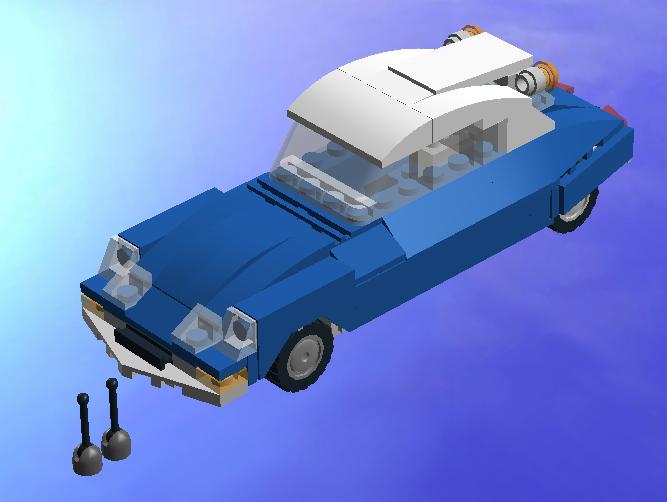
Hi all, I´m totally new to LDD (installed it last night). I'm trying to use advanced constructions, but have some problems; 1) I´ve created a car, but it ended up resting 1 plate up in the air, floating. How do I bring it down on the ground¿? (or bring the ground up to the car) (The car (Citroen DS 20) rests lower in the back, than in the front, thus LDD lets the back wheels "float"...) 2) I need to use the antenna part of the "mini antenna", but it comes with the base. How can I spearate them¿? -is there a way to create a new piece which would be JUST the antenna part¿? 3) So, no studs-in-technic-holes, I gather from browsing this forum. Major problem, but I wont ask about it here (hehe) 4) Using a 1x2 tile on a stud, ideally the tile could be positioned ANY way we want, but the program seems only to allow whole and half stud positions, even if the tile does not have a pin inside. Any solution to that¿? 5) I know that "pony-ears" are illegal, and the program doesnt allow it. Is there a way to do it anyway, seeing that this method is as old as the existence of the "plate" in the product-range¿? (-and that it has been used in numerous oficial sets in the 60, 70 and 80´s.) 6) Similar to 5); For making side-mirrors to minifig cars, I often use a modified plate with clip, and a 1x1 round plate. Program doesnt seem to allow plates to clip. Is there a way to do this¿? Thanks in advance for any help, and I am sorry if many of these quiestions are FAQ´s and already answered here. I "did" browse around a little, but may now have seen it. (here´s a fair bit of info anyway... ;-)
-
Maybe you could add links to the pictures, please¿?
-
Very sweet!
-
Nice job! The inn is genious. First I thought it looked too small, but your interior decoration prrofs that it is okay. The lorry is excellent too!
-
Could this be a new "golden age" of LEGO train?
Hoexbroe replied to DaddyDeuce's topic in LEGO Train Tech
What is missing, is a new HOBBY TRAIN set; With all the new pieces, and especially in all the new interesting colours; Dark green and dark red, -just to mention a couple of suggestions... -
Excellent job! -And congratz on the award! ;-)
-
Are LEGO Trains Classed as "Real" Model Trains?
Hoexbroe replied to Paul B Technic's topic in LEGO Train Tech
Well, in that case I´ll briefly expand a little on two major issues; track conducting power and problem with wiring; I find it troublesome to construct models around the IR receiver and the AAA battery pack; With power from the rails (like all other decent model railroad systems) you won´t have to change batteries. As of wiring; basically you just need two wires; I hope most people wont see that as a problem. -Actually the wires needed between battery-pack, IR-receiver and motor in each motorized unit bothers me more! (-and I dont mind if I am the only one feeling so! hehe) -
I think it is an excellent rendition of Richard Browns old VW combi from 2007, for which he published instructions free on the internet already... Instructions can be found here; http://www.mocpages.com/moc.php/32246
-
Are LEGO Trains Classed as "Real" Model Trains?
Hoexbroe replied to Paul B Technic's topic in LEGO Train Tech
I am an avid H0 scale model railroader, and I dont REALLY consider that the current line-up of Lego-trains qualifies as "real" model trains; Because of the track-system! It is currently impossible to control trafic with multiple trains on a complex layout. The old 9V system had everything needed. (Namely powering the trains through the tracks, and giving the posibillity of installing DCC control) Saying that, I DO however think that Lego is excellent for model-railroading. As the internet is already full of excellent examples of very beautiful working models nobody should discard Lego because of looks alone. Lego basically blew it when they abandoned the 9V track system and introduced the PF with IR, which is practically useless for most "real" MRR implementacions. IMHO the prime objective of the Lego MRR society should be to DEMAND the re-introduction of the 9V system! The importance of this cant really be stressed enough... -
Impressive interior for the bank. But I would change the outside of the roof; not letting the sloped bricks´staggering show against the DBG wall, but use some white plates diagonally. It´s just a suggestion...
-
I am very happy to see you writing here also. When I saw the first posting here, I went straight to your Flickr account and commented on a couple of your creations. They are all real masterpieces! Looking forward to further postings from you here...
-
eBay user sells instructions for other builder's MOCs
Hoexbroe replied to Badsneaker's topic in LEGO Town
Nightmarrish reading!!! It´s also disheartening to see that the E-bay seller is still going strong, despite the long-time indignation from people all around. *ALL* of us are to blame a little for allowing it to go on (I say this intenting to adapt a PRACTICAL view on things), instead of strengthening our own protection (like including watermarks, titles and names in the photos, as already mentioned in this thread) and writing emails to E-bay and this E-bay scammer-guy. It can hapen to ANY of us at any moment, and I am certainly guilty of doing... -nothing- in order to protect myself. So... Note to self; -Include name and watermark in photos! Thanks for the info, please keep the thread updated! -
Lovely-lovely!
-
Yeah, the Eruobrick presentation was delayed because I had to resize some of the pics to 800. Sorry! I´m glad you like it, and thanks for the blog! Thanks. Especially coming from a master of the Art Deco style himself! -And thanks for the blogging!
-
You are right. Maybe you can find a Renaul which look even mor similar¿? hehe. Unfortunatly I dont use computers to help design and build, so no LDD file. Thanks! No plans to keep it or make it bigger, but I DO want to reuse the blue sky-wall. It can be extended from the current 10 road-plates to a maximum of 13 plates.
-
Heh... Thanks. The job has kept me away from my Lego for some time now. I would say "half around the world", but in reality it´s only like a quarter around the world. Anyway I´m sure you get the idea... Unfortunatly I will have to go back there after new years eve...
-
Thanks (to all of you!) Actually... I *AM* a model railroader first and foremost! Some of my crazy project can be seen here; Model railroad Actually... It´s supposed to be a Renault. But never mind... Hehe. Additional photos can be found here; Brickshelf -No; no fire department. Yet... Thanks. I was very sad when I discovered some of the damages on the petrol-station. That´s what happens when you allow projects sit around for 6 minths. I´m glad you like it anyway.
-
Layout Hi everybody, I´ll present you my biggest MOC (or collection of MOCs) ever; The CITY diorama of the ficticious french town of "Royville" anno 1967. This diorama was originally prepared for the 5th annual HispaLUG gathering in Madrid, December 2011. Unfortunatly I did not make it to the exhibition because of my job, so these photos are from a test-setup in my basement. *** First off; an art-deco petrol station; *** Second; Cachin Motors. A Citroën specialist workshop and sales office, -but the skilled mchanics will take on ANYthing; As mentioned, for the people working here, their job is also their hobby; *** Next, the Hotel Chat Noir. Famous especially for its fine dining and excentric chef... The likeness with the statue is striking... Two guests hurry away, as the famous chef is known to be rather full of himself, and can drag on and on and on with his tales, once he has "tried" the brandy (supposedly for cooking) too many times... *** Then we´ll have to cross the main road, to get to Rue de la Gare; *** Last building to be presented here is Royville train station; Street-side; *** Here´s some photos of the trains giving service to Royville. All 7-wide and using RC+PF; The X-3800 railbus. Also known as "Picasso"; A 131 from SNCF; Dont forget the VIDEO of the trains running around; *** Some more random shots; *** Some overview photos; *** Technical data; The MOC is 4 meters long and 1,2 meters wide. The decoration counts some 70 minifigs. There are 19 historic vehicles. One straight-road baseplate was cut in half, in order to facilitate a more flexible city-design. (Please dont hate me ) The names Royville, Cachin and Chat Noir are of course in honour of the model railroad masters Astrid Cachin and Marcel Darphin´s fantastic 0-scale layouts. That is all! Merry X-mas and happy new year.
-
Excellent OK petrol-station and Brugsen shop. Really captures the "look and feel" of Denmark!
-
A Guide to building a Medieval Village
Hoexbroe replied to Derfel Cadarn's topic in LEGO Historic Themes
Thank you SO much for this inspiring thread! I´m enjoying every bit of it! -
Thanks for the words everybody! Hannibal; Thats a very touching story; Thanks for sharing! I hope to present the whole MegaMOC 2011 diorama before we actually get to 2012. Am currently working far away from home, and havent been able to post much for some time now.