
tmctiger
-
Posts
146 -
Joined
-
Last visited
Content Type
Profiles
Forums
Gallery
Everything posted by tmctiger
-

[Train Layout] The WindMill Lego Train Layout Project (WMLTL)
tmctiger replied to LegoLow's topic in LEGO Train Tech
Hi, wow that looks great. Just one remark: I think that some tracks to narrow to each other. It is possible that you'll get problems with wider trains and longer rail cars. BR, Guenther -
Hi Mestari, Yes the point geometry is extremely limiting, especially if you don not have a huge space available (this was my reason btw.). The interesting thing is, that when modifying the points you can always go back to the original geometry. Just add a 1/2 curve. BR, Guenther
-
Hi Mestari, actually it is not very difficult. You just have to work carefully to prevent placing cuts on wrong or similar. I just used a very a accurate saw with a lot of teeth per cm. And a scalpel (very sharp knife for finishing and cleaning the cuts - there a special tools for modeling). And I used a cyanacrylat based super glue to glue the parts together. Bear in mind that you always have to modify a right and a left point together, since you need the cut away parts from the left one on the right one, and vice versa ... But modifying two points just take about 10min, a bit faster if you gained some experience after the first vie modified points. Just let me know if you need additional info. BR, Guenther
-
Hi All, I have an update on my work for the layout. However it is just a digital plan how I planned to create the streets in my layout. On the following Images you can see the streetlayout for the left layout part (see layout overview in this thread). First I planned to go only with the actual street-baseplates from Lego, but then I came up with the idea of using brick built streets to be more flexible and of course to also fit the modulars easy into the layout (in my previous layout I built the modulars directly on the street baseplates which leads to some pain when removing them from this plates, this error I won't do twice). So here we go with my streets: There is one thing I have to mention: the street consist actually of two modules. The one module consists of the boarders holding the modulars and the street in place which are directly connected to the street plates, and the other module, the actual streetlayer which only rests on the studless part of the streetplate: The border module: The street module: And just one image which all the surrounding buildings: As always any feedback is very welcome! BR, Guenther
-
Hi, yes for sure different slopes would be great, but actually I have to less space for gentle slopes ... BR, Guenther
-
Hi AshiV, ok I see, thanks for the clarification. BR, Günther
-
Hi AshiV, have you considered to also add none 9V Tracks, actually there is only one: double crossover ? Did you also have plans to add modified tracks, like modified points? Anyway thanks for the great compilation of Lego track geometries. BR, Guenther
-
Hi! Thanks for your feedback! BR, Guenther
-
Hello All, there is a short project update: I manged now to complete all the track ballasting for the lower layer: The next step now is to complete the ballasting on the middle layer. To complete this task I also have to build the upper layer (some woodwork). BR, Guenther
-
Hello All, I just stumbled across this post and I like the idea to have a thread collecting all the digital layouts. This would be a great resource for one who is currently planning a layout. Therefore I'll add my plan: You'll find additional plan material to this layout in my brickshelf folder: http://www.brickshelf.com/cgi-bin/gallery.cgi?f=564608 However, this layout is not just a digital plan, I am currently putting it into practice. There is a thread related to this layout, where I post project updates from time to time: find the eurobricks thread here. You can also find WIP images also in my brickshelf folder. Some Background info: It is a PF-Layout, with the goal that 4 trains can run independently on the layout without taking care of switching points or whatsoever. The second goal is to place a modular building city on the layout which should hold all my modulars and have space for later MOCs. Due to the limited space, the layout therefore have three levels, where on two of them you'll find train tracks. The train can also travel from the lower level to the higher one over a ramp. BR, Guenther
-
Hi Pyro, Thanks for the nice words! yes Money is, when it comes to Lego, always an issue ... but actually for me, finding a suitable room and having time, was/is the biggest problem. When it comes to money I see Lego as my hobby, and for sure there are more expensive hobbies out there. Even building a H0 model railway is more expensive. And I also think on heavy smoking people: they literally burn a lot of money which I can invest in Lego since I don't smoke (and of course they harm their body, but this is a different story...) So I have a rough budget I can spend yearly on this project. So the worst case for me is, that the budget is consumed early ... but the consequence is only that the project takes some time longer, but I don't care, because building is the most fun - I think most here will think the same ... I have also some WIP news: I am currently find some time to work on the landscape and I am currently refining the lake area. I hope I can post some new LDD plan pictures soon. So stay tuned ... BR, Guenther
-
Hi All, since I was building last time the ballast for the tracks and therefore my fingers are hurting now I have now switched interimistically to LDD Layout planning again (to rest my fingers ) and planned some of the stone/rock wall connecting the upper most layer with the middle layer of the layout. I have also updated the upper layer to get more free space for MOCs and some space for a little creek(upper layer) with waterfall and pond(middle layer). At first have a look on the updated layout plan: Here you can see all three layers combined: the upper layer in tan, the middle layer in green and the lower layer in gray baseplates, the blue ones are placeholders for houses. I am now showing you the draft design of the rock/stone wall area near the little pond: You can find the high-res renders in my brickshelf-folder. I am now very interested in your feedback. What do you like, what do like not so much... BR, Günther
-
Actually I forgot to mention one Software that I also used: This is LibreOffice (or Excel) for calculating the numbers for the ramp inclination (anyone who plan also to have an inclination on his/her layout you can use my spreadsheet (LibreOffice file) as a reference). Another information: If you plan to use Bluebrick seriously make sure to load a different track skin; because when you print the original track skins you can't distinguish single tracks, and this may cause you problems during building your layout.
-
Hi, Thanks! I used the software "BlueBrick" for the general layout design. You can find the software here. For all other Lego related stuff I use the offical Lego Digital Designer (LDD). E.g. for the track ballast.
-
Thanks! Yes I'll post updates from time to time here in this topic.
-
Thanks! The inclination is roughly 1.2 plates per single straight track element. (about an inclination of 1.7°)
-
Hi all, as promised here some updates about the layout I am planing, no actually I am building it - I don't believe it ... Ok, as I had my vacation the last two weeks I had plenty of time ad I was able to put it into the layout. 1. I managed to complete most of the needed track modifications (switches, curves (1/2), straights (3/4, 1/2, 1/4). Some straights (3/4 and 1/2) are still open to build, due to lack of straight track pieces. 2. The most important part is now finished: The table holding the complete Layout. With roughly 3.5m x 2.1m it is quite big an was constructed out of four parts. This means that the first and second level (all levels where a train track will be) are ready. During construction the table looked like this: You can find more images about the table in my brickshelf folder once it went public. 3. The second most important part is also finished. The track ramp, connecting level 1 with tracks with level 2. This was somehow a tricky part, since the ramp has to overcome 21cm hight difference in about 6m track length. This results in roughly 1.2 plates per straight track piece. As you might know I often got the advice to not exceed 1 plate per track piece height difference to not run into problems with my trains. The most problematic train I have is the Emerald Night, which is quite famous to not climb really easily. But for my surprise, it took my track ramp very very well, and also all my other trains .... so I am quite happy with how the ramp worked out. Here is a picture of the ramp during construction: You can find more images about the table in my brickshelf folder once it went public. 4. Since the table and the ramp are finished, I went to test-layout the tracks and test the ramp, and free space beside and above the track to make sure each train will fit through the tracks. Thankfully I did this test run because some pillars holding the level 1 where to close to the track and the Horizon Express didn't fit ... but moving the pillars a little bit to a different position all worked fine again . Here I have to say, moving the pillars was not that easy, since the complete layout is planned to be walked on and therefore I just were able to move the pillars but not to remove some of them completely. Here is a picture of the test layout: You can find more images about the table in my brickshelf folder once it went public. 5. Last but not least, I managed to even start to staple some bricks . I started with the ballasting of the tracks where I do not have to remove them again due to some additional woodwork. And if you believe me or not, this was for sure the hardest part during construction so far ... it is relatively easy to plan this ballast (since there are already some instructions out there in the web), it is also quite easy to order the parts via bricklink (but not cheap ), but I completely forgot how painful it will be to put all those 22000! pieces on their places. I can't tell how much my thumb hurt. ... but finally I think the result is worth the going through this "pain" ... 6. What is still open to due beside the obvious? The level 2 table still needs to be built, this means again some woodwork. Once this is done I can proceed with the ballasting of the tracks on level 1 and also start to build the city on level 1 and 2. I mostly use the Lego CC Modulars, but also MOCs. One Town house MOC and several landscaping MOCS. The Town house is mostly complete (you can find some overview here) but there is a lot of work to do for the landscaping MOCs. Please let me know what you think of the project so far. I am also very glad to receive some feedback what you like and what you think can be done better or should be changed at all. BR, Guenther
-
Hi, yes it is indeed a permanent display. it is about 3.5m x 2.1m in size. You are right. It looks a little bit like an airport, but only in 2D. ... Since it consists of three different height levels, the final layout can not be confused with an airport. @all: stay tuned for some WIP update shortly ... BR, Guenther
-
Hi All, I have now an update again on my progress on my layout. I have now started with building ... sort of ;-) ... actually I am currently building the table which will hold the layout. Here you can see some pictures I took during building (once they are publicly available): http://www.brickshelf.com/cgi-bin/gallery.cgi?f=565253 I started also another task which is very important to make the layout happen: the modification of some track points: http://www.brickshelf.com/cgi-bin/gallery.cgi?f=565324 As always I'll appreciate your feedback. BR, Guenther
-
Hi all, I have a strange problem with Blue Brick: I created a Layout (see here the Layout) with a width of 3.42m according to a ruler of Blue Brick. You can see the ruler in the linked thread on one of the layout images (top ruler in the image). I am now planning to create the table out of 3x 1.14m plywood and for visualizing reason I created 3 rulers with 1.14m to see where the plywood borders will be in the layout. But when I do this, I noticed that concatenating the three rulers result in a slightly to short overall length. I dig a little bit deeper into this issue and noticed that the term 1.14m applies actually for a ruler with +-1 Stud. So you can end up with a little to short 1.14m ruler and also with a little to long one, but none matching exact 1.14m. Did anyone else also observe the same problem? Sidequestion: What software do you use for planing your layout? And when using Blue Brick, how do you mange to get exact measurements? Without exact measuring capabilities, the Software renders useless, because it is all about to fit a layout into a given space, but when I can't rely on the values coming from the software, it is useless ... :( BR, Guenther
-
Hi All, I have a little update: I currently managed to order all needed parts for the ballasting of the visible track. So I am currently waiting for the orders. Once they are here, I'll start building the table and starting with the track layout. I'll post some images of the progress from time to time. Br, Guenther
-
The incline is planned with wood - like you would do it on a H0 layout. Banking the curves is not planned. The current incline is roughly 1.4 plates per track element. Unfortunately I do not have tracks with wider radius e.g ME Rails, so I can't change the radius (using flex track might be no option since the trains run not very well on these and might derail or get stuck in the inclination)
-
Hi, actually I had this idea also ... so in the future it might happen. Before I have to see how the surface below with the fright station work out, and I have space for the pillars...
-
Hi, thanks! Yes a mocup is planned anyway and I also plan to add the last curve on level 1 also to the ramp to get the inclination a little bit down (then it is ~51 track pieces). Yes the ramp is covered/not directly accessible, however a access from below the layout table is planned (also needed for derailed trains on the track loops covered by layer 1 and layer 2). Unfortunately larger radius curves won't work for the ramp, since lack of space.
-
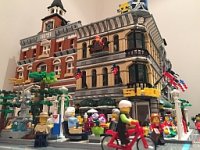
Hi guys, I currently have a small city/train layout. It is currently getting to small for my trains and modulars. (if you are interested you can find it here: http://www.brickshel...ry.cgi?f=554588). This made me think over a redesign of the layout where I have more space for the trains and the modulars, and where I have more "track-space" to move the trains on the layout (with the current design I can move 4 trains independently on the layout). I have now to describe what you can see in the image above: First you see the whole visible track of the layout. You can also see that it consist of three levels: gray baseplates = level 0 green baseplates = level 1 (20cm above level 0) tan baseplates = level 2 (only streets and houses, 20cm above level 1) All blue baseplates are placeholders for modular houses. You can also see, that this layout only works with modified points. The tracks on the red baseplates are the ramp where the train can go from level 0 to level 1. In the picture above you can also find the dimensions of the layout. In the pictures below, you can find the track layout of each single level (for reference the track ramp is shown in all thee pictures): Level 0: Level 1: Level 2: Now my Questions are: What do you think in general of my layout? What would you change/ what didn't you like? Do you think the given ramp is doable with PF-Trains (height difference = 20cm) BR, Guenther