Search the Community
Showing results for tags 'dozer blade'.
Found 1 result
-
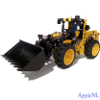
Yet another little excavator. Jono Rocky's model was great, but one main thing I wanted to add to that model was some functions to the undercarriage. Then Efferman started his Liebherr Compact 926 project and figured I could add another cylinder to Jono Rocky's arm. This is the result: As you can seen, also used the standard Liebherr colours. Yellow and DBG just happened due to the panels at the rear and the colour of pneumatic switches and I figured I'd use white for the cab instead of "yet another black cab". It isn't scaled to existing Liebherr though. Functions: - Full functional pneumatic arm - Pneumatic dozer blade on the undercarriage - "L2" engine (let's say it's a little "out of sync" though more on that later) - Full 360 degree turn with controls at the rear I was pretty surprised the blade holds the entire model up, especially after every single cylinder on the arm nagged about hoses not being the right length or in exactly the right position. If anybody has any suggestions to make the hoses less stiff (some kind of oil?), I'd love to hear it, because this was just stupid. These panels just screamed: use me here and never ever remove me from this place I added a second pump to the undercarriage so the superstructure could turn 360 degrees 1millmeter of play between the gears+axle and hoses I actually wanted to add another function: cabin lift, but besides having a lack of space behind the cab for this (hoses) it would have a serious negative effect on the support of the arm. So I dropped this idea. I didn't really like having the controls for the turntable stick out at the rear so much as this, but I had no room for other solutions. I tried lowering the "knob" one stud so it wouldn't have to be that long (it's this long so it doesn't collide with the superstructure while actually turning). I tried looking for a way to make a sliding mechanism, but there was simply no room. So I settled for this third option: removable and click it elsewhere on the body. I didn't try to close up the whole rear with tiles, mainly because the hoses ruin any type of mounting points available. On the other hand I like seeing a bit of "the guts". Especially when I spend quite a few evenings on these "guts" (hoses) to get it to work properly The L2 is poorly tuned In the space available my options were limited. I used @Attika's half pin solution for the fake engine, but these pins won't work with plates with a clip on top, because they can lock up on these pins. So I needed parts that were round on top. I could only think of this crankshaft part in the 2x2x2 studs space available. In this WIP you can clearly see the current situation: I added the 2L thin liftarm for the simple reason that I like the engine more going 2 up> 1 up> 2 up etc. than 2 up > nothing > 2 up. Neither option is realistic, so I chose what was most fun for me With his other pneumatic buddies: Some WIP pics That moment when you realise that your superstructure is 1 stud too long or your undercarriage 1 stud too short... I tried making the superstructure 1 stud shorter, but that would really hurt the rigidity of the arm. So I made the undercarriage one stud longer, which funny enough was a bit of a puzzle to make it bigger, but in the end it turned out better (mounting of the blade didn't stick out on top anymore for example) and the whole undercarriage is stronger than it was. No idea how much hose I used. Jono Rocky was at 1.3m of hose iirc, with 2 more pneumatic functions I am probably closer to 2 meters. There was an attempt to add a diff to this model, like the previous models I made. However due to the size of the diff and the ground clearance it would turn out something like this: As we all know from Sariel's gear calculator, there isn't a combo of gears for 1 stud down+1 stud right, but these bevel gears with half a studd offset, work pretty well for this purpose (though I doubt it would play nice with torque from a motor). It even has that, as @Didumos69 would say, "sweet Lego gear rattle". It's probably common knowledge, but it was funny to stumble upon this during the build and something I might find another purpose for in the future. I decided to drop the diff from the model in favor of the dozer blade function. I also dropped the scale of this diff concept, because the bucket would be too big. I didn't want to build a smaller bucket or use one from normal Lego, so I decided to scale up to the normal Technic bucket. In case you wonder why there isn't a video of the pneumatic functions. I tried, but my big paws block alot of the model when operating the functions And here's a video of the pneumatic functions, don't ask me why I didn't think of holding it this way yesterday... Thanks for reading yet another too long post from me
- 24 replies

