
mkeller234
-
Posts
114 -
Joined
-
Last visited
Content Type
Profiles
Forums
Gallery
Everything posted by mkeller234
-
As I remember, the minifigs weren't completely assembled. The legs and maybe some of the extra parts were loose. I see your point, but I loved the way they were displayed and made special. Seeing that box really brings back some memories. I remember the old poly-bags with perforated holes all through them. Ripping those bags open was always a sign of a great day. I remember the very vividly the Christmas that I got the Black Seas Barracuda. After I finished building the ship, I carried it along to all of our christmas parties so that I could show it off. That was not easilly done considering how HUGE that ship was to a small kid. I built my ship back together last December. I Ironed the sales and cleaned off some of the grime with a magic eraser. I thought the teeth marks might bother me, but I actually look at them with warm memories instead. My 2 year old daughter loves playing with the BSB!
-
Tutorial How to: DIY decals
mkeller234 replied to mkeller234's topic in Minifig Customisation Workshop
Cool! I love all of the colors. -
That is really, really cool! I love the subway. This is the kind of thing your son may talk about when he is an adult. Great layout and sure to be great memories.
-
Very nice! I love the way you created the brick arch look in the rear windows. It really sets off from the other textures and looks great.
-
Tutorial How to: DIY decals
mkeller234 replied to mkeller234's topic in Minifig Customisation Workshop
Laser printer toner is really dry to the touch, so I don't think that time is a factor at all. -
Tutorial How to: DIY decals
mkeller234 replied to mkeller234's topic in Minifig Customisation Workshop
Yeah, I suppose it could always be the tape. I'm pretty sure the tape I am using is cheap stuff. I like all of the different colors of figures, I don't think I have ever seen them like that before. -
Very nice. You captured the likeness very well!
-
Wow!
-
Tutorial How to: DIY decals
mkeller234 replied to mkeller234's topic in Minifig Customisation Workshop
I made the decals for 4011 Cabin Cruiser this morning. I think I spent a total of 30 minutes, including creating the vector art. If anyone wants this file, let me know and you can have it for free. DSC04405 by mkeller234, on Flickr DSC04404 by mkeller234, on Flickr DSC04407 by mkeller234, on Flickr -
Tutorial How to: DIY decals
mkeller234 replied to mkeller234's topic in Minifig Customisation Workshop
I forgot to answer how long it takes to soak. I'd say it takes me roughly a minute or two to get the paper saturated enough. Really, what you are looking for is to be able to rub the paper pulp away with the pad of your thumb with relative ease. -
Tutorial How to: DIY decals
mkeller234 replied to mkeller234's topic in Minifig Customisation Workshop
If you goof up, you can peel this stickers back up and start over. I'd imagine if any ink got left on the figure that you could remove it with a bit of rubbing alcohol. -
Tutorial How to: DIY decals
mkeller234 replied to mkeller234's topic in Minifig Customisation Workshop
Looks really good! As far as removing the paper goes: I always use the pad of my thumb to remove the paper pulp. I don't scratch or use my fingernails to do that. I've noticed sometimes that the clear areas can sometimes look murky. I think that has to do with removing as much paper pulp as possible, to get clear results. I also wonder if some tape brands may be clearer that others. You can always see a bit of yellow color in packaging tape. I wonder if transparant Scotch tape would yeild clearer results? -
Yes, thank you for taking your time to present us with these great reviews. I would also like to compliment you on your stellar photographs. This set is certainly attractive! The cab style really sets it off compared with the typical Lego trucks. It makes me think of the old model team truck....well, sort of. Beautiful.
-
Tutorial How to: DIY decals
mkeller234 replied to mkeller234's topic in Minifig Customisation Workshop
Yeah, they will work with anything that you can stick them on. They are basically just a clear sticker. It won't look like printed ink though. If you are using colored bricks, you may need to paint white on the bottom to keep the colors bright. -
Tutorial How to: DIY decals
mkeller234 replied to mkeller234's topic in Minifig Customisation Workshop
In my experience it hasn't mattered if the laser print was old or "fresh". I know that I've had success past 24 hours, don't believe I've tried longer than that. Awesome! Glad I could help out. Any chance we could get some pictures of your finished product? I'm going to do the decals for cabin cruiser next, but I may add my own personal touch. -
Great review too! Your pictures and thoughts are much appreciated for someone on the fence over this truck. I Worried that the design was naive too. I just google searched, and found the real life version of this Lego model. It's actually pretty darned similar! Check it out http://www.fordaq.co...ucTIid=17894306 Screen Shot 2014-01-29 at 1.15.42 AM by mkeller234, on Flickr Screen Shot 2014-01-29 at 1.15.54 AM by mkeller234, on Flickr
-
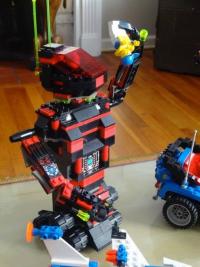
Gears as mushrooms, how cool is that? That is really impressive work!
-
Tutorial How to: DIY decals
mkeller234 replied to mkeller234's topic in Minifig Customisation Workshop
I have silk screen materials. Has anyone ever tried a really fine mesh to print on blocks? I'm not personally interested in doing that, but may someone is? -
Tutorial How to: DIY decals
mkeller234 replied to mkeller234's topic in Minifig Customisation Workshop
Ok, someone has to put this to the test. Maybe I'd be tempted when I get some time. -
Tutorial How to: DIY decals
mkeller234 replied to mkeller234's topic in Minifig Customisation Workshop
Thank you Rufus. -
Tutorial How to: DIY decals
mkeller234 replied to mkeller234's topic in Minifig Customisation Workshop
Yes, but this is free since I always have packaging tape. -
Tutorial How to: DIY decals
mkeller234 replied to mkeller234's topic in Minifig Customisation Workshop
Let me know if you want the art. I will send it to you for free. -
Tutorial How to: DIY decals
mkeller234 replied to mkeller234's topic in Minifig Customisation Workshop
Thanks! I've really enjoyed the awesome reviews on this site. -
I've recently come out of my Lego "dark age" and started rebuilding some of my old sets. I was never one to keep sets together very long, so naturally i've lost a lot of stickers. One of my other hobbies is classic bicycles, which often share the dilema of missing or damaged art. This method for producing decals was taught to me by a clever artist on a popular bicycle forum, so he really deserves any and all credit. This method is simple and inexpensive and much of the materials are common. I assume the trickiest part for most people will be producing the art. I happen to have Adobe Illustrator at home, so I am able to create my own vector art files. I believe other cheap, maybe even free software exists. Sometimes high quality art can also be found as images on the web. On to the step-by-step: 1) Produce the art. Use a laser printer and any cheap printer paper. Laser printing is key... if you don't have one, you could try any of the copy shops around. As mentioned, I used Adobe Illustrator. I am replacing the decals for 6594 Gas Transit. DSC04389 by mkeller234, on Flickr 2) Cover the art with packaging tape. DSC04390 by mkeller234, on Flickr 3) Burnish the tape onto the image. I use scissor handles and rub over the tape surface. You will be able to see which areas have bonded well. It doesn't take much effort. DSC04391 by mkeller234, on Flickr 4) Cut the decals out. The closer, the better. I usually follow the shape of the art, but it doesn't really matter. DSC04392 by mkeller234, on Flickr 5) Submerge in water DSC04393 by mkeller234, on Flickr 6) Once the paper is saturated, it can be rubbed away with light pressure from your thumb. Remove as much paper as possible. DSC04394 by mkeller234, on Flickr As you can see, the decals are clear. This is both a blessing and a curse. I happen to be positioning these over white bricks, so the colors will look nice. For use with dark bricks, you will need to either paint the back with white paint, or find a printer that can print white (ALPS). DSC04395 by mkeller234, on Flickr 7) Place the decals on your model. These decals are very forgiving and can be slid around easily. They stick on their own without glue. Make sure you allow them to dry completely before really handling them. 8) Admire your work! DSC04399 by mkeller234, on Flickr DSC04398 by mkeller234, on Flickr Ahhh... the teeth marks of my youth. DSC04400 by mkeller234, on Flickr Lego trucks sure have changed since I was young. I love the detail in these new models! DSC04401 by mkeller234, on Flickr
-
Almost ready to buy my next modular.... But having a tough time decidi
mkeller234 replied to mkeller234's topic in LEGO Town
Ha, I'm assuming that you didn't read through? It was pretty unanimous, I bought Fire Brigade.