

Elusys Ra Arwal
-
Content Count
112 -
Joined
-
Last visited
Posts posted by Elusys Ra Arwal
-
-
5 minutes ago, Alazon said:You can buy it here: https://www.tiromedia.co.uk/product/brick-fanatics-magazine-issue-10/
Thank you for the link! I'm gonna buy it right away

-
Really, really nice! I like every detail and yes it looks more close to the original submission, but with its own different character. If I have to nitpick, I don't really like the whiteness of the windows, because they look too bright compared to the rest. But that's it. I love the spaciousness of the Jose's Inn, Rosie's supply shack with her guns ready at hand and everything else going on in the scene! Lovely work indeed!
-
59 minutes ago, Alazon said:Have you checked out issue 10 of Brick Fanatics? In the magazine, there are some interesting stories about how the whole Pirate theme came to pass: https://www.brickfanatics.com/pirates-30-years-of-lego-treasure/
Maybe I can send you a few pages from that issue as a DM ...
I didn't know about that magazine. I wonder if that issue can be still purchased because I wouldn't mind having it.
I was interested in actual pictures of prototypes or just drawings that brought the creator to the actual ship we got... that would be very interesting from a creative point of view and also one could try to reinstate some of the discarded ideas or features that didn't made it because at the time it might not have complied to the total amount of bricks allowed in a set.
-
In the previous pages I posted some minor modifications to the bay, by either changing the colour of the white parts to reddish-brown, or by adding extra panels to the structures, to give a more planked and run-down look. I finished modifying some of those planked panels I made back in April and then I added other elements to the set, to make it look more complete.
Here are some pictures:


In order to enrich and, maybe, improve the look of the bay, I've added different parts to it:
1. The mid-section has had the addition of a back section with a couple of windows, a small balcony with swinging planked cover door and a sloped roof with more planks, vines and foliage.
2. The prison has got an additional roof with some plants on it.
3. The stairs and bridge that lead to the captain quarters have received a railing and some more flowers and vines.
4. The kitchen area now has got a balcony with broken planks.
5. The rooftop of the captain's cabin now has a shed that shields the cannon and makes the area look more finished.
6. More palm leaves, vines, flowers and plants have been added throughout this back area.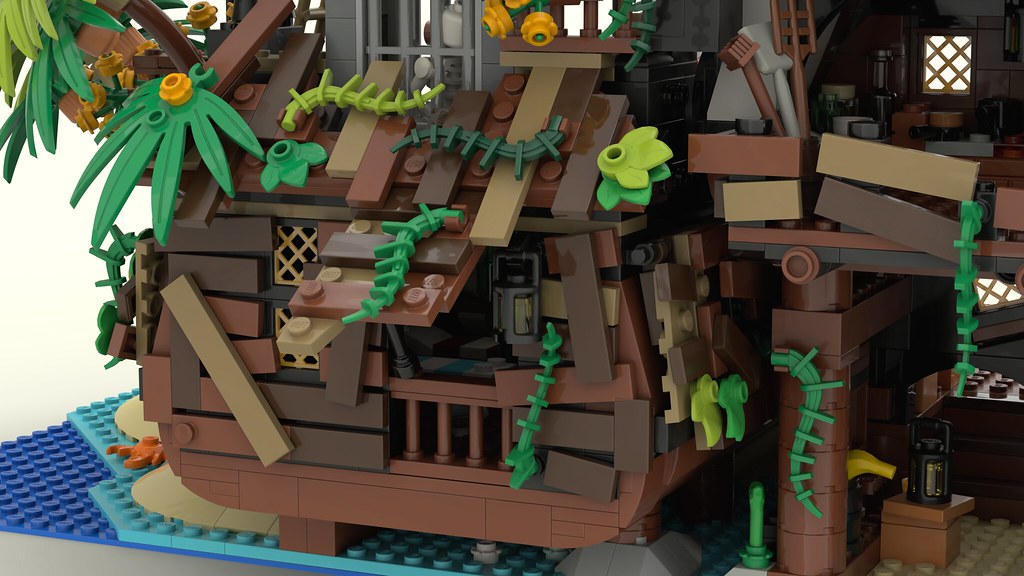
Close-up view of the back of the mid-section with the additional windows, small balcony with swinging plank cover door and a sloped roof with more planks, vines and foliage.
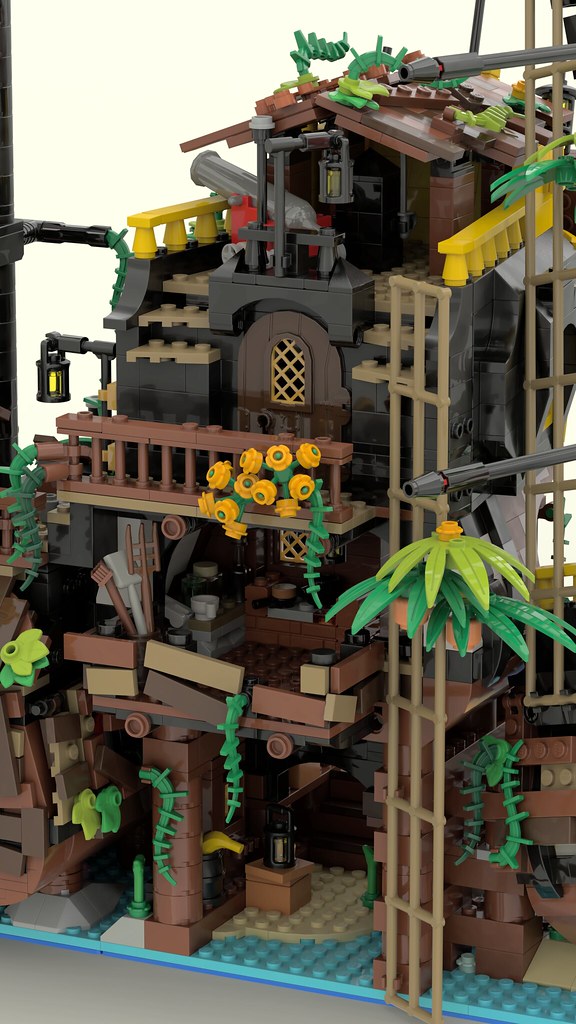
Closer perspective of the kitchen large balcony area, the new bridge with its railing, flowers and vines that leads to the cabin and, up on the rooftop, the new shed area.
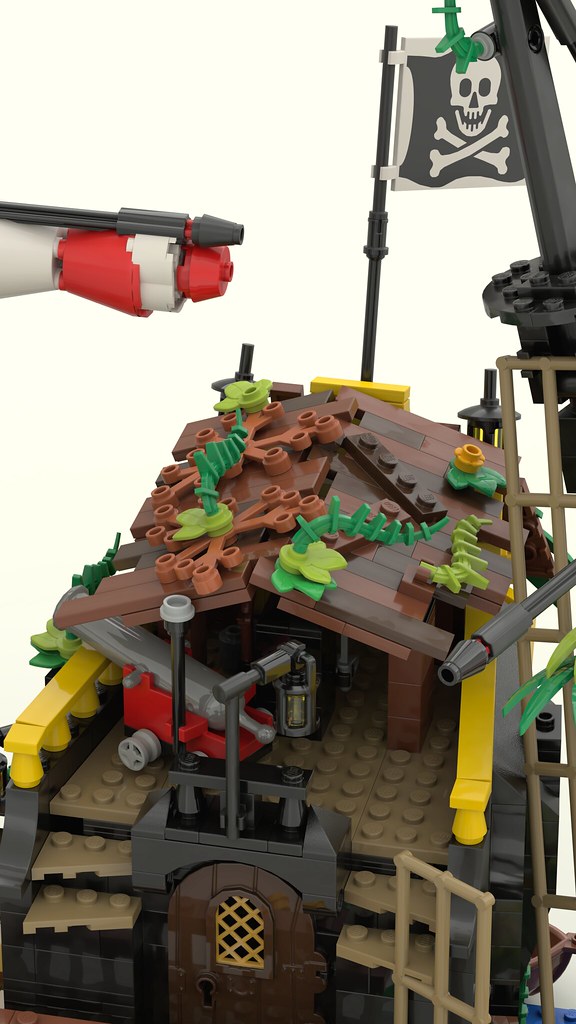

Close-up of the shed on the captain's cabin.
And as a bonus some pictures of the whole modified set by night and by day.


-
I searched online and on here but I found nowhere any information about the prototype that lead to the construction of the actual model. I was wondering if the original author left somewhere anything about how the Black Seas Barracuda was before becoming what it is. Plans, drawings, photographs, etc. I think it would be cool to see the process behind that masterpiece, to see what got included and left out because of lack of parts or Lego's reluctance to make new parts.
We sort of have prototype photos of the Barracuda Bay,, some pictures can be seen here:
-
That's weird... Maybe you should contact some moderator here and try to get help or understand why this is happening. Or maybe something is getting missed in translation. If you're trying to upload things on this website using the image upload option and it says you have no space, well... it is because your picture you already posted used all the space available, but the point is that you're not uploading anything on this website, you're just sharing a link from flickr and it gets displayed in here automatically.
-
This is wonderful and it would have been amazing once finished. Really great details everywhere!
-
On 10/19/2020 at 11:30 PM, kurigan said:OK, First off: Awesome! Creativity and improvisation are the very essence of Lego! Using a few non-Lego parts to improve your experience, to make you model/toy match your maturing sensibilities, when there were no Lego branded parts available, is right on, as far as I'm concerned and I applaud you unapologetic attitude towards such practices. I also like what you're doing on deck with trying to make her a tad more realistic and to-scale. Traversing carriages were a thing in the era, but not quite like the big Lego turntable and it always kind of bothered me about Renegade Runner too.
As for the gun designs, again, a builder after my own grisled heart. I've been playing around with gun designs for a long time and even started a catalog for a while but lacked the coding skills to do it efficiently. I have found that fitting technic pins in heads to be a bit of a crap-shoot. They lock well in to some, but want to pop out of others while still others will hold if you twist them once in place. I cannot figure out what the "X" factor is, as it's universal across all types and eras. The fez gun is great and I love it, but I'm afraid you may have trouble with it not wanting to sit flat on deck. I had a design like that years ago which I dumped for that reason. It always wanted to point down at the horizon because of a similarly twisted brick. If you poke around this album on my photobucket (sorry for photobucket
 they're supposed to be getting better but that's where all my stuff is ) I have a few designs I think work pretty well, with breakdowns that may be helpful or inspirational in developing yours. You can also check out The Foundry, that catalog I mentioned, though it was never very extensive.
Cheers
Dave
Thank you for the compliments and support about the use of non-Lego parts. I agree that the turnable cannon on this ship and other sets is cute as a toy but not that great for "realism". I even think that those two cannons are too much and I should just put a couple more swivel-guns on the back of the ship, given the approximate size of it. Maybe just allow 1 cannon, but then there is the problem of moving it around on a small ship (if one wants to keep it into the realm of realism). That's too much nitpicking, which means to just put this ship aside and build it anew, on a custom hull etc etc... So, to keep the general shape and memory of the original RR while still updating it a little bit (to make it slightly more realistic), I think I reached that goal.
Regarding the pin, you mean it is all about luck, if you get one that is microscopically larger than the other pieces, it may fit into the head, otherwise it will stay loose... cool to know! I just checked your link on your photobucket and I like your "Napoleonic" cannons, I have some of your older designs already saved into a file on my PC, back when I was trying to find some cannons' inspiration. I have many other models downloaded from Flickr as well, and yes, the options are many and the result may vary. As you mentioned, I've been struggling into finding a good combination of elements to create a decent series of cannons too. For my larger MOC ship Parthenope, I have experimented with several types of cannons' styles, and it took a while before getting where I wanted to be.
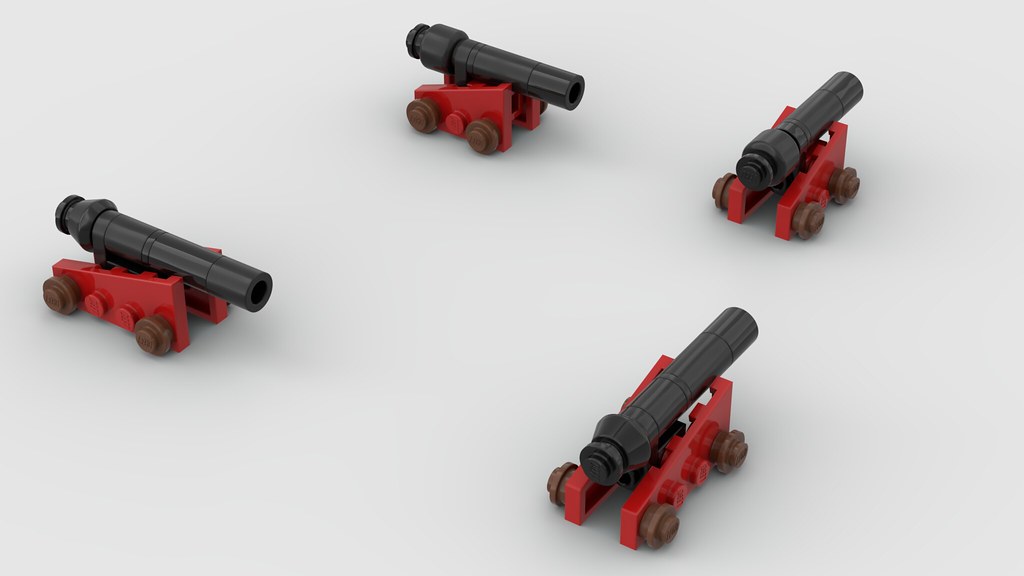
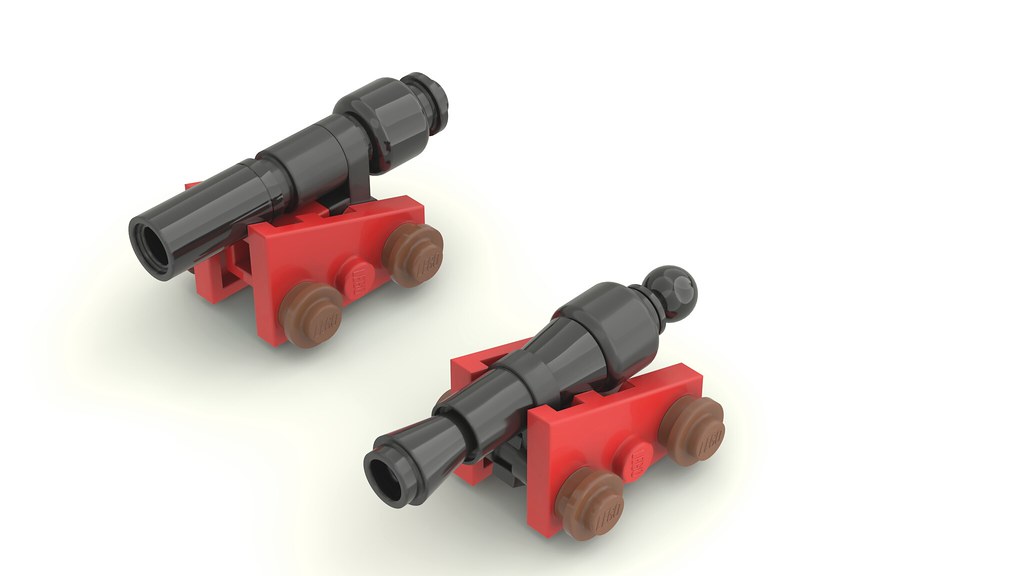
The picture above shows the smaller and larger cannons, both having a very old round brick with no bottom lip on the front as a muzzle. Once I saw that piece on stud.io I though I solved the problem to get a sleek and uniform barrel, instead, when I ordered the pieces and started building it, the bricks didn't fit or were too loose, then I checked the product again and I saw that those round bricks are OLD! So, I ditched those and used the regular round brick.

In the picture above, for the larger cannon I had two options, make it grey and use the bucket as a muzzle or make it black and use the palm-tree piece as a muzzle. The latter is what I ended up using. I also added a bar inside of the barrel to make it straight and sturdy (as you mentioned the problem of these pieces not being so strong) and I am enough content about the result. I was thinking I could buy the grey buckets, paint them in black and use them too... but I don't know yet, I don't need all these cannons anyway!
For the smaller cannon I used on my big ship, I think I will order some parts and make it look like the small one I posted here for the renegade runner, because it looks cute, but i am still deciding on that!
Here are other 3 versions/variation on the larger cannon I still don't know if I want to build in real bricks, as in modifying the ones I already made:
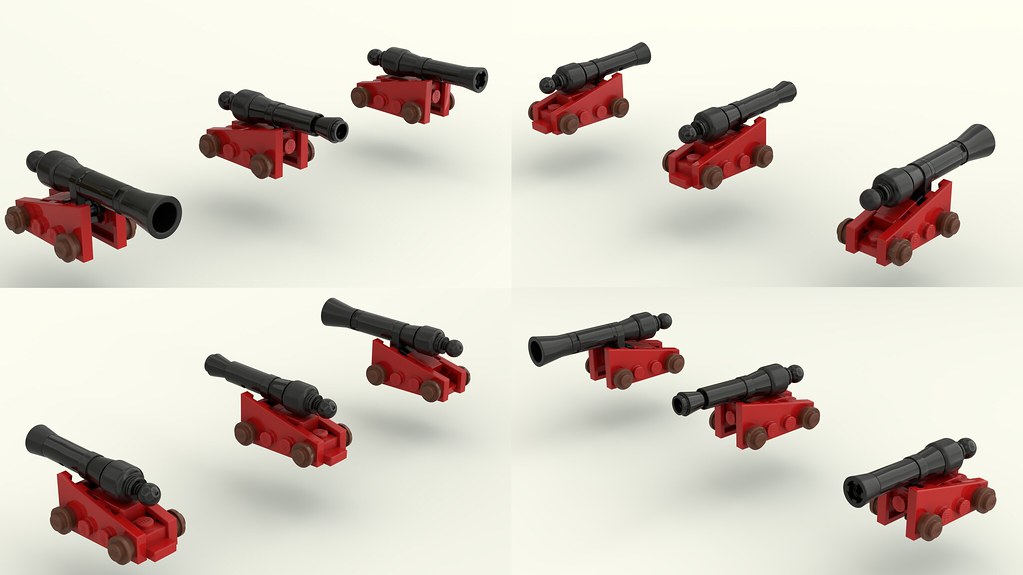
Looking at the picture's subpictures in a clockwise motion, the first cannon on the lower left is a sort of modified version of the cannon you see in the picture before this one, the one with the muzzle made out of the black palm-tree piece.
The other two cannons are the larger version of the smaller one I made for the Renegade Runner.
On 10/20/2020 at 4:23 PM, iammac said:You get my upvote for those chubby little guns!
MAC
Thank you!
-
47 minutes ago, evancelt said:Gonna try building some of those cannons tonight!
Great! Share here the outcome, I'm curious, and also check if the tow-ball pin is loose or not once attached to the head
-
Made some lanterns and turned them on!


Do you think I should add a lantern also to the front of the ship?
-
12 hours ago, rock raider said:I really like the cannons. I have been using a cannon with the same towball pin/head/fez combination but my carriages are somewhat lacking; usually just an Erling in between the breech and chase. I will have to steal this idea.

Have you had any trouble getting the pins to stay all the way in the head? I've noticed that mine tend to be loose and show a slight gap.
I have yet to try the pin version. The type of cannon I have made for my other ship is the one in the first post... I have no idea if the pin would stay completely in or leave a small gap. If it is slightly loose, then I would probably put some glue to stop it, because those aren't parts I am going to use in other builds, therefore I don't care that much, also because they are quite common pieces, they cost near to nothing, so ordering a few more the day I will need them (which is going to be far, far away) won't be such a big deal.
I am not so concerned about modifying the pieces in all the ways possible to obtain what I want. For example, when Lego doesn't make the part I want in the color I need, I spray-paint it because I don't understand why lego doesn't produce such piece in a basic color like black, or white, or yellow, etc... For instance, I painted the gray road sign clip and a wedged plate in black because I needed it for my anchors, or I bought some wedge sloped brick in another color because the shop I was buying my pieces from didn't have the piece in the color I needed (I wasn't going to use a different store and pay extra for a few parts plus shipment to have it in the color I need, so I got the pain and I am done!).
I made 2 holes in some 2x3 plates because lego makes technic plates from 4x4 to 4x8. I needed one 12x8 and I needed the hole in the middle only, so... hole in the middle! Etc.. hahah
This is to say, if you don't care that much for those parts, just use some glue and problem solved!
-
1 hour ago, Sir Archibald said:I have issues uploading images here.
I opent the original png in photoshop and set export scale to 10% original size and also lower quality within the 10-50% range and export this as a more compact jpeg.
The resulting images look very bad and I can't even upload more I tried in the edit of this post.
Maybe you can tell me how to uplaod hilgher quality within the 20kb limit.
You should open a free flickr account and upload your pictures there and then link them here, which is also a simple process:
- upload the picture on flickr
- go back to the main page to view the pictures
- click on a picture to view it
- on the lower right corner there's a download button. you click on it and it gives an option "view all sizes"
- you click on it and it brings you to a different page with a list of different sizes
- you should pick the "medium 800" or "larger 1024"
- on top, in the search bar, you get a link, copy it and paste it here in the thread and you've got the higher resolution picture.
The nice thing is that if you click on the picture you post, it takes you back to the flickr page where you can check the original size, if you really need to see a small detail.
-
Mini-tutorial


As you can see the snot brick is at an angle that on a flat surface will make it unstable, but on a studded surface it should make it stable enough. In my case I will file that small part underneath because I don't care and I need it flat. If there's some other solution to obtain the same angle with another type of brick etc, i'll be happy to apply it.
-
You should add more pictures here as well! I really love it, the colours, the modularity, the minifigures. I think it is a great set on its own and would be a nice base to expand its concept and create other jungle/native sets so to make it in a modular larger enchanted island.
-
20 hours ago, JintaiZ said:Fantastic work!
The bricks are getting a bit old... but I know they are from 1989...
I don't understand that statement Do you mean that as a whole concept it is getting outdated because people (kids and teens mainly) are moving to digital content/computer games, so they don't really bother using actual toys anymore or what?
15 hours ago, Captain Becker said:Great little MOC! For the cannons Id say the latter one, maby change the muzzle for a fez piece as well? Other than that! Looking good, that rigging tho aint doing it for me as its non lego
I did what you suggested about changing the mussle and I LOVE IT! Thank you for the suggestion! As for the non lego part, I understand but there are no real lego pieces that can substitute those wooden part and be in scale. I considered the cannon wheels, but those are too small to be used as blocks, and too round to be pulleys, so that's why I used the wooden ones.
Here's the mod you suggested:


-
Hello everybody,
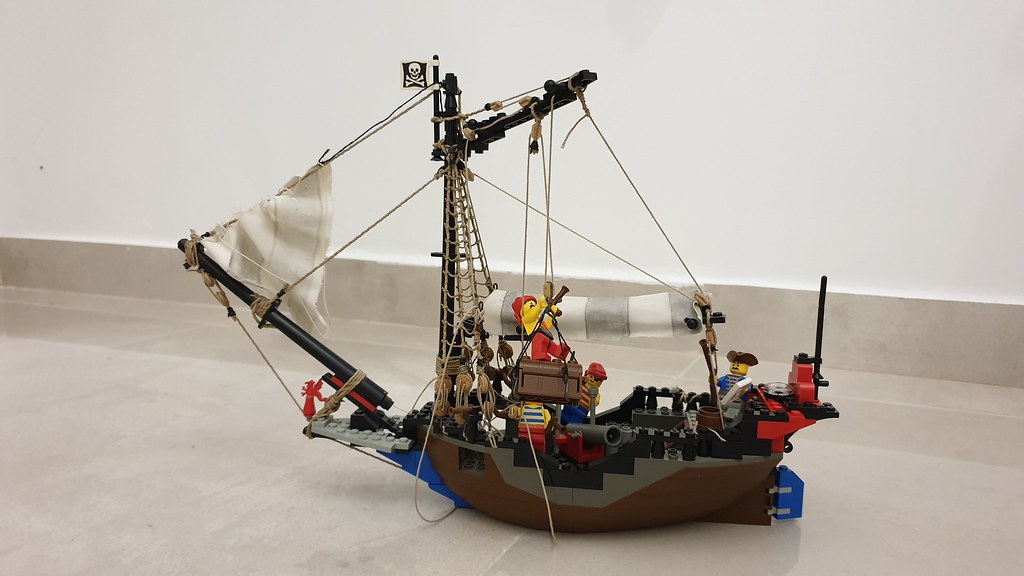
several decades ago (1993) I got the renegade runner as a present, at the time I was 8 years old and I loved that little ship. I played with it a lot, I had battles with my BSB and my brother's Imperial flagship. It was fun. Then several years later I modified it, added shrouds, made new sails off of the original ones (which I still have in almost pristine conditions) and added all the little details that made it look more like a complete ship, as for its rigging.
Back then I didn't have so many bricks and here in Italy there were no LEGO stores where to buy them from, therefore if I didn't buy a new set, I didn't have any bricks... given the high prices of any set, no bricks for me... yay! So here I post some pictures of the ship in its current state, that is since 1998-9, and some more pictures of the modifications I am going to make as soon as I get some pieces I don't have right now.
1998-9 modifications:


2020 modifications:

What I did was mainly adding a deck, a wheel, some more decorations and two cannons.


In the photo above you can better view the work made on the deck. The main area can be lifted (it is a 8x8 square), giving a simpler access to the storage area beneath. There are two pairs of stairs for the bow and stern decks, which also frame two small hatches that give access to the areas below the poop and prow.
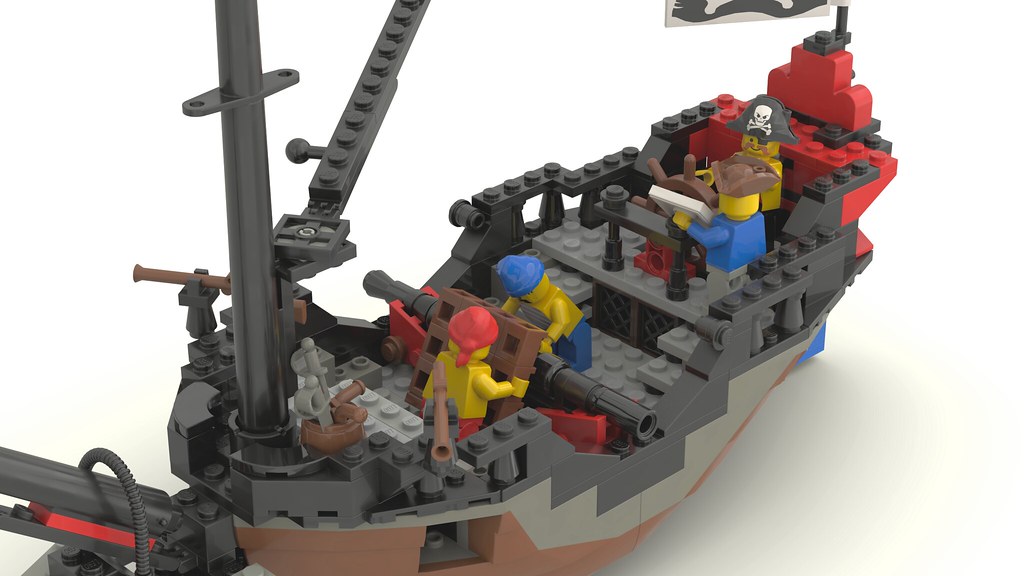
I didn't want to dramatically change its original form, just enhance it a little bit and make it more "realistic". I know that it needs to be rebuilt from the ground up in order to achieve that, but I like its charming shape, and having those additions are just a way to make it a little bit prettier than it already is. Of course all the rigging that you see in the photos of the 1998 version will stay, so you have to imagine the studio renders with that rigging on top!
Of course any and every suggestion will be gladly appreciated!
In fact, one suggestion would be regarding the cannons. I have two versions, I like them both and I can't decide on which one to pick... ugh!
-
53 minutes ago, Fraunces said:Source?
If you click on the picture you get to its source...
...and if you don't want to click on the picture, here's the source Markus Ronge | Flickr
-
This is not much pirate per se, but I think it is pretty wacky
-
Your solution could be a viable one, with that sliding mechanism underneath the cannon. The only problem I see is that you're going to use many more pieces to build it, while you could simply do what has been done for centuries on real ships, just to avoid having guns running everywhere. You should use ropes, give it enough slack so you can push it all the way back and still be able to push it out when you open the gun ports. I did something like that on my ship, but with custom cannons. Here's what I did:
48905917348_afc35529f5_b.jpg (1024×576) (staticflickr.com)
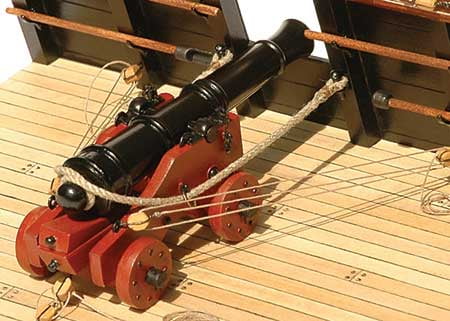
As you can see, on the ship wall I used those white modified plates 4081b where I will attach the ropes and have a loop around the back of the cannon, something like this:
https://www.hobbies.co.uk/userdata/root/images/ms4005cannon3.jpg
you can see the white rope attached to the wall and around the cannon, of course I won't insert any of those pulleys because there's no room for that, but the main rope will be good enough to hold the cannon in place and to not have it running around. That being the case if you don't make your ship sides detachable, then everything I said won't work anymore and you'll have to go back to either your idea or another one.
NB. for some reason my images don't show up in the message...

-
55 minutes ago, evancelt said:Still seems very stable, though time will tell if it stretched out or not. It stays put (doesn't immediately detach or move around). Seems plenty sturdy (plastic is thick).
Great, because I was thinking to do the same operation as Captain Becker, just cutting and gluing, after buying some hats, because I don't have that many officials, so I don't really care. Plus I was also thinking to paint some of the wigs in a greysh colour , just to make a different effect.
-
Neat! That's a good idea, if you don't want to glue it, but my concern is its stability. Since it doesn't attach to a stud anymore but just sort of clipping around the head itself, I have some questions:
Is it still stable?
Does it detach as soon as you hold and/or move the minifigure?
Do you think it has become less sturdy and prone to have the sides of the wig snap and break?
-
Yeah, it was quite informative to read those topics. I just hope the pictures will stay and not be randomly deleted because this or that service stopped working/was shut down!
-
Hi @SteamSewnEmpire Here you go!
Two topics on the same ship, with some extra pictures available, all present on this very forum:
In addition there's another thread on here about the 1993 LEGO World Expo "Pirates Ahoy!" where have been posted some pictures of the booklet given at that exposition with information on the creation exposed.
-
The file I made is reverse-engineered, but when I checked what I did with the LEGO manual that was published a few days after me publishing it on here. It resulted in me only using a couple of different pieces in the bow and in the linking parts used on the yards, but the rest is accurate as in 98%. You can check that by taking apart each section of the model, since I've grouped them, and verify the correctness or adherence to the original model.
Modding the Barracuda thread
in LEGO Pirates
Posted · Edited by Elusys Ra Arwal
Thanks for "elevening" my additions! I can share the new file file, there's no problem about it.
Here's the link: https://1drv.ms/u/s!AlQl1MOk7t7SgRMvQaRVtEArOqJU?e=nDeJsP
On a side note, yesterday I worked on a new type of sail, to show off the weathering and the damage after 20+ years stranded on the island, so I made two version with a different color-scheme:
Version 1:
The red stripes now are dark gray, while the white stripes are dark tan. This is because the elements have damaged the sails, broken them and their colors are no more the original ones. On real ships sails are almost never pure white, they always tend to a sort of light tan/light gray color, which gets stained and dirty because of the weather, so they turn darker and with patches of dark color all over them. So this is what I wanted to portray here, also since these have been hanging for 20+ years, their discoloration/mutation is even worse than on a regularly kept ship.
Version 2:
In this version I tried to change the color-scheme with something more reminiscent the original red color, so I used a mixture of nougat and dark nougat, to give that faded-away look. I am still not sure of that color, but given the fact that there's not a color wheel in stud.io, I had to make do with what I had...
NB. If you click on the pictures you get redirected to my flikr page with more pictures of the bay