zephyr1934 Posted April 28, 2024 Posted April 28, 2024 5 hours ago, Imanol said: The problem is that all of the bricks that I used as a child were from 2005 to 2014 and I´ve never seen this phenomena occurring so I don´t understand why it´s happening now. Also I´m not happy to sell instructions for a train whose bricks will develop several cracks. I'm just saying it is an old problem. Any flaws in the bricks are not your fault and unless you are doing any extreme stress on the parts in your build you should not let Lego's faults keep you from selling instructions. If you start looking at your built sets or MOC's that have been around for a few years you will start seeing these fractured 1xN here and there Quote
Hod Carrier Posted April 28, 2024 Posted April 28, 2024 (edited) I'm not sure that I completely discounted the manufacturing process as the cause, although I was unaware of the issues caused by changes to the molding processes as described. I just couldn't see any other plausible explanation once misuse was ruled out. But now that we can see that this cracking has affected many others, I think we can see where the issues come from. Given that your bricks were new and cracked almost immediately rather than as a result of degrading over time, I would still recommend that you take a full inventory of damaged parts and complain to LEGO, especially for those parts that came directly from them, asking for replacements. Just to say that I think you've got yourself a great looking consist there now. All that hard work has really paid off. Congratulations!! Edited April 28, 2024 by Hod Carrier Quote
Imanol Posted April 29, 2024 Author Posted April 29, 2024 9 hours ago, Hod Carrier said: I'm not sure that I completely discounted the manufacturing process as the cause, although I was unaware of the issues caused by changes to the molding processes as described. I just couldn't see any other plausible explanation once misuse was ruled out. But now that we can see that this cracking has affected many others, I think we can see where the issues come from. Well, for now I want to build a bigger case and I will try to contact other train moc builders that have done bigger and complex models in order to find the extent of the problem as I can´t seem to see this problems in other builds posted on the Internet. 9 hours ago, Hod Carrier said: Given that your bricks were new and cracked almost immediately rather than as a result of degrading over time, I would still recommend that you take a full inventory of damaged parts and complain to LEGO, especially for those parts that came directly from them, asking for replacements. Once I rule out any other reason I will initiate a complain with LEGO about the issue but I don´t know if they will answer for the bricks sold by other people even though they advertised them as new. 9 hours ago, Hod Carrier said: Just to say that I think you've got yourself a great looking consist there now. All that hard work has really paid off. Congratulations!! Thanks, the idea is to finish it this summer with the addition of another powercar and the 2 "Turista" cars but first I wan´t to solve this issue Quote
Imanol Posted May 30, 2024 Author Posted May 30, 2024 Well, I have bad news (again). I have found the first major crack on a piece in the cafe car. For those who are not aware the cafe car was the last part of the train that I ´ve built and it was made with pieces from other sellers. The crack is in a 1x3 block located on the middle of the car (see render). This brings again my initial question, could this be (at least in part) caused by a structural problem in the train. Crack Cafe car by Imanol, en Flickr This idea comes from the fact that all of the external factors are different the train car was not subjected to any forces other than it´s own weight as I have not removed the roof, also as I previously said. The possibility that it is caused by a defective batch can be ruled out as the pieces were bought two months after the first order and from different sellers who listed them as new. Currently I´m very busy with exams so I don´t have found yet the time to inspect all of the train in search for more cracks or any other problem so I can at least know the extension of the issue. If anyone has any other theories feel free to say it as I need to sort this as soon as possible because I have several orders for instructions of my trains and I don´t want to include what might be a critical error in the design. Imanol Quote
Hod Carrier Posted June 5, 2024 Posted June 5, 2024 Another vertical crack...? Where on the brick does it occur? From what I can see from the outside I can see no reason why the crack would have appeared, but it's hard to see if there's any structural weakness inside. Does the completed car flex? Does the car look straight when you look along the side? If the answer is "no" I would say that it's not a structural problem but that you've just been unlucky with the parts you've had. Quote
Imanol Posted June 5, 2024 Author Posted June 5, 2024 21 minutes ago, Hod Carrier said: Another vertical crack...? Where on the brick does it occur? From what I can see from the outside I can see no reason why the crack would have appeared, but it's hard to see if there's any structural weakness inside. Does the completed car flex? Does the car look straight when you look along the side? If the answer is "no" I would say that it's not a structural problem but that you've just been unlucky with the parts you've had. The crack is like the others, it starts in the middle and covers the lower half. The car appears to be straight but I will check it later more thoroughly. There are two points of concern: - The attachment for the bogie is located in the upper part so the car is hanging from it - This piece is located under the point where the two window parts join, this was used using the cheese slope technique but for some reason the window is larger than the frame and it comes outwards a little bit. Apart from this area cracks are starting to appear in the other 1x3 that is in the image. I hope this will help determine the problem. Thanks, Imanol Quote
Hod Carrier Posted June 10, 2024 Posted June 10, 2024 I can't imagine that it is a consequence of your design. The 1x3 brick you highlighted is held at the bottom by three layers of plates, two of which cover the entire length of the brick. OK, so I would normally try and support everything from underneath rather than from the top, but that's really just so that the action of gravity pushes the parts together rather than pulling them apart, but the clutch power of LEGO parts should be sufficient that it shouldn't really make such a big difference. It would be a major redesign, but if it worries you you could have the bogie attachments linked to a sturdy chassis using Technic L-shape liftarms and then build the bodies on top of those. This is what I did with the railcar, but that was forced onto me because of the way that the body sections were attached which meant that there would have been no other supporting structure. Quote
Imanol Posted June 11, 2024 Author Posted June 11, 2024 23 hours ago, Hod Carrier said: I can't imagine that it is a consequence of your design. The 1x3 brick you highlighted is held at the bottom by three layers of plates, two of which cover the entire length of the brick. OK, so I would normally try and support everything from underneath rather than from the top, but that's really just so that the action of gravity pushes the parts together rather than pulling them apart, but the clutch power of LEGO parts should be sufficient that it shouldn't really make such a big difference. It would be a major redesign, but if it worries you you could have the bogie attachments linked to a sturdy chassis using Technic L-shape liftarms and then build the bodies on top of those. This is what I did with the railcar, but that was forced onto me because of the way that the body sections were attached which meant that there would have been no other supporting structure. For now, redesigning the entire car is discarded as I don´t think it will be worth it but I will see it in the future. As I said in my previous message there is another possibility which is that the window is pressing it and producing the damage even though the tile on top is perfect it may be transferring the forces onto the brick below and causing the cracks but this is all suppositions. I think that for the other pieces broken I´m going to try to strengthen the union between the two sides of the car which is for now the only idea that comes to mind although there are several cracks on the window frames that I can´t explain for now Do you think if this could be the cause of the problems? Thanks for all the help, Imanol Quote
Hod Carrier Posted June 29, 2024 Posted June 29, 2024 On 6/11/2024 at 12:06 PM, Imanol said: I think that for the other pieces broken I´m going to try to strengthen the union between the two sides of the car which is for now the only idea that comes to mind although there are several cracks on the window frames that I can´t explain for now Do you think if this could be the cause of the problems? The truth is that I don't know. I've never experienced this myself and I can see nothing wrong with the images you've posted. Quote
Imanol Posted July 5, 2024 Author Posted July 5, 2024 On 6/29/2024 at 12:56 PM, Hod Carrier said: The truth is that I don't know. I've never experienced this myself and I can see nothing wrong with the images you've posted. Well, I´ve finally found time to work with the train again and I have discovered what I think is the main cause of the cracks. The two areas marked in this photo are the main critical points on the car as they are not properly connected: In this other image you can see the connection points (apart from the upper area: This is what I think is happening, the arrows signal the forces involved. The bricks marked are the ones which have developed cracks so the theory checks up. Now comes the second part, which is how to solve this. Frankly I don´t have any idea. I knew from the start that this could be a problem but I wasn´t sure how to solve it but I didn´t imagine it could cause all of this. It might be a good idea to start thinking on a complete redesign of this areas changing the bogie connection from the top to the bottom. If anyone has another idea feel free to say it. And of course there is another problem as unfortunately I will be away from my home several days so I won´t be able to test anything on the real model. Thanks, Imanol Quote
Imanol Posted February 4, 2025 Author Posted February 4, 2025 Hi everyone, thanks to the help of @Hod Carrier we were able to redesign the entire car structure adding a technic frame which now supports the weight of the cars. This was enough to stop the cracks that were appearing. Now that this problem is solved (and I´ve had time) I can start with the next phase, which is to motorize the train. I´m completely new to LEGO motors so I don´t even know how to approach it. I spoke to @Nikonissen a while back about using the Technic Large Motor (88013) like the crocodile locomotive and he told me that it was very slow so I planned the design to accommodate the Train Motor (88011). But after thinking about it, I prefer to have Technic Motors as this allows for a smaller bogie assembly which will help with the problems of the power car as right now it struggles with R40 curves due to it´s length. I´ve also been experimenting with custom bogies and I would like to use them on this train, but I find that the wheel sizes are very confusing. Currently the train has the RC wheel (38340) with it´s holder but I´ve noticed that the axle hole wheel (55423) is slightly bigger so I don´t know if this will be a problem. There is also the issue of how many motors I will need to power the train as it weights around 4 kg. I know I want the traction to be symmetrical in order to have the same ride quality in both directions. As you can see the train has two powercars so it will be as easy as duplicating the design. [url=https://flic.kr/p/2p3R7b3][img]https://live.staticflickr.com/65535/53197112454_f3cc91a141_k.jpg[/img][/url] For now I´ve build one power car and three coaches but I´m planning on redesigning the entire powercar once I´ve decided which motor configuration is better. Right now any help will be greatly appreciated as I´m still a noob with working with real life LEGO trains. Thanks, Imanol Quote
Hod Carrier Posted February 9, 2025 Posted February 9, 2025 On 7/5/2023 at 11:26 PM, Hod Carrier said: Another option from the left-field would be to put the train motor on it’s side inside the body of the power car driving a conventional Technic power bogie. It might be a bit of a fiddle to get it set up correctly so that everything aligns properly, but it means that you can have the speed and power you want from the train motor without having to compromise on the size of the bogie. This would be my recommended solution for power. Quote
Imanol Posted February 9, 2025 Author Posted February 9, 2025 2 minutes ago, Hod Carrier said: This would be my recommended solution for power. Thanks for the idea. The main issue with that is that I can only have one motor in each power car as the motor bogie sideways can´t fit above the front axle as the cab is slanted so I don´t know if it would have enough power with only one motor. Quote
Hod Carrier Posted February 9, 2025 Posted February 9, 2025 Couldn't it go over the rear bogie? Quote
Imanol Posted February 9, 2025 Author Posted February 9, 2025 2 minutes ago, Hod Carrier said: Couldn't it go over the rear bogie? I have checked the train and it´s very possible that the height is not enough for it to go sideways in any place as there are several hinges on the inside that allow for the slanted roof. So that idea might not be possible at all Quote
Hod Carrier Posted February 10, 2025 Posted February 10, 2025 Referencing the render of the interior of the power car that you posted in July 2023, I would have to disagree and say that you have more than enough space. The train motor turned on it's side is only 10 plates high and I estimate that you have you have a space 13 plates high over the rear bogie, assuming that you've not made big changes to the design in the last couple of years. You could easily clear the interior of the support pillars and have the roof supported by the sides instead, or even integrate the motor and battery into the structure of the car. I just think that it's worth looking at again and seeing what you can do because a high speed train needs to be fast, and Technic motors will not give you that speed. Quote
Imanol Posted February 10, 2025 Author Posted February 10, 2025 1 hour ago, Hod Carrier said: Referencing the render of the interior of the power car that you posted in July 2023, I would have to disagree and say that you have more than enough space. The train motor turned on it's side is only 10 plates high and I estimate that you have you have a space 13 plates high over the rear bogie, assuming that you've not made big changes to the design in the last couple of years. You could easily clear the interior of the support pillars and have the roof supported by the sides instead, or even integrate the motor and battery into the structure of the car. I just think that it's worth looking at again and seeing what you can do because a high speed train needs to be fast, and Technic motors will not give you that speed. The issue with that image is that all of the side supports were hidden so the space looks bigger. This how it looks right now with the bogie sideways (I can´t remove the wheels in studio) and as it can be seen it can´t fit. Sorry for the quality as it´s a screenshot instead of a proper render: [url=https://www.flickr.com/gp/157697012@N05/33g130F899][img]https://live.staticflickr.com/65535/54319276445_bf383eba44_c.jpg[/img][/url] In any case I will need to redesign the roof supports as they are in the way of any cable connections so the space between them will change Quote
Maufol Posted July 14, 2025 Posted July 14, 2025 What an amazing model! So challenging design , even the special Talgo rodal that is so unique and difficult to "simulate" in Lego...! Quote
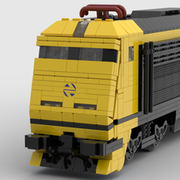
Imanol Posted August 5, 2025 Author Posted August 5, 2025 On 7/14/2025 at 6:38 PM, Maufol said: What an amazing model! So challenging design , even the special Talgo rodal that is so unique and difficult to "simulate" in Lego...! Thank you very much, the design has been quite challenging, specially the locomotive front. I´m not going to claim any merit about the "rodal", that was entirely designed by @Hod Carrier who has also helped a lot on the process of transferring the design from a render to a real model as the structure was completely redesigned during that process. Right now the full train has been finished with 2 power cars and 5 trailers but I´m having issues with the gear mechanism on the bogie that supposedly needs to transfer the power from the motor to the wheels so I want to solve that before presenting the full train. Thanks, Imanol Quote
Imanol Posted August 5, 2025 Author Posted August 5, 2025 (edited) Well, after some time without any updates on this forum I can finally say that the train is completely finished but, as I have mentioned in the previous message, the powertrain is not working so I want to solve this issue first. Currently the design of the motorized bogie is quite simple and consists on a technic frame with 4 axles which transmits the power from the motor located inside the power car frame to the wheels. The design is based on one proposed by @Hod Carrier but lengthened by one stud to be the same size as the dummy bogie which was previously in place: This is how it looks underneath with all of the gears visible: The main issue I have encountered is that with even without any load applied to the motor (apart from the weight of the power car) there is some type of issue that detaches the main axle underneath the bogie which completely breaks the power transmission. In the next picture the axle is detached from it´s place to be more visible: I have tried several things which includes: - Attaching the Technic bricks to the main frame also from below. This didn´t work as it can´t go through switches without bottoming out. - Reverting to the original design which has one stud shorter. I still encountered the same issue. - Trying to fix the vertical axle in place to impede the upwards/downwards movement. The axle due to the force of the motor freed itself. - Using a larger axle fixed at both sides of the motor. Same issue as before. So after trying all of the above I´ve been left with a train that is not able to move with this configuration as before finishing all of the improvements I tried using the train motor as a normal LEGO train and the train was able to move although at that point the entire train wasn´t finished so I don´t know if with the two powered cars was enough to move the whole train. I´m open to suggestions about how to solve the problem but I´m also aware that this might require a complete redesign of the bogie and maybe use a full technic structure with more support although that might cause issues when trying to attach the rear section of the power car that swivels with the bogie. I´m sorry but right now I don´t have any photos of the full train assembled but I will try to have one on the near future. Thanks, Imanol Edited August 5, 2025 by Imanol Photo links Quote
zephyr1934 Posted August 7, 2025 Posted August 7, 2025 On 8/5/2025 at 6:59 AM, Imanol said: I´m open to suggestions about how to solve the problem but I´m also aware that this might require a complete redesign of the bogie and maybe use a full technic structure with more support although that might cause issues when trying to attach the rear section of the power car that swivels with the bogie. You will probably need a structure that locks the two bevel gears together. Easiest would be 87408 or 48946 But you might be able to make something work with non-technic parts like the 3956 bracket Quote
Imanol Posted August 7, 2025 Author Posted August 7, 2025 7 hours ago, zephyr1934 said: You will probably need a structure that locks the two bevel gears together. Easiest would be 87408 or 48946 But you might be able to make something work with non-technic parts like the 3956 bracket First, thanks for the suggestions, I haven´t thought of any of them before. Right now I don´t have access to the real train (or any of the suggested pieces) but I can test if it fits on the Studio model. The bracket looks almost perfect but the hole is slightly misaligned so that won´t work. Talking about the Technic option, with the piece proposed (87408) I have two ideas. The first one is to the central axle to the wheel axle using two of them. This in theory should keep the axle fixed, but the main issue is that the piece is too wide to enter inside the current frame so the bogie will need to be entirely redesigned as the Technic 1x4 and 1x6 bricks are the main structure of the bogie so removing them requires a new way of connecting everything. The other idea that occurred to me was to connect the main axle with the one which comes from the motor. This is right now the easier solution to implement although I have serious doubts about its usefulness as the motor axle is not very well attached on it´s own but it can be used as a way of fixing both axles. For now I´m going to make a working solution using the technic pieces and see if I can try an implement everything with little disruption to the rest of the design. Thanks a lot for the ideas, Imanol Quote
L-Gauger Posted August 7, 2025 Posted August 7, 2025 I have encountered this problem before, and there are two potential solutions I know of that minimize re-design. One is to substitute the 1x2 Technic bricks for 1x4 Technic bricks. This will require some creative redesign of the inside structure of the bogies, but the increased clutch power of the 1x4 bricks makes a huge difference. The other (stronger) solution is to use two 4x4 Technic bricks: This would be an even more extensive re-design than the previous suggestion, but would guarantee a strong drivetrain. Hopefully this helps! Quote
zephyr1934 Posted August 8, 2025 Posted August 8, 2025 10 hours ago, Imanol said: he other idea that occurred to me was to connect the main axle with the one which comes from the motor. This is right now the easier solution to implement although I have serious doubts about its usefulness as the motor axle is not very well attached on it´s own but it can be used as a way of fixing both axles. The above is basically what I hand in mind, I THINK you showed examples of this connection failing. With the bevel gears locked in that will keep them from pulling apart. I think this will be strong enough for the other two pairs of bevel joints. The center one worked against the clutch power of the studs while these end ones work against the studs themselves. Assuming you have 1x2 technic bricks on that center axle and probably 1x4 plates below them I bet this will be strong enough. But if it isn't, then you could turn to this: 1 hour ago, L-Gauger said: The other (stronger) solution is to use two 4x4 Technic bricks: Quote
Imanol Posted August 8, 2025 Author Posted August 8, 2025 13 hours ago, zephyr1934 said: The above is basically what I hand in mind, I THINK you showed examples of this connection failing. With the bevel gears locked in that will keep them from pulling apart. I think this will be strong enough for the other two pairs of bevel joints. The center one worked against the clutch power of the studs while these end ones work against the studs themselves. Assuming you have 1x2 technic bricks on that center axle and probably 1x4 plates below them I bet this will be strong enough. With this design I can keep the 1x2 technic bricks with no issue, the problem is that the technic brick itself is the lower part of the bogie as the first idea I had to solve the problem was to put 1x4 plates underneath. This looked like it could work but then I started to notice that the train was struggling on switches and then I found that due to the switch design didn´t have enough clearance and it was bottoming out. Right now I have tried securing in place the motor axle but due to the motor vibrations (up and down) it was able to loosen the technic bush (4265) that were put in place. I tried using a longer axle to be able to attach it over the motor but it didn´t work. Another is that in order to place the technic connector it was necessary to remove the 1x4 technic plate that was keeping the axle straight so I will need to think on another way if I want to keep using the issue. 14 hours ago, L-Gauger said: I have encountered this problem before, and there are two potential solutions I know of that minimize re-design. One is to substitute the 1x2 Technic bricks for 1x4 Technic bricks. This will require some creative redesign of the inside structure of the bogies, but the increased clutch power of the 1x4 bricks makes a huge difference. The other (stronger) solution is to use two 4x4 Technic bricks: This would be an even more extensive re-design than the previous suggestion, but would guarantee a strong drivetrain. Hopefully this helps! First of all, hearing that this has happened before and could be solved only by better securing the axle is a relief. One of my main concerns was that this was caused by a lack of power or adherence that was affecting the weakest link on all the mechanism but I´m glad to hear that (it might) not be the case. I have adapted both ideas to the design but each of them has it´s own issues although they can be overcame. The 1x4 crossed technic bricks allows the bogie to have the same length as before but I´m not so sure about it´s stability (although Studio says it´s more stable) With the 32324 Brick the bogie is one stud longer which can cause issues but due to the slanted design of the train undercarriage, the bogie can be one stud longer on the frame part. There is also the possibility of combining both of the proposed solutions, using a stronger frame and at the same time securing the motor axle but right now I don´t know if it´s going to be better. For now I will try to work with the technic frames and at the same time look for a way of securing it to the frame of the train as right now the only attachment point is the motor itself. Thanks for all of the help, Imanol Quote
Recommended Posts
Join the conversation
You can post now and register later. If you have an account, sign in now to post with your account.