
Hopey
-
Posts
209 -
Joined
-
Last visited
Content Type
Profiles
Forums
Gallery
Everything posted by Hopey
-
 Is an adder necessary when coupling two pratically identical motors? Two such motors should automatically match their speeds, if I understand correctly, in the same way as using multiple locomotives to drive a train. Suppose one motor is inherently a few percent faster than the other. When running with no load, the faster one will do all the driving and the slower one will simply freewheel. However, once a load is applied, the faster one will slow down, and when it reaches the speed of the slower one they'll both be doing the driving. Or is there something I've misunderstood? Awesome work, by the way.
 -
Nice, somehow I've never seen this set before. I think it came out right at the start of my dark ages. I don't quite understand the steering and suspension works. So turning the hand-of-god both rotates the large turntable, and drives the pinion on the center axle? This seems rather odd to me; shouldn't the middle axle stay fixed and the front and back ones steer? Does the settering rack have to bend in order for it to steer? That seems an odd design to put in an official model. From memory that piece is made from a different plastic which is fairly flexible, but I'd have thought it'd still wear out after a bit when used like this. And lastly, what's going on with that back axle? It's as if they've designed it to be steerable, then changed their mind and fixed it in place somehow. What degree of freedom does it have? Is it pendular, so the wheels can lift up and down?
-
8043 Excavator problem
Hopey replied to DarkShadow73's topic in LEGO Technic, Mindstorms, Model Team and Scale Modeling
I recently built my 8043 again after buying a can of silicon lubricant. I used a brush to put some on the teeth every gear and in every hole that a rotating axle goes through. (This seems to have worked ok, but honestly there doesn't seem to be that much difference) I also lubricated the changeover sleeves and used a tan frictionless pin instead of a blue one. It turns out this was a mistake. The changeover mechanism is so low in friction that when you let go of the red lever on the remote, the tension in the gear train is enough to pop it back out. I.e, in order to use a function (boom or track) reliably, I have to hold the red lever in the appropriate direction. As soon as I let go, it bounces back to neutral, or even over to the other function. So I'm guessing they had a reason for using a blue pin there. -
Need help with gears
Hopey replied to Pat-Ard's topic in LEGO Technic, Mindstorms, Model Team and Scale Modeling
Not entirely sure what you mean about them turning at the same speed, but I think it'd work if you had a decent return-to-centre system. I agree that the two would quickly get misaligned if it wasn't return-to-centre. However, in my eperience it's difficult to get return-to-centre to work well (using shock absorbers or elastic bands) for anything but very small MOCs; on a largish model (e.g. 9398) the amount of spring force you need to get it to reliably return to center is too much for the M motor to work against. -
Need help with gears
Hopey replied to Pat-Ard's topic in LEGO Technic, Mindstorms, Model Team and Scale Modeling
I assume that whatever you're creating is IR controlled? Rather than doing it with gears, you could do it with the directional switches on the remote. i.e. have a separate motor for steering each axle. Connect both to an IR receiver, one on each channel. On the remote, fix the two controls for that IR receiver together, so that turning a wheel or whatever moves both levers the same way. Both directional switches the same = reguar steering. One direction changed = crab steering. Might take up less space, too. -
Monowheel
Hopey replied to Zerobricks's topic in LEGO Technic, Mindstorms, Model Team and Scale Modeling
I like. What kind of battery pack have you squished in there? Do you reckon you could fit in a kind of inertial steering system? I.e. mount a flywheel with a vertical axle, and rotate it clockwise at a fairly high speed, to make the whole thing rotate counterclockwise? -
Double-length Linear actuator
Hopey replied to Hopey's topic in LEGO Technic, Mindstorms, Model Team and Scale Modeling
Fair enough; nothing new under the sun, I guess. Does your setup have the problem with the clutch engaging when only one of them is extended? I have to say though, if that issue can be avoided, I like my setup better. There's less of it spinning around, and it should be much simpler to mount the driven end, just driving it like you drive a normal one. Edit: I take that back. I had a go, and mounting them with the big ends together prevents the clutch problem entirely. -
Not sure if others have done this before, but while thinking about making an extendable boom, I came up with this: This is just a proof of concept, of course. In case you don't want to watch the video (or if it's not clear), the concept is based on the fact that for the LAs to work in the normal way, the end of it must be held in some way, otherwise when driven, the end just spins. So one of the LAs (A) is driven, and the other (B) has its input axle fixed (not clear in the photo). When A is driven, there's no resistance (hopefully) so it turns its end, which in turns the end of B. Holding the input and turning the end is the same as holding the end and driving the input, so B extends/retracts. When this is complete and B resists, it prevents the end of A from turning and it works as normal. It seems to work fairly well, except that if the LA with the motor directly attached extends first (as in the first attempt in the video) the clutch often kicks in once it's done, preventing it from turning and extending the other one. Switching back & forth a little bit seems to fix it when this happens. But it does seem as though this would work better under conditions where the greater load was during retraction rather than extension. Has anyone ever used this concept in a MOC before?
-
Yet another crawler
Hopey replied to Hopey's topic in LEGO Technic, Mindstorms, Model Team and Scale Modeling
Glad you guys like it. So the typical English weather cleared up for long enough today for me to have a go of it outdoors. I'm rather pleased with the results, although clearly grip is an issue. Would have to get some 3rd-party tyres to improve this. The steering is very slow, but in order to make it faster I'd have to gear it up, and I'm not sure it'd be strong enough, and besides, I don't really have enough room (without completely redesigning the middle). It might work better with a small linear actuator, but I don't have any of those. I don't think I can be bothered putting a body on it. For one, putting a body on a crawler like this always looks kind of silly in my opinion, and I'm more interested in modelling mechanical stuff than bodywork anyway. -
What is wrong with my suspension?
Hopey replied to Wallace's topic in LEGO Technic, Mindstorms, Model Team and Scale Modeling
As a guess, I'd say it's because the 6L links that stop it moving sideways are too high up to work properly, so when you lift one wheel up it's moving sideways instead up compressing the springs. They should be down at the same level as the torque tube, like in the 9398. (I've got exactly the same 3 sets as you, by the way) -
So, for this week's installment of "what can I do with lots of M motors", I decided to build a crawler. Inspired by z3_2drive and others, I wanted to make a lightweight, minimalistic one, but wanted to do it a bit differently, to make it stand out from the crowd... (Apologies for the quality of the photos, they're taken indoors at night with a flash) So probably the most obvious and fundamental thing to notice is that each wheel is driven independently by its own M motor, which attaches directly to the portal hub input, with 1:3 gearing down in the hubs. Why? Well, why not. From there, I really just winged it, doing each element as simply as possibly. Rather than a simple-yet-elegant system of links (which I don't have the pieces for), I separated the different rotation axes of each axle. For roll (one wheel higher than the other), each entire assembly is attached to a turntable. A rubber band (non-genuine, sorry) onto a beam attached to the centre part returns it to the upright. For up-down movement of the axles, they simply pivot at the point where they attach to the turntable structure, with a pair of shocks at each side. These are actually probably too stiff, I might replace them with some softer ones. I'm not really that well-versed in different suspension geometries, so I don't know what disadvantages might exist here, but it seems to do the job. It inherently eliminates any unwanted side-to-side movement, and prevents the need for complex articulation of the shock absorbers. As for steering, initially I planned to control each wheel individually, and skid steer to turn. This didn't work out; besides the fact that I was too uncoordinated to control it, the skid steering just didn't work. It just tried to destroy itself without turning at all. I didn't want to complicate the drivetrain at all, and giving it enough room to rotate the portal hub _and_ the motor seemed rather complicated as well, so I kept the wheels fixed to the axles and used a linear actuator driven by a 5th M motor to implement centre-pivot steering. This works quite well, albeit slowly. My experience with the Pseudo9398 taught me that having one M-motor stalled (i.e. steering at full lock) would significantly reduce the output of the other 4. This doesn't happen with this setup, as you only power the motor to change the steering, not to maintain it. The rigidity of the LA also prevents bumps from altering the steering angle. I haven't quite reinforced the structure enough for the LA though, it bends the whole thing a bit if you try to drive it to full extension. I had also planned to do something a bit fancier with the motors, having them offset so that I could have the wheels a bit closer together, but having them that far apart (there's a 15L beam between the tops of the portal axles) doesn't seem to be a problem, and is simpler, so I went with it. As for performance, I'm very happy with it. Power-wise, it had no trouble with the climbing and will flip itself over if you try and crawl up a 90degree wall (it only weighs 880g). It took me quite a few attempts to get it to climb up there, but I think that says more about the driver than the vehicle.
-
New style of crawling begins
Hopey replied to z3_2drive's topic in LEGO Technic, Mindstorms, Model Team and Scale Modeling
Looks nice. I can't quite see it clearly, but it looks as though you've mounted the shock absorbers with only one degree of freedom, by simply attaching them with a pin, rather than the two degrees of freedom that the 8110 and 9398 achieve by attaching them with those pins with the hole in the middle. Doesn't this twist them and put a lot of strain on them when one wheel is lifter higher than the other? -
Rechargeable Battery Pack Mod
Hopey replied to Hopey's topic in LEGO Technic, Mindstorms, Model Team and Scale Modeling
Nope, just using the two battery packs from above. Both are only 9.6V; version 1 is 8xAA, version 2 is 8xAAA. I did a bit of reading, and it seemed as though installing a regulator would just absorb any extra current, so with a 9V regulator I'd get no real advantage from having 10 batteries at 12V over 8 batteries at 9.6V. I may be wrong in my understanding though. Is there any way in which 10 batteries giving 12 V via a 9V regulator would be better than 8 batteries giving 9.6V with no regulator? -
Dragster MOC
Hopey replied to Hopey's topic in LEGO Technic, Mindstorms, Model Team and Scale Modeling
I'm glad I posted mine first :) I built mine from a mechanical perspective; I had 6 motors and wanted to see how I could use all of them to drive a vehicle, and then built a rudimentary dragster body around it. No engine, dud cockpit, not much planning. Yours is clearly designed to be a dragster from the start. I like the details such as the engine exhaust. What're you using to drive it? I'mm only using all the M motors because that's all I've got, I'm fairly sure that a single XL motor would be comparable to the 6 M's, and two XLs would blow it away, if geared properly. As an aside, are you seriously from Maclean? 'Cause I'm from Yamba, although I'm living in the UK at the moment. -
The LEGO Wheelchair
Hopey replied to Burf2000's topic in LEGO Technic, Mindstorms, Model Team and Scale Modeling
Blimey that's a lot of parts. I can't help but notice the orange 5x11 panels, which so far have only been made in the unimog. Please tell me you don't have that many unimogs? -
Dragster MOC
Hopey replied to Hopey's topic in LEGO Technic, Mindstorms, Model Team and Scale Modeling
I'd love to do it with L or XL motors, but my budget's rather limited at the moment, so I'm trying to see what I can build with what I've got. Videos, as promised: The finished product: Just the minimal back end: This is why it's got the small wheels underneath the battery packs. I was hoping it would still drive like this when it was finished, but no such luck. -
So I've got 6 M-motors and wanted to see how much go-fast I could get out of them. Here's the result. Of course it's bloody yellow; *sigh*. There's more pictures in the brickshelf folder Some videos to come. It's pretty quick. I was hoping that the weight of the batteries at the back would make it pop a wheelie when it accelerated, but ended up making the nose a little too heavy. It'll pop up if you reverse and then go, but not from a standing start. I used portal axles to hold on to the wheels a bit better, and to make it easy to change the gear ratios, although in the end I went for simple 16:16, as I discovered that this is the highest gear ratio that will, fit; you can't gear up, as a 20T gear won't fit in the input bit. I also put them in upside down, as there was actually too much clearance if the wheels were aligned with the axles. I made sure to get them as close together as possible for the look of it; there's only a 3 stud gap between the portal axles; just enough to fit the knob wheels that drive it. So the total gearing is 20:12. It's a bit hard to see the drive train in the pictures. At the front, the left two motors share a single shaft driving a 20T gear, as do the right two. These two 20T gears drive a 12T gear in the middle, shaft to a knob wheel, which drives a perpendicular knob wheel, which drives the portal axle inputs. The same thing is mirrored from the back (with only 2 motors, no shaft-sharing) driving the other side of the same knob wheel. 16:16 in the portal axles. I tried running it with a single battery pack, and it went well for about 1 second before everything cut out due to too much power being drawn, hence two battery packs. Mechanically, I'm quite happy with it. The drive shaft train is well-supported, and the whole back end is very structurally sound, although the battery pack mounting was done as an afterthought. The front section's kind ugly and flimsy, and the whole thing's a fair bit heavier than it needs to be. The cockpit's terrible, as I didn't really plan for it at all, and just bunged some pieces on at the last minute. If I have another go at it, it'll be one that integrates the battery packs into the body instead of just bolting them onto the back, and maybe putting all 6 motors in line, all driving a single shaft that runs right down the center of the whole thing. Might twist a bit under load, methinks... That or a crawler with an M motor on each wheel.
-
Rechargeable Battery Pack Mod
Hopey replied to Hopey's topic in LEGO Technic, Mindstorms, Model Team and Scale Modeling
Could you tell me more about this regulator? I considered putting 10 AAA batteries in for 12V (which I think would have fit, with some effort), but read that although the motors would be fine with this, it'd probably damage the IR receivers. -
9398 - Lego Technic 4x4 Crawler
Hopey replied to AndroTech's topic in LEGO Technic, Mindstorms, Model Team and Scale Modeling
This is again from my pseudo-crawler (I haven't actually bought it, I just wanted to see how close I could get to building one with what I had. This part's pretty much identical to the real one, just different colours.) I replaced the two 4L lateral axles with a 4 and a 5 with a joiner inbetween. You could just use a 9L instead (I think this is what Sariel did). The knob wheel on the longditudinal shaft needs to be 1 stud nearer to the axle than where the 20t tan gear was. I used a 3L beam to fill the gap (yellow, visible in the picture through the holes in the crossmember) held with two black pins, and the same 5.5L axle-with-stop as was already used; this just means that instead of sticking out the grey piece at the front by half a stud, it only goes halfway through it, which makes no difference. Make sure you put them on opposite sides in front and back, so that if you put the two axles next to each other they'd be mirror images, as with the diffs. Otherwise the wheels will turn in different directions. This means that when assembled, both lateral knob wheels should be on the left-hand-side of the crawler (or both on the right, no big deal). -
Rechargeable Battery Pack Mod
Hopey replied to Hopey's topic in LEGO Technic, Mindstorms, Model Team and Scale Modeling
*Bump* So I've had another go at this, using AAA batteries this time. Obviously this means it won't hold as much charge, but it all fits inside now, and looks much prettier. Not going to do a full instructable, but basically, I hacked out the baffles that normall go between the AA batteries, to make space. I also made a bunch of 'notches' in various places where I needed wires to run through. I did this by melting it with a soldering iron and cleaning it up with a craft knife. A dremel or similar would be better, but I don't have one. I connected up the batteries in two groups of 4. I soldered them together this time. I wasn't sure if I could get a good join, but by scratching the battery surface on the negative end, and making a little wire lassoo to go around the positive end (and scratching it too) I managed to get the solder to grip quite well. The two 4-packs were connected in series, with a wire going around the outside, and ran the end wires to the places where the existing wires attach. I also added an additional wire to each for charging it. The soldering of these two connections is pretty bad; I should've cleaned the soldering iron after melting all that plastic. It'll do. These are just molex connectors from an old broken PC power supply, since they fit in the plug that's already on the charger I found. So currently, I can just pop the cover off and attach these wires when I want to charge it, and they tuck away neatly in the left over space when I'm not. In future I might get around to making a nice charging socket with a 3.5mm plug or something. So that all works. Both covers go on, and there's no externally visible difference, hence the blue pin for me to differentiate it. Not much point posting a photo of that. Now I just need to see what the battery life is like... -
9398 - Lego Technic 4x4 Crawler
Hopey replied to AndroTech's topic in LEGO Technic, Mindstorms, Model Team and Scale Modeling
Since we're talking about colour schemes, I'll bump this thread: I'm not actually a big fan of the yellow, but I do reckon it looks better with a single colour. I didn't really have any other option other than yellow with the parts I had. A few yellow 5x11 panels would have been nice. I also took the black beams out of the doors after I took the photos. I also prefer the mostly-black chassis to the red one, and would have replaced more of the grey parts with black if I could have. And I'm not a fan of black wheels with black rims. my 2c. -
My Pseudo9398 Crawler
Hopey replied to Hopey's topic in LEGO Technic, Mindstorms, Model Team and Scale Modeling
So I took it for a little test drive outside. It's using the 9.6V battery pack from this thread. The only difference from the standard gearing ratio is the portal axles have 8:24 instead of 12:20. I've also modified the steering a little bit; I moved the steering motor back 1L and using the space to brace it so that the gears don't skip, which meant removing a horizontal beam, but it still seems pretty sturdy. (Many apologies for the shaky camera; I was driving it and filming it at the same time, and i'm too uncoordinated to drive it with one hand.) Without being scientific, it looks as though the performance is roughly equivalent to the videos I've seen of the real thing, so it appears that two M motors is roughly equivalent to a single L motor. I'd be interested in seeing someone do an empirical test, though. E.g. get an L motor vs a pair of M motors, pushing in opposite directions on the same shaft, or something like that. One last thing I want to try out before I pull it apart is to put the diffs back in. It seemed very strained when turning, particularly on a flat grippy surface (i.e. wooden floor), and you can noticeably hear it running more smoothly when it's going in a straight line. -
Rechargeable Battery Pack Mod
Hopey replied to Hopey's topic in LEGO Technic, Mindstorms, Model Team and Scale Modeling
So I've done the first prototype, with mixed success. Even though I'm using old, not-too-fancy batteries (they've been in and out of Wii remotes for 3 years or so), there's a significant improvement in power. My pseudo-crawler has much more torque available now, and can actually crawl over some things. It's so much better that the steering now clicks and destroys itself when it reaches lock. So that aspect's a goer. As far as fitting within the battery pack and looking as pretty as the original, well, lets just say my eyeball measurements were a bit optimistic. The batteries stick out about another 1 stud length out the bottom. So besides looking hideous, it probably won't fit inside a model. There's also nothing stopping the batteries from falling out at the moment, and I don't really have any ideas other than duct tape. That's the battery assembly. As you can see, I butchered the insert that normally holds the batteries, keeping just enough to mount the connector and PCB, which needs to be in just the right place for the switch to work. This is actually the main problem, as it takes up more space than I'd anticipated, and is what leads to the batteries sticking out the bottom. The actual assembly of the battery series was quite simple. I didn't want to modify the batteries at all, as this is just a proof of concept; if it works I'll buy some dedicated batteries (probably eneloops) and put these ones back in the Wii remotes. So the series was achieved by placing a bent paperclip across each junction in such a way that it wraps around the positive terminal and contacts the next negative, and holding it in place with the tape. Then a looped one at each end to attach the wires to, and a bunch more tape around the outside to hold it all in place. This works better than I'd expected; they don't seem to lose contact at all, however, if/when I do it permanently, I'll figure out a way to solder wires onto the terminals. The PCB assembly only takes up one side of the top of the thing, which should leave me enough space to add a small charging socket next to one of the screws. The outer part needed some modification as well. There's two ridges on each side which the inner insert slides along. These made the space just slightly too narrow to fit the batteries in, so they needed to go. If I had a dremel or the patience to do it with a stanley knife, I'd have used that, but I went for a soldering iron instead. The trimming down of the insert was done with this as well. Not pretty and one must be very careful. I melted one of the edges where the covers slot in. Oops. So I'm not sure what the next step is. I'm very pleased with how it performs, but the aesthetics clearly need a lot of work. How much charge do AAAs hold compared to AAs? Besides using AAAs, any suggestions on how to make it go together? [edited - typos] -
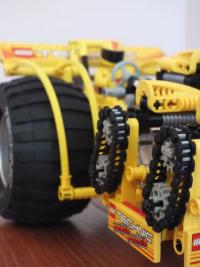
My Pseudo9398 Crawler
Hopey replied to Hopey's topic in LEGO Technic, Mindstorms, Model Team and Scale Modeling
I'm not noticing the power cutting out, so I think it is the batteries. Will give it a go with 2 receivers & 2 battery packs. Here you go; shield your eyes. -
Rechargeable Battery Pack Mod
Hopey replied to Hopey's topic in LEGO Technic, Mindstorms, Model Team and Scale Modeling
Thanks for the tips. Might be a little while before I get the funds together for a charger. As for using regular batteries, I think that constructing something with contacts such that I can easily pull them out is a bit beyond me, and I've never had much success trying to solder wires onto the ends of batteries. Might be worth a shot though.