
XTN
-
Posts
146 -
Joined
-
Last visited
Content Type
Profiles
Forums
Gallery
Everything posted by XTN
-
[TC27] Lime dump truck
XTN replied to efgen86's topic in LEGO Technic, Mindstorms, Model Team and Scale Modeling
I really like the design of your American trucks, so I'm looking forward to see the result. The nose looks promising already. For me it was a hard struggle to fit all the functions when I made a Holmes 750 in that scale on a Mack Cruiseliner chassis. I hope to see some helpful solutions to improve mine. -
I've entered the Lego Techic party kinda late when buying 42078 as my first Technic set, so I've totally missed the four digits set number era that many of you praise for offering great B-models. After building the Mack A-model I also had to buy another copy to buy the B-model, bc I loved to have two Amreican trucks in the same scale standing next to each other on the shelf. So yes, I've build the B-model because the set had one. I've also built 42093 B and the van from 42098 B as a basis for further modding. Later I found the RB website and the incredible amount of models that fit the theme and the scale of 42078, so I've bought another copy of it and manifested my addiction to 15 studs wide trucks. After crossing this border, I've bought sets bc of their alternatives on RB or later as parts packs, so I don't really miss the B-models. At the end it doesn't matter for me if the alternative model is provided by TLG or a talented MOCer.
-
[TC27] Reach stacker
XTN replied to Jurss's topic in LEGO Technic, Mindstorms, Model Team and Scale Modeling
I've seen this boom concept in a post by @suffocation first and fell in love with it so much, that I had to copy it for one of my tow trucks. For my truck I found two ways to make this concept tough and reliable: give it a little more guiding, maybe limit the travel of the inner boom part just a little, let it stick out like two studs less, use flipflop beams for the upper guide rail inside of the panels and use them with the first hole perpendicularly oriented, then they are thicker than normal liftarms, which gives the boom more stability and less play. Maybe that works for you too as it did for me. And... I really like your project so far, especially the design of the rear axle. -
After all the mod, here's another addition to my garage: Jeep Wrangler Unlimited. Of course it fits onto my car transporter trailer or inside its belly. It features: HOG steering openable hood, tube doors, trunk door fake V6 engine driven by differential from rear axle foldable trailer hitch; for folding it in or out, the the boot floor can be folded up. I wish it didn't have to be orange, but those are the parts in my inventory. In my eyes the front bumper looks awesome, maybe I will add a fake winch, like just a hook with an inch of rope. By now I didn't find enought space to add a real winch with a knob without destroying the overall look of the nose. I guess I will leave it like that for a while, I'm open for ideas. Folding in the trailer hitch... The girl is getting ready for a trip to the beach.
-
Thanks mate, that means a lot to me.
-
Also my van was updated. It started as mod of the 42098 B-model years ago and was sitting on my shelf untouched for a long time. The idea was to create an adjustable rear axle to be able to change the chassis angle from a civilian look to a custom car look that matches the giant V8 inside. Therefore I've changed almost everything inside except for the V8. The height of the rear axle can be adjustet by two small LAs. These are operated by a small axle that is used for the HOG steering too. just remove the small axle from the steering position (midlle of the roof), place it in the hole (back of the car) for rear axle adjustment, then place it back to the roof position for steering. To make the van look more civilian, the spoiler can be removed and hidden inside the van. Now it features: HOG steering openable roof in the back + rear "window" fake V8 engine adjustable rear axle height Here are the pics. Civilian look (low + no spoiler) Custom look (high + spoiler) Open roof, spoiler and axle for steerin/adjustment Spoiler stored inside Another small update, more like an upgrade. 42128 got a bumper guard. To still be able to open the hood, the bumper guard can be folded down.
-
I updated some of my vehicles. In previous posts I had shown that I've changed my orange and white 1977 Ford F100 inspired pickup truck from a long bed version to a stepside variant bc I was bored of the look. Also I lowered the roof and I had to cancel some of the features. These features still remain: HOG steering, working steering wheel fake V6 engine driven by rear axle via differential openable doors, hood and tailgate Here are the missing pics. Next one is the red sportscar from one of the more recent posts. It had a small issue: There was no engine inside. This problem is solved, now it features a small transversely mounted three-cylinder in-line engine in the back. Now it features: HOG steering with working steering wheel openable frunk, doors, engine cover in the back. fake three-cylinder engine in the back directly driven by the rear axle The girls called a mechanic to check if everything is fine, because now the car makes strange noises while driving.
-
The night between kicking out the old couch and getting the new one delivered, when the living room was almost empty, I made myself a wish come true on the living room floor (probably not what u think ):
-
The latest addition to my garage: A small red sportscar, that fits onto the car transporter trailer. It features: HOG steering with working steering wheel openable frunk, doors, engine cover in the back. The frunk offers enough space for four (!) luxury shopping bags. The engine in the back is still missing. Now there are enough cars to fill the trailer without using the pullbacks.
-
Grohl's Creations
XTN replied to grohl's topic in LEGO Technic, Mindstorms, Model Team and Scale Modeling
My two cents: Can we have a speed build vid on YT pls? I miss the message "boat doesn't float". I love the fact that this moc already has more comments than parts. Not sure bout it, but this moc might be the absolute king regarding its comment part ratio. -
42176 Porsche GT4 e-Performance
XTN replied to Ngoc Nguyen's topic in LEGO Technic, Mindstorms, Model Team and Scale Modeling
My first thought too, but there is one, just an inch away, right in the middle of the lip... probably the same numbered bag. Well, nvm, TLG must know what they're doing. -
42176 Porsche GT4 e-Performance
XTN replied to Ngoc Nguyen's topic in LEGO Technic, Mindstorms, Model Team and Scale Modeling
Uhm... the front spoiler... at the right and left end of the lower lip... Why are they using a blue 2L liftarm on each end and not blue toilet paper part (aka comma part) as in te middle of the lower lip? -
I agree with every single statement already made here. On first sight I thought the only interesting parts are the narrow truck wheels and the bucket - now the bucket(s) disqualified itself. Well, mb the two buckets are a great opportunity for MOCers? Nonetheless, I think this is an awesome starter set with great playability and a lot of functions. It looks fine even without applied stickers and it works fine without needing an app to play with it - a bunch of arguments that are often mentioned in this forum. I like this set for what it is. Good job, TLG!
-
I agree with every point, except for the count of system bricks, imho there are to many of these. Mb the Jesko just isn't the perfect car for resembling it in Technic in that scale. But as a generic supercar or hypercar it looks fine (not the headlight stickers!) and the parts are promising for alts or mods. I already think of using a bunch of the panels for a generic supercar in Mack scale, using tires like in 42165.
-
Yes, most likely. There is a mechanism like that on RB already, in three different sizes, I just can't find it anymore, only have the lxf files resting on my pc.
-
At the front there are standard rims with six double spokes, at the back there is a print with five spokes... Seriously?
-
My biggest project - the car transporter semi-trailer - is finally finished. Here are the features: Mack compatible Frame width for the most part 17 studs, as the frame shouldn't be significantly wider than the trucks. Excluded from the limit are elements for controlling the functions Clearance within the frame 14 studs as the vehicles to be loaded are a maximum of 13 studs wide and need some clearance The vehicles to be loaded sit low in the “belly” of the trailer The rear part of the upper deck folds down to allow loading of the upper and lower decks - quite obvious for a car transporter trailer The middle section of the upper deck can be raised and lowered using 4 small, synchronously running LAs. The front section of the upper deck can be tilted using small LAs The landing gear can be extended and retracted using small LAs. All functions can be operated from both sides of the trailer An extendable ramp at the rear of the trailer Due to the frame construction and the use of Pythagorean triangles in the front and rear areas, the frame is very stiff and, despite its length, hardly bends even under load. Only in the front overhang is there a certain bend in the size of between half a stud and a stud, which at the same time compensates for the different wheel diameters between the trailer and the tractor. The high rigidity offers great playability, but doesn't help empty my shelves: When the trailer is fully loaded, the total weight is almost 4 kg, which then only rests on the tandem axles and the fifth wheel coupling. To avoid permanent damage to the axles of the tractor and trailer, I only leave the trailer on the shelf empty or loaded with a maximum of two cars. The trailer is 98 studs long and holds up to seven of my cars. The size becomes clear when it is parked next to my other semi-trailers.
-
Questions for LEGO Engineers
XTN replied to a topic in LEGO Technic, Mindstorms, Model Team and Scale Modeling
From my experience, it is important that a feature works safely and reliably. If a mechanism is so fragile that you have to constantly stand next to your kids, explain to them what they can and can't do, and if you have to constantly repair it, then it's not fun to play. Storage compartments, such as for tools in a tow truck or simply a trunk in a car, can add a lot of fun and playability. For the type of features, just follow your heart. Maybe ask yourself why you chose that project. If you build a car, add a simple HOG steering. The number of features should initially be low. Add doors to your car. And after adding doors, find out that you might have to redesign the frame, because it is not stiff enough anymore. Add a fake engine. And after adding this, you might find out that you have to redesign the steering, because there's not enough space for both. And so on. You will continue to challenge yourself from model to model to add one or two more features or to improve already known features. Perfect example. -
Okay, that's strange. I could have sworn I uploaded pictures of the Unimog, but I can't find them too. As they didn't get any vies om imgur I guess I just forgot about them. There has been no progress for more than a year. The base is 42139, the engine and gearbox are unchanged. Unfortunately the playability is not very high, the HOG on top of the vehicle in conjunction with the high, easily tiltable chassis make steering on uneven surfaces very difficult. I like the vintage look of the cabin and I wanted to see if the seat-shaped wheel arches fit, but imho they are too wide. And tbh the gearbox of 42139 sits so low, that it doesn't offer the great offroad capabilities an Unimog should have. At the end, this vehicle in this configuration might stay unfinished forever.
-
Questions for LEGO Engineers
XTN replied to a topic in LEGO Technic, Mindstorms, Model Team and Scale Modeling
Most of the time I use my own mechanisms, because they usually fit better and add playability (e. g. HOG steering), but I've realized that sometimes, when I had trouble to make my own mechanisms work, it helps to take a look at the real-life counterpart. Due to the fact that LEGO is plastic and real-life mechanism often use metal, you will need more space in LEGO to make a mechanism stiff enough to work properly - or reduce its complexity, which is the way I usually chose. My vehicles have their place on shelves in my living room, so aesthetics go first. If a vehicle (a MOC or a set by TLG) has super cool and interesting technical features but doesnt fit into my preferred scale, I won't add it to my garage. I even created pullback MOCs, that have no function besides the pullback enginge. But there's one more aspect to me: playability. My MOCs are tested by my kids, they need to be robust and the functions need to work smoothly. If a mechanism is too flimsy and i don't find a way to fix this, I might even eliminate it. So my ranking is aesthetics 1st, playability 2nd, functions 3rd. I don't like to integrate system bricks unless it's for decoration, like lights, signals, badges, dashboard, grille... Since I only bought Technic sets to fill my inventory, I don't have many system bricks. I get my inspiration from MOCs on rebrickable and eurobricks, from movies and from keeping my eyes open every day while driving to the office and back. To solve design challenges I build one or two prototypes of the specific section and try and rebuild and try and rebuild... Sometimes the challenge appears in the final model, but it's pretty much the same process - just more frustrating. For linear actuators or pneumatic cylinders i build liftarm dumies that mirror the retracted and the extended state. My in LEGO most often used experience from real-life mechanical engineering is: Pythagorean triples. A must for creating stiff frames in a grid-based universe. I prefer using Technic for every reason mentioned in posts above, plus because it has less variety of parts and colors (even if this advantage is decreasing since the addition of parts in vibrant yellow and dark orange or many new different panels). My tip is: Browse rebrickable for alternate models. Then buy the set, build the set, disassemble it, build the alternative model. This way you can experience different solutions and building techniques from different designers using a limited amount of parts. Thank you for opening this cool thread. Have fun building! -
Questions for LEGO Engineers
XTN replied to a topic in LEGO Technic, Mindstorms, Model Team and Scale Modeling
So true!!! -
Thank you very much. You're right about red, but the truth is, the color choice was primarily forced by the parts in my inventory Another good one might be black for a semi tractor unit to resemble Rubber Duck's famous truck from "Convoy" or white. A white hood would make it possible to use the 3x1 plate with the MACK sticker from 42167. I was thinking about that too, but I dont have the angled liftarms for the wheel covers. Looking forward to see your variant one day!
-
First attempt: Lever mechanism. Second and final attempt: Pneumatics. I hope you like the result. Thx for reading and watching.
-
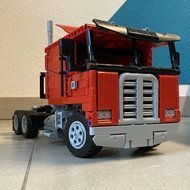
The Mack R Series dump truck is [almost] done. On the way to completion I only had to sacrifice the TGS, but not the Granite. The Mack R now offers HOG with a gear reduction, pendulum front axle, rear axle suspension like the TGX from @mpj with an increased suspension travel. The axles swing individually around the longitudinal axis and the whole tandem can also swing. The two rear axle differentials are connected to a V8 fake engine. The hood and doors can be opened, the loading area tilts via pneumatics and the tailgate is locked when the loading area is lowered. The biggest challenge was the limited space. A V8 fake engine had to be pressed in under the short, tilting hood and above a swing axle. In the cabin, the tightness made it difficult to implement the gear reduction for the HOG. But because this makes steering much more pleasant, I stuck with it until the end and I'm glad it was possible to realize. In the frame, the main drive shaft takes up a lot of space due to the vertical movement of the rear axle suspension and prevents the installation of a medium or large LA within the frame to tilt the loading area. Outside the frame, however, these LAs would be too wide and the rear tires would block due to the pendulum movement of the axles. The first attempt was to use a lever mechanism, but it required a lot of force and was anything but elegant. The solution was two narrow pneumatic cylinders from 42128. The pump can be operated directly on the vehicle or it can be easily detached for easier handling. As a special feature, the loading area offers a simple gravity-operated lock for the tailgate that was inspired by @functionalTechnic's tipper trailer as seen in this vid: LEGO Technic - Mack Anthem Dump Truck (MOC) - YouTube Well, a few little things still need to be polished. This includes the pendulum mechanism of the front axle, which currently still has too much play around the vertical axis. For this I will install a small turntable instead of a simple cross axis. Also there are a few color inconsistencies, such as the gray panel in the hood or some sticking out 3L pins that need to be hidden or replaced. But other than that, the truck is finished and playable.
-
That's an interesting point. From the pic i guess 42165 is 13 studs wide, which is also the case for 42166. In real life, F1 cars are 2 meters wide, but I'm not sure about the measurements of the Extreme E buggy. For me it looks like a vehicle of the size of a dakar racer like the Audi RS Q e-tron, which is 2.3 meters wide. My personal OCD always starts calculating if a new leaked or released vehicle might fit the 15-studs-wide-trucks scale, and if this F1 car is 13 studs wide, it's very close to that scale (2 meters would be 12 studs in that scale), which makes it an instant buy for me.