
Glenn Holland
-
Posts
109 -
Joined
-
Last visited
Content Type
Profiles
Forums
Gallery
Everything posted by Glenn Holland
-
I chose the L-2a over the surviving models for a few reasons. The primary reason is that it was the most well liked class of L-2 according to crews, and remembered fondly. Also these were produced earlier in the 1920's and better represent NYC fast freight power of the time, namely with the Elesco feedwater heater on the top front of the smokebox. I think this feature is THE classic look of NYC freight. Lastly, the L-2a has been on my long list of locomotive projects for many years. I'm very glad it worked out for this project.
-
Thank you for posting this here @coaster. I'm very happy with the result.
-
[MOC] Frisco #1501 (4-8-2 Mountain Type)
Glenn Holland replied to legonerd54321's topic in LEGO Train Tech
Awesome! -
This is a fantastic looking passenger train. Excellent job on it.
-
I talked to him not too long ago. He's around, just busy with the rest of life.
-
I have had success with powering only one blind axle and using traction tires on the flanged wheels. The connecting rods keep everything in sync.
-
It’s worth noting the width of the open air car and locomotive cab (8 studs!!) I'm very excited about the set. Setting aside the new inferior wheel design, all around it does look like it’ll be a winner. I’m also very glad they designed a true 4-4-0 rather than resorting to a more fantasy, Winter Village Train-styled easy locomotive. It’s definitely an immediate want-list set. I can’t wait to get one.
-
[MOC] Buffalo Creek & Gauley 2-8-0 #13
Glenn Holland replied to Glenn Holland's topic in LEGO Train Tech
@Sérgio - For some reason I have a glitch where I cannot click to quote your post here. Thank you all! -
[MOC] Buffalo Creek & Gauley 2-8-0 #13
Glenn Holland replied to Glenn Holland's topic in LEGO Train Tech
Thanks! I used a silver Sharpie paint pen for that. I mounted the wheel facing up using some scrap plates and an axle. Then I just spun the plate around and held the pen to the tire. The tire is slightly raised from the spokes, so it was easy to only paint the tire. Just takes a steady hand and some patience. Paint thinner can't hurt to have on hand, though. -
[MOC] Buffalo Creek & Gauley 2-8-0 #13
Glenn Holland replied to Glenn Holland's topic in LEGO Train Tech
Thanks all of you for the compliments! Thank you! Regarding the cheese slopes, the definitely seem to touch the top of the rail in the photos I posted. I can assure you that they do not. Like the rest of the locomotives and rolling stock I've built, they sit about one plate above the rail. This is a common truck design that I have to thank Cale Leiphart for. Glenn -
[MOC] Buffalo Creek & Gauley 2-8-0 #13
Glenn Holland replied to Glenn Holland's topic in LEGO Train Tech
What a surprise! Thank you! -
Help me better understand: why do you feel the motor needs to have the freedom to rotate? Casey Jr., as shown in your reference, is a 2-4-0, which is nearly the smallest wheelbase possible for a steam locomotive. You could almost get away with all six wheels being fixed to a rigid frame, but for the sake of ease, I think you'll want to allow the pilot wheels to move. As @M_slug357 mentioned above, you'll want your cylinders to be rigidly attached to your train motor, and leave room for the pilot wheels to swing around/beneath them. This will save you the headache of having to articulate your connecting rods. Once you arrive at a solution you're happy with, you'll want to measure the distances between your two driving wheels and then from the main driver to your cylinder. You should need a 7-stud long rod to connect the wheels together. The distance to the cylinder depends on which axle you want to have as your main; the front or the rear. Keep in mind you'll need at least three studs worth of travel built in, so your main rod doesn't collide with your cylinder, or fall off, and drag along the ground. It will depend on your design. Zephyr1934 can help you out once you know what you need.
-
[MOC] Buffalo Creek & Gauley 2-8-0 #13
Glenn Holland replied to Glenn Holland's topic in LEGO Train Tech
Thanks! I put a lot of effort into research. To me what really makes a locomotive identifiable is the details - in this case, things like the dual air pumps, three air tanks, offset rear driving axle - they all are subtle nuances but have a huge effect on the final model. What a compliment! Thank you! I tried to go for the "United States Shortline" style when I was choosing what cars to put behind this engine for the video. It looks great, although several more hoppers would be more appropriate! The locomotive is indeed very smooth. It's well balanced and doesn't tear itself apart. Thanks! Having a good starting point always helps. The difference is in the details. I use the Hi-Line Steam sound card from Dallee Electronics. This is my second time using it, the first being my reading 4-6-2 "Crusader". I wrote an article about it for Brickjournal #46. The packaging is a little different but the setup is the same. To summarize: - Sound card. This particular card has 10 whistles and 6 bells from Eastern US railroads. - Speaker. Dallee sells different size speakers that plug into the sound card. - Chuff sync. Dallee has two options: magnetic and optical. I use magnetic. Two magnets are glue on opposite sides of a technic axle and the sensor is mounted nearby on the fourth driving axle. - LEGO interface. It will require some soldering, but you'll be able to operate the whistle and bell off of LEGO IR if you use the interface. Power for the card comes from the interface as well. The prototype of this product is actually what's powering the system in my Crusader. Much appreciated! It seems the connecting rods are what people enjoy the most, which is very gratifying to hear. This is the first time I've designed a full set of running gear by myself. I opted for more detail rather than keeping the "LEGO" look to them. It's a little unconventional but I don't think it distracts the viewer from the rest of the model. They are indeed 3D printed. I used Shapeway's Fine Detail Plastic and used Tamaiya TS-100 paint for the gunmetal color. The only modification I had to do to these parts is ream out the main crank pin hole a little so it would run more smoothly. -
[MOC] Buffalo Creek & Gauley 2-8-0 #13
Glenn Holland replied to Glenn Holland's topic in LEGO Train Tech
Thank you, If there's a PennLUG meeting I can make, I'll bring it along. -
[MOC] Buffalo Creek & Gauley 2-8-0 #13
Glenn Holland replied to Glenn Holland's topic in LEGO Train Tech
Thanks all! Sure thing. Facebook's search function isn't the greatest. -
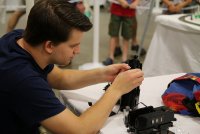
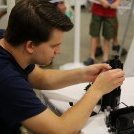
Hi forum. It's been a while since I've built a model for myself. More than 2.5 years, actually. This late winter and early spring, I've been working to end that cold streak and here is the result: I modeled Buffalo Creek & Gauley 2-8-0 #13. Buffalo Creek & Gauley 2-8-0 #13 by Glenn Holland, on Flickr Due to the gap in my personal building, I wanted to choose a locomotive which could be completed with relative ease, minimum of custom electronics, but would allow me to model a high level of detail. The BC&G #13 had been on my list for sometime, so I decided to go for it. Mechanically, the locomotive is identical to Brickmania's S160 2-8-0. It's driven by a single L motor coupled to an IR receiver but uses a custom battery (out of necessity). I did end up installing a sound system from Dallee Electronics which I took out of a previous dismantled locomotive. Buffalo Creek & Gauley 2-8-0 #13 by Glenn Holland, on Flickr Thanks to Cale Leiphart for his support, photo taking, and work with the decals, thanks to Andy Mollmann for printing the decals, and thanks to Brooks Stover for his amazing BC&G website. Link to Brooks' website: http://www.buffalocreekandgauley.com/ Link to my Flickr album for the locomotive: https://www.flickr.com/photos/41032663@N08/albums/72157709020830252/with/48036954871/ Link to the article I wrote for Brick Model Railroader: https://brickmodelrailroader.com/index.php/2019/06/10/buffalo-creek-gauley-2-8-0-13-by-glenn-holland/ And lastly the the video I made showing the details and running: Thanks for checking it out. Happy building. Glenn Holland
-
Thanks for another good write up. Glad to see you're still enjoying our cars, and of course finding a few areas for us to improve. These have already been taken care of as we're ordering more books this week for a restock. Couple notes - We're still trying to get our next two cars out this year, but if we can't, they should be ready in January. We are planning a dual release, which will include a 60' bulkhead flatcar (from yours truly) and a 50' boxcar of western origin, designed by Cale. We would have liked to have these out much sooner, but we hit some serious dead-ends in our research with both cars and had to design that 2-8-0 for Brickmania. The 2-8-0 steam locomotive you mentioned is a USATC S160, and is going to be produced exclusively by Brickmania (not Brickarms :) ) as a full kit. It will be available from them on Friday, December 21st. BMR also tested it's own locomotive (also planned to be released as a kit) which we will formally reveal in January with more information.
-
OcTRAINber 2018: The Foreign Challenge is go!
Glenn Holland replied to raised's topic in LEGO Train Tech
Indeed, and thus I must say congratulations! The bus was surely a favorite of all four judges. Excellent work, and to the rest of the winners and participants! -
OcTRAINber 2018: The Foreign Challenge is go!
Glenn Holland replied to raised's topic in LEGO Train Tech
Hi everyone, @raised has posted the results of this year’s competition. The final article is now available on the Brick Model Railroader website: https://brickmodelrailroader.com/index.php/2018/12/09/octrainber-2018-the-results/ Thank you again to all of this years participants. We hope you enjoyed the challenge this year, and we’ll be thinking about new challenges for next year. Glenn -
OcTRAINber 2018: The Foreign Challenge is go!
Glenn Holland replied to raised's topic in LEGO Train Tech
Absolutely no worries on my end. We all certainly wish we could have posted the results weeks ago. We were pretty quick last year, by comparison. Thanks for understanding our position. It’s obviously a labor of love and of course this is something we genuinely want to put together for you all, and we seriously love doing it. Just one of the ways BMR can move this hobby forward. As a side note, we should have the results posted within the next week. @raised is getting things wrapped up on his end, being the “main coordinator” if you will, and he’s also probably the busiest outside the hobby. I hope this delay isn’t sitting too badly with anyone. OcTRAINber is definitely something we would like to do every year and we don’t want to turn participants away. -
OcTRAINber 2018: The Foreign Challenge is go!
Glenn Holland replied to raised's topic in LEGO Train Tech
Hey guys, we've all been really busy during November (holidays, personal lives, one of us started a new job, etc.). We're on the home stretch now. I extend my apologies that we haven't posted the results yet. Rest assured, they are coming, and we will be sending out prizes shortly thereafter. And yes, it was a bit difficult, at least for me, to sort through these awesome builds. Excellent job everyone, it was definitely a good OcTRAINber. -
I understand your reasoning now, thanks for clarifying. Admittedly I would probably do the same thing and keep my own model rigid frame as well, and relegate it to only be used on grand curve layouts. The real Q's were pretty restricted on Pennsy's track anyway, so in a way that would be prototypical as well! In reference to your point about shuddering, that pertains mainly to the way the track is constructed (until we have viable replacements). You may be familiar with the idea of a "grand curve", but in a nutshell, it's a way of building a curve where several straight sections are laid together and offset on the outside by a half a stud (or something) while keeping the inside tight, creating a curve. The small outside gap in the track is what causes the wobble, but I would say most of the time it is not as bad as what you see in that video. We do have greater radius curves available than what we had several years ago, but the turns are still quite tight, relatively speaking. I know PennLUG would like to have custom track (perhaps 3D printed) that would be a drop-in replacement for the grand curves we have now. That would eliminate the potential for the shuddering. The locomotive speed settings can be solved with a product like the PFx brick. It can be tuned to your locomotive and allow up to 250 (I think) speed steps instead of 7 like a normal remote, and has an option for setting inertia to a locomotive and train. Just a basic response, point by point. No offense taken to your comment at all- this hobby is about finding what best suits your style, which is the best thing! You can tailor your efforts to get exactly what you want, while I do the same for myself, and we're still using the same bricks to do it with. If you want to build generally more static models, by all means, go for it. Again, very nice engine. Maybe one day I'll build one that doesn't look bad in a curve. ;)
-
I think this looks pretty nice. You managed to capture some key details of this locomotive in a nicely proportioned package. It's been on my long list for some time, I just knew someone was going to get to it before I could. As a friendly word of caution, you may need to find you need to do some reworking. The clearances for some the wheels look pretty small, particularly the pilot truck and between the first engine and second cylinders and tender trucks. Obviously the Q2 is a big locomotive with a big tender and the duplexes were rigid frame locomotives. I'm interested in seeing how you went about solving the "articulation" problem. I'm also curious about what part you used for the headlight, that looks pretty nice.
-
Thanks for that nice review, Scott. Your N&W blue version did turn out pretty well, I think that's the only version of that scheme I've seen built. I'm also glad you liked the wide vision. We tried pretty hard to make that a very nice exclusive kit, and I hope we succeeded. I know it continues to be Cale's favorite that we've done so far. I definitely swung for the fences on the detail in it. And yes, I am working on a regular release for the wide vision, coming early 2019 assuming no setbacks. I've found that the International Car Co. wide visions were so drastically different that an instruction kit warrants three separate models, so that's what were doing. Basically, it'll be three separate models in one book, which will exemplify each cupola position ICC offered on this design: centered, semi-offset, and offset. For reference, the Mopac shown above is the offset design. The three cars will each be from different railroads and have very different floorplans. Beyond these three cars, we'll offer extra decals for more railroads, they just won't be 100% accurate, given the prototypes likely has several different options in the floorplans and such. I'd love to release even more than three designs, but we have to start being practical somewhere :)
-
Starting the WIP off right ;) Looking forward to the rest.