

doug72
-
Posts
2,426 -
Joined
-
Last visited
Content Type
Profiles
Forums
Gallery
Everything posted by doug72
-
 @Berthil said "I had to limit the amplitude of the train switch. If it gets pushed too far by the loader the dumper cannot get the hook in front of the switch bar and the train keeps rotating. There one on the loader and the dumper." I had trouble when using shock absorbers of them pushing the train off the track as it released - had to put a beam positioned on the rack side at the height of the 8t gears to prevent this. No problem with rubber bands versions. Also so I have shortened the train trip bars from 15 L to 13L which has helped stop the "L" trip from hanging up on the train unit. Had my layout running now for severeal hours with just few ball escapes as dumper discharged , now fixed. I like your demonstration set using the passing sidings module. Does it keep up with the GBC requirement of 1 ball per second ?
 -
I found a low cost source at the local market at 1/3rd normal price for a pack of 4 Energizer AA recharge batteries and with a 6 battery charger from Lidl they are sufficient for my needs. Fine tuning my layout and performing well.
-
Train Car units: Now changed the 4L axle / 2L axle connector / 5L axle combination to a plain 9L axle that drives the two train wheel axles. This eliminates the possibility of the 2L axle connector rubbing on the underside of the M motor. There is a noticable improvement with smoother running and less power consumption. Now using AA rechargable batteries in all train units. Train Layout, More balls needed to even out the distribuion around the layout, at times the Blue shuttle train runs with an empty hopper until next rotary dumper cycle. Might make a simplified through delay unit to lengthen the time the shuttle train runs between loader / unloader / loader and / or use a four lobe reverser for the loader. There is no room to increase track length at the moment.
-
Doug’s GBC Train System. Video Done. Now finalised the layout & tested with balls. Some minor tweaking required but now running smoothly and reliably. Only one ball escaped the rotary dumper and has disappeared in the conservatory somewhere ! This was due to to ball build up at entrance to the loader as dumper chute slope too shallow - now corrected. When transferred to the loft the layout will be more linear to fit the width available, so will probably use Vee reversers instead of the wide curves to turn 180 degs. The passing siding module not used as it it quite long taking up a lot of space with the two track switches plus passing module. Also sometimes failed. The two loaders need a few more bars on the conveyors to carry more balls & even out the train loads. Next project:- A through Rotary Dumper for the blue shuttle train, which will require a separate ball hopper wagon.! Video of system running:- Ambient Temp. 35 C.
-
Yes the chain has nothing to do with the ball lift - its there to confuse the eye !!!
-
@Berthil Most important improvement I made was locking the grey gear because it ran out during my tests, I have not had that problem but I like your solution to stop the grey drive slipping off, the axle, worthy of adding this as a MOD to the LDD file.
-
@Berthil Thanks for your comments, nice to see another rotary dumper working well and I see you have used the rubber band version. The elevator also gave me a lot of headaches with it dropping back down again, hopefully now resolved. I have modified the guide beams so the sharp bump is eased. Look forward to seeing a video of yours in action at the event you are going to. Thanks also to @dunes for doing all the LDD files. Still sorting out the final set up of layout but have now tested with balls and running OK, just a few snags to sort out - track lengths so trains don't idle too much. Don't have the parts for the balloon loop so will use a 4 lobe reverser instead which halves the time it takes to reverse the train. Once reliable will make a video. Eventually it will reside alongside my Lego train layout in the loft (attic)
-
Dougs Layout - started. Having built all the modules now and obtained a 3D printed double crossover, the first stage of assembling the layout has began. Only space large enough to assemble is the conservatory by kind permisson of my wife !! Tried both settings for the double crossover switches and determined which best and how long the track run to the loader module & back has to be so trains don’t run into each other on the crossover. Determined that the best is straight run into double reverser, that way the time delay between 1st & 2nd train releases is always the same. Position of loader module will be as shown or at right angle depending if I use the through module or reverser only. Stage 2:- Add loader to transfer balls from rotary dumper to train hopper and transfer to the unloader / loader modules. Note:- Train will enter the through module to be loaded - then be reversed by a 4 lobe reverser before passing back through module & return to crossover unit. I may try and use a Vee reverser to change the loading direction. Train Units:- Now built a 3rd train and it is much faster than the other two I have built. Think I have found a source of friction that is slowing them down. The end stop on the 2 axles that link the drive to both train wheel axles is rubbing on the edges of 1L bush spacer - evidence of dust when exmained. See image which shows the problem - solved by using plain 4L & 5L axles.
-
They are the closest you can get, easily available and roll just as well I brought some white Etsy balls and they tend to stop on the dimple caused by the holes.
-
The rubber bands are Made by Lego and therefore legal. Red band :- LEGO Rubber Band 25 mm (22433 / 44609 / 70904) Blue band :- LEGO Rubber Band 26 mm (44609 / 85560 / 700051)
-
General Part Discussion
doug72 replied to Polo-Freak's topic in LEGO Technic, Mindstorms, Model Team and Scale Modeling
Tried it and works OK - you need a LEGO Technic Hole with Pin (15100) in the blue cross block to support the other end of the yellow axle. Its quite a compact solution. -
PV Productions now supply orange Basket Balls, White soccer balls and Glow in the dark balls. https://pv-productions.com/product/lego-gbc-balls/ Now replaced all shock absorbers with rubber bands reversers and all working OK. Time to set up my train layout now all the modules have been built, IF I can find enough space !!
-
General Part Discussion
doug72 replied to Polo-Freak's topic in LEGO Technic, Mindstorms, Model Team and Scale Modeling
Thanks for the explanation. -
General Part Discussion
doug72 replied to Polo-Freak's topic in LEGO Technic, Mindstorms, Model Team and Scale Modeling
LEGO Black Cross Holes with Double Ø 3.2 Shaft Hole (24122) I recently brought 4 of these thinking they would be useful but so far unable to figure how they are used as the two cross hole parts don’t fit the holes in beams or accept pins. Does anyoine know how they are used ?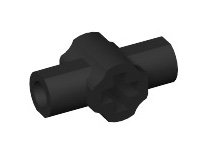
-
Double crossover reverser module. Sometimes the train fails to engage fully with the 24T gear that drives the differential & the two reversers, especially when train is running with the PF switch forward. Traced this to the PF switch underside sonetimes snagging on the two LEGO Technic Cross Block 1 x 3 (Axle/Pin/Pin) (42003). Changed to LEGO Beam 1 x 2 with Axle Hole and Pin Hole (60483 / 74695) The rounded end helps to engage the train better and still keep the 8T gear engaged with the 24T gear. The other reverser is OK. Also found that if the rubber band for the trip to unlock the differential, as train reverses, is too tight, that this also impedes the train as it enters, a slacker blue band used instead of a red band.
-
The build is as per the Akiyuki instructions apart from the two rubber band reversers so that should suffice. Had a slight issue with one train sometimes not entering far enough to engage the 24T gear when train running switch end first on the track that drives differential & the two reversers. Part of the underside of the PF switch sometimes snags the XOO cross blocks that keep the 8T gear engaged with 24T gear. I,ll post a image tomorrow. Changed the two cross XOO blocks to XO cross blocks and now OK. Found track from crossover track has to slope up and then level up to match the reverser module so that the train engages with the rack section properly. Had it running on test for a long time now,
-
Double crossover reverser module (Completed) (Video) 3D printed crossover received today along with the small gift of a buffer stop. Quality is very good and operation of switches is very smooth. Testing carried out and correct setting of the four switches made. Train cars ride very smoothly along the track and pass through the switches in “wrong” direction without any problem. Made a small MOD to the Red reverser, so that the trigger hits the train trip bar more centrally. To achieve this the 2L axle connector bewtween the two reversers was replaced by a 3L ribbed axle connector (white) and red red reverser shifted by 1L. Each reverser only requires one Red rubber band. Video:- Showing operation of the module linked to two other reversers for testing the 3D printed double crossover unit. Final set up will be linked to the Rotary Dumper & Loader modules.
-
Looks good still waiting for mine to arrive. Have both reversers installed now using rubber bands,found only one band per reverser is enough to trigger the train release & have made a small mod to make the triggers hit the trip bars more centrally. Will post images & will explain more once my crossover is received.
-
Double crossover reverser module. Now tested with one reverser converted to use red rubber bands and works very well with less force required to operate the module. Awaiting more red bands to convert the other reverser. The conversion is very easy to install.
-
[TC14] Urban Wave (Withdrawn)
doug72 replied to doug72's topic in LEGO Technic, Mindstorms, Model Team and Scale Modeling
Progress has been non existent, due lack of crucial parts - all used up building the Akiyuki Train system, and due lack of time I am with drawing from the contest. If anyone else wants to try and build it please do. -
[MOC] Tractor Trailer
doug72 replied to Black_Belt_Titan's topic in LEGO Technic, Mindstorms, Model Team and Scale Modeling
Use Flickr for images. and YouTube for videos. Very easy to use. -
Technic 2019 Set Discussion
doug72 replied to dimaks13's topic in LEGO Technic, Mindstorms, Model Team and Scale Modeling
I think Lego should make a “Back to the Future car”. Then we would not have to speculate ! -
Unable to see your images. I use Flickr all the time to post images, upload image to Flickr click the share arrow, select BBcode then select image size and copy file name then paste into your posting.
-
Double crossover reverser module. Now built and tested using two other reversers. After finding I had missed one 7L beam that blocks the differential I got it to work correctly. One very small MOD: I didn’t have LEGO Slope Curved 1 x 2 x 0.66 (11477 / 17134), so I substituted a LEGO Slope Curved 4 x 1 Double (93273) which works OK. Awaiting delivery of the TrixBriix Crossover Basic track before I can test with Rotary dumper & Loader modules. I noted one odd feature:- The rear of the reverser module is one plate higher than the front !! Don’t know if thats intentional or an oversight. Very easy to convert to a rubber band version, awaiting an order for red rubber bands.
-
Might need two 1/4 straight tracks to join double crossover to the two reversers or use a standard straight Lego track.