

gethema
-
Content Count
18 -
Joined
-
Last visited
Posts posted by gethema
-
-
short review of C64005W Alfa Romeo F1
Pro
- Part quality (visual/haptic), fit
- Level of detail / closeness to the original
- printed slicks!!!
- 1A display model
- good implementation of the (similar to the original - few) functions
- no “color plague” (black pins)
- high-quality packaging
- background information (introduction building instructions), plaque
- no missing parts
- License model, comparably cheap (ca. €100)Neutral
- dimensions (huge - 66cm long)
- number of stickers (>70)
- building experience (somewhat unspectacular, partly repetitive, overall OK)
- black everywhere (building instructions)
- easy motorization (see YouTube)Con
- quality of the stickers (horrible) - Accuracy of fit, brilliance (poorly visible)
- not a Ferrari ;)All in all a top model, I would have happily paid €20 more for better stickers. Nonetheless, an absolute must for every F1 fan. I originally wanted to get it directly from CADA, but then got it from a local retailer in Vienna. Definitely not a beginner model though.


-
15 hours ago, amorti said:So, which CaDA model should I present next?
Is the group interested in e.g. the Alfa f1 car?
I would definitely be interested!
Been trying to get my hands on one but it's not available in Austria yet, and having little to no experience importing from China (customs, warranty, etc.) I might have to hold out just a little longer.
Nice vid:
-
4 hours ago, Thirdwigg said:Thanks for sharing pictures, and I like the headlight changes you made. What's the red car in the photos?
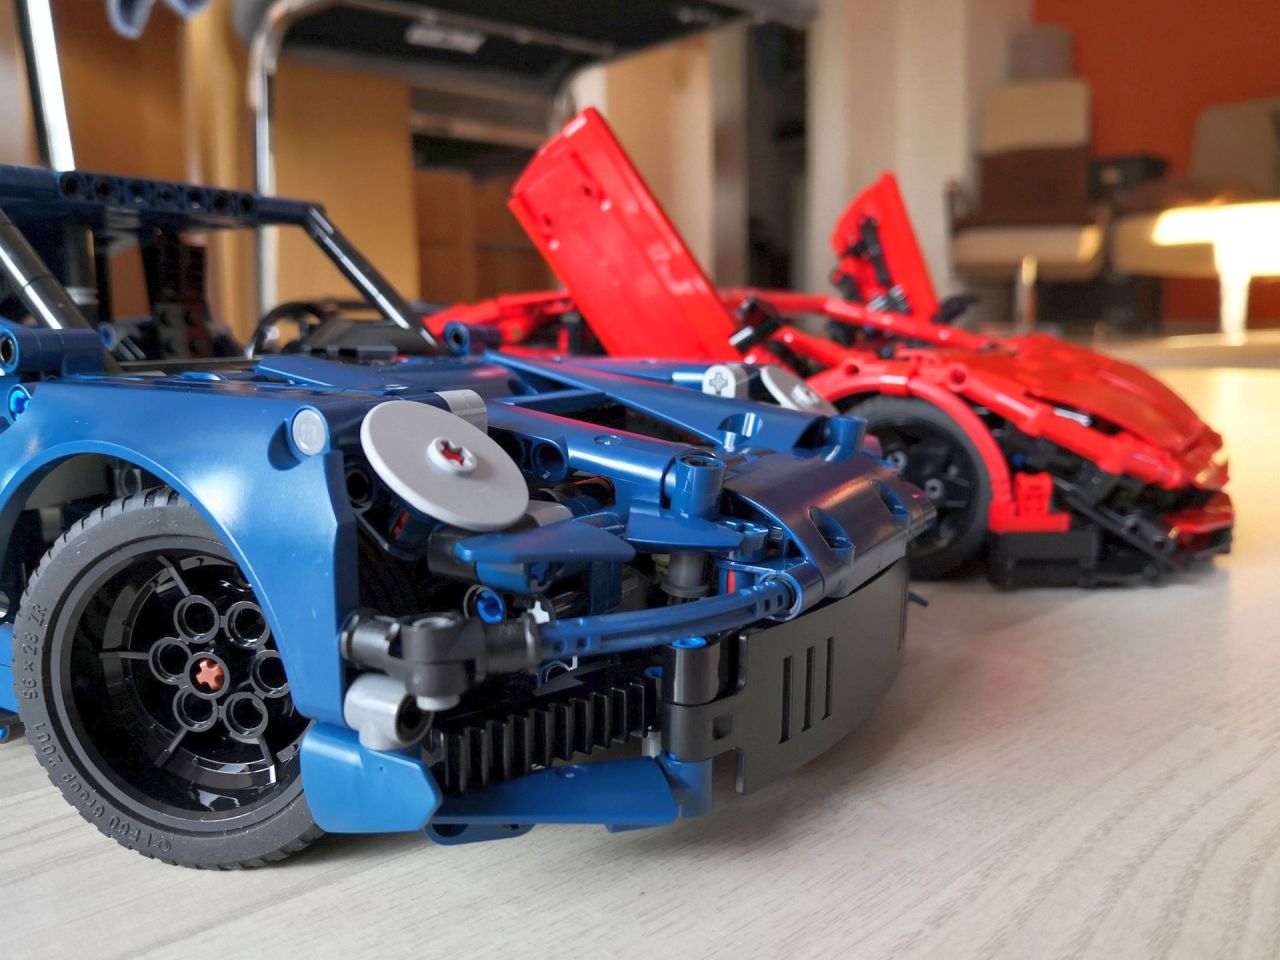
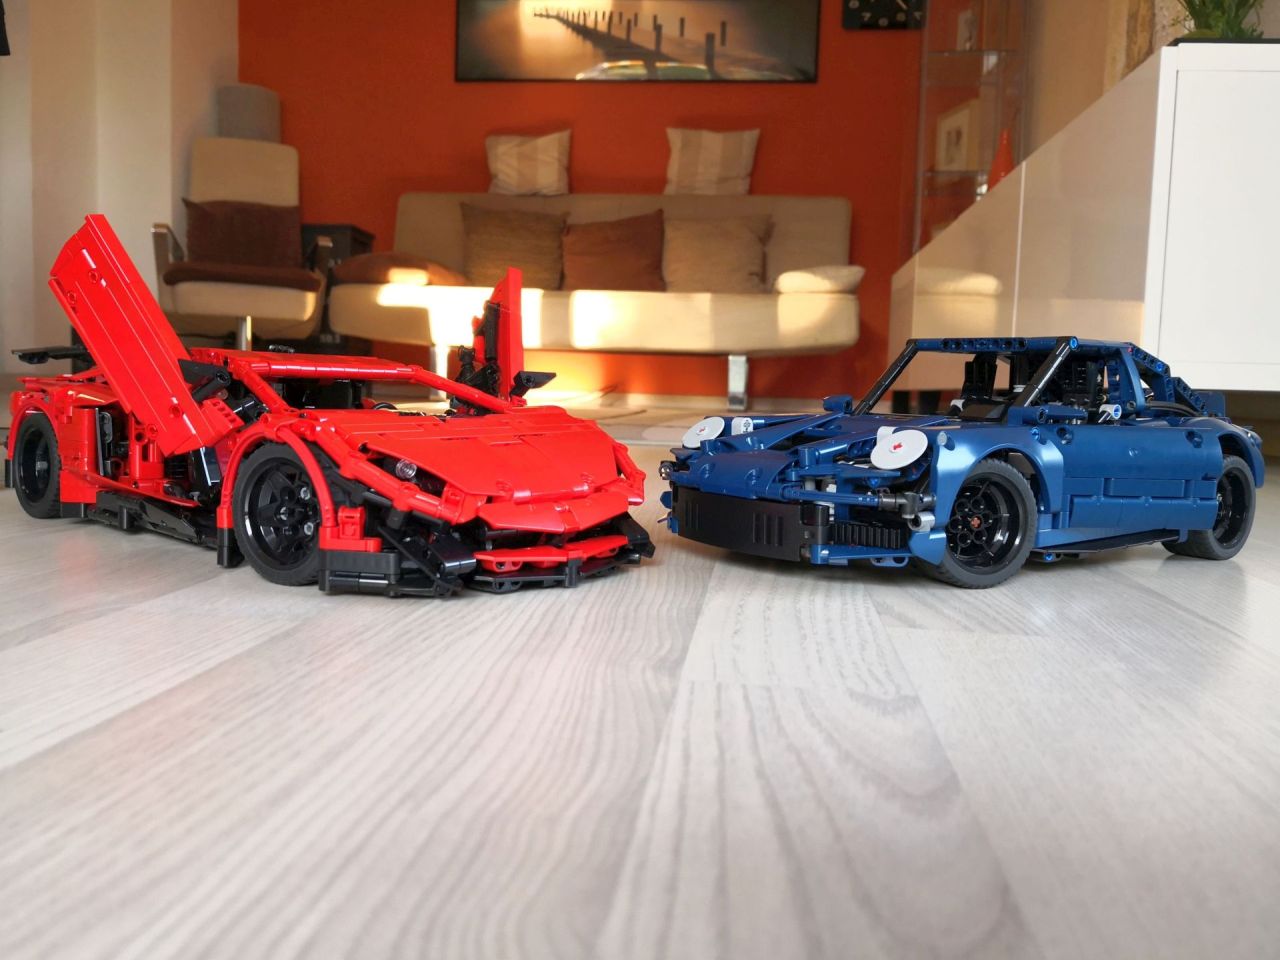
Thank you! The red car is the Remote Controlled Lamborghini Aventador SV by Lego_Bee, in a static version.
-
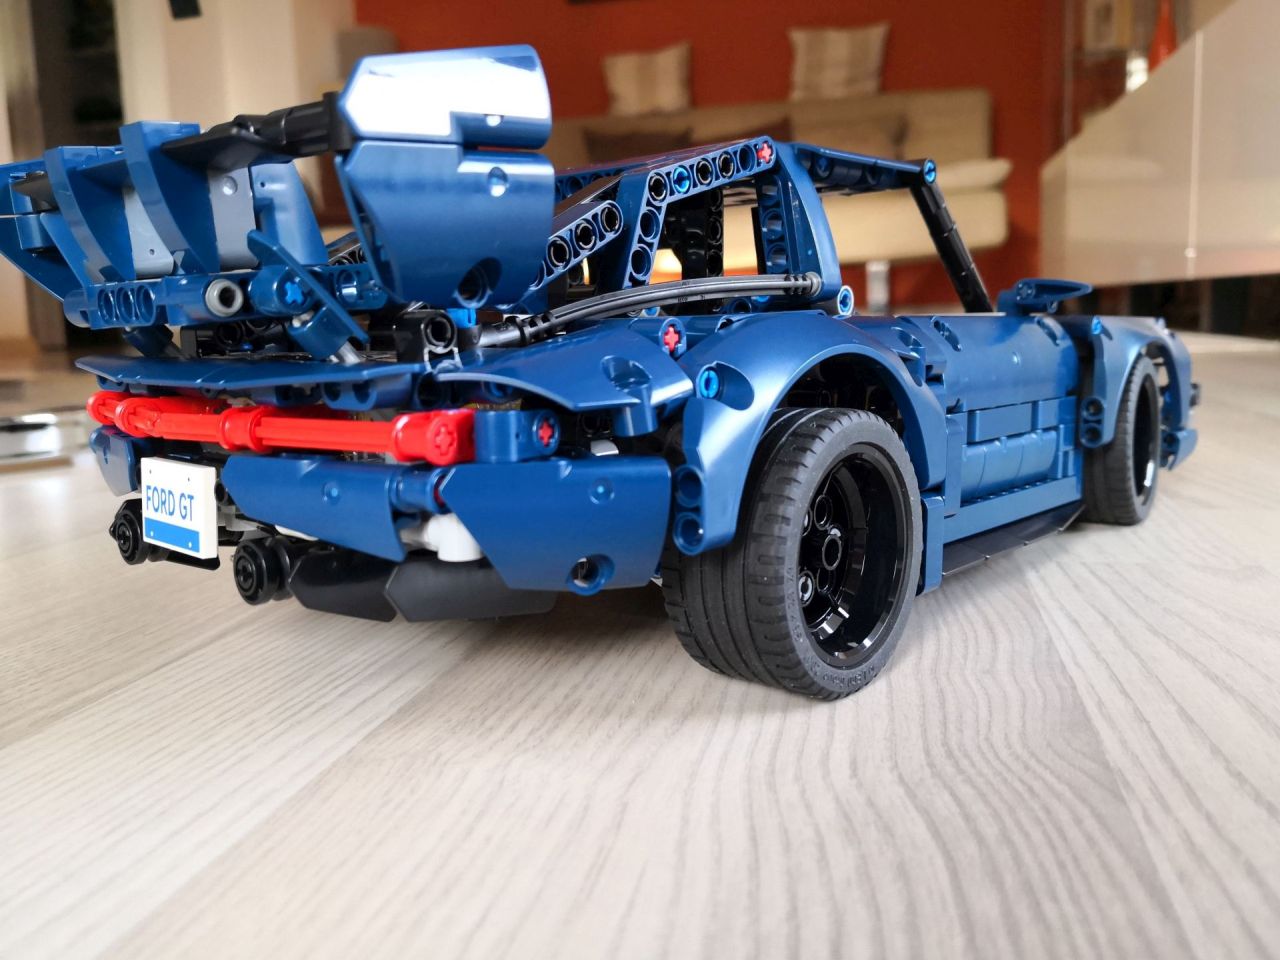
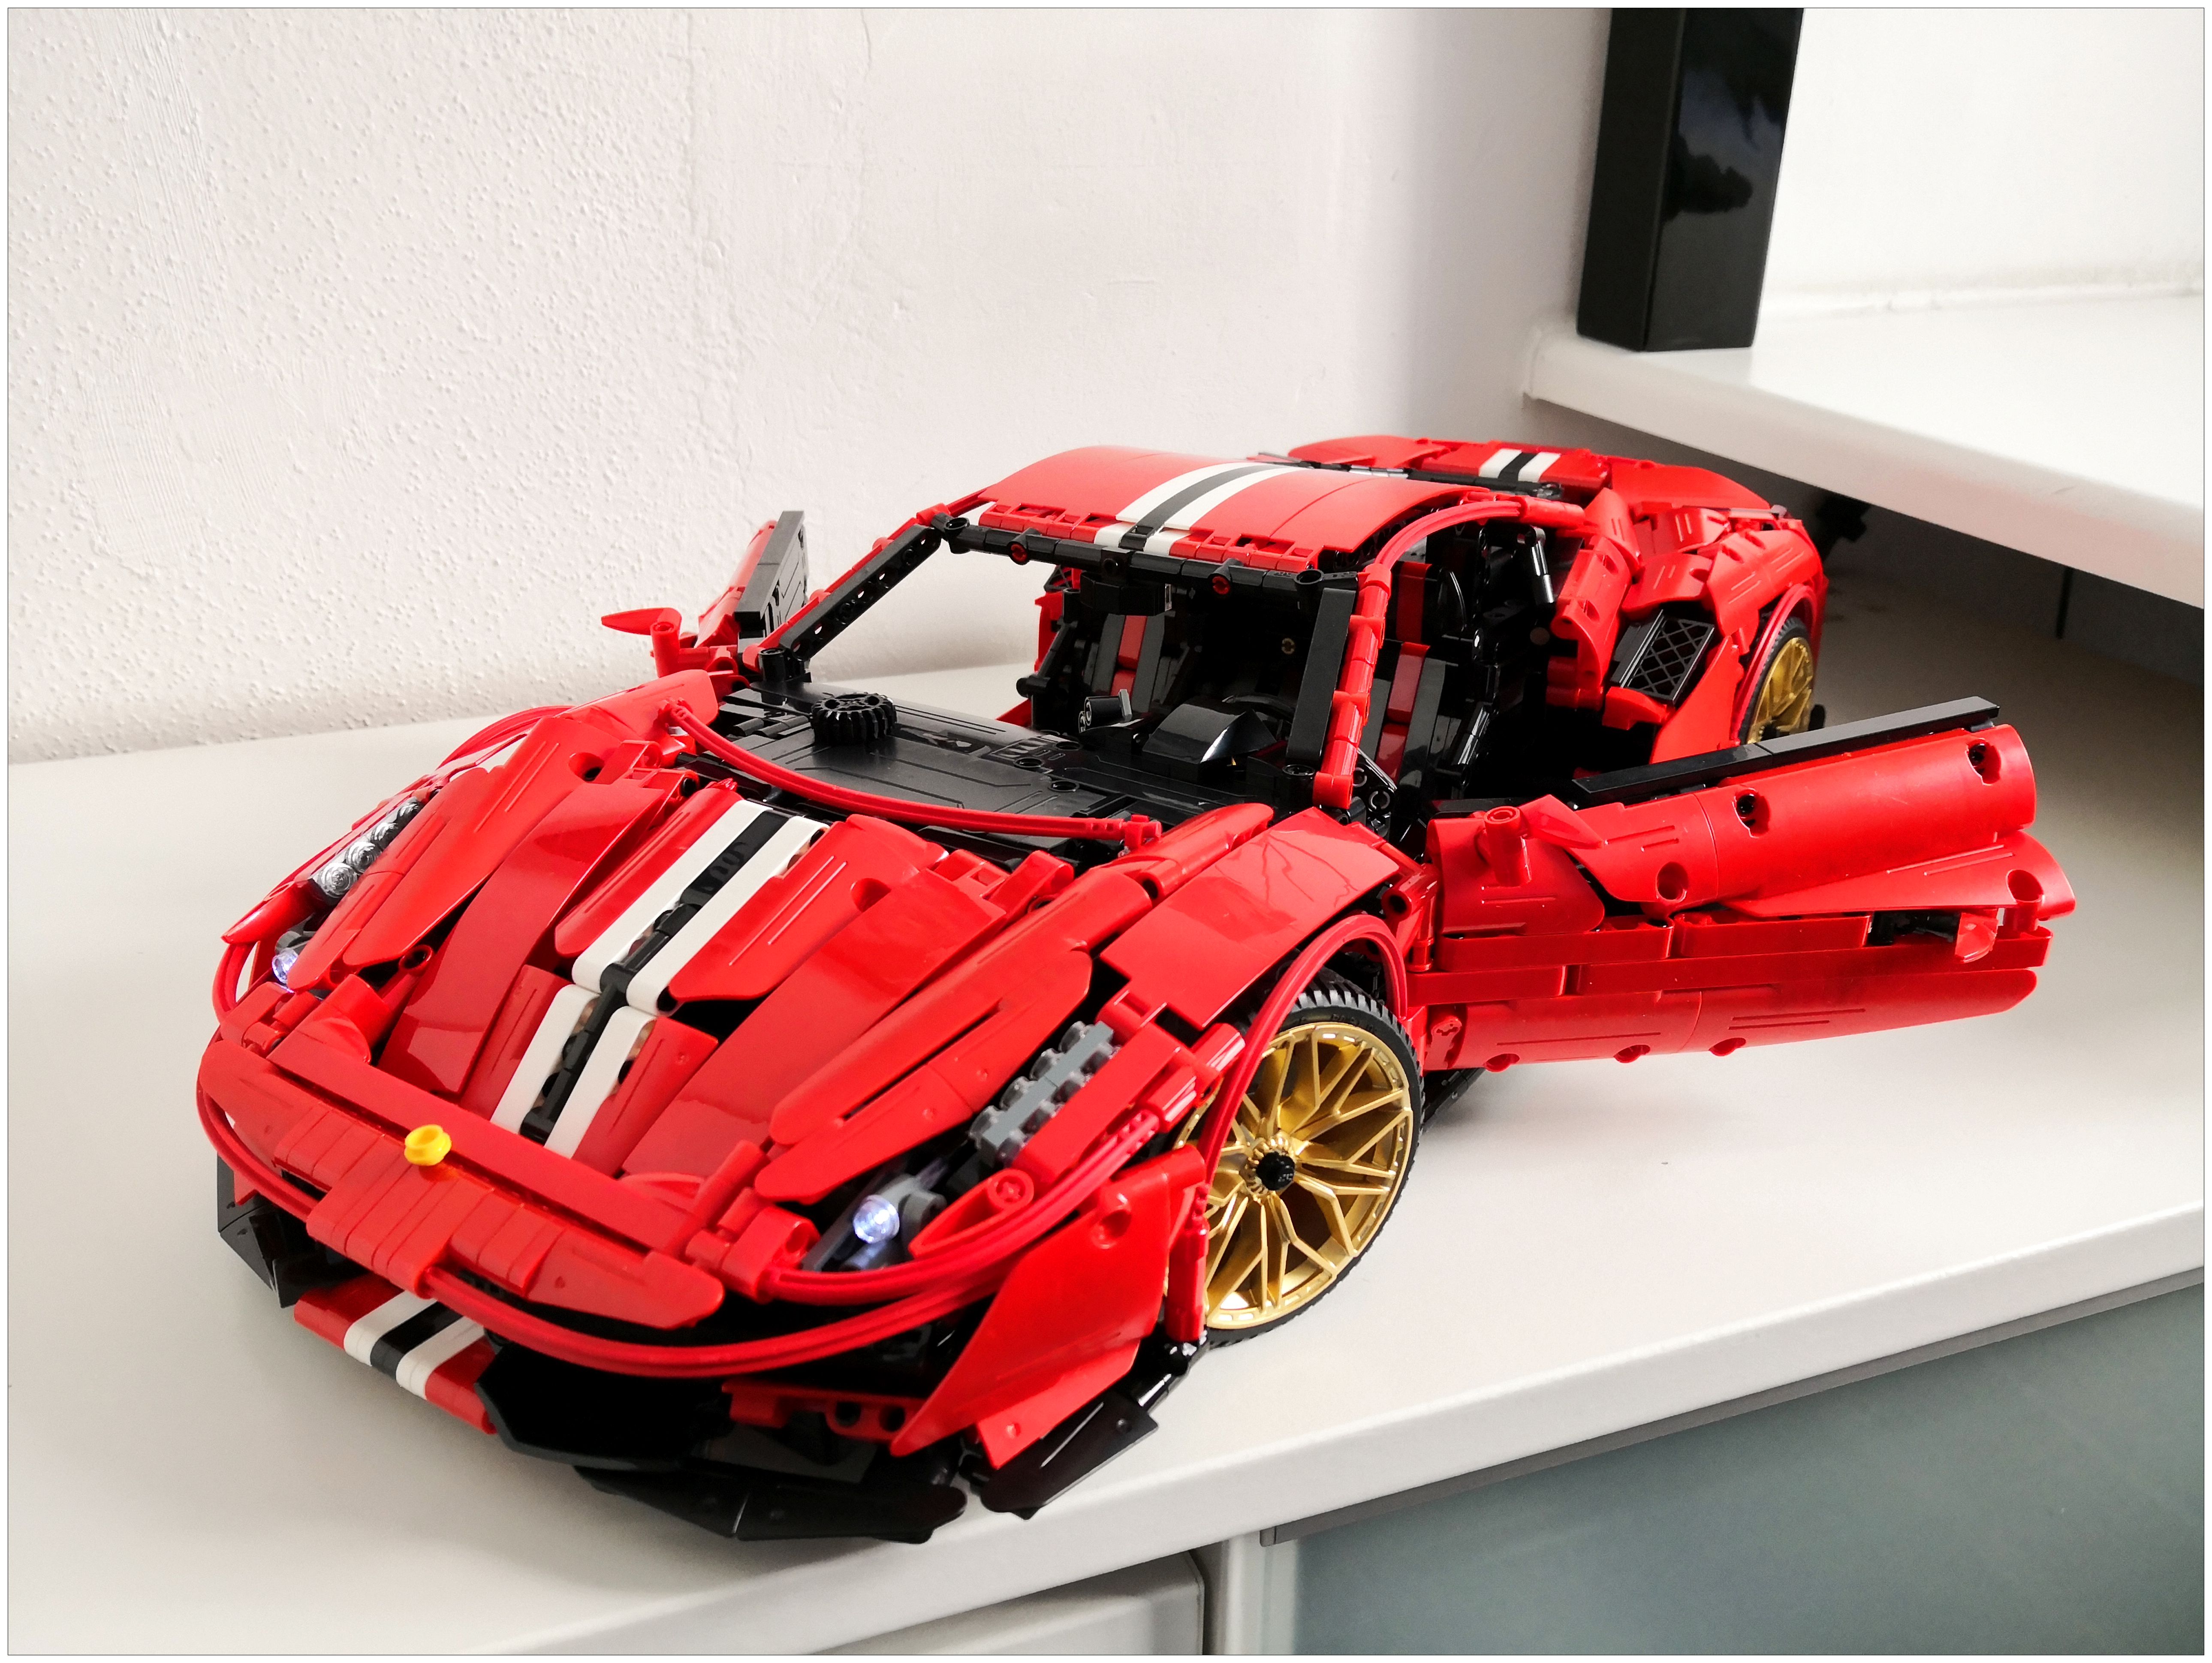
Super happy with the Porsche! Made some minor alterations to the front (only 42154 parts), I think the discs work slightly better for headlights than the Ford GT ones. Unfortunately, since I already applied some stickers, I need to at least replace the license plate since it's definitely not a Ford GT anymore

Some impressions:


-
Amazing Porsche, who'd have thought a modern Ford GT transforms into a classic 911 so easily ;) Nicely done, great MOC - I particularly like the creative parts usage and the exchangeable wing!

-
22 hours ago, osterum said:I made a short instruction. Since I can't attach the pdf to the message, I uploaded it to the boosty:
https://boosty.to/osterum/posts/25dd4c45-a9c7-490c-b2e9-ced90cc30829?share=post_link
Thank you very much, nice solution!
-
1 minute ago, Celeri said:Even without being a fan of the F12, this MOC just makes me want to do the same. I have put triggers on price for this set...
Well, to be perfectly honest, I've been a little sneaky and went for the Lego knockoff which is said to still sport decent enough quality for a very moderate price tag - in fact, I've roughly paid one third of the 42125's RRP (180 EUR in AT), while even its usual price range is still at least double the money (120-130 EUR).
Will take a while to arrive though...
-
Being a big fan of the real F12 Berlinetta, I actually bought the 42125 set today just to build this beautiful MOC. Kudos to the designer especially for making it possible to build it just with parts that come with the set. That said, I will eventually try and flesh it out with a few more details or close some of the gaps using additional parts. But hats off to paave, great work indeed! :)
-
1 hour ago, brunojj1 said:Thank you so much! It´s a valuable contribution along with your HOG shifter paddles activated in your previous post
!
@brunojj1 My pleasure, don't mention it!
 If anything, I should be thanking you for creating yet such another incredibly detailled model, and if I can contribute even a little by e.g. sharing mods / fixes, I'm glad to be of service!
-
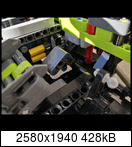
Due to several requests in another forum here also my HOG mod for the static version (C61043W) as photo series. Please note that this mod requires additional parts as depicted. Steering wheel still fully working.


-
@amorti Thank you!
I've now embedded the first pictures the same way as the last, I know certain pic hosters can be a pain in the butt when it comes to ads.
Now that my previous post spans almost half a page, I hope it's not too long or the pictures too big - I can exchange them with smaller versions or add them in a compressed file if it is an issue.
-
21 hours ago, grego18f said:Please explain how you managed to have working paddles ? I think I am not the only one interested.
Regarding the manual version of the 488, do you have the link for the PDF of book 1?
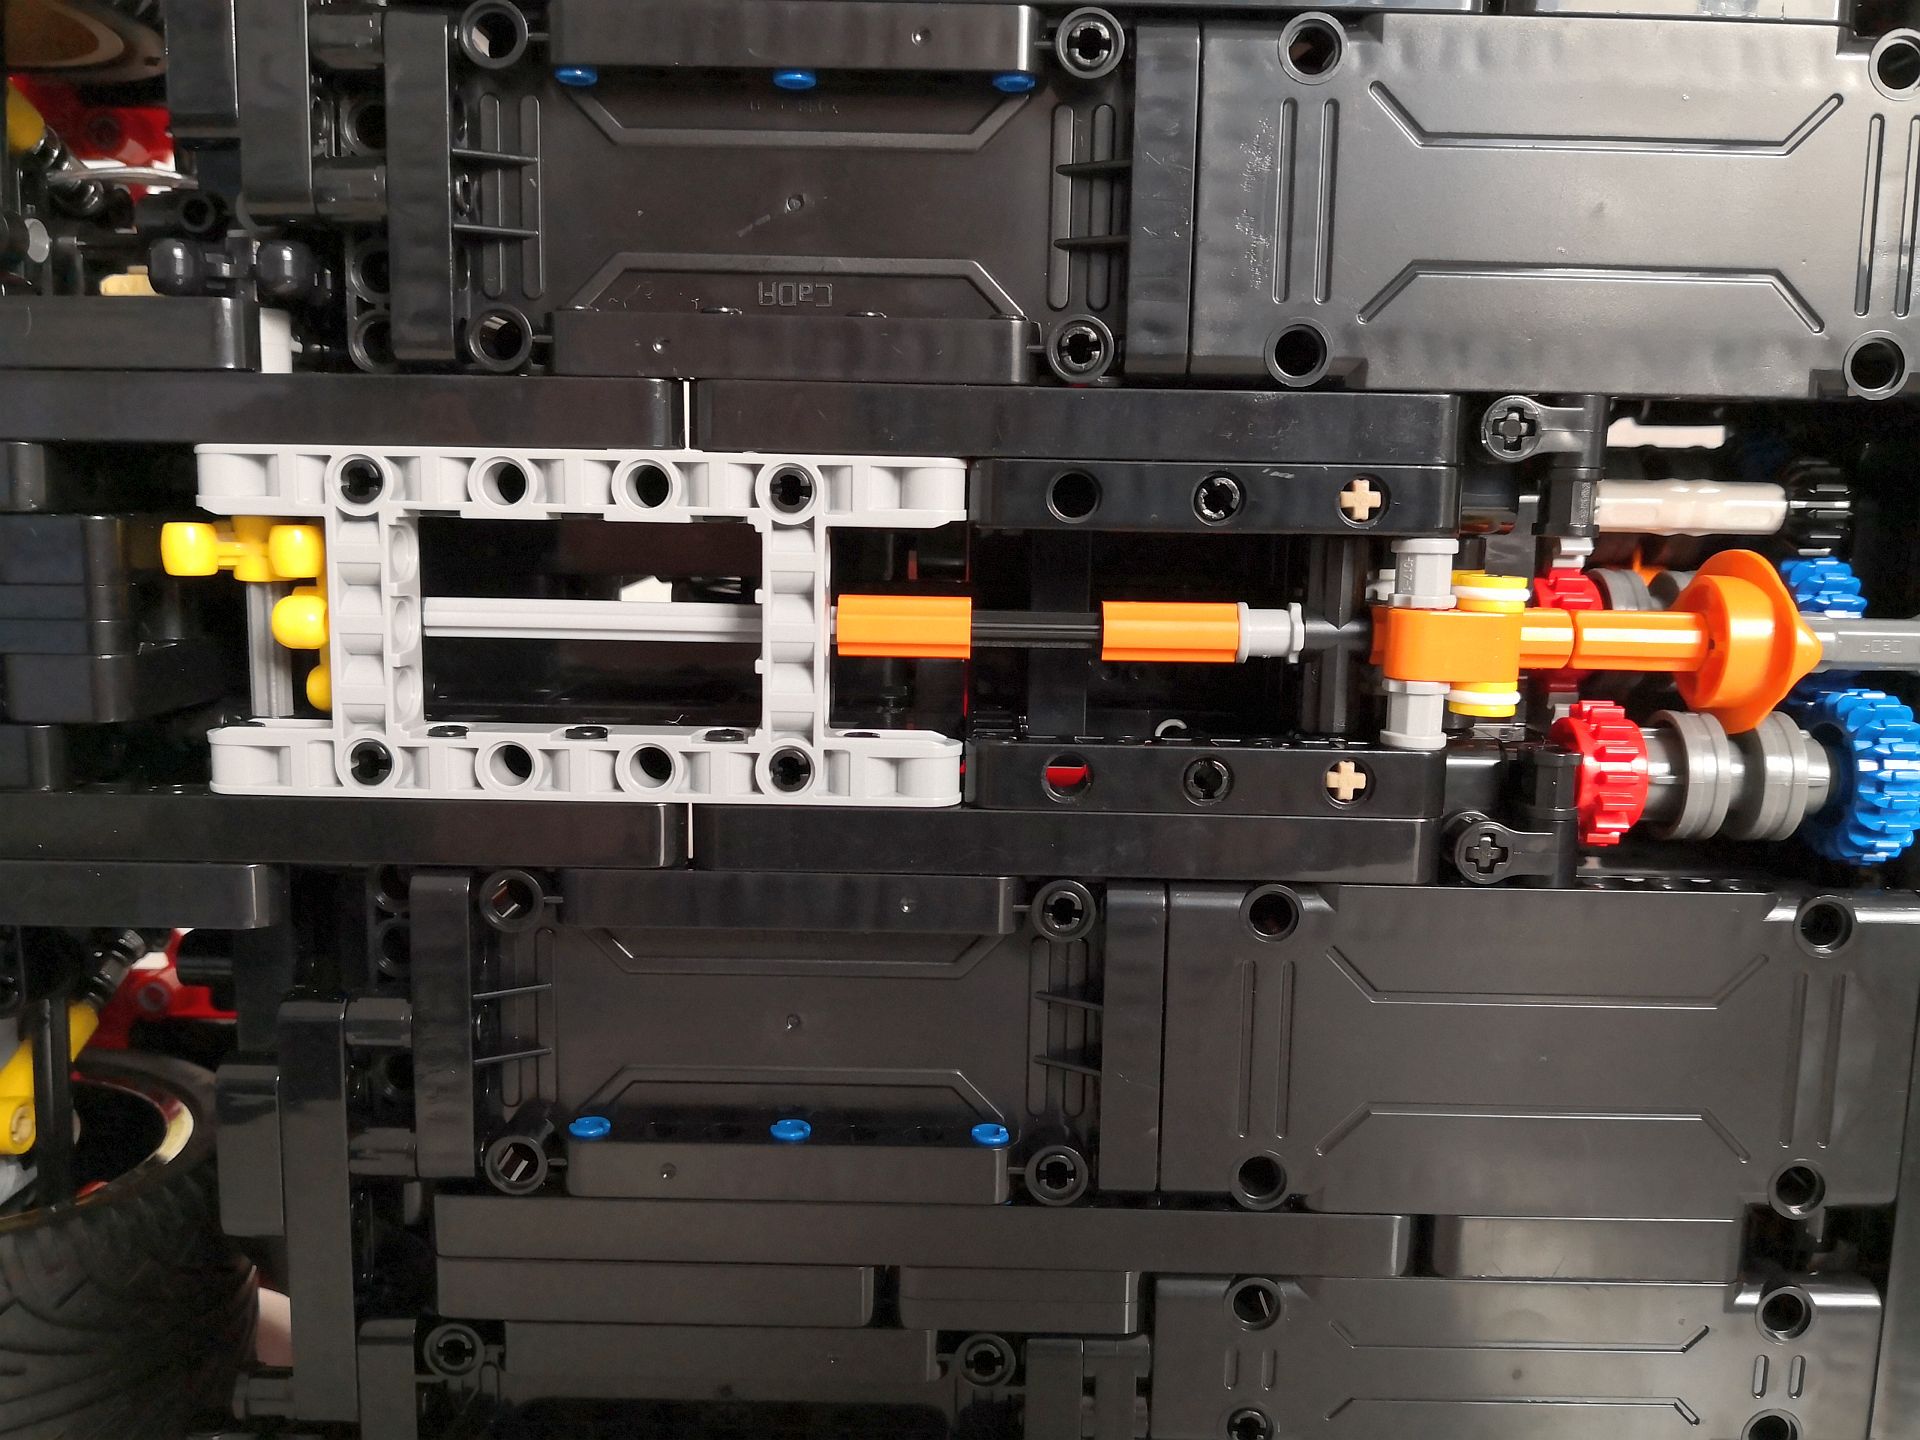
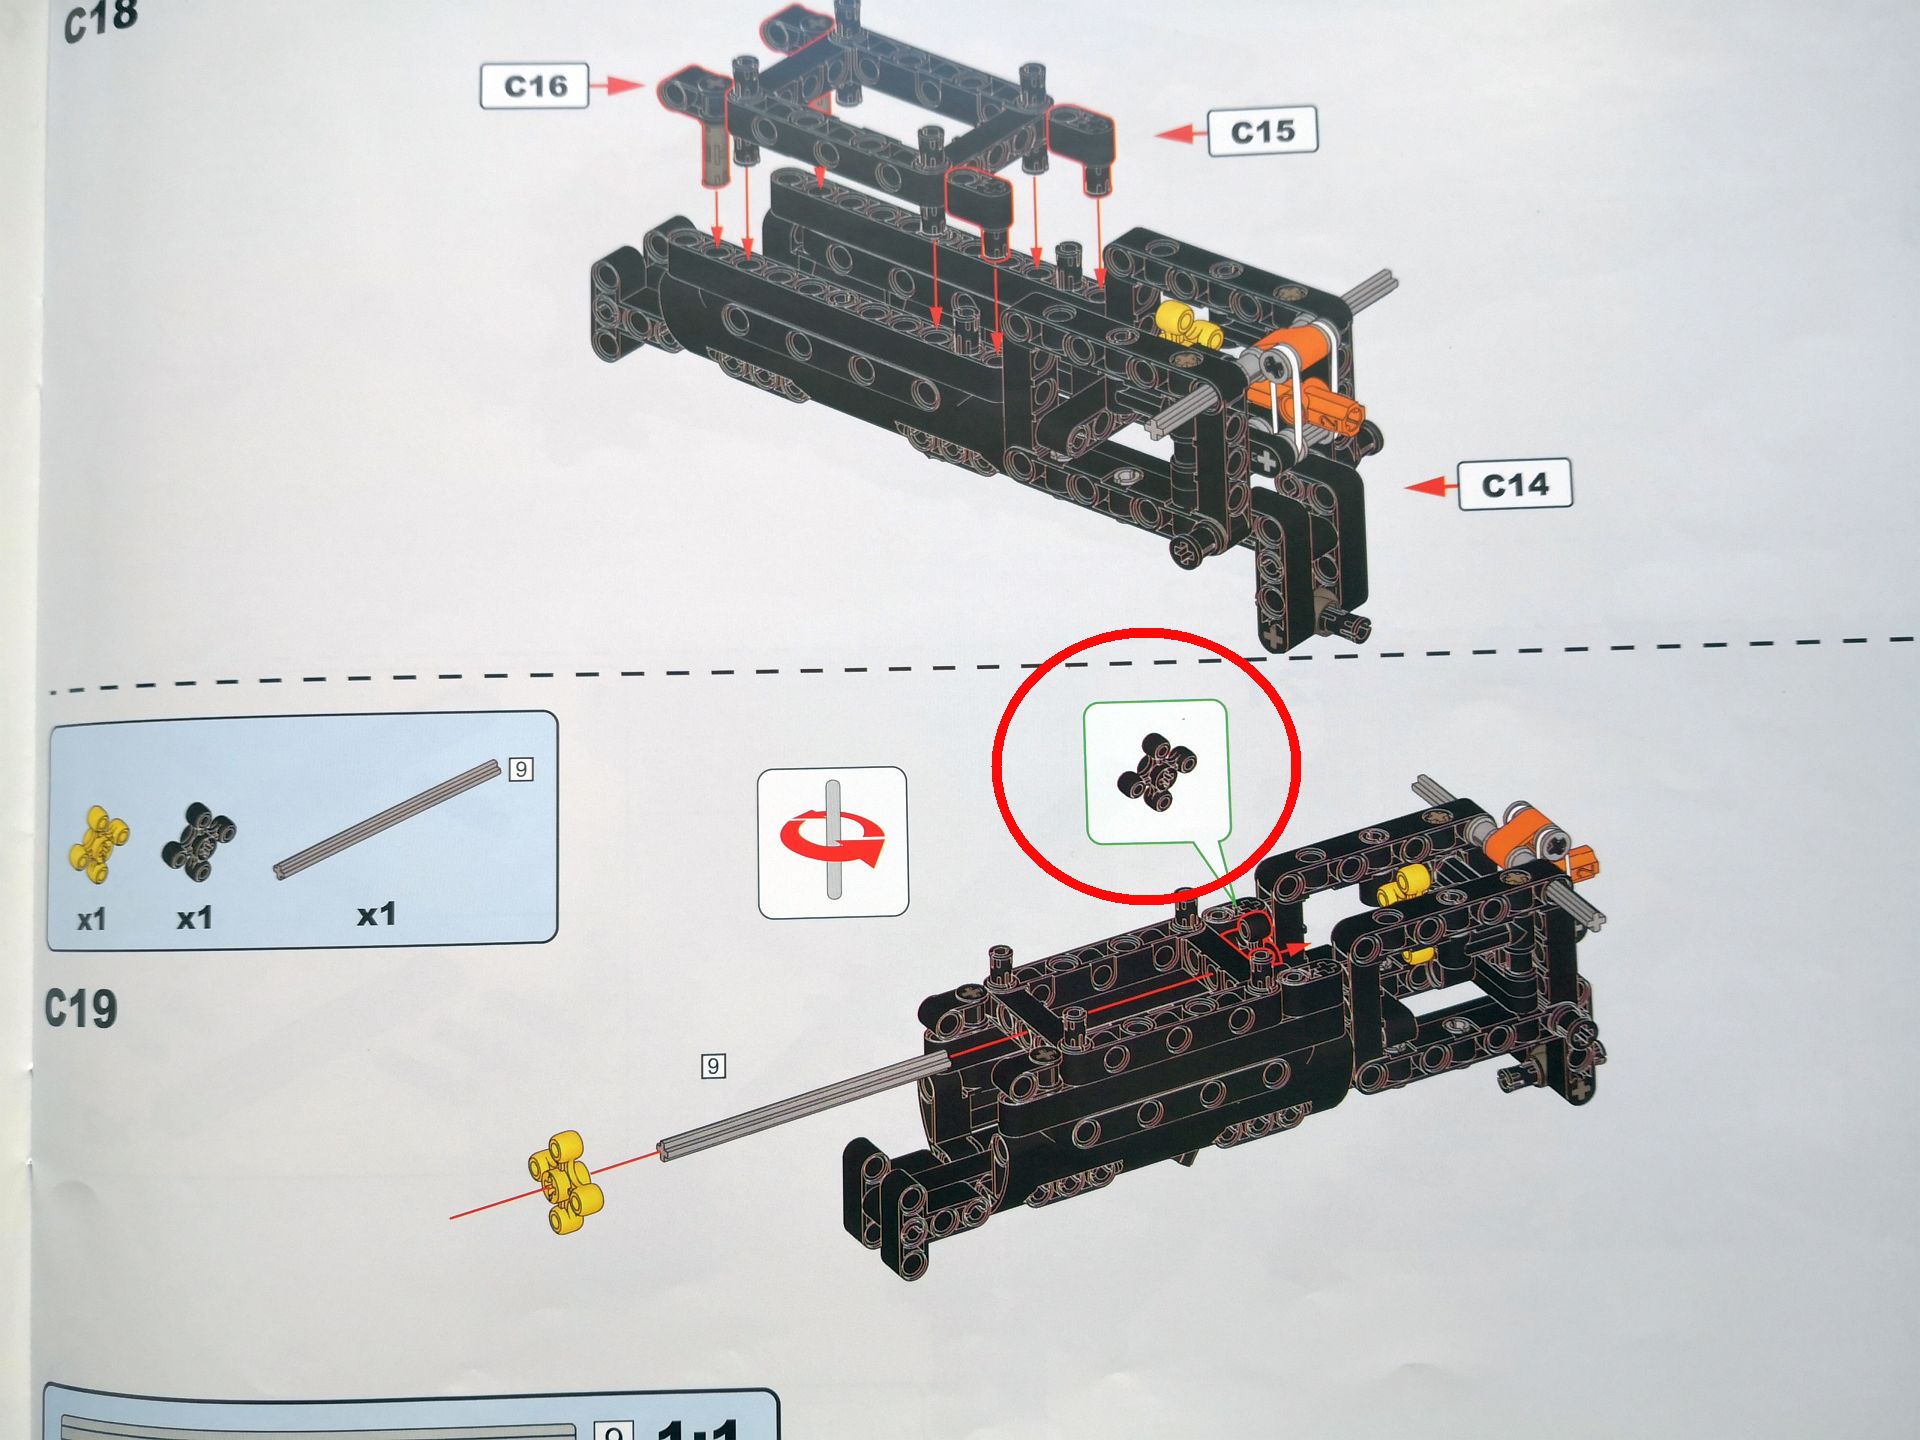
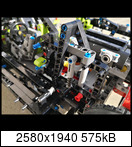
Regarding the the paddle shift mechanism:
1. Instead of adding a knob wheel in step C19, connect the front section of the paddle shift mechansim to the main part by using a 9l axle and a connector:
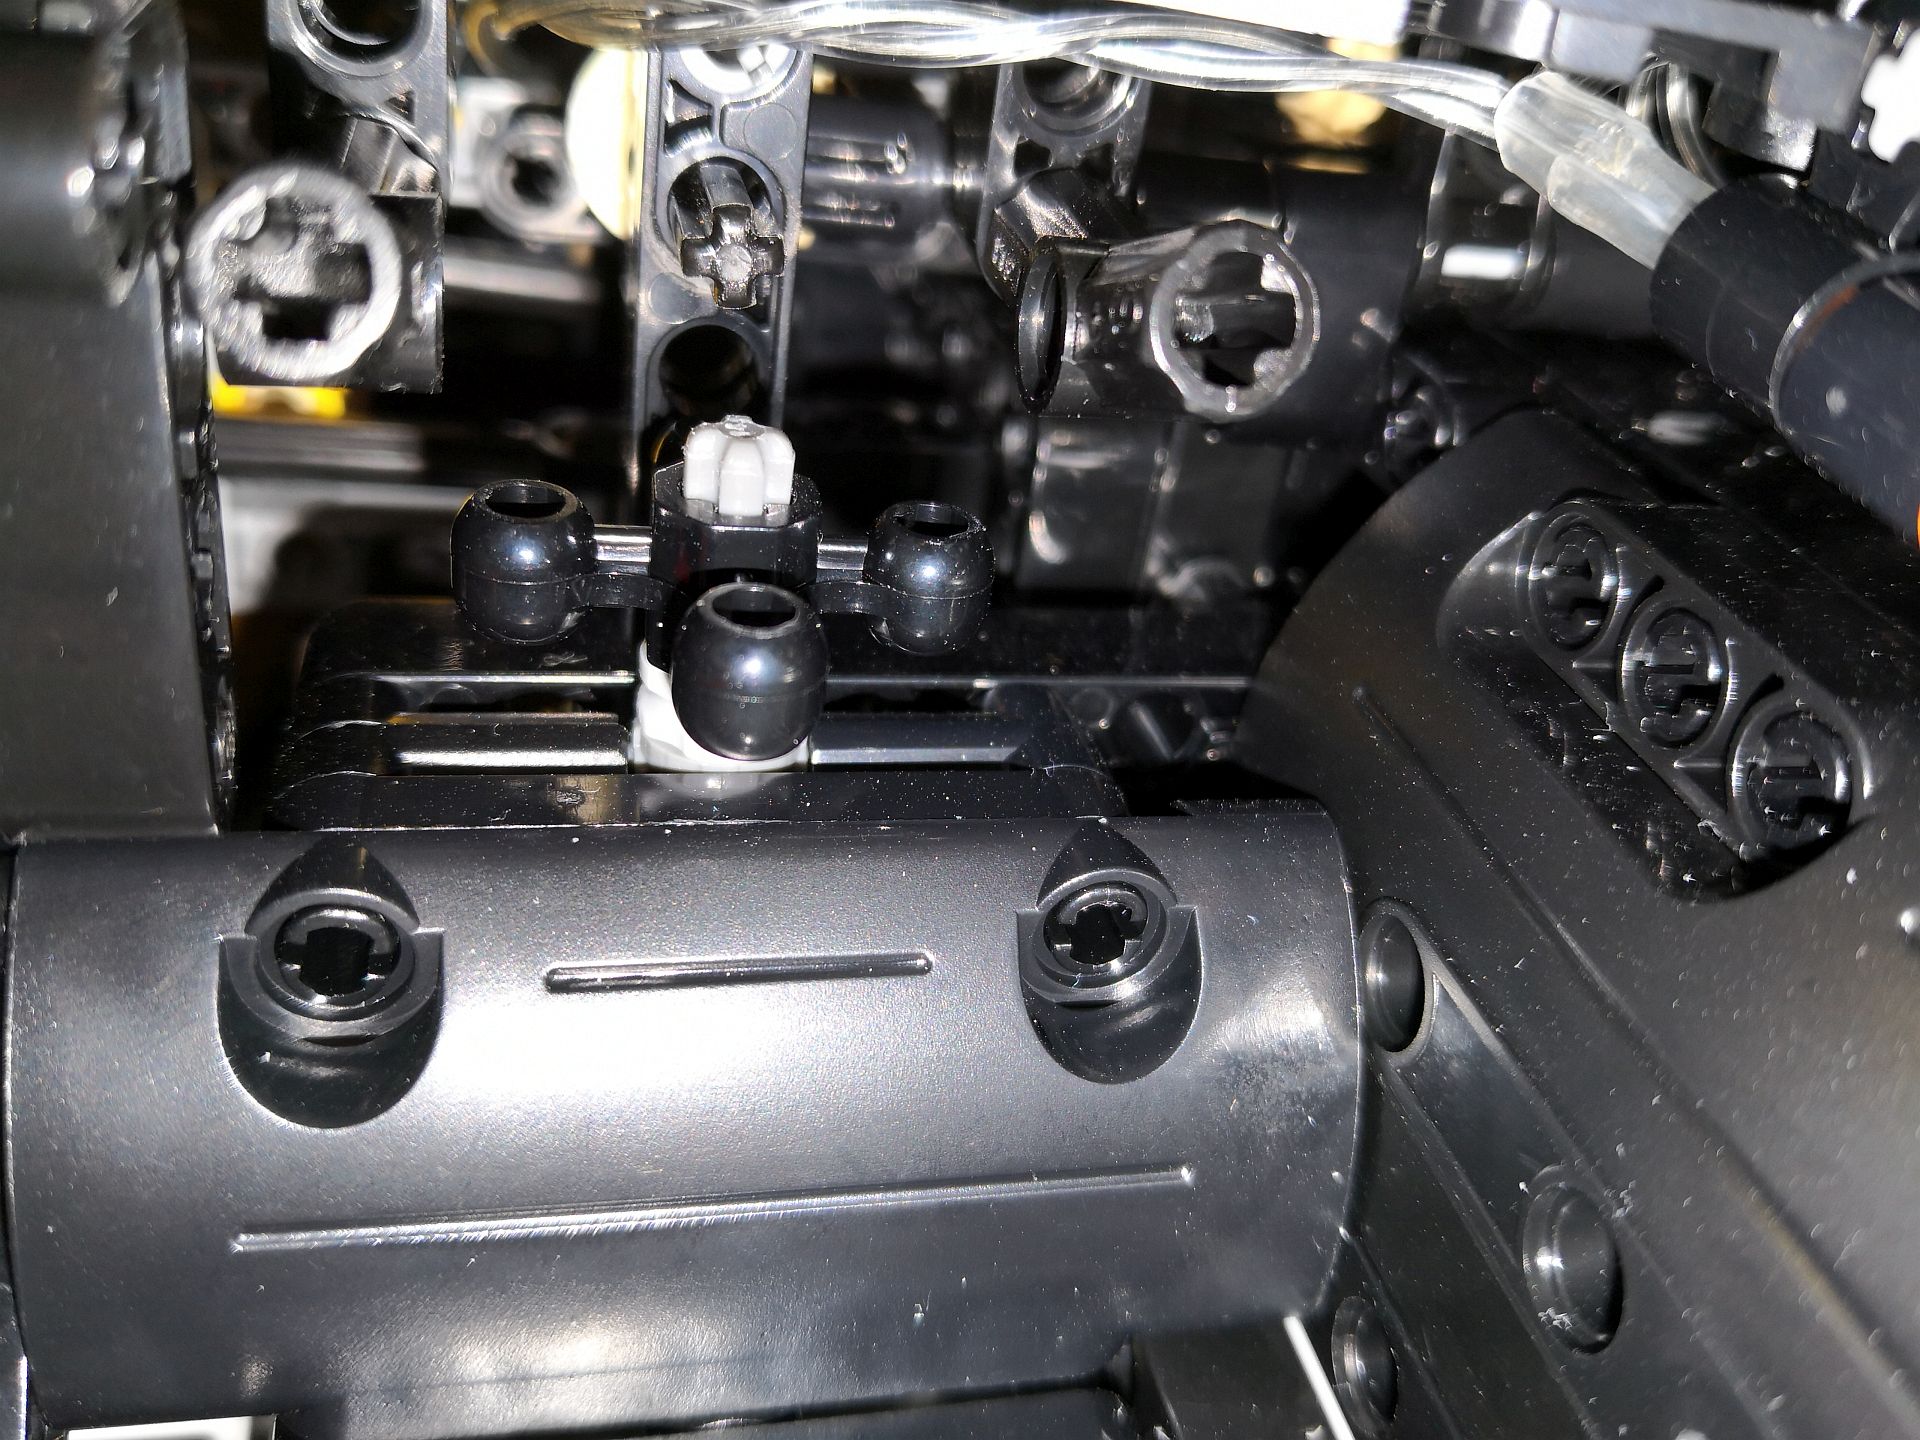
2. Replace the 1x5 thin beam with axle hole in step C53 with the knob wheel from C19 and replace the 4l axle with stop with a 3l axle:
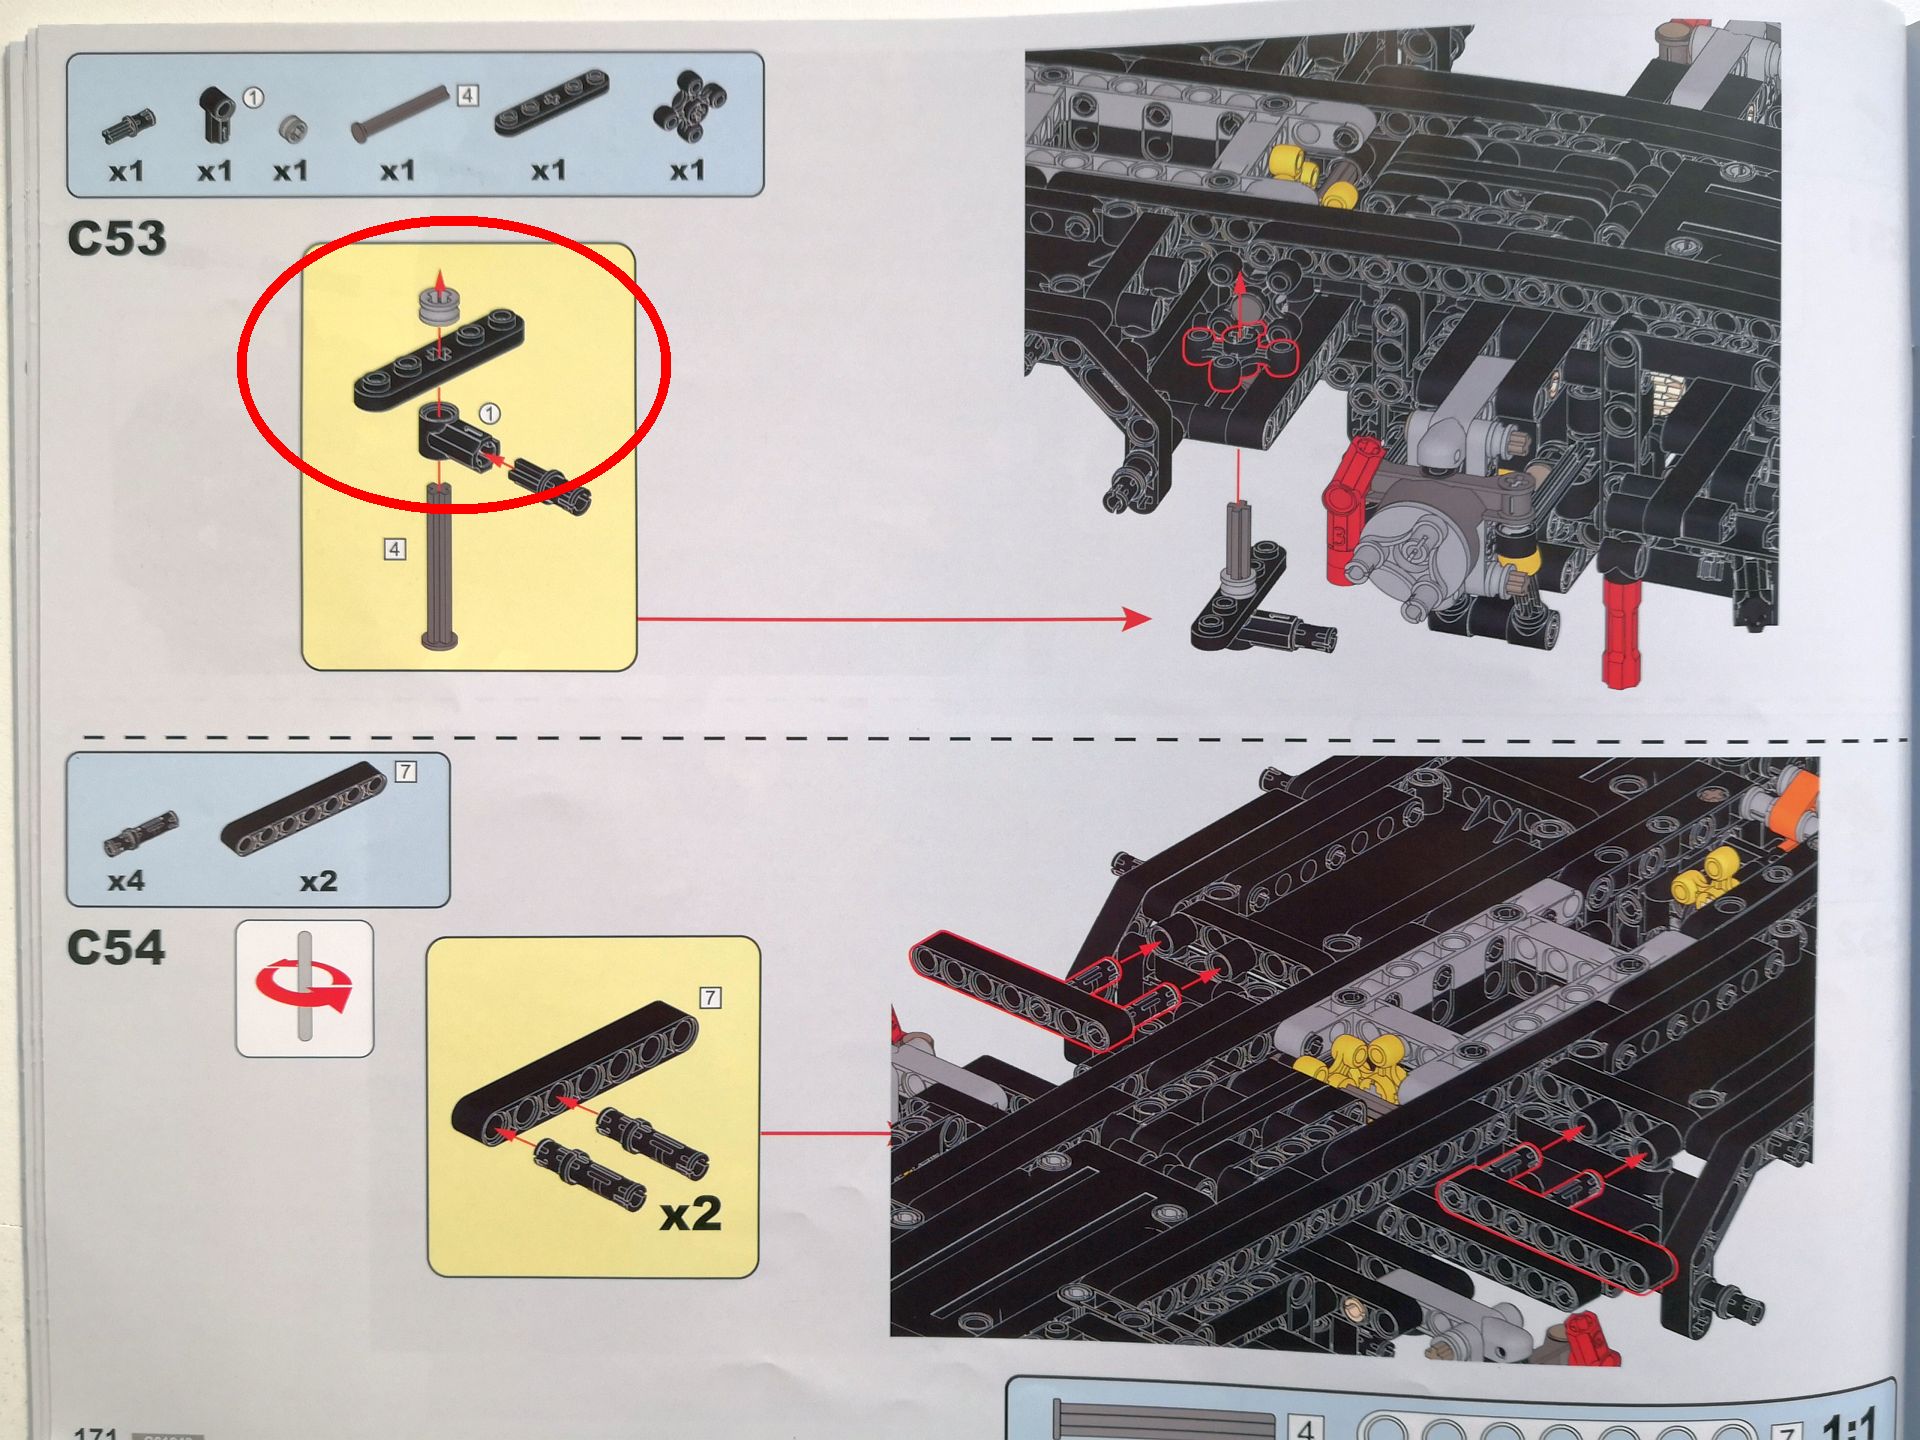
3. Add two 1x2 thin beams to each of the paddle shifters as depicted below
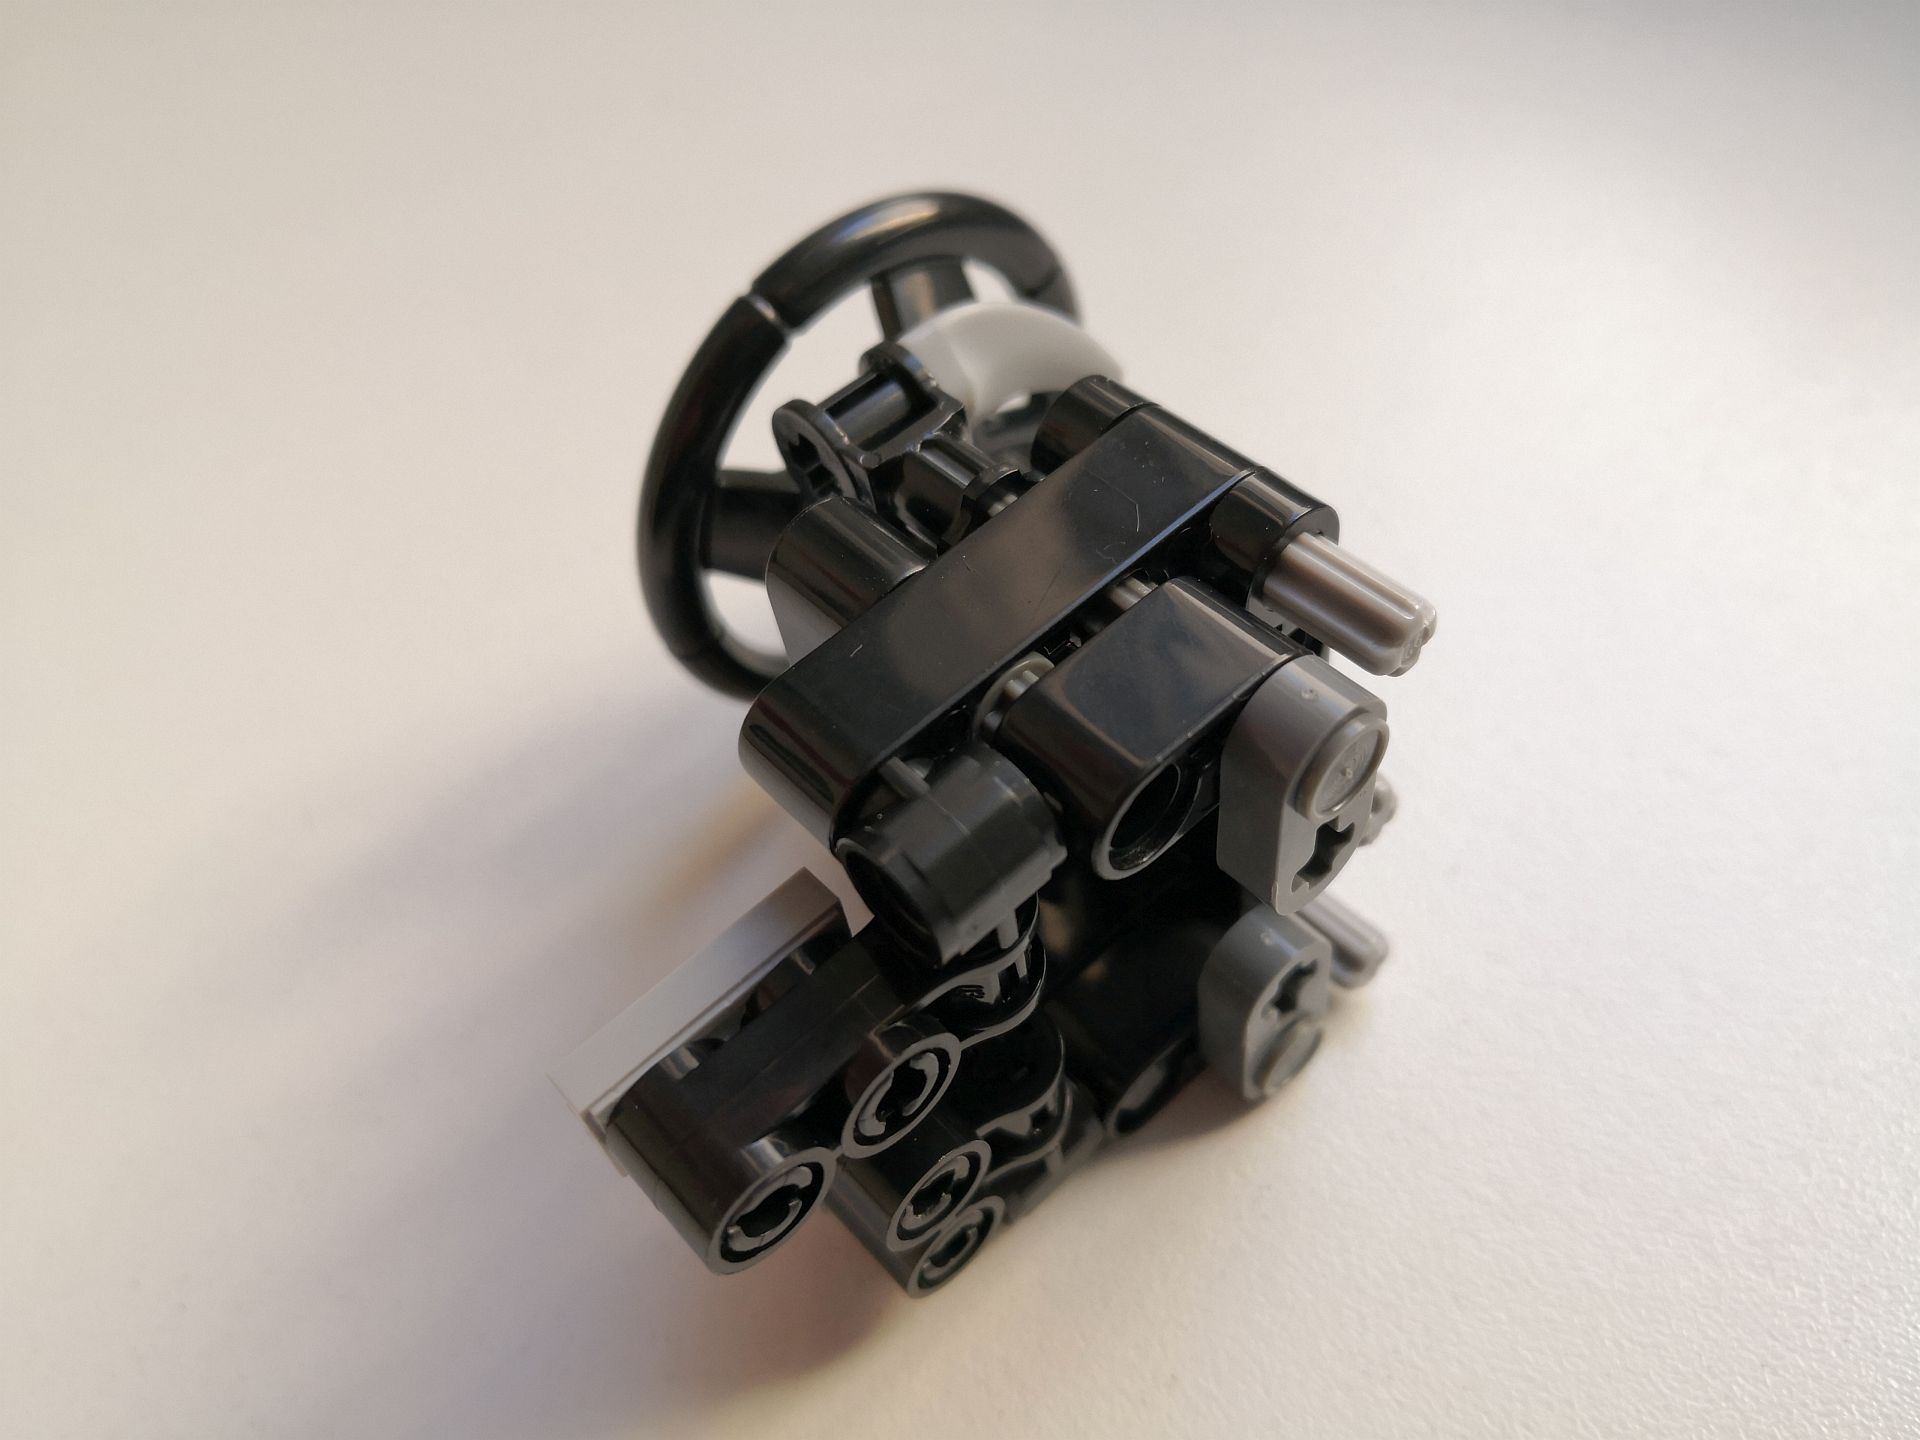

In the end, it should ideally look / work like this:
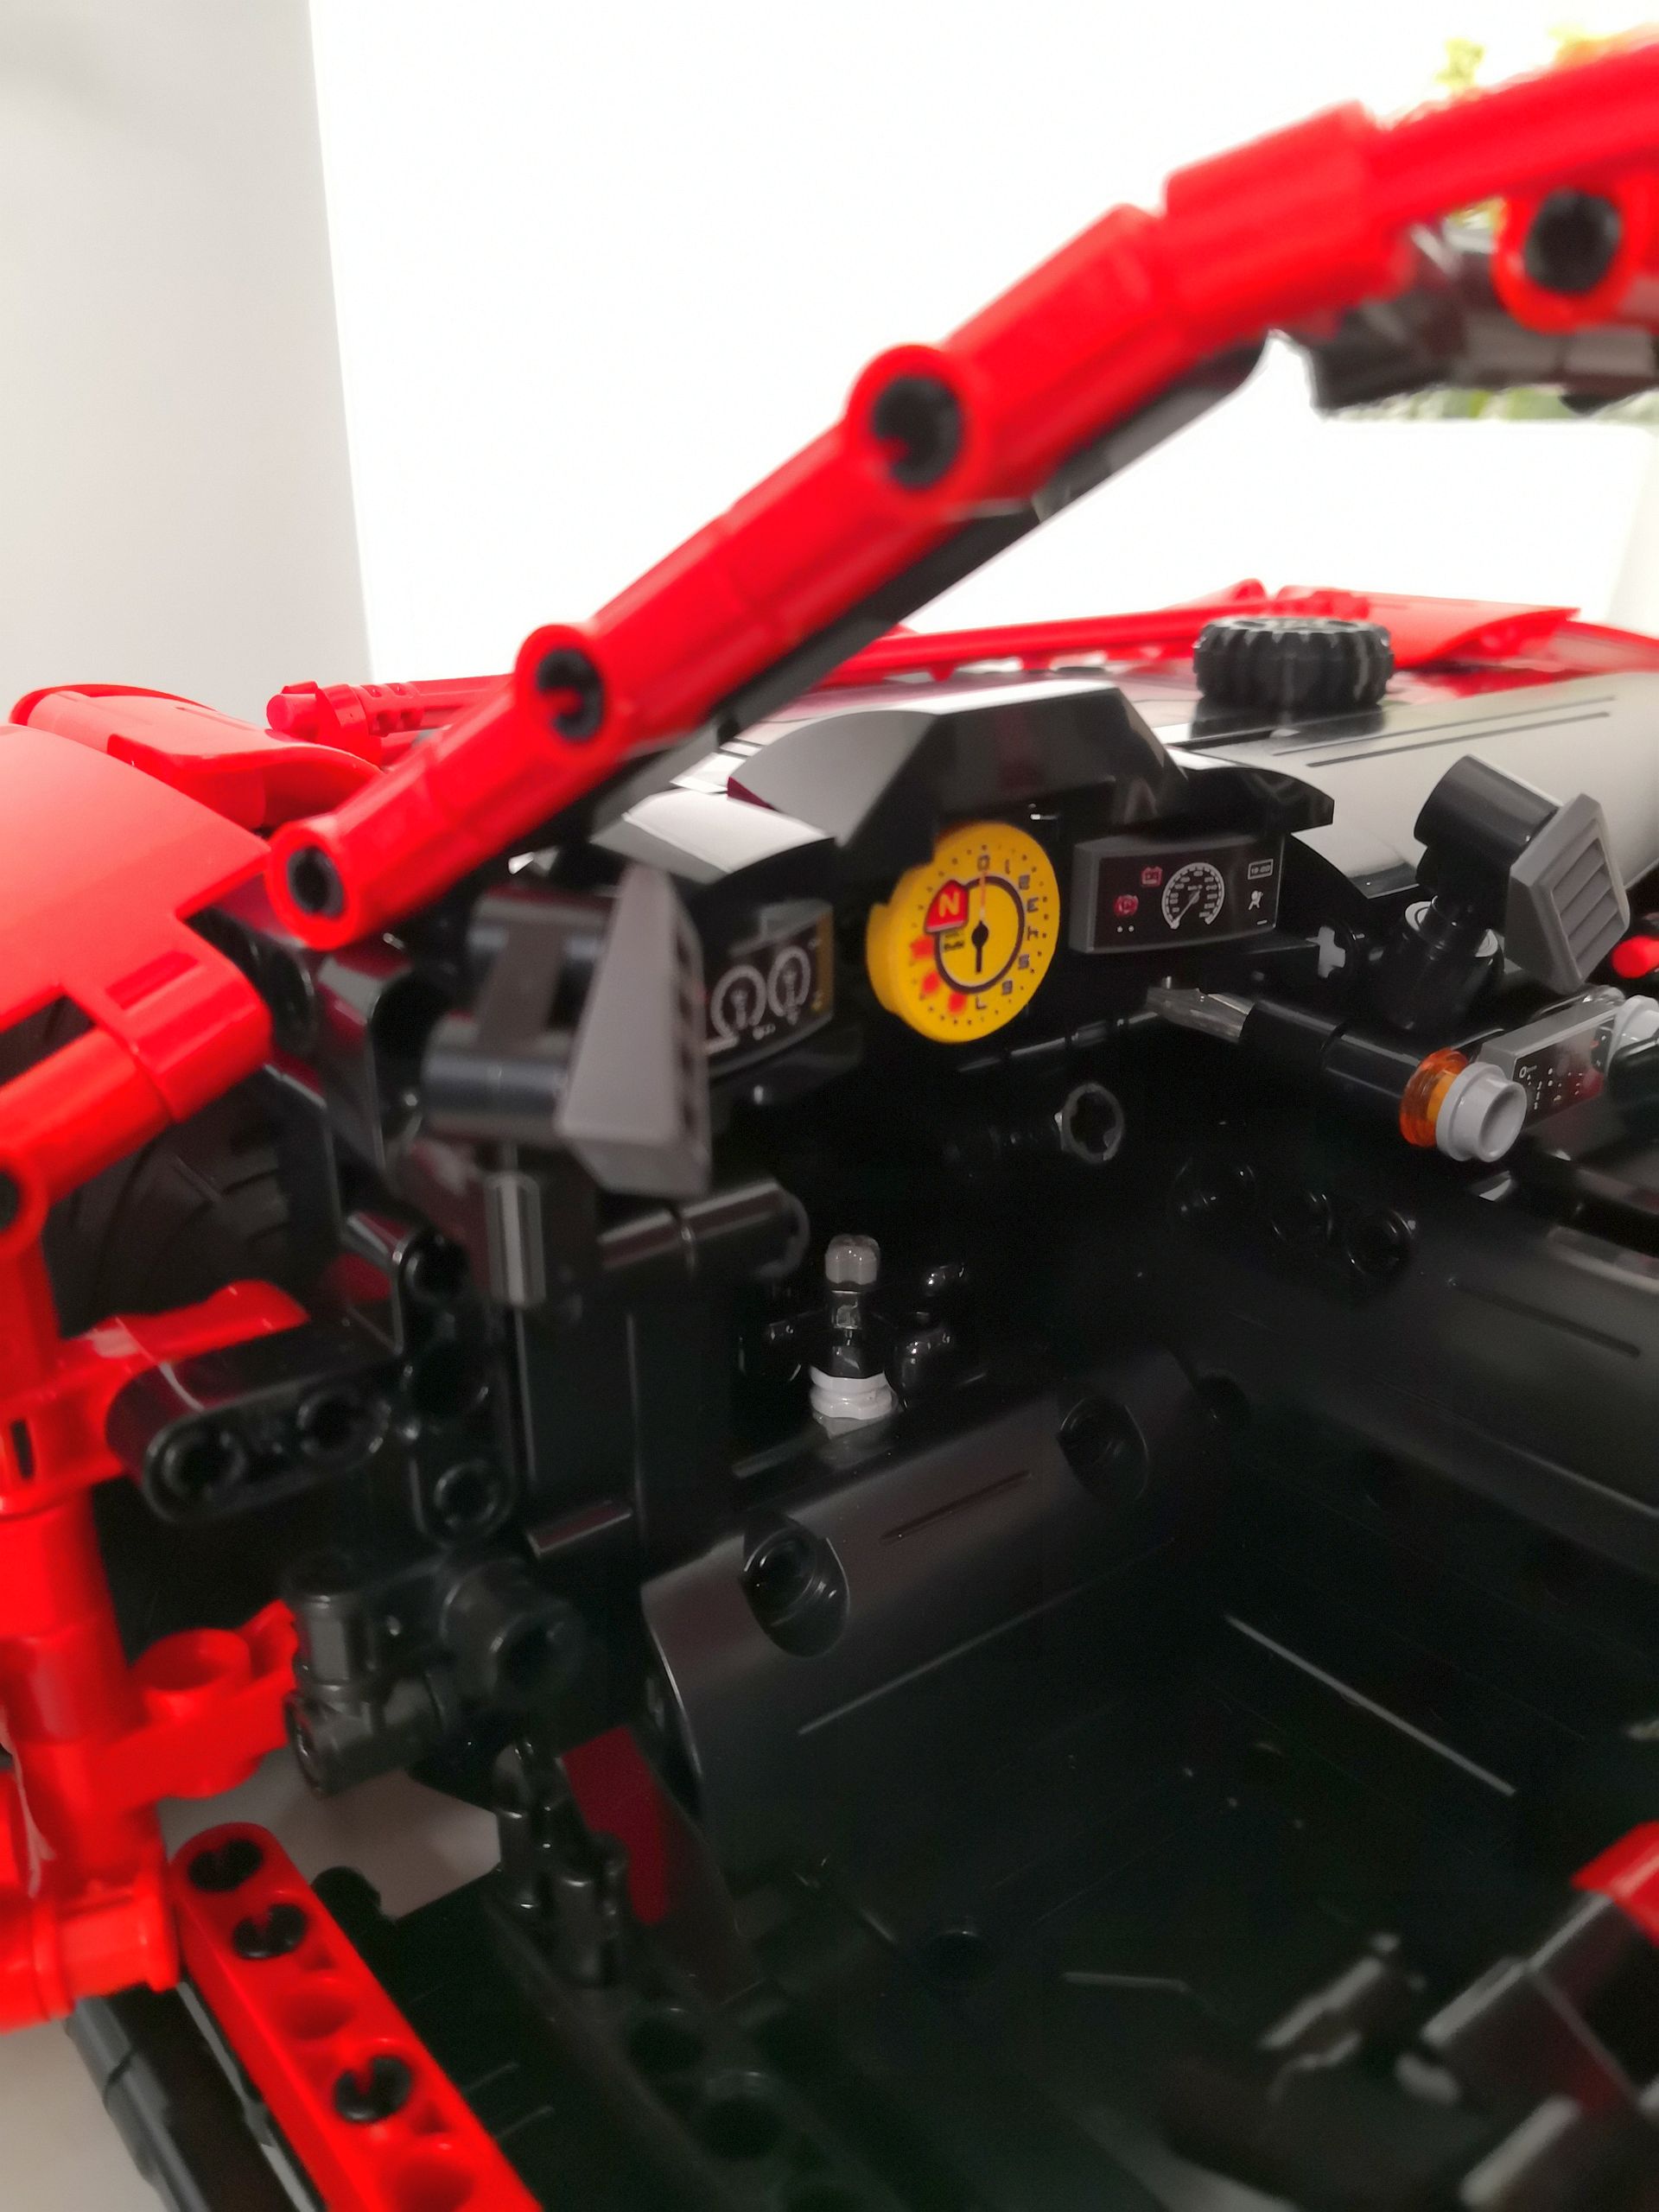
I have also added a HOG steering function to the dashboard and some more minor modifications / improvements that benefit the playability and the visuals of the static model. I can share them once I'm finished.
Oh, and in case you wonder, the yellow 1x1 plate round is just placed loosely on top of the bonnet and will be replaced by proper stickers as soon as they arrive ;)
And since I couldn't decide which wheels looked better, I just fitted each side with a different pair
Here are some more pictures of this gorgeous car:

Here is the link to the whole gallery: https://abload.de/gallery.php?key=jK03MVxn
PS: no, I do not have the link for the manual, sorry.
-
8 hours ago, amorti said:The wheels can just as well be GT3 wheels, to me they look nicer on this than the chrome ones CaDA used anyway.
I'm guessing the shift paddles don't work on the static Version? If they do, I'll be interested in how they managed that.
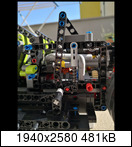
As a matter of fact, I'm building the static version right now and have actually found it to be fairly easy to get the shift paddles to work, even without any additional parts required.
Basically, all you have to do is connecting the paddles to the main shifting mechanism (disconnected in static version) by using a 7l axle and a connector in the gearbox tunnel. Replace the 1x5 thin beam directly beneath the paddles with a knob wheel and add two 1x2 thin beam to each of the paddles.
Can post pictures if anyone is interested, currently still finishing the model.
-
Now that vacation is finally here, I've decided to re-build the Sian, this time in the pimped version.
One of the things that bothered me most with the original model was the fact that the doors and the spoiler frequently didn't stay in place, especially when lifting, moving or tilting the model to see its belly.
So, having a few spare springs lying around, I tried to integrate simple spring-loaded locking mechanisms for the doors and the spoiler, with minimal to no changes to the chassis of the car (and with as little extra parts as possible).
Turned out it wasn't so hard at all, but just see for yourself:
doors:
spoiler:
(sorry for the bad pictures, its hard to capture on photo but the spring is secured in the empty section right next to the front suspension)
in action:
Going forward, I will try and connect the engine cover to the chassis, eventually integrating an assisted opening mechansim as well. I just don't like those 'loose parts' scattered around on my models ;)
-
On 10/22/2019 at 4:44 PM, brunojj1 said:It´s simply the lower part of the mini antenna
, you might have them lying around for decades..
Haha! Brilliant, yet simple and clever solution!
Would have never thought of that
Thank you!
-
1 hour ago, imvanya said:Looks like this part to me. The recent Porsche 911 RSR set had similar caps as well, actually.
Perfect, thank you very much for your quick help! :)
-
hi guys, I was wondering whether these wheel caps are custom made parts?
I couldn't find them listed in the inventory, and I'm looking for some nice fitting caps for my Mclaren.
Thanks!


42171 Mercedes-AMG F1 W14 E Performance
in LEGO Technic, Mindstorms, Model Team and Scale Modeling
Posted
judging from the pictures it unfortunately looks like it can't hold a candle to the Cada C64005W Alfa Romeo F1 (for double the retail price btw), proportions somehow look off...
very unfortunate since I like the team / livery and would have definitely considered buying it...
and WTF why no shock absorbers??