

baard
-
Content Count
235 -
Joined
-
Last visited
Posts posted by baard
-
-
Very nice locomotive! Thanks for sharing!
-
Hi
It helps to remove the yellow part and modify your switch mechanism, then you will get more room for any overhang. Look for posts on how to modify switches and you will see many examples.
Good luck!
-
Nice train, I like how you have made the trucks look like a 3 axle bogie
-
Like it.
Agree on the nice idea with the chain on the coupling
-
baard, have you tried your solution "out in the open" or do you only use balasted track that always gives you enough room to hide the big gear and motor?
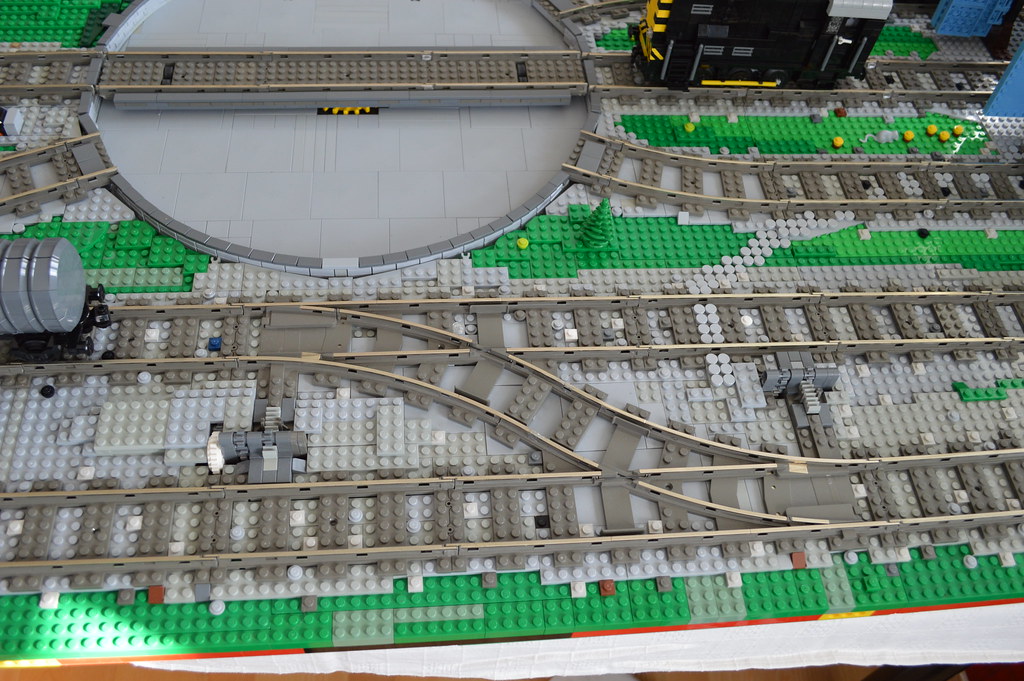
Yes, but I also don't like the visible gears, so for a couple of my switches sits a house over the little motor. The obvious disadvantige of any solution that is built above landscape is that it looks bulky and has to be built quite close to the track, thus eliminating the possibility of overhanging trains and cars.
I have also tried the "spear" solution where you don't have to modify the switch at all, but use a minifig spear to push on the little moving piece of the switch (I don't have good name for the part on the switch), but again, the motor that you have to use will have to be hidden somewhere.
I will defenitely look into the pneumatic solution you have posted, as this for a small area can be a viable solution. If you elevate your track at least 1 brick, you will also have room for the tubing.
In conclusion, I think that my layouts in the future will always be built a couple of bricks above baseplate, at least where there are switches. This is of course brick demanding, but hey, then you can add small slopes and gradients that in the end will make your layout look more real. After all, earth is not flat

-
Fantastic MoC. Like all of it, the train, landscape and the smoke.
Is the train motorized?
-
Nice idea.
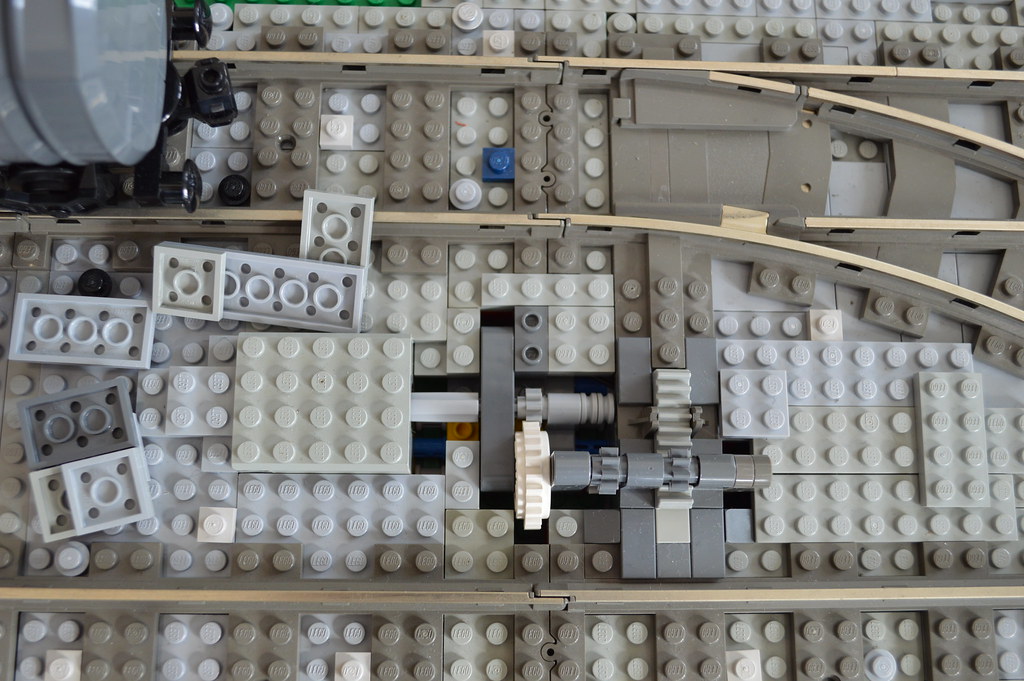
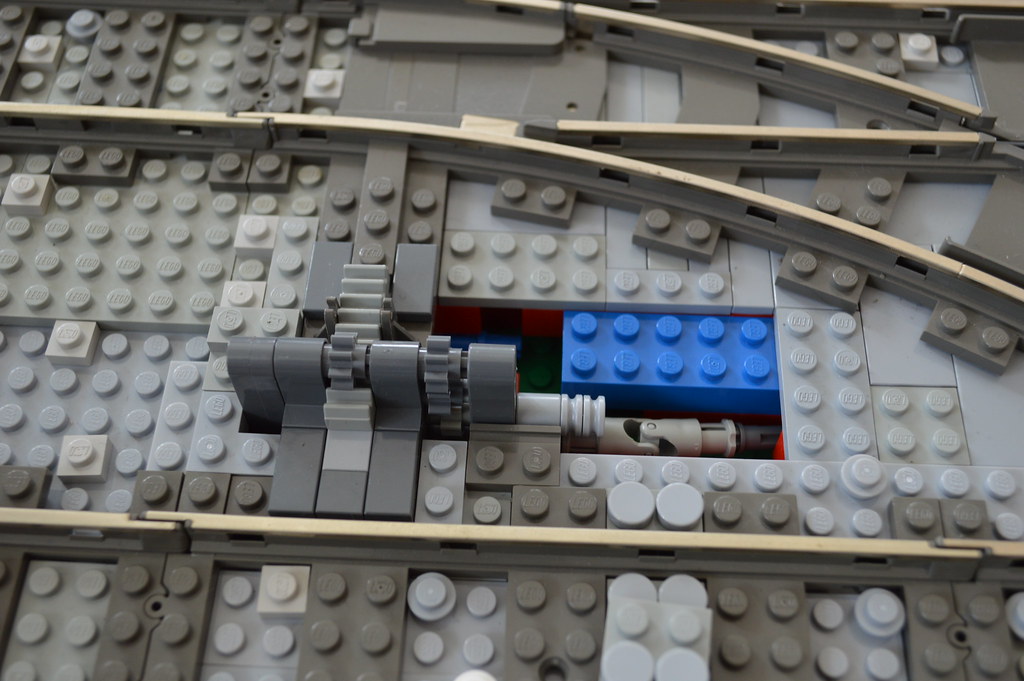
As far as I can see from your pictures the pneumatic cylinder turns a technic liftarm that moves an 8 tooth cogwheel on a rack that moves the switch?
I have found that motors do the same job as long as the rack can be held in place (it is merely resting on top of the switch) by the 8 tooth cogwheel. If you have space underneath your rail, the motors can be hidden. I guess you could do the same with the pneumatic cylinder. Have you tried using the small pneumatic cylinder?
See my Flickr for a motorized version (rails are mounted 2 bricks and 1 plate over the baseplate):
-
I love these, and they bring back good childhood memories, as my mother had 3 of these in a row. Special sound, fantastic roof design on the real thing.
Very nice MOCs. Thanks for sharing!
-
This approach is also a bit interesting because it allows us to made some of the more exotic track pieces without having to worry about making 70,000 of them. Double outside slips, double crossovers, Wyes, 22.5° crosses, 45° crosses, odd-length straights, you name it. If I can model it, I can build it.
It defenitely is. Nice work!
Does the plastic come in several colors, or do you have to paint it afterwards?
The price you mention, is that for a finished product? If it is, I am very interested in buying.
-
Generous and brave, letting the kids play with your trains!
I do not let kids play with my trains at shows. Moving trains are always fun for them to watch anyway. Once I made a crossing inside a tunnel. This of course created a lot of interest because the trains did not come out of the expected openings in the mountain. At one show, a kid was laying in front of my layout (as this was close to the floor) for a couple of hours
.I must admit that exhibiting non-moving MOCs is far more relaxing on the exhibitor, but seeing the light in kids eyes is of course rewarding in itself.
Good luck with your next show!
-
Nice renderings. I have that old book somewhere and remember building some of the models just by looking at the picture. In those days, the instructions seldom were more than 1 page long anyway....
-
Thanks a lot for sharing. I saw many awesome ideas on your MOCs. I might borrow some of them in the future.
Anytime. I lurk around this forum all the time and get a lot of inspiration from others. Selander from Sweden was the first builder to use a linear actuator under the train to retract the magnet as a decoupling mechanism for instance, I just refined the idea to fit smaller spaces.
Thanks for sharing your model, I like your shunter
 . Happy building!
 -
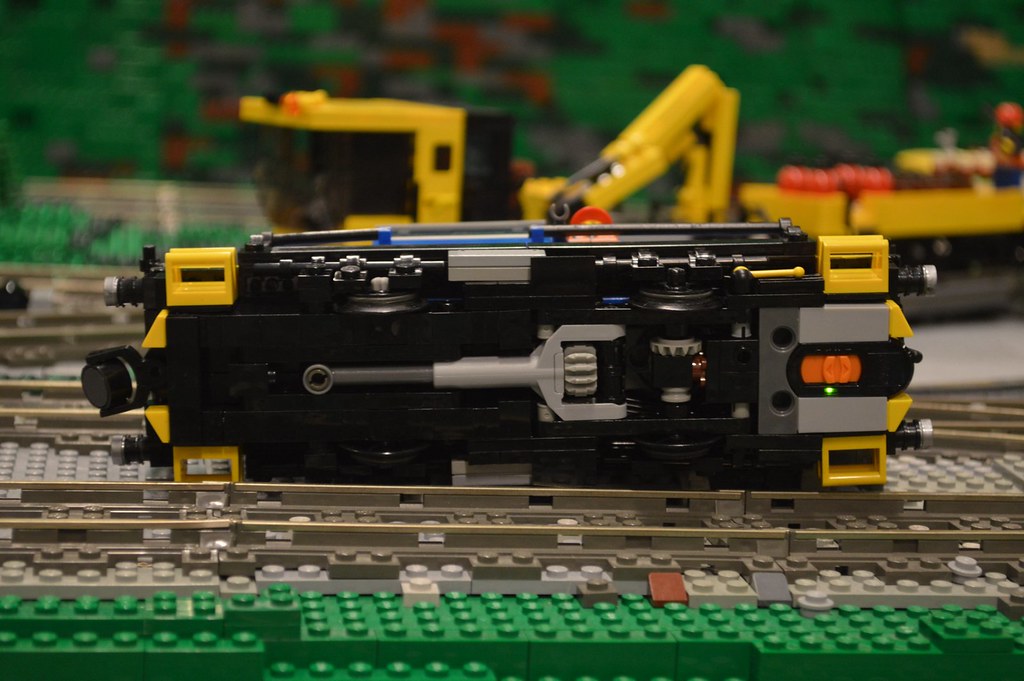
Decoupler, here it is. Flip around my Flickr, then you can see my version of a Norwegian SKD 226 shunter. I use the small 9V battery box with a cable conversion, and 2 M motors. Because of the decoupler mechanism, the propulsion of the train is only on two wheels. The same goes for my version of a class 8 Diesel chunter, where I have made a video of the decoupling. See links

-
Great locomotive, and I like the lay out on your mobile for controlling the thing
Thanks for sharing!
-
Fantastic layout, buildings and trains!
And with the lighting it looks amazing. Liked that welder inside the round house.
Thanks for sharing!
-
Great looking locomotive! thanks for sharing!
-
Well that's not looking bad at all. Actually very clever using TECHNIC liftarms. They fit perfectly being half a brick wide
I like this solution too, and it is even possible to use longer liftarms, e.g 6 long = 5 bricks high
-
R104 on the outside. In the far left you can see every radius parallel, r104, r88, r72, r56 and r40.
Thanks for sharing, it looks fantastic, still waiting for my ME metal rails.....
-
Nice setup, and the train seems to run well. Thanks for sharing. The next is to build a nice track for it!
-
Great mansion!
Love the furniture and the garden/front yard
-
Nice layout!
The outer curves are ME curves of what radius?
Thanks for sharing, and a good idea with the security camera(s)
-
Cool train, and the sound is fantastic!
keep ut the good work
-
I like the whole setup
Thanks for sharing!
-
Nice!
Like it!
Railyard Workshed.....WIP
in LEGO Train Tech
Posted
Like it
Looks like the visitors at the show did too!