
Fyredog
-
Posts
170 -
Joined
-
Last visited
Content Type
Profiles
Forums
Gallery
Everything posted by Fyredog
-
Great looking Module. This one is definitely on my list. I am working on 2 Akiuki Modules, hoping to have them ready for August. So did you have any issues while building it? It looks to run smooth. I really like the Blue!
-
I plan to follow the plan I used when I reverse engineered the 8043. I will try first using technic hubs with L motors. If that fails I will resort to trusty power functions. The movement and speed of the 8043 was acceptable to me. So if I can get the same movement and speed out of the 42215 I will consider that a success. We have to remember we are limited to what Lego gives us to build with. I build GBC modules now, one thing I have learned is there are several ways to accomplish the same outcome. Some are better some are worse. The 42215 is too expensive IMO, but with more $$ and some work it can be a great working model. Technic models can always be improved, and I think that's why I enjoy them the most is because we can improve them over and above what Lego gives us. We can share what we have done to improve them here for others to try on theirs. I enjoy seeing ideas that others have. There are very smart people here. I wish Lego would learn here and improve on their end giving us more diverse models. The cars are starting to get old. we need more variety at Technic from Lego. anyways - if you are interested here is the thread to my 8043 if you are interested.
-
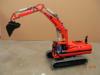
I bought one for $300.00 on marketplace locally. I feel it was an OK deal, cause I wasn't really interested at $430.00. I plan to RC it using the newer Technic hubs and L motors. I reverse engineered the 8043 way back in 2010. If you are interested I have put the link in below of that thread. I like the 42215, but I feel the value is not worth the price. The 8043 had good value with good price and was easily converted over to RC. I feel the 42215 will be great once conquered and is able to operate more like a real one. I may pull my red one out and do some updates as well. I plan to put the drive motors, the cab rotate motor and a hub in the bottom section much like I did with the 8043 R. From what I can tell the 42215 has more room to play around with. Although I have many GBC modules planned, I may have to squeeze this one in.
-
[GBC] Akiyuki Ball Factory
Fyredog replied to Berthil's topic in LEGO Technic, Mindstorms, Model Team and Scale Modeling
YAY!!!!! BRAVO - Welcome to The Ball Factory Club!! -
[GBC] Akiyuki Ball Factory
Fyredog replied to Berthil's topic in LEGO Technic, Mindstorms, Model Team and Scale Modeling
Lets talk about the ball picker first. I had this issue as well - what I did was took the white elastic band off and found a slightly smaller one, put that one on and my issue went away. Your bucket emptier - What I notice is that the buckets wobble a lot! and when they wobble they won't set down flat, which causes the bucket to hang up on the emptier frame. I also notice the contact points - they are not even on the front as opposed to the back. The bucket emptier should have the same contact point on the front and back at the top ridge of the bucket. You talked about a mod you did to the bucket emptier - I would revisit what you did, or go back to the original design. I only made one change to the bucket emptier which I pointed out earlier on step 276 leaving the 2x4 plate out. -
[GBC] Akiyuki Ball Factory
Fyredog replied to Berthil's topic in LEGO Technic, Mindstorms, Model Team and Scale Modeling
Here is a pic of my spiral lift currently - I experience NO jams with an overloaded input box of balls. They do recycle along the backside of the lift if they get pushed through. BRAVO on your quest! I do see only one thing, which is minor because it doesn't seem to harm anything. The buckets entering the shifter - they seem to push back slightly before sliding. You may want to put a thin 1x3 lift arm on the far side - I think that would eliminate it, or add a bushing. Otherwise, time for testing - let it run and run! So I had some time on my hands between projects and cleaning up the shop, that I decided to pull the beast out and fix an issue that has not happened yet. I have over 30 hours on the L motor, and who knows how long it will actually last?? But instead of taking 30-60 minutes to swap it out in it's current state I decided to make it easy to get to and a 5 minute swap. It took me a bit to get it figured out because that sub-assembly sits a half stud off from the frame from side to side. I'm super happy with the result, and now I think the beast is show ready for an event at the end of January. I did a few support mods to make the transmission structure a bit more sturdy. I also included a photo of it in it's transportation box. -
[GBC] Akiyuki Ball Factory
Fyredog replied to Berthil's topic in LEGO Technic, Mindstorms, Model Team and Scale Modeling
Do you have a photo of the inbox and the spiral lift? I had many many issues with the spiral lift from the get go. Did you modify it at all? My modifications seemed to fix the jamming of the spiral lift. -
[GBC] Akiyuki Ball Factory
Fyredog replied to Berthil's topic in LEGO Technic, Mindstorms, Model Team and Scale Modeling
From your video Here is what I'm seeing: 1. Your bucket picker now appears to be picking the buckets up right in the center of the bucket - Perfectly. So whatever you did it worked. 2. Your bucket slider has 3 issues that I see. 1. When the buckets are slid into Bob, you can see that it is putting quite a bit of pressure against Bob, sliding too far into Bob. 2. Same for the bucket emptier. The buckets are slid too far causing the tilt when the bucket is raised. 3. The buckets appear to stop for a moment then are pushed into the slider from the conveyor then slightly pushed back before sliding over. So a trick I use is to take the tubing like on the spiral lift and slice one ridge or whatever length I need and use it as a spacer or bushing. On your bucket lifter I see a small gap between the bush and the connector. I believe I used a spacer there to keep it in place. Plus you are keeping it Lego with a modified lego tube! Go back and watch BH's Video and my video. I must have watched BH's video at least 50 times. I solved quite a few issues along the way watching his video. Anyway, clearly from BH or my video you can see the bucket slides into the pusher from the conveyor with no pause. then slides over. I would also replace the connector of the pusher with a thin 1x3 lift arm on the right side of the bucket as it is pushed into the emptier. that will give some room and can help the buckets to not tilt. I think you need to take a small bit of amplitude out of the slider when they are sliding into Bob. That could also maybe solve any issues with Bob and bucket placement back on to the wheel. I would suggest looking at the timing of your chain drives that drive the slider. It looks like the timing is off. I had someone tell me that they timed everything to Bob. Your motor sounds pretty good. It sounds like you have eliminated a lot of friction. You are getting close and closer. Keep going - you will get it! -
[GBC] Akiyuki Ball Factory
Fyredog replied to Berthil's topic in LEGO Technic, Mindstorms, Model Team and Scale Modeling
I had a lot of issues with the bucket emptier and buckets turning on their sides and jamming. I played with timing quite a bit trying to solve this. I finally determined that the bucket needed more room when being returned back to the slide table. I removed one of the Connectors and replaced it with a 1x4 thin arm and a bush. This allowed the bucket to be placed flat. This would be the one to the right of the bucket while in the jaws of the bucket emptier. That solved my issue - which looks to be exactly your issue as well. Also, The bucket lifter, I can tell you that you need it to slide more into the bucket. Your amplitude is not enough, It will drop buckets back on to the wheel when balls are loaded, which causes Havoc. I'll need to watch Bob more - but if you had a video of Bob dropping the bucket, that would be helpful. Also you need to load it up with all 21 buckets. Before you put any balls into it, be sure the bucket system is working perfectly first. You are close my friend!!!!! -
[GBC] Akiyuki Ball Factory
Fyredog replied to Berthil's topic in LEGO Technic, Mindstorms, Model Team and Scale Modeling
I made that tilting ramp even on that side - but yes I had that same issue. I made my own exit ramp system, I wasn't in love with the tube style exits. I also made the lever to that 4L lift arm a straight shot instead of that modified one that is supposed to clear all of that on that side. That's the beauty of GBC, you are able to make your own mods based on your needs and experience, and share with others. -
[GBC] Akiyuki Ball Factory
Fyredog replied to Berthil's topic in LEGO Technic, Mindstorms, Model Team and Scale Modeling
Your bucket Emptier has the same problem mine did. I fixed it by leaving the 2x4 plate out on step 276 (Part 3). That 2x4 plate causes the 2x2 modified tile inverted to catch on the emptier frame, causing that jerky movement. -
[GBC] Akiyuki Ball Factory
Fyredog replied to Berthil's topic in LEGO Technic, Mindstorms, Model Team and Scale Modeling
Your Bucket Picker looks GREAT!! It is simplified and looks to run super smooth. Along with modifying mine to easily replace the drive motor, I will upgrade my bucket picker to match yours! GREAT JOB!! -
[GBC] Akiyuki Ball Factory
Fyredog replied to Berthil's topic in LEGO Technic, Mindstorms, Model Team and Scale Modeling
Pole Dancer is reliable....BUT needs serious work on the motor clutch system. The stopper on the differential makes for some serious binding. Also needs technic bricks added to the intake to keep the steppers aligned properly. Once that is all figured out the pole dancer can be a rather reliable module. Congrats on your behemoth module!! I think I have seen the videos of it. Great job. How on earth do you transport that sucker? -
[GBC] Akiyuki Ball Factory
Fyredog replied to Berthil's topic in LEGO Technic, Mindstorms, Model Team and Scale Modeling
I'm planning to make a Mod that moves the motor to a place that can be easily removed and replaced. I have 30 hours on this motor and during a show I want to be able to swap motors rather quickly. I'll post pictures once I complete this MOD. -
[GBC] Akiyuki Ball Factory
Fyredog replied to Berthil's topic in LEGO Technic, Mindstorms, Model Team and Scale Modeling
I had posted this on Page 16. I am very happy that I added this into the build. It comes in handy more than once. Yes to adjust spiral lift timing to ball picker. How are you coming along with yours? -
[GBC] Akiyuki Ball Factory
Fyredog replied to Berthil's topic in LEGO Technic, Mindstorms, Model Team and Scale Modeling
According to your experience, how important is it to use completely straight axles, even for simple torque transferring mechanisms? Does it affect the overall “smoothness” and friction in a noticeable way? With so many movements on this module I chose to use the axle checker on every axle I used on this module just to take any unforeseen issues out of the equation. In fact I will never build a module without checking any axle for straightness. And how do you usually proceed when lubricating? Do you use PTFE spray for that purpose and if so, how and in which amount do you apply it? I use RC Car shock oil. I apply with a q-tip. I usually just slip the q-tip through the hole or holes that hold the axle. I used it sparingly so it doesn't drip everywhere. From my understanding, the length of the swinging arm is 4L. This will result in a max travel of 6L (3L to each side) which is still given even with the added 1x3 liftarms. I need to test it at the running module. I would encourage you to watch Berthil's video of his V3 and mine, and closely observe the movement of the bucket Lifter. As I said in one of my recent posts that I had issues with the Lifter travel and not picking buckets properly. This was due to the arm colliding with the turn table and not creating enough travel or amplitude. Once I modified the arm to clear the turntable, I was able to get enough travel to get an even grab on the bucket. That required full travel where you have your 1x3 thin lift arms placed. -
[GBC] Akiyuki Ball Factory
Fyredog replied to Berthil's topic in LEGO Technic, Mindstorms, Model Team and Scale Modeling
So looking at your pictures, the 1x3 thin lift arms will NOT work placed there. You will not have enough travel in both directions for it to work properly. However, I believe if you placed them on the other side of the 3L axle pin connectors That might work. In fact I think using a modified bent 3x3 L thin lift arm would be even better. See pix below. Also the locking slider - It has nothing for that pin to rest on, if you were to place your finger in place for that tan pin to rest on, you will see it close. It is not meant to rest all the way down. That structure will come later in the build. I thought I had issues there as well. You might also want to swap that out with an axle with a pin connector then put a bushings on that - you will get the full locking effect. That is shown on one of Berthil's upgrades. -
[GBC] Akiyuki Ball Factory
Fyredog replied to Berthil's topic in LEGO Technic, Mindstorms, Model Team and Scale Modeling
So you have gotten this far and everything moves - so that is a good thing. At this point I would consider disconnecting everything from the drive line but the spiral lift. Make sure that when the motor is running you get a nice smooth sound from the motor and as you add in movements listen. I did most of mine by hand crank. Once you have determined that the spiral lift runs smooth, then connect the ball picker. Your ball picker is not running as smoothly as it could. It should have as nice and smooth movement back and forth as you can get it - there is some kind of resistance there. After you get the picker running smoother, then work on Bob by himself at the front of the module. I pushed the push-rod back and forth until I felt it ran smoothly enough to add into the drive train. I would get rid of the red band - This module likes to run on setting 3 on the transformer. That band adds friction. Spend good time understanding how Bob works and finesse him any way you can to make him run nice and smooth. Your bucket picker looks to be running nice and smooth, and I'd be interested to see how exactly you constructed it. This is one of the hardest movements to get to run smooth (at least on mine). My only concerns are I see that when the Bucket picker is in place to drop the bucket, your arm collides with the grey tile beneath it not letting it drop completely (this also causes binding and binding is friction). Also where you have added the 1 x 3 x 1/2 lift arms you lose amplitude sliding back and forth to the turn table - so I'm not sure how that's going to affect the lifting and dropping of the buckets. I had the issue of that arm swing back and forth into the turn table which affected my lifter not lifting the buckets properly. I'm not sure what you mean by the locking slider, maybe you can expand on that? Over all you should be proud you made it this far. Trust me that when you think you want to give up on this thing, just walk away from it and think on it. You will, with an extreme amount of patience, work through it methodically and find your way through it. Just remember to work on one issue at a time. don't try to fix everything at once. I started from one end and worked my way through it. I couldn't be more pleased with my factory at the moment. I hope I explained everything clearly - if not ask and I will do my best. Good luck and remember PATIENCE brings virtue! -
[GBC] Akiyuki Ball Factory
Fyredog replied to Berthil's topic in LEGO Technic, Mindstorms, Model Team and Scale Modeling
So Last weekend was my last show for a few months. I took the BF, set it up, loaded it up and when the show started I turned it on and let it do it's thing. It ran for 6.5 hours solid with not one issue. I would every so often, turn it to manual operation and let fans turn the crank to operate it and they were amazed as too the ease of the operation of the module. It is a huge fan favorite. It had over 12,000 balls run through it. I am completely satisfied, and encourage anyone that builds this thing to perfect it and enjoy it. See it in action below. My modules start at 1:03. The BF is at 2:15. My modules end at 4:28. -
[GBC] Akiyuki Ball Factory
Fyredog replied to Berthil's topic in LEGO Technic, Mindstorms, Model Team and Scale Modeling
So I was testing one last time, and had another issue arise. The ball picker would inconsistently drop the left ball or drop it late. so after observing for a few minutes, I determined that the left jaws were not getting enough movement when triggered. So I modified it so that both jaws would get the same amount of movement. See the pic below, a rather easy mod. The other issue I had was the balls were dropping a split second too soon, so I added a couple bushes to keep the bush that moves the ball picker back and forth from sliding down. When this bush slides down it makes the amplitude shrink. The pix below are the mods I did. -
[GBC] Akiyuki Ball Factory
Fyredog replied to Berthil's topic in LEGO Technic, Mindstorms, Model Team and Scale Modeling
So after 3 days of running approximately 21 hours, the Ball factory reared some problems that I was able to observe. For the most part it ran rather well. The first issue I had was the timing from the spiral lift to the pall pusher/picker was off. It didn't cause an issue but every now an then. It was a big enough problem that I would have to stop the module and fix it. Once I figured out what it was I was able to adjust the timing that I had built in from the start. So I am happy to have had it in there. It provided precise timing and after I had made the adjustment that issue was resolved. The spiral lift worked pretty well, but every now and then a ball would jam between the vertical lift arms on either side. Not very often, but often enough that I wanted to modify the spiral lift so I wouldn't have that issue happen again. The first photos shows the vertical lift arms being pushed out by one stud, so no jamming is able to happen. Next was Bob every now an then knocking a bucket off the bucket feeder on his way back to pick a bucket up. I tried using the timing on the push rod, and was able to kind of get the timing so it would work the rest of the show. Once I got home I adjusted Bob by I think 2 teeth on his gear drive up front. Now he gets in position just before the bucket is pushed into his grasp. That was a fairly easy adjustment. I think my biggest issue was the bucket picker. The problem was that I was not getting enough amplitude when it slides into the bucket prior to lifting. Therefore the bucket was tilting towards the bucket wheel, sometimes dropping back on the wheel. That will and did cause havoc. The issue was that the linkage would rest against the bucket holder on the wheel, and not allow the full amplitude for the picker to center on the bucket before picking it up. I modified the linkage in the second picture below and the picker so that it would clear the bucket wheel, which gave the amplitude needed to pick the bucket up in the center as seen in the 3rd picture. So far the Factory now works flawlessly, although I have not done any long term testing. I have a show on October 25 in Las Vegas called BricksVegas. That's a 6 hour show which should be sufficient testing. I will post video of the Factory running at that show afterwords. I hope this info helps. -
[GBC] Akiyuki Ball Factory
Fyredog replied to Berthil's topic in LEGO Technic, Mindstorms, Model Team and Scale Modeling
My suggestion, is to just go through the posts and maybe put your own parts list together. That's what I did. -
[GBC] Akiyuki Ball Factory
Fyredog replied to Berthil's topic in LEGO Technic, Mindstorms, Model Team and Scale Modeling
@9v system Thank you, Not sure what you mean by timing change for the bucket placer? What does this timing change do exactly? -
[GBC] Akiyuki Ball Factory
Fyredog replied to Berthil's topic in LEGO Technic, Mindstorms, Model Team and Scale Modeling
@Berthil Thank you sir, I appreciate the compliment. -
[GBC] Akiyuki Ball Factory
Fyredog replied to Berthil's topic in LEGO Technic, Mindstorms, Model Team and Scale Modeling
Here is the final testing video. I will have this on display at Brickslopes Utah next week.