Hi Breakdown,
I’m the guy behind 4DBrix.
I’m willing to take a look at any need that might exist in the monorail community. Just send me the details of what you would like and I will check if there is a viable solution to it.
Hi Paul,
I’m the guy behind 4DBrix.
That’s an interesting questions and one of my focuses designing the monorail tracks. The teeth on the 3D printed tracks are slightly blunter than the original tracks but it’s not an issue of the cog. The cog has enough play to be able to handle a variety of track teeth. Note that there even is a slight difference between the teeth on the original LEGO tracks. The short track has 41 teeth for a length of 8 studs while the full track has 163 teeth for 32 studs; the teeth on the short LEGO track are thus slightly sharper than the teeth on the long LEGO track. A fair amount of play is also needed to get the motor over the switch points.
Hi ecmo47,
I’m the guy behind 4DBrix. There is a video on our 4DBrix YouTube channel:
where you can see the Futuron monorail train on the 3D printed monorail tracks.
Hi Wookie,
I’m the guy behind 4DBrix.
The main focus is to create the best possible monorail track (from both a functional and an aesthetic point of view) while keeping the price to an affordable level. They are 3D printed and that’s visible, if that is an issue then these monorails are not for you. We understand that and we want to be very open about this, the goal is not to trick people into buying something they are not going to be happy with.
The pictures on the 4DBrix website show the rails as they are, but keep in mind that those are close ups. The print lines are about 0.2mm thick, you cannot see that type of detail from a meter away. You can verify this on the YouTube video. At around 20s the video shows a close-up and you can see some of the print lines, but in the overview shot of the full layout (starting at 1:07s) I can no longer tell the difference between the original and the 3D printed tracks.
To summarize, I feel that from a practical point of view (meaning that if you look at the tracks from a distance like you would in a real life situation) the aesthetic quality is good; otherwise we would not have released them. But they are not real LEGO tracks, so you have to be OK with that to enjoy the 3D printed tracks.
Hi AlmightyArjen,
I’m the guy behind 4DBrix. To be honest, that’s a question I hadn’t really thought of before… I’m afraid I need to get quite technical to answer this.
Wear is normally related to the hardness of the two surfaces making contact. The rails are printed with pure ABS, the same material as LEGO uses. So in both cases it’s a ‘hard’ metal cog rubbing against a ‘soft’ ABS surface. I don’t really see a difference in hardness between the original and 3D rails, and even if there was I don’t think it would be a meaningful difference as the cog is clearly much harder. I haven’t seem any wear on the 3D printed tracks, but as they are new they have only seen a limited amount of use.
A related issue would be teeth breaking off. 3D printed ABS has a different strength than injection molded ABS. The rails are printed by laying down small strings of ABS. Those strings are very strong (as the material in those strings is similar to injection molded ABS) but the bonding between neighboring strings is weaker. In case of the monorails, the ‘strings’ are parallel with the axis of the rail. That means that the cog is stressing the teeth in a direction that pulls on the ‘strings’, so in the direction the material is the strongest. It’s not stressing the planes in between the layers. So I don’t see any increased chance of breaking off teeth compared to the original rails. I tried pulling of teeth with pliers, they did not break off...
Hi Breakdown,
I’m the guy behind 4DBrix.
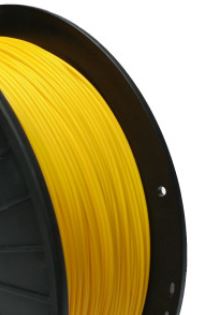
The color of the tracks were a major focus when developing them. I tried a couple of standard gray filaments and none matched close enough to my taste. In the end I had a filament provider recreate the ‘Classic Light Gray’ based on the LEGO color code...
This is a screen shot from the YouTube video. The straight track is one I 3D printed, the curve on the right is an original LEGO track. The color match also depends on the state of your original tracks, as the old gray tends to turn yellow over time. If you compare the two rails from close by you will see a slight difference, also because the surface of the 3D printed rails is not as smooth as the injection molded LEGO ones. But if you take a step back and compare them from 1m away, I can no longer see a difference.
Hi,
So I’m the guy behind 4DBrix.
As Breakdown stated, I’m working on a system to automate LEGO train and monorail layouts. The main goal if to offer a LEGO compatible range of products like you have for the model train sets: track switch motors, traffic lights, sensors, decouplers, … and an extended range of special tracks. I stared with the monorail and I’m working on both monorail and train products at this moment.
The next big target is to finalize the automation software and hardware for the trains. The first version should include: tracks switch motors, traffic lights and train sensors. Eventually the monorail will also be supported by the automation system. You can see a prototype of the monorail automation on the YouTube video. If you focus on the station, you can see that I mounted a white motor to the monorail control switch; it’s how I started the train at 1m32s. This is a custom LEGO compatible servo motor that can by mounted on the monorail controls with a special connector. The goal is to create switches (standard left, right and the Y and cross) that can be powered by the same motor. 4DBrix is a micro-business, so this will take some time...
It was a nice surprise to find this post here. We intend 4DBrix to be community driven, so I tried to reply to all your questions as detailed as possible. If you have any additional comments, questions or suggestions don’t hesitate to get in touch.


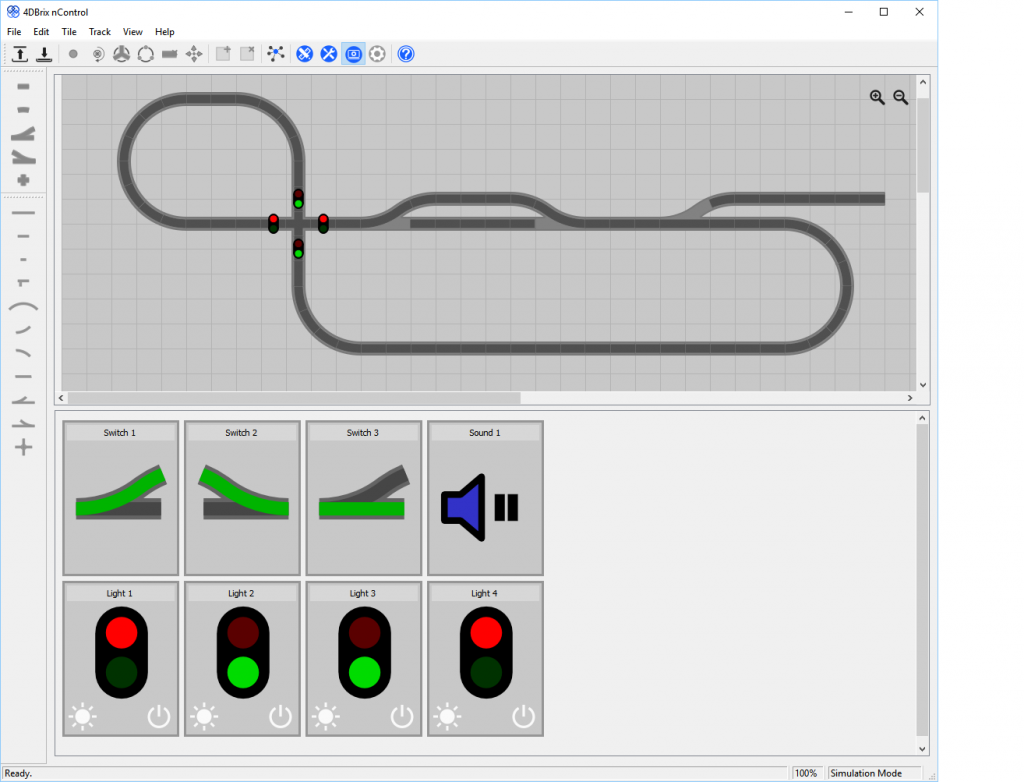
 We have been working on a software to design and automate LEGO train and monorail layouts. The first BETA version of nControl is out and can be downloaded for free from the 4DBrix site. It has a track planner for train and monorail layouts and has the first elements of the automation simulation: track switches, traffic lights and sound effects. We also have 2 YouTube videos to get you started. Download link: https://www.4dbrix.com/downloads Getting started videos: https://youtu.be/wddnCAJZTlQ https://youtu.be/w2RDMXt1sgQ Let us know what you think; any feedback, suggestions or ideas for additional features are welcome! Lowa