

afol1969
-
Content Count
397 -
Joined
-
Last visited
Posts posted by afol1969
-
-
This has got to be the most ingenious/elegant use of this part, as support for the track sprocket. Bravo!
Can you give us a description how to mount it? I've 4 of them...
@scapuc: Great! And you've the same problem having enough thin liftarms, I've to wait to receive the bricklinked parts befor I can continue with the base. And I don't have enough 5L axles with stop, so I've to use the standard 5L axles instead. And there's no need
for that part, you can use a 3L liftarm fixed with two pins

Greetings
Alex
-
If I may be so bold as to ask, what's the planned difference between your instructions and the existing gigabyte file? Making some steps more clear? Reducing file size? ... I've only just built the base for this, but it's been ok so far - i'm wondering where i'm about to get stuck

At first: The file may be smaller because I combine more parts per step to reduce steps,
Secondly: They'll be clearer, I'll add several arrows resp. notes to show where to put the parts. In sheo's file it is sometimes very difficult to see where the parts belong, you risk to forget some parts. Myself I'm not sure if I have found all parts which belong to the model. That maybe I'll see while building.
I build it as it is, but in some rare cases I can use another parts if the build process allows and if it's not visible. The build takes long time and patience, and is sometimes rather tricky by connecting parts, because the model is so dense.
Greetings
Alex
-
Great work, Jurgen

The instructions look very clear and show an improvement, as my instructions are an early work where I was at the beginning to get common with MLCAD/LPUB.
Greetings
Alex
-
Boah, what an incredible construction! The dimensions are amazing! And you've put lot of time for creating the details in the control room
One of the biggest technic creations I've ever seen. Looking forward to your final construction.

Greetings
Alex
-
Probably been done to death already but any suggestions on small enhancements or pitfalls i should be wary of? Would like to build fairly as is but in searching have read of a glitch in the front panhard rod joint and the suggestion of an air tank.
Hi Glen,
See here:
http://www.bricksafe.com/files/afol1969/Instructions/UnimogX.pdf
Greetings
Alex
-
I've now started to build the excavator, at first the base. Soon I've seen that I've to reorganize completely the building/part steps. You must have a very good look to the instructions, and place the parts at the right order, otherwise you risk, that you cannot disassemble some parts (for ex. axles full pushed in). So I've decided to make more steps with less parts to make easier to follow the building process.
Normally I make somme little modifications while the building process, but I try to to get the original build, otherwise it will not be sheo's model any more. The density is amazing, never seen a such compact model.
I've still some parts to buy and made a new bricklinking.
And there are new problems with some MLCAD commands, maybe I need some support from our LDRAW Masters in this forum
 . For ex. how to show in instructions a provisional part, and remove it some steps later. The buffer exchange command gives not the result needed, the RETREIVE command let disappear all parts from the steps before.
Greetings
Alex
-
Hi blakbird,
I created it from scratch. That gave me the occasion to make an provisional build stepping to work for the later instructions. The most difficult part was setting the correct rotating points for the boom sections and the actuators.
Greetings
Alex
-
Congratulations, Alex!
Only one remark: the 5.5L axle on the boom seems to protrude a little further than it should.
Hi sheo,
Thanks, it was a massive effort to create the LDRAW file. You're right, the 5.5 axles were placed one stud too far outside. I've made the correction.
But I'm sure that the file needs some more corrections. That's I need to build to create the instructions. And maybe I'll not finish them before autumn.
The LDRAW file you can download here: http://www.bricksafe.../TerexTH400.mpd
Do you still have the LFX file? It would be fine if I have it to compare and find out some errors.
And if somebody want to support the instruction generation - you're welcome.
Greetings
-
Alex,
For the MK3 non-suspension with Firgelli actuators which mpd file(s) should I use as reference?
After going over the whole thing again I am now set on the MK3 non-suspension carrier with the Firgelli actuators and 5 unit boom.
Thank you for all your help and support!
Alex C
I'm still on work to complete the instructions for the MK3 Version. But a draft you can download here: http://www.bricksafe.com/files/afol1969/Instructions/GMK6400-MK3%20(1).pdf. Part lists and step order are ready for building, but I still have to add lots of annotations, for ex. how to connect the PF parts. Hope I'll finish it next week to upload the final instructions.
Greetings
Alex
-
I have it!

And now let's build it!
Greetings
Alex
-
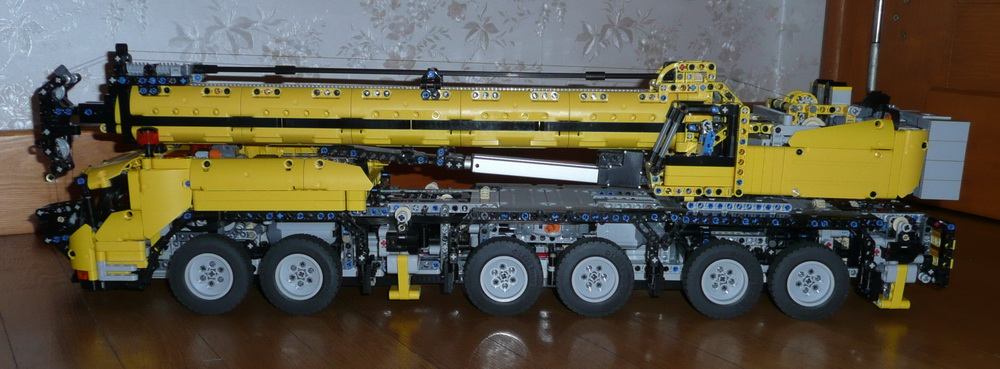
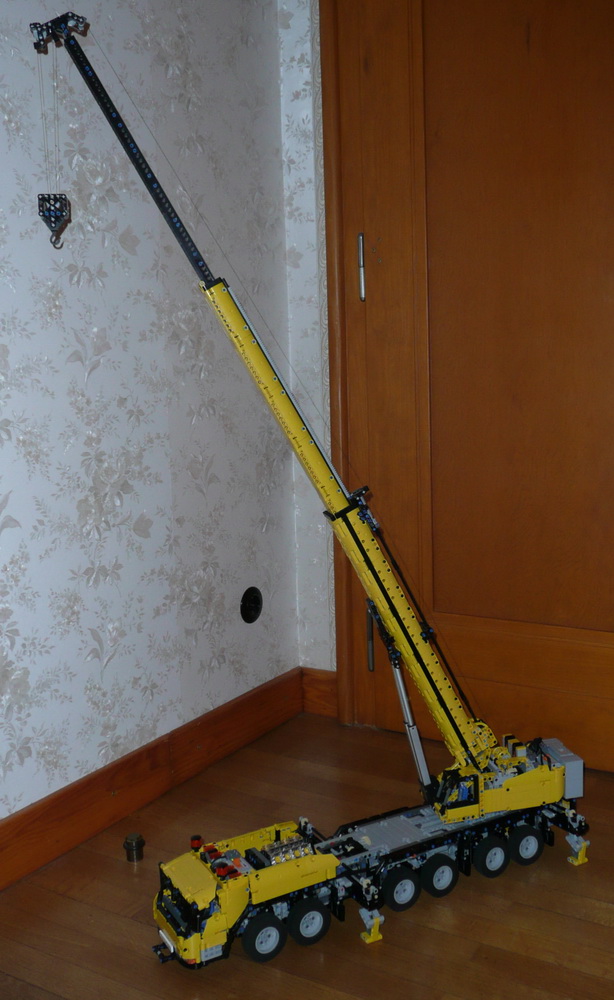
Here the latest photo with full extended boom:
Greetings
Alex
PS: @Marc: You've PM.
-
hoi lucio
what can we do too thange your mind too make instruktions
i think that manny manny peple whans buid this master piece and wil pay for it
the tractor trck is also an masterpiece and i now its an lot off work
I think, making instructions needs collaboration of some people, because for a MOC like this it needs very long time, that maybe doesn't encourage Lucio to do it alone. The best will be, while disassambling the airport tender, he should make photos from all step, that gives us the possibility to create an LDRAW or LFX file, and then create instructions. Even it will need a half year to make the instructions, I think it is worth.
Greetings
Alex
-
Hi Alex C,
I'm very sorry, I don't have any brickstore or else part lists, I've only them created from the LDRAW file. Most people ask me for bsx part lists, but myself I don't use bsx files. I count the amount of parts from my stock, and I make notes which parts I need to buy. To build MOC's I often use alternate parts in different colors if possible, so the part lists always change.
If wanted, I can put the model onto Rebrickable, but it will be a problem with the Non-Lego parts (Firgelli actuators and wires)
For the instructions, I used the DAT file from Philo, the wires I've created myself. Serveral parts I've created you can download here: http://www.bricksafe... flexible Parts
I've used the standard actuators without down-gearing, two of them have just enough force to lift the boom. I was inspirated from efferman's boom to use additional beams to optimize the leverage, and to get an higher angle (~80 degrees)
The actuators you can get from an online-shop in France: http://www.robotshop...-100mm-ev3.html, so that you don't need to pay high shipping tax.
The NXT-to-PF wires you find in this shop too: http://www.robotshop...o-pf-cable.html
But the down-geared actuator you only can get from Canada.
Hope I could answer all your questions
Greetings
Alex
-
Found this topic now, and I only say: WOW! What a masterpiece of creation!
That cries for Hall of Fame, Instructions, and building.
Never seen such a stunning and complex work, you're so talented

Greetings
Alex
-
The full suspension version you can still find here: http://www.bricksafe.com/files/afol1969/Instructions/GMK6400_1.2.pdf
I'ts an updated version, I'd to correct an error, and I've added more annotations.
The RC Unit with 4 channels you can download here: http://www.bricksafe.com/files/afol1969/Instructions/RC_Unit.pdf
I've build both versions, so I can compare them.
IMHO, I really recommand you the MK3 version without suspensions with Firgelli actuators on the superstructure.
At first, the drive/steering properties are much better, also on carpets. The outriggers drive out with less speed, and the feet are stronger. The fake engine looks very natural with the high-speed cylinder driving. The Firgelli actuators look much better and can lift the boom in a higher angle. Two standard Firgelli's are enough to lift the boom, (when batteries in the BB are fully loaded)
There is no need to use an extra motor for the boom lifting, so that gives the possibility to build a more stable and stiffer superstructure.
So the MK3 version is for me the preferred and final model, I'm really happy with it.
Photos will follow soon.
So now, who starts to build a bigger version with 8 axles and Unimog tyres?
Greetings
Alex
-
I can't say this often enough, this is a 'phenomenal' build. The more I do in LDD, the more I appreciate how intricate the design is. It's taking several hours to do the virtual build, and that's a bit 'deceptive' (non representative) compared to the number of hours (or maybe weeks) the author invested into this.
That said, and for those of you who have built the actual/physical model, what is the function of two turntables stacked together?. As I'm only 'playing' with LDD, I can't figure out yet what they're for.
Edit: Never mind, I found it. On page 826 onward, only the turntable is shown for 'clarity'. The superstructure is built on top of the track frame. I was used to two parts built separately then assembled together in the final step, but here it's not the case.
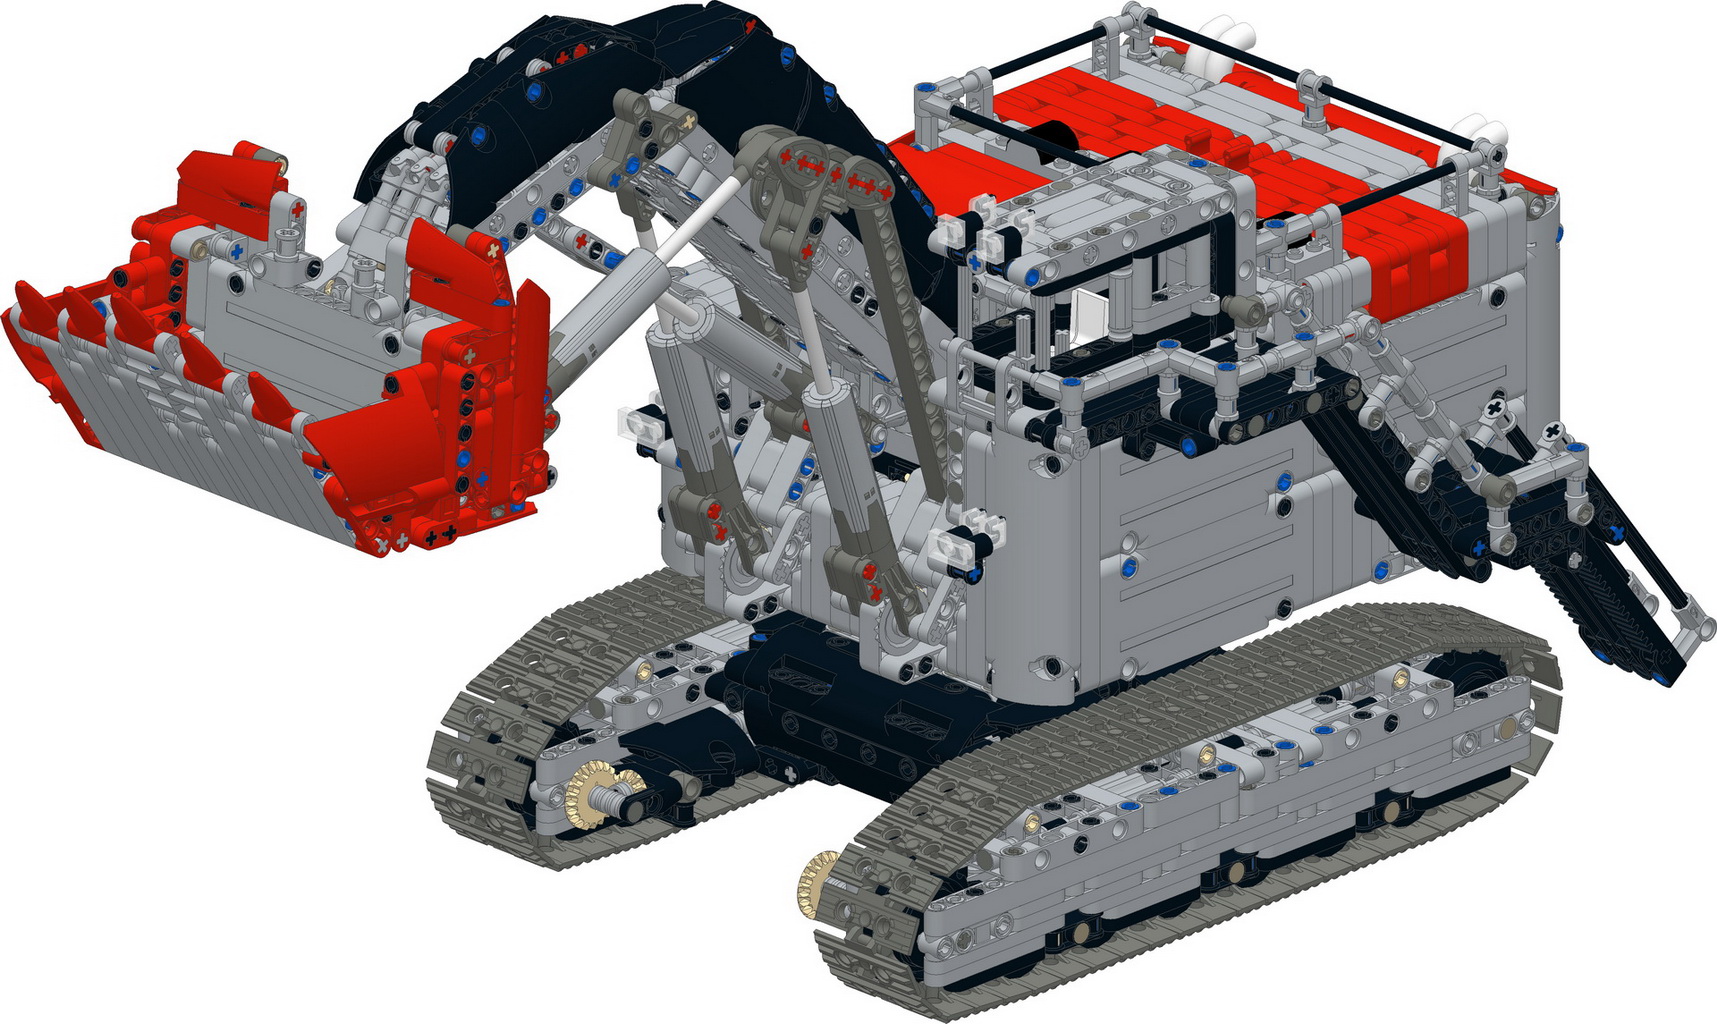
I just come to finish the LDRAW file for the excavator, I'll upload it in the next days. A quick'n dirty build stepping I've already made. So in next future time, I'll build the model, so I can go on to create the instructions with LPUB. But that will be a real challenge, there are so many submodels to integrate, so complex building steps, that I know that I'll not finish the inetructions before summer end.
Greetings
Alex
-
Blakbird, you're the man here!
Incredible work and impressive review, excellent renders
Have already downloaded the LDRAW file and say: Thanks for the massive effort
Greetings
Alex
-
Afol1969, do you have instruction for long version of boom? (not 5, but 6 segments)
No, I haven't. I've only the CAD file made from efferman's boom (see here: http://www.bricksafe.com/files/afol1969/Big_superstructure.mpd). And I cannot guarantee that all parts are complete as LDD has not all parts in the database, converting from LFX to LDR sometimes gives terrible results.
And for the moment I've not planned to make instructions of it, I've now other projects I'm working on them.
Greetings
Alex
-
I just finished the base-construction of this incredible MOC. INCREDIBLE!!
Now my question: are there any instructions for the superstructure of Efferman or any other? I only found the GMK6400.pdf with one superstructure.
There I miss the counterweights...
thanks
I'm still working on the MK-3 Version with the Firgelli actuators on the superstructure. The step orders are right now, and the part list available. Still a lot of notes to add, but I've uploaded an new draft, at least you can collect the parts and start the building.
http://www.bricksafe.com/files/afol1969/Instructions/GMK6400-MK3%20(1).pdf
Greetings
Alex
-
Hi, Grum64,
I'm back from the holydays, and now I see your building progress. Keep good on, you'll make it!
Myself I've to continue to finish the Grove MK-3 with Firgelli actuators.
Greetings
Alex
-
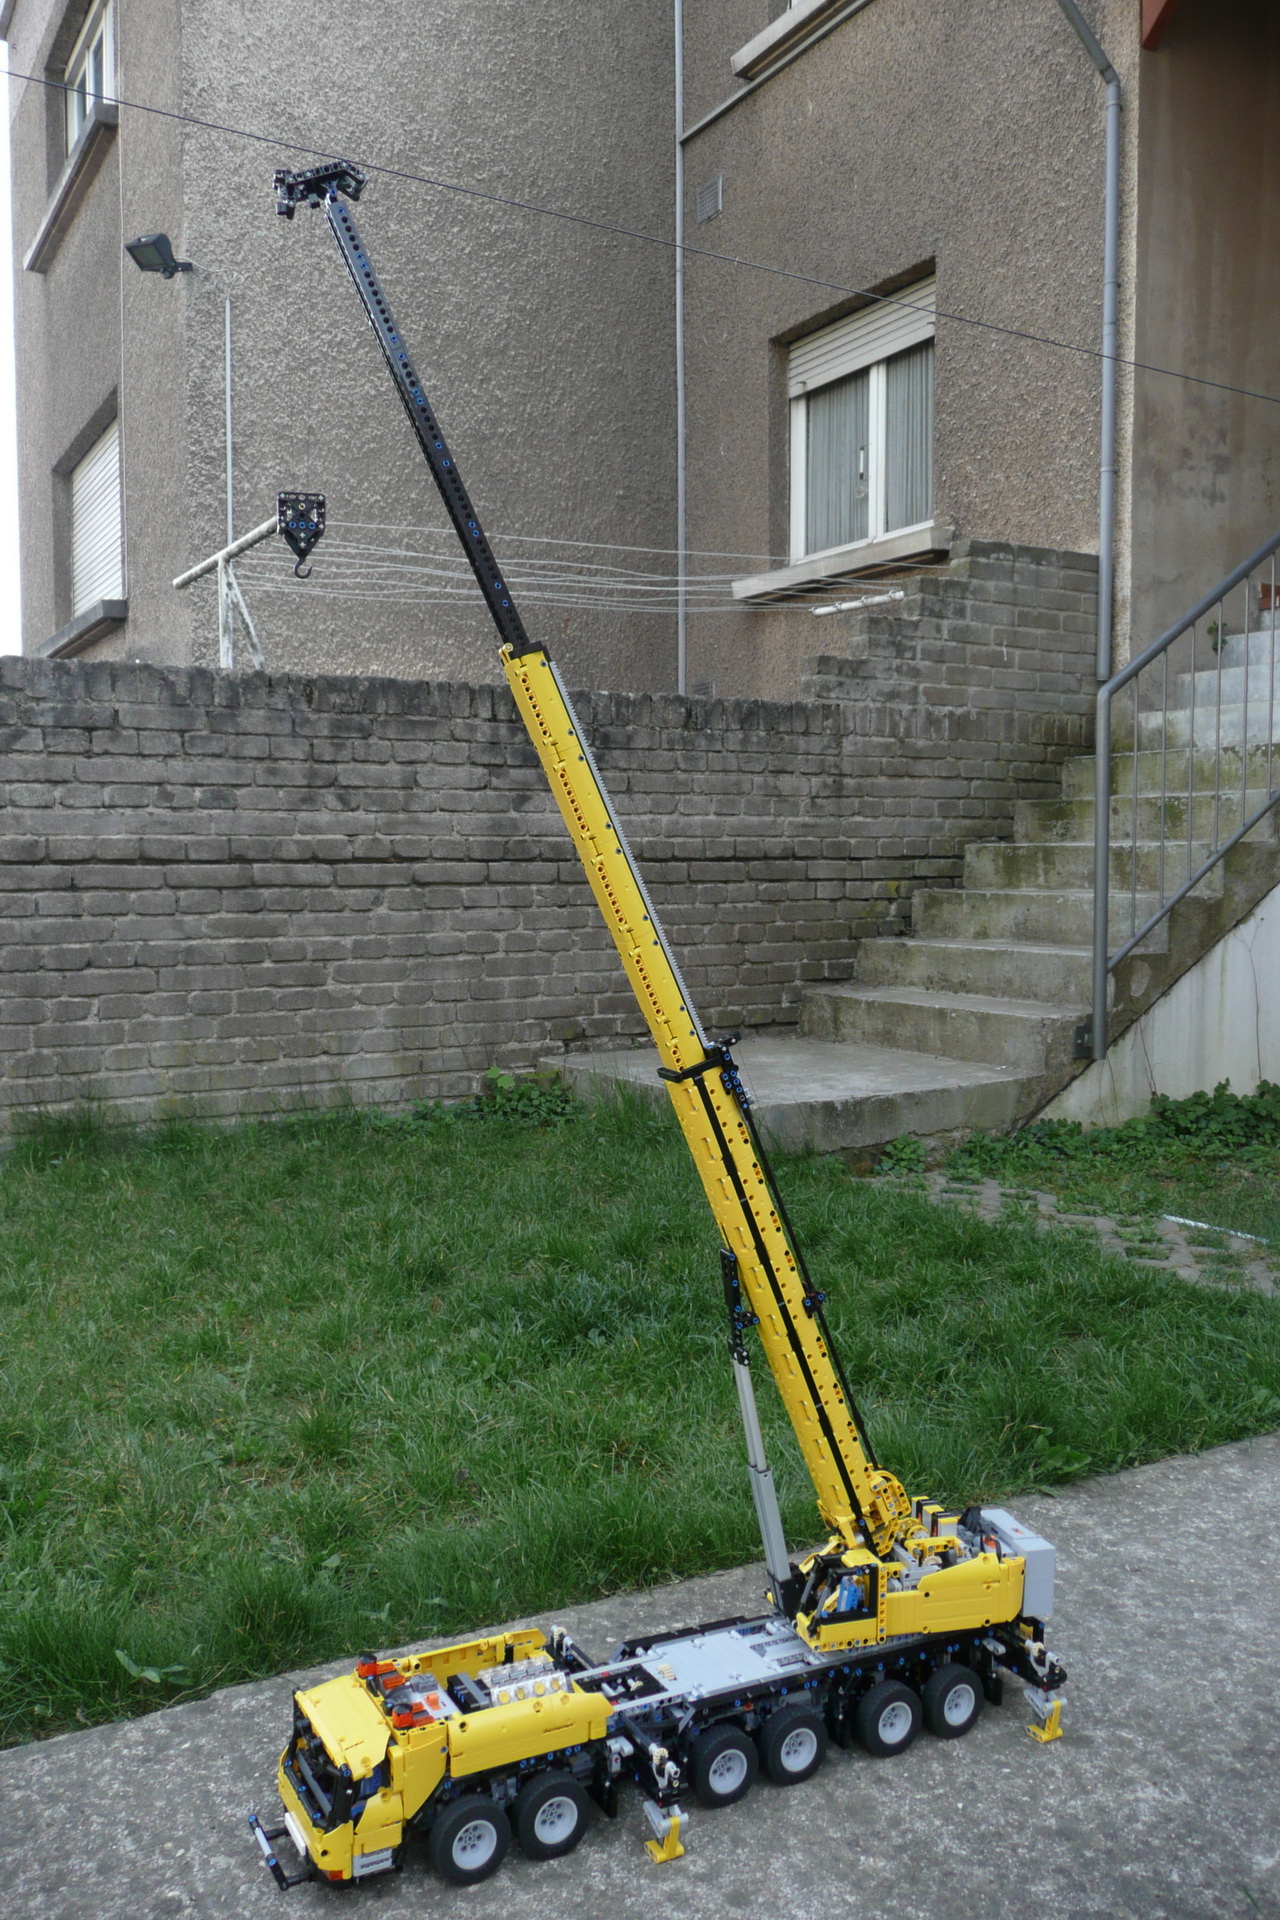
It looks so real to the actual crane with the longer actuators. Looking forward to see how the boom preforms and how the carrier move around with these cool superstructures!
I've made an demonstration with different boom rise angles:
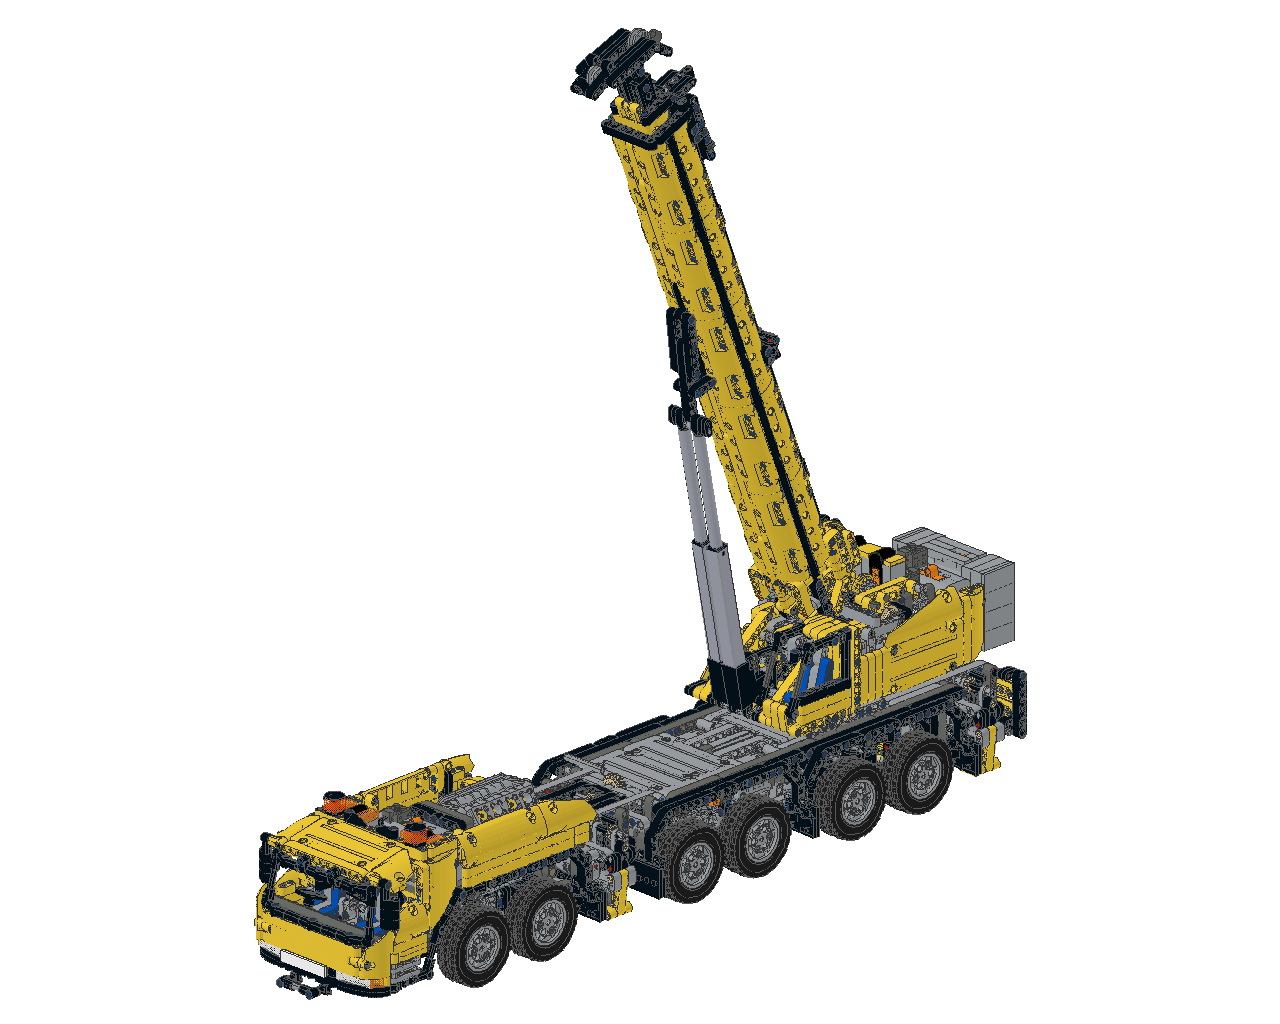

As you see, you can get an higher angle with additional liftarms whose function is like an actuator elongation. I was inspirated by efferman's boom construction. It needed a lot of tries, but I think now I've got the best results, the boom lift angle looks relistic, and there are no problems to raise it with standard Firgelli actuators. But it's the limit, a longer boom (like efferman's boom) needs down-geared actuators.
Greetings
Alex
-
Hi all,
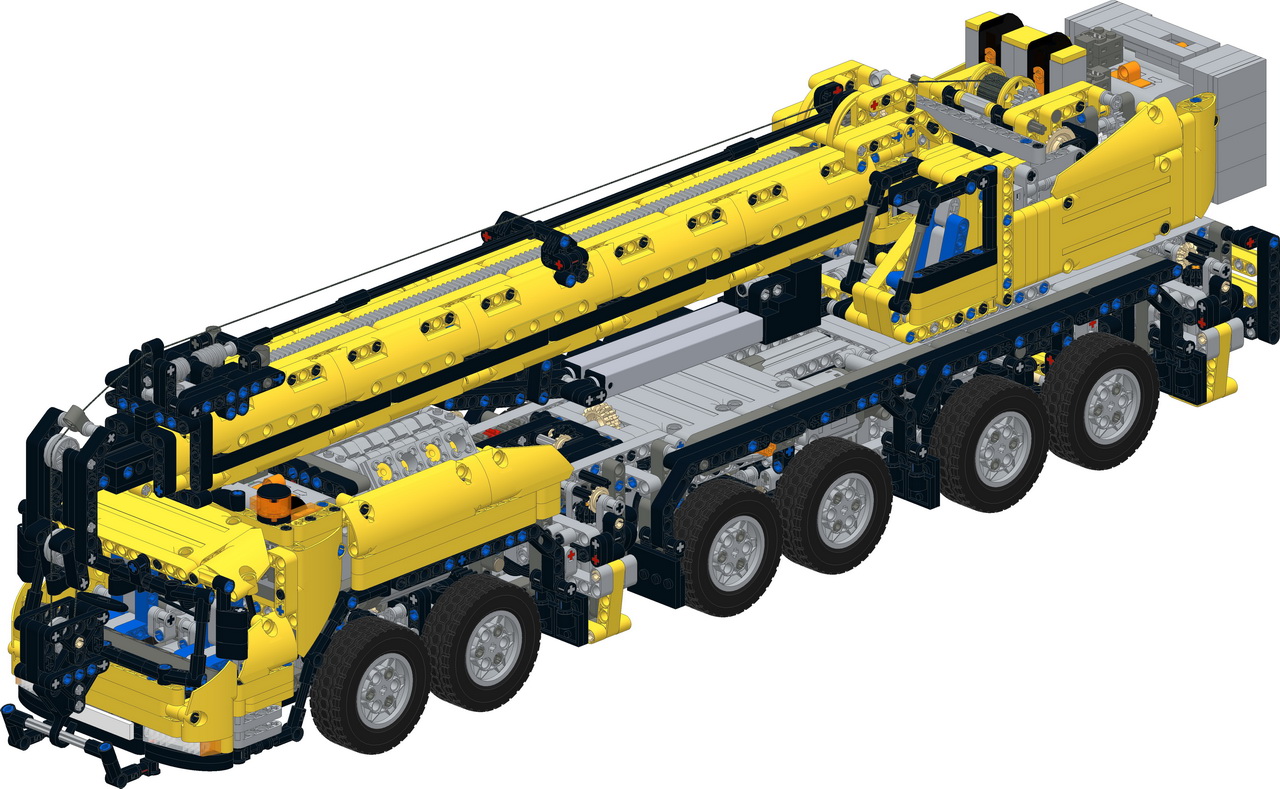
Now I think that I've the final and more or less perfect version from the MK3-crane with the modified superstructure (two Firgelli actuators)
Instructions will follow soon.
Greetings
Alex
-
Hi afol 1969
I have finished the Ultimate 42009 and have gathered the parts to start on the Grove 6400. Have you had time yet to convert efferman's crane to a PDF?
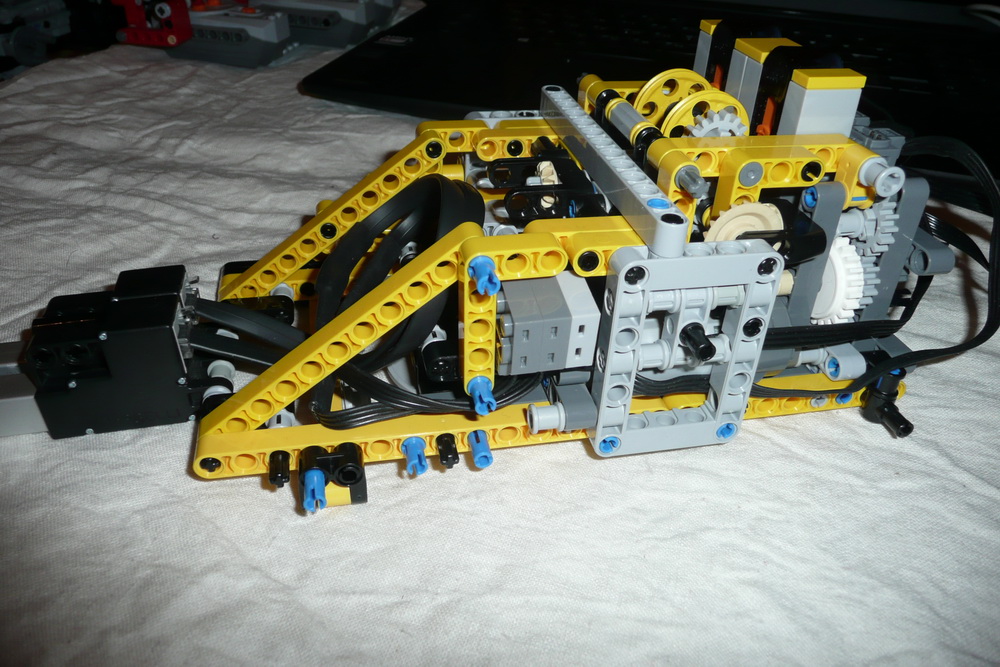
No, I didn't have time to make PDF instructions, there's just the CAD file available. Maybe there's a volunteer to make instructions, I'm working on other projects now - especially on gerger's crane boom with the Firgelli actuators. The superstructure I've modifiede and I'm working on instructions. For the boom I'd to make several tries to get the best function and the highest lift angle. After some tests, I can say that the boom can be lift with two standard Firgelli acutators - with fully charded batteries in the BB. I'm now on the third try - and the last to have the perfect combination. But each time I've partially to disassemble the boom. Here some pictures after the first modification try:
Greetings
Alex
-
Good Job, Therion
Very impressive. Still on the CAD file creating, I struggle on finding out which PF connector belongs to which motor/extension, I have to review shoes's instructions more times, or better, have a tracing of all wires. As I want to build it too, I'll make photos from the cabling. I'm now on page 844 from 1640 (of the superstructure)
Greetings
Alex
[MOC REVIEW] Grove GMK6400 Mobile Crane
in LEGO Technic, Mindstorms, Model Team and Scale Modeling
Posted
Hi Alex C,
The instructions are soon ready, definitively I can upload them next week. Notes and photos are made, just creating a page with the superstructure mechanical/electrical scheme.
I'm sorry that it took long time, but I am a perfectionist to create instructions, I make controls again and again, and I want to make them easy understandable that it shouldn't appear building problems.
Greetings
Alex