

afol1969
-
Content Count
397 -
Joined
-
Last visited
Posts posted by afol1969
-
-
Hi legolijntje,
Thanks for the suggestion. I've found a complete turntable in the part list (50163.dat). I've already made the change in the CAD file, and I' upload the upgraded PDF file soon. By the way, I agree to blakbirds statement, a use of two separate turntable parts allows to create individual angles for connected constructions. But it's possible too to take right angles for the construction without problems.
For building, I used the complete turntables, an I fixed the winding guide easily with the 4 stop pins on the turntable support
@blakbird: You can download the CAD file, and take a look at side panel beams in ~45° angles, you see the difference that the pins fit exactly in the CAD model. They hold the construction in exact right angles, but I had to modify the drum front rollers a half stud length, for that the drum fits correctly on the frame.
In general, in most case I find some few things that can be modified. For example to make the construction more stable. For the thread spools I used shorter axles with additional axle connectors, because the longer axles bent too much under the drum weight.
Greetings
Alex
Edit: Drum driving tested and all ok, corrections in the instructions are made. Final instructions uploaded on 4 march 2015, modified with a train regulator as blakbird suggested.
-
Hi all,
As promised, I've uploaded the Instructions from Nico71's Braiding Machine.
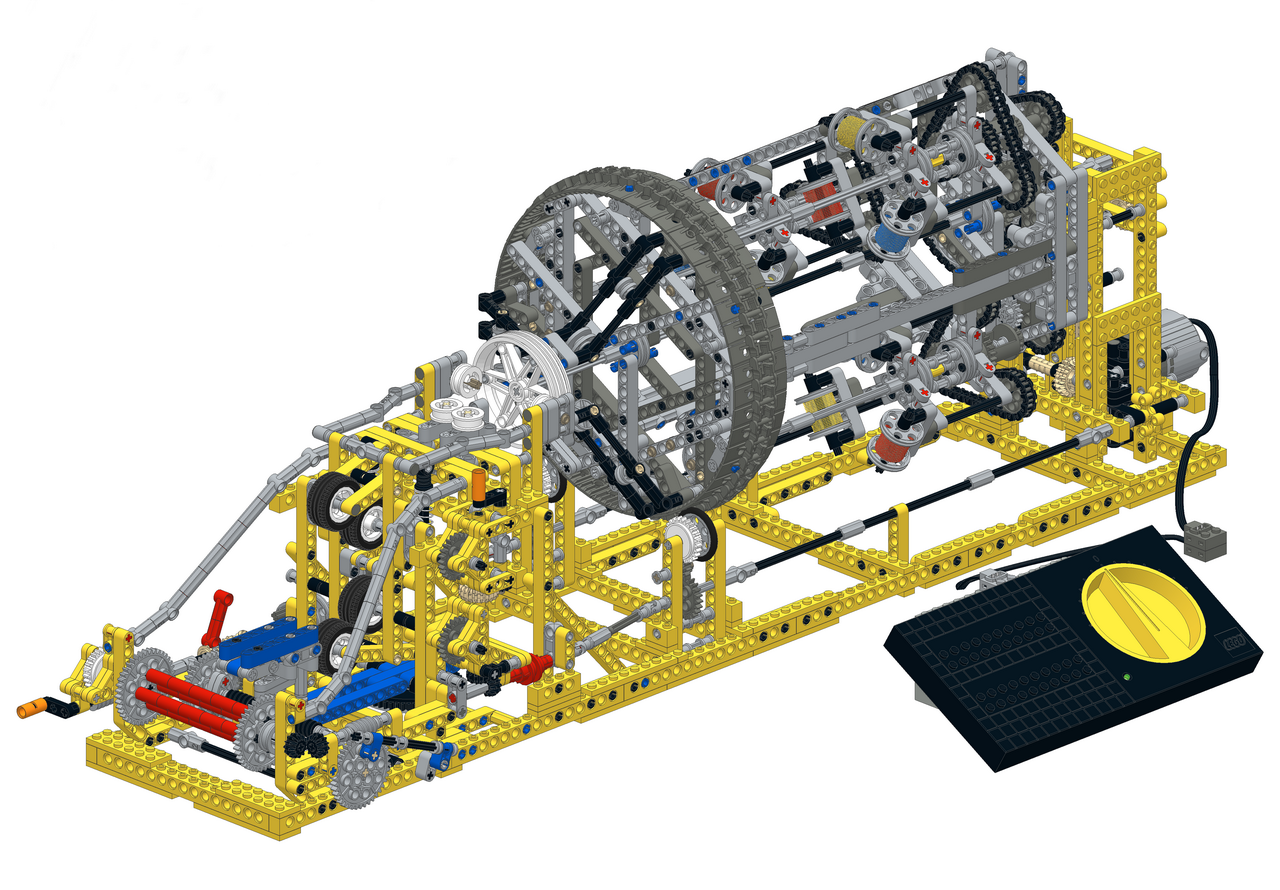
It's a first release, but ready for building. It's a motorized version. It contains minimal modifications, for ex. beams with different length which do not stress the panel construction, other plates, some different parts....Some few errors were in the Cad file, I'd to redraw the chain guides to get the correct number of chain links, and a Pin in the reversing link was in wrong place. But for such a complex construction blakbird has made a perfect work in short time, a CAD file helps a lot to create instructions. But it was still a lot of work which needed much concentration.
I've not tested the braiding mechanism, because I've not the right strings for braiding. I've tried with knitting wool, but it was to thick for correct working.
I've not the time for a test now, I go to the holidays in some days. But I'll upload a second version later, with additional photos and explanations. Who wants to build it, do it, and test it! Maybe someone finds an error in the instructions where I can make the correction before presenting the updated Instructions.
NOTE 12.01.2016 : The instructions are now for download on Nico71's web site.
Greetings
Alex
-
After reading this topic, it's sure that this awesome and impressive excavator is on my build list. And what an effort to make instructions with so many pages!
To answer the question about instructions by LPUB with callouts and Submodels: I think the time which Sheo spent on creating instructions, we should appreciate this and take his instructions as they are. As they are good enough to build the model, there's no need to recreate "better" instructions. Only a part list in Brickstore format would be useful, and a CAD file, that blakbird can create renders. We should more concentrate on errors / for suggestions in the instructions, and for that we need to wait for the complete instructions.
Greetings
Alex
-
Alex,
The link is not available anymore. Can you share the PDF again?
Hi Jim,
I've now all the instruction files on bricksafe. Because sometimes the dropbox links were broken or deleted.
See here:
http://www.bricksafe.com/files/afol1969/Instructions/Boom%2042009.mpd
http://www.bricksafe.com/files/afol1969/Instructions/Boom%2042009.pdf
Note: The link for the instructions is also in my signature.
Greetings
Alex
-
Hi Rob,
I don't take to much worth on using the exact colors, especially an small parts like connectors, gears etc. I use the colors which I have in my parts stock. So in this case for the Ultimate 42009 I used these parts in black, which is much easier to get.
Greetings
Alex
-
This backhoe is also on my build-list since long time. It's amazing to put so many functions in a complex and compact construction!
Thanks for the great and detailed review

Greetings
Alex
-
Thank you !
A new creation : a hot bulb tractor with a special features : adjustable ignition point :
:)
Hi, Nico,
I've made a CAD file: http://www.bricksafe.com/files/afol1969/Instructions/Hot%20Bulb%20Tractor.mpd
@blakbird: Can you make a render of it?

Greetings
Alex
-
Amazing! The book is a must-have for me - a good collection of amazing models from our hard-core Technic moccers - (and I'm honored that there are models where I've made the instructions
) I already see my money gone by buying parts if I want build some models 
Greetings
Alex
-
Thanks
 Looks really good. And well-made instructions . I think I've more or less all the parts with electric parts included to build- except the green parts. But I can use them in yellow.
Greetings
Alex
-
awesome! but why not using the rechargeable 7.2 Volt battery box instead of modifying the standard one?... the 7.2 is way lighter and should do the job very well...
I already thought about it, but that needs major modifications to maintain the design. And there isn't much weight difference, and I have so many standard battery boxes that there's no problem to modify one. And for that I used a box already with little damage.
@Theo: For the crane, it needs some cooperation from our instruction masters here
. I could do it alone, beyond question, but maybe I'll not finish the instructions before November, and it would be fine to have a donation that I could buy the missing parts to build it. I don't make instructions available without building the model before.And currently I'm on the work for the braiding machine. The instructions are partially ready, but I still wait for parts I've bought at Bricklink. There were errors in the CAD file, for example I need more chain links than indicated in the part list.
Greetings
Alex
-
New instructions available: RC motorized 8-Leg spider from Scott Pomeroy.
As I noticed that the legs construction was a little fragile, I had to do some reinforcement modifications, and the battery box was too heavy. A major modification for a 9V battery solved the problem. And the spider walks now fluently. But the ground must be smooth, and the ends of the leg parts need to be protected with tape, plaster or else to avoid scratches and damages.
A cool MOC to frighten women

Instructions can be downloaded here: http://www.bricksafe...-leg spider.pdf
Greetings
Alex
-
That's done, the CAD file is ready for working on it!
It was more work than I thought, because of correcting lots of angles that all parts fits correctly together, especially on the cabin. After opening and reviewing the file with Notepad, I think I don't forgotten any parts. If parts are missing or displaced, this may be appear in the original LFX file. I found some, but there can be more. At least it will be visible by doing the stepping.
You can can download the file here: http://www.bricksafe.com/files/afol1969/Grove%20GMK6400.mpd
Greetings
Alex
-
I am so ready to build this beautiful, exquisite model. When, oh when, oh WHEN can we have the instructions?!
Good instructions will take their time
. I'm still reviewing the parts position order, and on the way I've noticed that there are still some minor errors in the CAD file, like for ex. pins which are displaced of a half bush length, some weird part angles...and I'd to correct the shock absorber position, same for the pin connector toggle joints mounted on wrong side.But all errors only can be eliminated if the file is stepped and at least build the model.
I've already on purchasing the necessary parts, and I think I have get all within next month.
It will be fine if within next two month someone else can take the task for the Step/LPUB work - and the LSynth drawing (not necessary if clear notes where electric connections do belong)
In September I can build up the model and make the final instructions finish, and maybe I find some suggestions/modifications to do. And if I see the fully extended boom, I indeed think about a further turntable counterweight resp. what to modify if the boom bends too much....
Greetings
Alex
-
If you are reordering it then I will wait for your file as not to get in your way.
That's ok. If all positions are correct, it will give a better visibility to the part placements, and it will be easier if something to change. But some parts have rather weird angle positions, that I must take care how to correct them.
What do you plan on working for the instructions? Stepping? Creating sub-models? Please let me know on what you'll work on, so we can coordinate the tasks.
Another note: I still have an unknown part while opening the file; it's the new 3L axle pin 11214.dat. It seems still not be available in the parts folder, even I made a parts scan to update the list.
Greetings
Alex
-
I thought you said you didn't have time to work on it until September?
Right. But for correcting the parts positions, it goes rather quick. Next week I can send you the CAD file. The stepping work I'll start at the beginning of September, same for the build process. So first I've to check up the inventory and buy the necessary parts.
Greetings
Alex
-
After a first look, I have 95% of the part list available, only a few parts I've to buy. For perfect Instructions, I have to build the model - and to disassemble and rebuild it for control.
@Alasdair: I don't think that LPUB crashes due to the parts amount, Madocas' Truck has more parts, and I didn't have any problems (except that LPUB is very slow) But sometimes LPUB crashes where I don't find the reason.
I've opened the Cad file, and the are three unknown parts. But that's the minor problem. But first I' have to correct the position/rotation points for all parts. So let's begin
Greetings
Alex
-
Hi Alasdair & blakbird,
It would be great if you can create a CAD file from the LFX file. My offer to create the instructions is still valid
The boom itself I think is quick made, because it only differs minimal from the extended Boom created by Christophe Moitte.Another thing is the turntable. Maybe I have to make a little modification what concerns the boom counterweight; I had to use a second battery box for a better balance. (see pictures in the extended boom instructions) But I'll see, if I've build the model, and maybe I still have to buy some parts..
But the the instruction project I'll not start before September, in August I'm in holidays, and before I'll have finished the instructions for the RC 8-leg Spider and Nico71s' Braiding machine.
Greetings
Alex
-
Difficult to say.
I don't have the 42009 and neither the 420030, but can build both of them cause of parts from 8275,8421, 8043 and some more....but if I don't have parts at all for beginning, I'll tend to buy both sets 42009 and 42030, where I could start from. Buying sets is IMHO the best way to get a big amount of parts for a reasonable price.
Greetings
Alex
-
Hi all, i am new to here, it is a nightmare to put this servo motor in this part? I don't want to disassemble the whole thing -.-
First: Welcome to EB
Sometimes you are forced to disassemble the complete chassis to make the modifications, I'd to do it three times before I finally finished the instructions from Marcus53s' model.
@Pat-Ard: Do you have an LFX-file or some more photos from the front axle? If so, I can add the modifications in the instructions.
Greetings
Alex
-
when i open the file it says that 12 pieces was removed from the model, anybody know what pieces that was removed?
Same here. If I don't know which parts are missing, surely I'm not able to build the model correctly before making instructions.
Greetings
Alex
-
I have most of them shown in the first post, but until now I haven't found what to do or how to use them.
Greetings
Alex
-
Hi All,
I've the final instructions for Marcus53s' Unimog, I hope I've eliminated all errors.
Have a glad building
http://www.bricksafe.com/files/afol1969/Instructions/UnimogX.pdf
Now I can start new projects. But it's summer now, so I'll spend more time outside.....so it will take more time to work on new instructions

Greetings
Alex
-
I've just started a new project, a remote controlled spider with 8 legs, with battery box on the back. Soon I noticed, that the box ist too heavy and the legs bend. So I've modified the battery box that I can place one 9V battery in it, that makes the box much lighter. Photos are soon following, when I'll present the instructions.
Greetings
Alex
-
And we have a winner! O.o Wow stunningly painful. I'm impressed that you were willing to share it.
It's time I should present my first MOC, if I'll find the time to build one. I'm sure it will be a laughing number too, because I think it will look like a children's MOC - with functions which do not work

Very funny thread
Greetings
Alex
[MOD] 42009 Mobile Crane - MODs and Improvements
in LEGO Technic, Mindstorms, Model Team and Scale Modeling
Posted
@blakbird & gerger:
Amazing work you've done, respect!
Now I'm back from the holidays, so lot of news tor read about the crane. Gerger made an update and stepped the carrier, and blakbird has started with the instructions. So no need that I make the instructions by myself, but I can review the MLCAD and LPUB steps to see if any changes can be made, for ex. to make steps clearer and eliminate errors, combining steps to use more parts in one step and so on.
Also I've seen the steps need different rotation angles to make all parts built visible.
Making building instructions is a massive work, so I understand that blakbird is not going on perfection, but I can do that task. My offer on collaboration for the project is still valid.
Greetings
Alex