

DaFokka
-
Content Count
61 -
Joined
-
Last visited
Posts posted by DaFokka
-
-
My girlfriend gave me the 4260 Road Work Crew for the holidays (you can see her present in the back of the pictures). I thought it'd be fun to have a go at building a C-Model. I grew up in a rural community and combine harvesters were a common sight in my youth. Without further ado, this is the result:
The model has the following functionality:
- The mower drives the conveyor
- The conveyor almost reaches the hopper
- The hopper can be disconnected
- Rear-wheel steering
The model is more fragile than I would have liked but this is the best I could manage with the limited part selection. The colours, stickers and the anniversary brick work out quite nicely.
Some more pictures can be found in the Instagram post.
-
I have finished building this behemoth and here are some thoughts:
-
The build can get a bit repetitive. This is the first time I have ever wished for a non-seniorized (the forum replaces the term I wanted to use with '<insert that tiresome argument>'
 ) piece. I am sure your fingers will do the same after sliding 300+ white round bricks on technic axles.
- The pacing of the build is great though. The coaster is divided in two sections which take roughly the same time to build. Each section starts out by laying out the floor plan. Then the supporting frame is built. Fitting the roller coaster pieces is very satisfying. Inbetween there are some awesome mini-builds to break up the monotony. The stalls and the cotton candy car (in the Netherlands they are called suikerspinnen or sugar spiders) are nice but my favourite is the COASTER logo, which just is a work of art in itself.
- The finished model is just huge. Make sure you actually have room to display it. It genuinely is a marvelous display piece and people of all ages will love to play with it (at least all my employees did).
-
The main attraction (
 ) of the model is its functionality. The roller coaster performs splendidly. The chain lift, the pusher wheels at the top, the siding, the station brake and the pusher wheel at the station all work together very well. The station pusher wheel has a limiting mechanism so you can't turn it the wrong way. My only criticism is that the main drive should have a similar system.
- if you add a PF M motor, you can put the roller coaster in a continuous loop, which works equally well.
- In what must have been over 200 rounds, the train has not gotten stuck once. Of course, you have to be vary careful to make sure everything is connected properly but once it is, it tends to stay put.
- The coaster comes with two three-car trains. It is also possible to join them together to form a six car train, but some minor modifications are needed. The wheels on the top tend to conflict which each other. This is easily solved by removing the first and the third pusher wheel. The six car train is a bit slower and more stable, but it won't fit in the station. I guess it all comes down to preference.
- Unless you want to build bigger coasters (and why wouldn't you), this is a poor parts pack. There are 200+ chain links, 300+ white round bricks and 150+ green 2x2 jumper plates but there must be cheaper ways to get them than a €350 set.
-
The build can get a bit repetitive. This is the first time I have ever wished for a non-seniorized (the forum replaces the term I wanted to use with '<insert that tiresome argument>'
-
On 5/10/2018 at 8:08 PM, Tomahawker said:What's the reason for the arrows showing the propellor rotation? That seems an obvious and unnecessary call out, unless there is some functionality linked to the prop rotation.
Any thoughts?
I don't know why they added the arrows, but they are oriented the wrong way. If the prop would rotate clockwise, the plane would move backward.
-
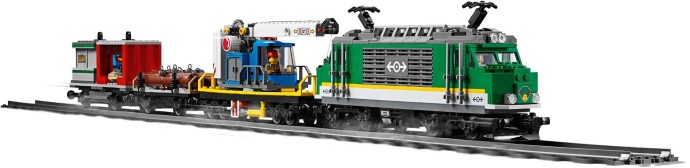
It looks like 8 red train windows are included, as well as 6 big train wheels in black
EDIT: Looks like I'm wrong on both counts. The windows are not of the classic train type. And there are 4 big train wheels with a flange and 2 big ones without a flange. Still, it looks like a great loc!
-
1 minute ago, Dorino said:Can anyone tell what is the colour of windshield glass in green locomotive? I really like that piece and i am just hoping it's not trans-light-blue. I can't really tell why i am not fan of that blue, I think trans-black and trans-clear looks more serious.
It looks trans black to me on the images released on brickset (you can find them earlier in this thread).
-
Pics of both sets are available at Brickset. This is the freight train:
-
I just managed to place an order (I am in the Netherlands). It is not showing up in my order list though and I haven't received a confirmation e-mail. Fingers crossed!
-
That's a nice GBC. Kudo's on the video! I think it's great you didn't put in your own music - the balls have a rhythm of their own.
-
Did you consider moving the driving wheels to the sides of the track? That way you could lower the center of gravity considerably, which should lessen the wobbling by quite a bit. It might also help with the steering.
-
16 hours ago, ColletArrow said:On the other hand, when I first saw it I presumed it would simply be colour detection, similar to the Mindstorms. Why over-complicate a young child's train set?
What if the bright colours are for the young child and the Bluetooth is for us? A man can dream, no?
-
Actually, I think the Duplo train is the most exciting innovation. I suppose those 'smart bricks' contain some kind of RFID chip. If that is the case, it would be possible to build stuff like block signals or switches based on the train content.
-
Great review, I subscribed!
-
I ordered one from A-Tembo in the Netherlands yesterday, got delivered today. At €143 (plus €5 shipping) it was a pretty good deal too.
-
When I read the title I did not expect this to be an actual dual voltage loc ;). Great work!
-
20 hours ago, Sariel said:I sense a lot of unboxing ahead.
<image>
Awesome, I've been obsessively refreshing your channel for the last couple of days!
-
Your reviews are always a joy to read. A bit of humour, some obscure details and great photography: 5/5, would read again.
-
14: 10
9: 6
18: 4
20: 3
10: 2
22: 1 -
One way to limit the amount of space needed is to build in two passes. In the first pass, you ignore colors altogether. This simplifies searching since the search space is smaller. Once you are fully content with structure and functionality, you will know exactly how many bricks you need in which color. Now you can gather all the parts from your collection, which is much more efficient than searching during the build. Of course, if you are really lazy, you can also order the parts from BrickLink and outsource the searching ;).
-
Nice mechanism, smooth operation and great photography. Really a nice GBC!
-
Mine arrived a week ago but I only built it yesterday since it was a birthday present to myself. That wait definitely took some self-control :D.
I agree with almost everyone here: This is a great set, possibly my favourite ever. Of course the subject matter is epic. But the build itself is lovely from the first to the 1969th brick (actually, brick #1969 is the brick separator but let's not split hairs ;)). Building this set is an excellent way to appreciate the sheer scale of the Saturn V. The build is subdivided in 12 sealed bags. The last one contains command module, the escape rocket, the lander, the service module, the splashed down command module, the stands, the lunar diorama and the payload fairing. The remaining 11 bags are dedicated to building the three stages that propel the relatively tiny service module+lander to a lunar intercept trajectory. Sometimes I change round the order of the bags to make for a more interesting build, but in this case building bottom-up is a great way to appreciate the dimensions and structure of the rocket.
The build is a masterclass in SNOT techniques. Almost every technique in the book is used to create an attractive shape, an impressive level of detail and a surprisingly sturdy model. Last but not least: If you would want to use this set as a parts pack (which I would consider heresy, by the way), you'll never need to bricklink another SNOT connector ever since the set is absolutely filled with them.
This set is a must-have. If you don't get it, you will regret it.
-
Amazing. I ordered mine on wednesday night 9PM (the Netherlands) and it was already on backorder. No indication as to the delivery date.
-
Hi Doug, it's nice to see how inventive you are. You are running into some of the problems I've also run into, although I haven't explored the mechanism as thoroughly as you have. The problem is that the mechanism both needs to provide quite some torque, needs to be very precise and also needs to run smoothly. I'm curious to see if the stronger differential will make a difference

-
- Lower left: This is a turntable. It allows you to rotate one structure in relation to another one like for instance the turret of a tank.
- Top left: This cam can be used in camshaft mechanisms. Also, it allows for a 1.5 stud offset which can be useful in some mechanisms, especially crankshafts
- Bottom middle: These gearboxes allows easy fitting of a worm wheel and a 24t gear for a 1:24 reduction in rotational speed and a 24x increase in torque.
- Center left: This is a differential, allowing the outer driven wheel to turn faster than the inner one in a turn
- Center Right: This is a clutch, used in gearboxes. You'll need additional parts for it.
- Right: These rods are used for suspension in cases there there needs to be more than one degree of freedom
-
Your progress is looking really impressive. And it looks pretty compact too, loving it!

Technic 2020 Set Discussion
in LEGO Technic, Mindstorms, Model Team and Scale Modeling
Posted · Edited by DaFokka
Promobricks has images of the H2 sets.
https://www.promobricks.de/lego-technic-sommer-2020-bilder/102934/
I'm not sure of the Volvo Articulated Hauler. €250 for a just three functions seems a little steep.
EDIT: Took out the images themselves because they were too large.