
Gianluca Morelli
-
Content Count
19 -
Joined
-
Last visited
Posts posted by Gianluca Morelli
-
-
Received my BaP order last friday (ordered on jan 1st) and it was like 50% incomplete. All the small stuff was missing, all the 1x8 tiles, etc. Total value 160 euros, received half of it.
Also waiting for another order I made on Dec 14th and still not showing up. I will never understand the logic behind shipping a 5 euros set with tracking, but a 100 euros BaP by standard mail.
-
Hi,
is there a new reference for the minifigure hand? They were previously available as 3820 but they are now all sold out (and without picture).
Thanks,
Gianluca
-
8 hours ago, Exetrius said:General advice to all: duplicate your tab before clicking "Confirm Order", it will duplicate your cart as well so you have a back-up.
Nice, can it be done with firefox/windows?
-
17 hours ago, Tusserte said:haul from December 28 finally showed up! Can’t wait for the one I just placed, it will dwarf this!
Where do the torsos with white hands come from?
[EDIT] Found: winter village firemen.
-
1 hour ago, BaristaBricks said:What color is on the left side with the dish and 2x3 shield tiles? Looks like teal but they don't make the shield in that color
Isn't it sand green?
-
Wow! It looks just like those cross-section images in the non-fiction castle books in my library.
looks like you got inspiration from Stephen Biesty


-
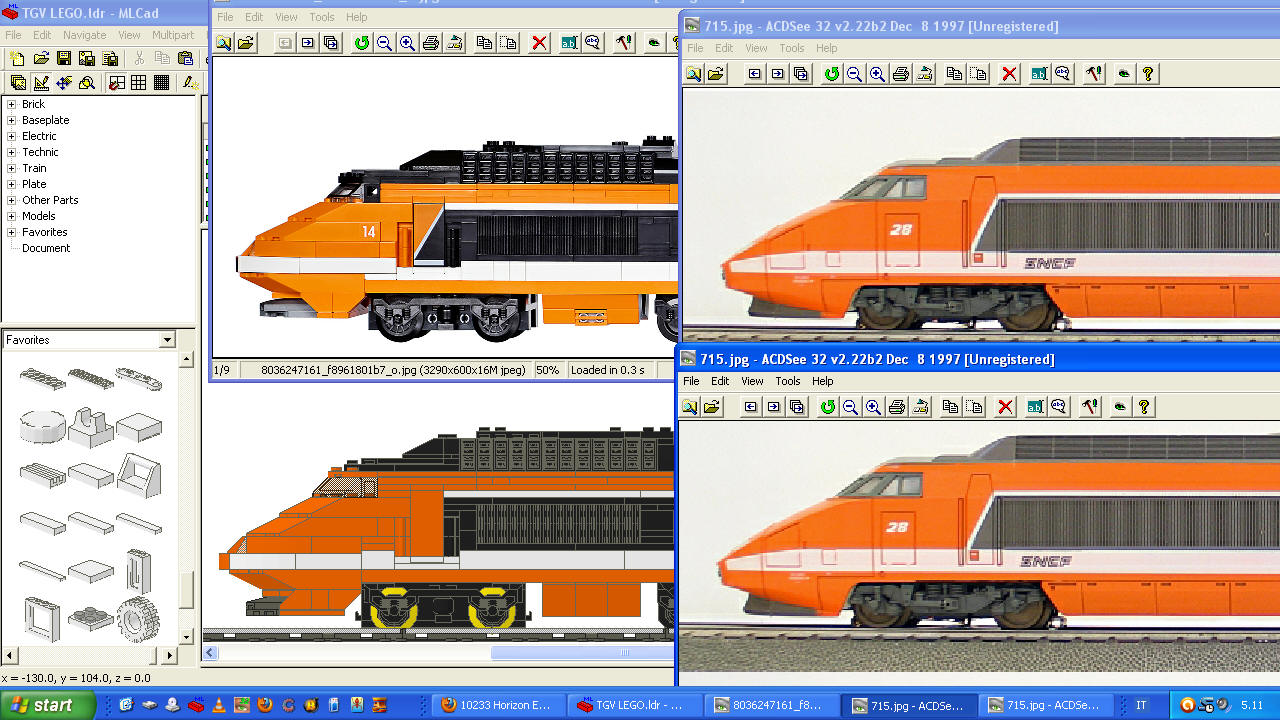
Being a long time TGV PSE fan, I made some light modifications to the nose of the engine. This because the nose is too high (even the white stripe on the side points upwards instead of downwards...)
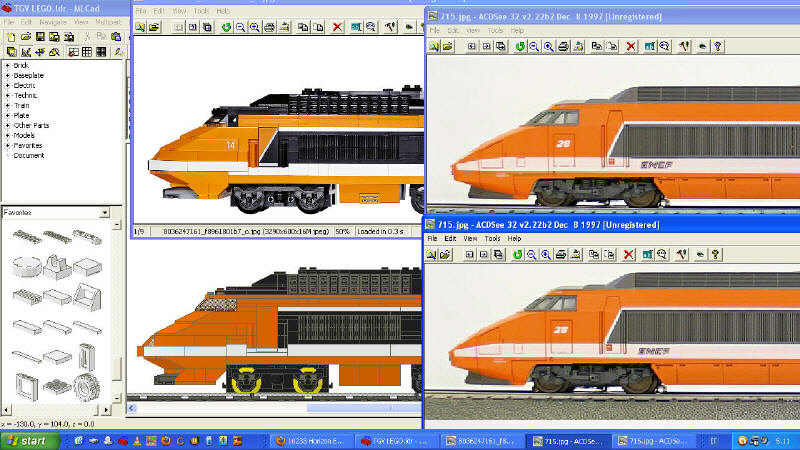
(full size image here: http://www.brickshelf.com/gallery/gm/OtherStuff/screen.jpg )
The side 1x6 white tiles become 1x4 tiles next to a 1x3 white brick and similarly the side 1x5 (1x4 + 1x1, actually...) orange tiles become 1x3 orange tiles next to two 1x2 orange plates stacked together.
This allows all the nose block to be moved 1 plate downwards. To compensate this, I added 2 orange 30357 (Plate, Round Corner 3 x 3) over the windscreen. And yes, the two black headlight bricks near the windcreen became two transparent 1x1 bricks...)
This modification also makes the front spoiler closer to the rail. But there's a couple ot bad things:
1. moving the big orange 32084s (Wedges 6 x 8 Cutout) "eats" the space for stud on the orange 1x1 brick with handle next to the door (it is 1/2 stud inside the wall so it needs a tile or jumper on top)
2. I'm not sure if the train motor can freely rotate
Not that I can't solve these issues... ;-)
Now, the next big thing to change is the position of the front bogie, that needs to be moved two studs forward. This can be achieved redesigning totally the front spoiler, aka not using the upsidedown 32084 (Wedge 6 x 8 Cutout) and moving the 6x28 train plate 1 or 2 studs forward.
But now it's 5.53 AM so it'd bedtime :-P
-
Searching "haunted" on brickshelf, this is the first picture you see:
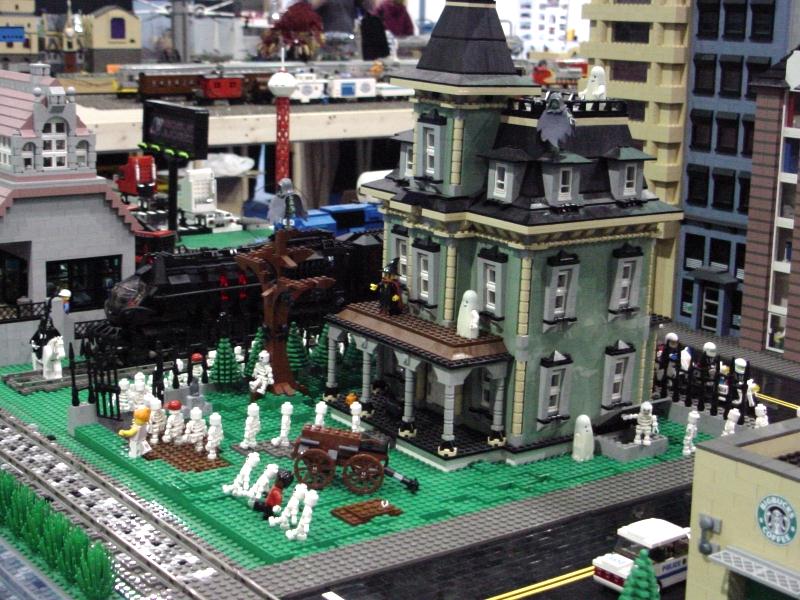
which is very similr to 10228:
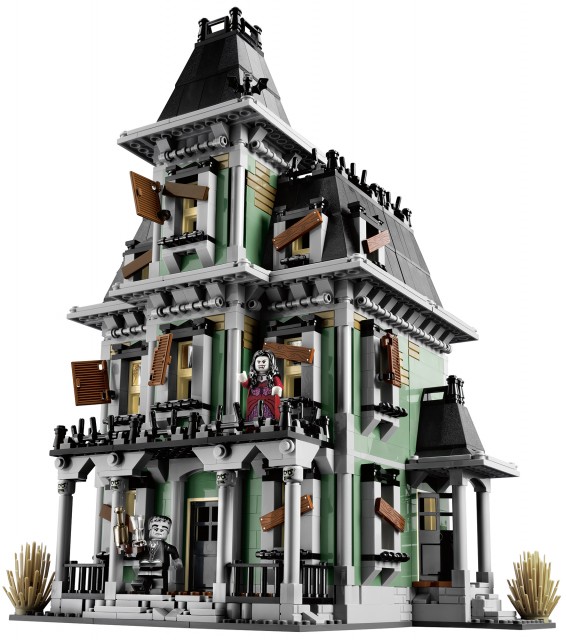
Should I say "OOOPS"? Or maybe who built that MOC is now a TLC set designer?
Also, in the upper floor there is a wardrobe with a 1x3x4 reddish brown door, that looks unpaired:
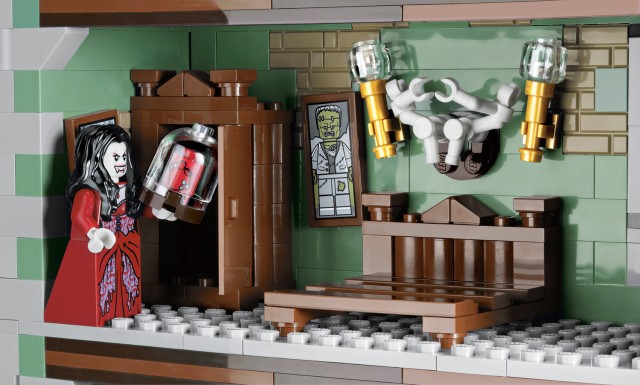
Those doors are so useful for us train builders, I hope we'll soon see its counterpart.
And BTW, wouldn't it be nice if we had such a set every year, for Halloween?
Every Halloween a new haunted house... creepy, eh?

-
OK, I finally succeeded in separating them:
1. slide a big knife blade between the two parts (on the wheel attachment side,
where the diameter is 3 studs)
2. slide another big knife blade, parallel to the first, in the same slot but
on the other side
3. rotate (twist) the knifes in opposite direction (pull one, push the other)
SAFETY WARNING: this might be a dangerous procedure, do it at your own responsibility.
Use big kitchen knives, the ones for cutting meat, smooth blade (no theeth).
If the blade is too thin and flexible, it could come away from the slot and hurt
you. Also, if the blade gets broken, pieces of it might hurt you.
Do point 3. at the biggest possible distance from your body, with eyelids closed
and looking in another direction.
Cheers,
Gianluca
-
Hi, did anyone succeed in disengaging these two parts? (and HOW?)
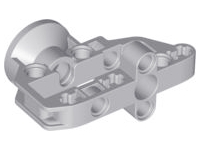
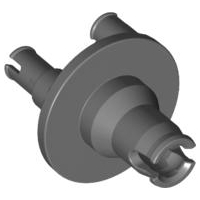
Thanks in advance, this is driving me mad...
Gianluca
-
Brickshelf and "2012" were my friends, and they can soon be yours : )
Thanks. Couldn't imagime it was that easy
Still missing pic 75 and 78-83...

-
I have them all in a zip file if anyone wants them emailing to them, they are well worth the look as I like the look of the new Dino sets and Fire sets.
If you have pics 75-83 please email the to me. Thanks

-
I am too stupid to find them I suppose...
 I only pass by those usual suspects, the SW, Dino and whatsoever pages. I only saw the Fire page and I have to say .. yucks.. the fire truck is somewhat nice but has very classic design. No offense, but that is how 12 year olds would build one. Lego was so advanced with their SNOT trucks and now this? I seriously hope the other trucks will be better, otherwise the years old cement mixer will be the peak of their truck design I am afraid.
If anyone could give a hint with what words where to look, that'd be splendid. Flickr and BS don't respond to me...

EDIT: Ah - found them!
Can you please let me find them too? I need pics 75 and up :-)
Thanks!
-
Hi all,
I searched in the forum but could't find anyting, so here's my question:
assuming that I have a plain train door (like this: http://www.bricklink.com/catalogItem.asp?P=4181) and I want to paint the bottom half in order to have something like this: http://www.bricklink.com/catalogItem.asp?P=4181p02, what kind of paint/tools should I use?
Lego paint on 80s doors looks so thin but is also very resistant, can I achieve similar results just with spray paint? Is an additional transparent layer needed for added resistance?
Finally, is there a way to know which commercially available colors match better lego colors?
Thanks in advance for your help (and yes, I'm a painting noob
 )
)Cheers,
Gianluca
-
Hi FONIX, this is a very nice mod.
I'd just like some help from you for the maths: when you put a 3.2V led on a 9V circuit you have to use a resistance to lower both voltage and current, right?
The formula is V =(R + Rled) * I, where V = 9V, R = 470 Ohm, Rled is the inner resistance of the led (unknown to me) and I is the unknown result.
Now, considering R >> Rled, I simplified in V = R * I or 9 = 470 * I so I = 9/470 = about 20mA. Ok, the current is lowered to a right value that doesn't fry the led.
But how do you know that the led is actually under 3.2 volts? I mean, starting from 9V you have 3.2V on the led and 5.8 on the resistance, but you can't choose the right resistance that allows this unless you don't know Rled, right?
(sorry for being a noob in electric stuff :-P)
Cheers,
Gianluca
-
There's a topic here
Thanks for pointing this out. Didn't look for a similar topic in the embassy, shame on me!
-
Hi, I'm almost sure this matter was alredy discussed but I couldn't find the topic, so apologies in advance if this topic is a duplicate.
Well, the title says it all so let's start with the list:
1) Einstein ("scientist") a generic scientist, with a double sided face (back side is the famous "tongue face"). Maybe we can give him some chemistry glassware (a test tube in one hand and an Erlenmeyer flask in the other, even if Einstein was a physician and not a chemist).
2) Asian lady ("geisha"), with umbrella, kimono and ribbon.
3) Mermaid, but sitting and not standing, like the Little Mermaid statue in Copenhagen harbour (Lego never made a sculpture of it, what a shame!)
4) Devil (*) red, with a trident and goat legs.
5) Angel, with a neck bracket that supports the wings
6) Chaplin, with bowler hat (reusable in victorian themes, if any) and stick
7) Eskimo/Inuit with smoked fish and snowshoes
8) Boxer, with gloves (reusable as snow gloves) and black eye
...to be continued...
Please let me know what you think,
Gianluca
(*) some may think it's unappropriate for children, but how many times it recurres in fairy tales, movies, cartoons etc?
-
Hi everybody,
I'm Gianluca Morelli - you already guessed it, eh? ;-) - from Torino (Turin), Italy.
I'm 36 and I'm mostly into trains and town. I was one of the first guys who built 8-wide trains in late nineties and I think I'm the only one who builds foldable houses (for easy transport to shows...)
I've been inactive for a bit; this is a short gallery of my older creations, updated to a couple years ago.
http://www.brickshelf.com/cgi-bin/gallery.cgi?m=gm
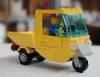
And BTW, I think I'm the first who made a Lego Piaggio Ape (the 3-wheeler in my personal pic). Strangely, this was the simpler MOC I made but by far the most successful: everybody here in Italy immediately smiles when they recognise it and I still remember when Pierre (who still wasn't a Lego Designer but was already a great MOC designer) asked permission to copy it for his town layout :-O
Cheers,
Gianluca
Lego Licensed Parts available from Bricks & Pieces
in LEGO Licensed
Posted · Edited by Gianluca Morelli
I'd like to buy the Lester torso (currently not available), does anybody know if it's gone for good or it might be available again in the future?