

Covenant84
-
Content Count
166 -
Joined
-
Last visited
Posts posted by Covenant84
-
-
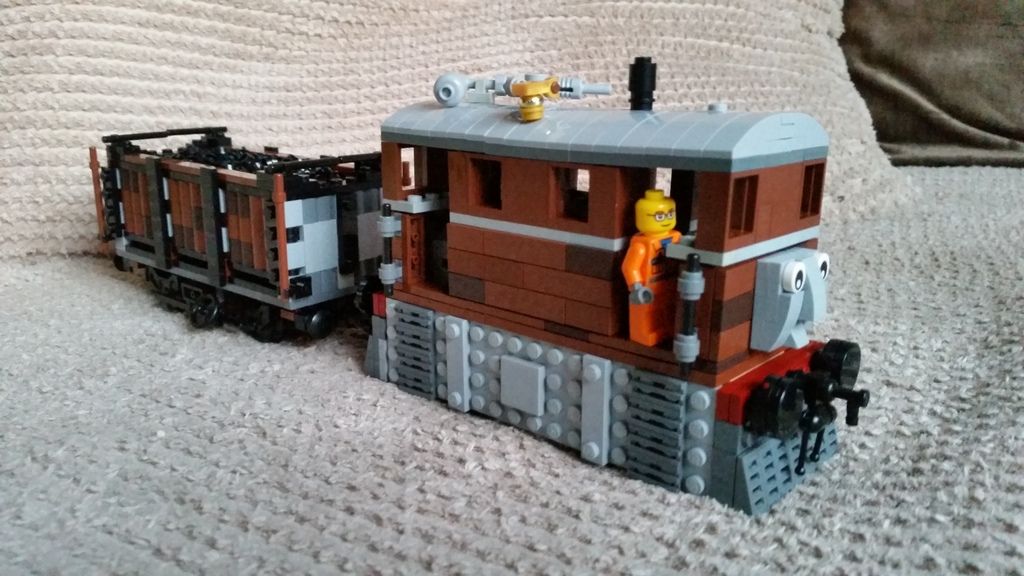
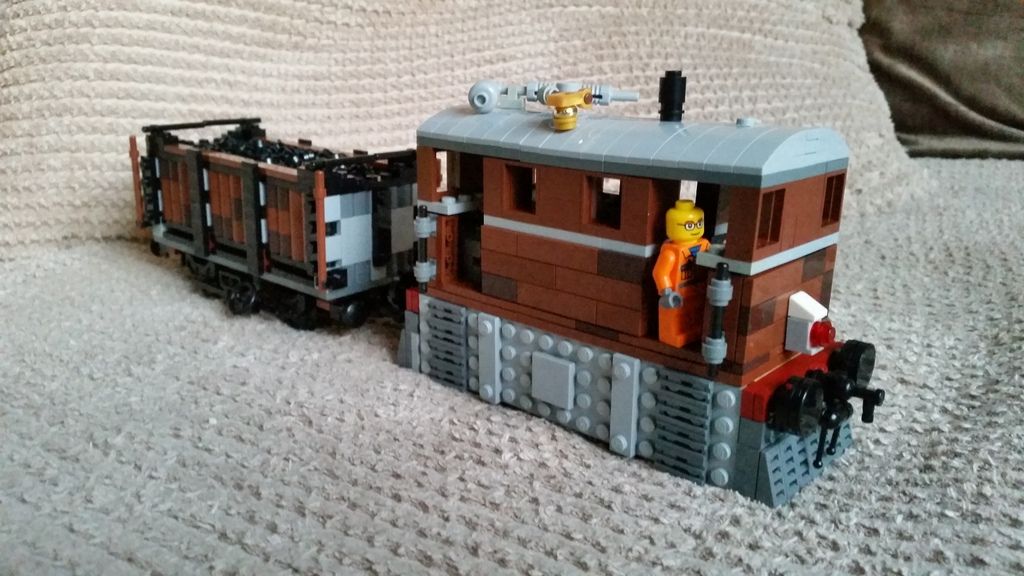
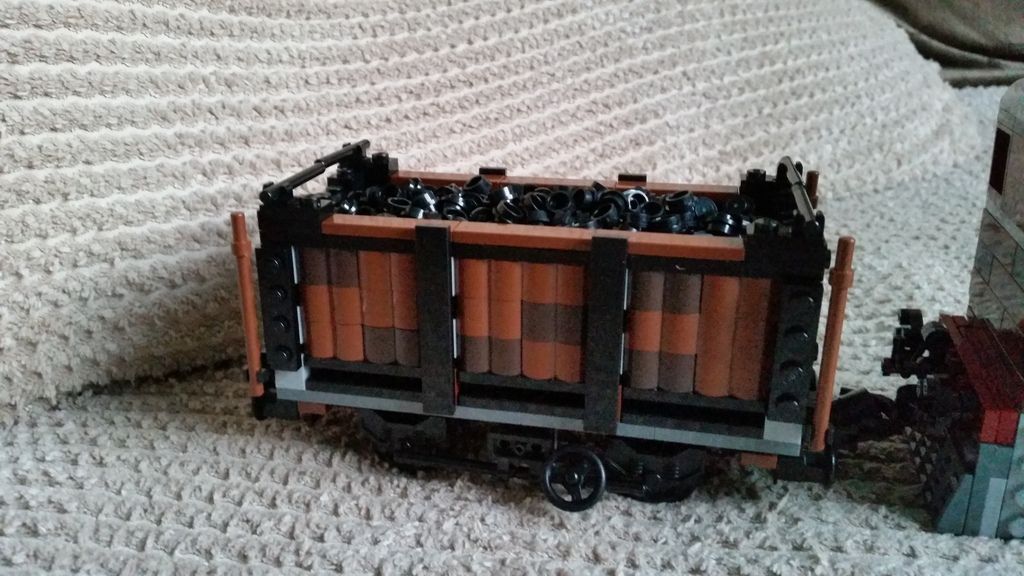
It's been a while but I've finally got around to making something. Loosly based on Scotnicks here's my version of Toby. It's not quite how i'd like it but with limited parts I'm really happy with the outcome. As mt 2 year old asked where his face was i built a face which can be swapped for a lamp held on by 1 stud for now. The coupings a little high but it seems like it might just be low enough to get away with for now until i get around to a more in depth re-design. Its powered by a 9v motor. I also managed to put together a coal truck from some spares I had around, again loosly based on Scotnicks. I'd like to make several of these along with some fruit vans eventually. C&C welcome.

-
Looking at a couple of books I'm currently debating which out of wisbeach or outwell to try something with. Your opinions please (assuming a little artistic license to get the right feel rather than an accurate model):
Wisbeach would perhaps fit neater into a rectangular area (table) as its a station with trams sheds and siding whereas outwell has more visually interesting features (canal and bridges plus a church) but would need to take in more of the surrounding area and therefore would be an akward shape. Which would you build?
Grum64.... hard to tell from maps/photos but do you have any idea of the comparative sizes for these options and do you have/can you get any photos of any surcingles features. From a Google satellite it looks like there maybe a few original houses in outwell opposite the church. Do you know if the pub's still there? Apart from rough road layout it looks like wisbeach has totally gone whereas outwell has the church and a 2/3 of the canal left. Is that correct?
-
Super! Do you know if it Will it corner ok with a train ok?
-
Thanks jtlan. I already knew of the two tram types but that's a really useful link about colouring. Where it says be does anyone know what type of blue? Navy, grey blue,?
-
Thanks therize. Wonderful version. I'm wondering if I could use a 9v bogie motor and hid it well enough you can't tell it's 4 wheeled instead of 6.
-
Noob question I think is related... If you have multiple ir recievers are they operated by separate controllers? Do you have to program them with a channel number or something?
-
Thanks both! Therize- link doesn't seem to work?
Rob- that's a great engine! Perhaps a daft question... where's the motor? Is that the black wheelbase?
Rob- is this what you used? http://pages.ebay.com/link/?nav=item.view&id=272036329078&alt=web if so do you just build up a footplate around it to raise the level above the swivel pin?
-
Grum64 thank you. I have a couple of books coming and may try to visit in the spring with my dad as he remembers it from his youth, but when I've decided where to start the model extra info would be useful!
Scotnick yes please! I actually pinned your toby on pinterest earlier.... its one of the better versions I've seen so far. Instructions and how to motorised it would be a really helpful start!
-
Hi all.
I'm currently working on a new lego room and loft space and wondering what long term project to start I've had thoughts of the wisbeach and Upwell tramway rekindled. I've always planned a loft railway and this seems like a great prototype for a lego model. Reasonable flat... plenty of character and features on a 'small' scale.
I've seen numerous lego versions of 'Toby' the tram and mavis but I'd want them powered. Last time I did lego trains was the 9 system. Could you tell/show me how the newer power functions is set up in the smallest possible space please? I'd love to see your small engines and diesel and find out how you squeeze everything in. Am i right in thinking there's 4 parts... the ir reciever and controller, motor and battery box? I will of course show my progress shortly!
For those not familiar with the tramway I found this great little website:
-
^ aye... WOW!
wish i had one these! (and the space to keep it!)
-
-
That's amazing! Love the details and the different classroom subjects especially! Adds plenty of interest. Good luck building it!
-
Wow - that's a challenging building to try to build - you've done great job of capturing it! Will head over and give my support.
-
I'd suggest extend the hull by 1 piece - that way you get a bigger ship and a bit more space to play with, but allowing more parts per section to really get a good level of detail. I find the shop one is quite bare for my liking so I'd say don't be tempted to do something much bigger or you'll end up with just a bigger one, not really a better one in my opinion.
-
Clip clop clip clop....... great build!
-
We're about to decorate our new house and have a 'spare room' Approx 2m x 3m. It needs to fit a sofa bed for guests as well as being both a craft/ hobby room and a lego room.
So... any Ideas for using the space please? Show me how you store your lego, especially multi functional space. There's a doorway on the short wall and a window/radiator in the middle of a long wall opposite the door. Would be great to get some photos for ideas and inspiration! Thanks in advance
-
Thanks Little John.
Any other suggestions/credits at all?
-
So much to see, so much to eat, drink and admire! Well done! Great way to show off a pirate captain collection too!
-
Amazing build! Love the octopus hair!
-
Fantastic build - good sense of realism. Haven't seen that tree technique before - consider borrowed ;) Where are the olive plants from?
Happy to give +1 on both credits.
-
Istantly recognisable well done. Hadn't realised they ran at Wisbeach. I'm not old enough but my dad has some memories of that tramway from his childhood.
-
Hi all,
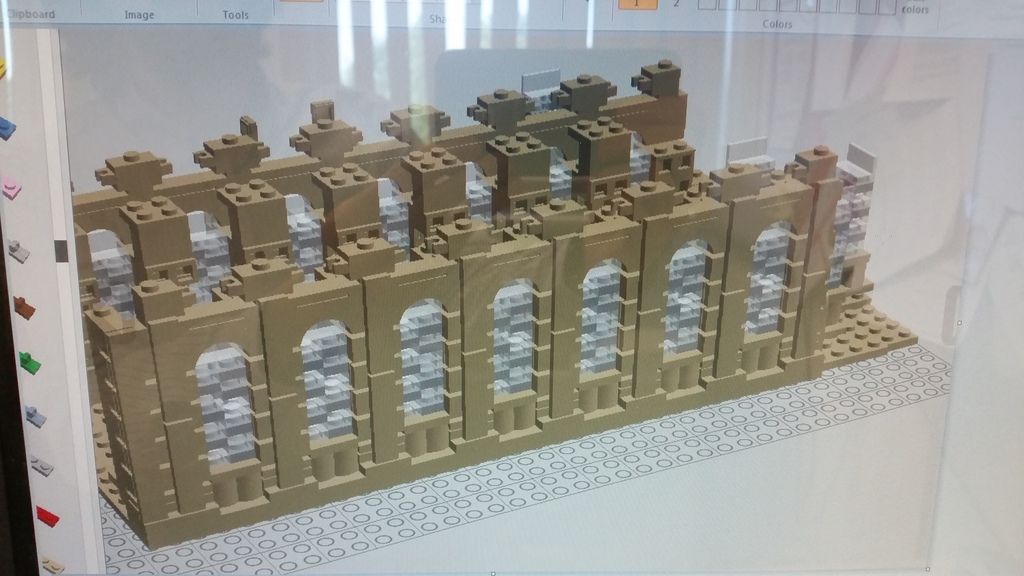
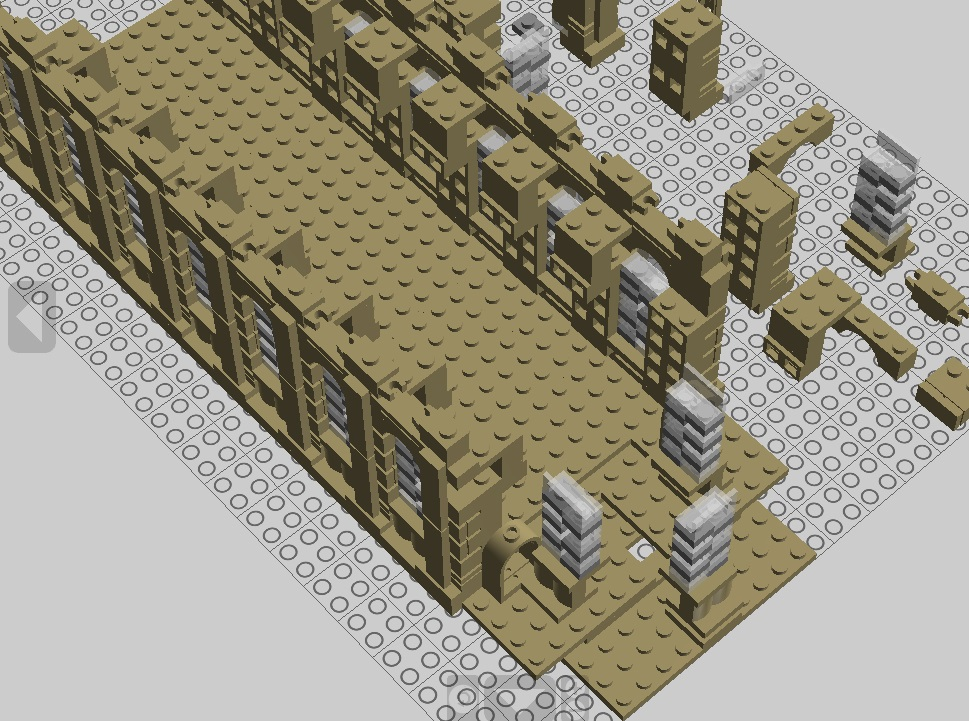
Made some progress. I've redesigned the front end. It means that the vertical columns aren't included there but I can't think of another way -I feel it's still recognisable. haven't thought about the roof there yet....... The rear doors had some slight changes made to the front, I think they look a bit better so hopefully i'll building them this way on he real one.
Next problem - things seemed to be going smoothly at the rear, until I worked out the width I 11 1/2 studs.... I assume because of the hinges at the other end. Any ideas? I guess on the real model I could fudge the angles at the rounded end to compensate or use headlights bricks to make a side connection but I think that would be too weak. Also a concern is the 1X8 'columns' down the sides - they're attached by a single stud... the geometry won't allow for more than one stud connection. I did try to redesign by that caused other problems elsewhere. If you see parts that aren't available please let me know.
-
-
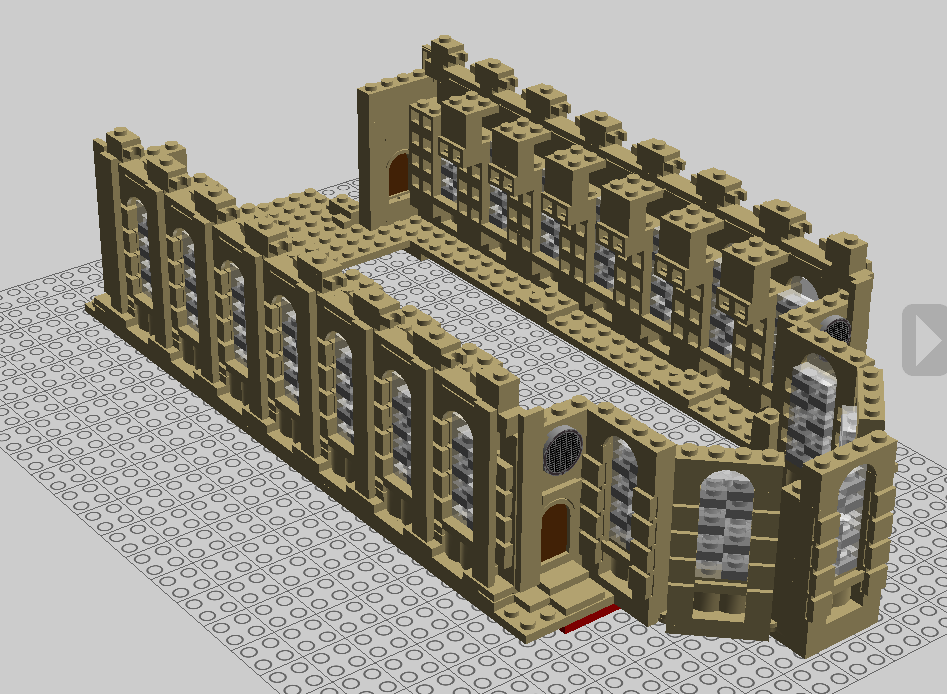
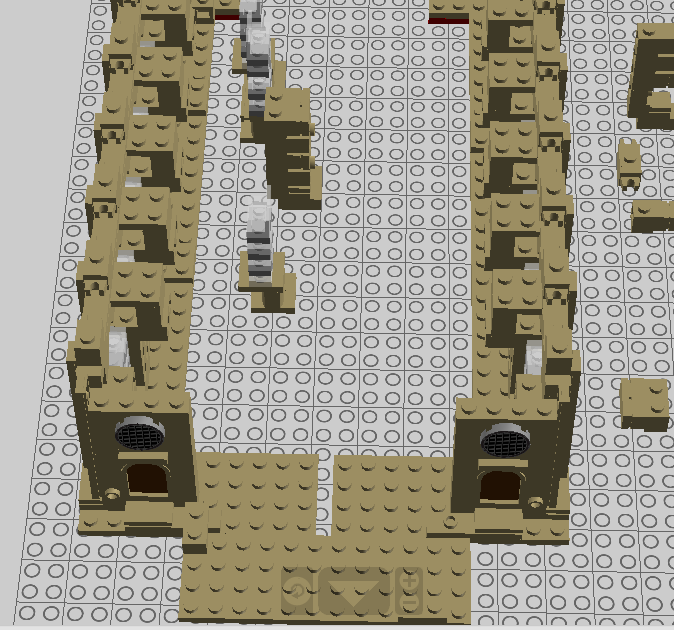
Right, made some progress - pretty happy with the side walls, although there is a little inaccuracy and a slight misalignment, but I think it capture the look pretty well. Was thinking of using the 1x2 'grid' pieces along the top held by clips to represent the fence along the roof... However... I'm wondering if I need to pretty much start again....
Walls from rear:
Walls from front:
2 issues:
1) Because of the way I've built the walls I can't recess the end details into them
2) Can't work out how to fit on the 'rounded' end - I was hoping to use hinges to put straight walls at 45degree angle but there doesn't seem to be room at the same size as the side walls. Am I out with my proportions?
Look forward to your thoughts....


Wisbeach tramline (toby and mavis)
in LEGO Train Tech
Posted
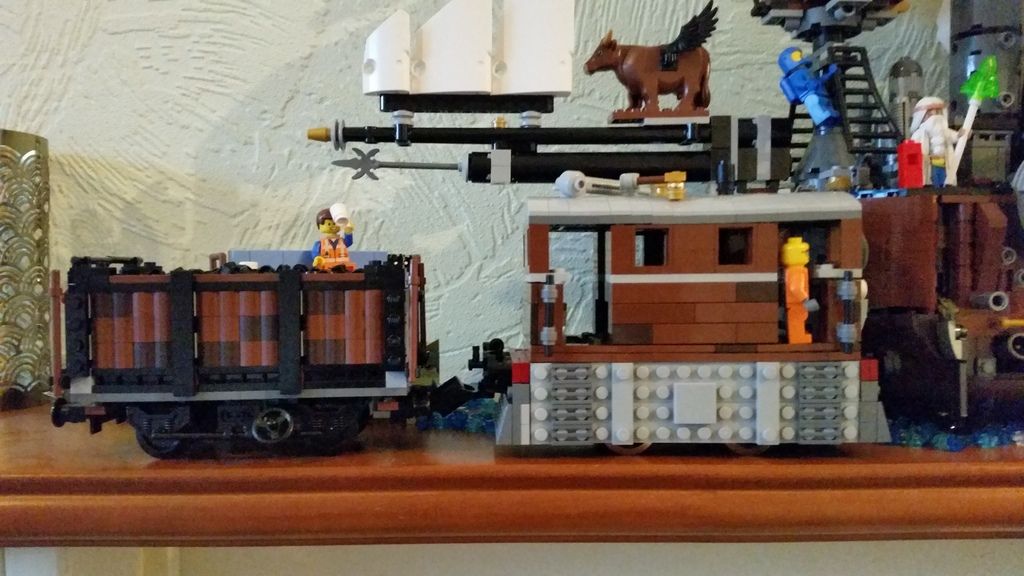
Thanks Nick - glad you like it! hadn't got the parts to follow your plans so this is what i managed to do with the parts I had. The first attempt used 4x8 plates for the sides but once i'd put the roof on the proportions were really out! (it still seems a bit tall compared to the real thing but without starting from scratch with new motors i doubt i'll do any better for now!). Ideally i'd prefer steps more like yours but there just doesn't seem to be the space with a 9v motor under there (and again i don't have the parts for now). I tried to make it a 6 wheeler to start with but it was proving to be impossible to do that with a 9v without making it longer. There's quite a bit of space in the cab so i may attempt some sort of interior in the future. I'm keen to build more now, i think a second tram, a 'mavis', a couple of tank engines (although i don't think they ran on the line, at least only very rarely) and of course a set of trcuks, fruit vans and some other things to add further interest. For now it'll have to wait for funds. Most of the parts seem to be quite a reasonable price on bricklink (or pick a brick walls when available they're really cheap) but tracking down the train wheels/couplings and motors seems to be the pricey part.