

Migalart
-
Content Count
34 -
Joined
-
Last visited
Posts posted by Migalart
-
-
Zblj
To create backgrounds I used free pictures available in internet.
First background was made by two NASA pictures:
http://www.lpi.usra.edu/exploration/education/gallery/earthsAttic/images/poster/moonSurface.jpg
http://www.ourprg.com/wp-content/uploads/2013/11/pia16610-640.jpg
Second background is more complicted - i found nice picture as free download - but it is somebody art. - I cant find the author.
-
TheWarden < This are not renders. Only Real 100% LEGO and photo camera ;)
Jim < thank you very muchfor front page :) I edited pictures source.
-
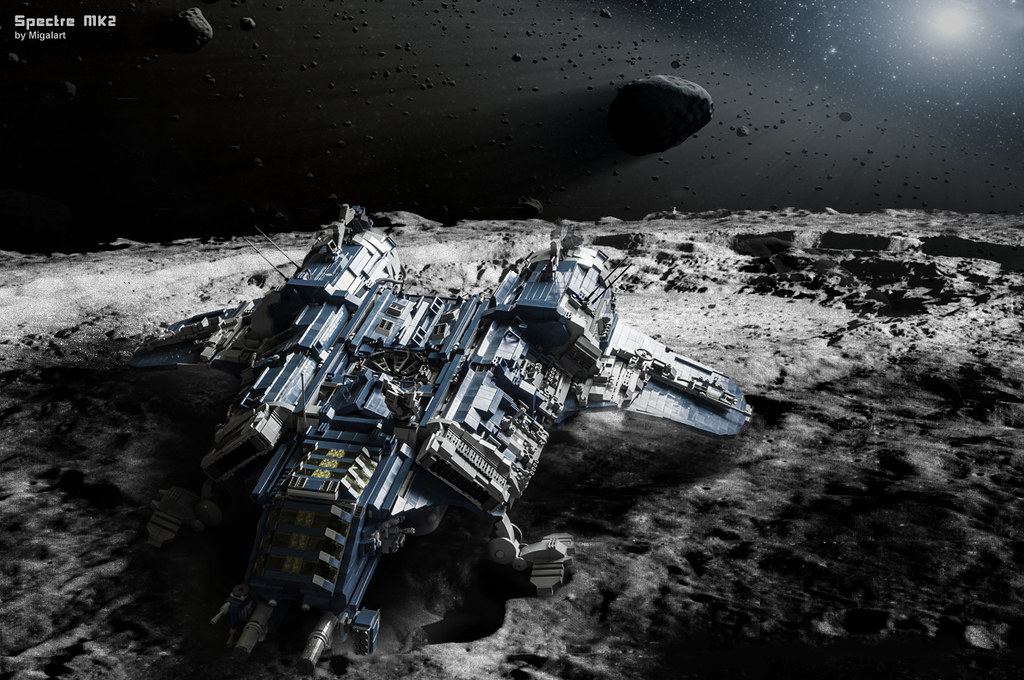
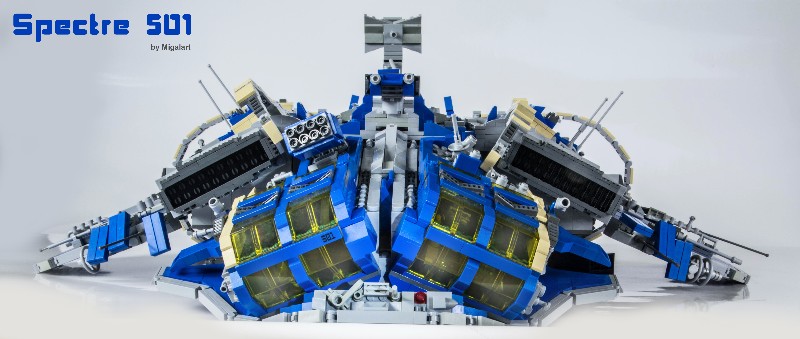
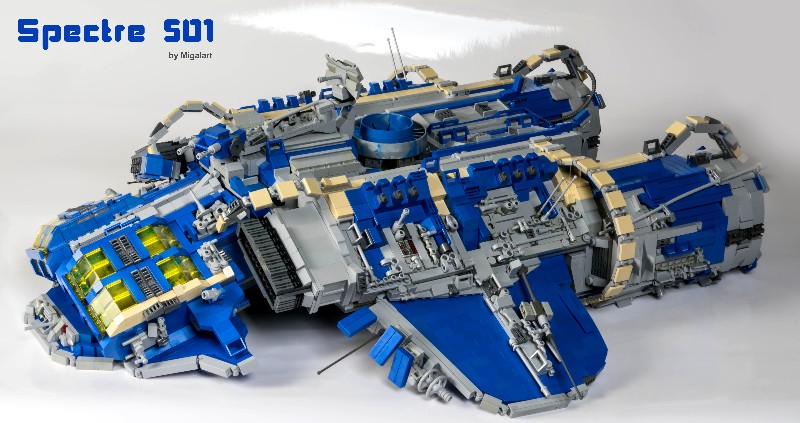
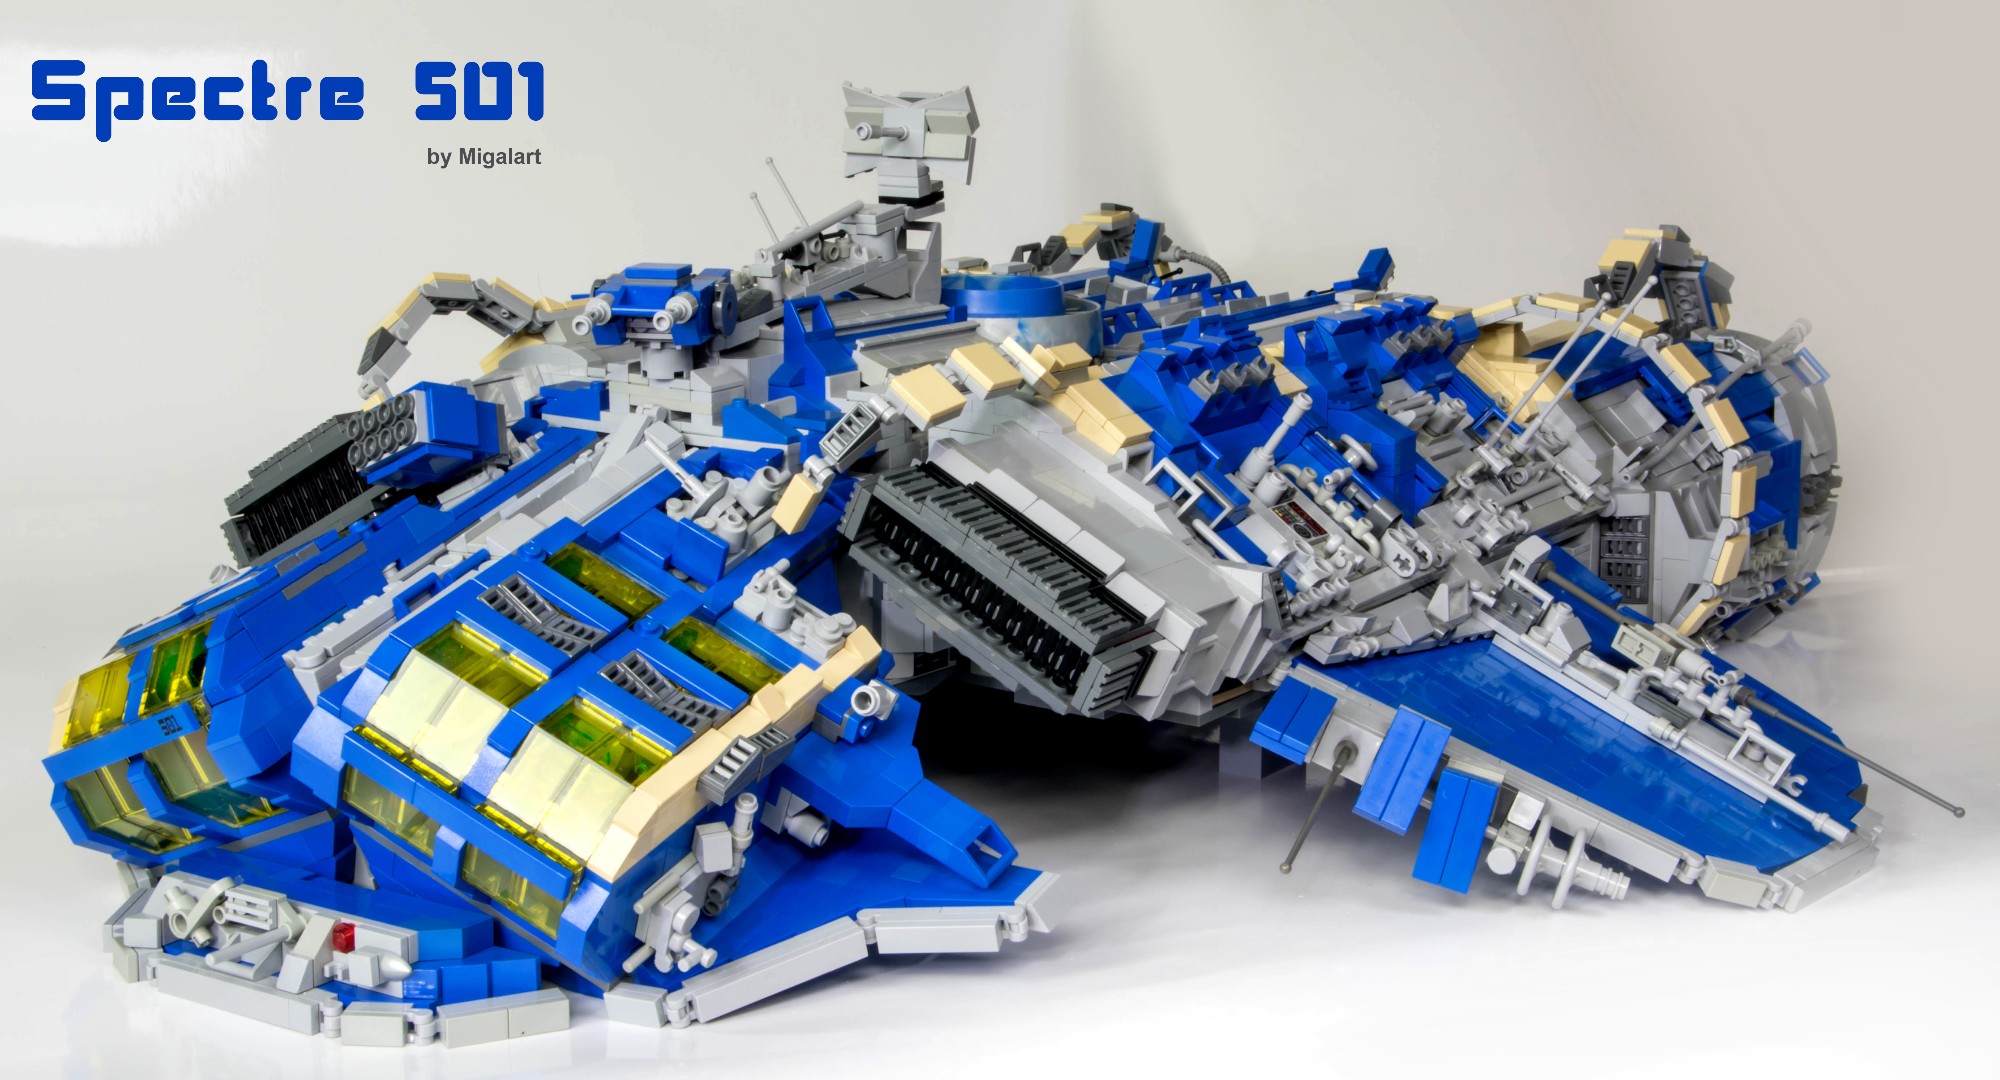
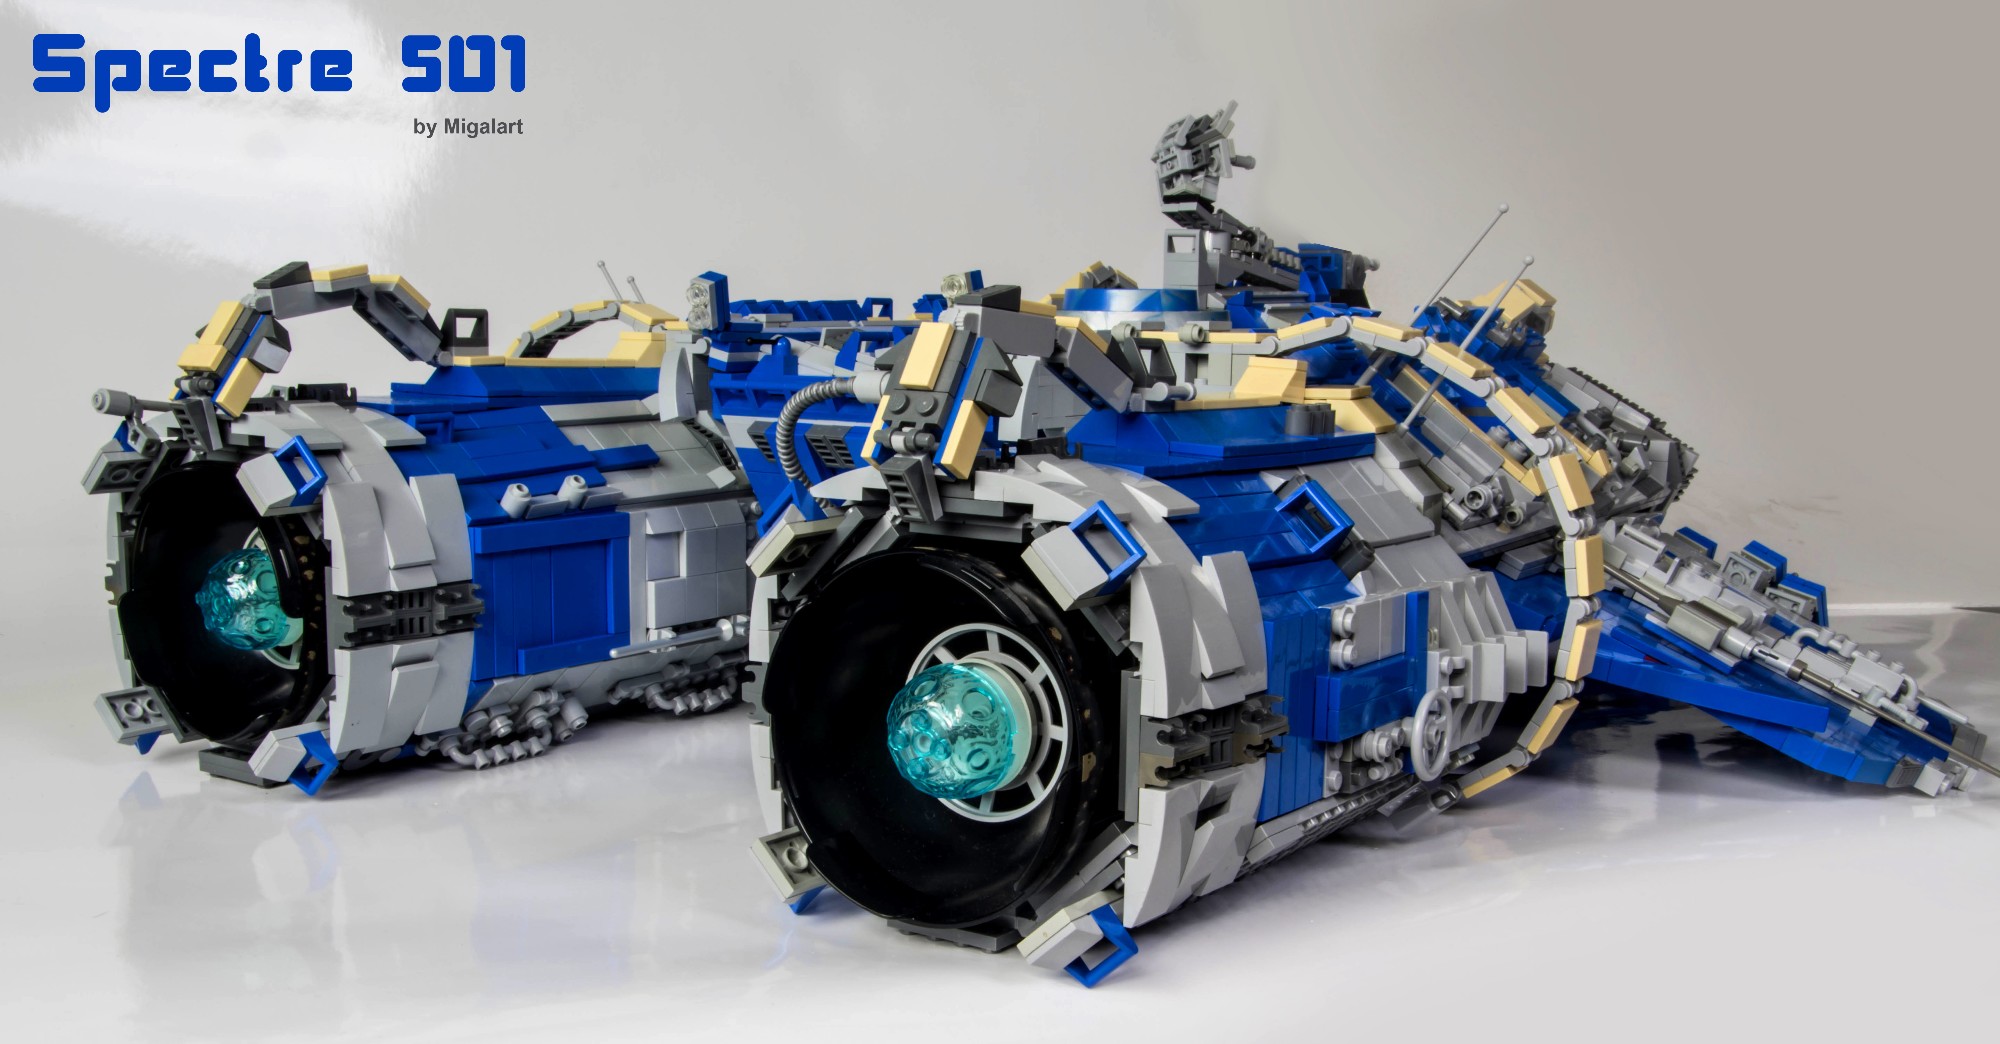
Spectre MK2
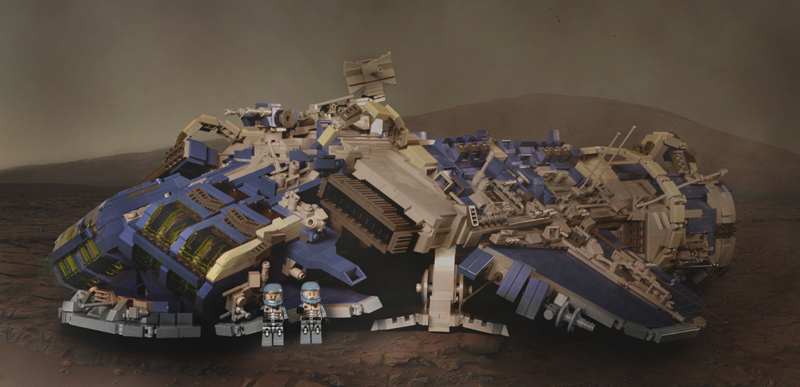
Let me introduce Minifig scale recon ship with full interior.
I am preparing long term project - lego sci-fi comic book and it was first "object" to be included in the book.
Here is basic look of the ship:
Here is the ship in comic book scenes:


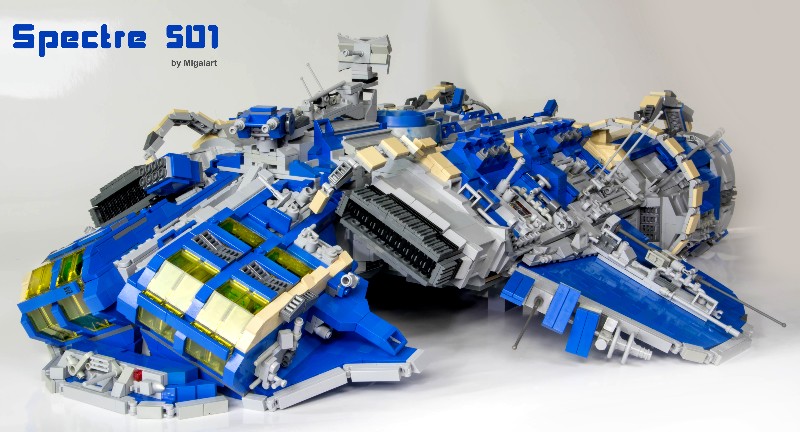
Before Specte MK2 I also did Spectre MK1
http://www.eurobrick...7034&hl=spectre
But i decided to make upgraded version, and so is Spectre MK2 :)
First version of frist episode of the comic book is here:
http://www.eurobrick...howtopic=135775
Still lot of work ahead ;)
My Flickr galery: https://www.flickr.c...hotos/migalart/
-
murphy_slaw
Wedge09
Thank you. I begin to understand what I need to improve. This is very important for me.
-
-There are a few English/ grammar mistakes, but they don't cause any issue with understanding the story.
- My only other comment would be on the amount of work it takes. 6 months for the episode 1 is a lot of time. I don't know how many episodes you plan to do, but if it's a long story i would suggest you try to think of ways to reduce the time you spend on it. Of course the great deal of work and time on it is what makes it outstanding, I only say so because it could be difficult at some point to find enough time to continue/ complete the project, and it would be a shame to have to drop it. Big projects are always the most exciting but they are also the first ones we shelf when life takes us in different directions; so i'm just talking of a way to ensure you can continue committing to it.
Once again it's an amazing work you did, congrats, and I am certainly looking forward to reading the rest of the Spectre and its crew's story.
Thank you Chase The Cop very much for comments. I do really need them ;)
Regarding special effects - I will think about others like explosion debris
Regarding English - this is not my native and I was never a good writer. I try hard to avoid mistakes. If enyone can show me mistakes in book i would appriciate this.
Regarding time. I took my 6 months to complete entire episode 1. But Spectre allone took me 3 months to build.
The problem is that episode 2 need mor complex scenography. Maybe I will decide to cooperate with other builders to speed up.
I have to say, that I learned a lot so in some part next photo shooting should be easier.
-
Hello
I present the first episode of my project: LEGO COMIC BOOK.
I got big dilema with it.
On one hand I got entire story, I would like to tell, in my head.
On the other I am not sure If mange to do it - IT is so BIG WORK.
So this is a try. A first short episode that took me 6 months.
Before I started shoting pictures I needed to build scenography.
The most important object in scenography for first episode was small space ship.
I made it together with interiors.
I really appriciate any comment that will help in continuing the project.
I mean especially comments regarding both visual part and the story telling itself.
I know the story is not revealed yet, and it is only a short fragment.On the other nad it is 34 pages and I am afraid it will be hard to read all of it.
So the main question. Is it readable ?


-
This is one of a few MOCs I see that actually have some (or any at all) modularity - VERY WELL DONE, MISTER!

Actually the only thing that would worry me a lot if I was a child willing to play with this "beast" would be it's quite visibly really hugely overdimensioned for a child play (or for any play), really: it is so big that even adult would have problem "swooshing" with it or get around it somehow (what about the child then), sorry.

From my point of view every model considered as playable should be in some reasonable dimensions compared to minifig...unless, as in many cases here on EB, you intended it to be just displayed, then it'd be OK, of course,
But except that I really think it is one of the best/interesting MOCs I saw here on EB with lots of playability/modularity (which should really be the main stuff I think), congrats.

thanks a lot
as i have written
this project is mainly to make cartoonnot child play
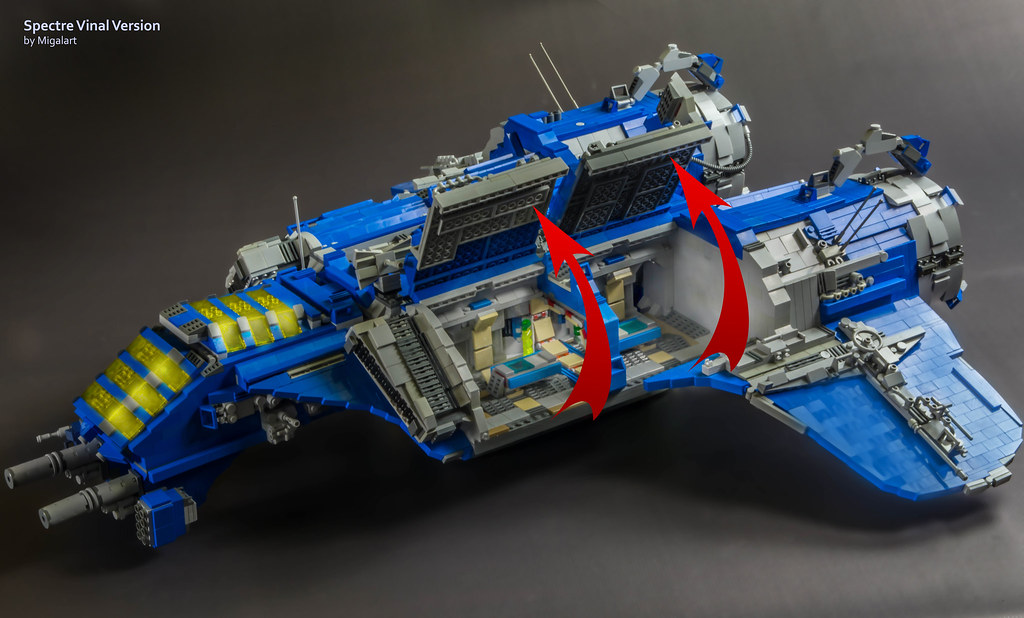
"Project idea – opening areas
The main purpose of this project is to create consistent technically (with some si-fi conditions) space ship. This space ship is planned to be in future main action place of space comics I am going to prepare.
For the comics I am planning to make many pictures outside and inside of the ship. It was crucial the ship to be accessible and playable inside.
In fact the possibilities to make pictures inside was main priority over construction integrity of the ship. For example I divided opening of main windows in navigation room to have possibility to catch the picture “from behind the cockpit”"
-
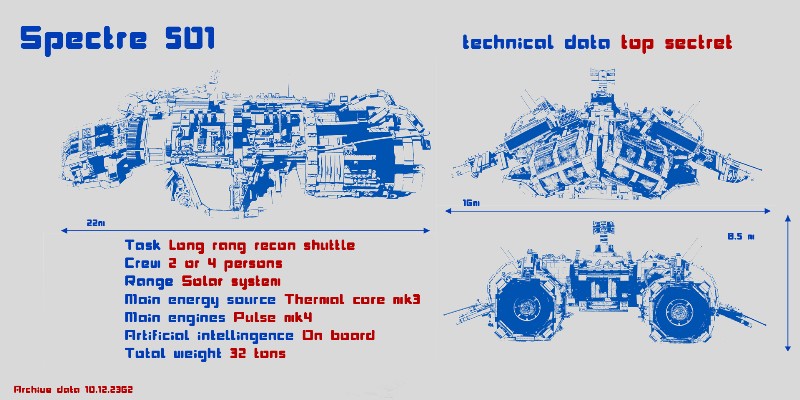
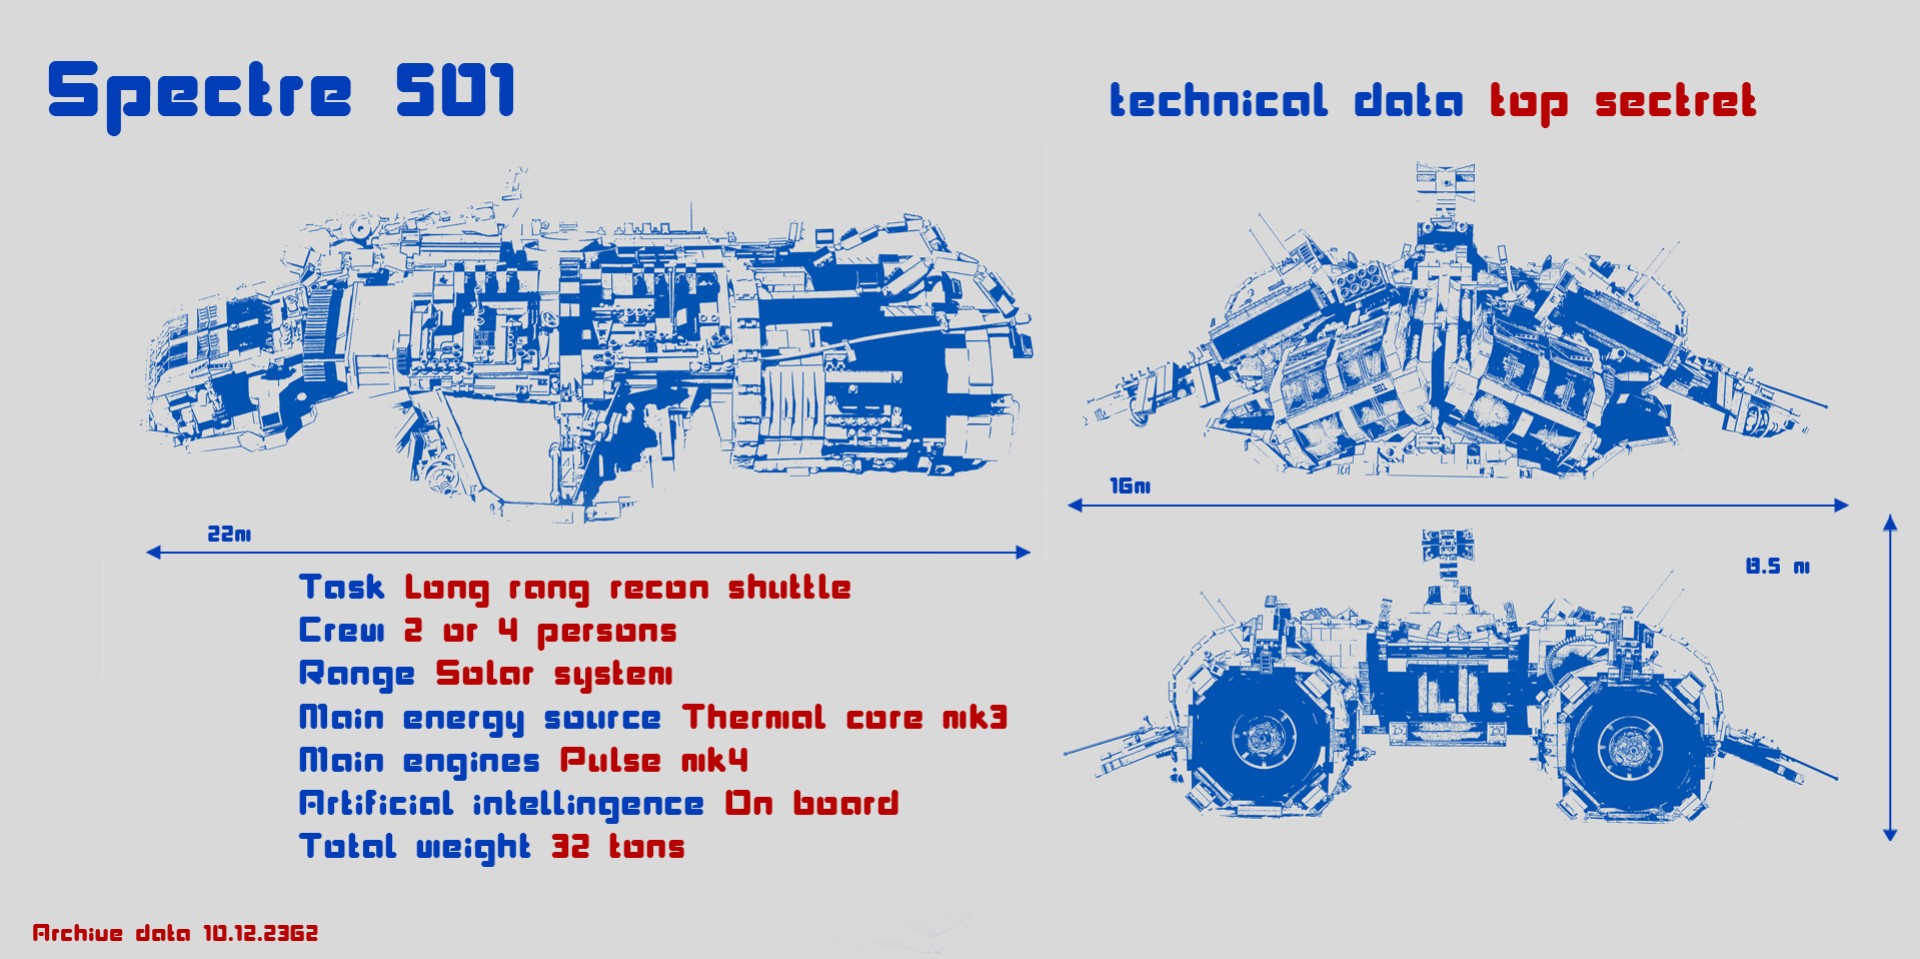
Secret project by Earth empire designed in the 2362. The spacecraft in which the 4 person crew can travel throughout the whole solar system.
Construction time two months.
"Own design"
THIS IS MY FUTURE CARTOON (COMICS) MAIN ACTION AREA


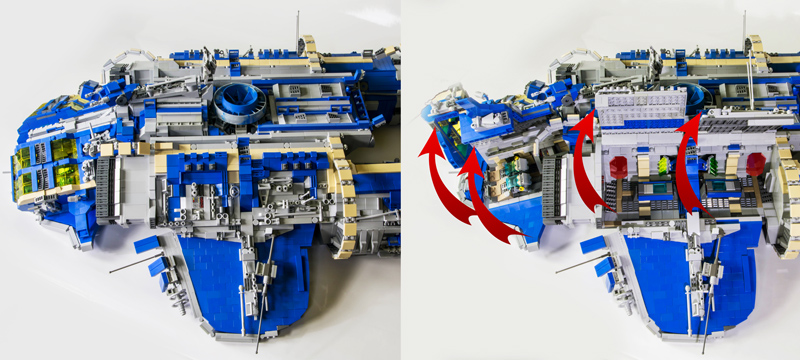
Project idea – opening areas
The main purpose of this project is to create consistent technically (with some si-fi conditions) space ship. This space ship is planned to be in future main action place of space comics I am going to prepare.
For the comics I am planning to make many pictures outside and inside of the ship. It was crucial the ship to be accessible and playable inside.
In fact the possibilities to make pictures inside was main priority over construction integrity of the ship. For example I divided opening of main windows in navigation room to have possibility to catch the picture “from behind the cockpit”
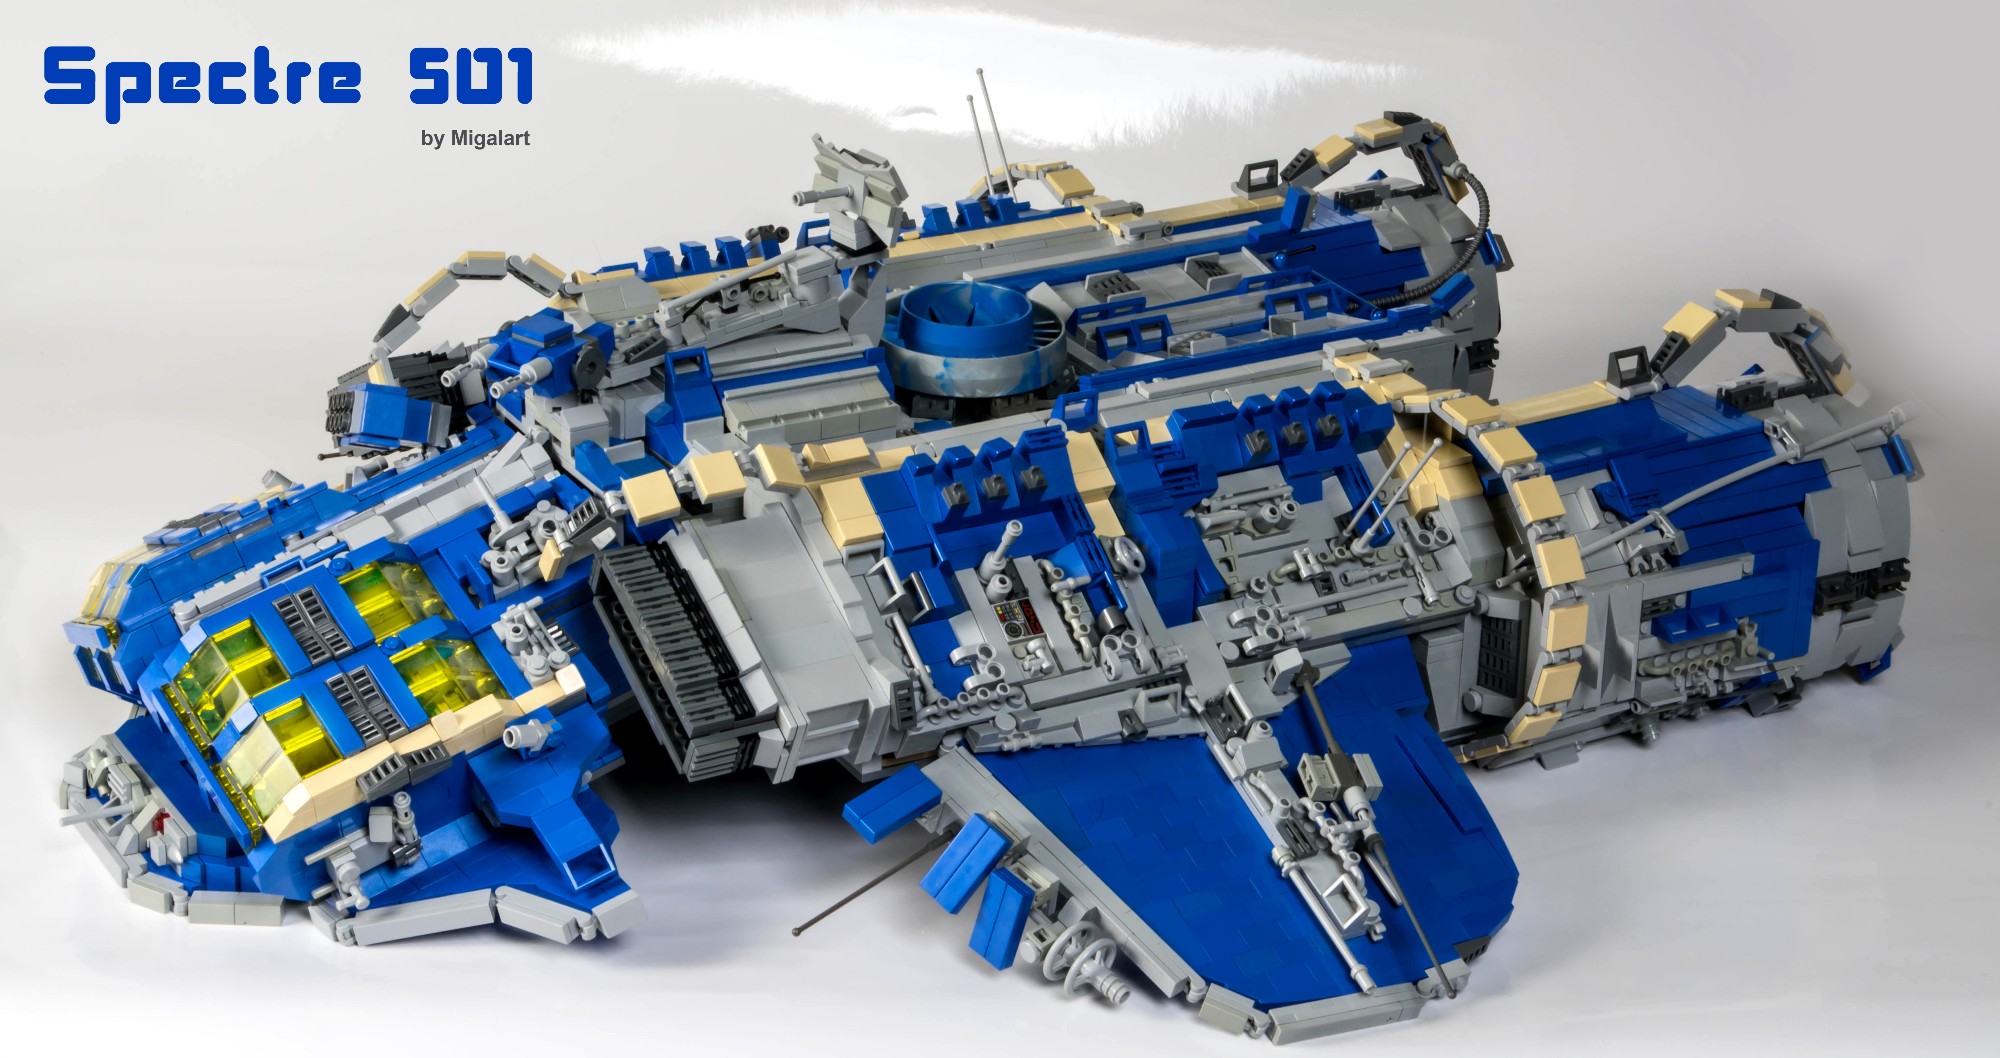
Playability
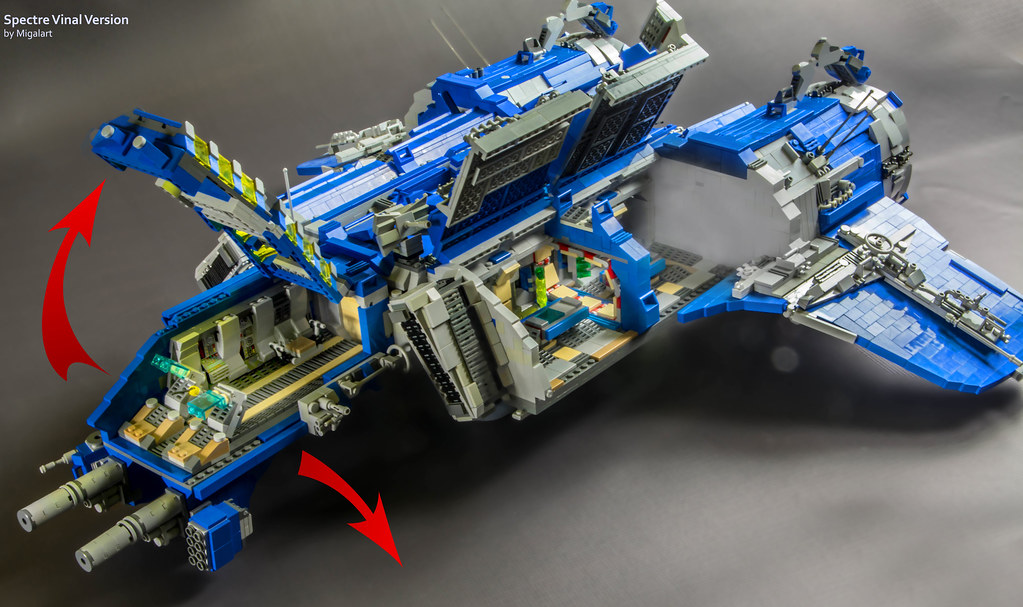
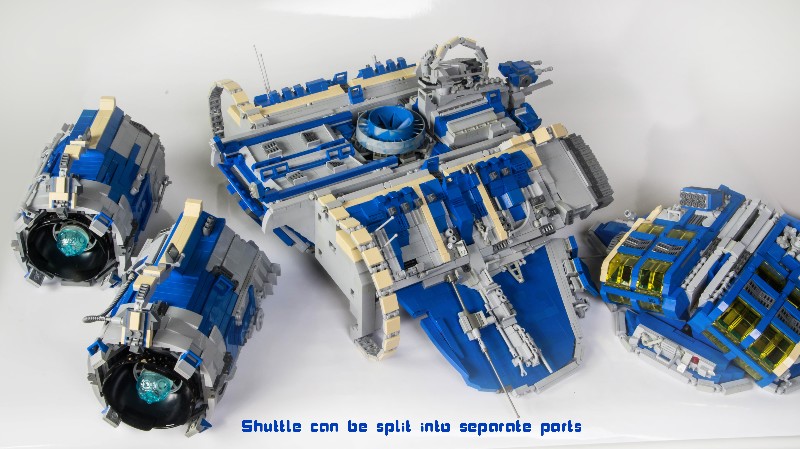
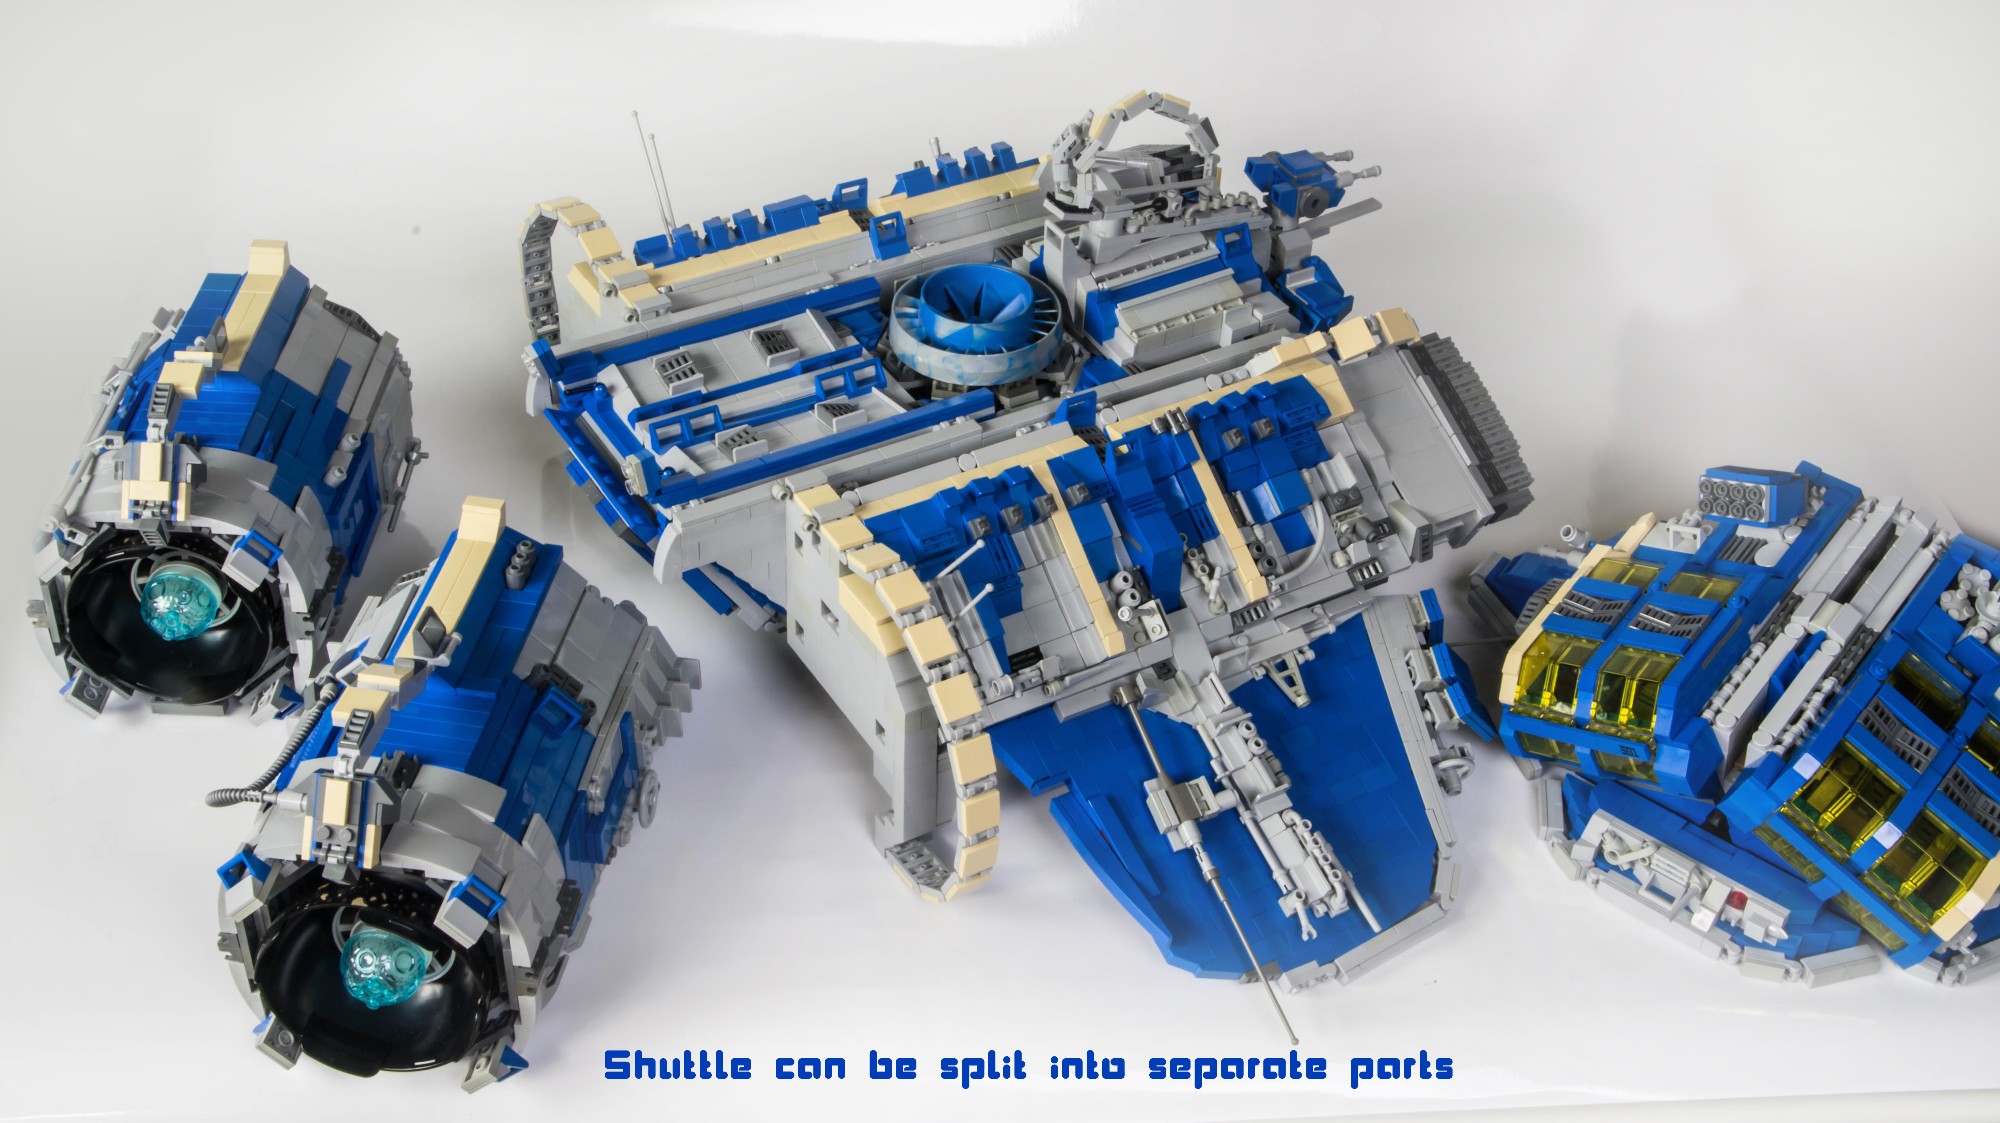
The vehicle is fully playable. It consists of four main modules
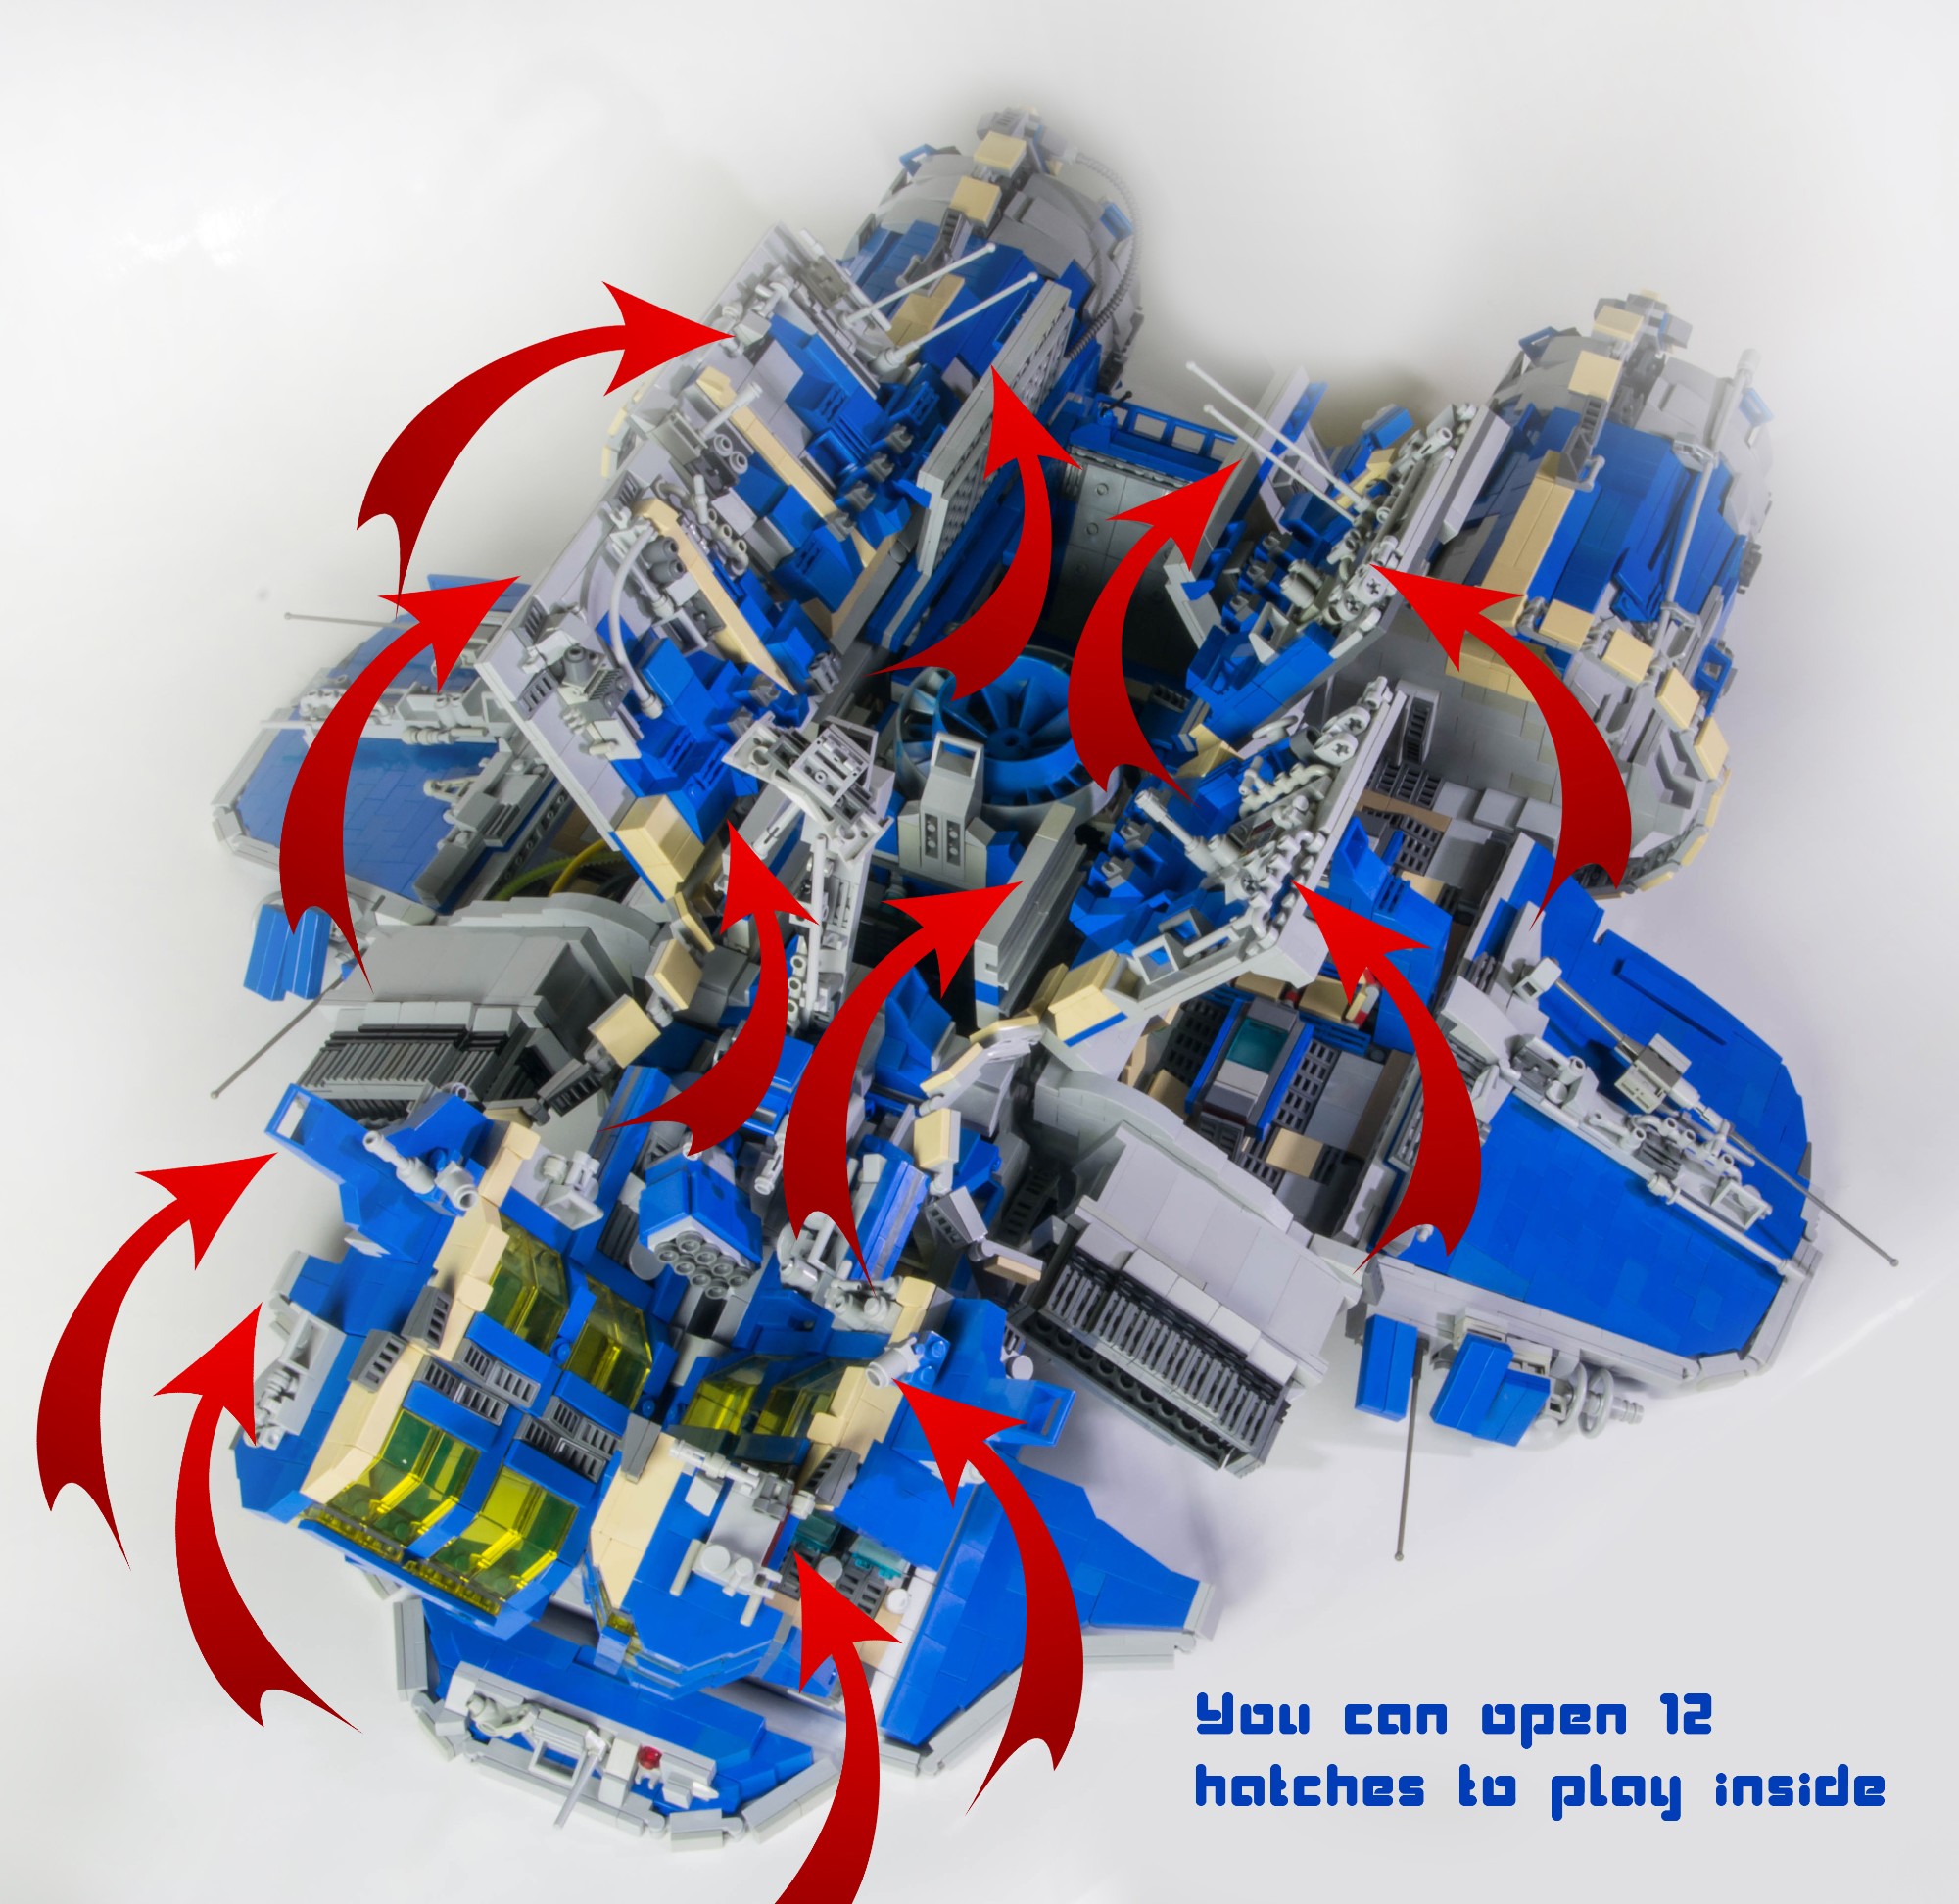
12 opened tabs provides access to the interior and comfortable fun.
The vehicle has 7 doors that can be manipulated from the outside irrespective of the fact that the flaps are open or close. The vehicle also has opened hangar (airlock), speeder in the hold, mobile access to the AI modules and a few other goodies.


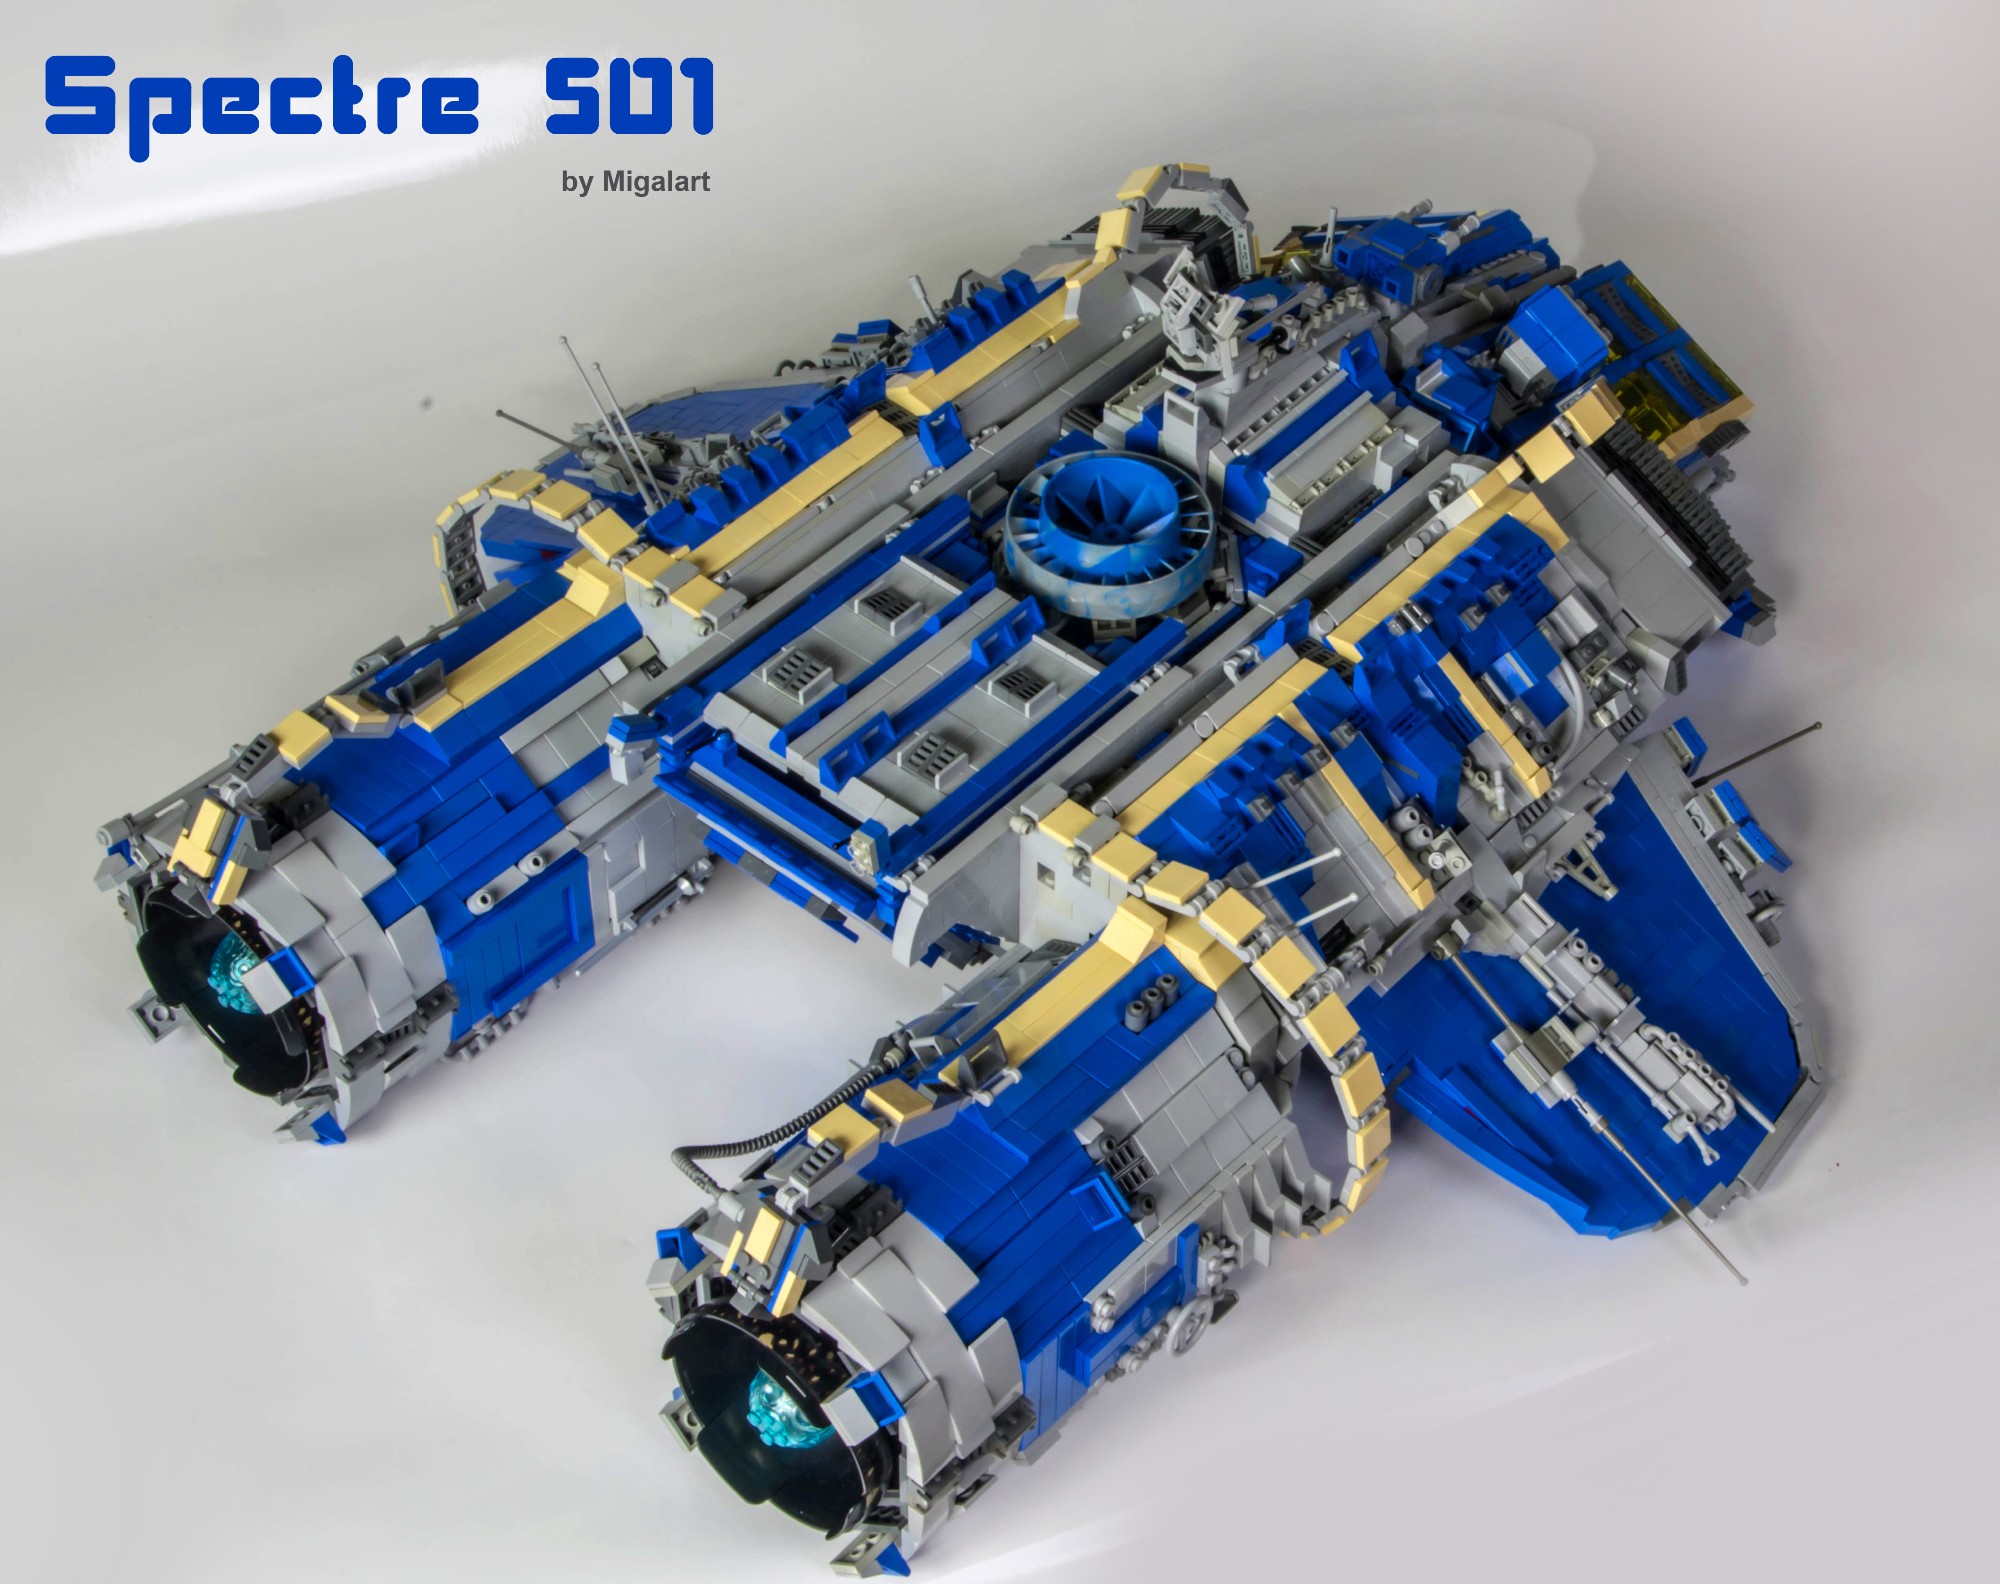
Engines and flight
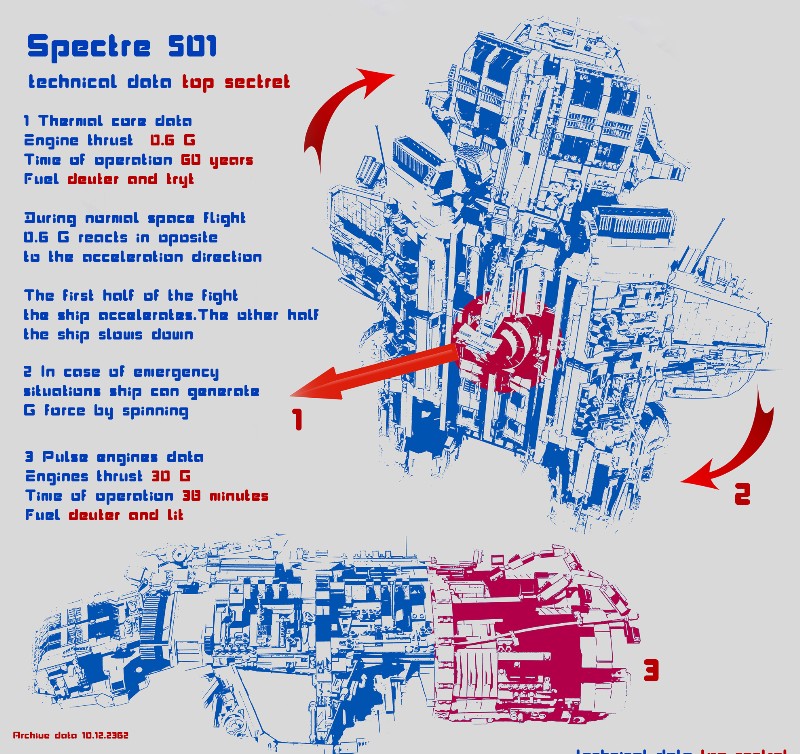
The main power source is a powerful thermo-nuclear reactor, but the vehicle also has a pulse motors. With the ability to transmit a constant acceleration of 0.6 G. The vehicle reaches the orbit of Pluto in just 60-100 days. For astronauts running toward the floor quite nice 0.6 G allowing together with the chemistry of maintaining healthy muscle tissue.
Most of the time ship travels in vertical position (1) using thermal core integrated engine as main thrust power.
It provides 0,6 G acceleration during entire flight.
The ship is not fully aerodynamic, but its strong pulse engines allow flexible operations even at Venus atmosphere
Pulse engines provides strong “escape” speed for the limited time.
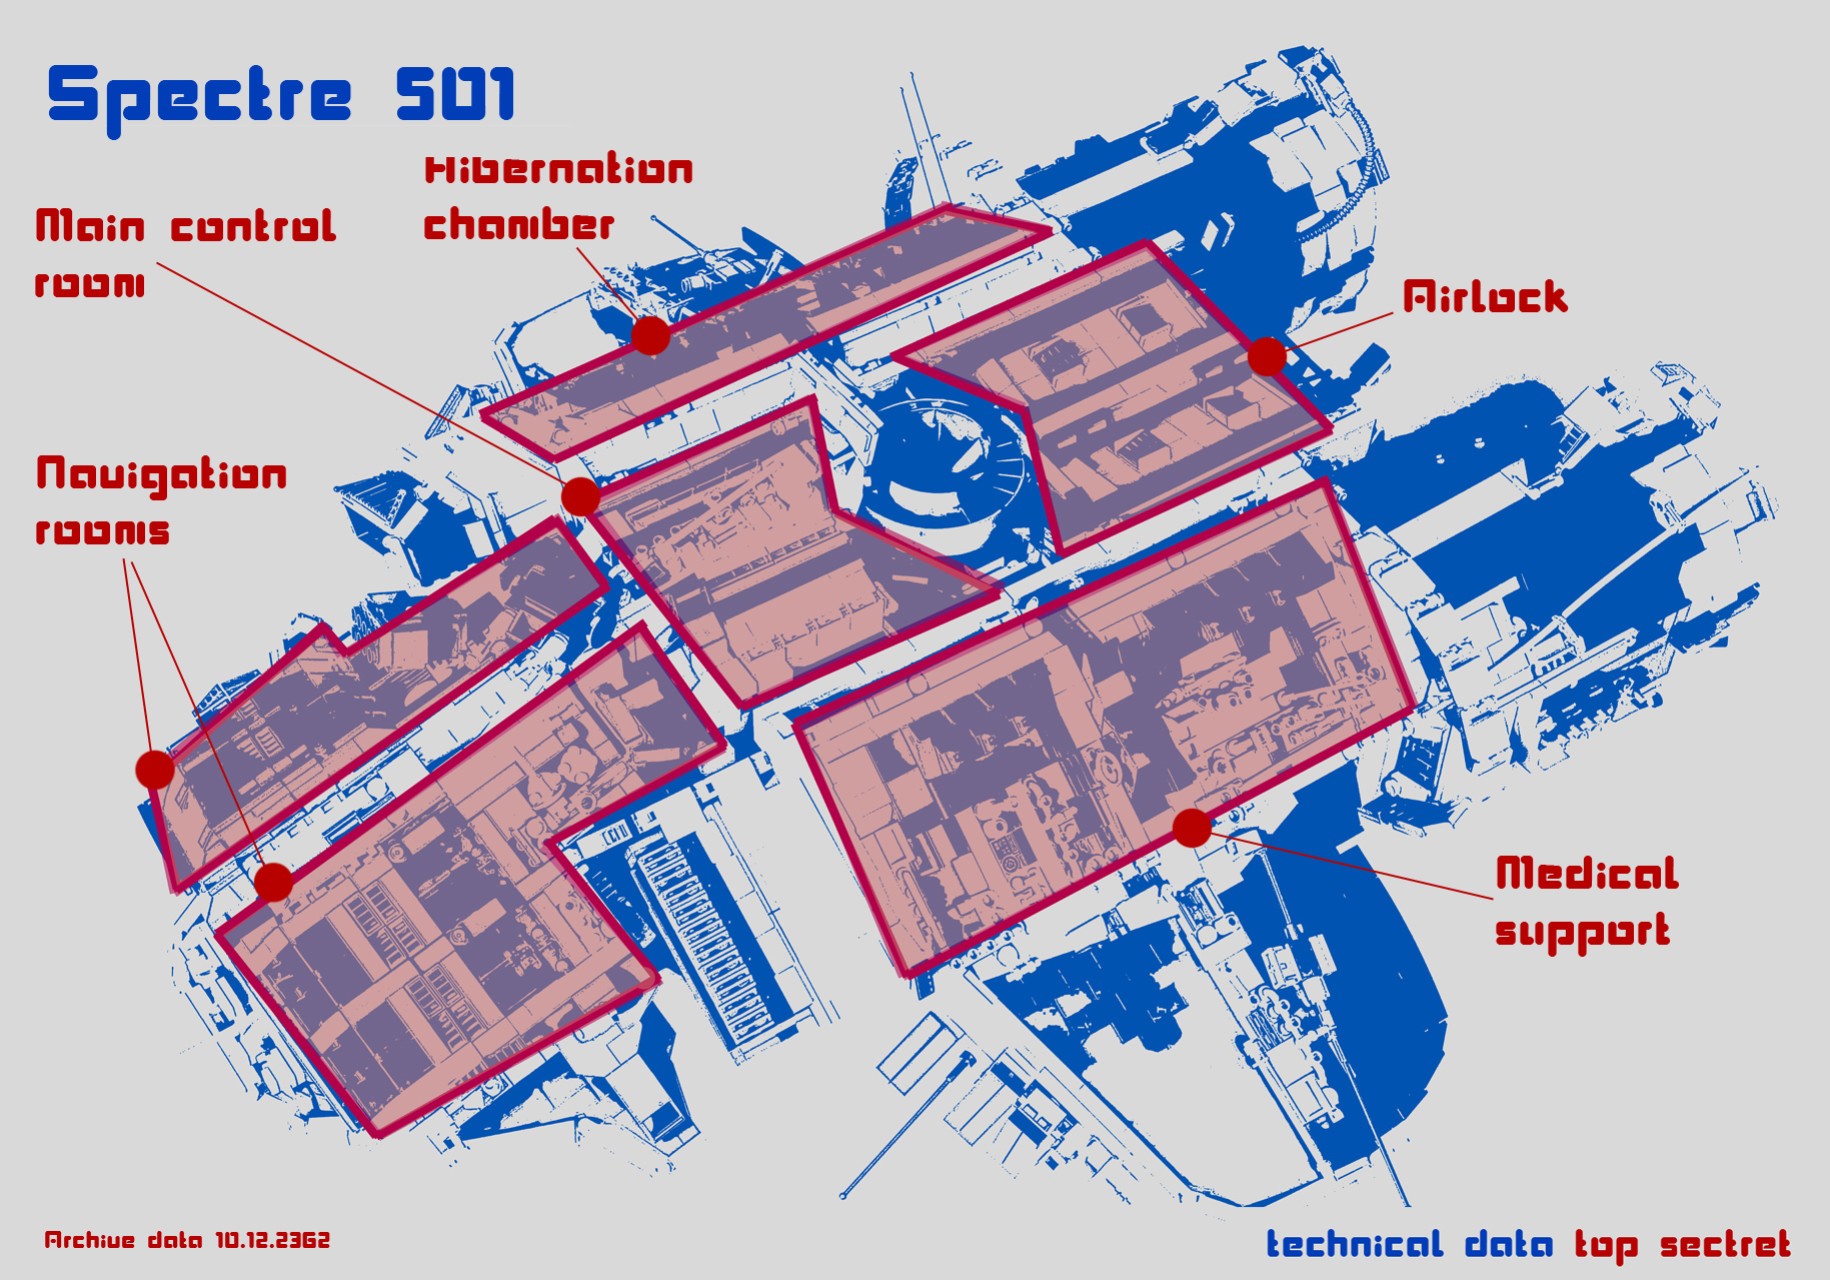
Inside structure
Ship consist of the following areas:
- Hibernation chambers
- Medical support
- Navigation rooms
- Main control room
- Hangar (airlock)

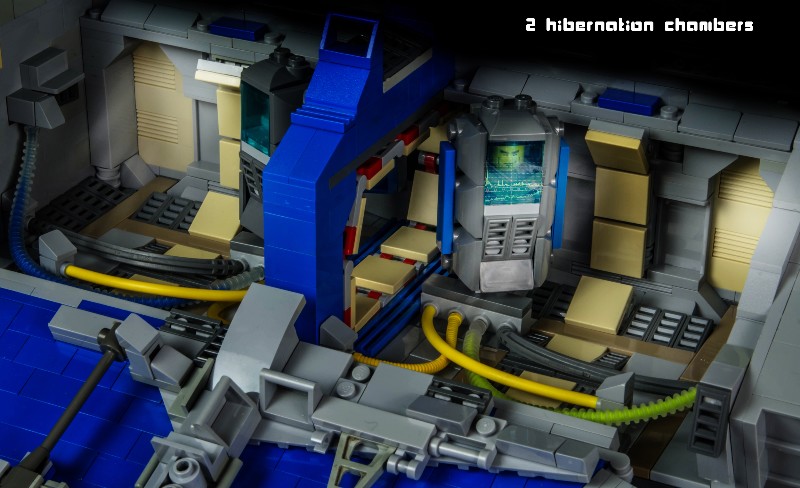
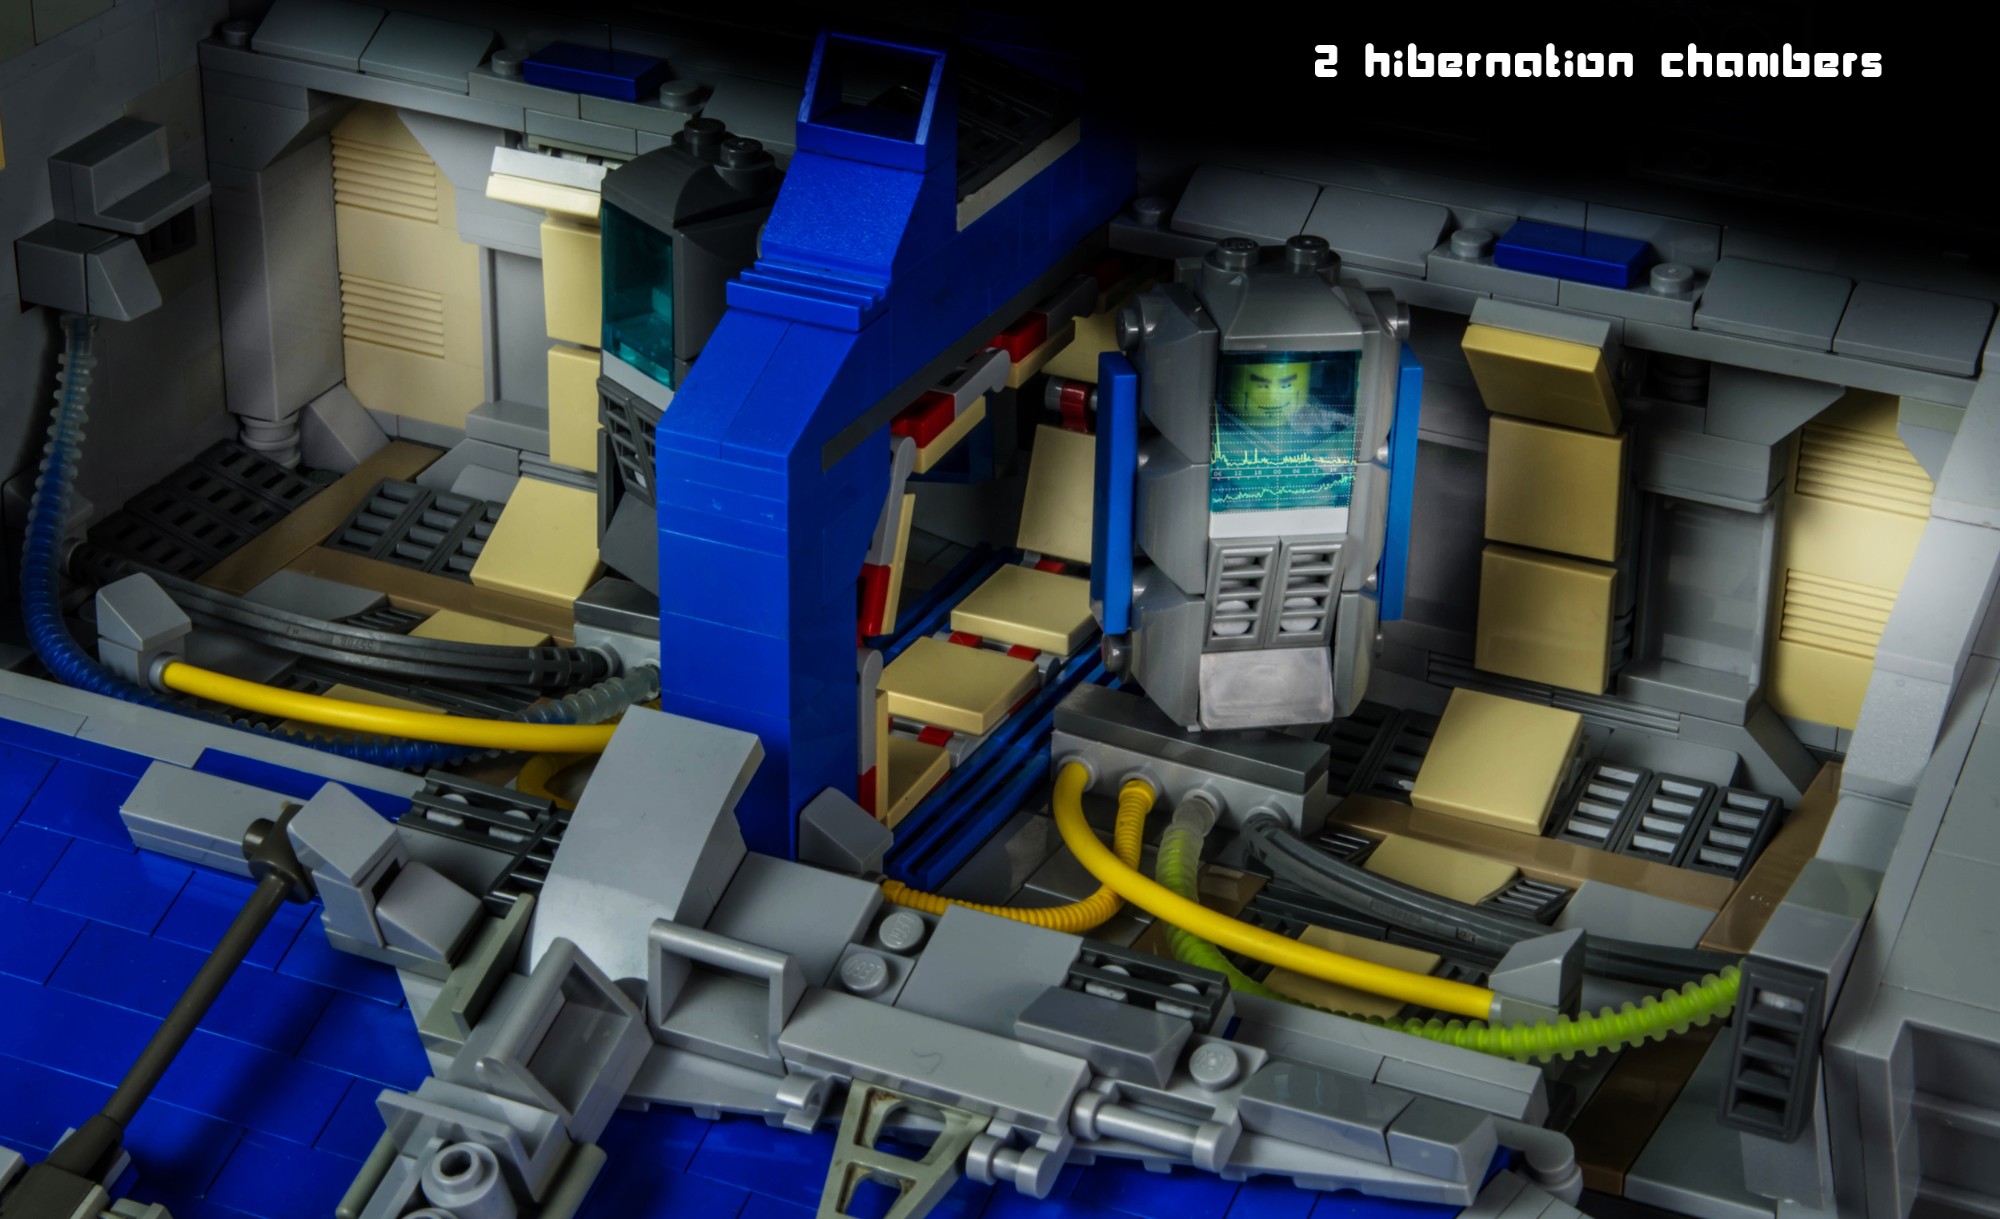
Hibernation chambers
There are two dedicated chambers that can provide wide range of hibernation from slowing metabolic time to total freezing.
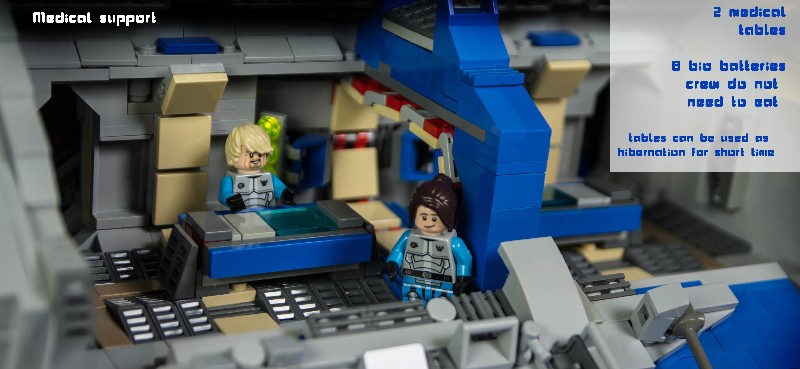
Medical support
Most important equipment here are two medical tables. They are fully automatic and can provide wide range of body regeneration procedures. (in real minifigures can not be put into tables). This tables can also provide limited hibernation options (not fully freezing)
Second important component here are “bio batteries charger”. Astronauts have rebuilded digestive system. They have build in bioenergetics system. In case of activity instead of eating and sleeping they only need to replace special bio batteries once every 36 hours. Ship is equipped with 8 bio batteries.
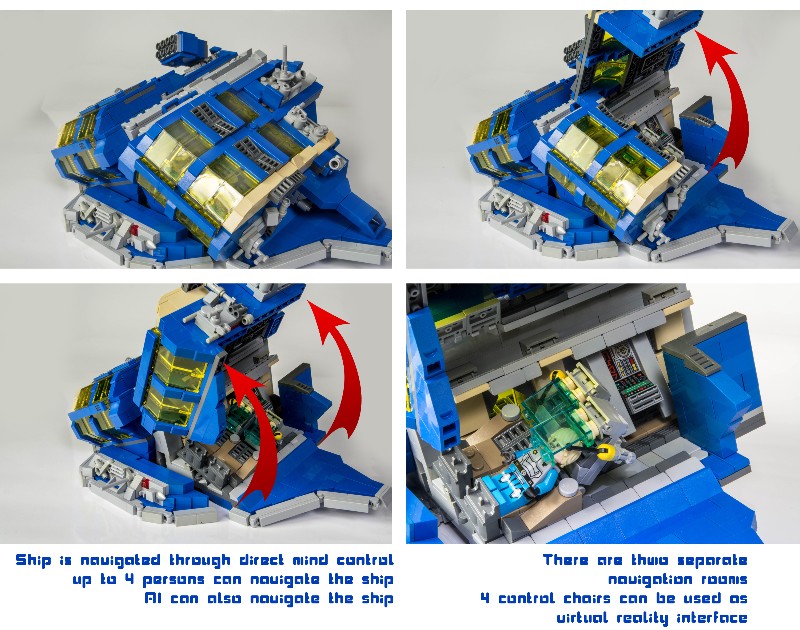
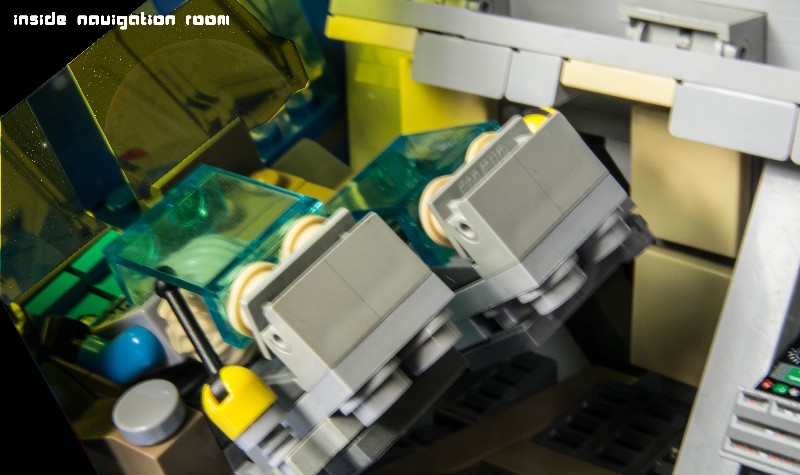
Navigation rooms
There are two separate navigation rooms each with 2 control chairs. By each of this chair astronaut can control every system of the ship. The control is made by direct mind connection (no need for other displays and interface)
The more astronauts are involved in the controlling of the ship more tasks can be split between them.
Either way the AI can control the entire ship by herself (girl personality named Amanda is loaded)
Chairs in control rooms have horizontal position control. They can tilt in opposite direction to the ship maneuver to limit G force negative effect. (idea stolen from Interstellar)
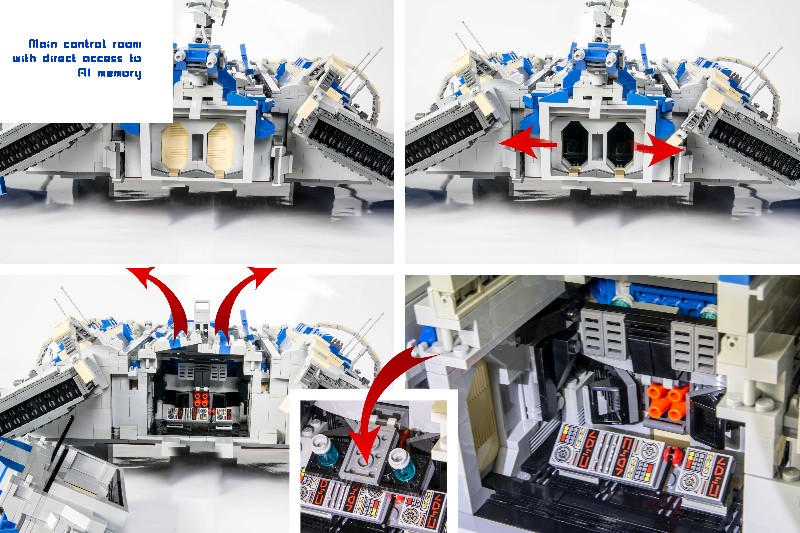
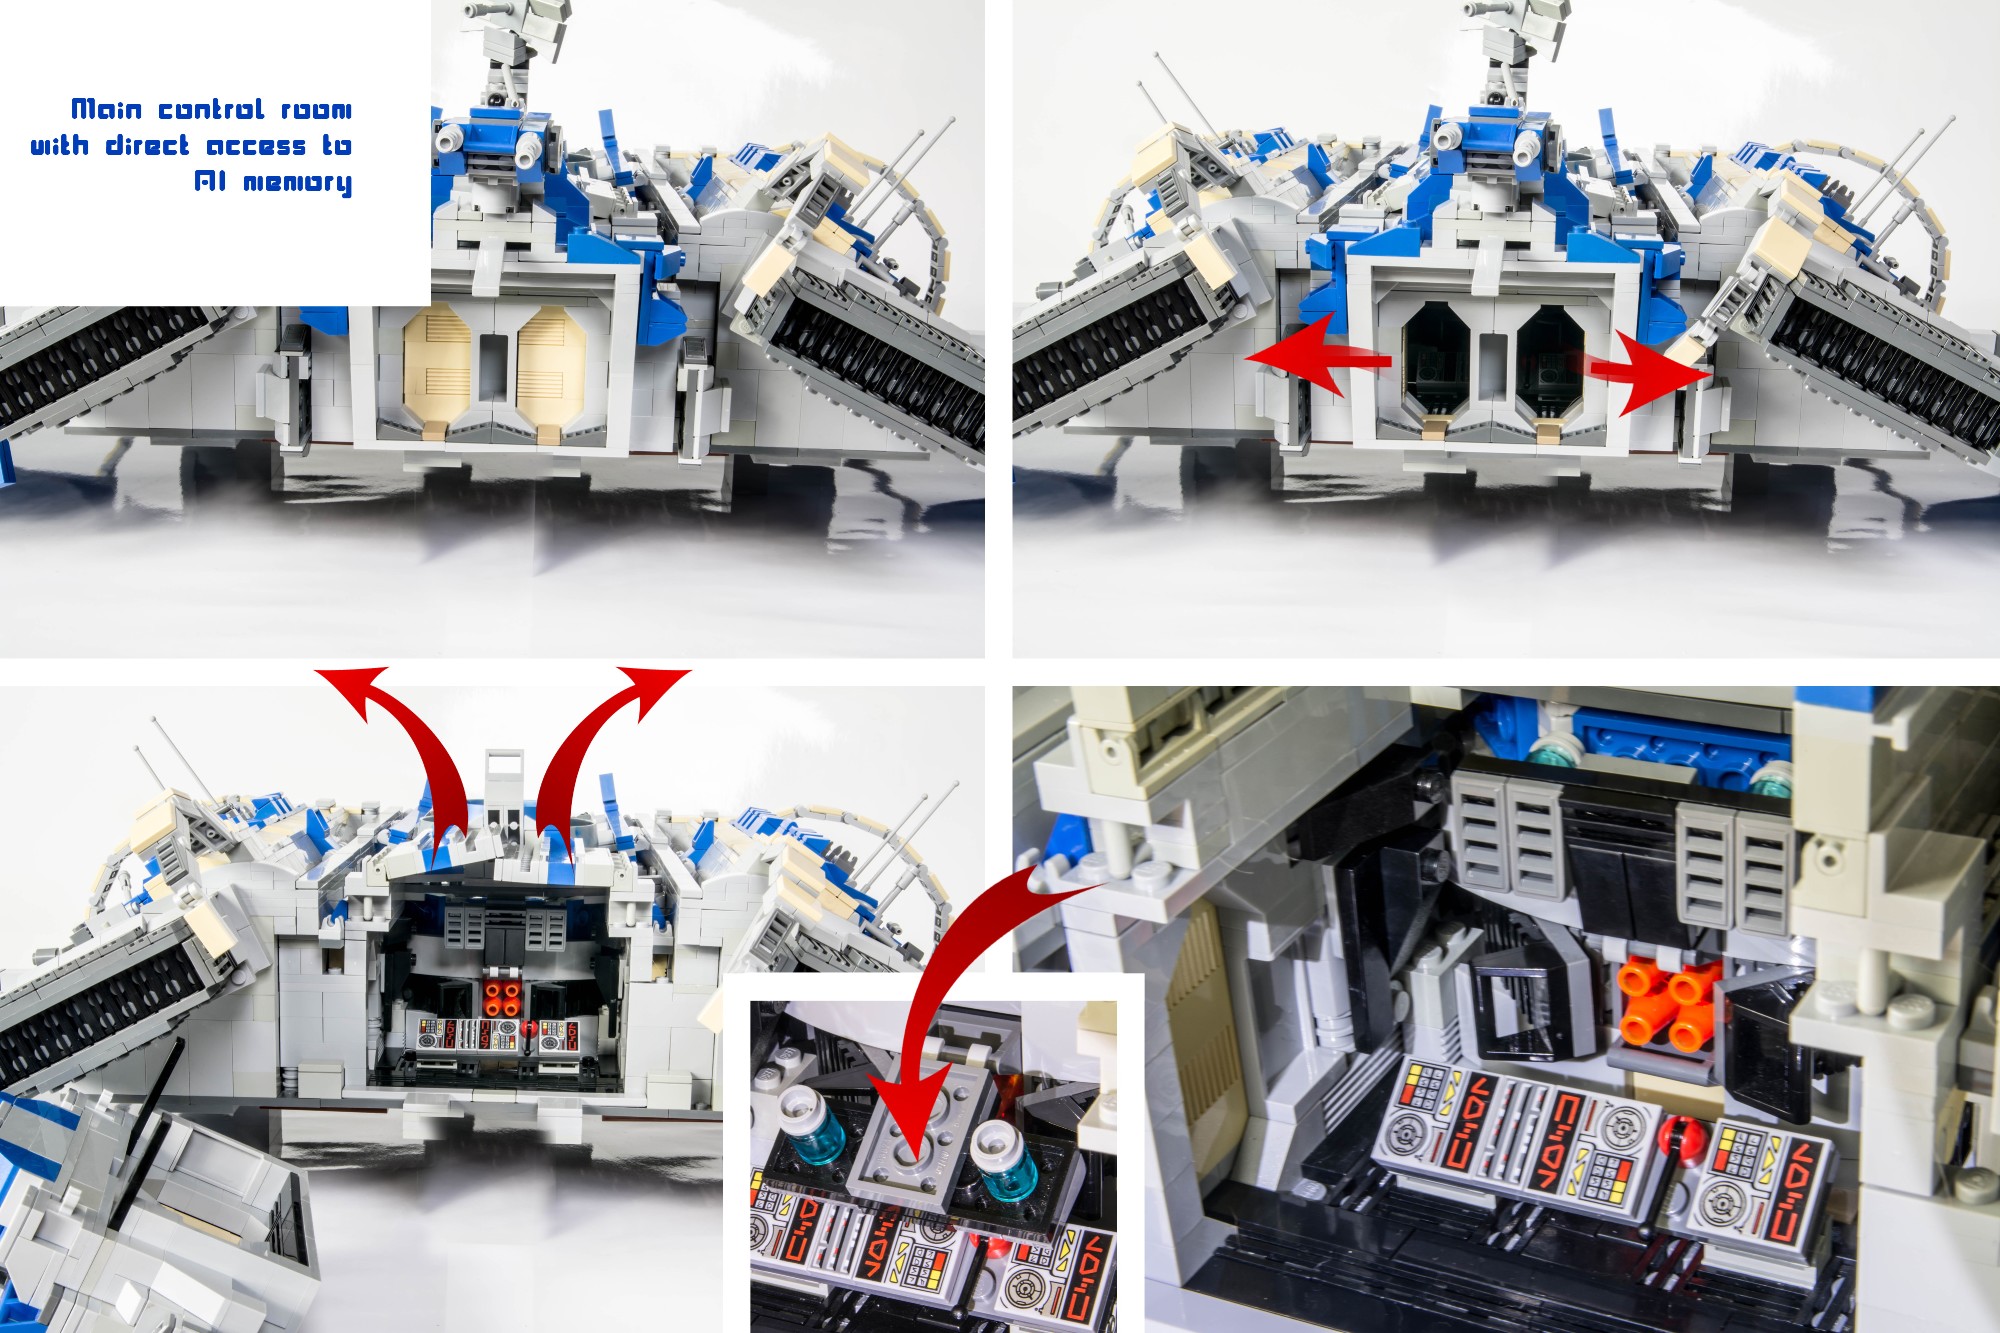
Main control room
There are two major systems with direct control here. One is thermal core and second is AI.
Both can be switch off here. You can also remove AI memory
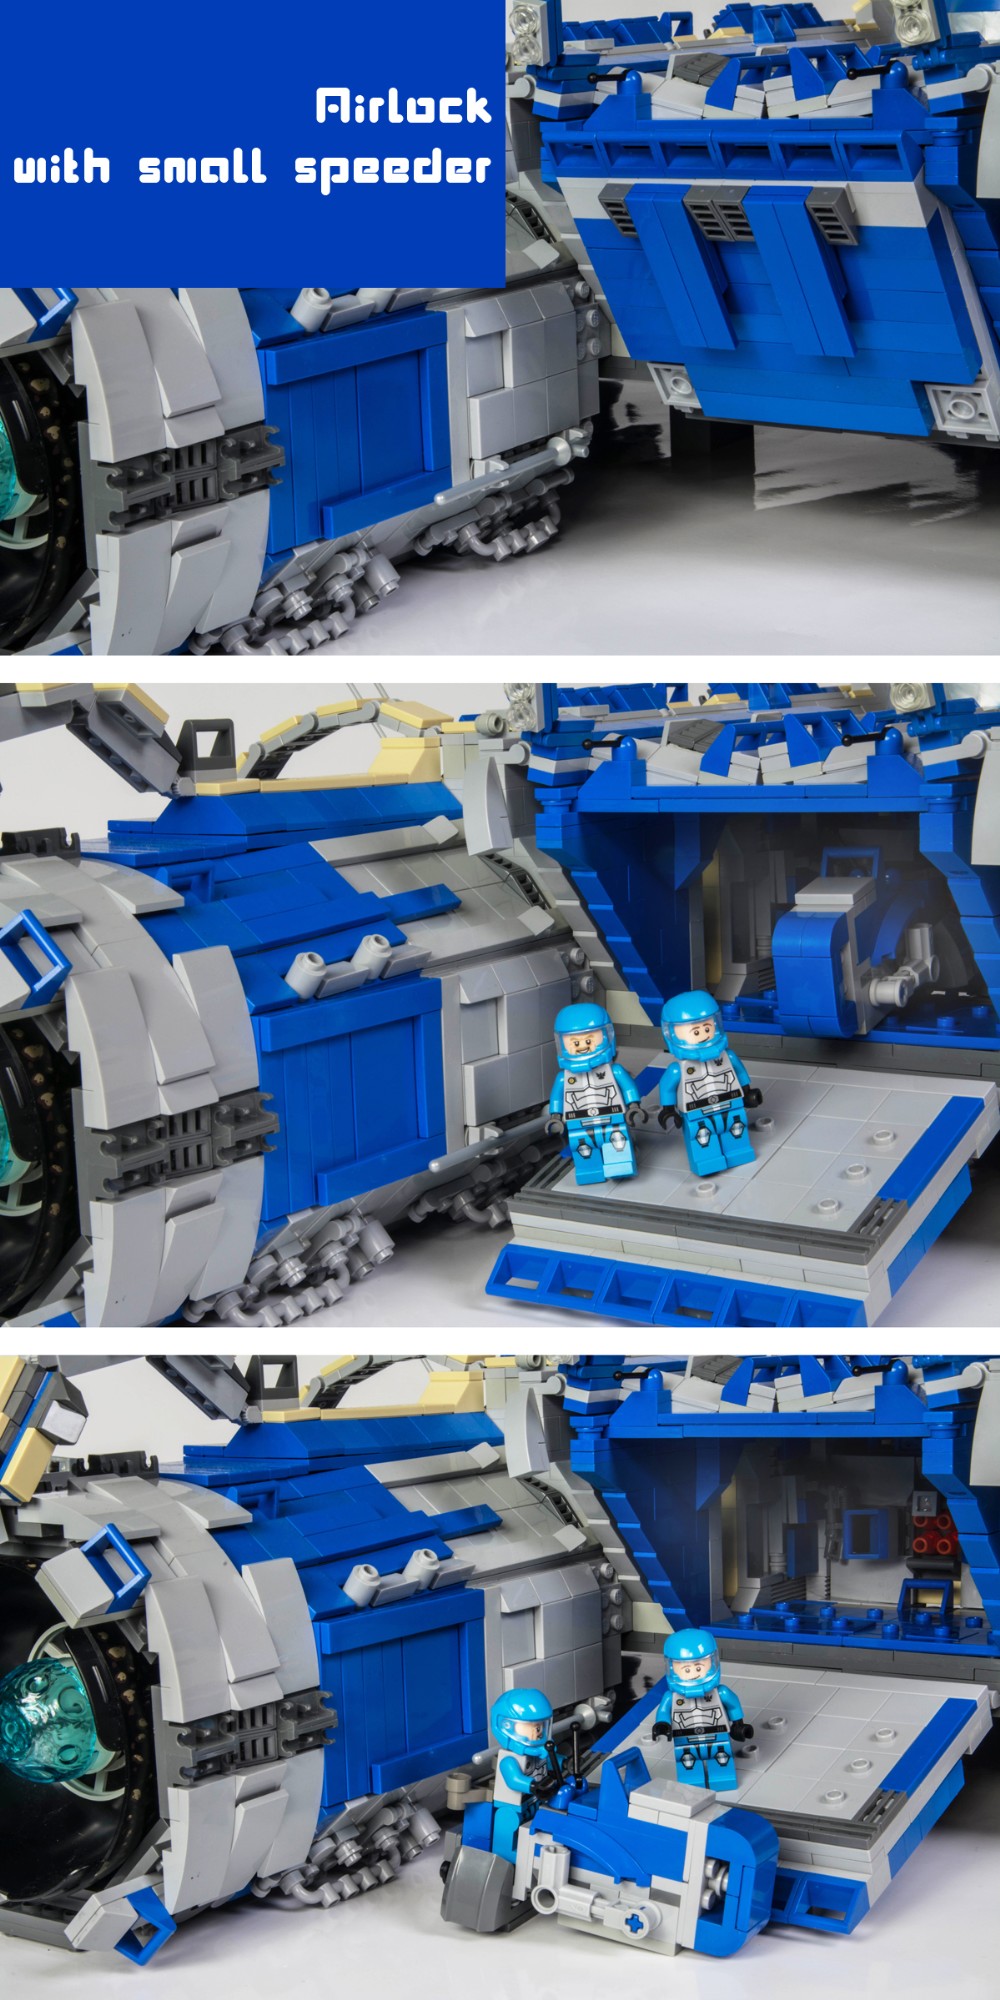
Hangar (Airlock)
This is the only entrance to the ship. It has small speeder and repairing equipment

Landing
Shuttle is equipped with landing pads. But it is too heavy to be really lifted by this pads.
In the early stage of the ship landing pads were integrated part of the ship. Later I removed them and I only place it near to ship to make a pictures.
Future and development
This is first version of the ship. I am not sure if it will be final one. I got feedback that the shape of the ship is a bit strange, and I have to admit that the head is in different style than the rest.
I also miss to build repairing robot. So there is a big chance I will develop the project.
High resolution pics:
-
Good job! I like it vey much!
-
I dont have prepared documentation of Erebor engineeing solutions
I have however this photo of Erebor dwarf secure transportation:

-
A lot ;)
On the other hand - this diorama is used partly on commercial events, so some money is back.
-
thank you all!
please help me to promote the Erebor movie.
I believe it deserves appritiation!
[media]
[/media]link:
-
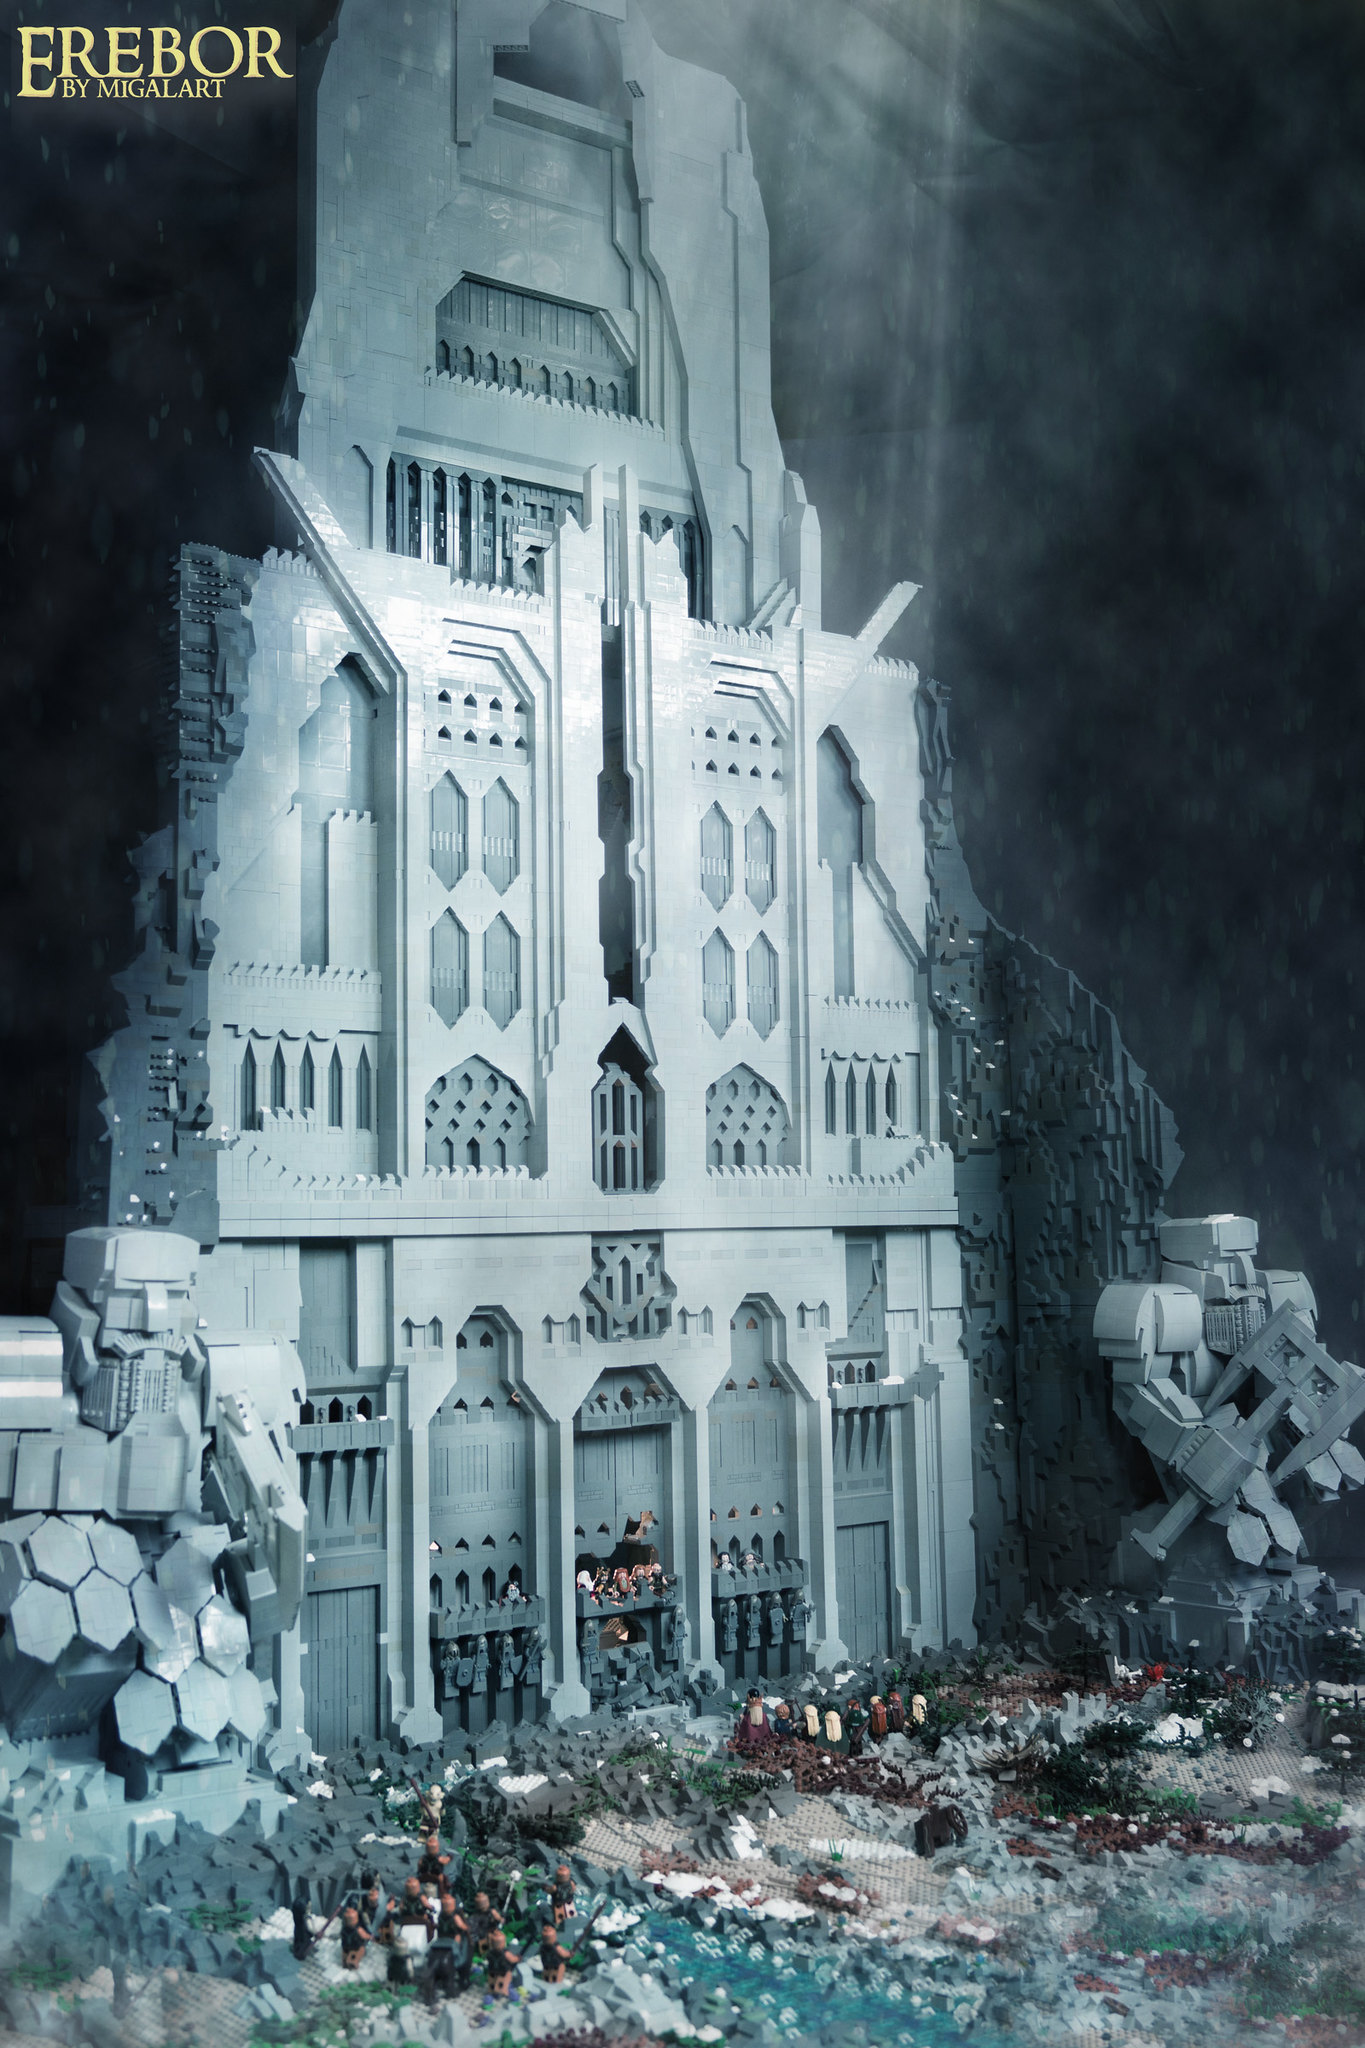
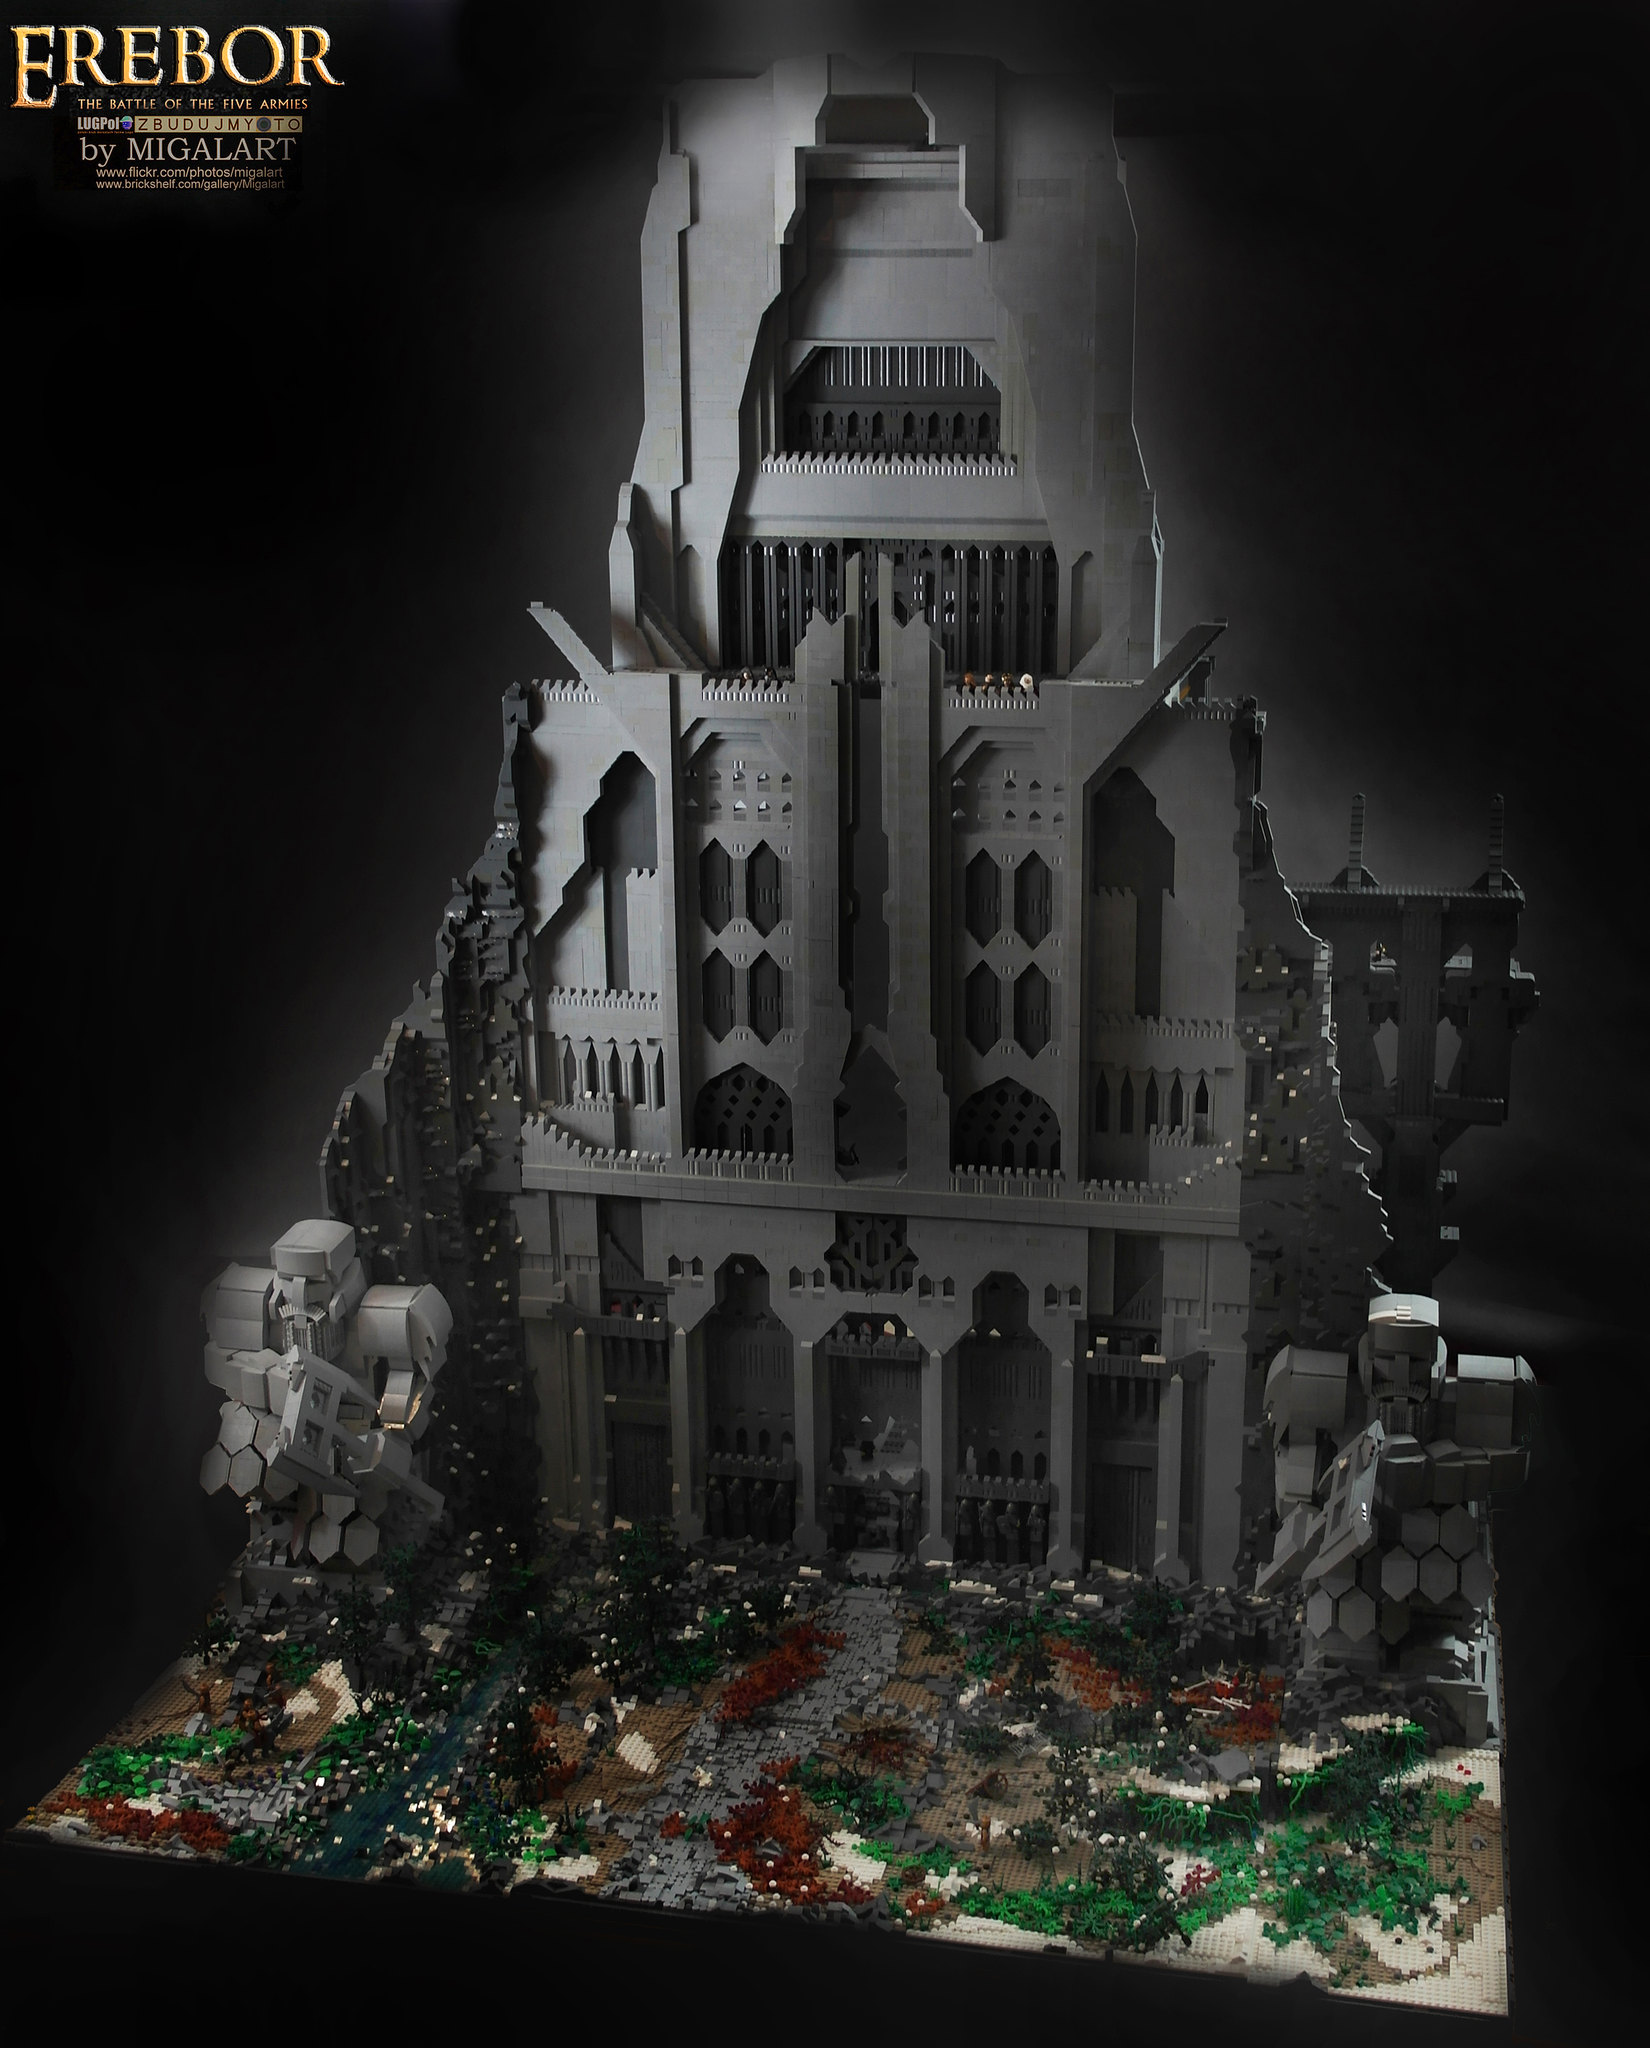
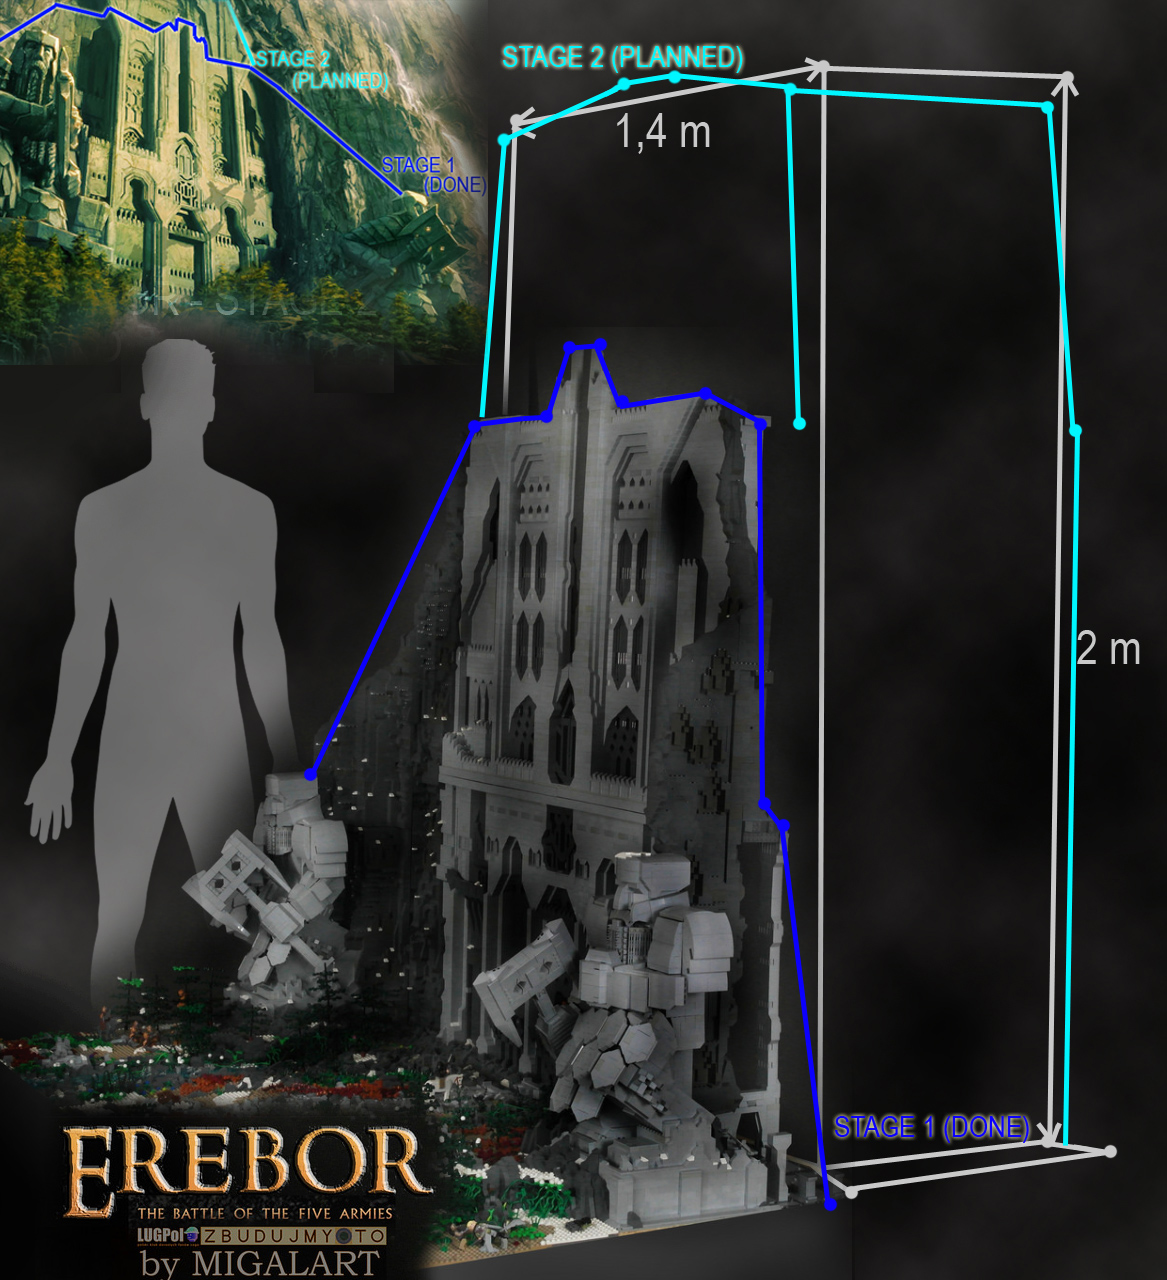
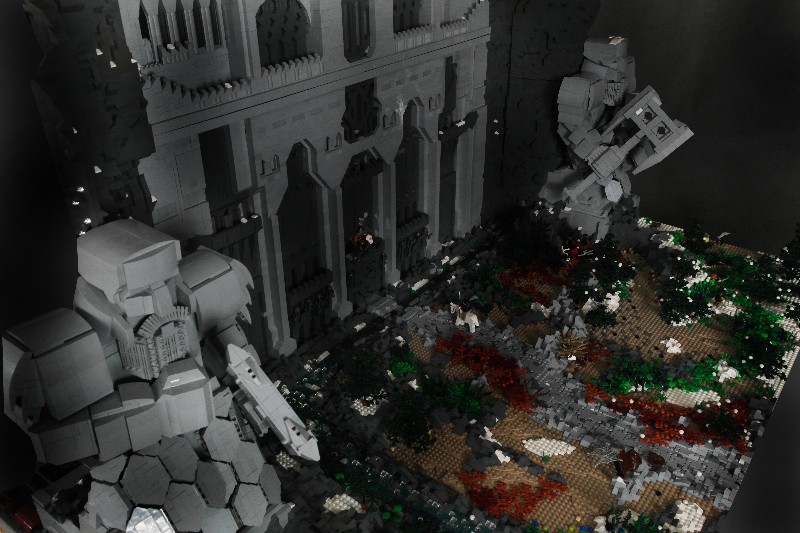
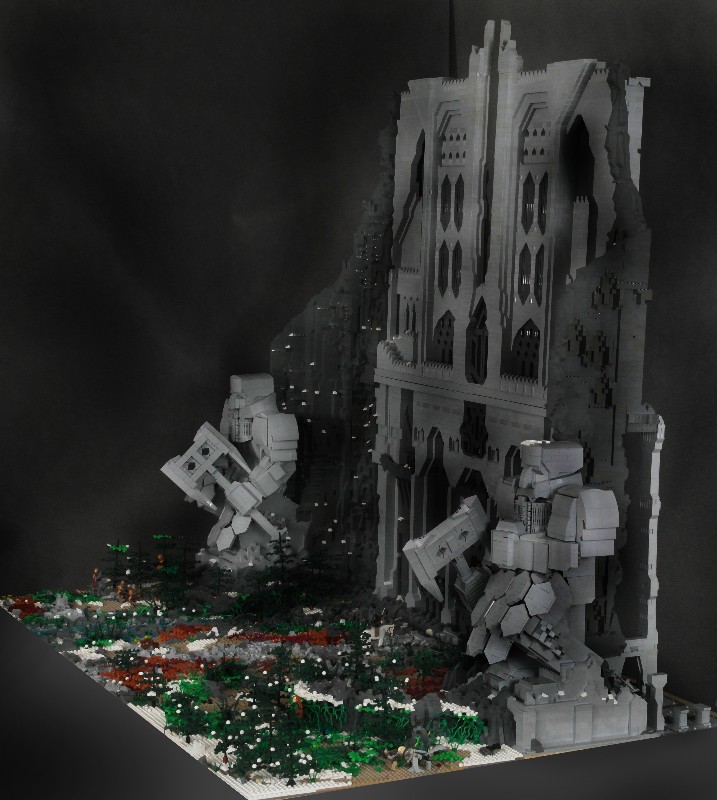
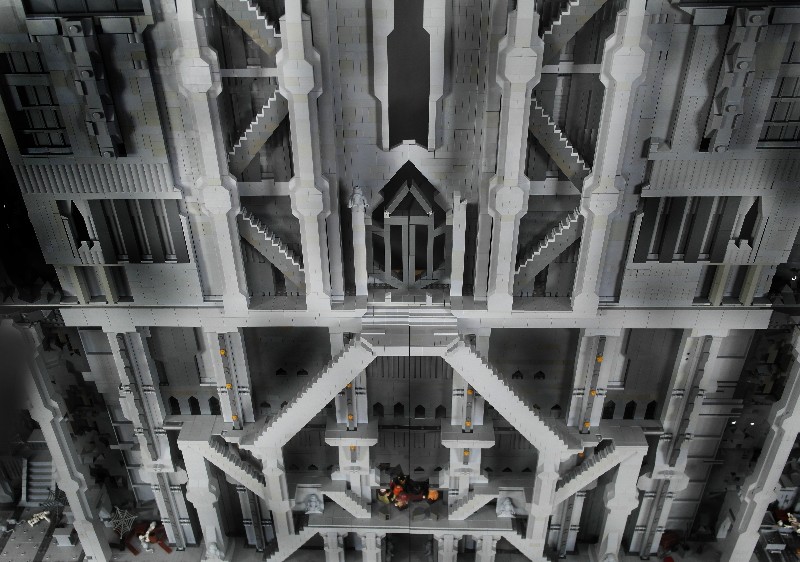
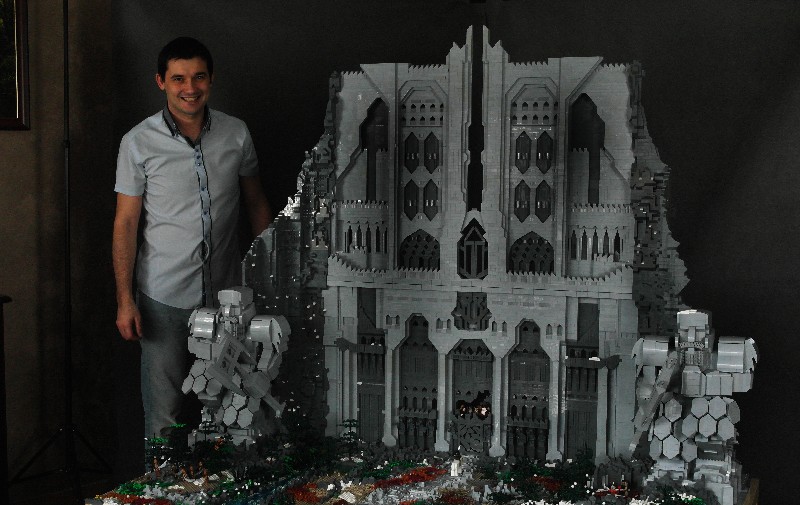
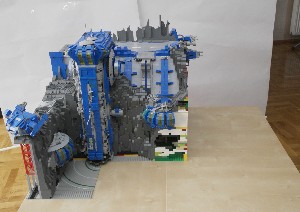
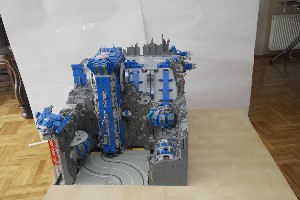
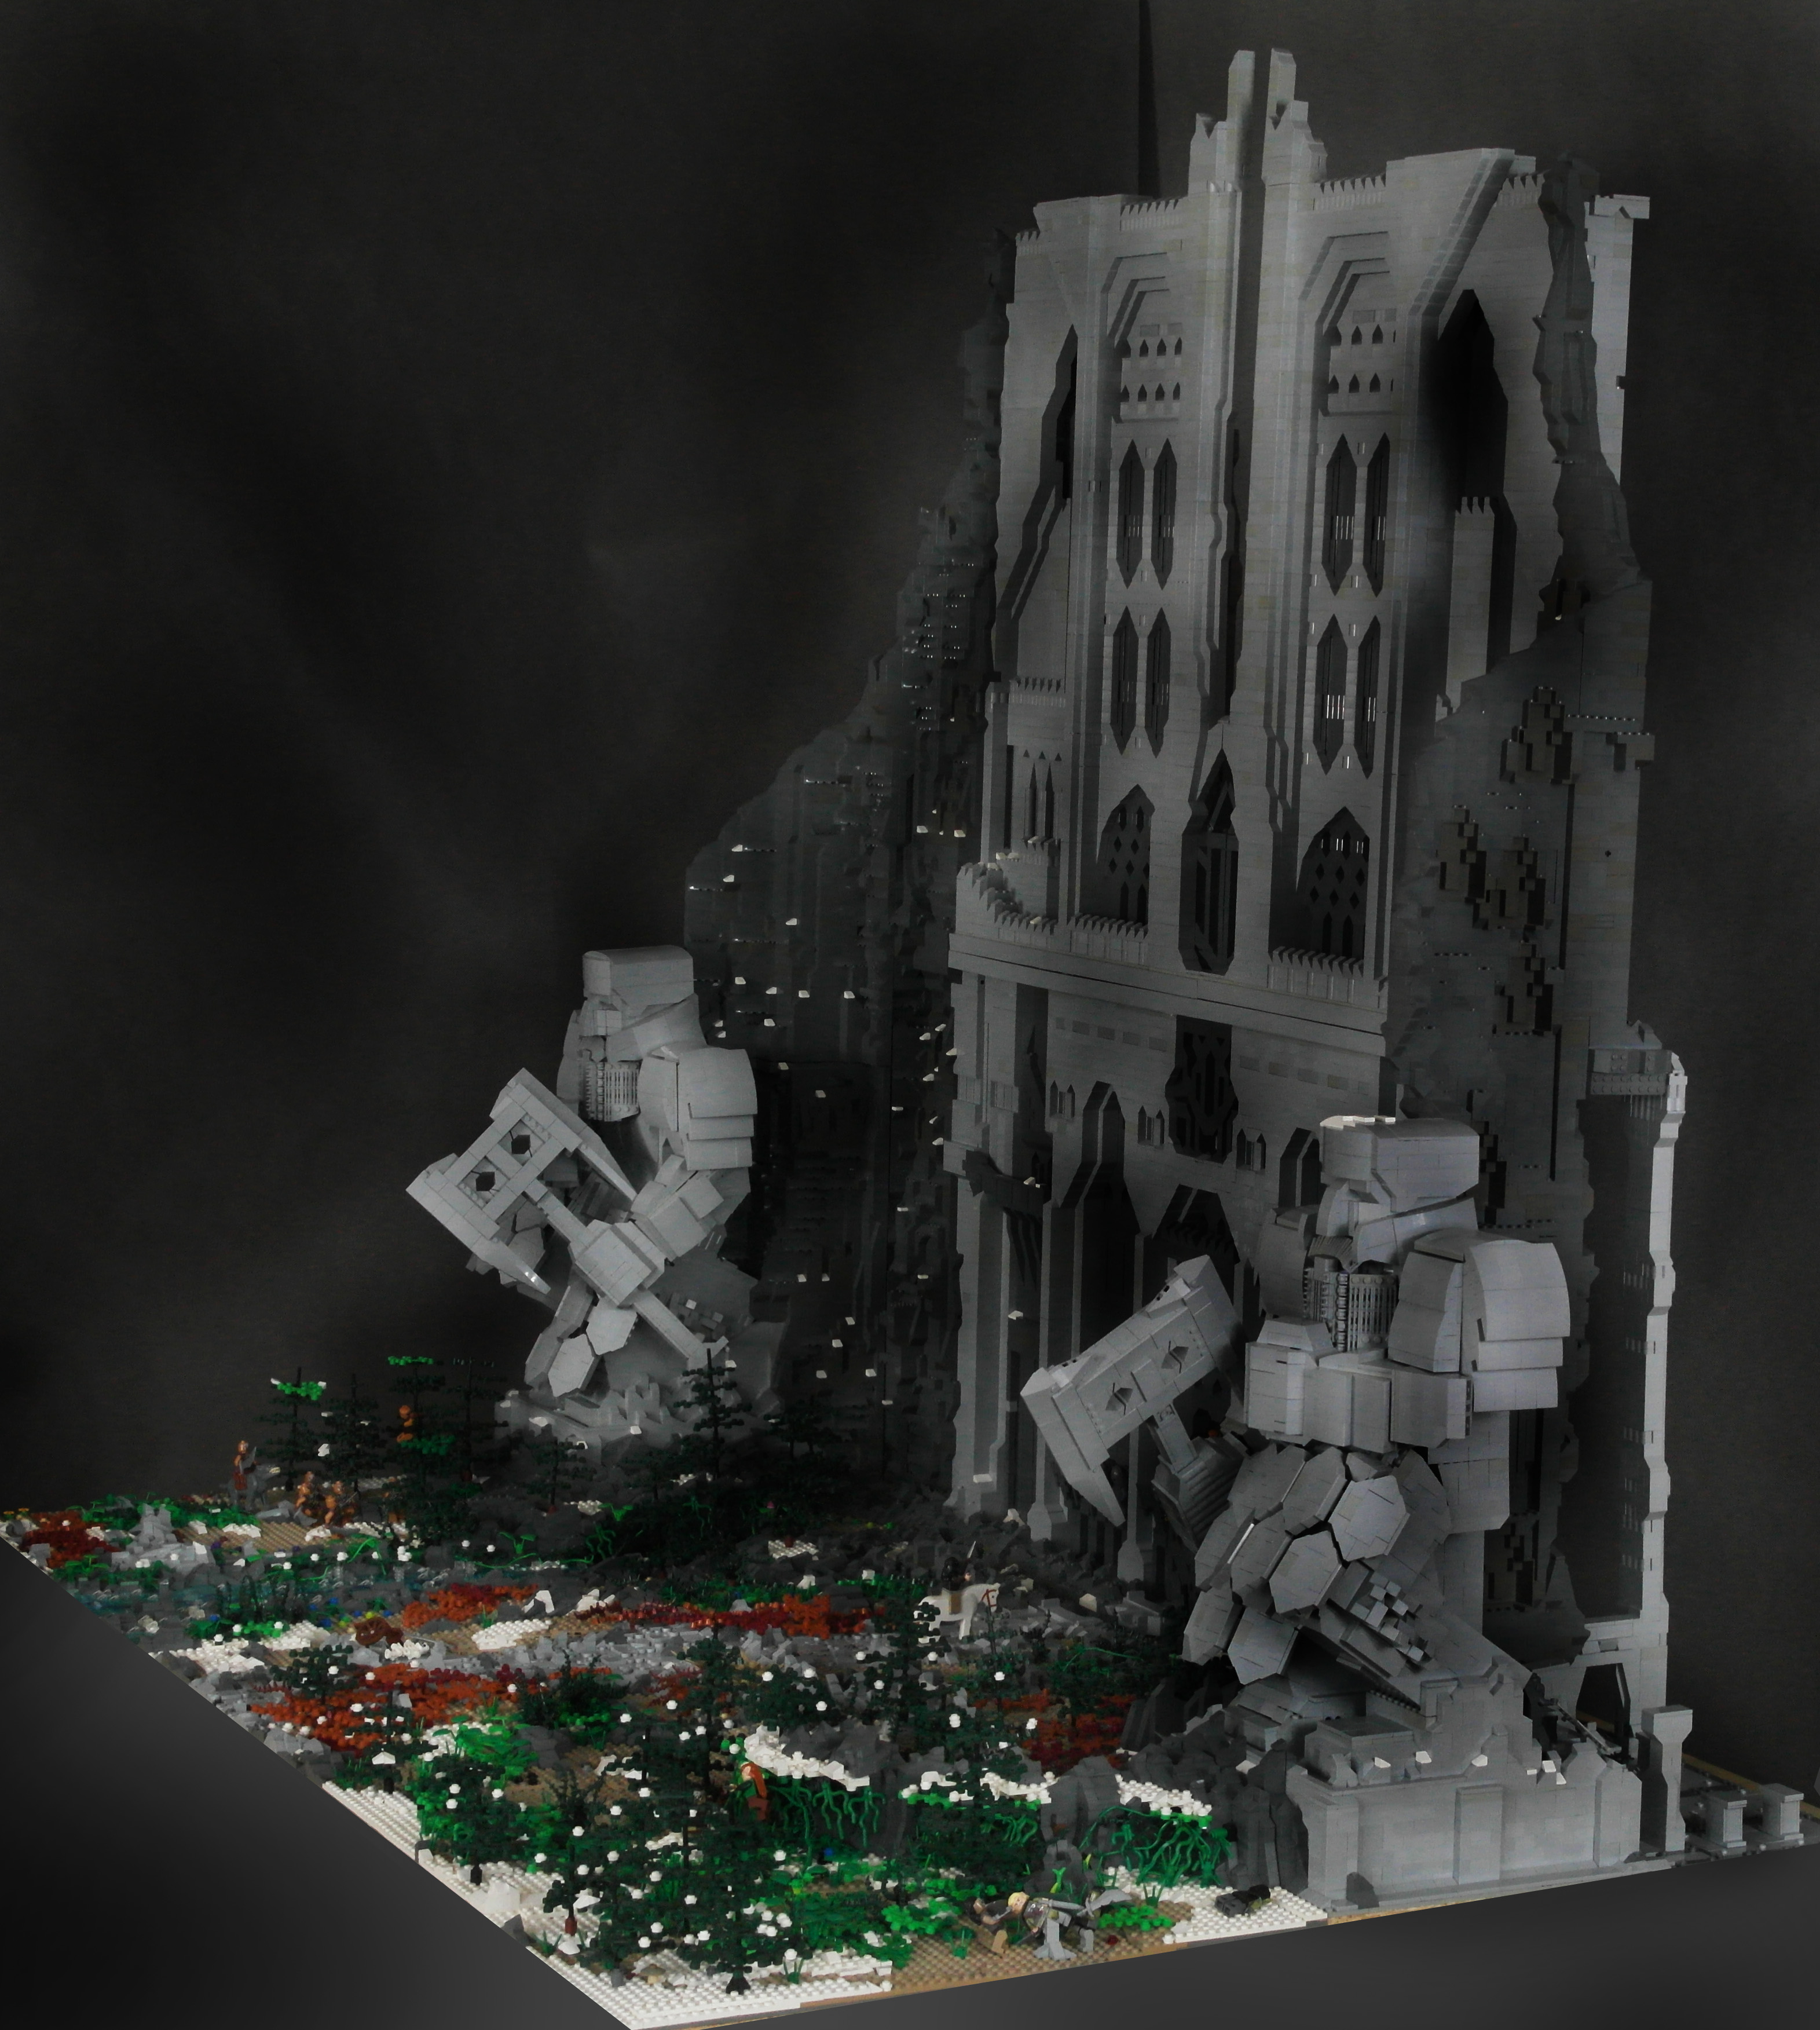
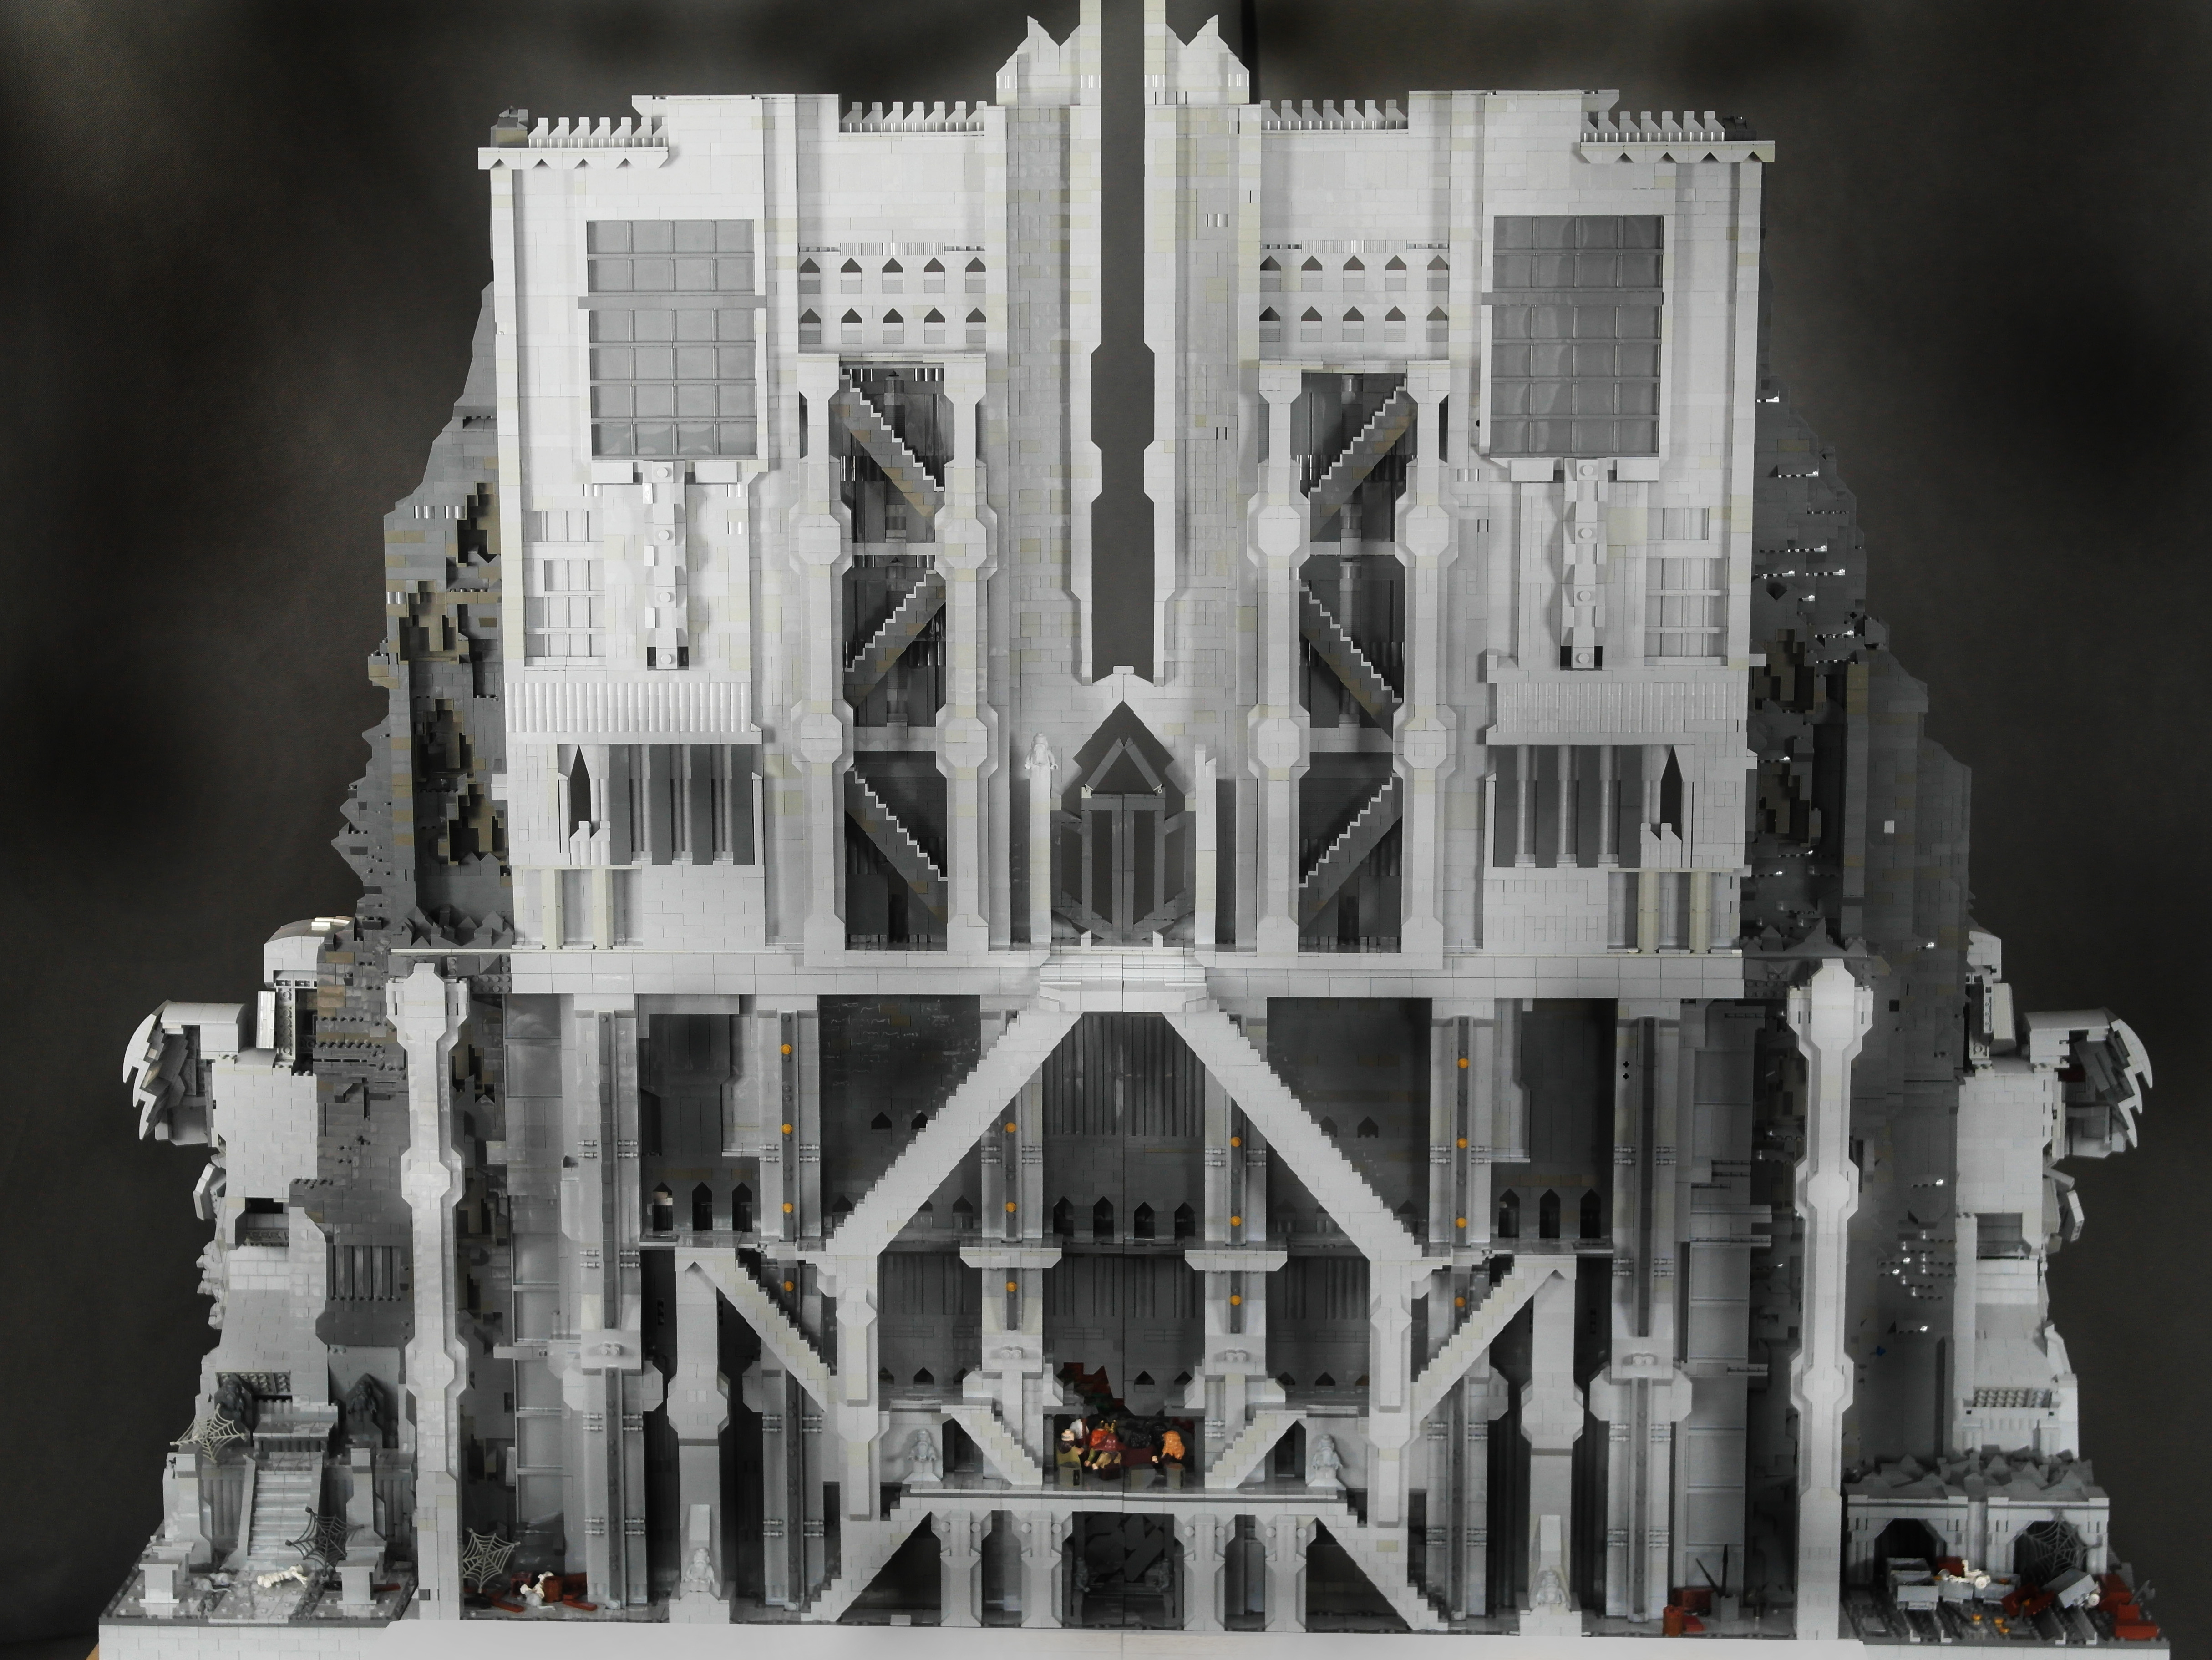
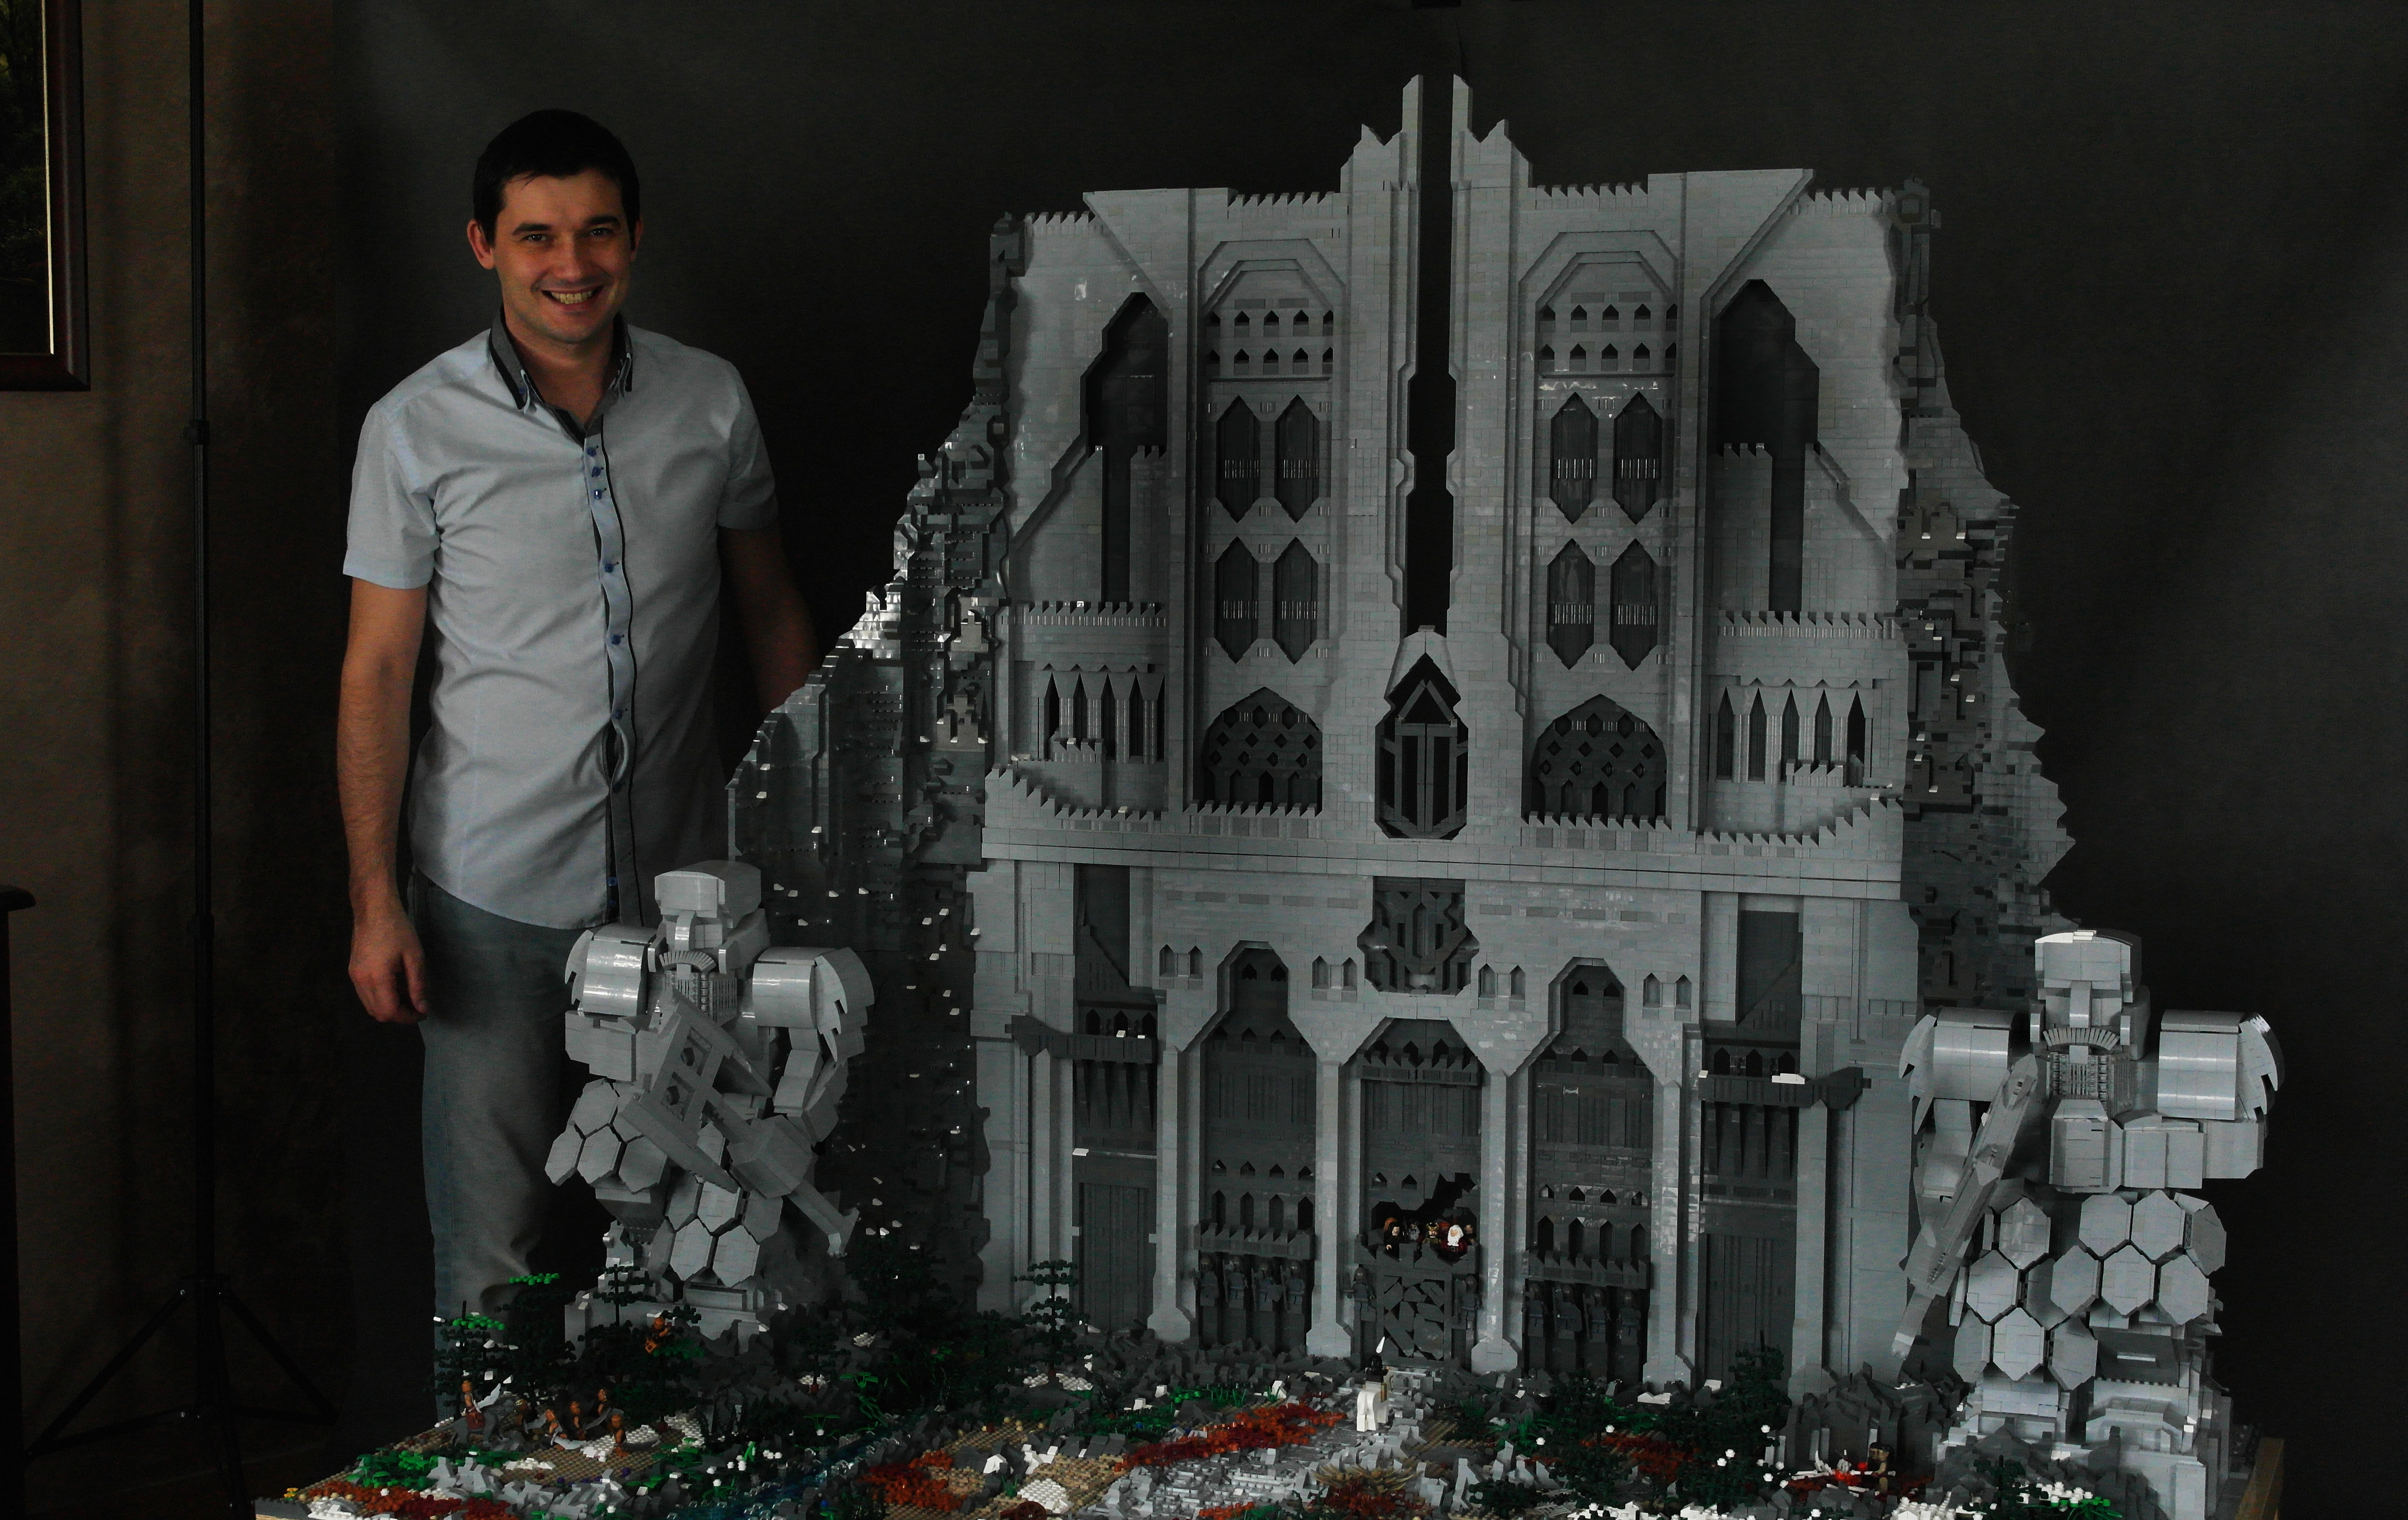
I am very pleased to announce that after more than a year I finished project Erebor;)
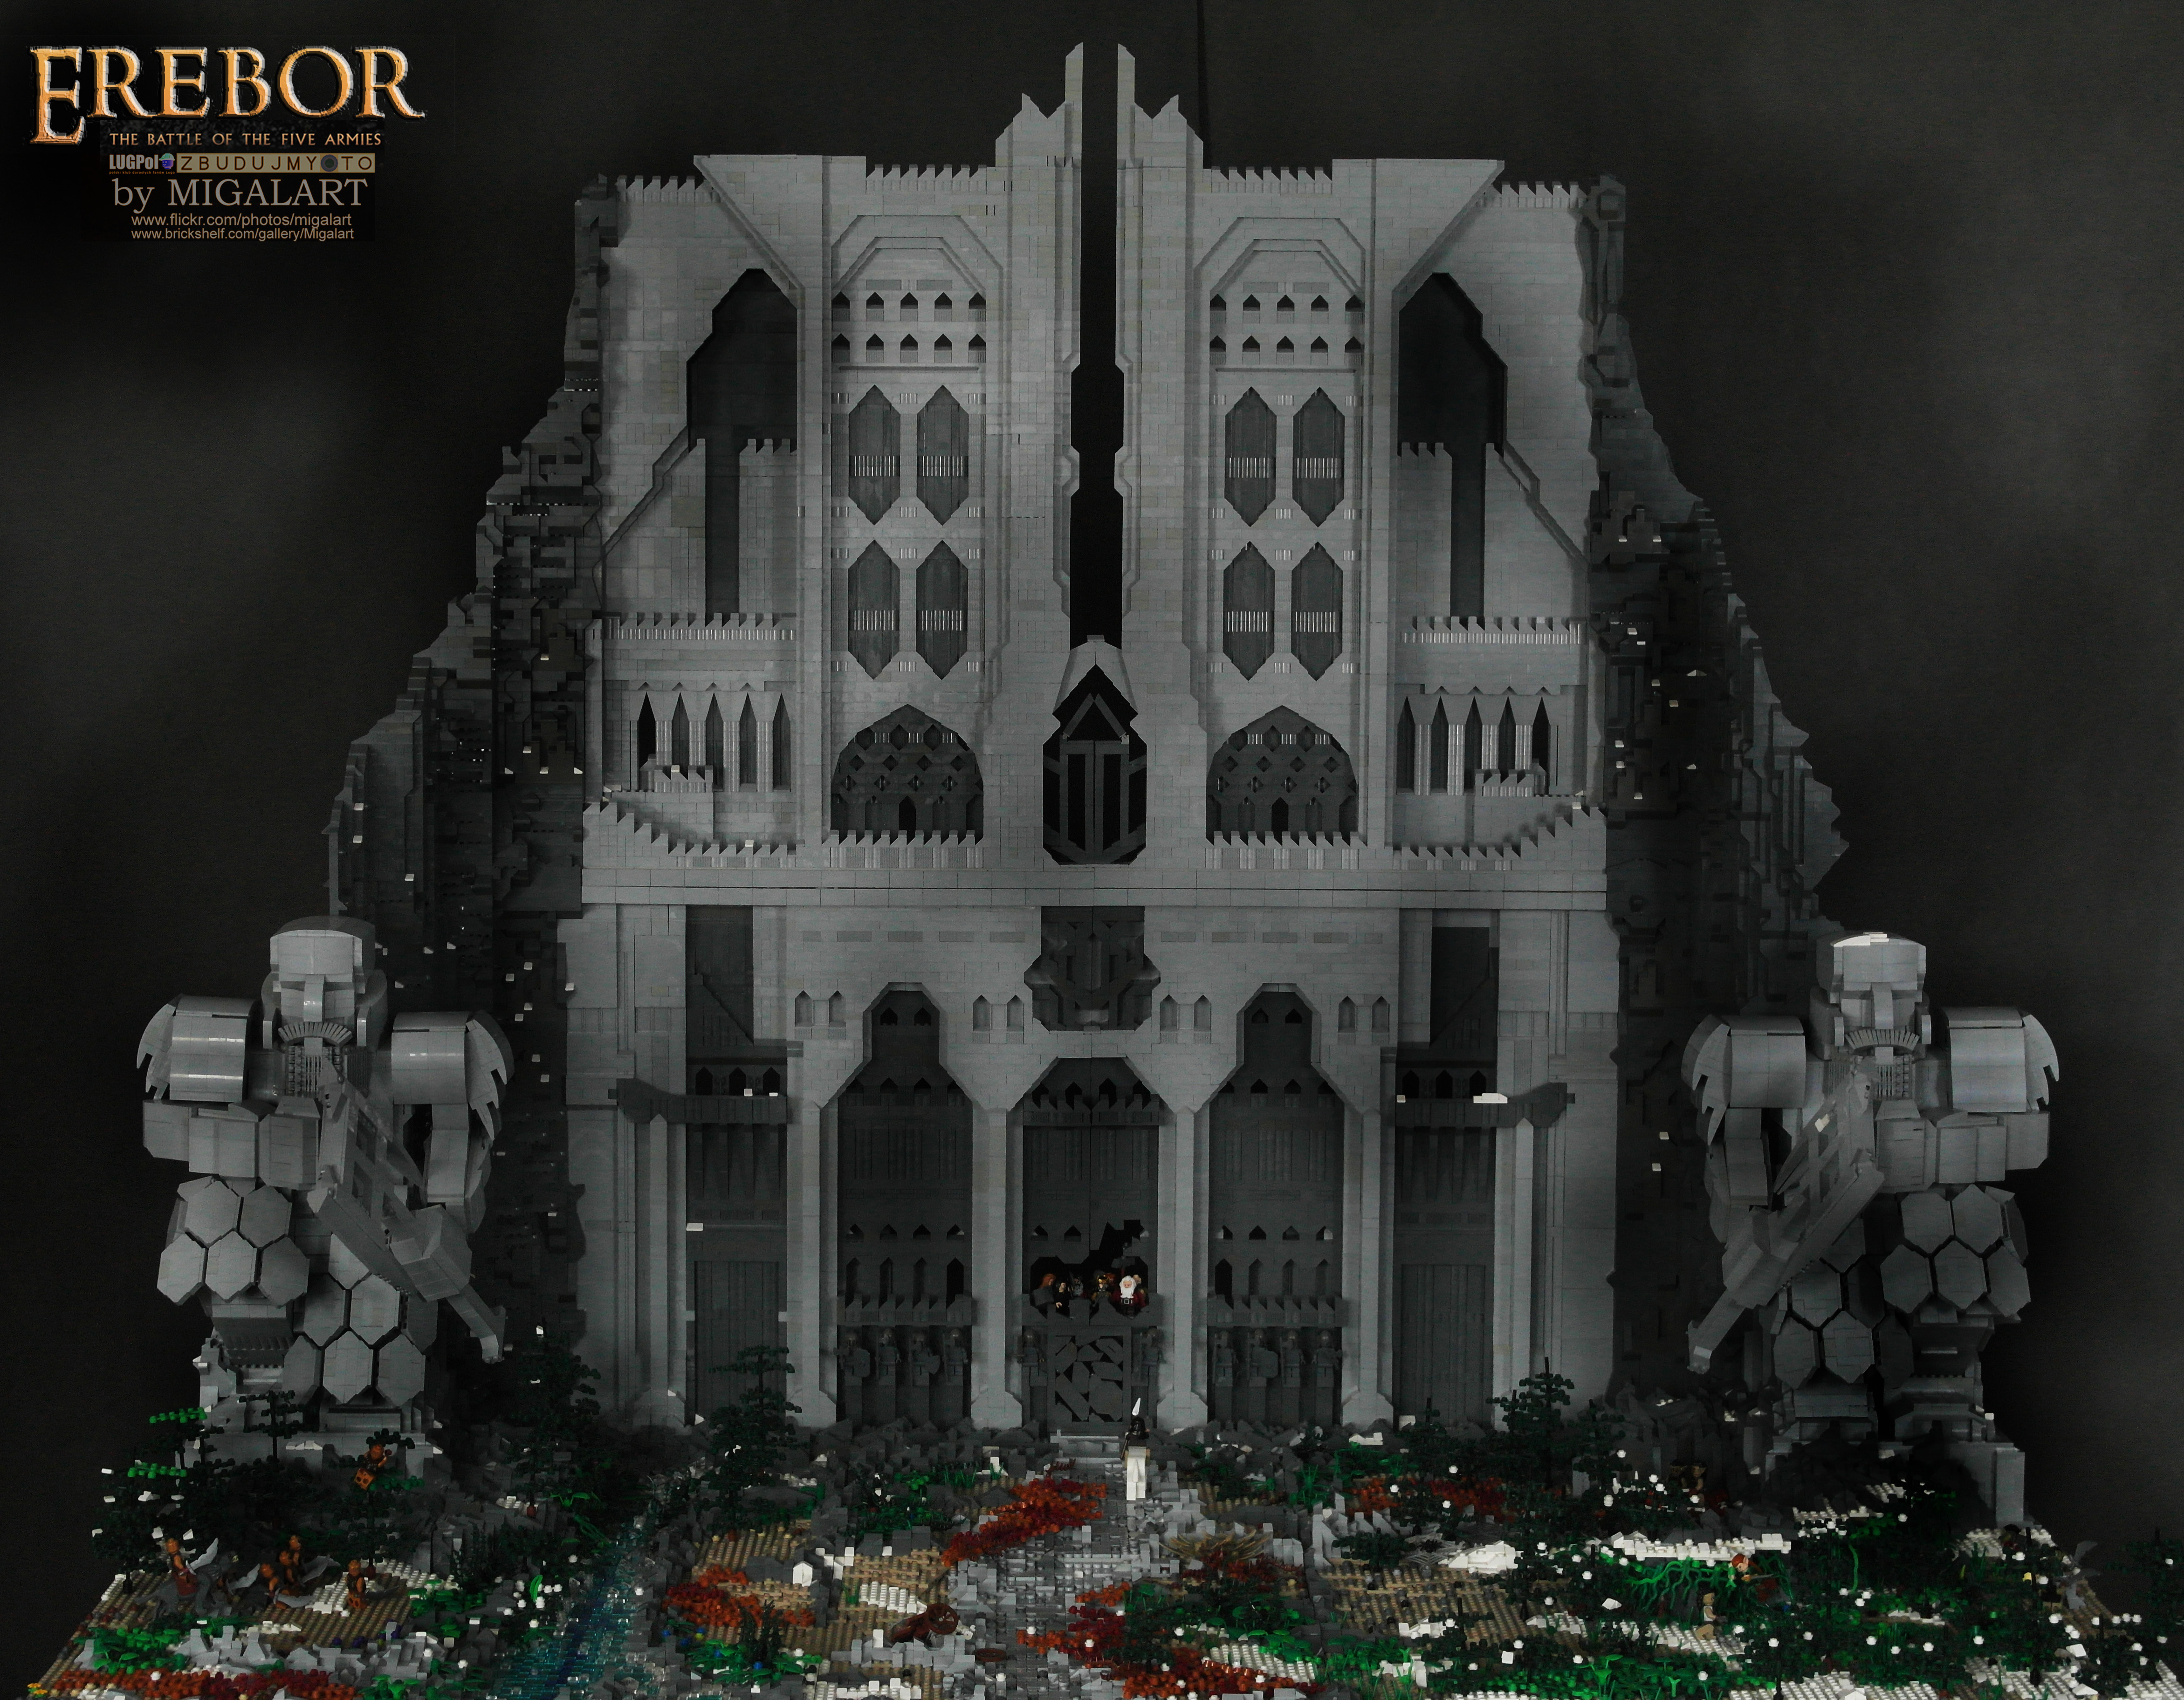
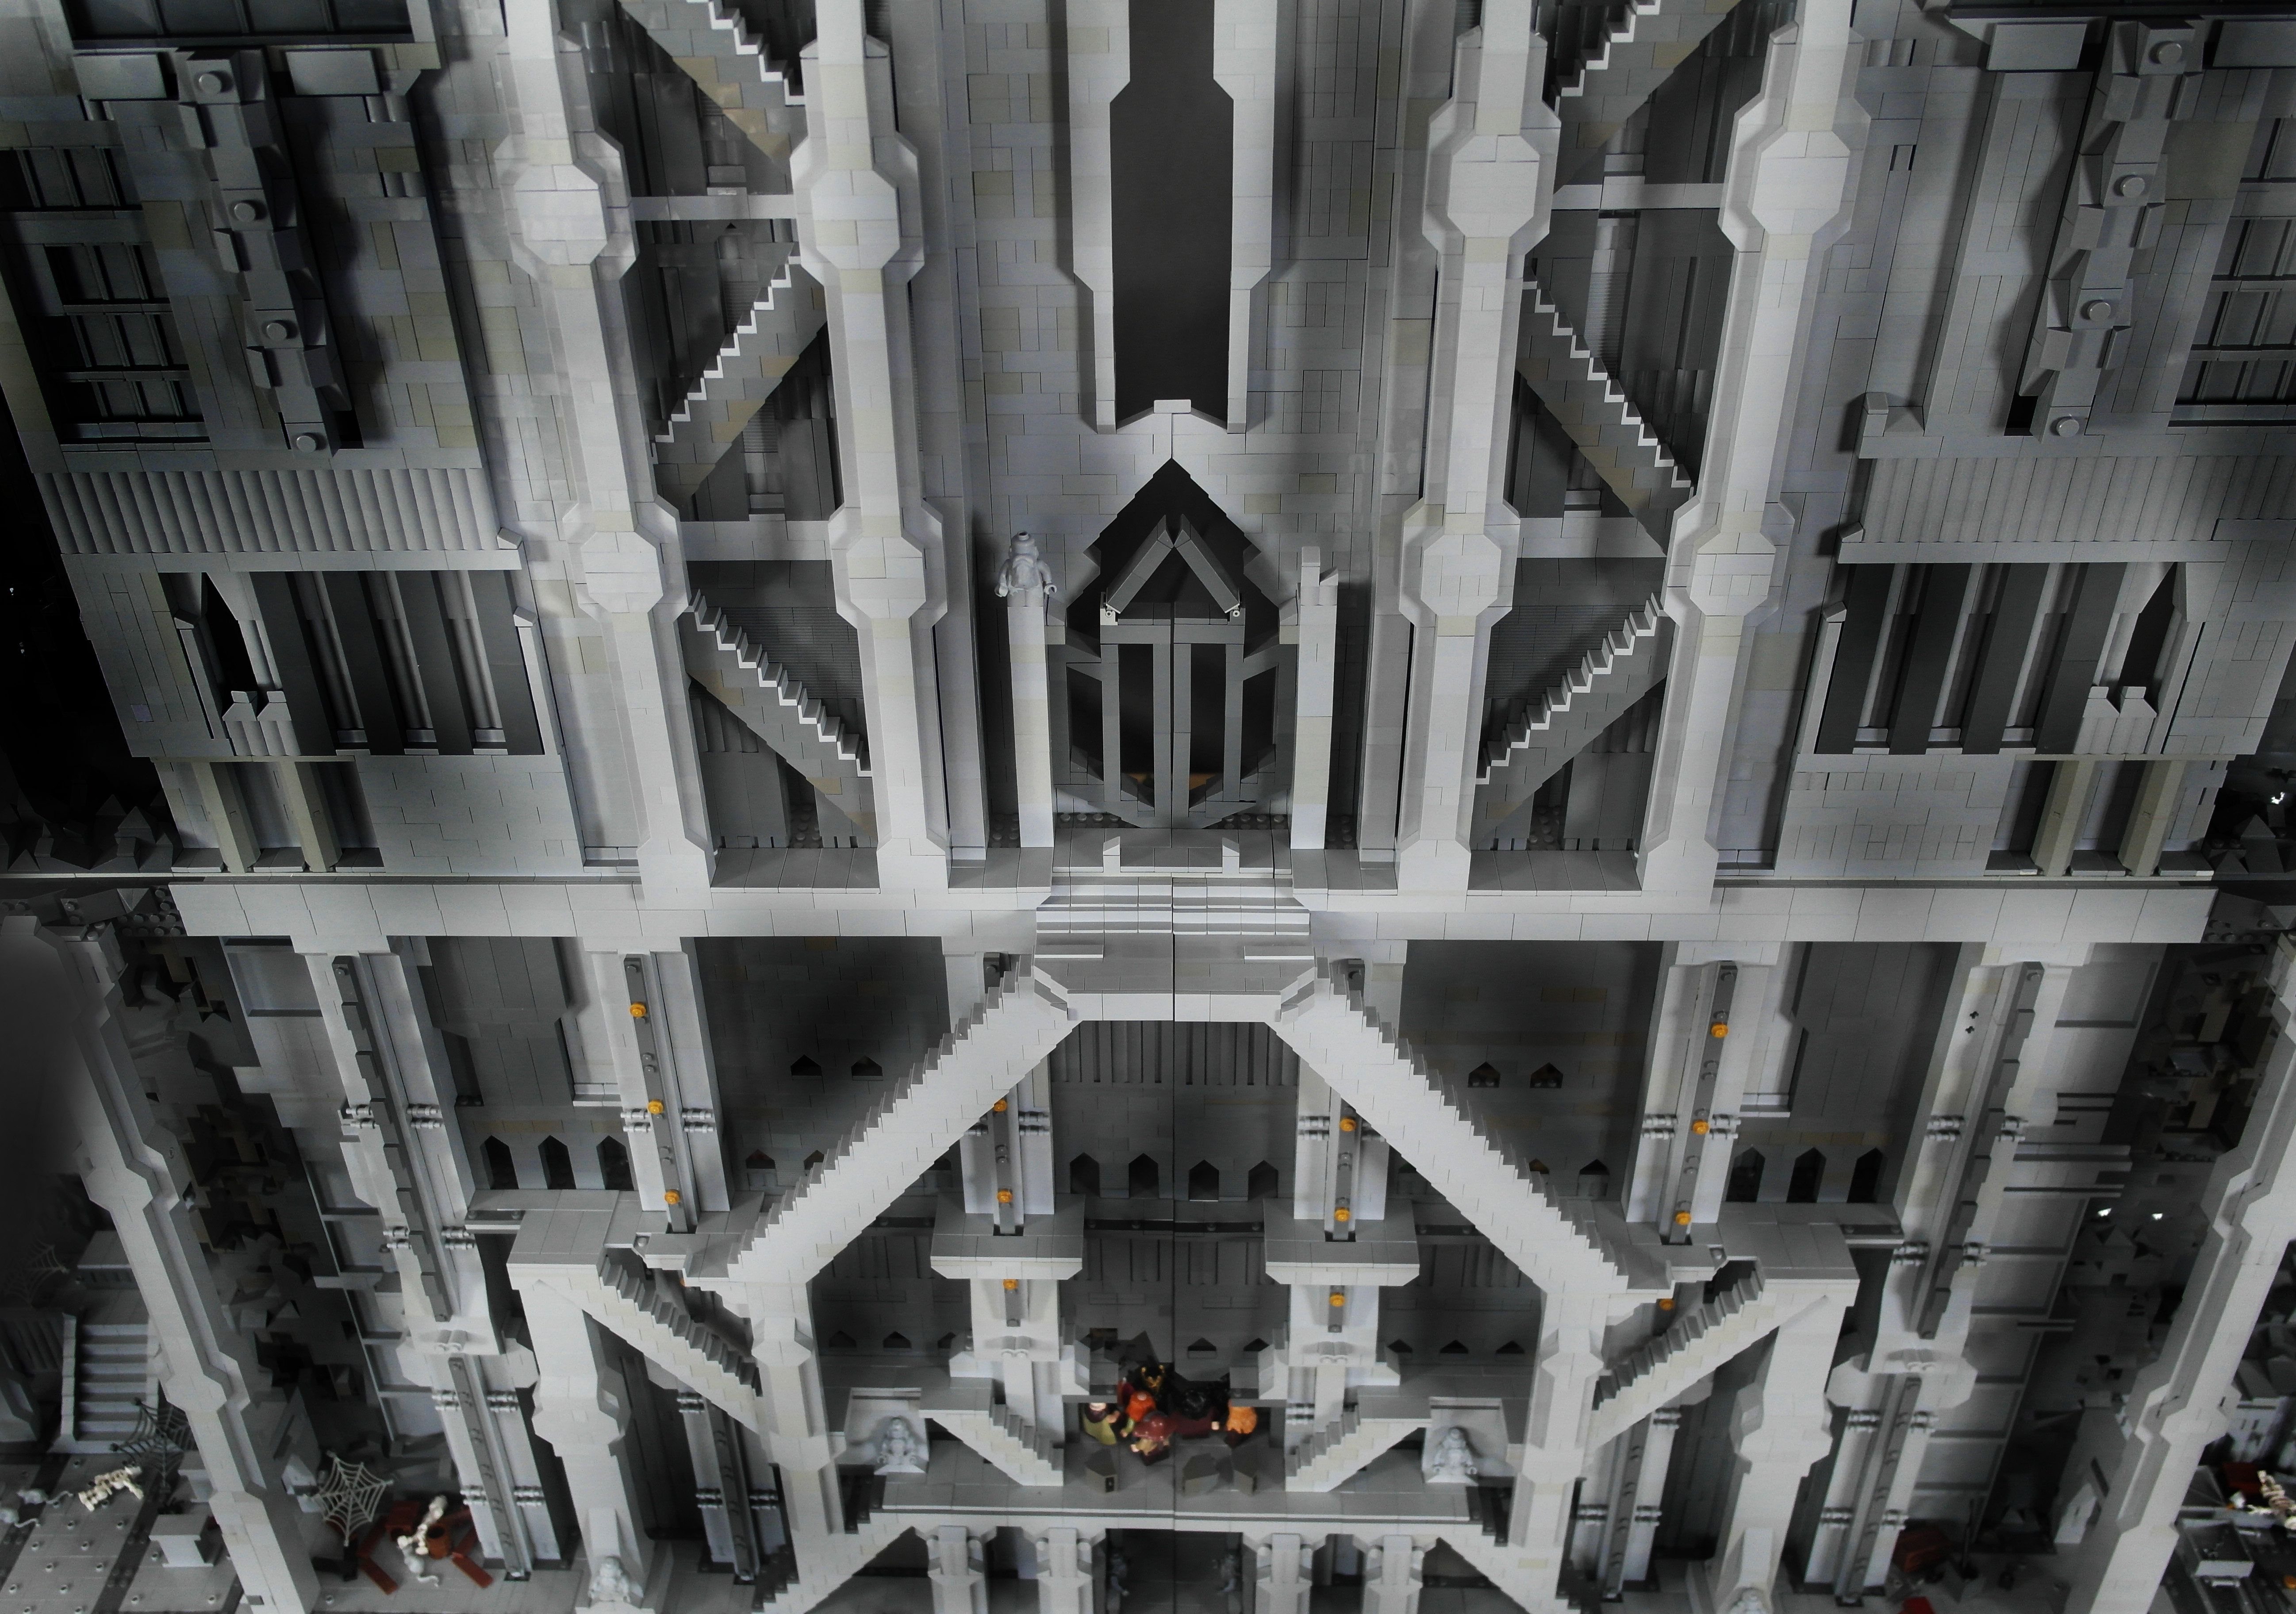
My goal was to build both the front and inside of the building. It was important to me that the facade of the building was mapped as closely as possible. The project was so large that it was divided into two phases (originally supposed to be even 3). The first part - 2/3 of the height of the facade and very limited interior was ready for an exhibition in Chorzow in May 2015
The structure has a height of 2.1 meters, consisting of approximately 120 thousand bricks and weighs 130kg.
Erebor in my understanding is something more than just building with blocks. It's set design for photos and video footage casting the atmosphere of the movie "The Hobbit Fight the Five Armies." However, getting the right mood require interesting pictures. For the first time in my life with such commitment I went to photograph just to see how little in this area I can. For help in preparation of photos and film I haveasked Nicholas Lewisnki “Fullnilson ", a graduate of the Lodz Film School. Shooting Erebor took us over a month. Cooperation with Fullnilson was very inspiring for me.
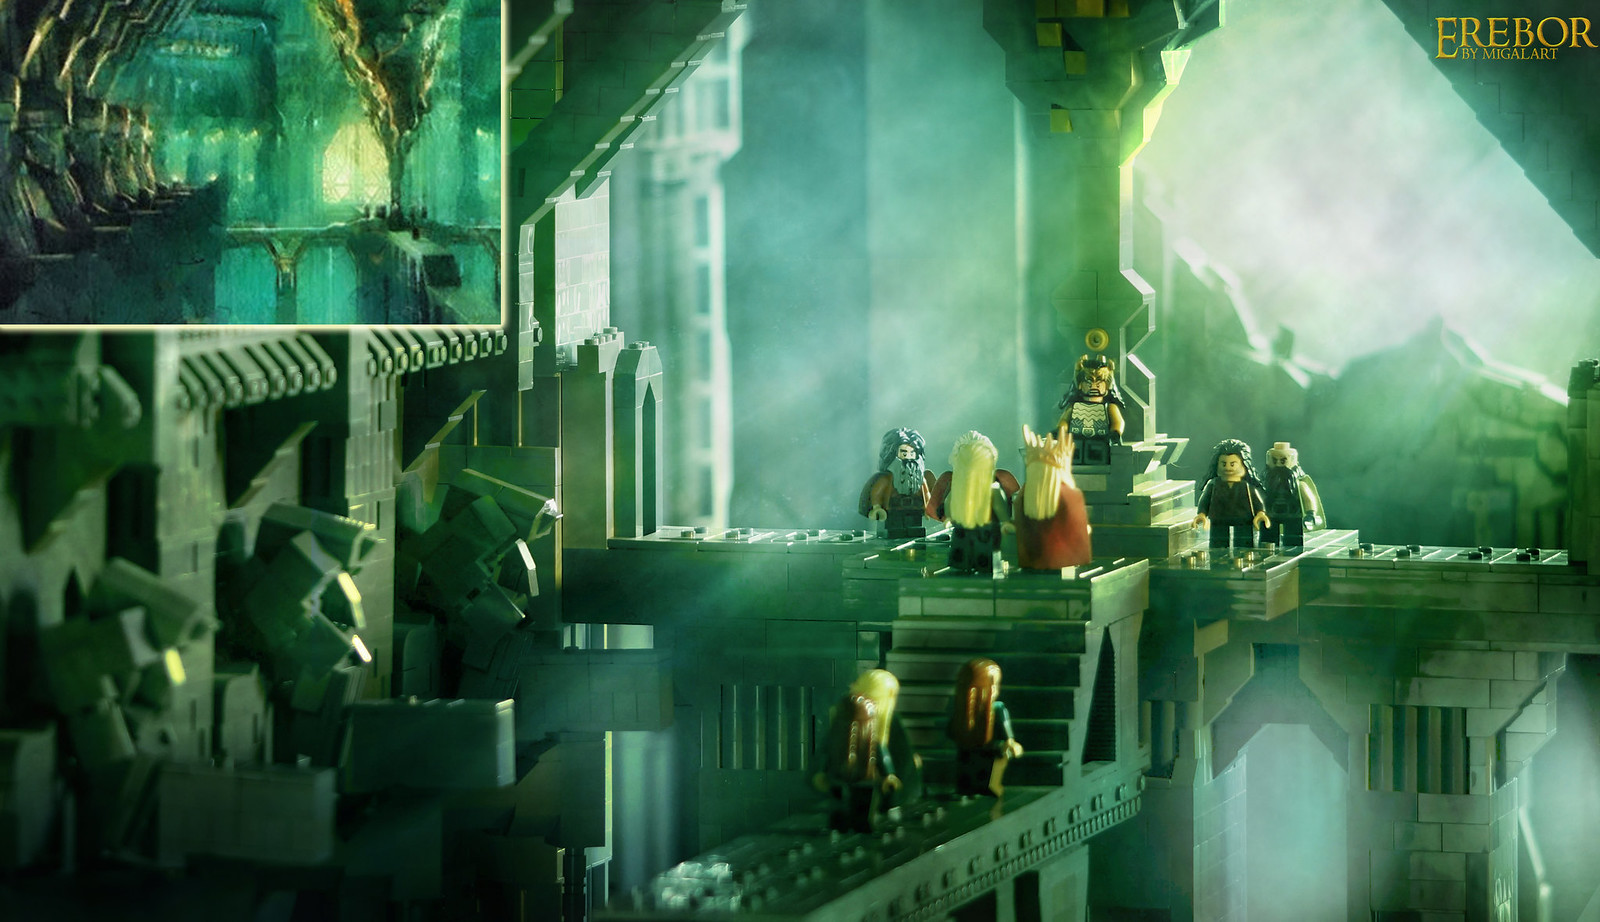
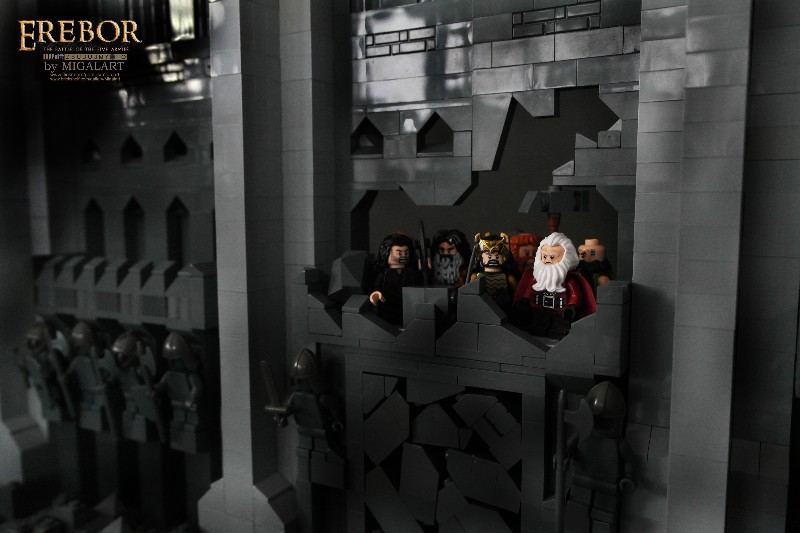
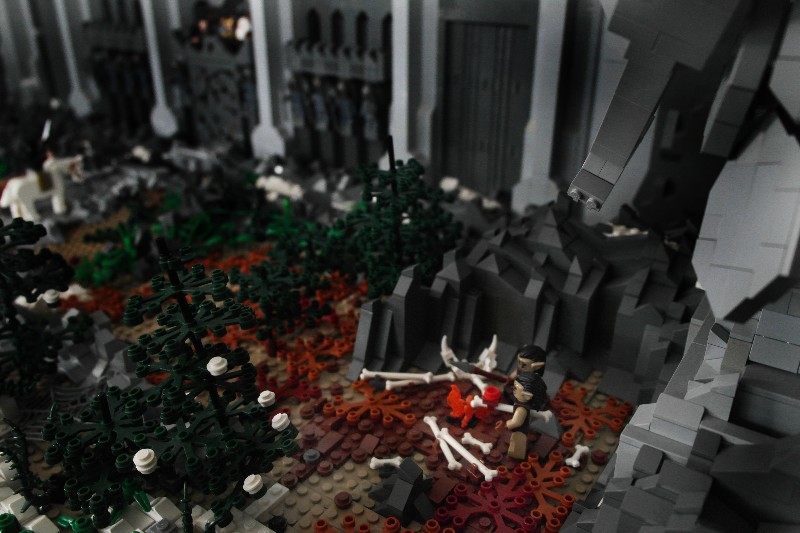
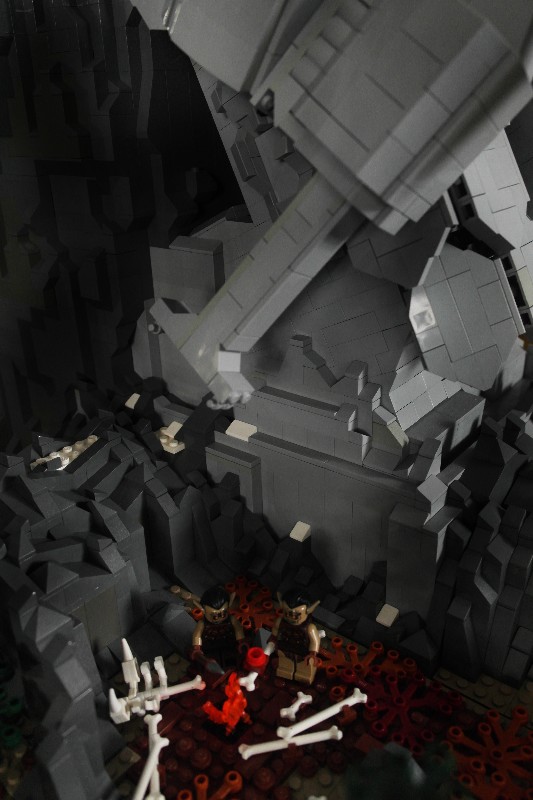
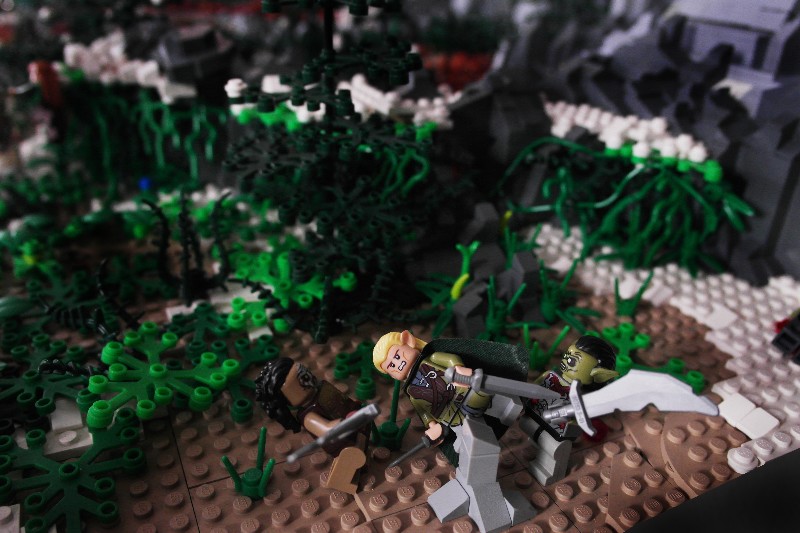
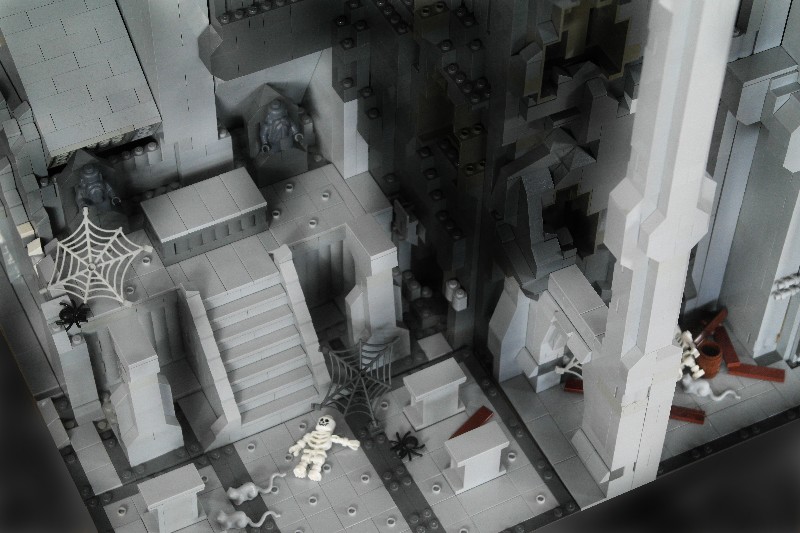
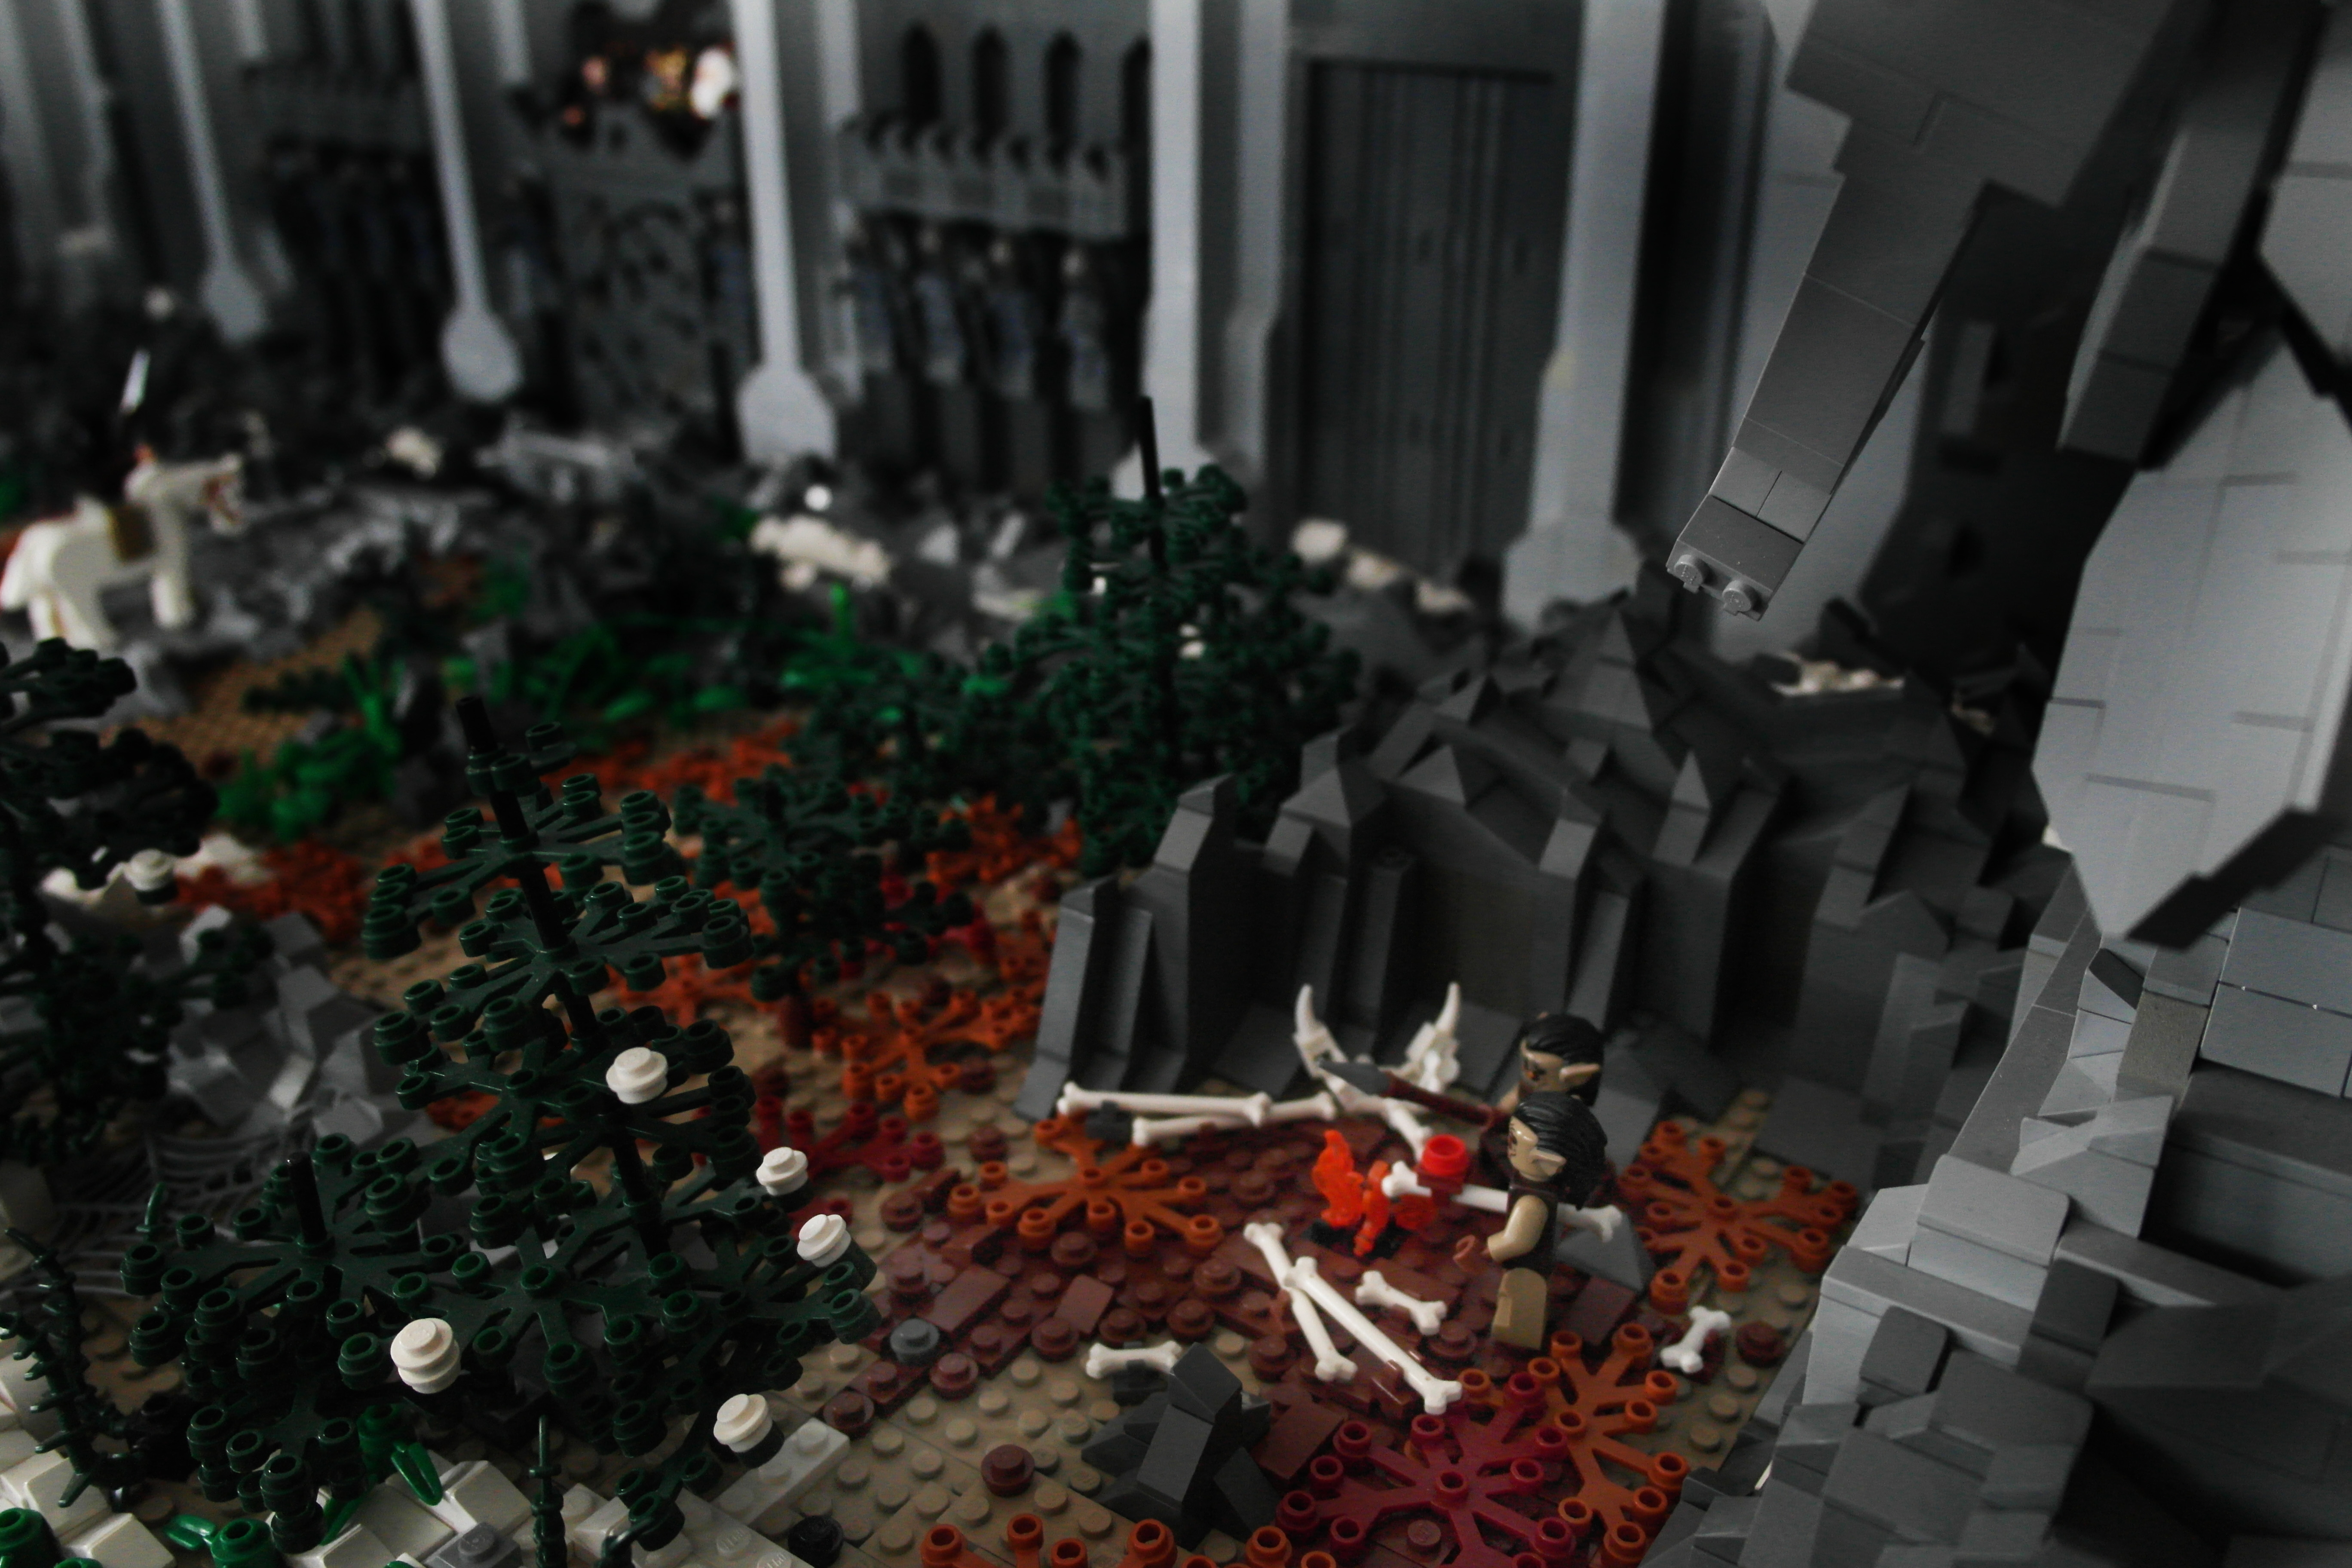
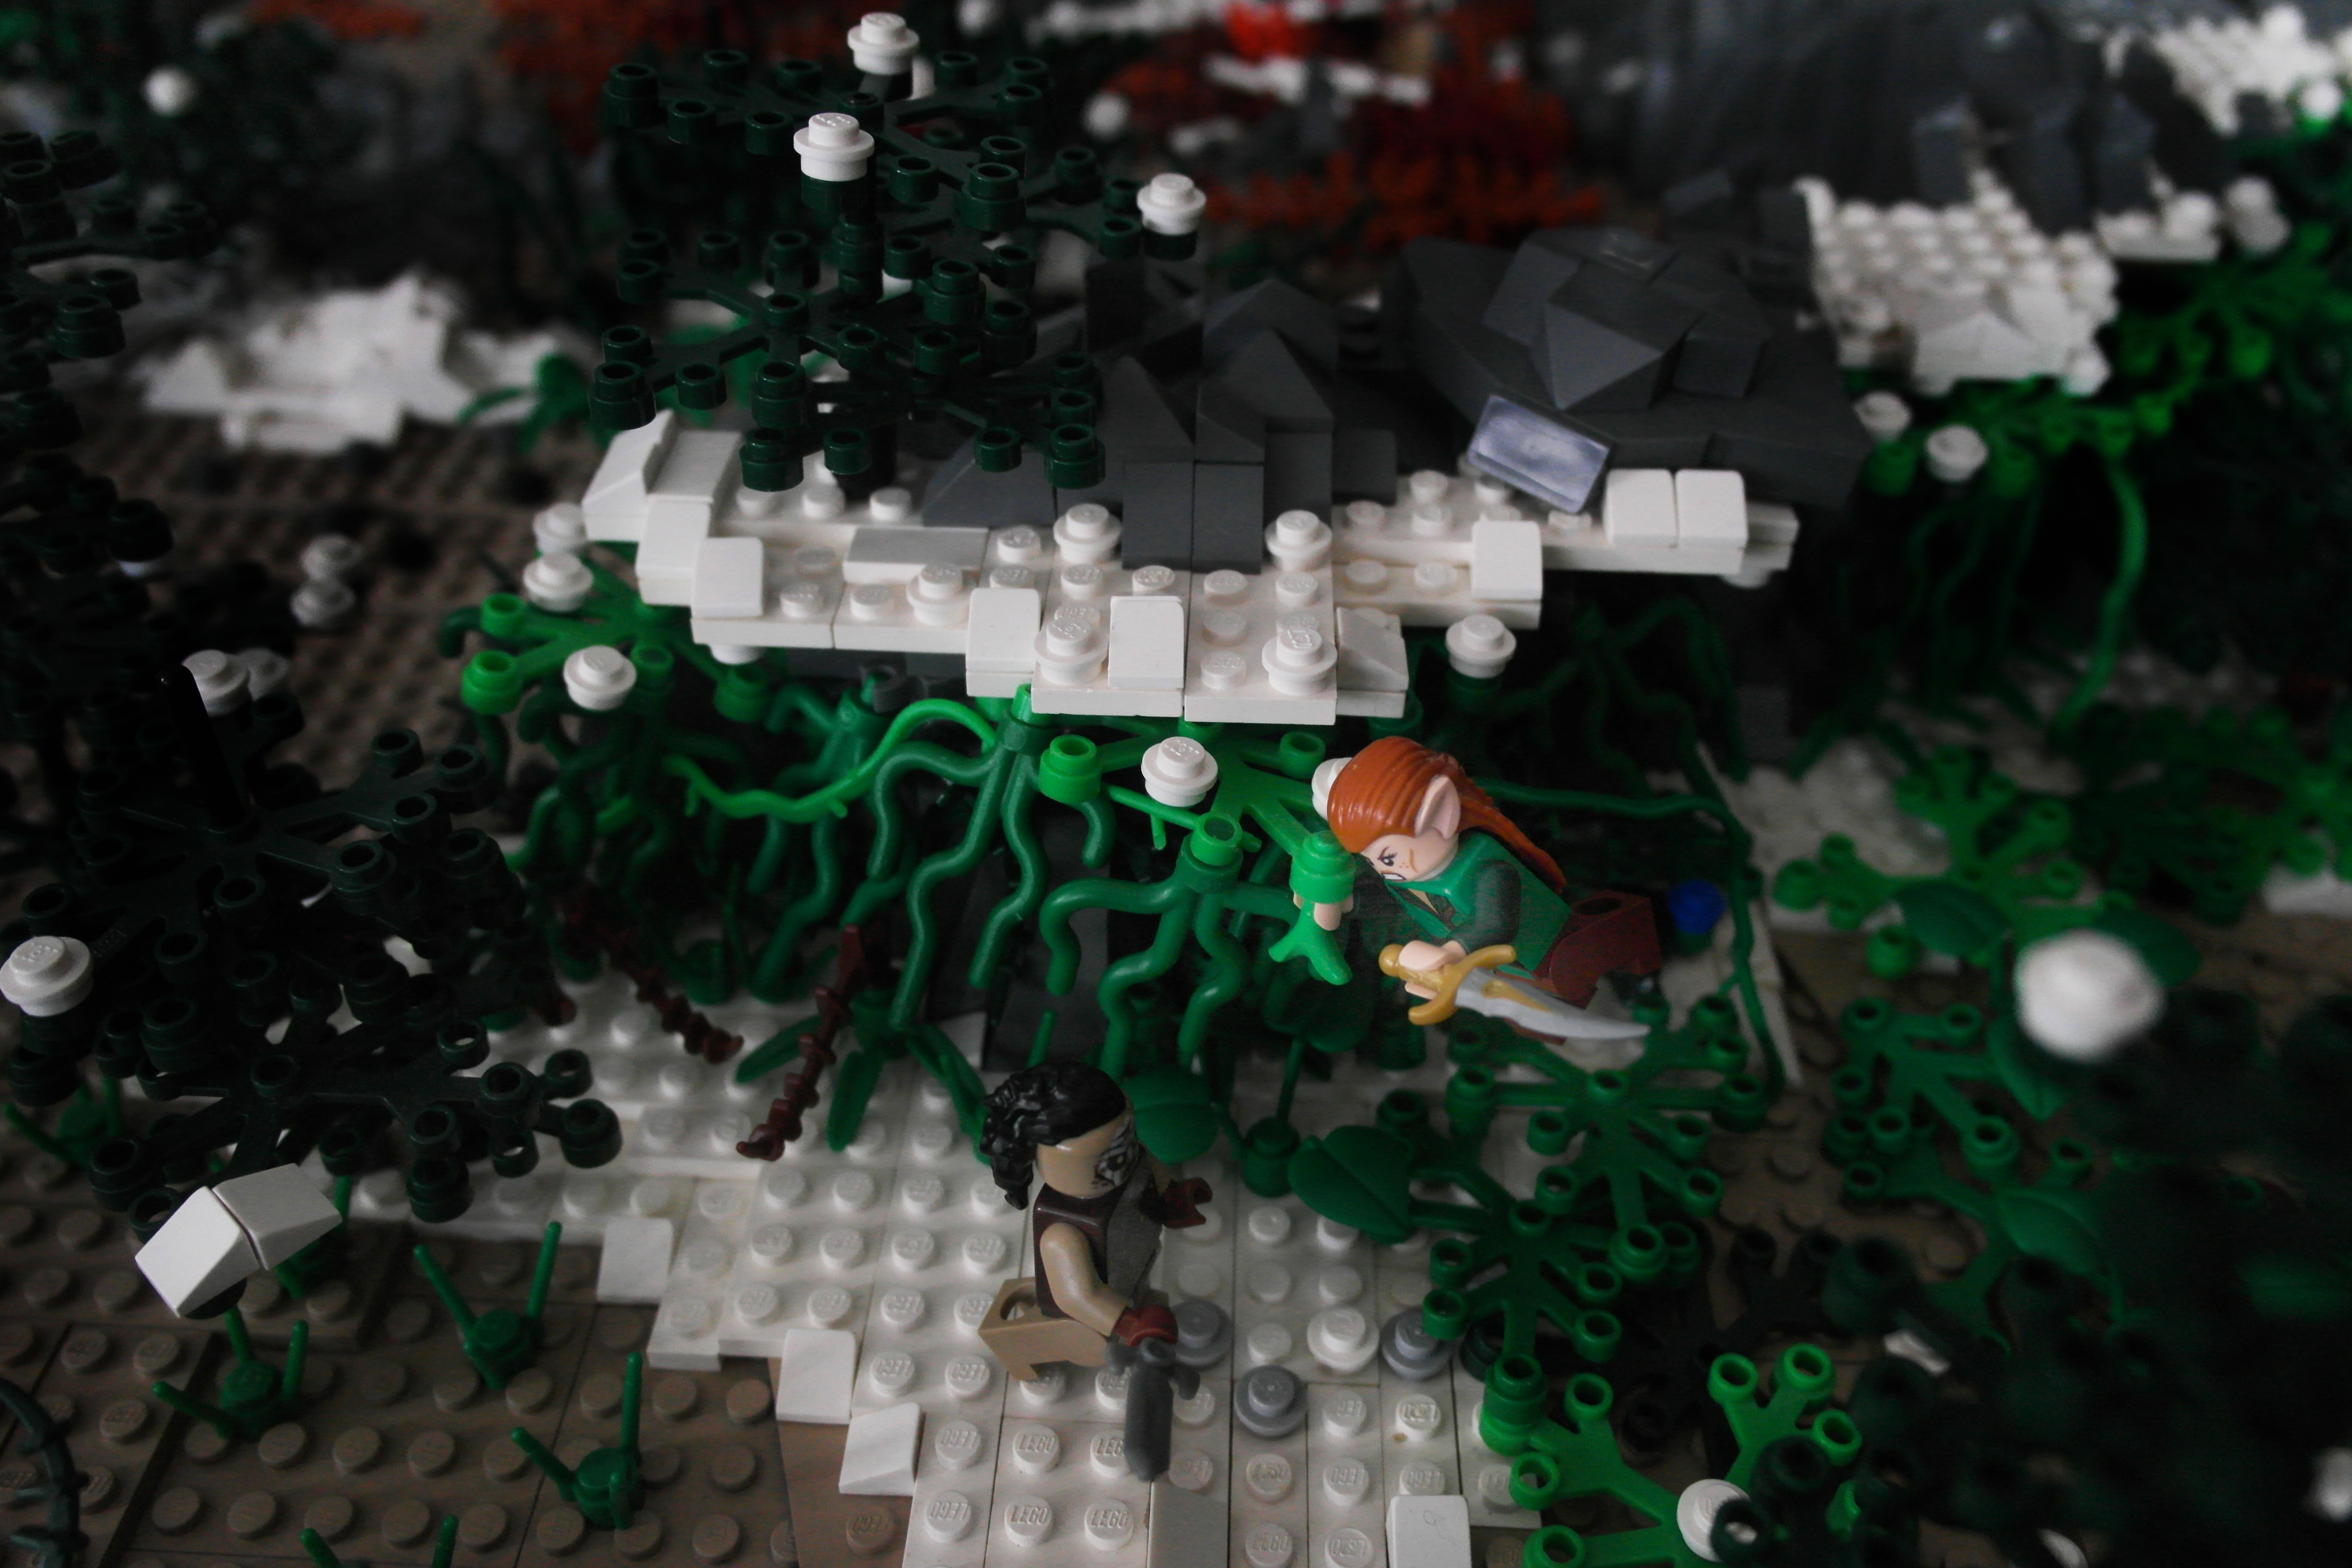
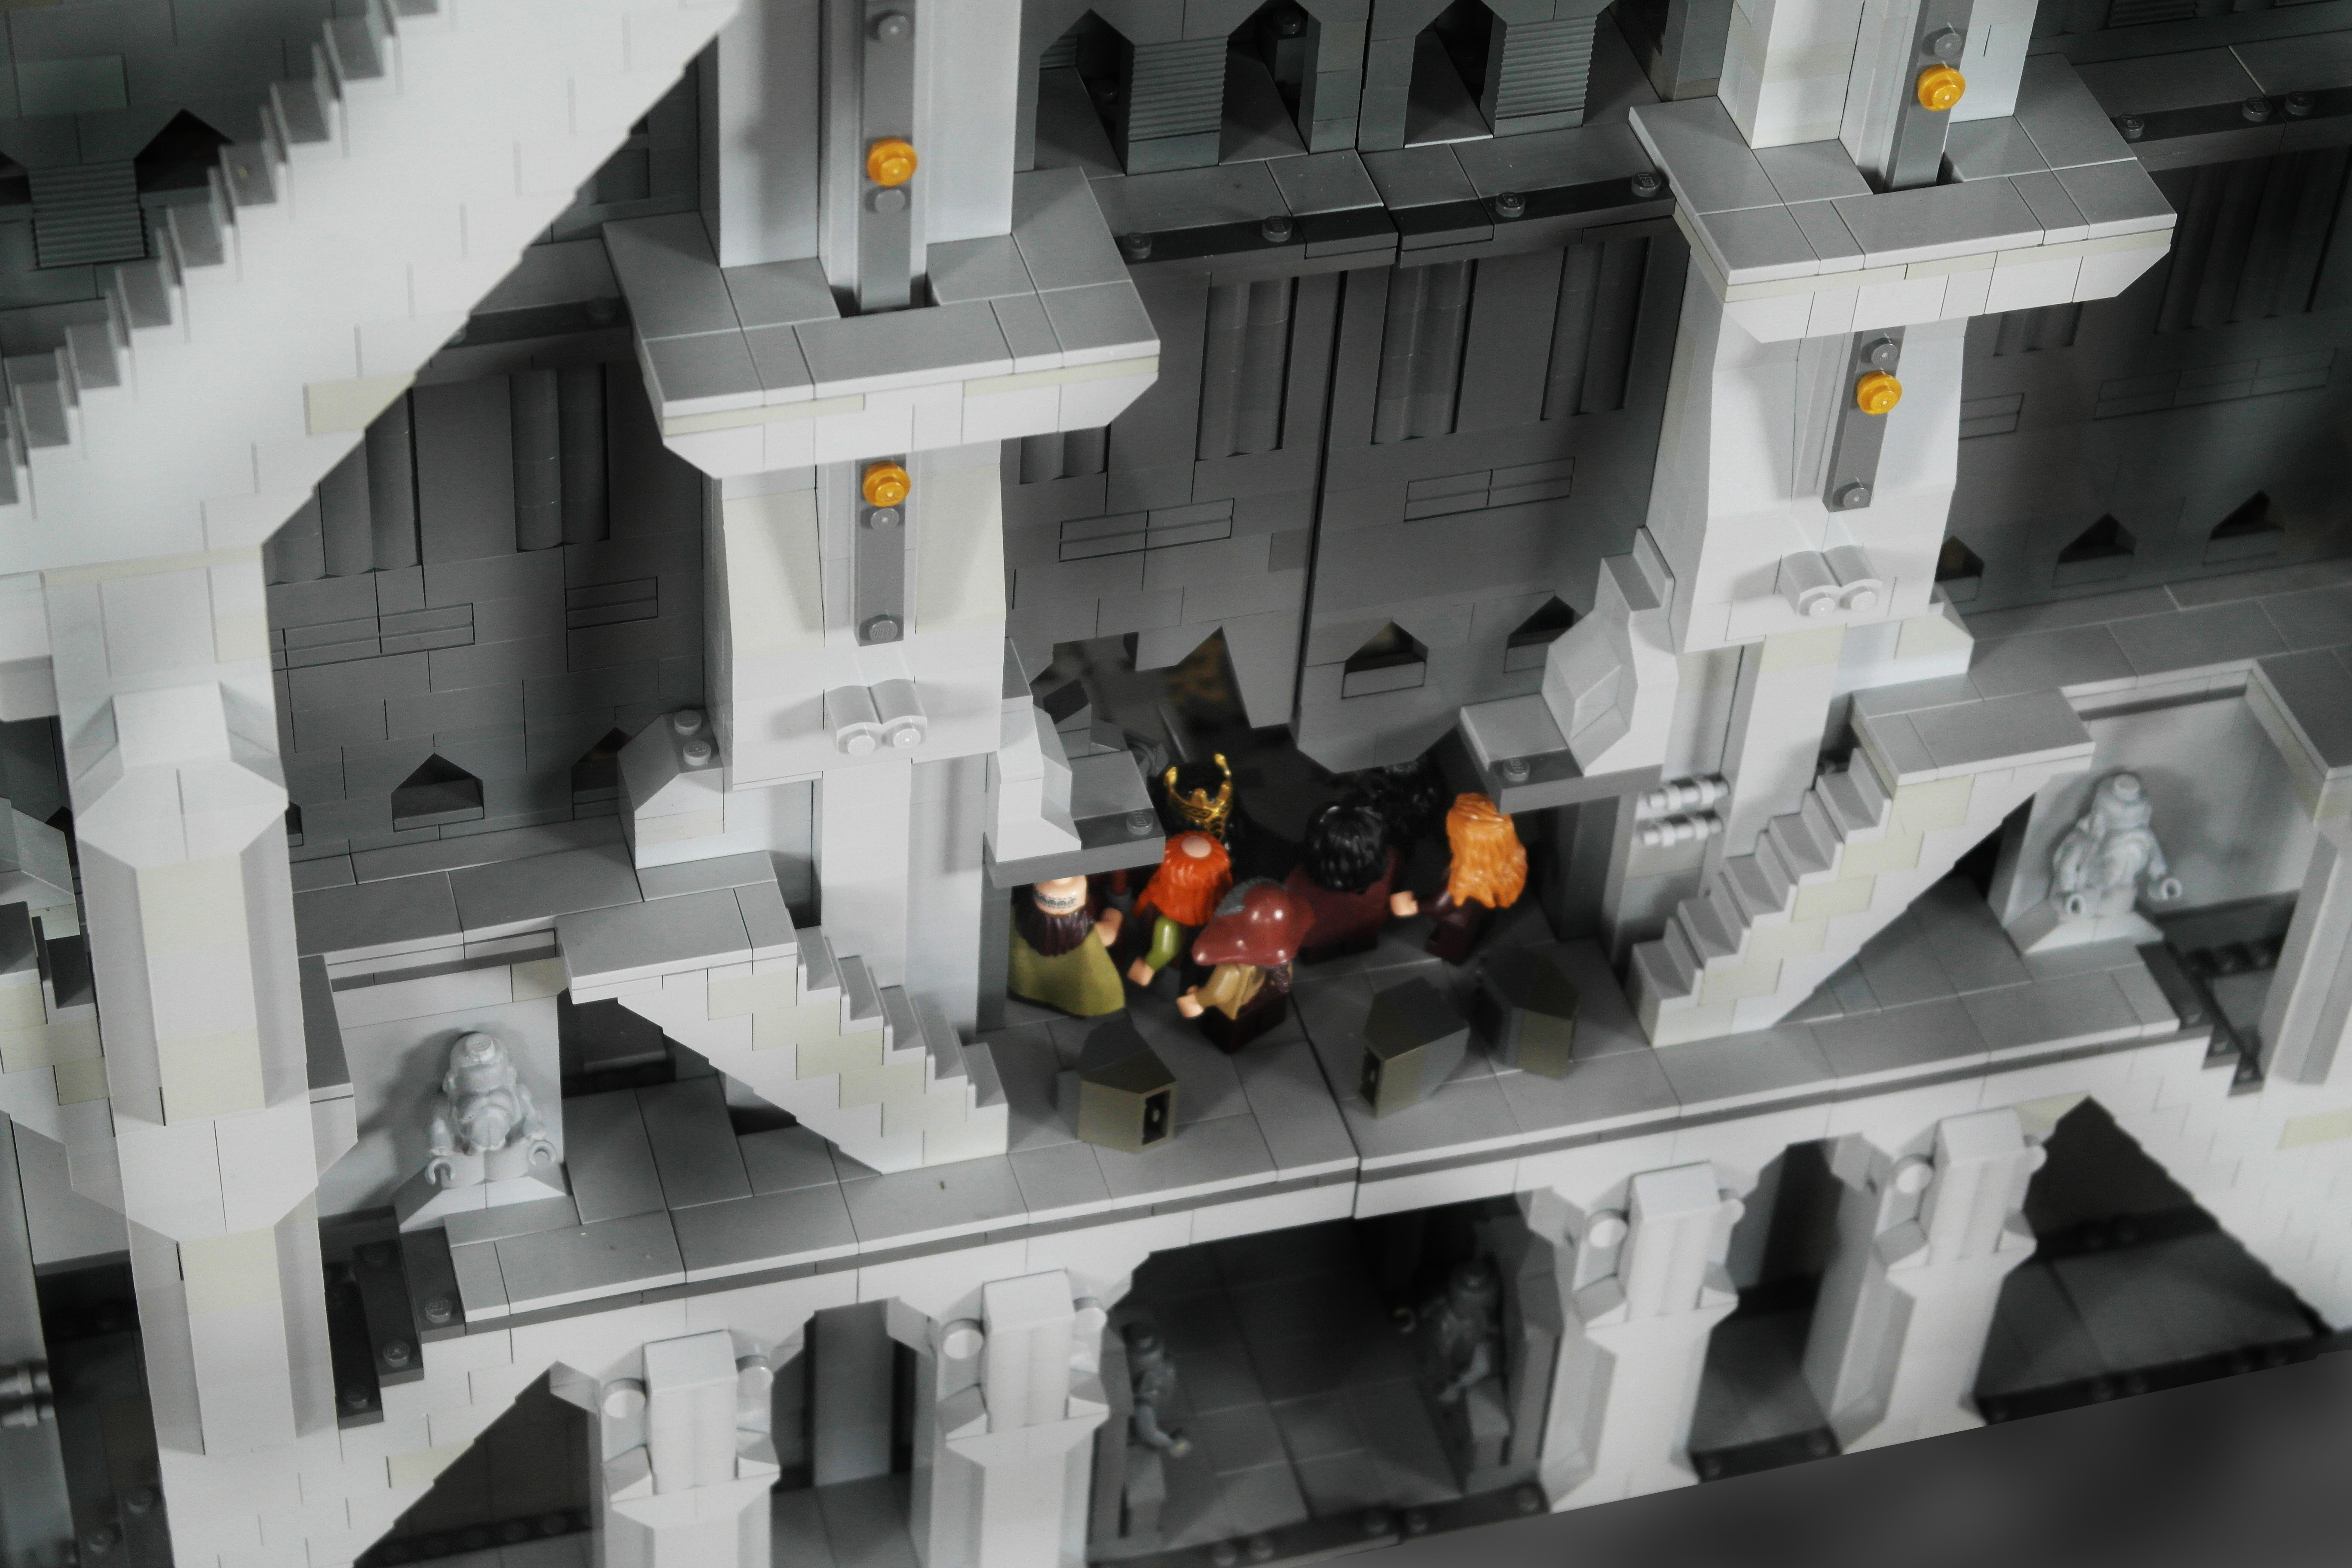
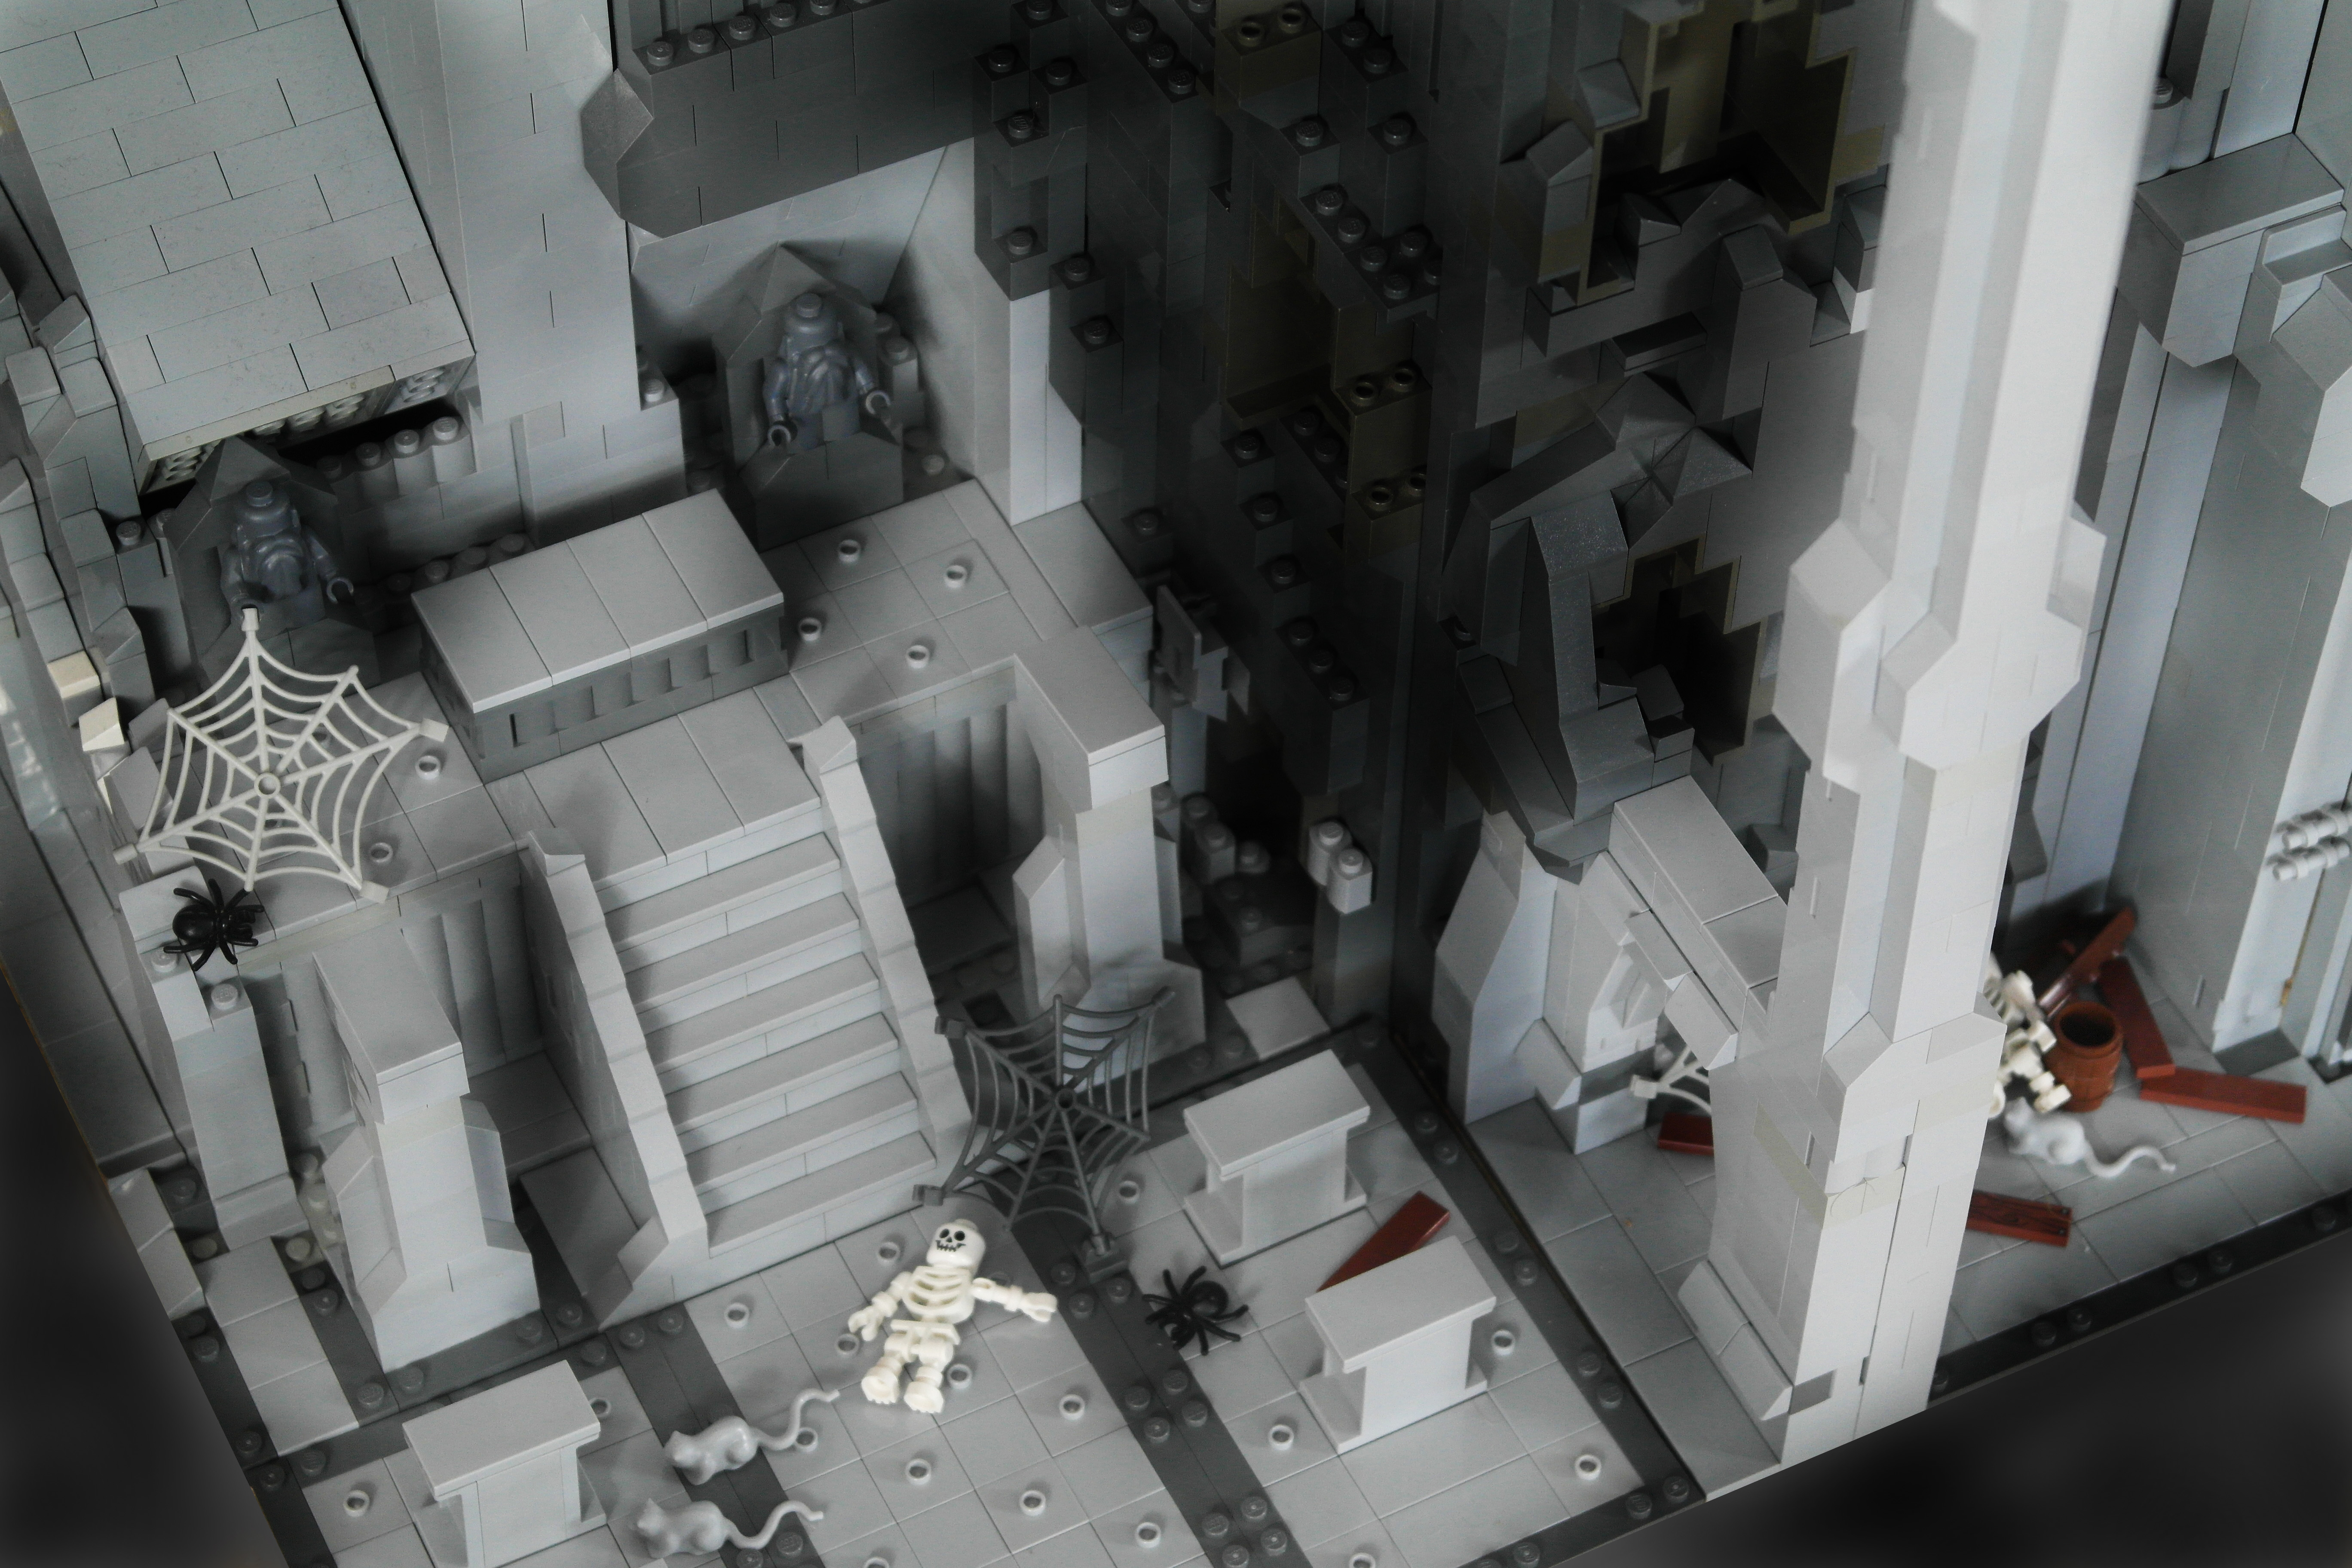
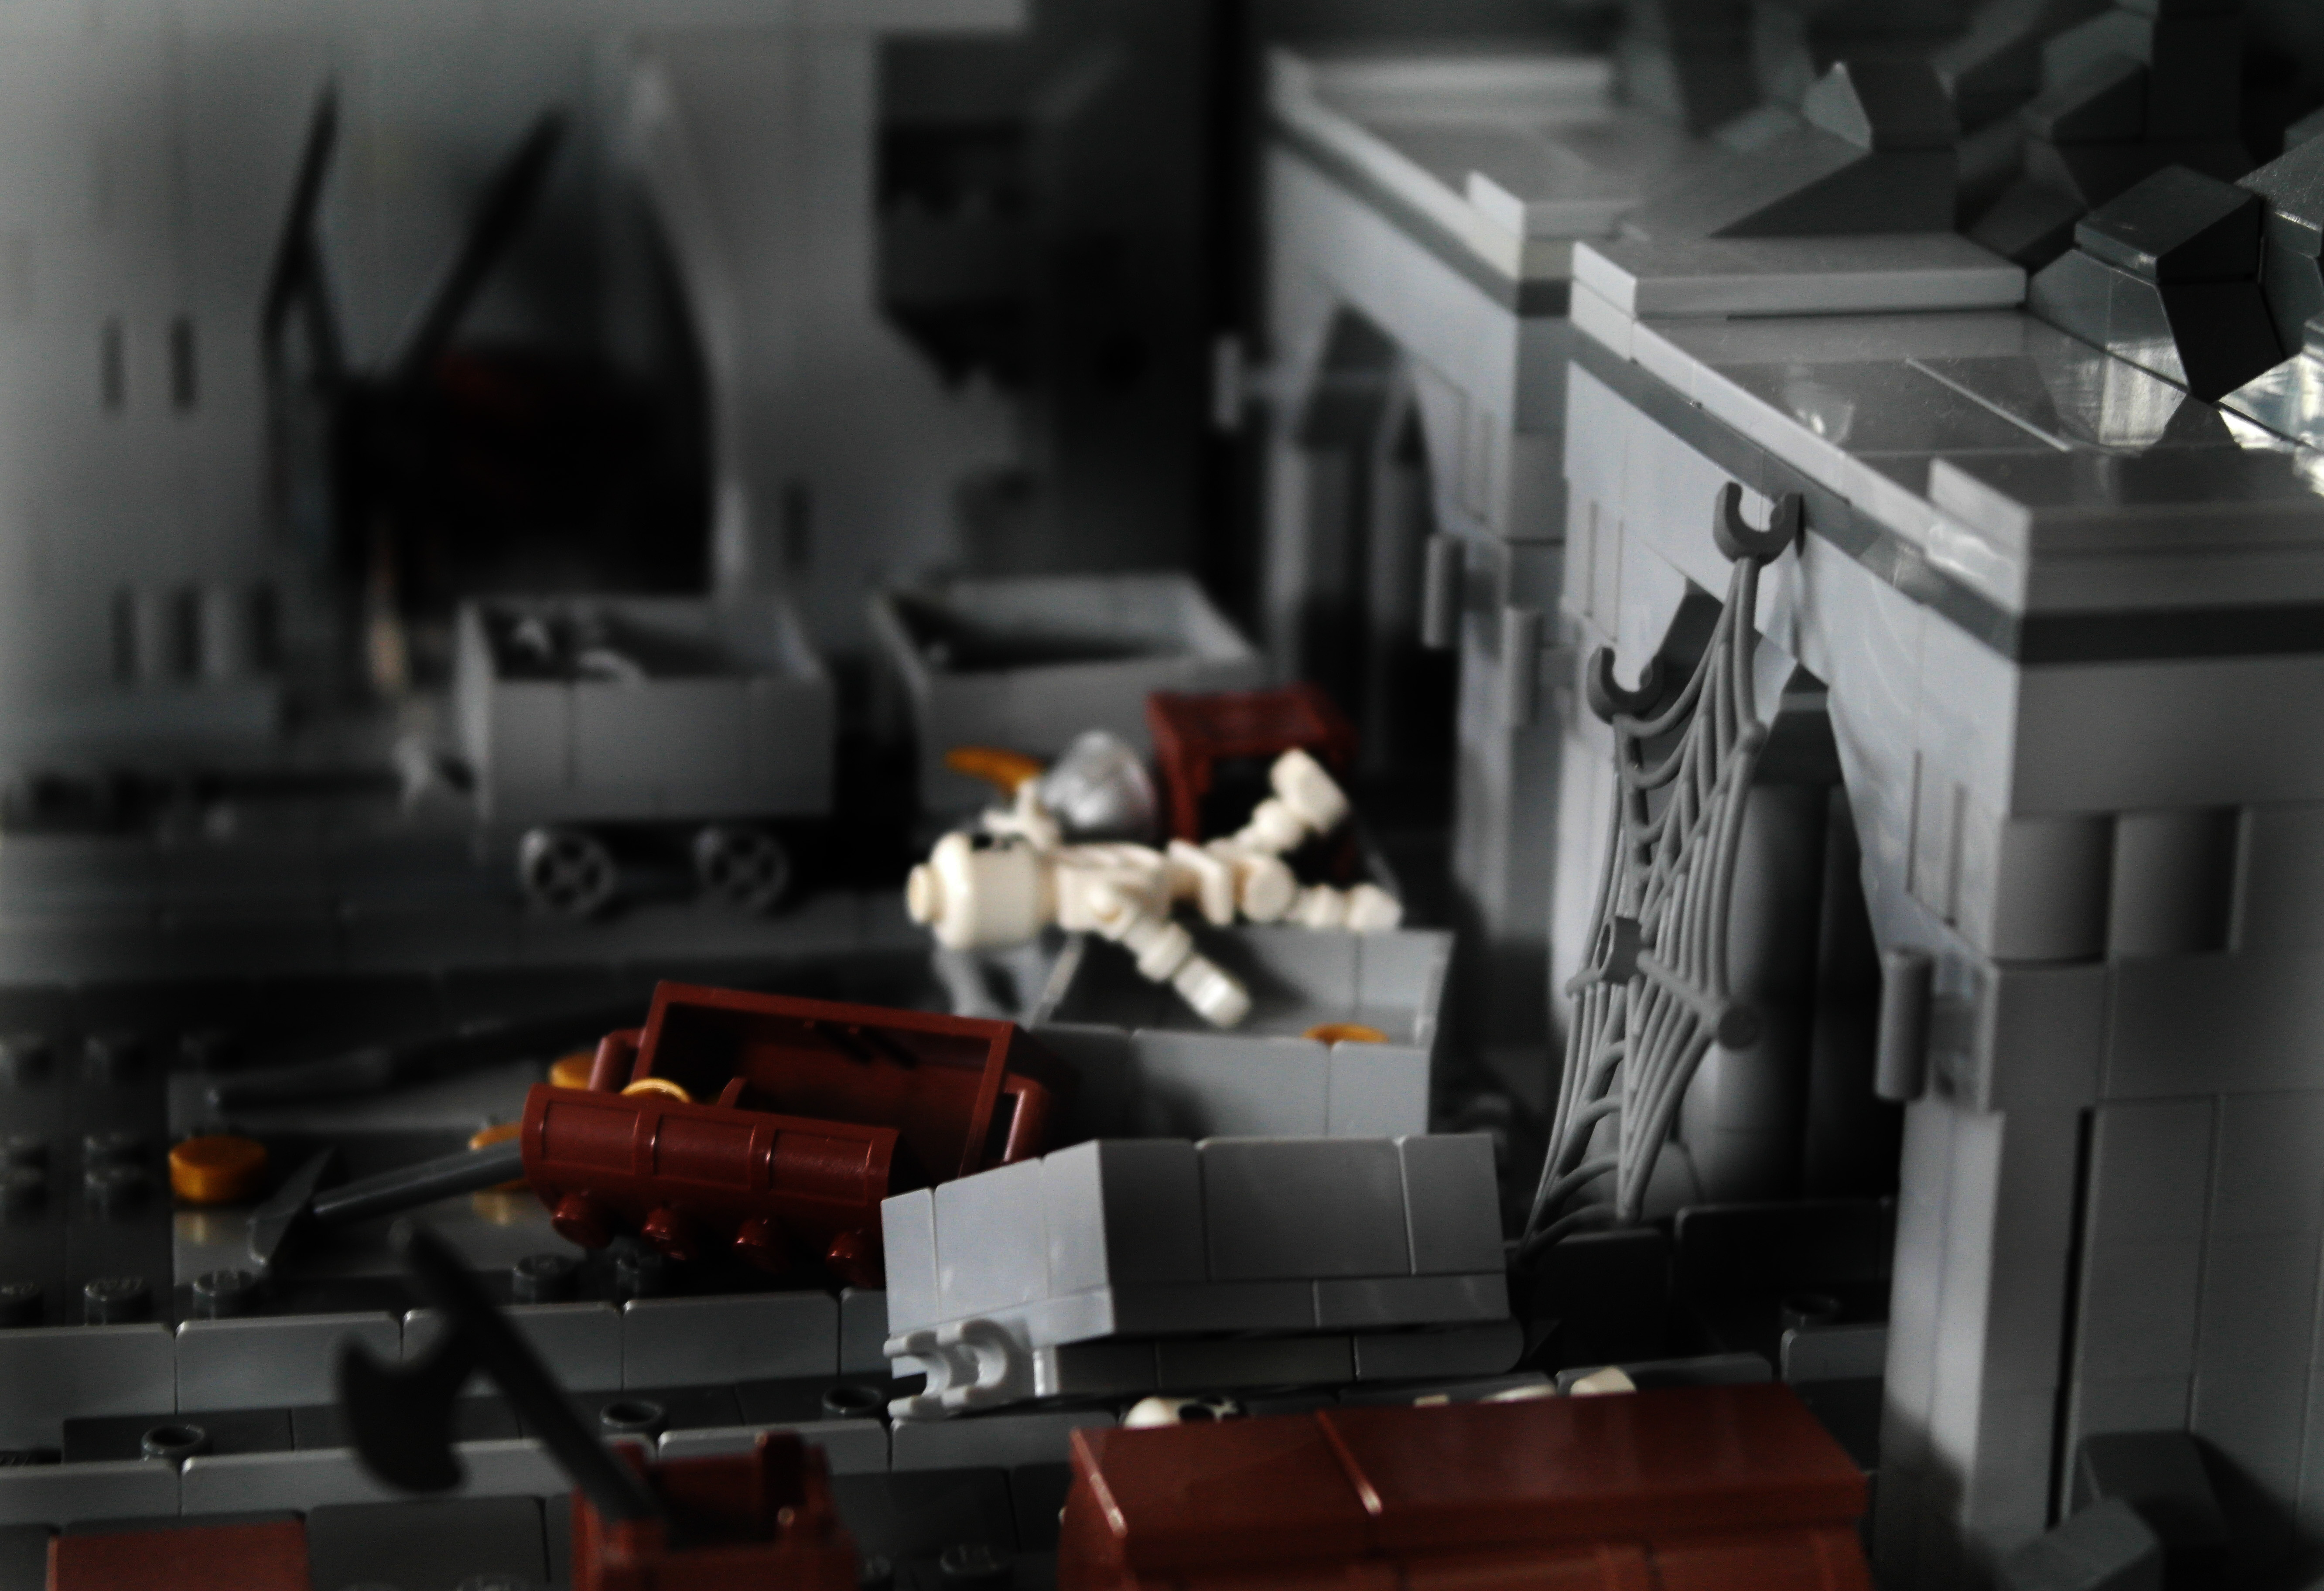
The interiors of Erebor:
"The visit elves" (a reference to The Hobbit Part 1)
Shot 1
Shot 2

"The sounds in the distance"

"Smaug and Bilbo"

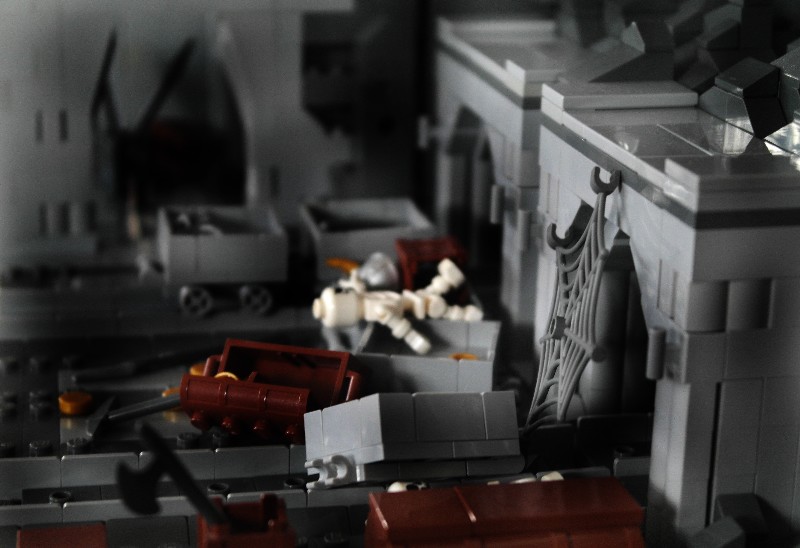
"The struggle in the mines"

"Escape From the Dragon"

"One of them is a traitor"

"In anticipation of the enemy"

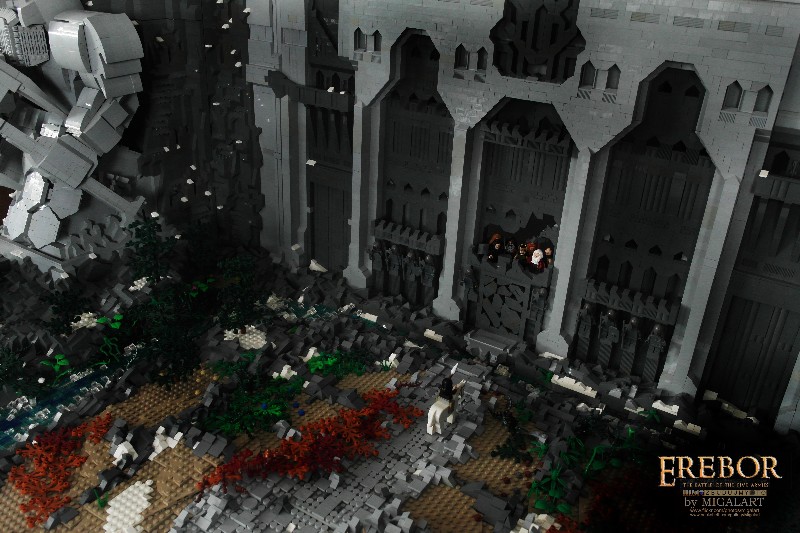
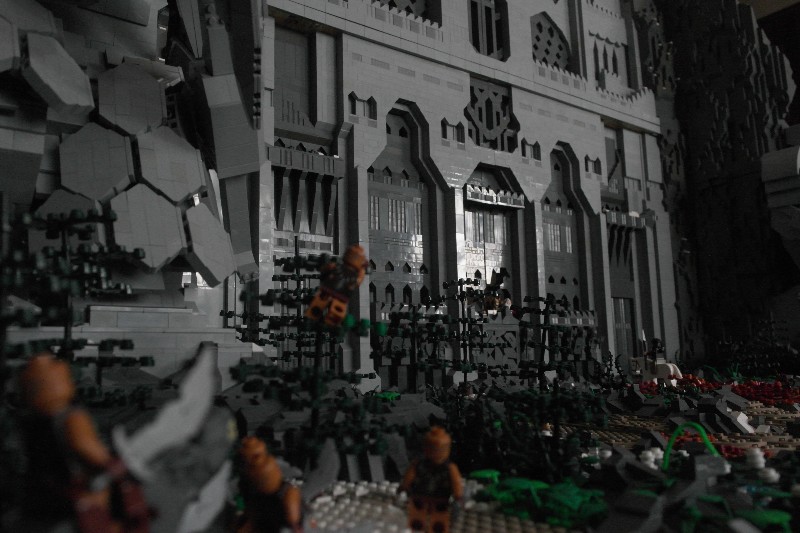
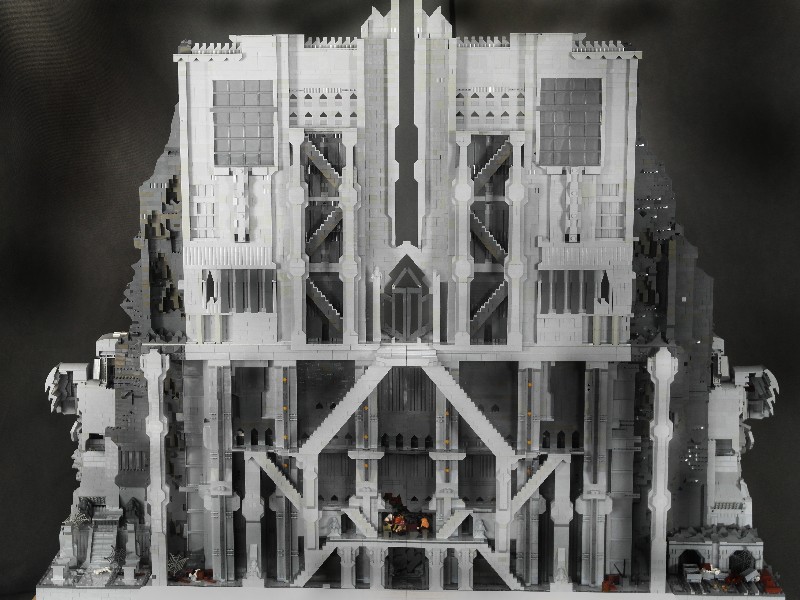
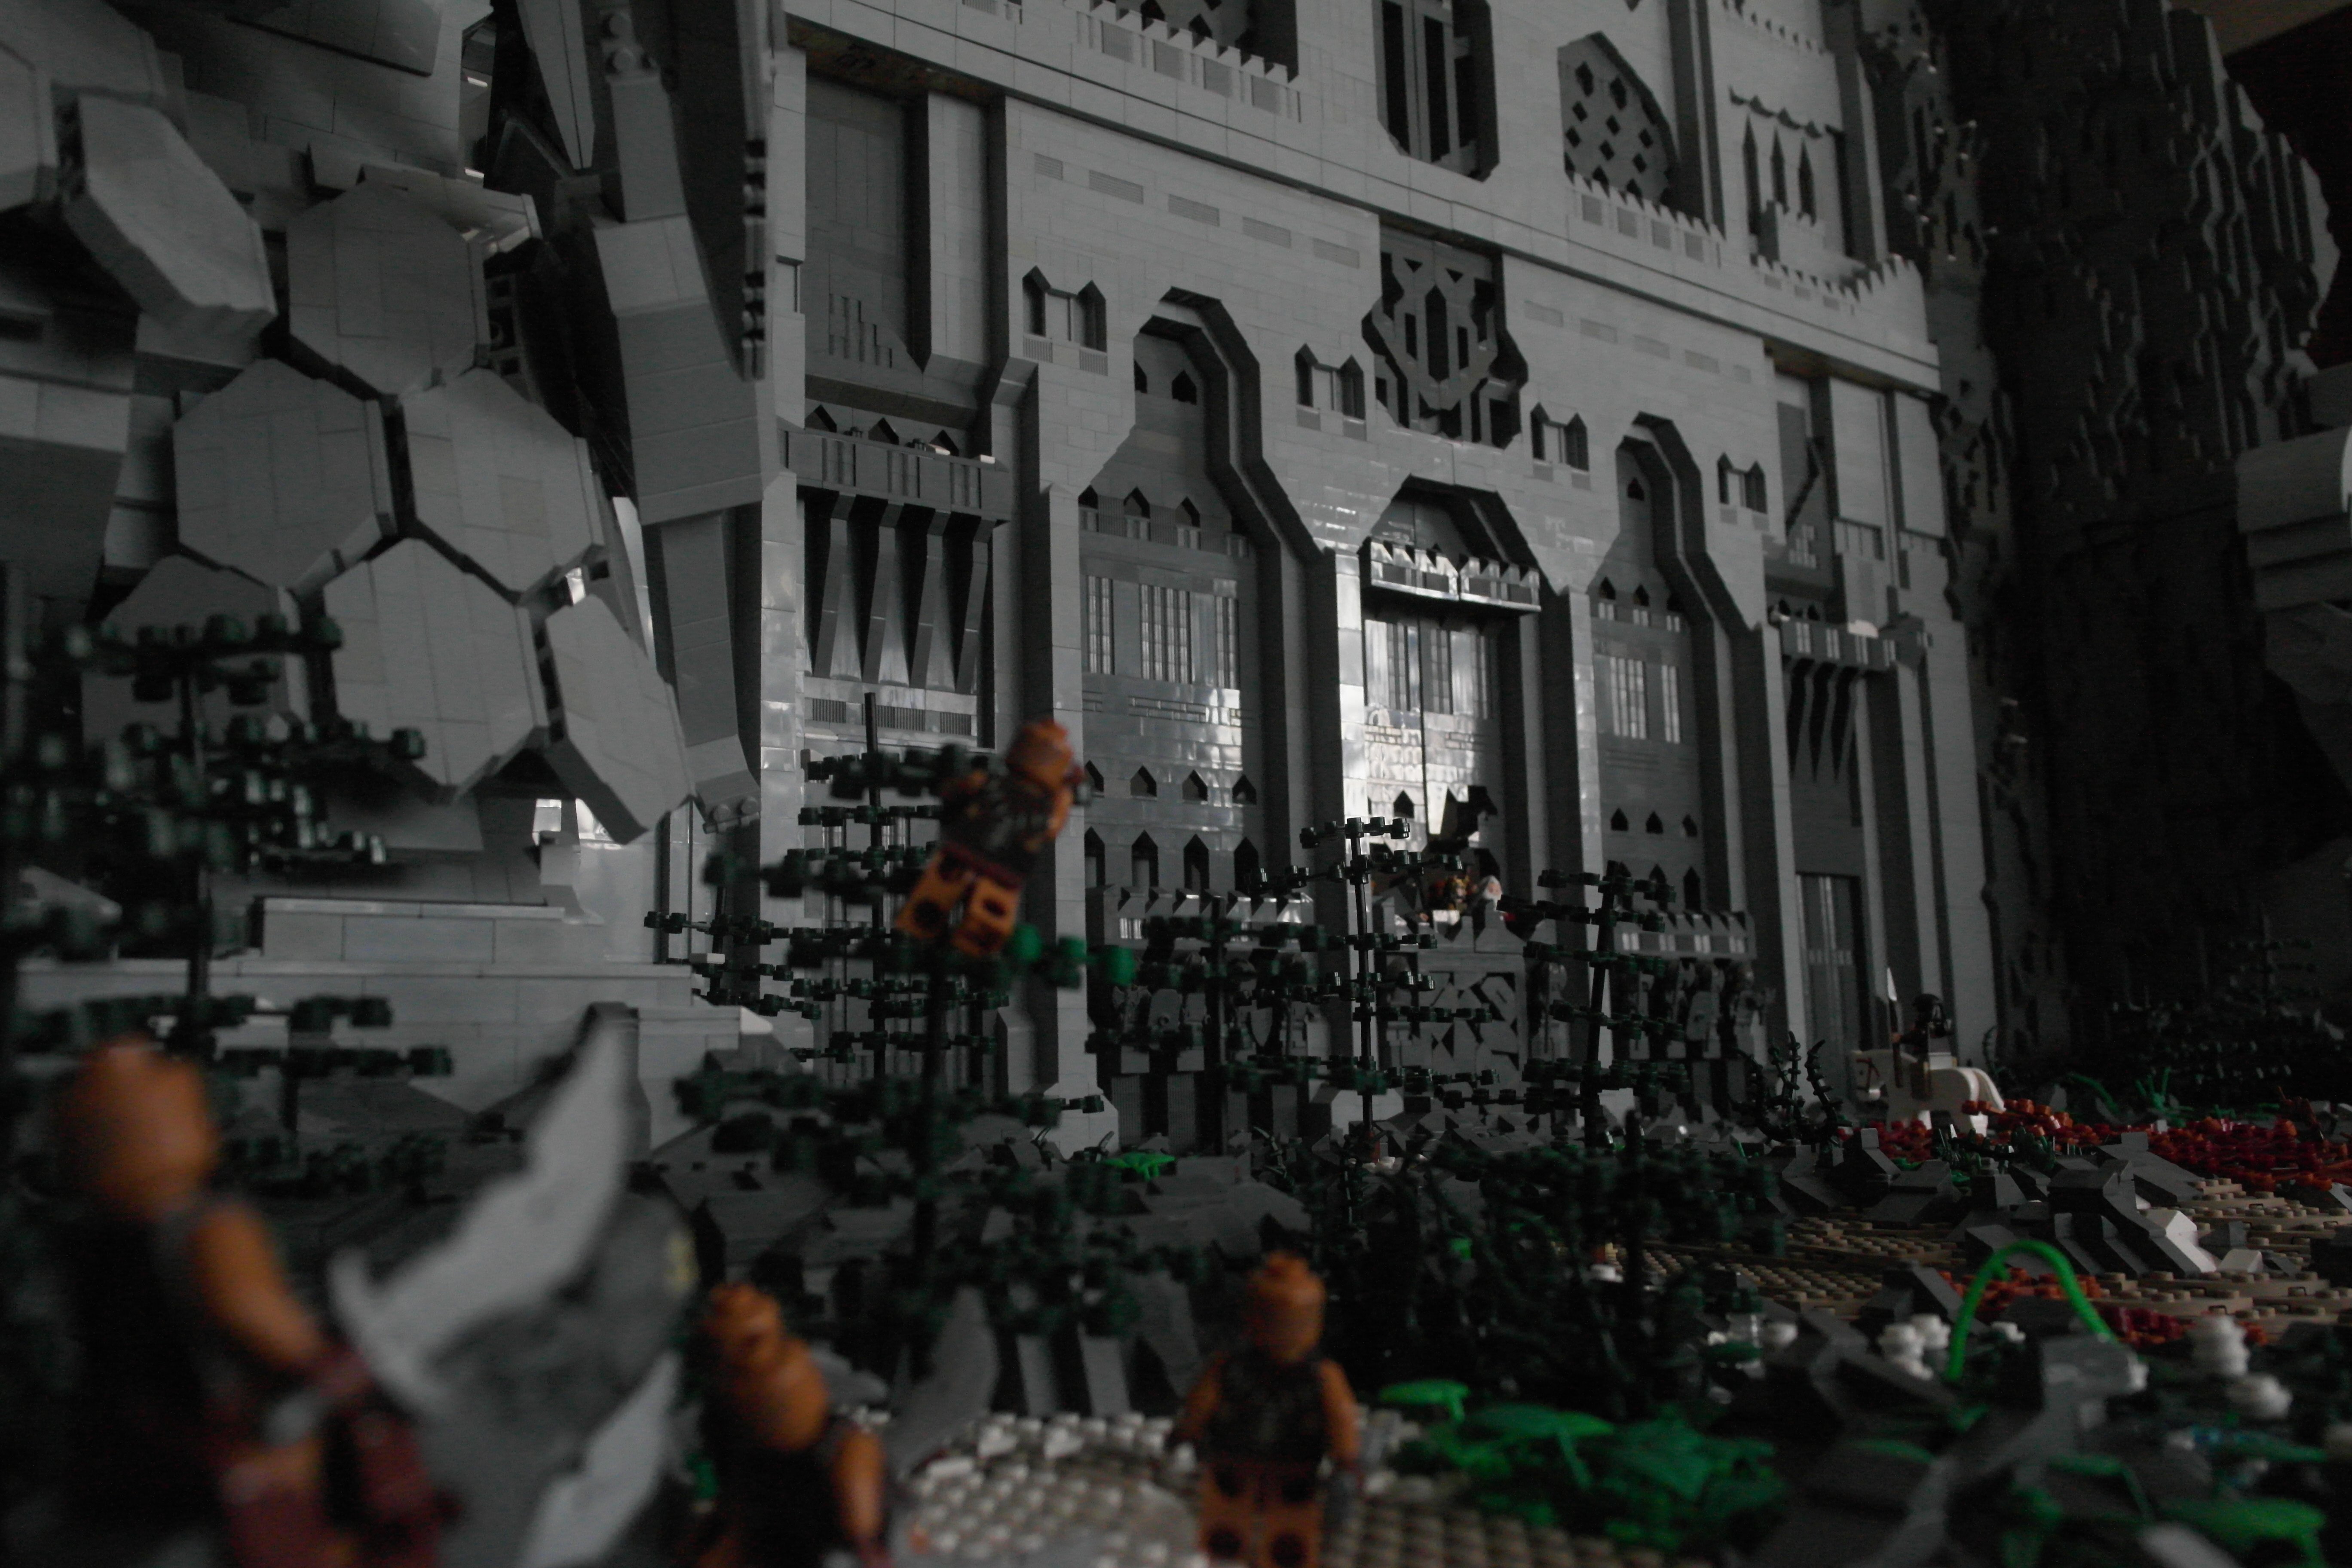
The facade of Erebor:
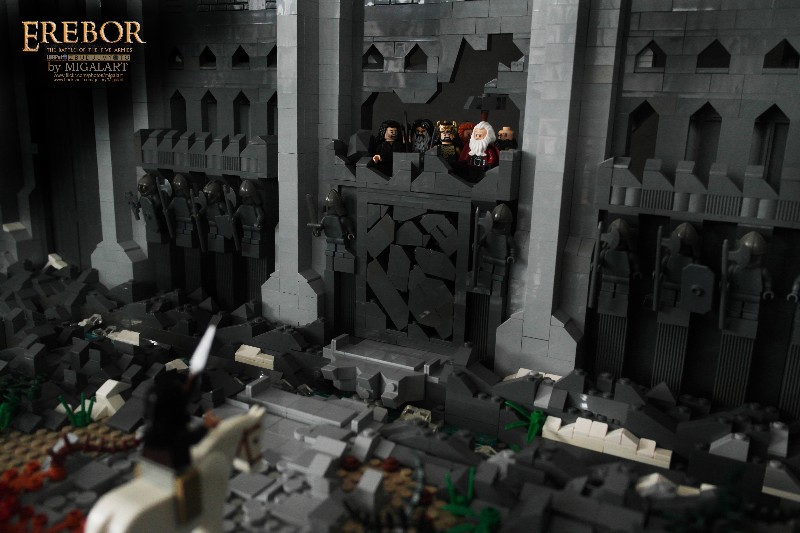
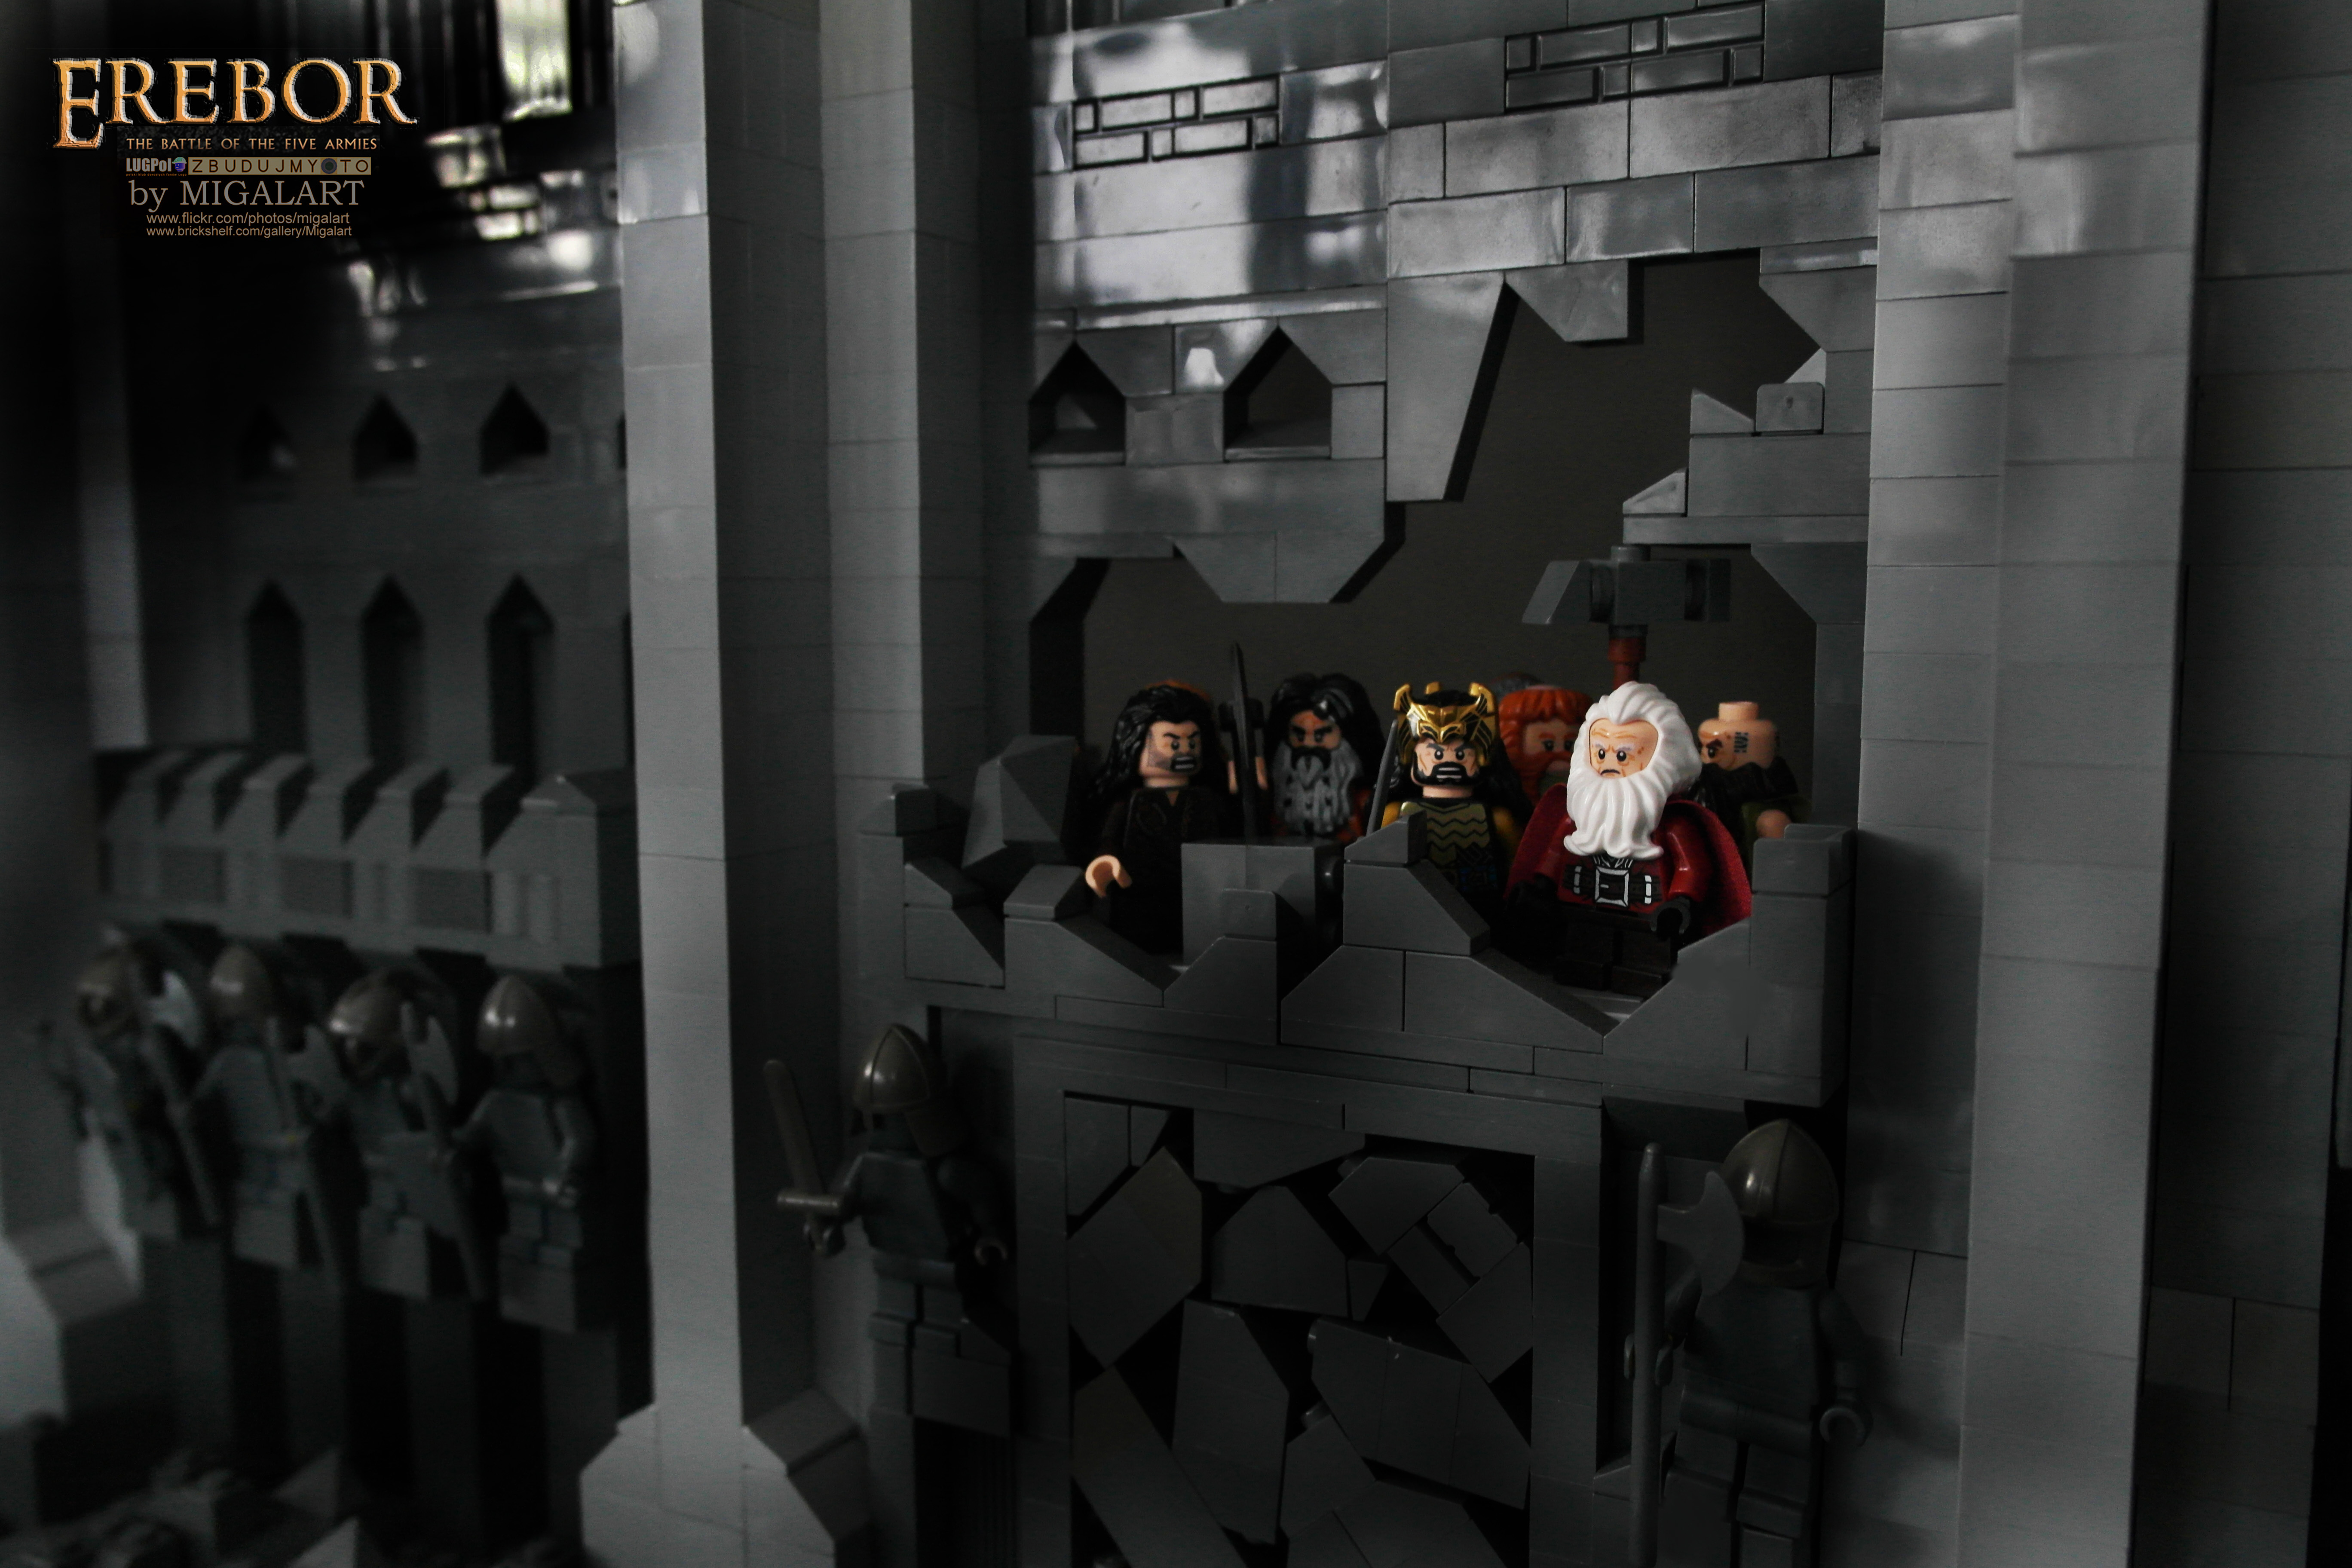
"Meeting before the fight"
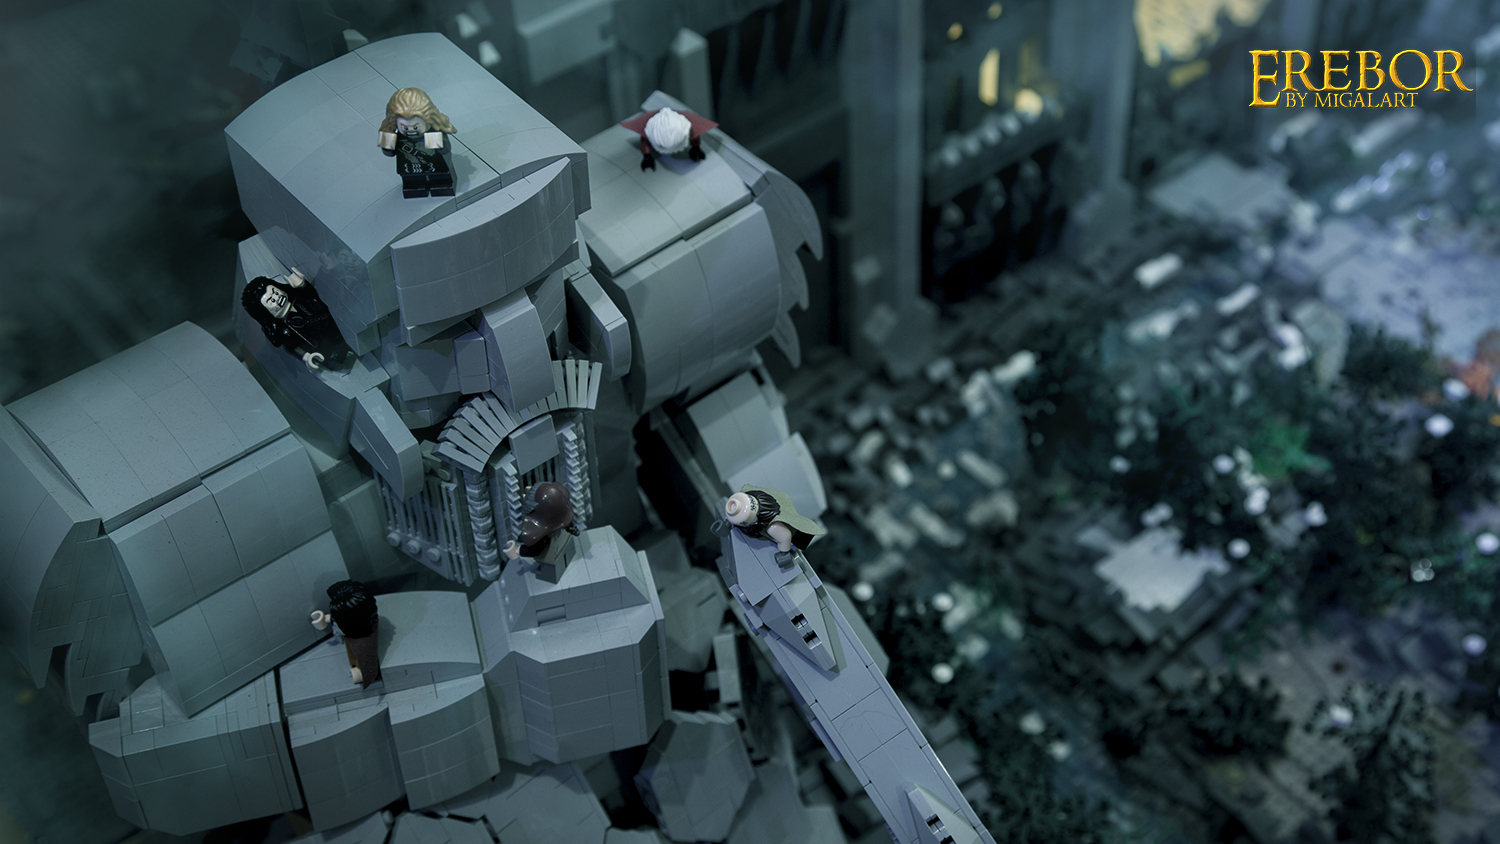
"Dwarf"
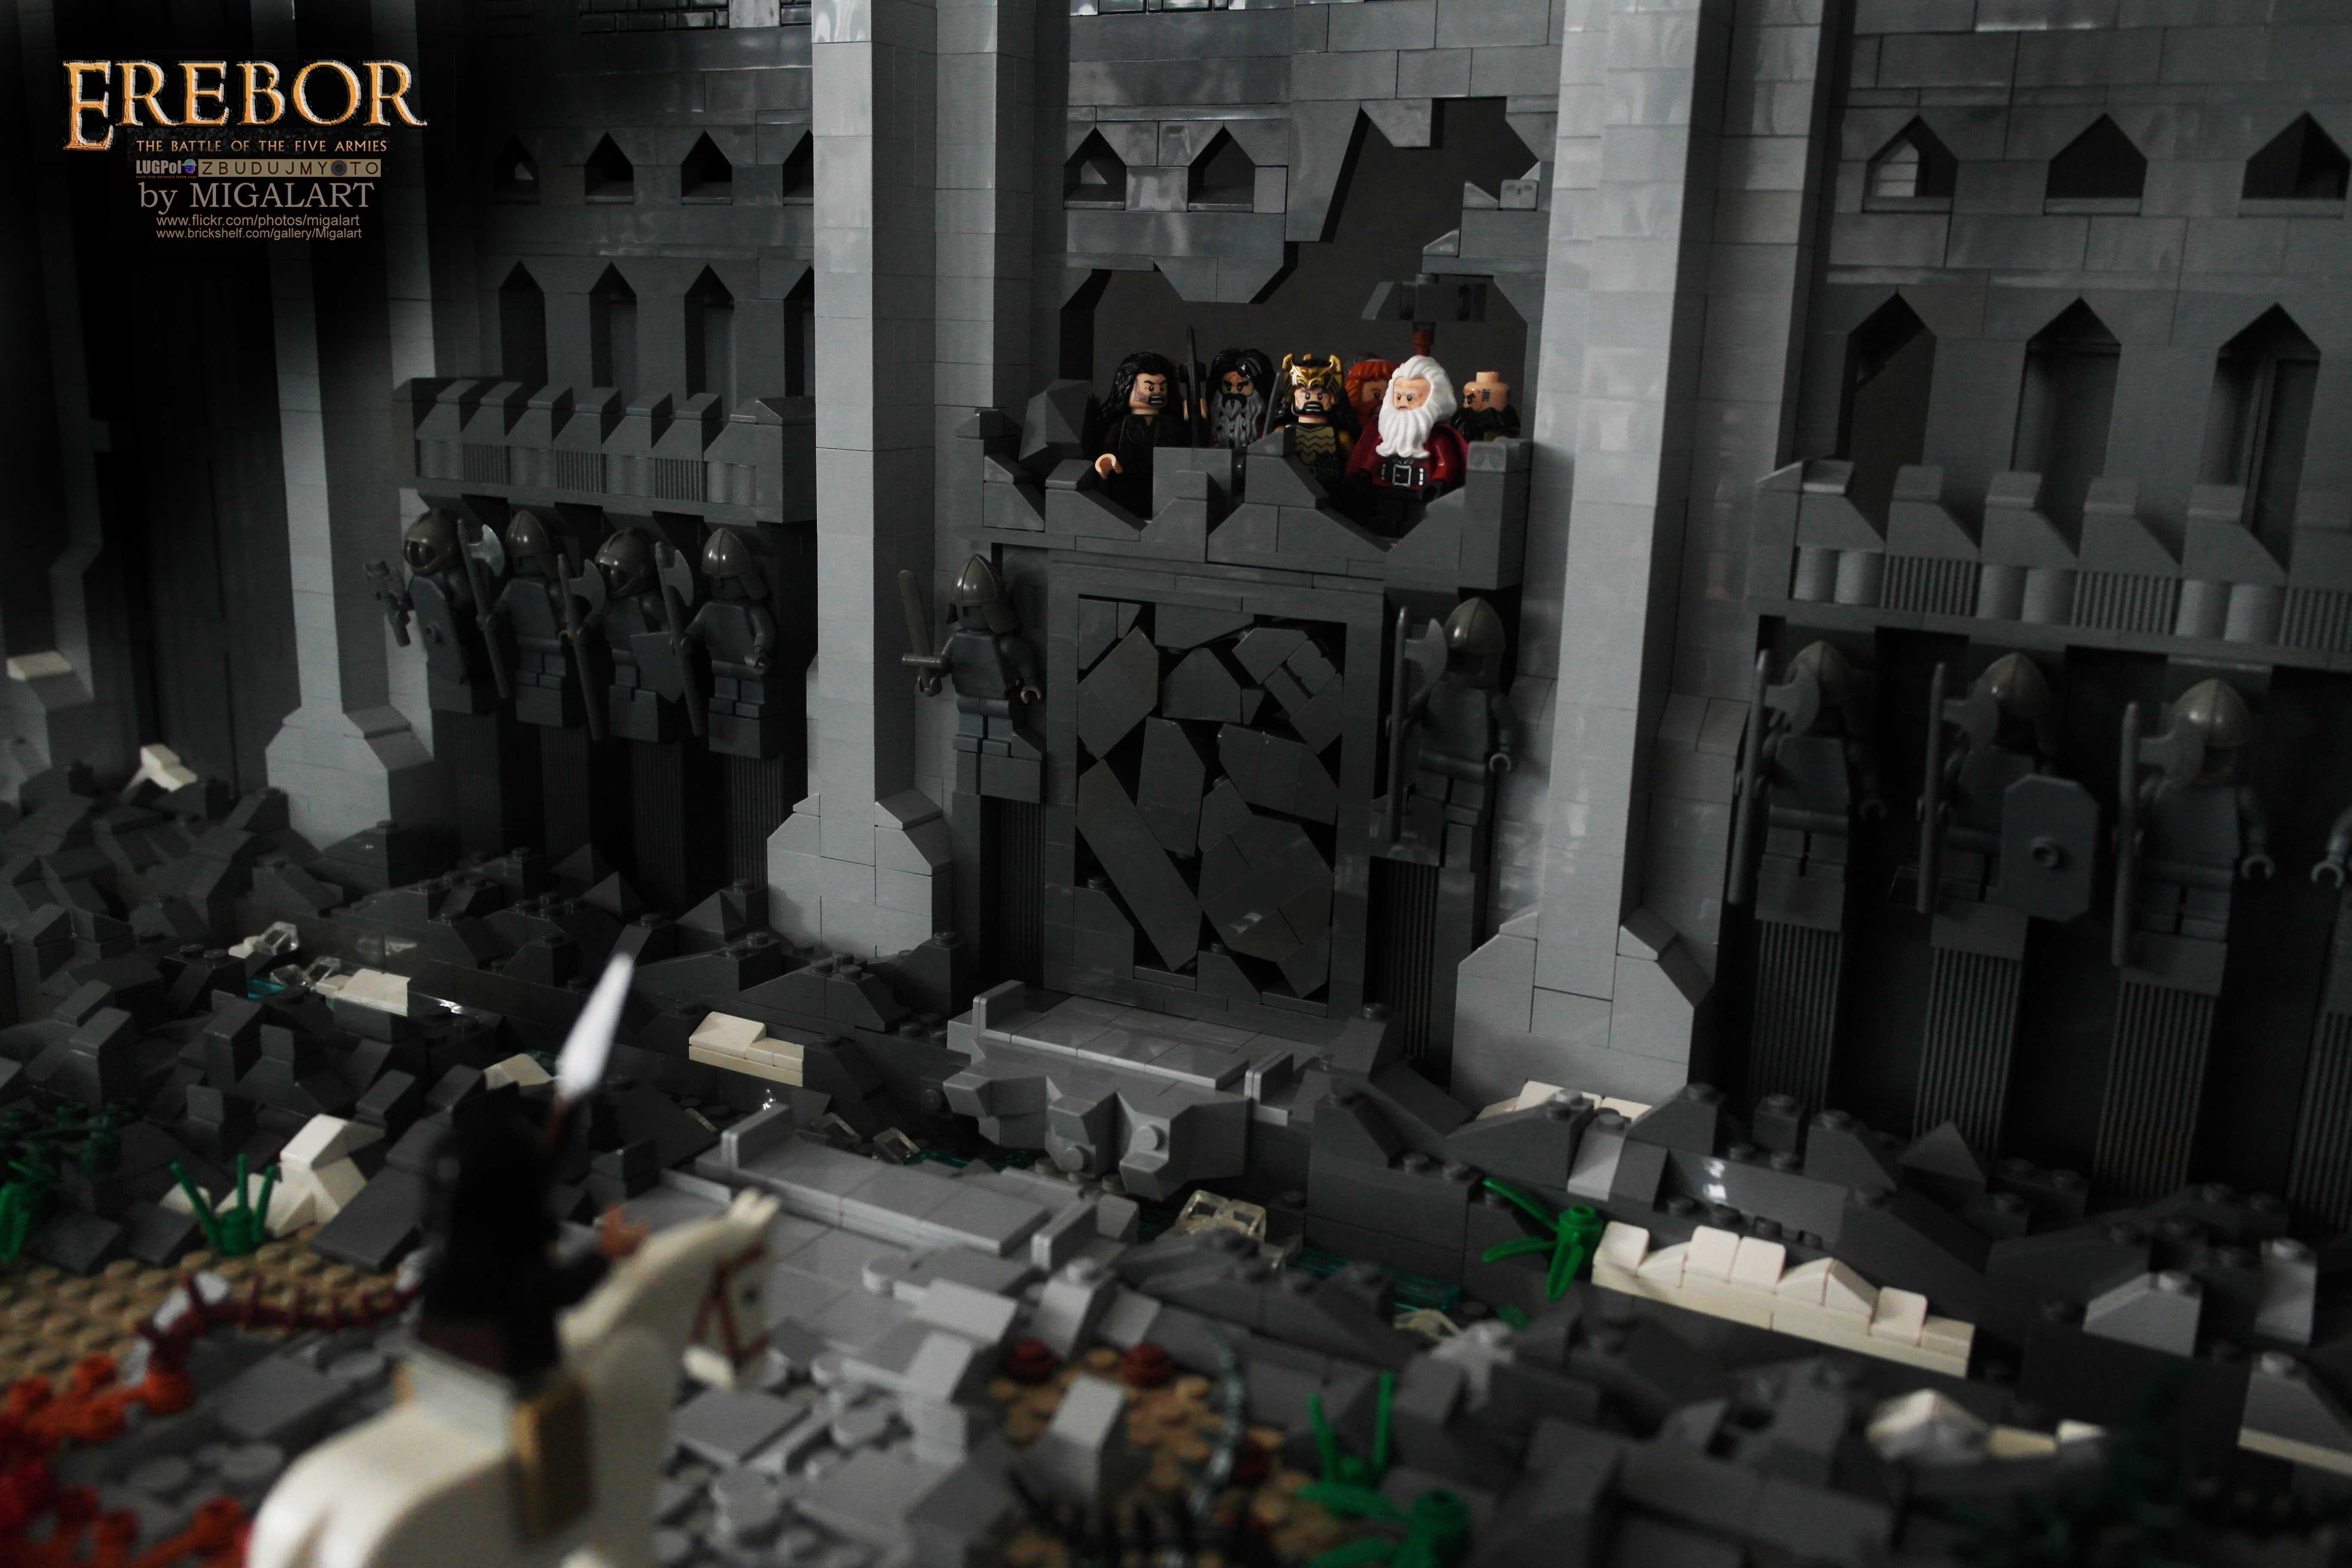
"The fight scene - the chaos on the battlefield"
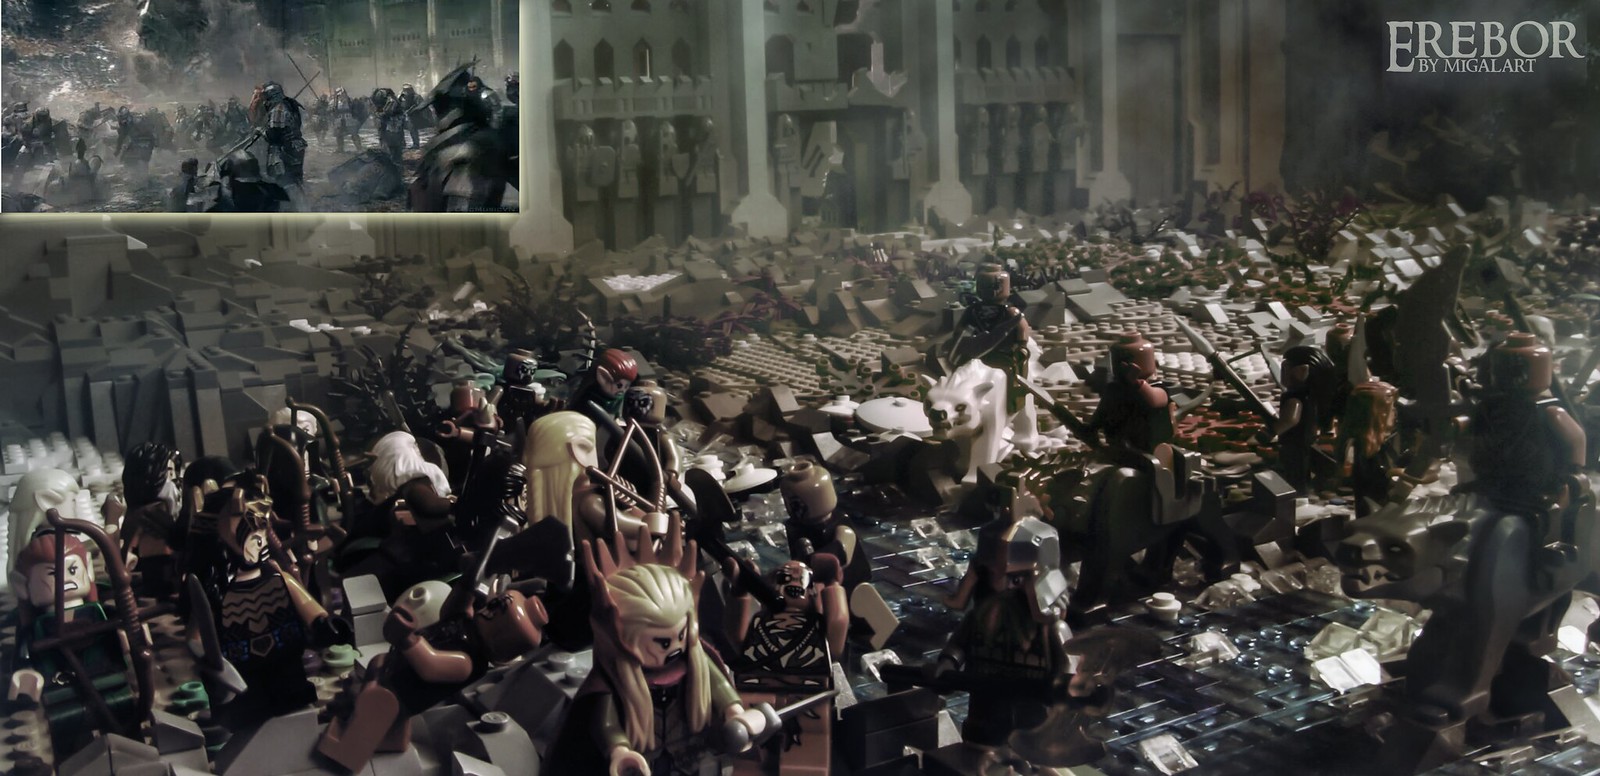
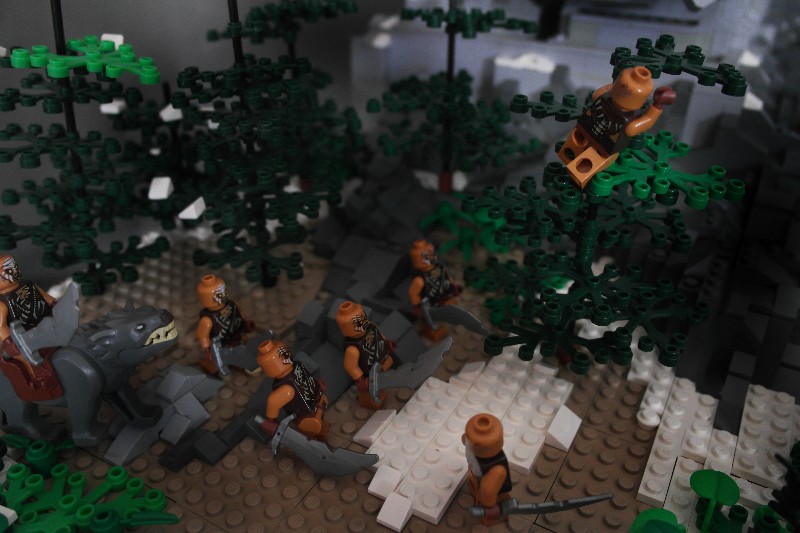
"Last Bolgs ambush"

"Showdown"

The building consists of approximately 20 independent modules, each of which could be quite a bit independent MOC. The modules can be arranged in different ways which I used in these shots:


Big dilemma was the color blocks under construction. For a moment I considered the use of sand green and dark green. These colors are so exorbitantly expensive and less available, that quickly gave up the idea and used the traditional gray bricks.
Fortunately, it turned out that adequate lighting is able to fully mitigate the limitations of color as you can see on the film:
If you have a poblem with youtube. Try this link: https://vimeo.com/143540635
Nicholas is a great artist, who in his activity joins the LEGO passion, film and photography. By the way, I strongly urge you to look at his work on Flickr.
https://www.flickr.c...tos/fullnilson/
With the development of the project shrank my plans. There was a moment that the planned building was divided into 3 stages with a total height of 2.8 meters (including 60 cm below the level 0). I planned a complicated system of bridges and steel works. The main reason for reducing the scale of buildings were logistical problems. The building must be installed repeatedly. Each successive meter in height entails other engineering solutions. Up to one meter provide sufficient lift the blocks themselves. In the case of 2-meter building I used a hidden wooden 3cmx3cm slats across the structure.
At the end - the picture with the author ;)
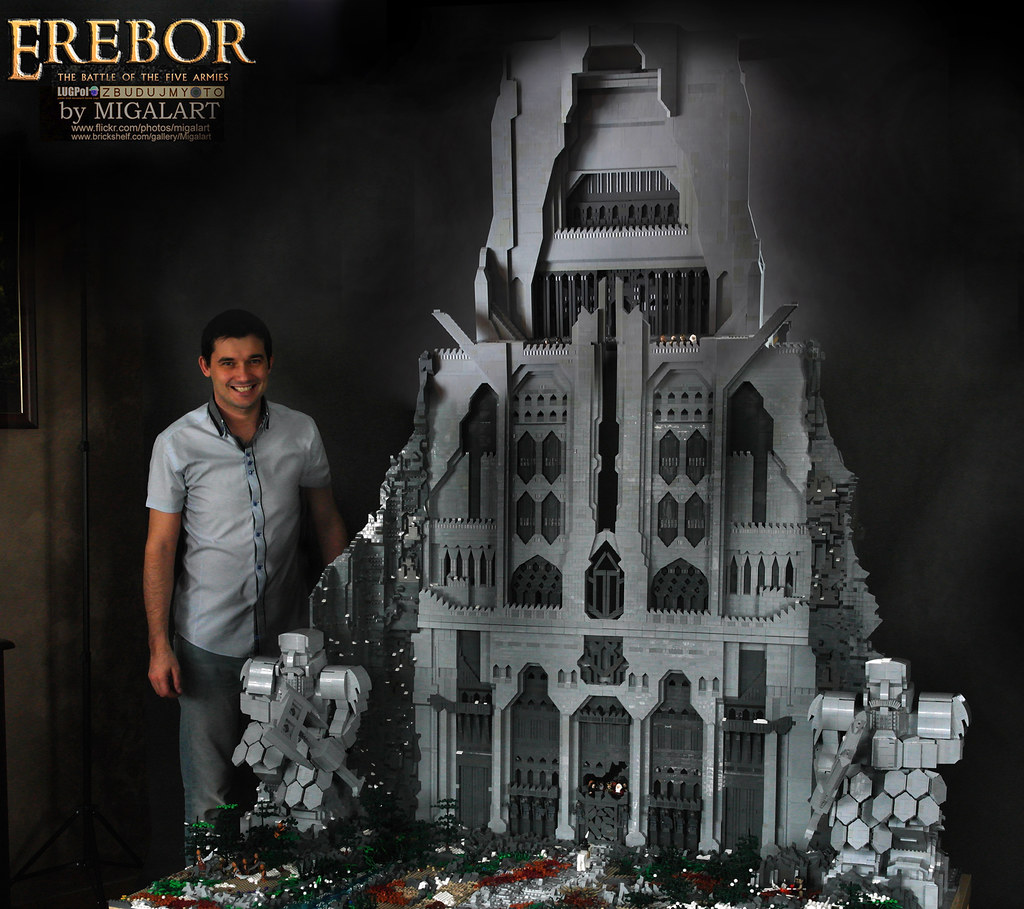
Of course, more photos on Flickr:
-
I decided to take some rest from large MOCs and do something small. I also wanted to do something for my son because my last MOCs were not too much playable.
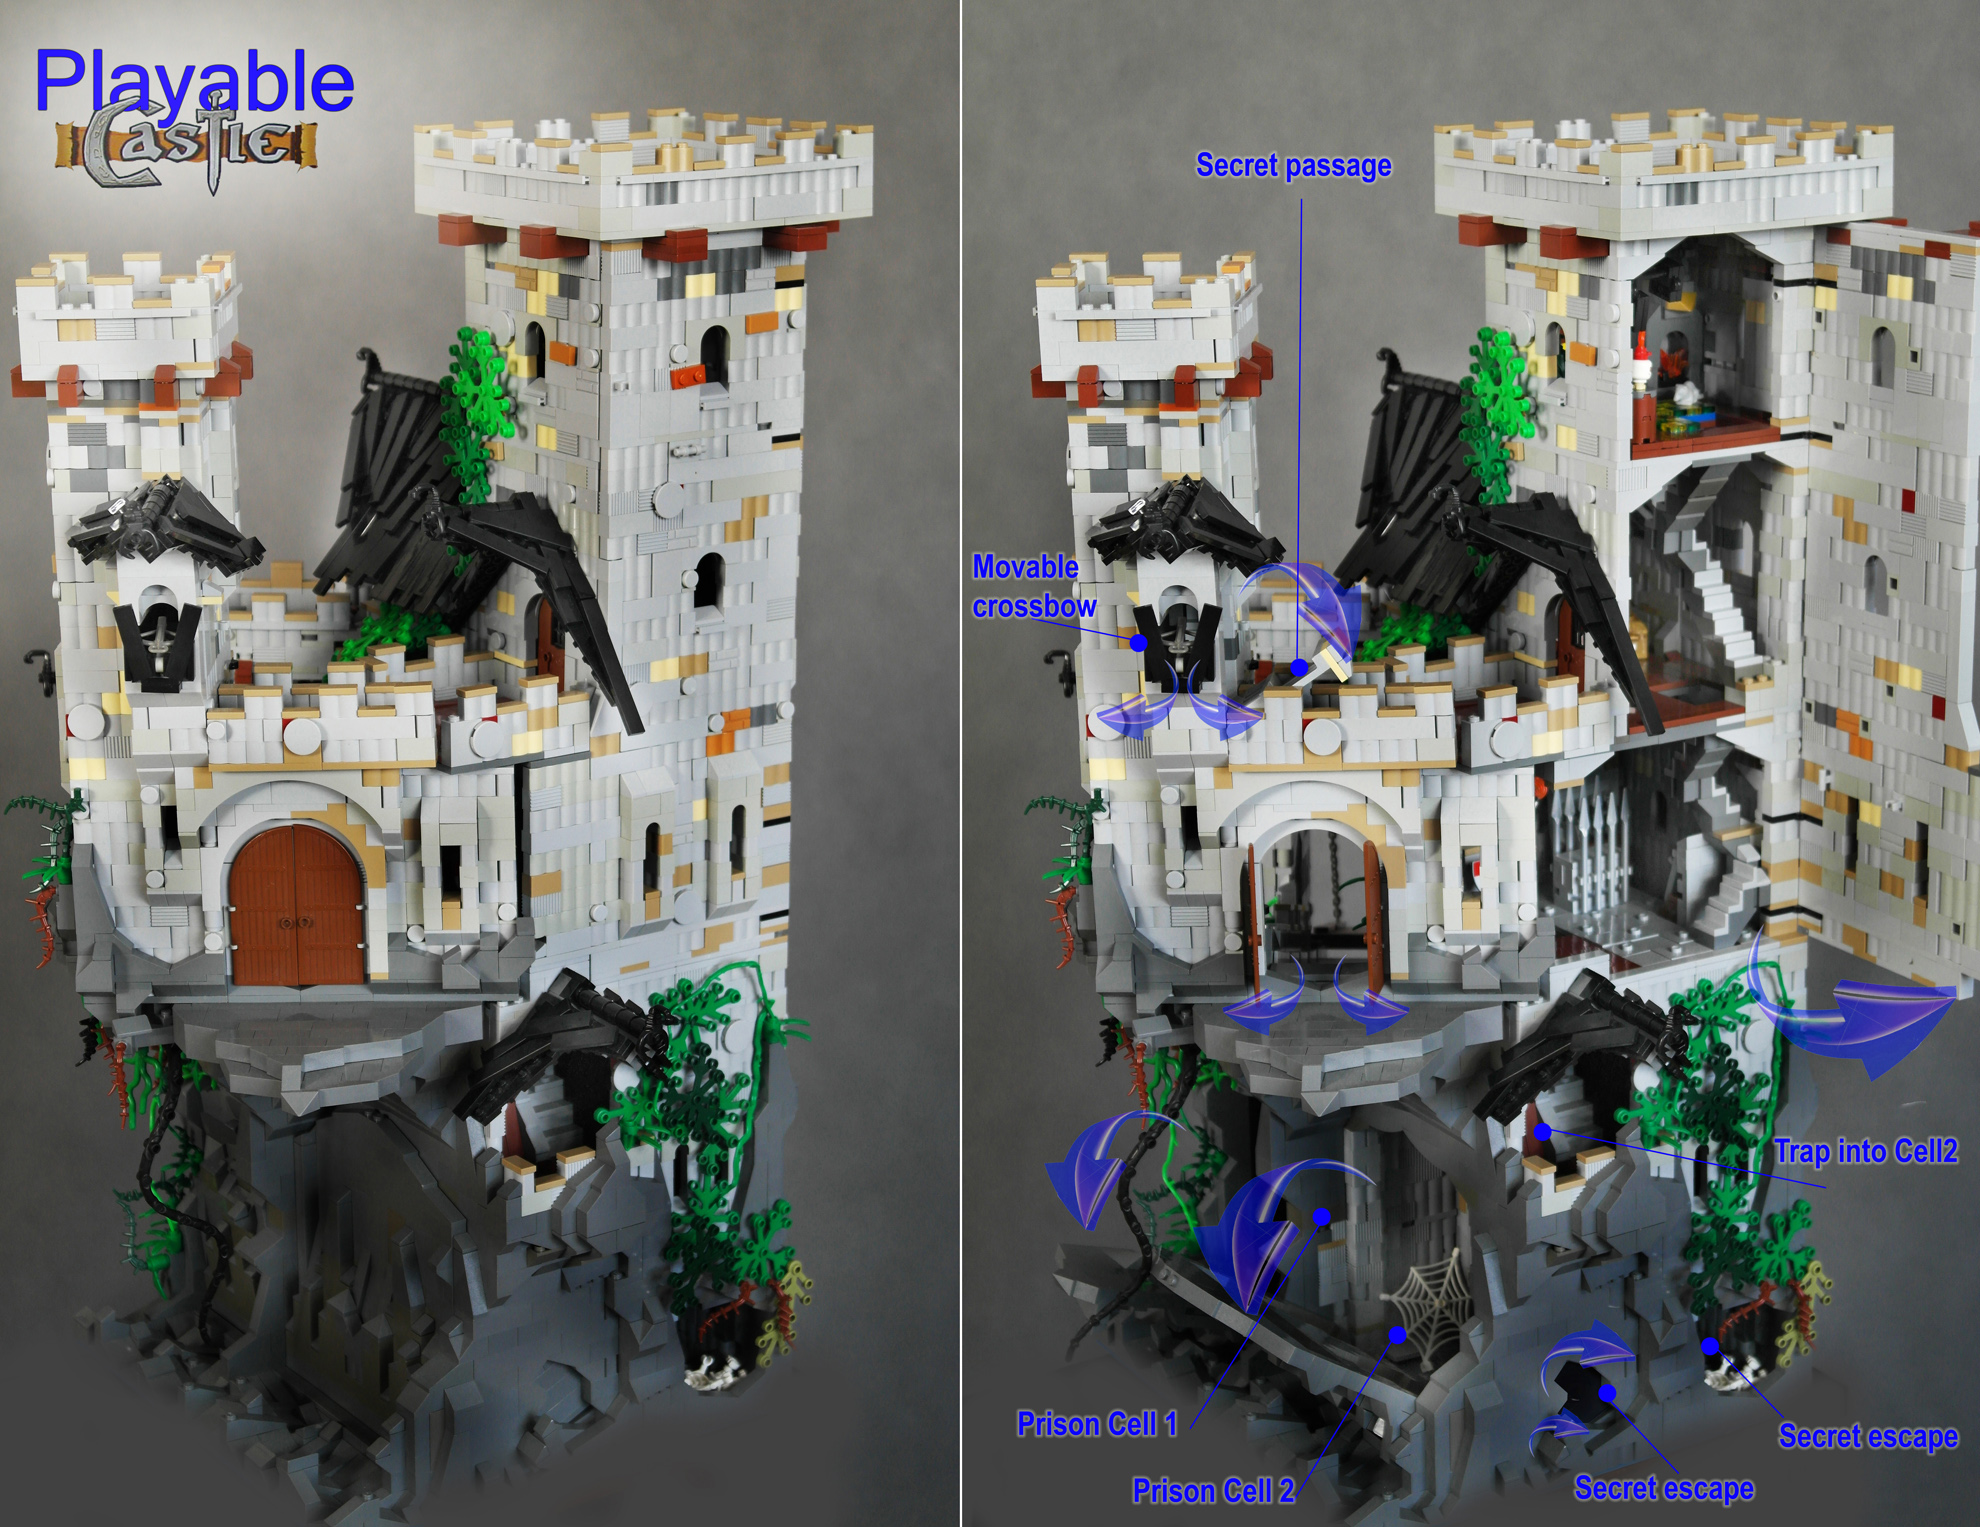
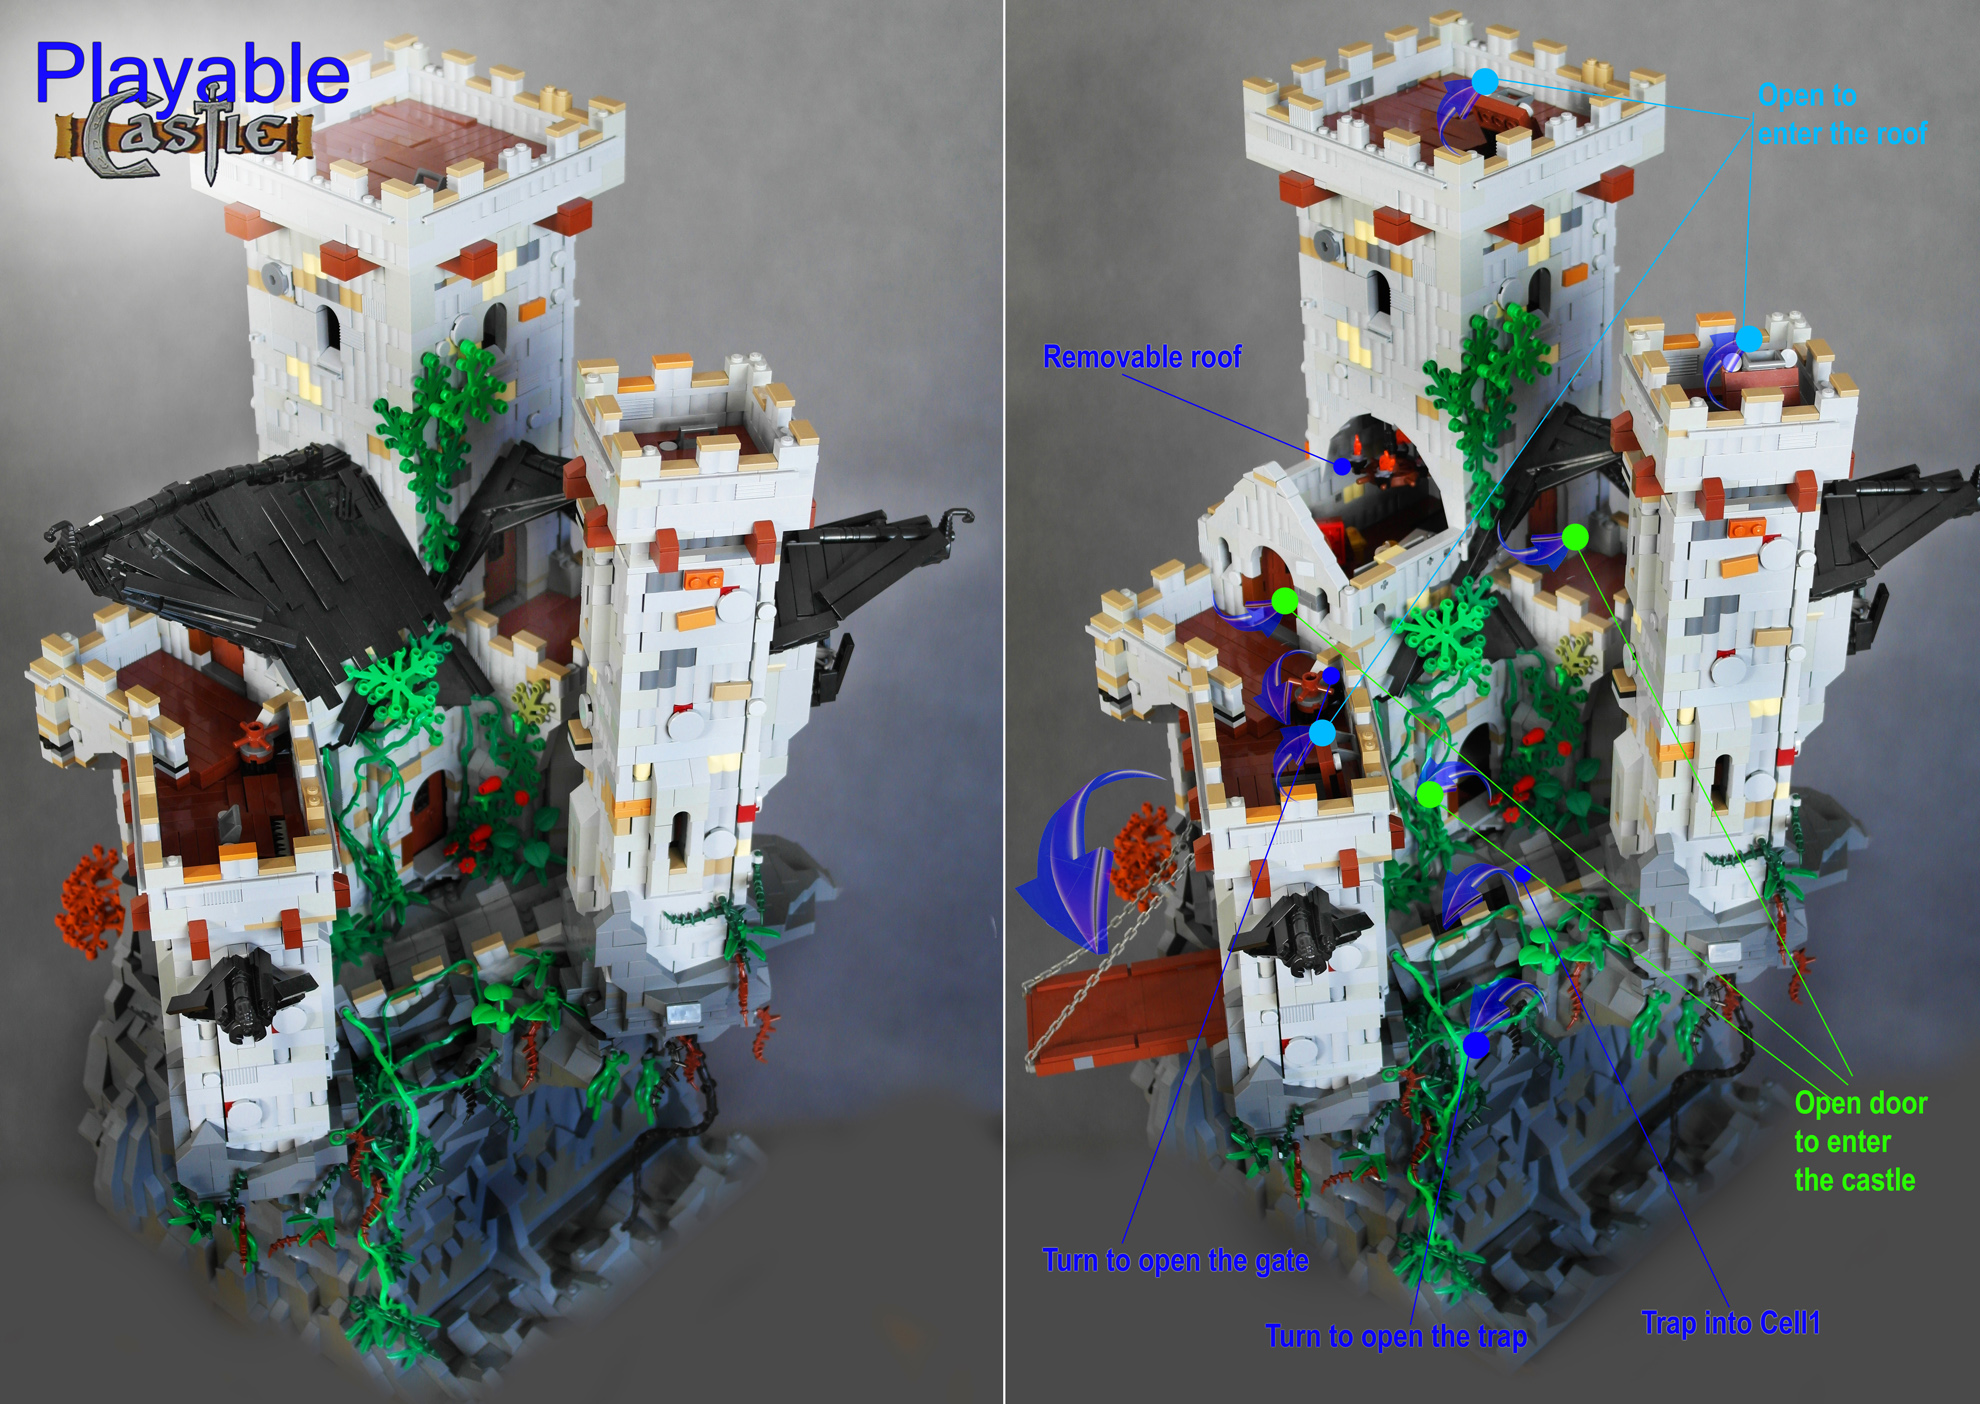
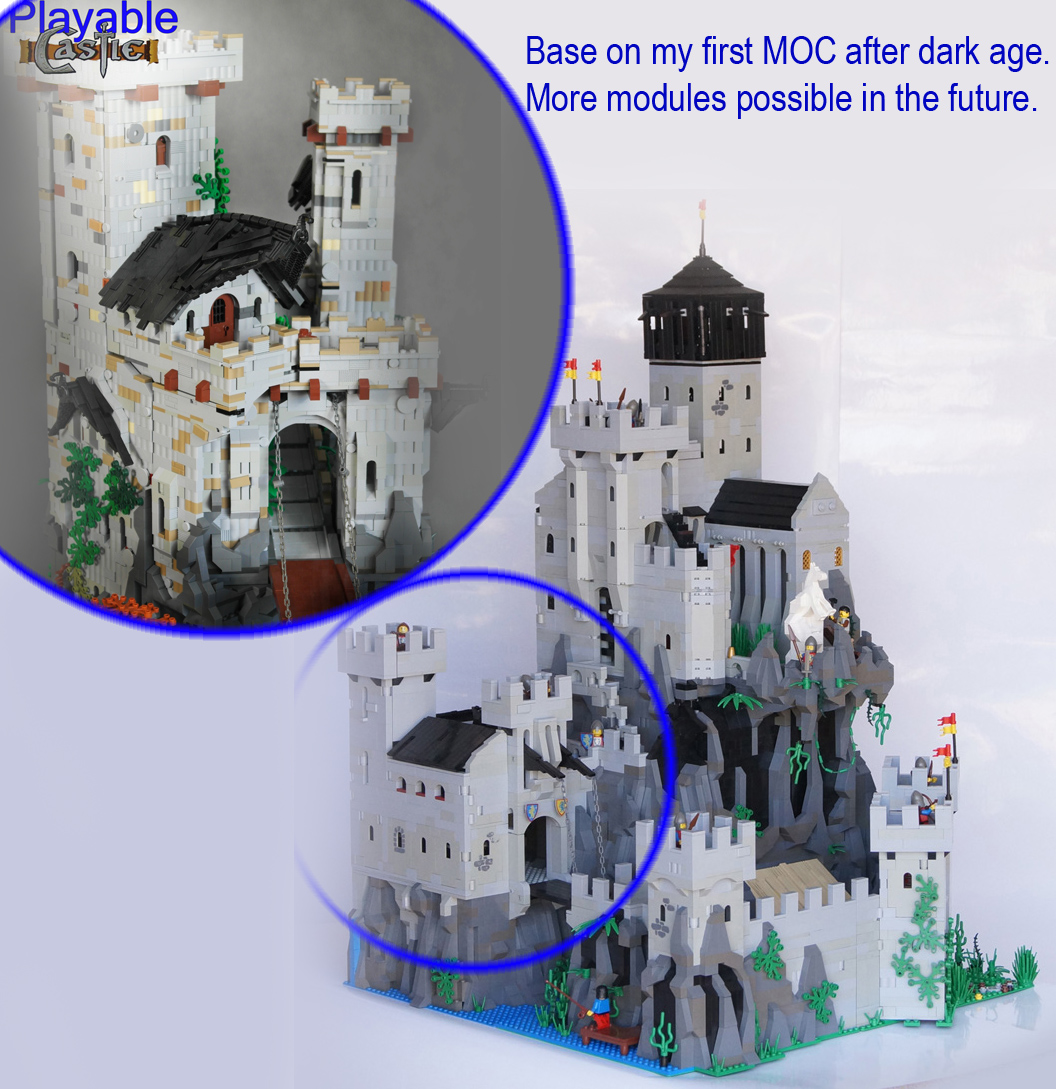
So this time I did something not for Exhibitions. Small playable castle in assuming toy for a boy at the age of 8-12 years. I tried to fit on a small area (1 base plate 32x32) as many as possible of playable elements. More than one base unit plate for child fun does not have too much sense since the castle must be reasonably mobile.
The castle also refers to my first MOC of the prior three years and is prepared to expand with new modules if I ever want.
As I said in the near future I do not plan to take this castle to any exhibition. It will remain in my son’s room until he gets tired of it :D.
Some statistics:
- Lowered gate
- 5 opening door
- 3 opened the hatch of the towers
- 7 opening walls
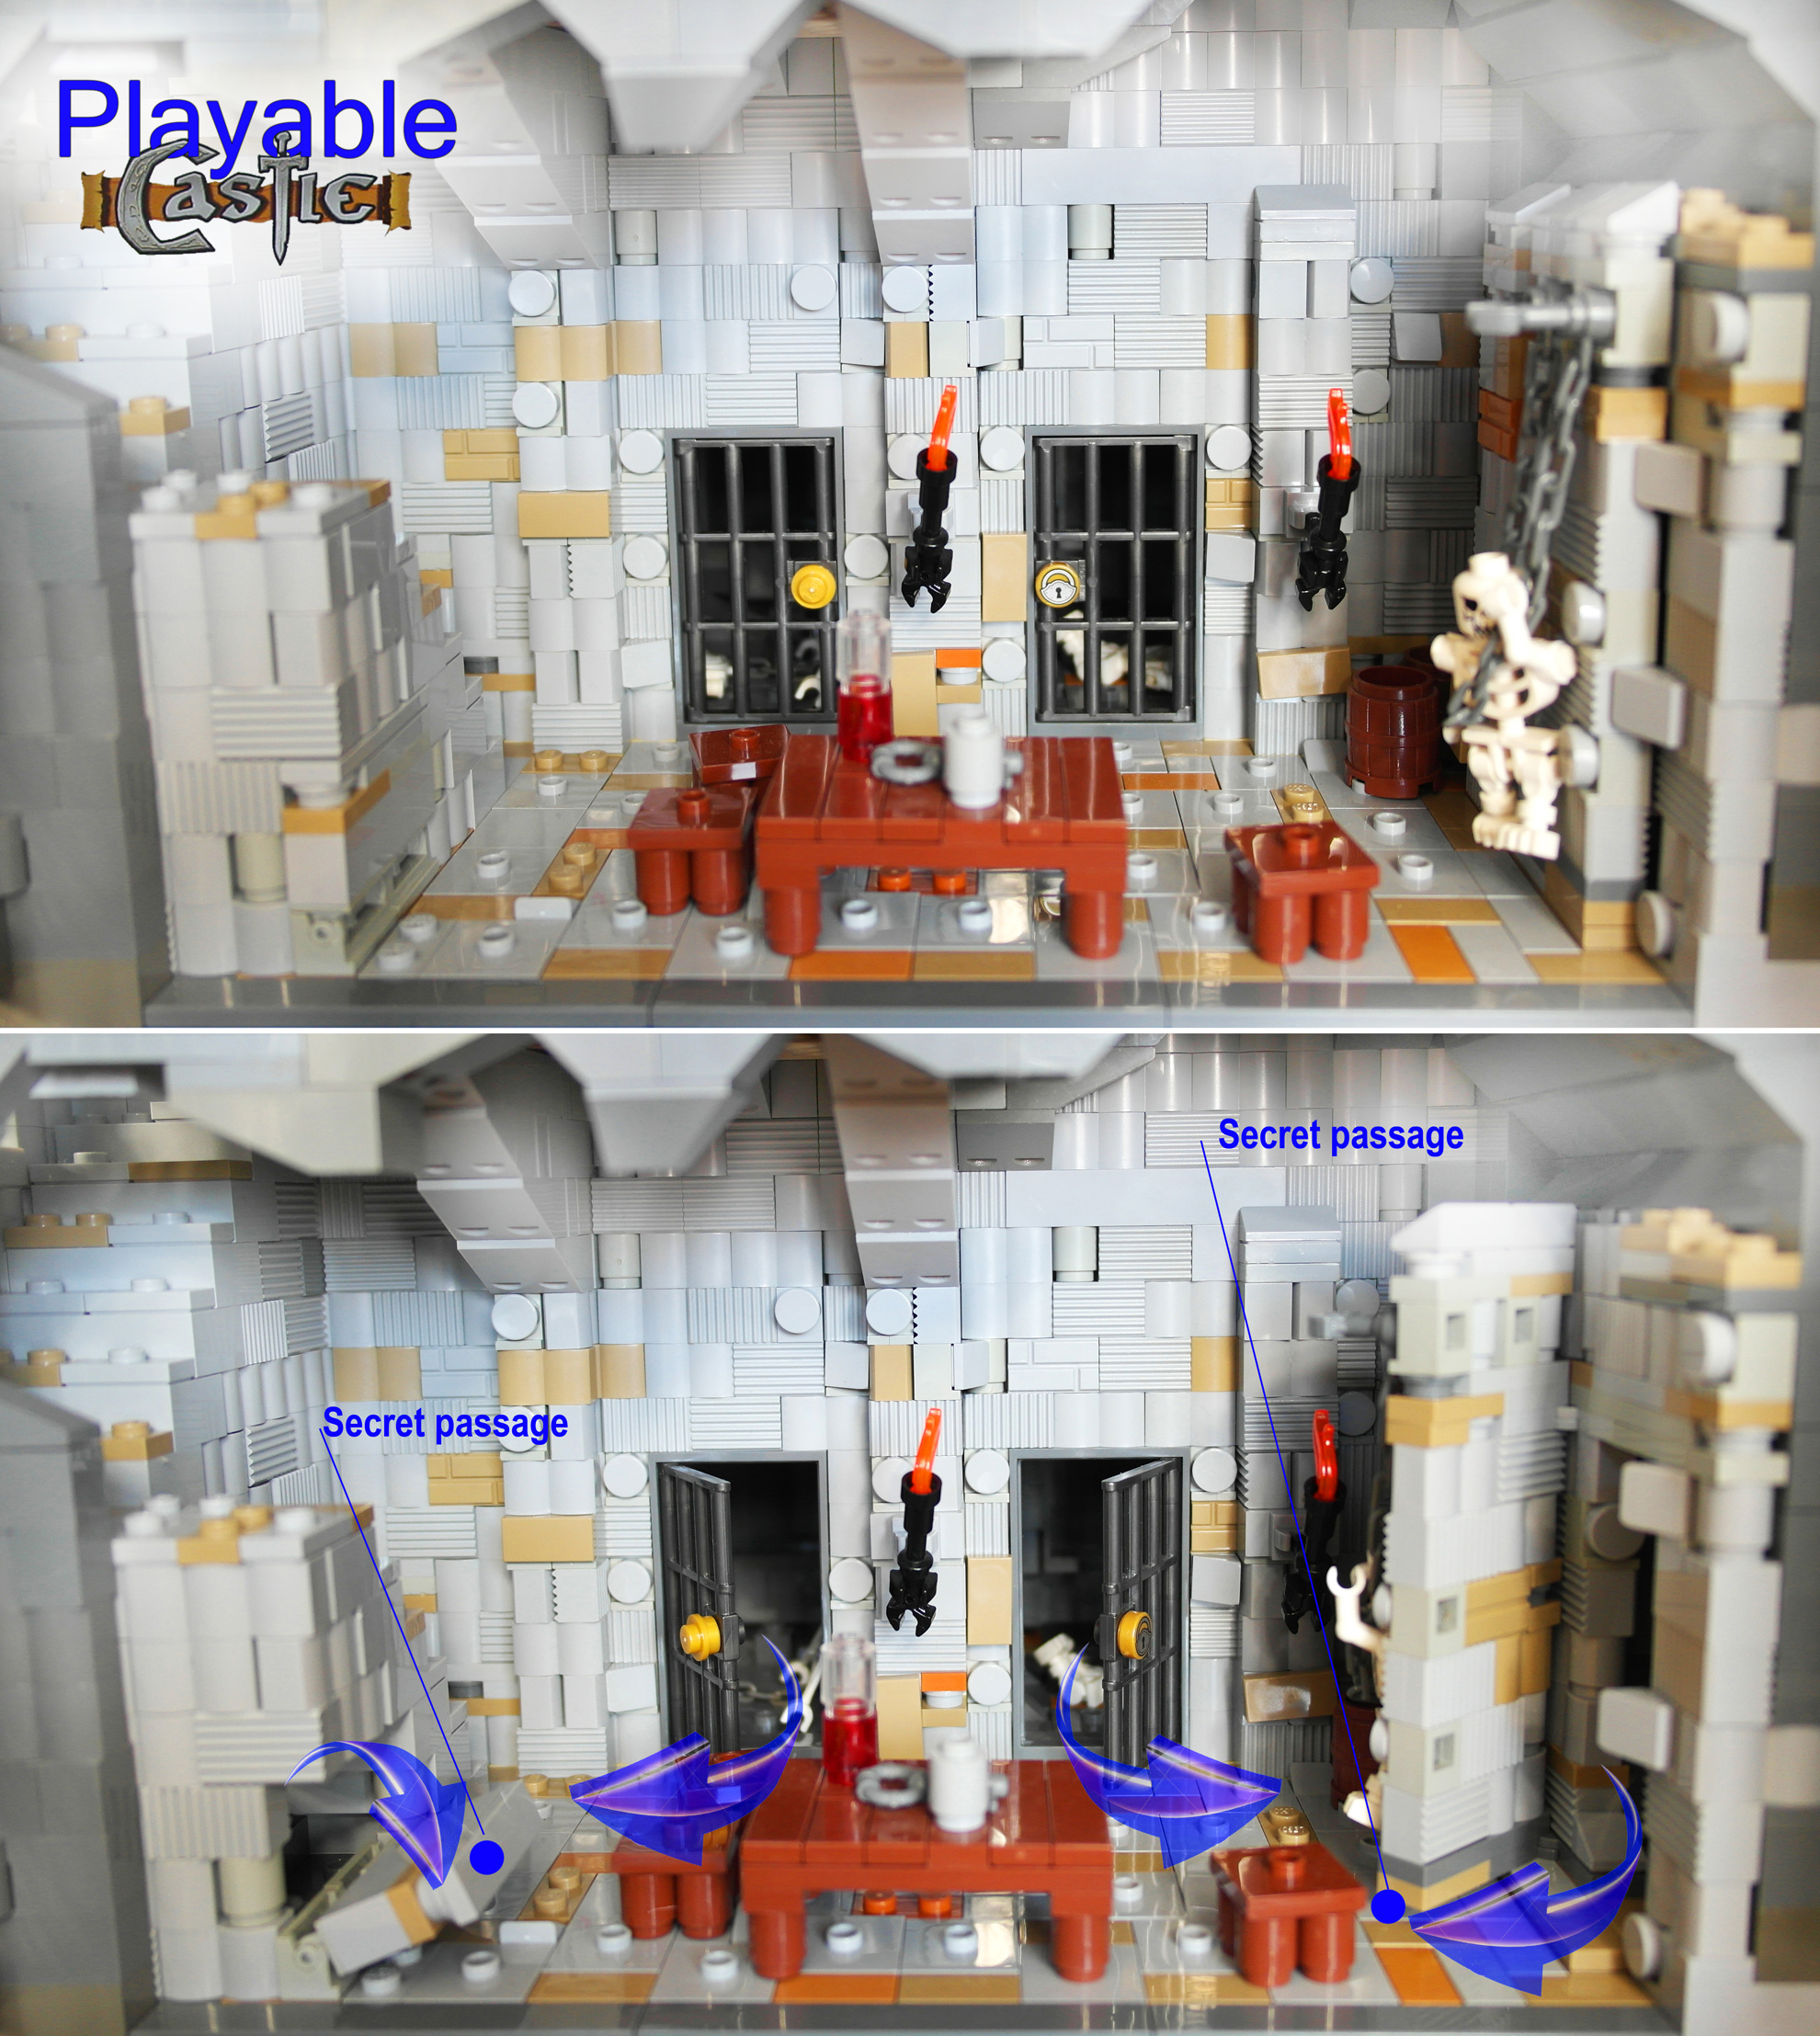
- 5 secret passages inside the castle (ie. Allowing escape from prison)
- 2 traps, where the road ends in jail
- stairs or ladder access to any place in the castle
- A removable roof
Two defense towers, prison with two cells, knights room, an armory, a lieutenant room, a room of magician.
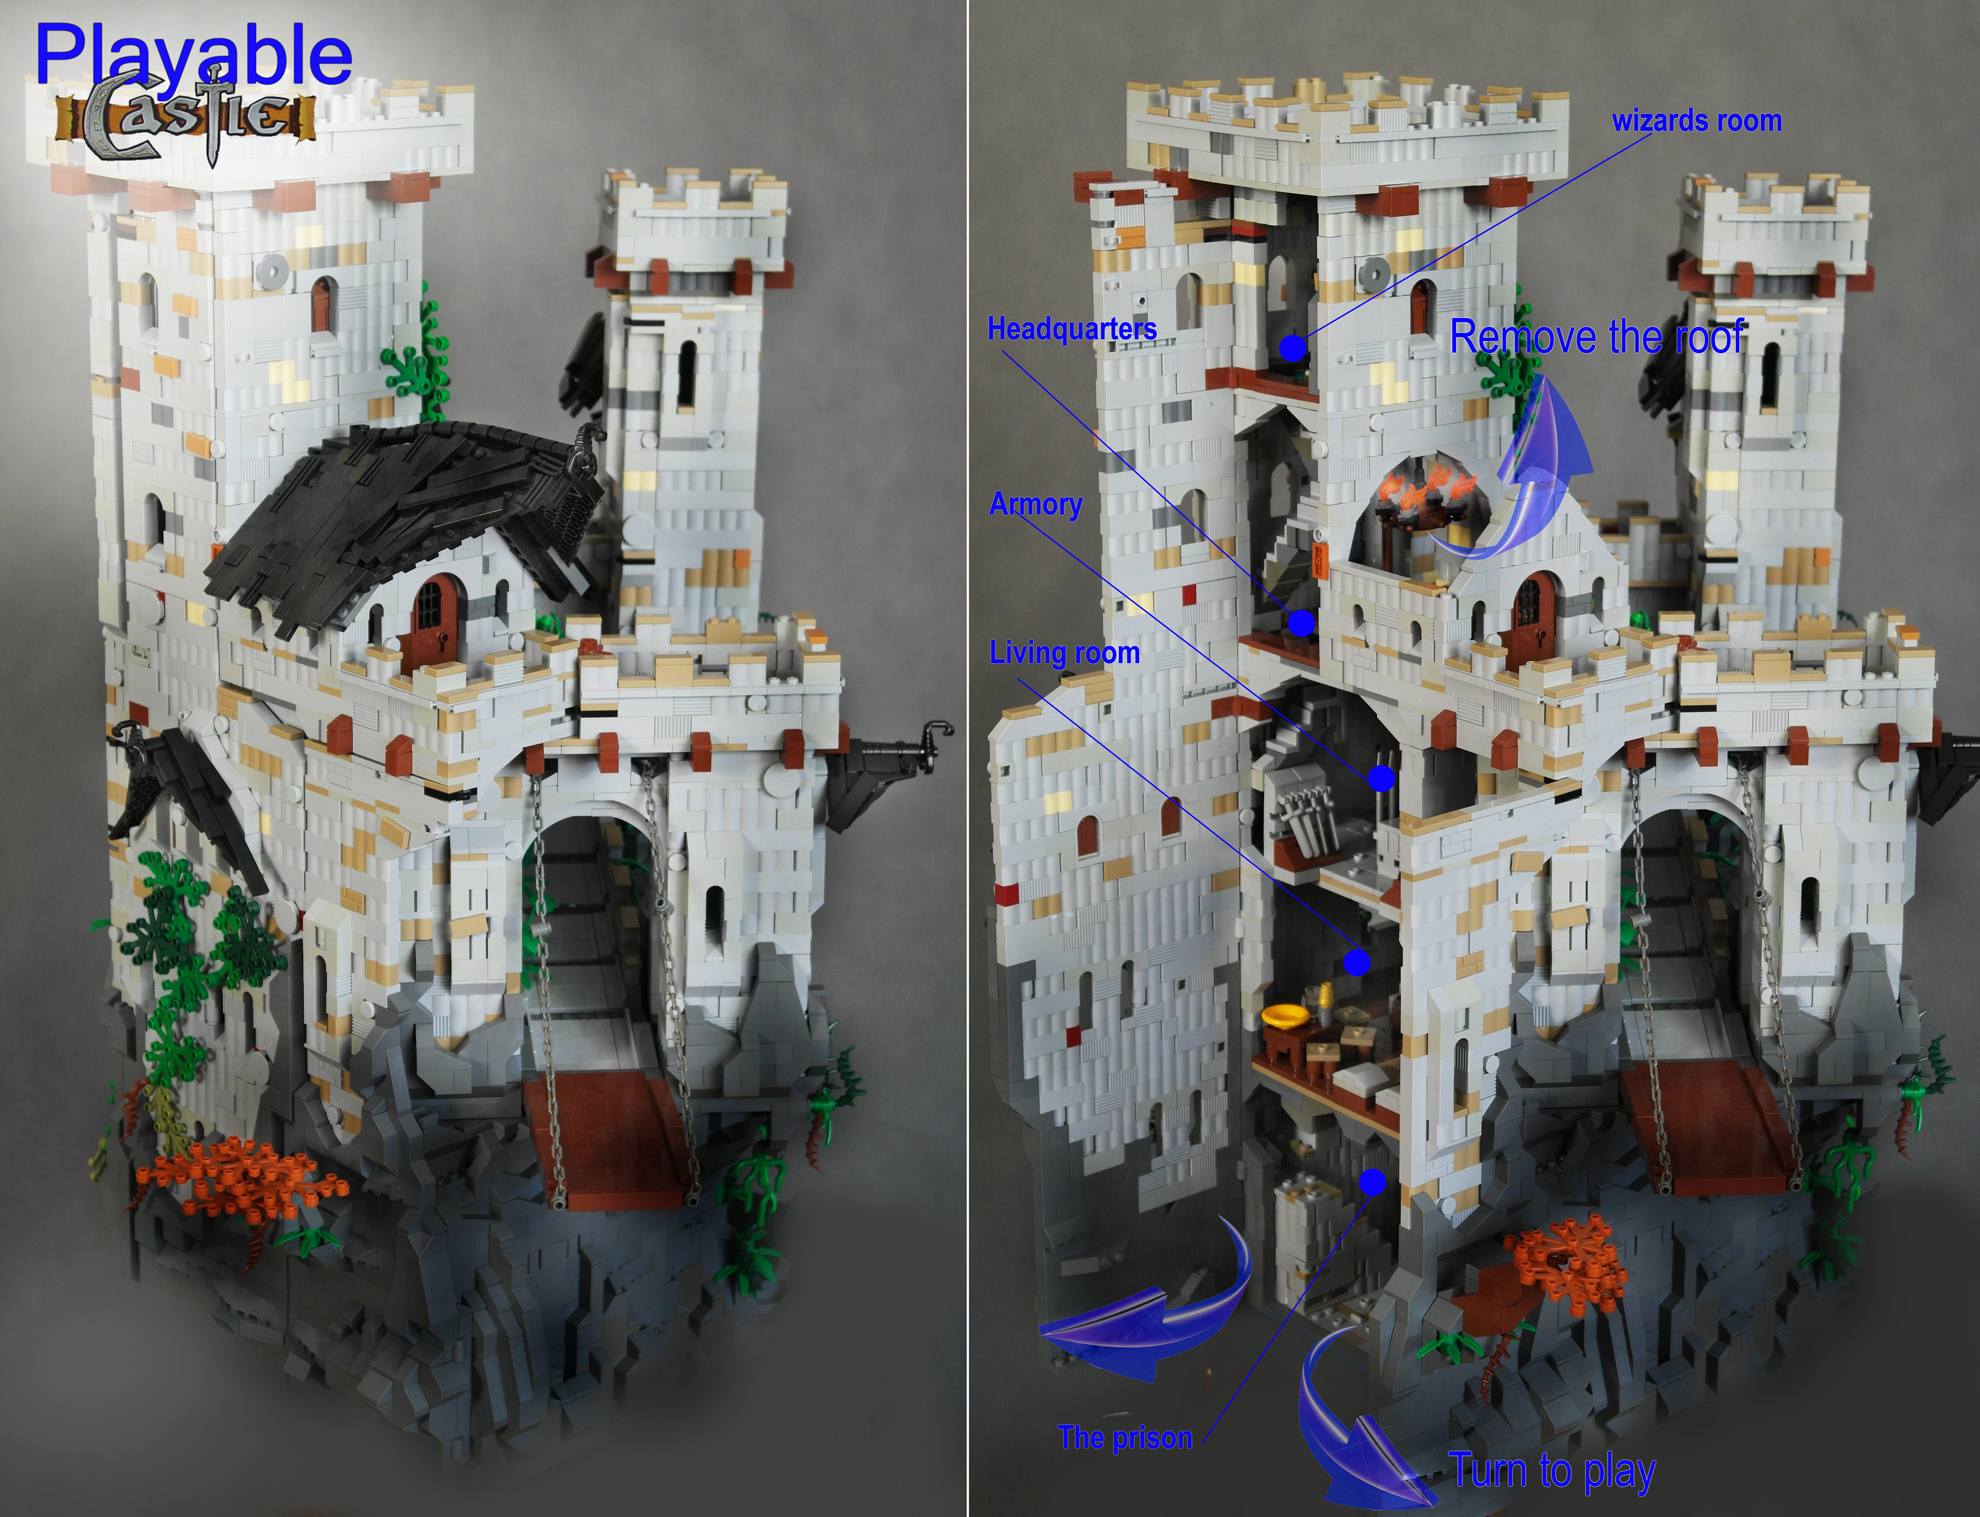
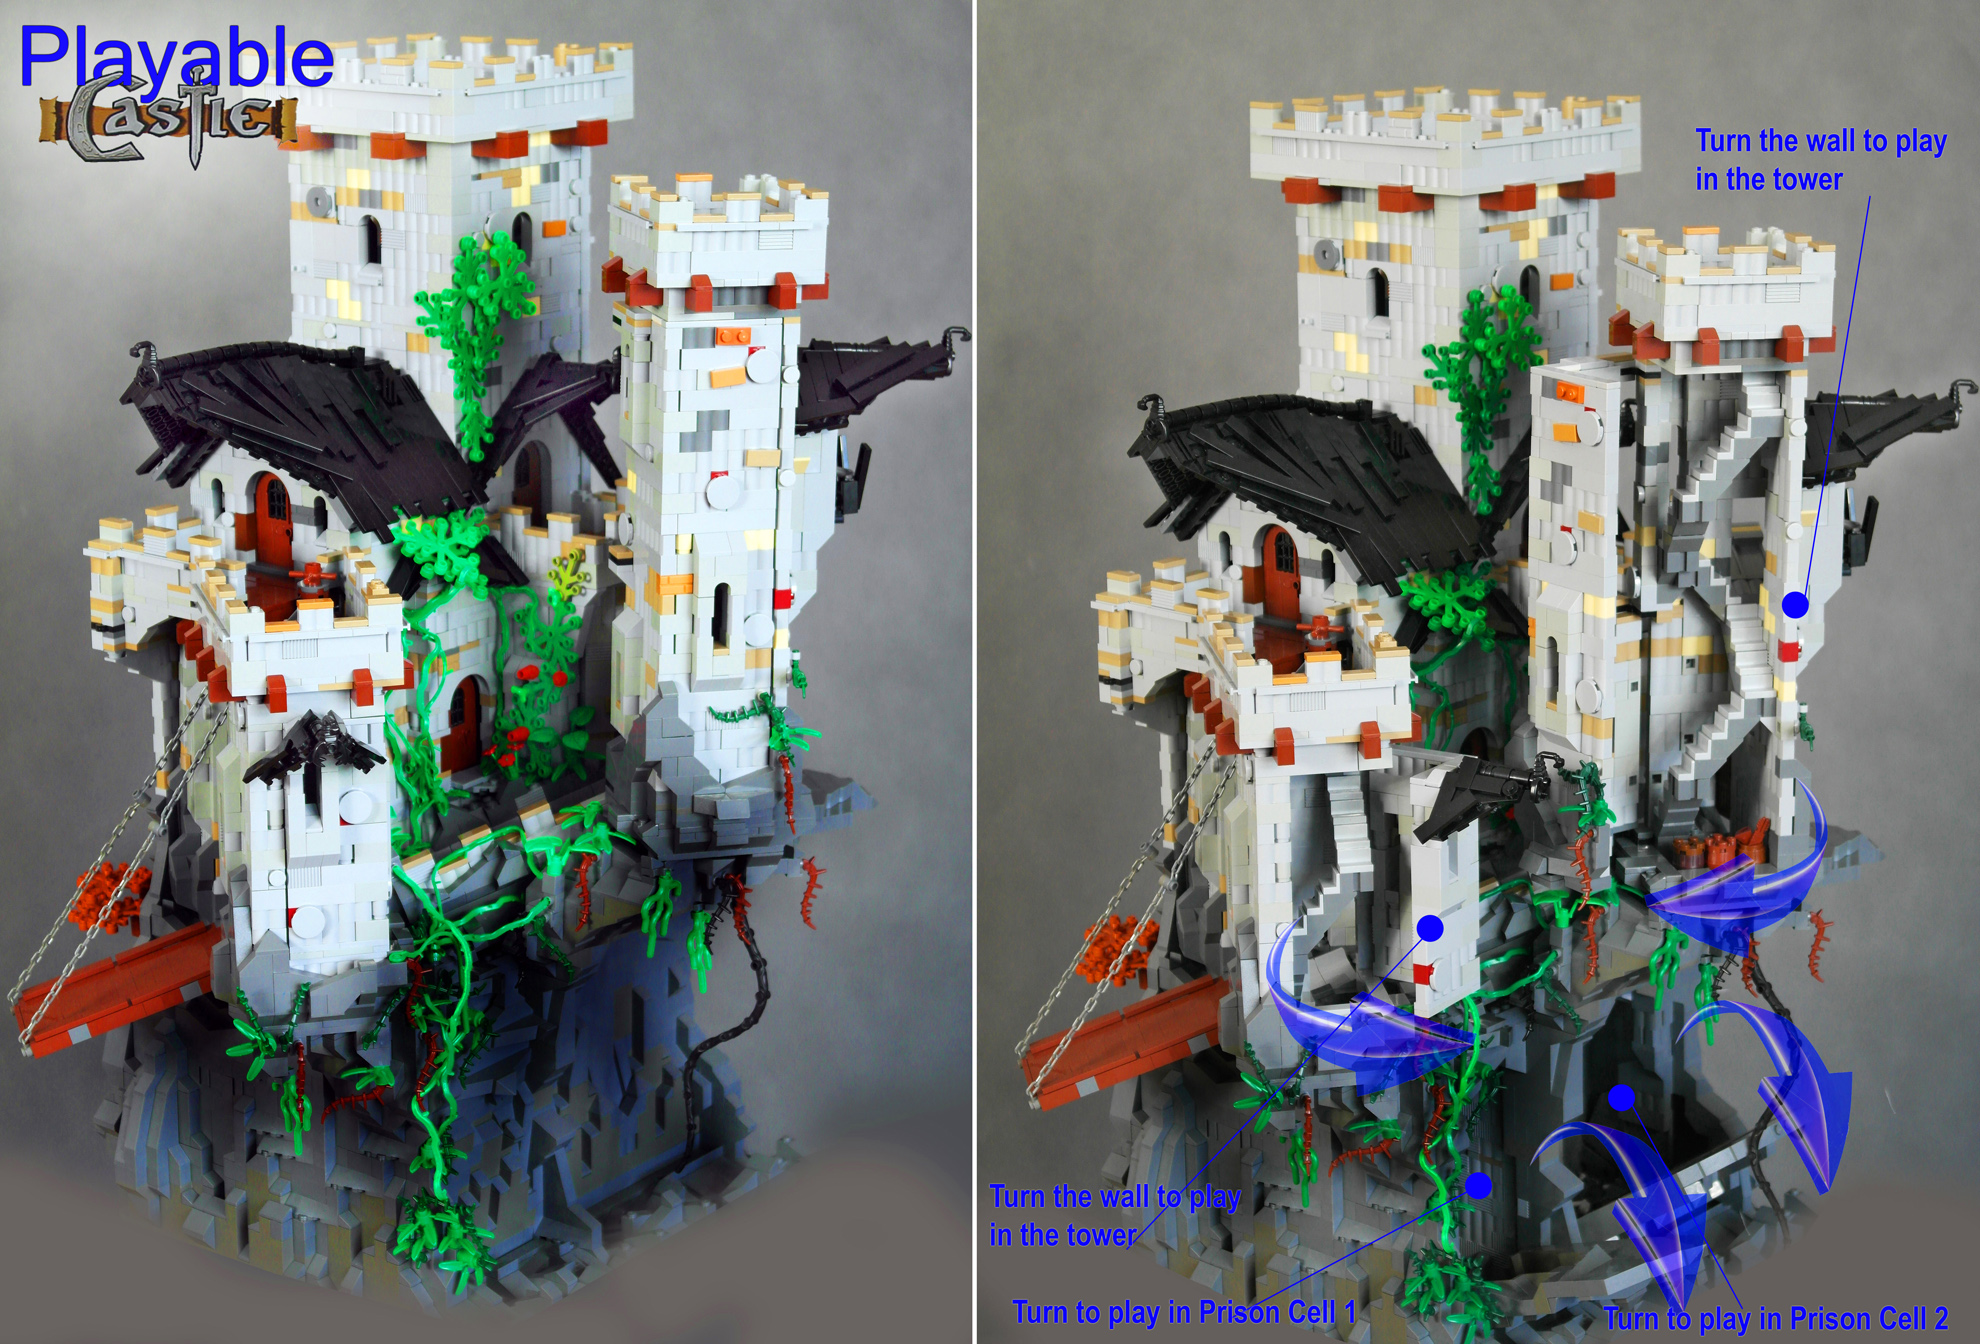
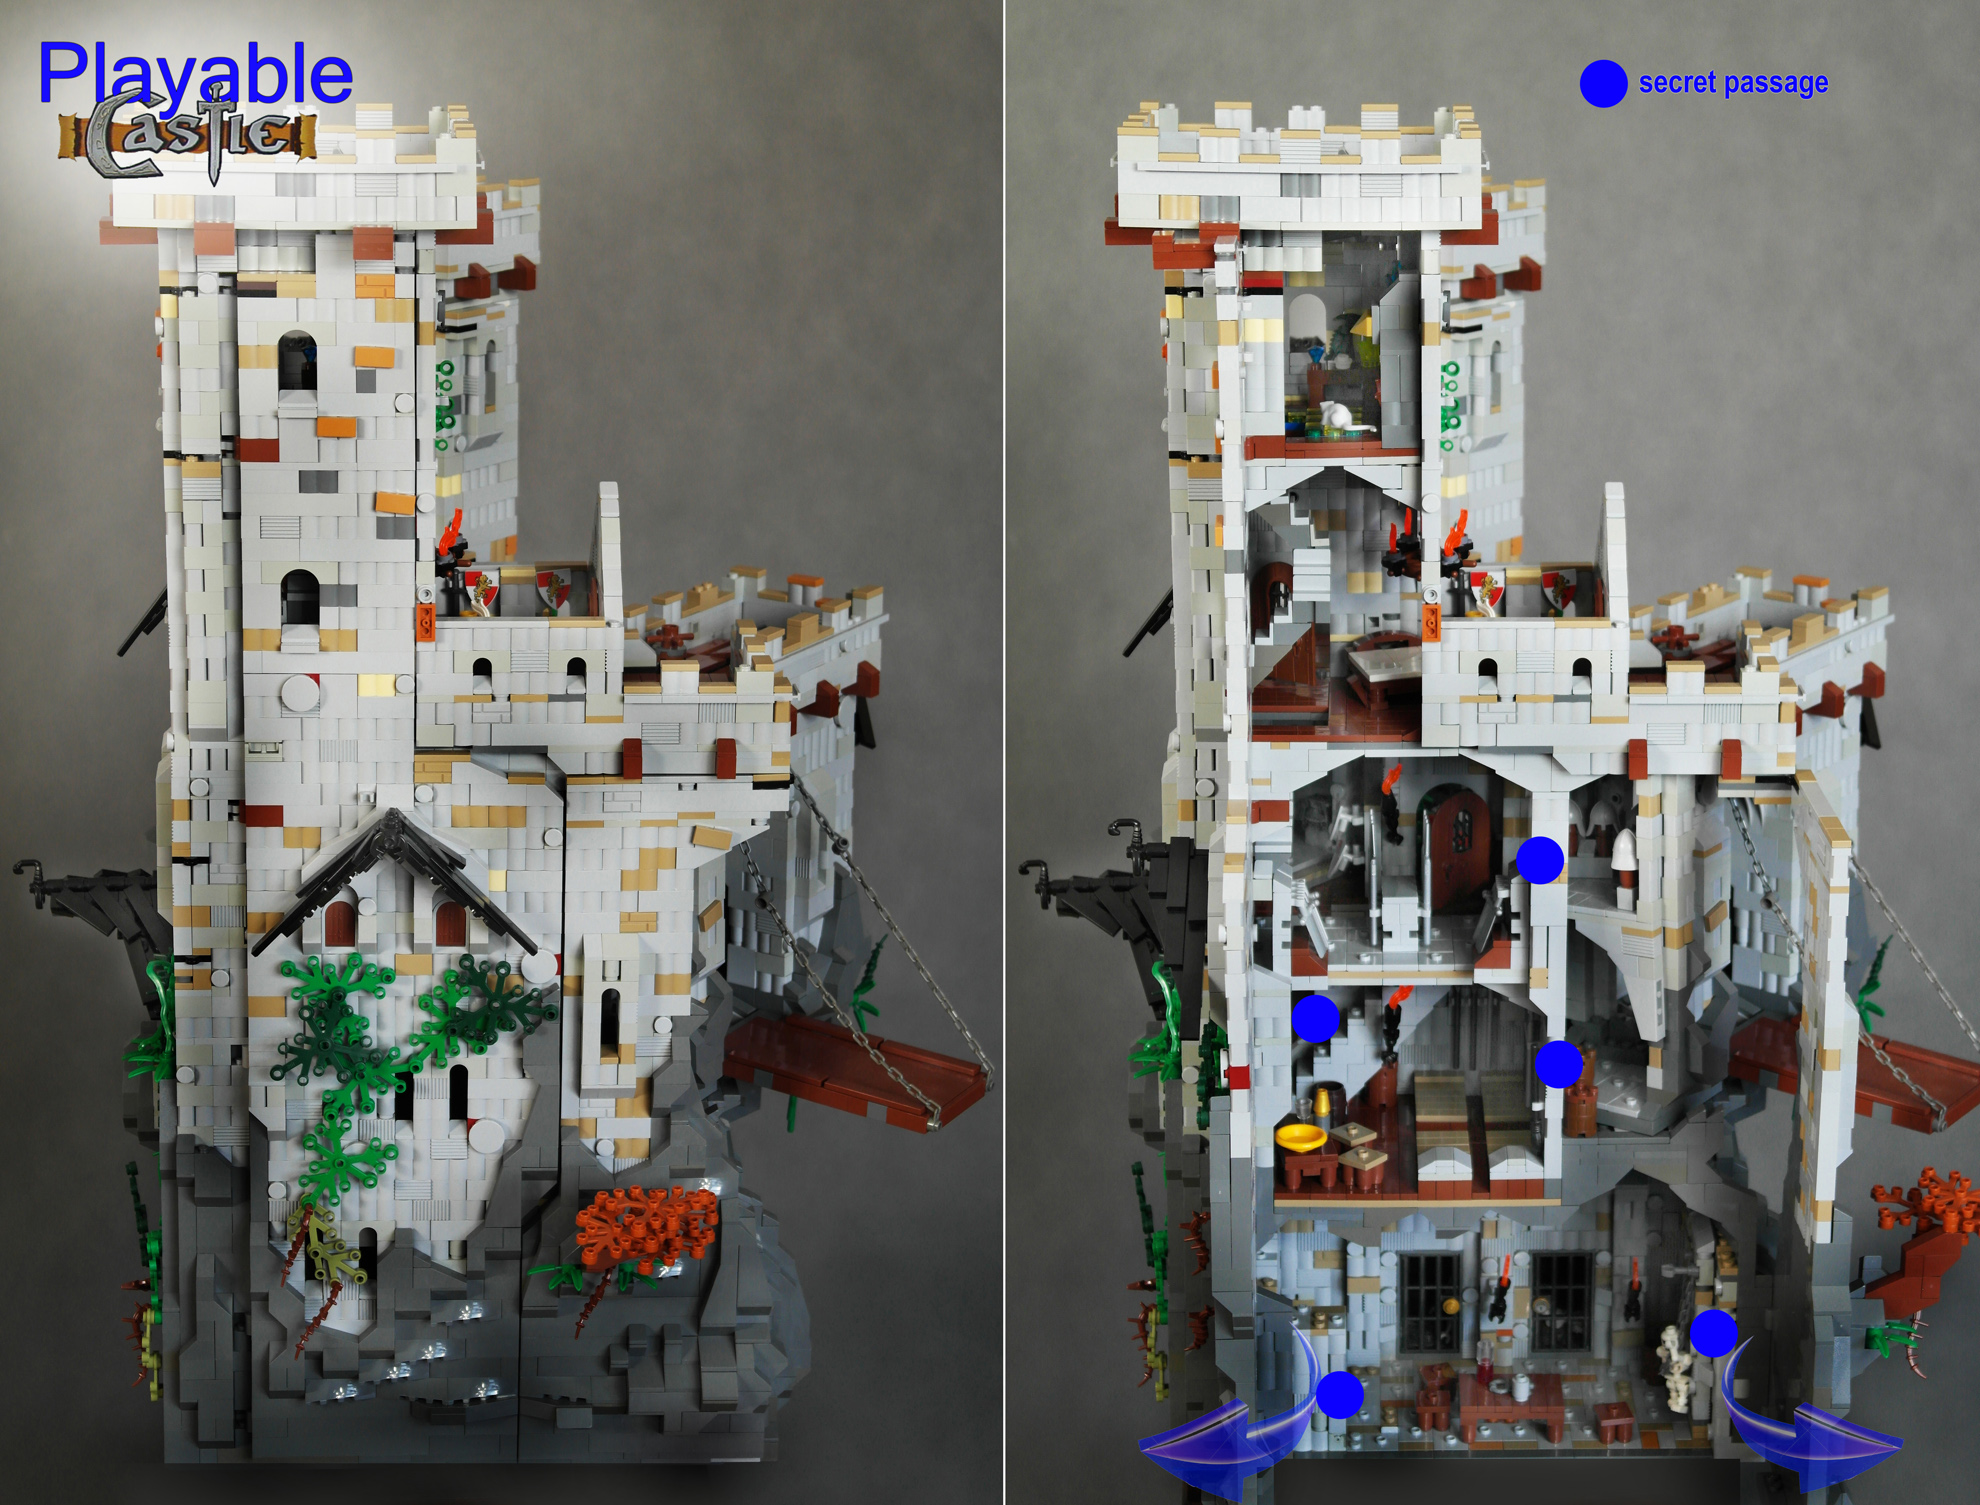
It was hard to take the pictures inside. Here is one good exeption - the prison.
My inspiration. My first ever MOC after the dark age:
High resolution pictures at: https://www.flickr.com/photos/migalart/
-
My future plans. (but still I not sure if i will do it)
-
Got any bricks left?
At the end of the build:
0 LBG bricks 1x1
0 LBG bricks 1x2
but i still got about 1000 of LBG technic brick 1x2 of which i have used about 5000 to lower the cost:D
:D
-
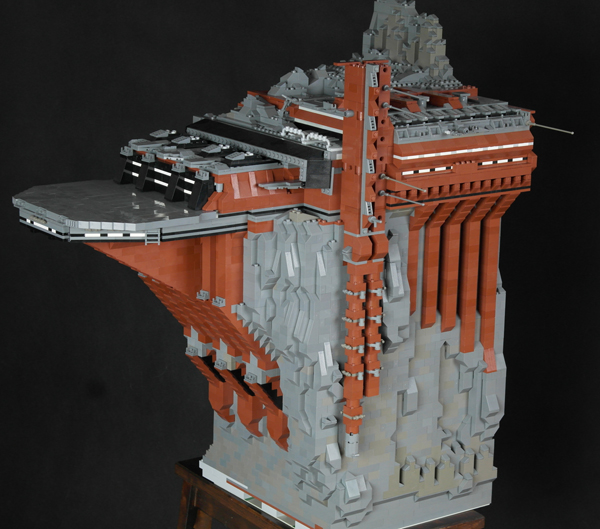
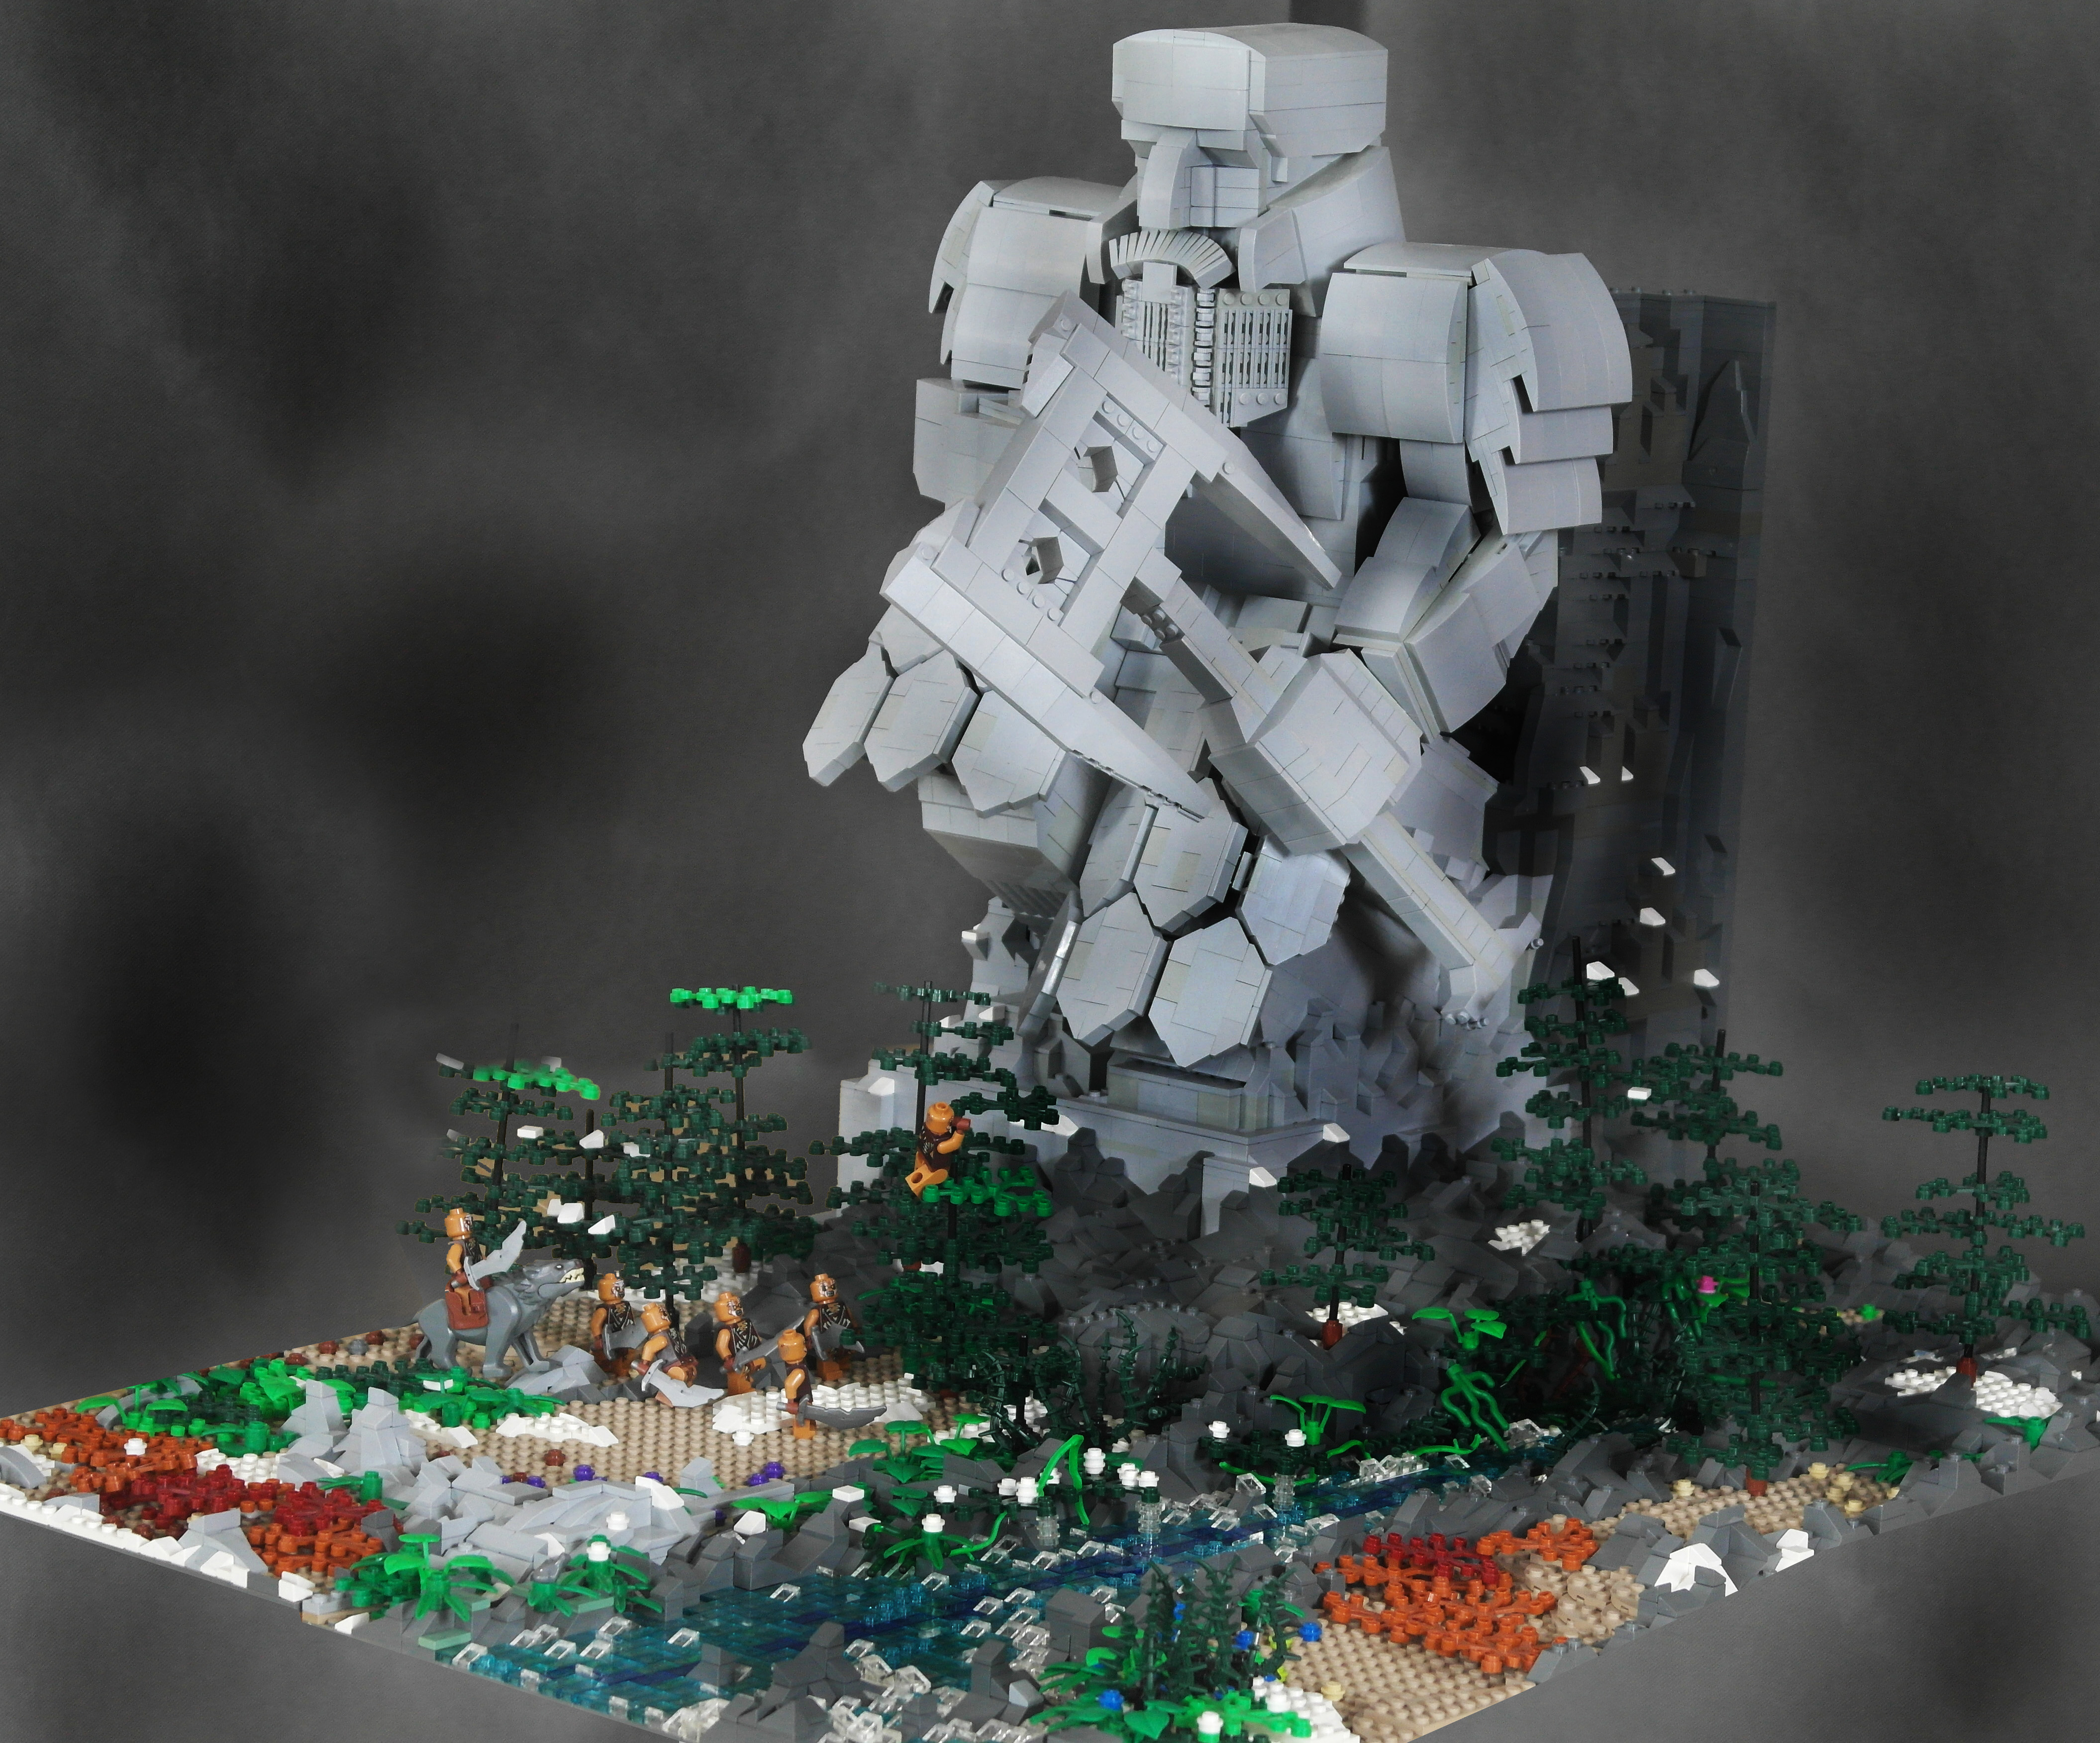
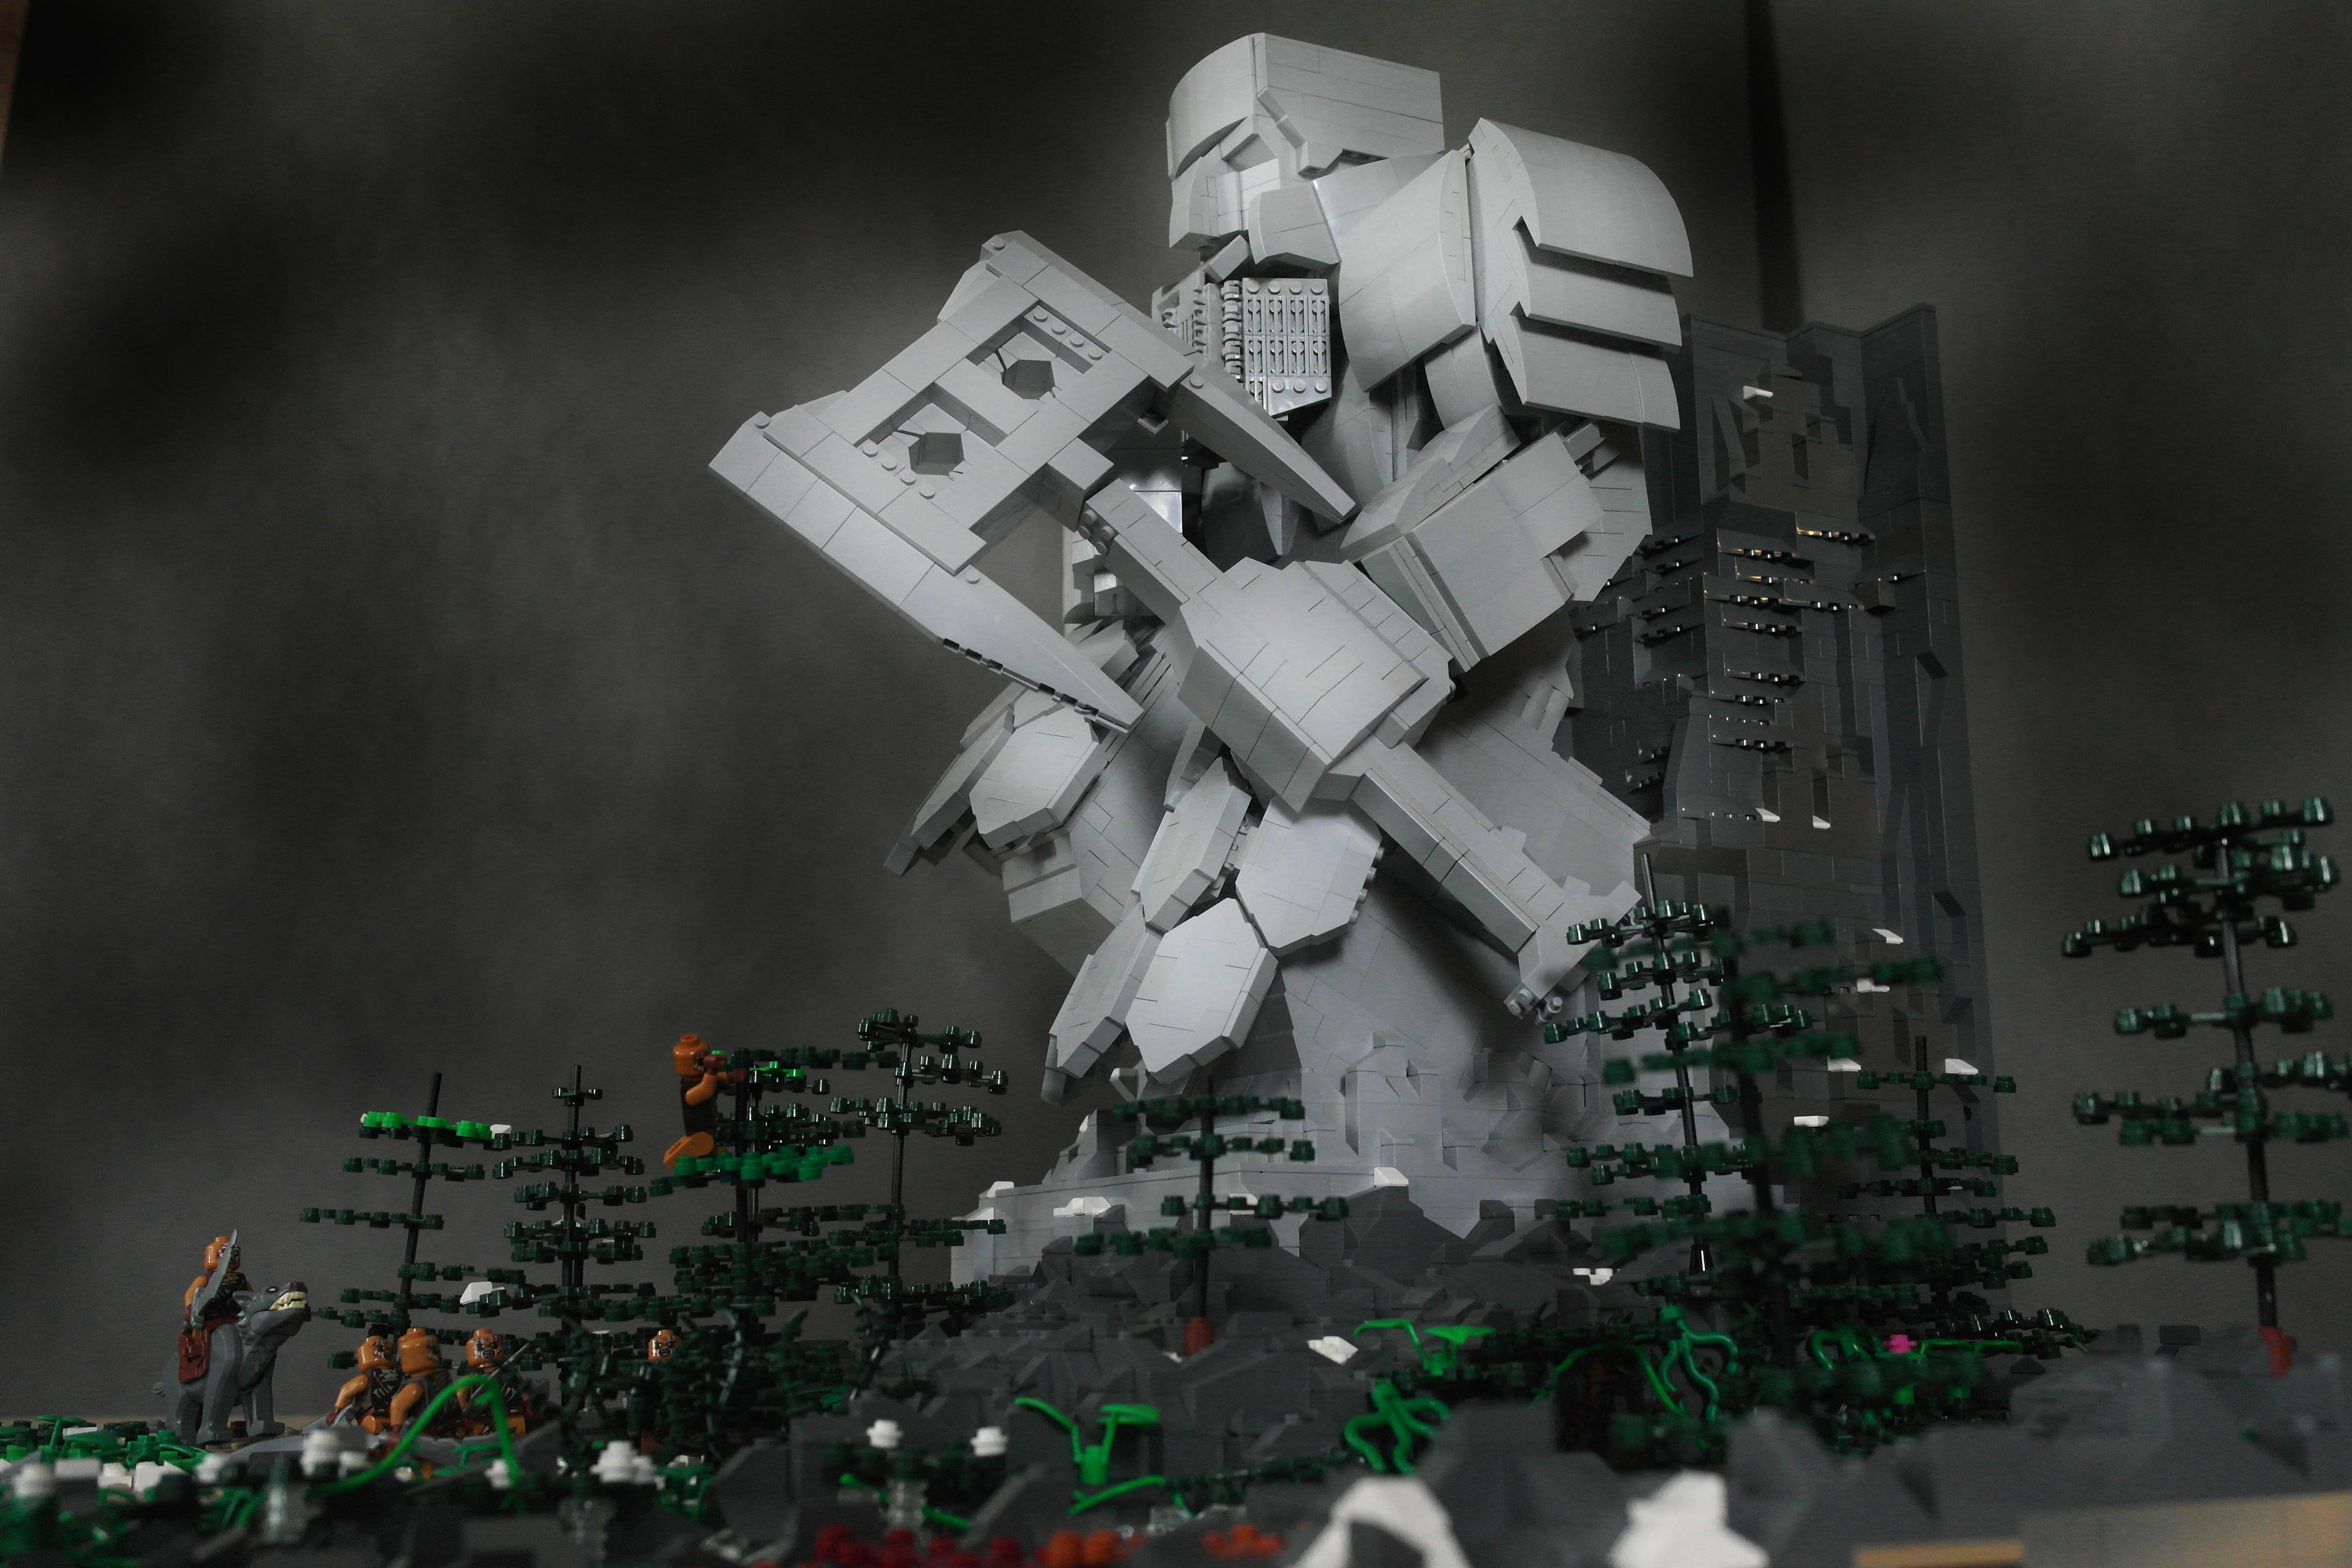
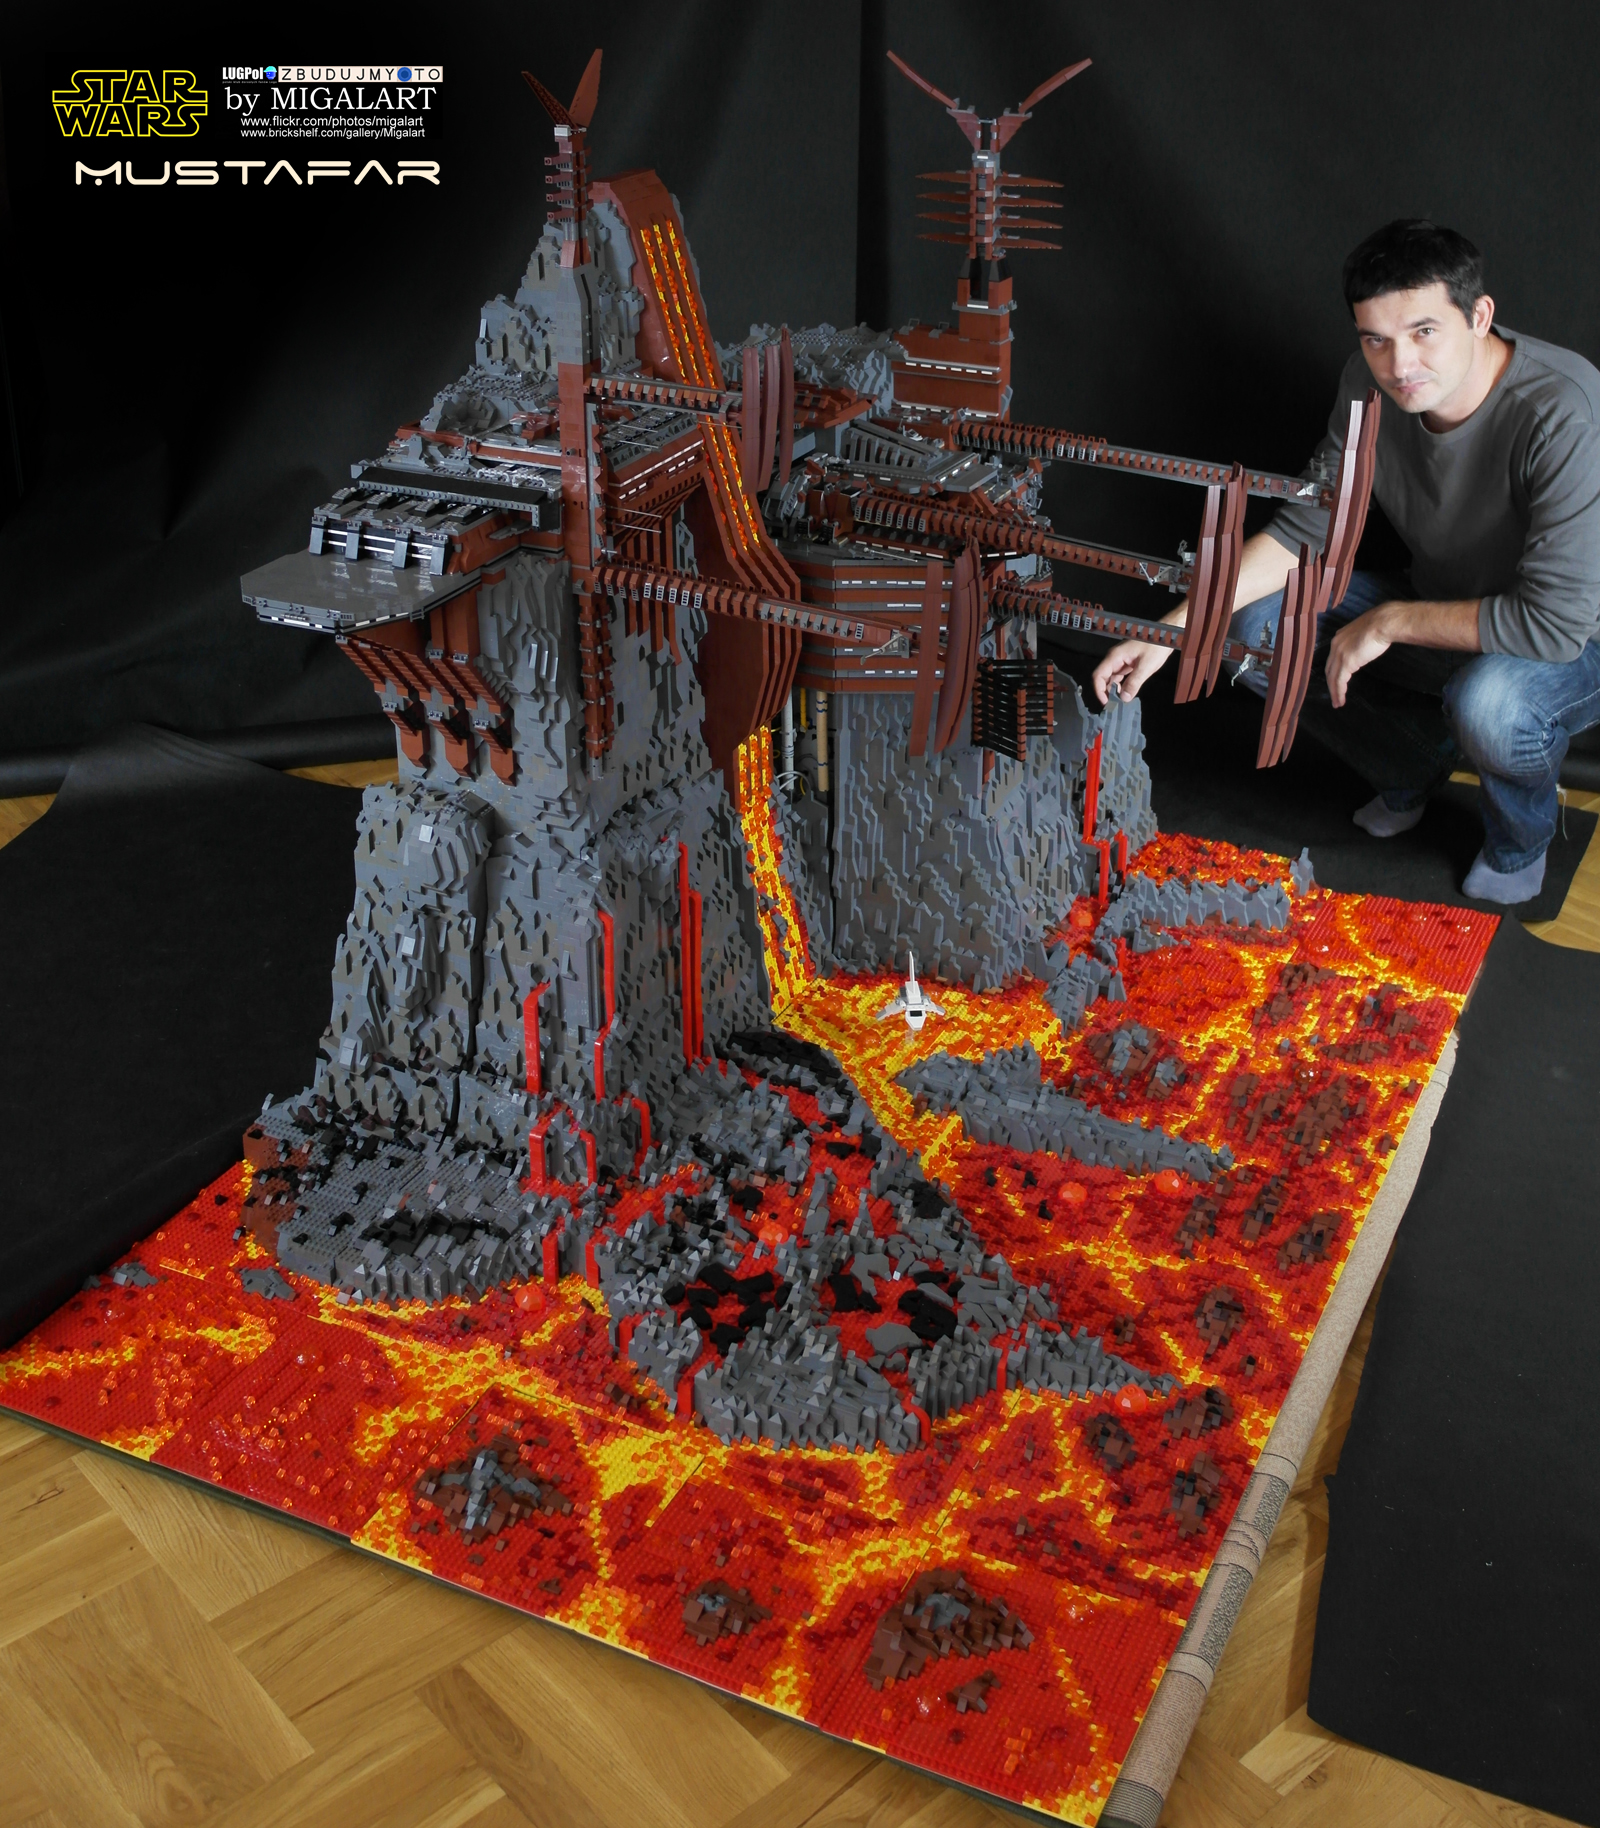
Erebor base on “Hobbit - The battle of five armies”.
MOC presents the meeting of Bard the bowman and Dwarfs in front of Erebor fortress, before the battle of five armies begin.
Attention – This is only 2/3 of original structure high. I had to decide to do it smaller or cut it.
I decided to cut it, but there is a chance that in the future I will continue project to the full size. It will have then 2 meter high J
Structure include exteriors and limited interiors of Erebor.
Time of building – 7 months
Size – 1,6 meter x 1,4 meter x 1 meter
Number of pieces – 55 000.
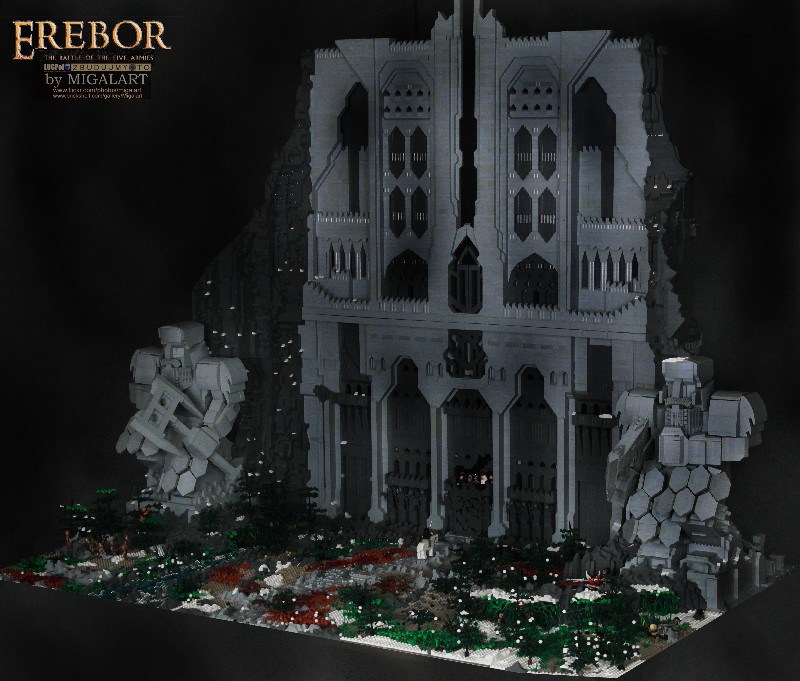
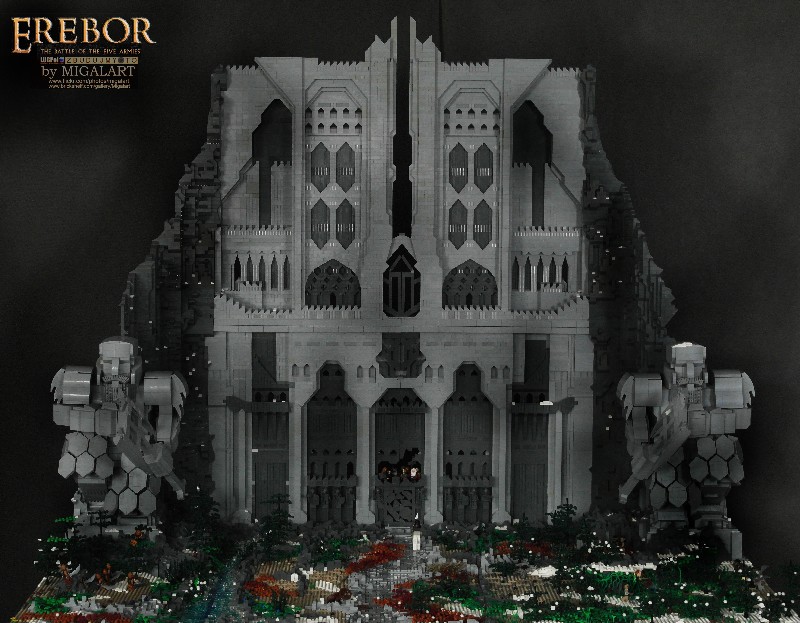


Single Dwarf Has more then 6kg and is bigger that LEGO Death Star set.
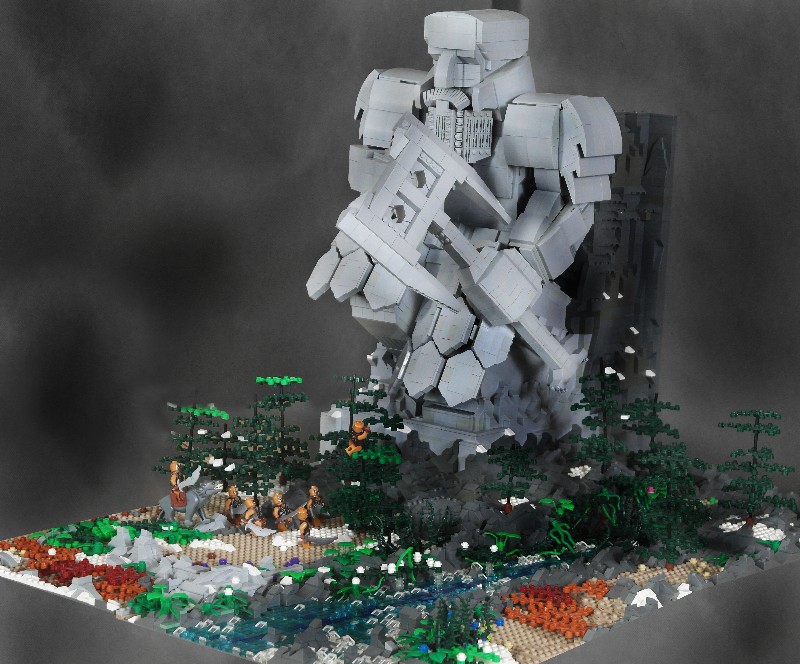
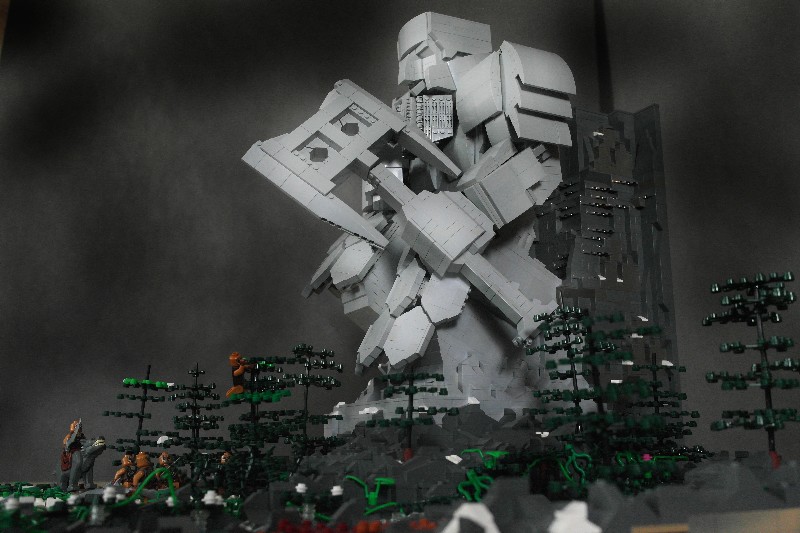
Photo with the autor :)
-
-
Zblj - you motivated me to prepare some "behind the scenes" info:
In short - zero magic, lot of fun. Nothing new for experienced builders
1) Idea
„Lava mastering”
2) Source files
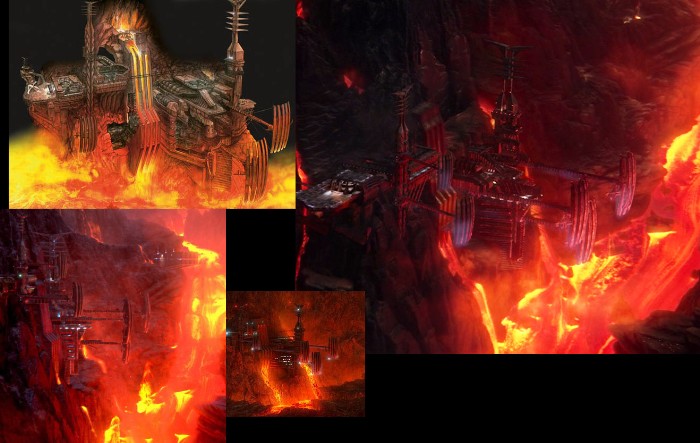
Internet browning. Mustafar documentation was very weak. Just two 640-480 images.
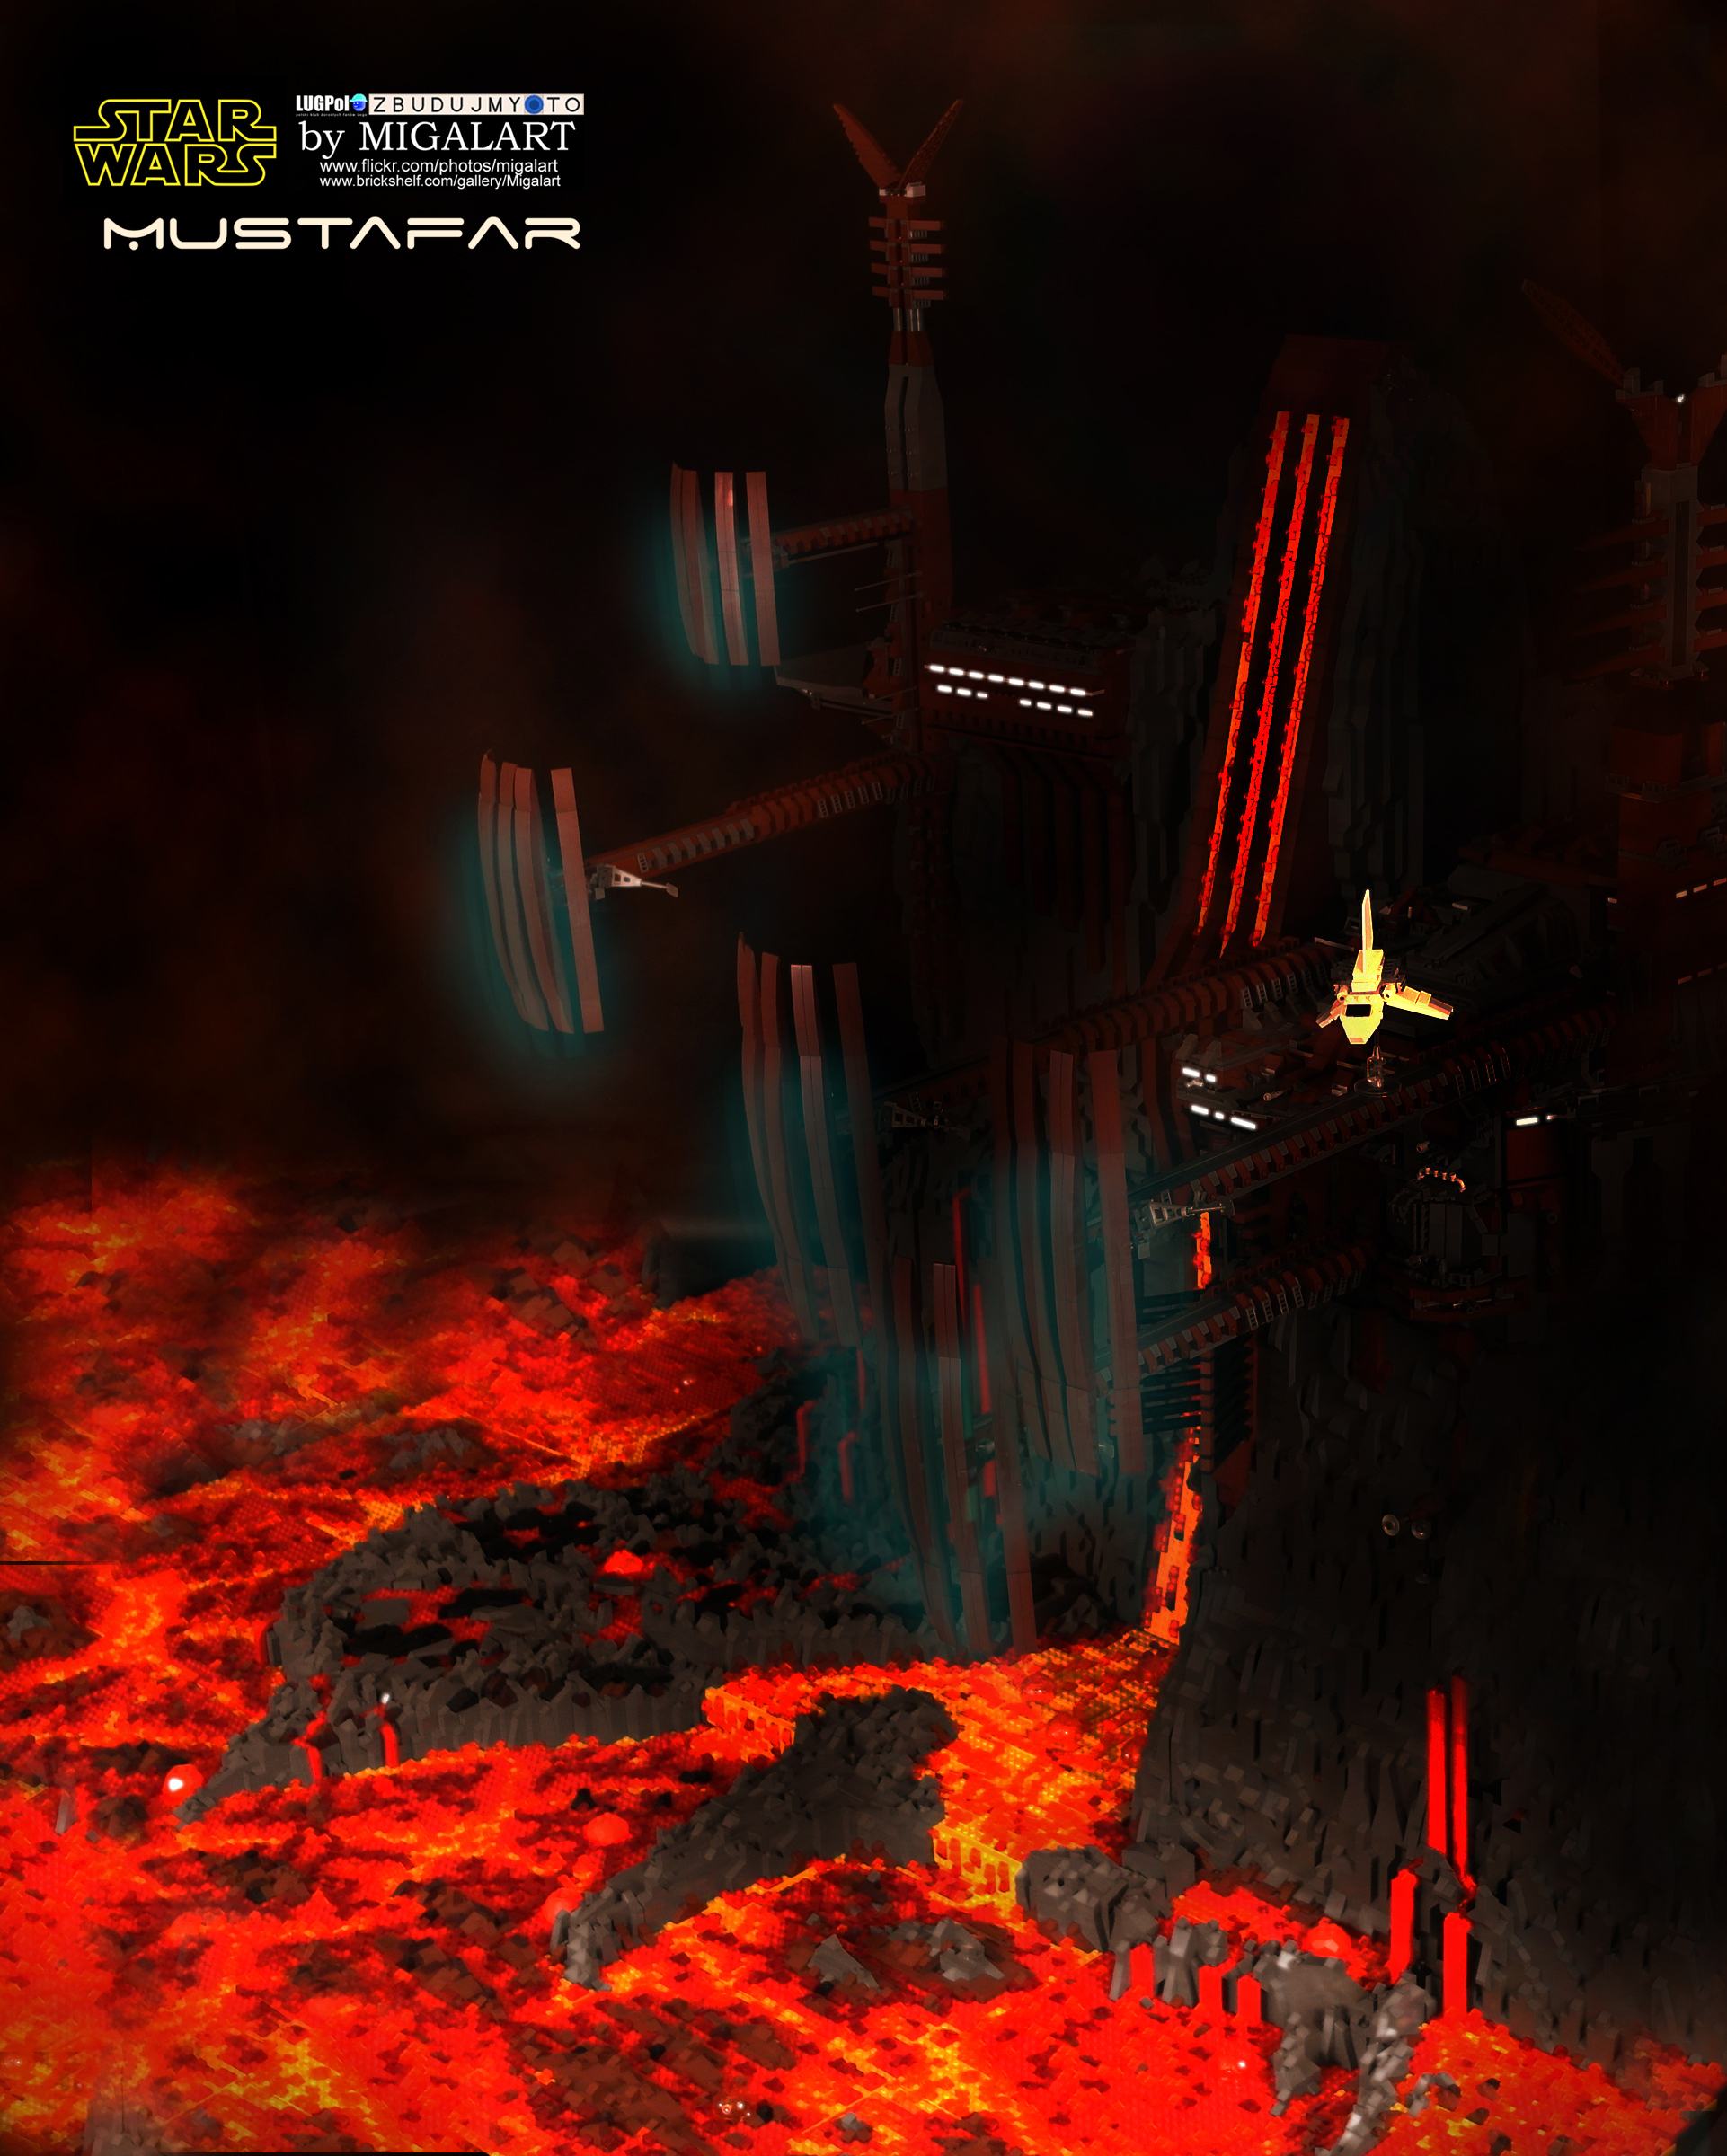
- Scale
It was difficult. One was sure- it can not be minifig. I decided that radiators will be the reference objects and all will be scaled to them. I have prepared few prototypes of radiators with different size. I used LDD but it has one weakness –gravitation not included.
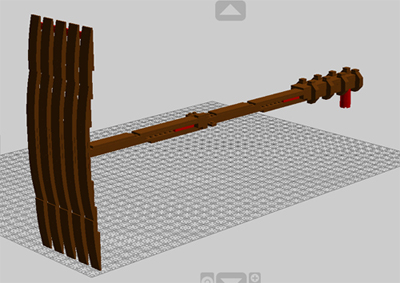
- Levitated radiators
The construction in the movie doesn’t include gravity to much, but I rally tried to bo close to the original project. I had to build 60 cm long arms with some heavy bricks at the top and it should not break without any external help.
The whole project was at stake on the condition that I will manage to do this. I made several prototypes. The arms are mounted base on lever rule. Their are double long base on the visible fragment. I choose detailed way to curie them that required buying 260 of his brick:
It is not available in brown, so I had to look for proper paint.
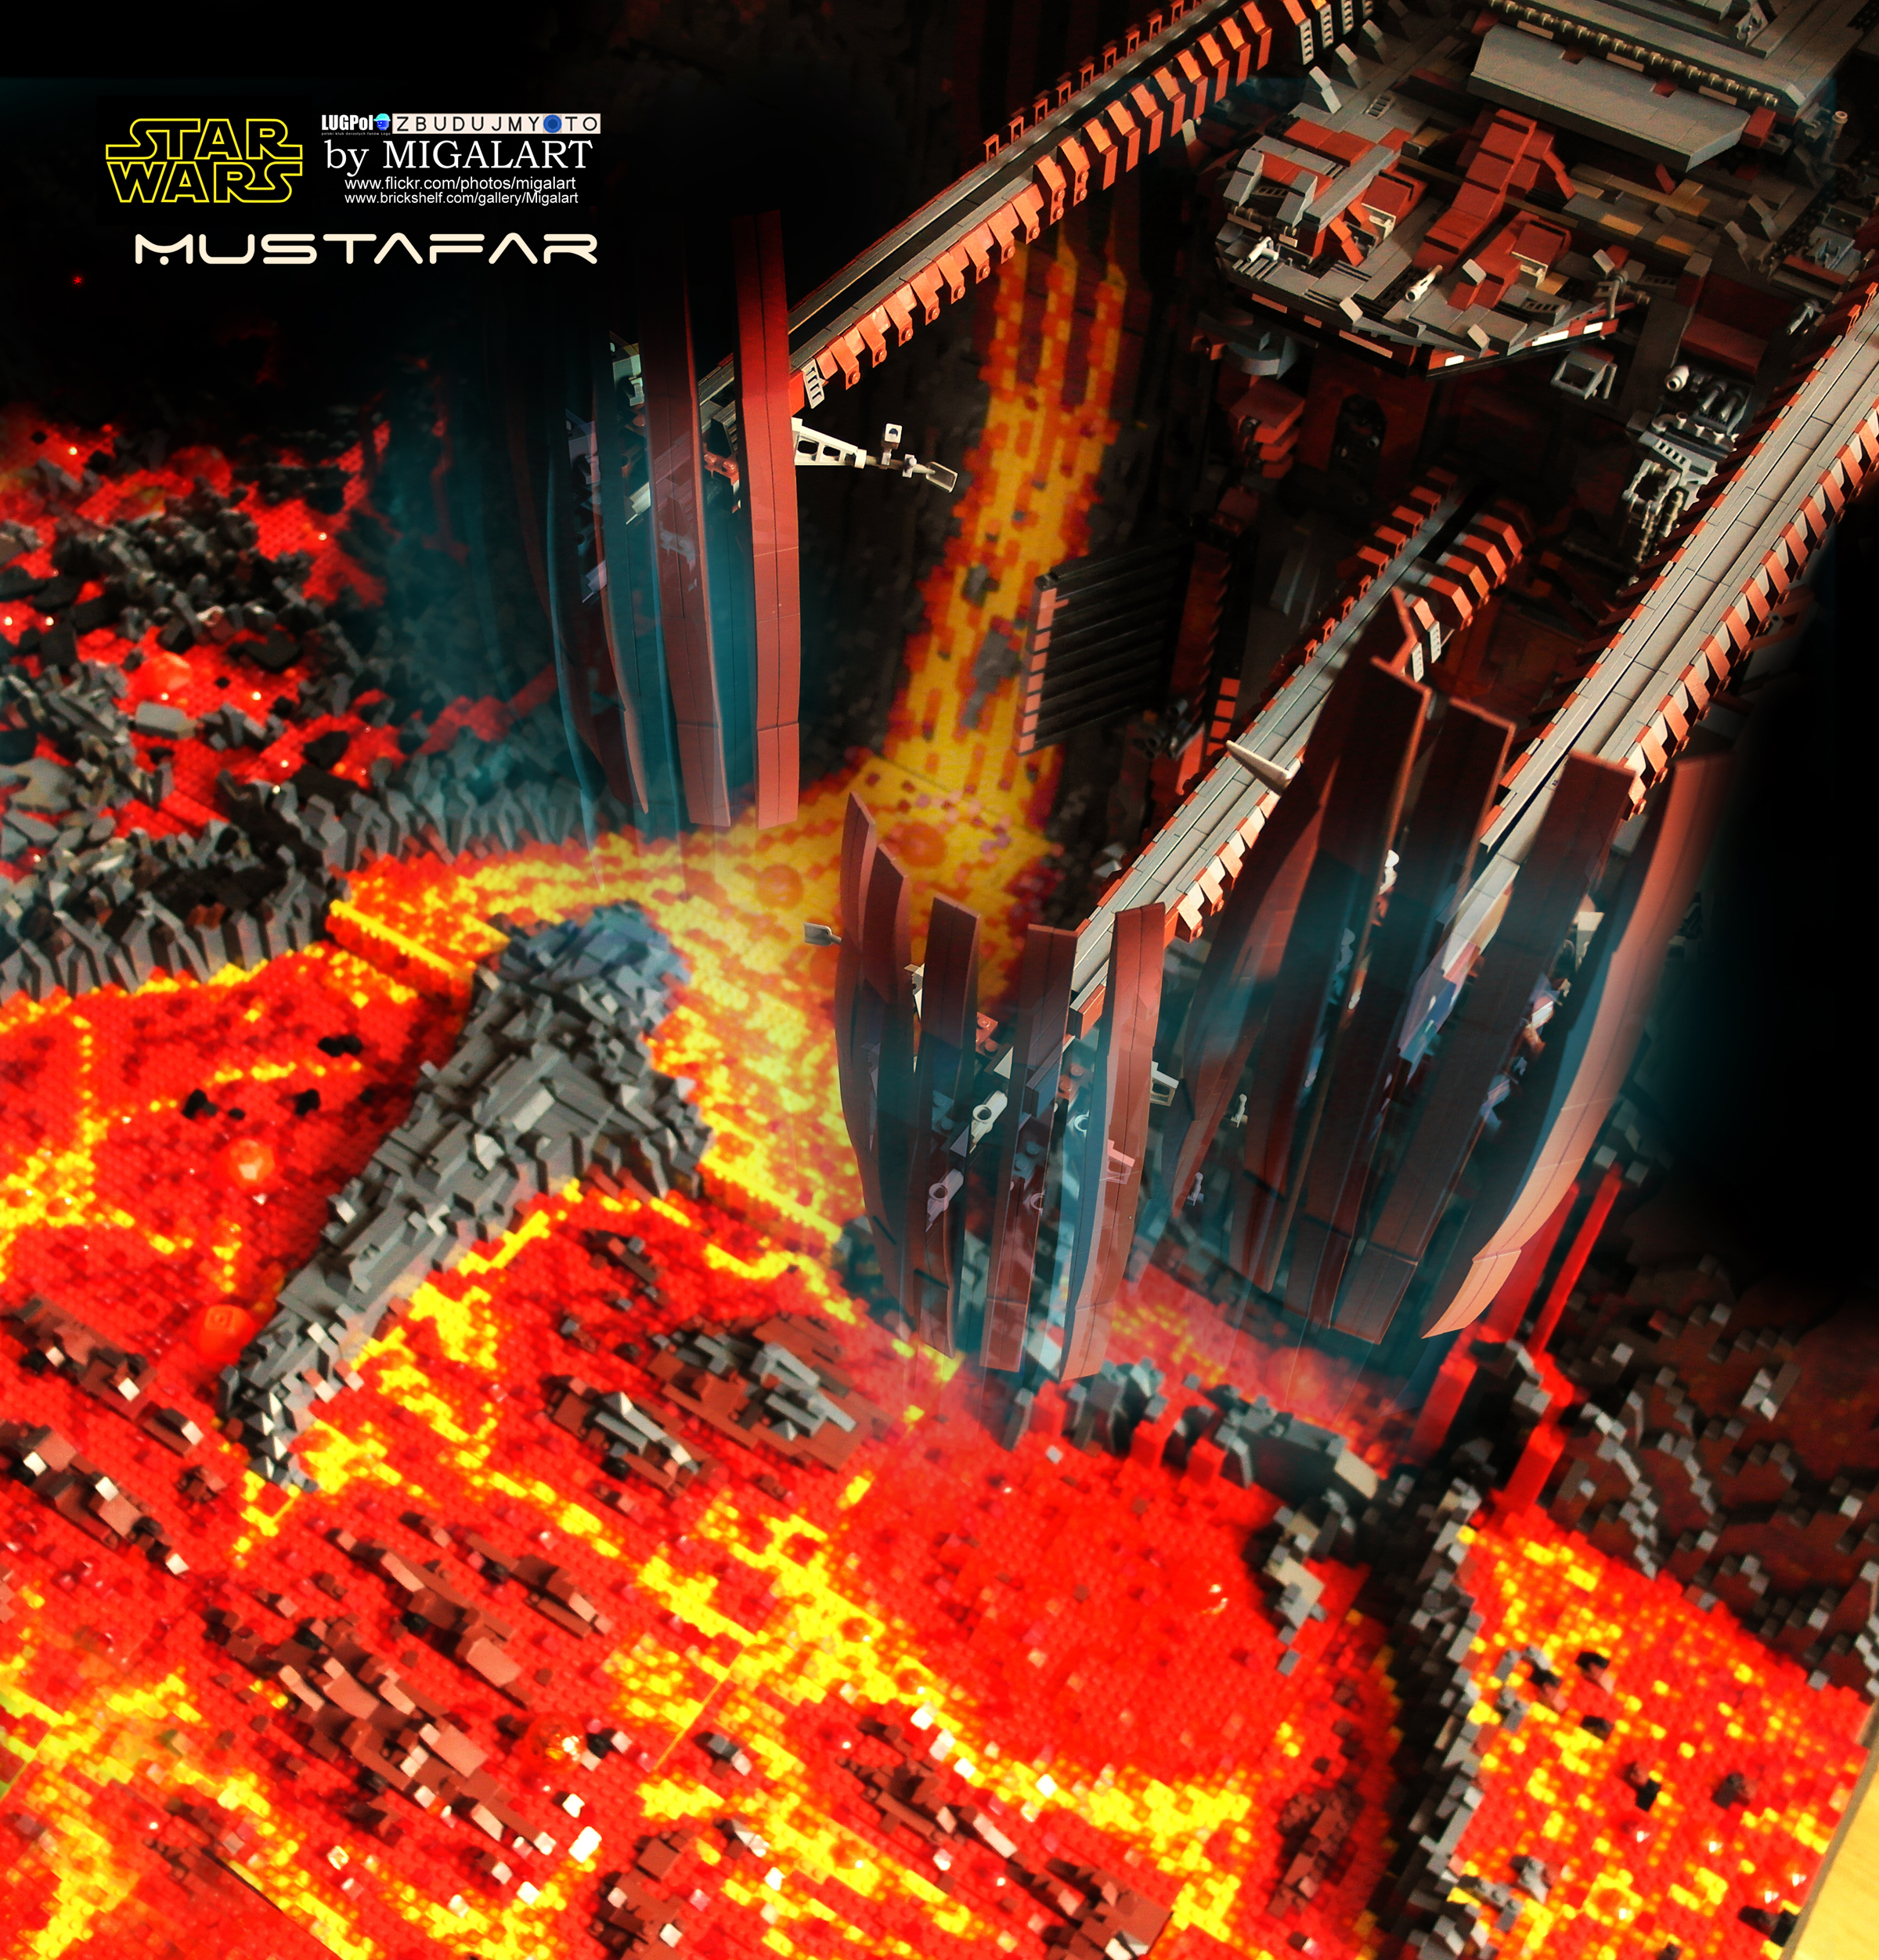
- Lego order
This is hard but I already made few big projects. Some parts was detailed counted. Others where ordered base only on mass – X kg of gray bricks,X kg of brown bricsk
30000 dots of yellow plates, any shape, as cheap as possible. 30000 dots of red plates, ETC.
I often buy modified brick which are cheaper, but building with them is more complex and difficult. I spend many hours on bricklink and prepare oreder in few shops to compare. The order have hundreds of positions if not thousand .
- Scenography planning
I try to include two different work dimensions:
- building for photography
- building for expositions
In paradox – this two dimensions work often against each other.
It is easy to create nice object for photography with just few bricks. Big constructions are more difficult to be photographed.
From the very beginning of each project I have in mind the position of camera …
- Modulars
This must be mobile construction which is the hardest point of all.
In the past I was dividing dioramas on eqal baseplate parts.
Now I try to divide the diorama on 5 types of modules:
- flat

- high
- complex

- speciall

- construction
I try to have most flat and high modules.
Dividing diorama in 3D is always very difficult for me and I spend many hours not building but just trying to find optimal way to do this.
8) Building
I build always directly from head. No big designs. The key is brick availability logistic and segregation. I organize my workspace to be able to build with 2 colors in the same time, and I have to get every shape of bricks in this two colors in few seconds. I build often with most cheap possible bricks. I use street base plates, etc.
All to minimalize the enormous costs.
9) Photo
I am not the expert in this but good photo is as important as the structure itself. I try to use good lighting and background.
10) At the end the photoshop and the worki is done.
- Scale
-
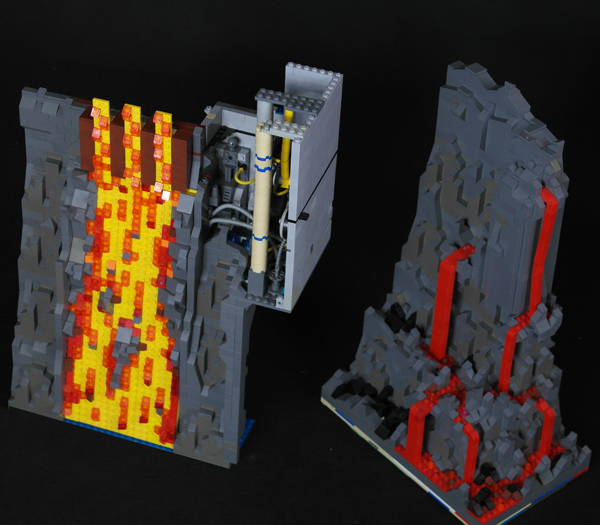
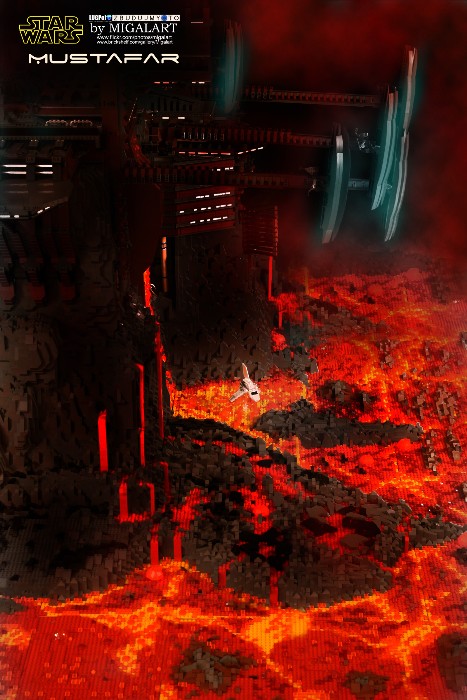
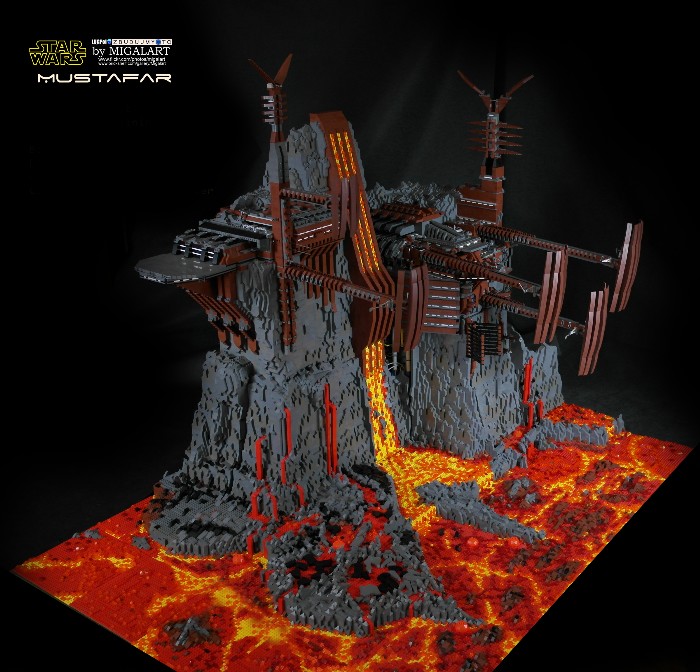
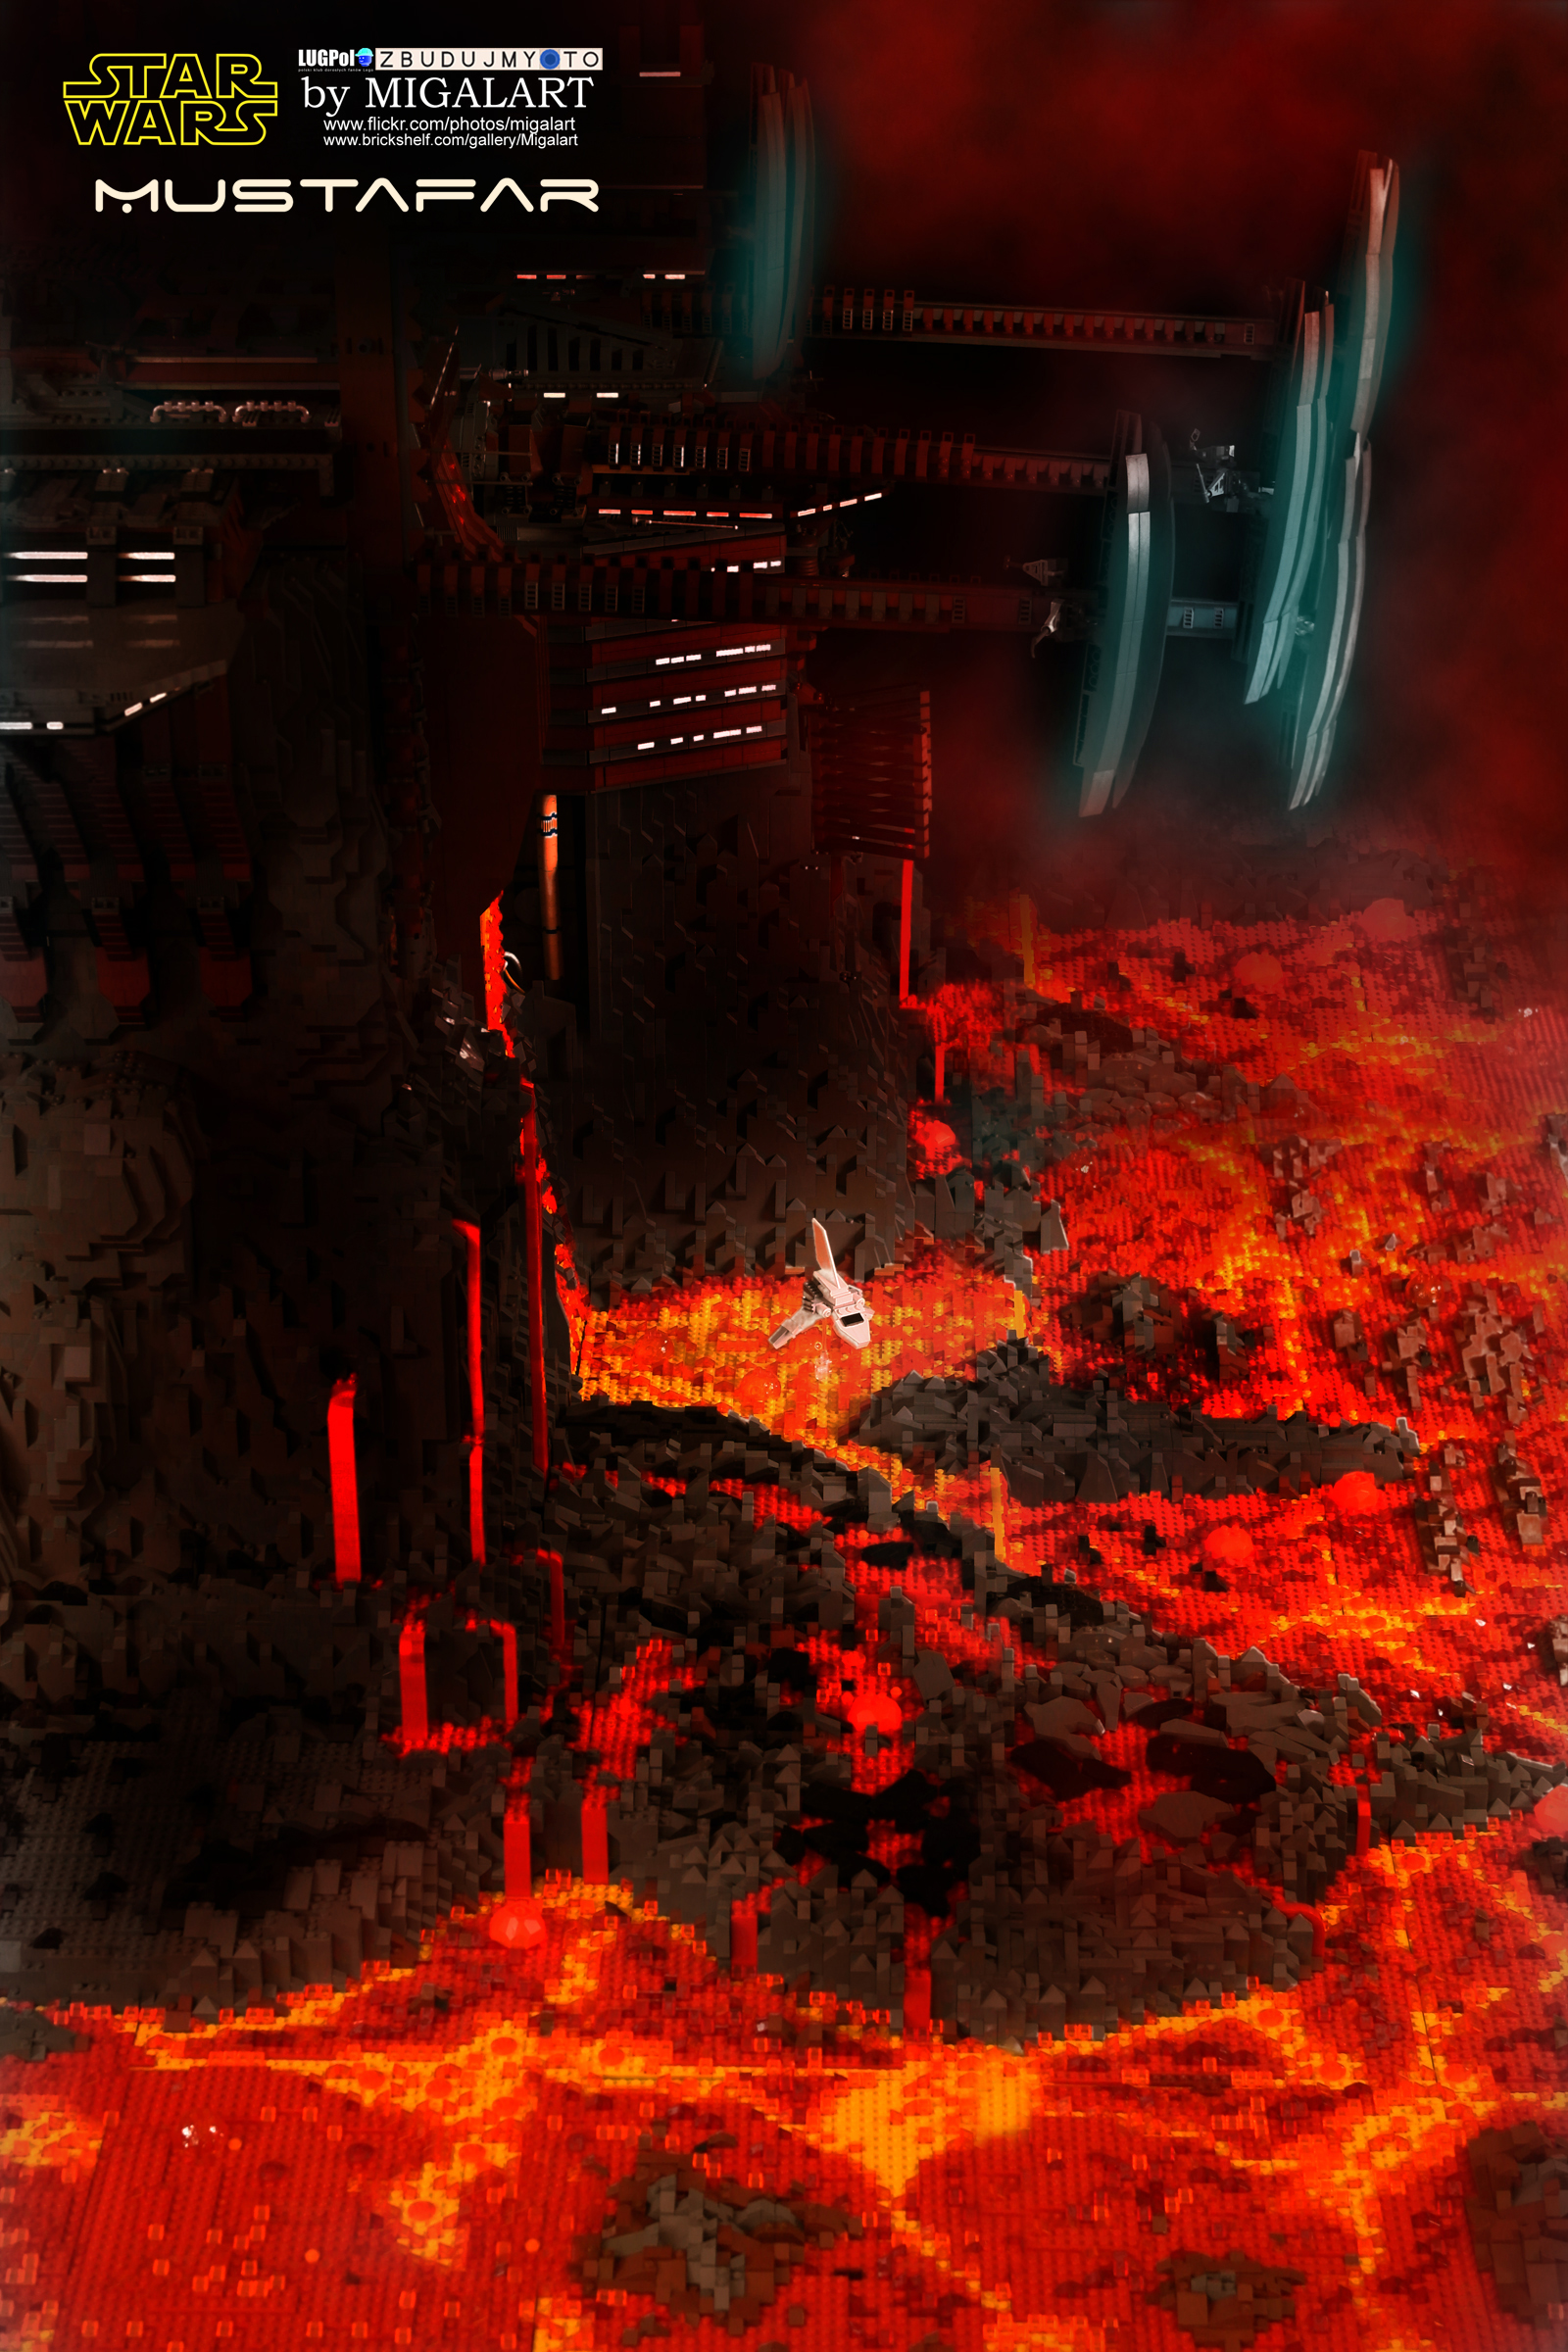
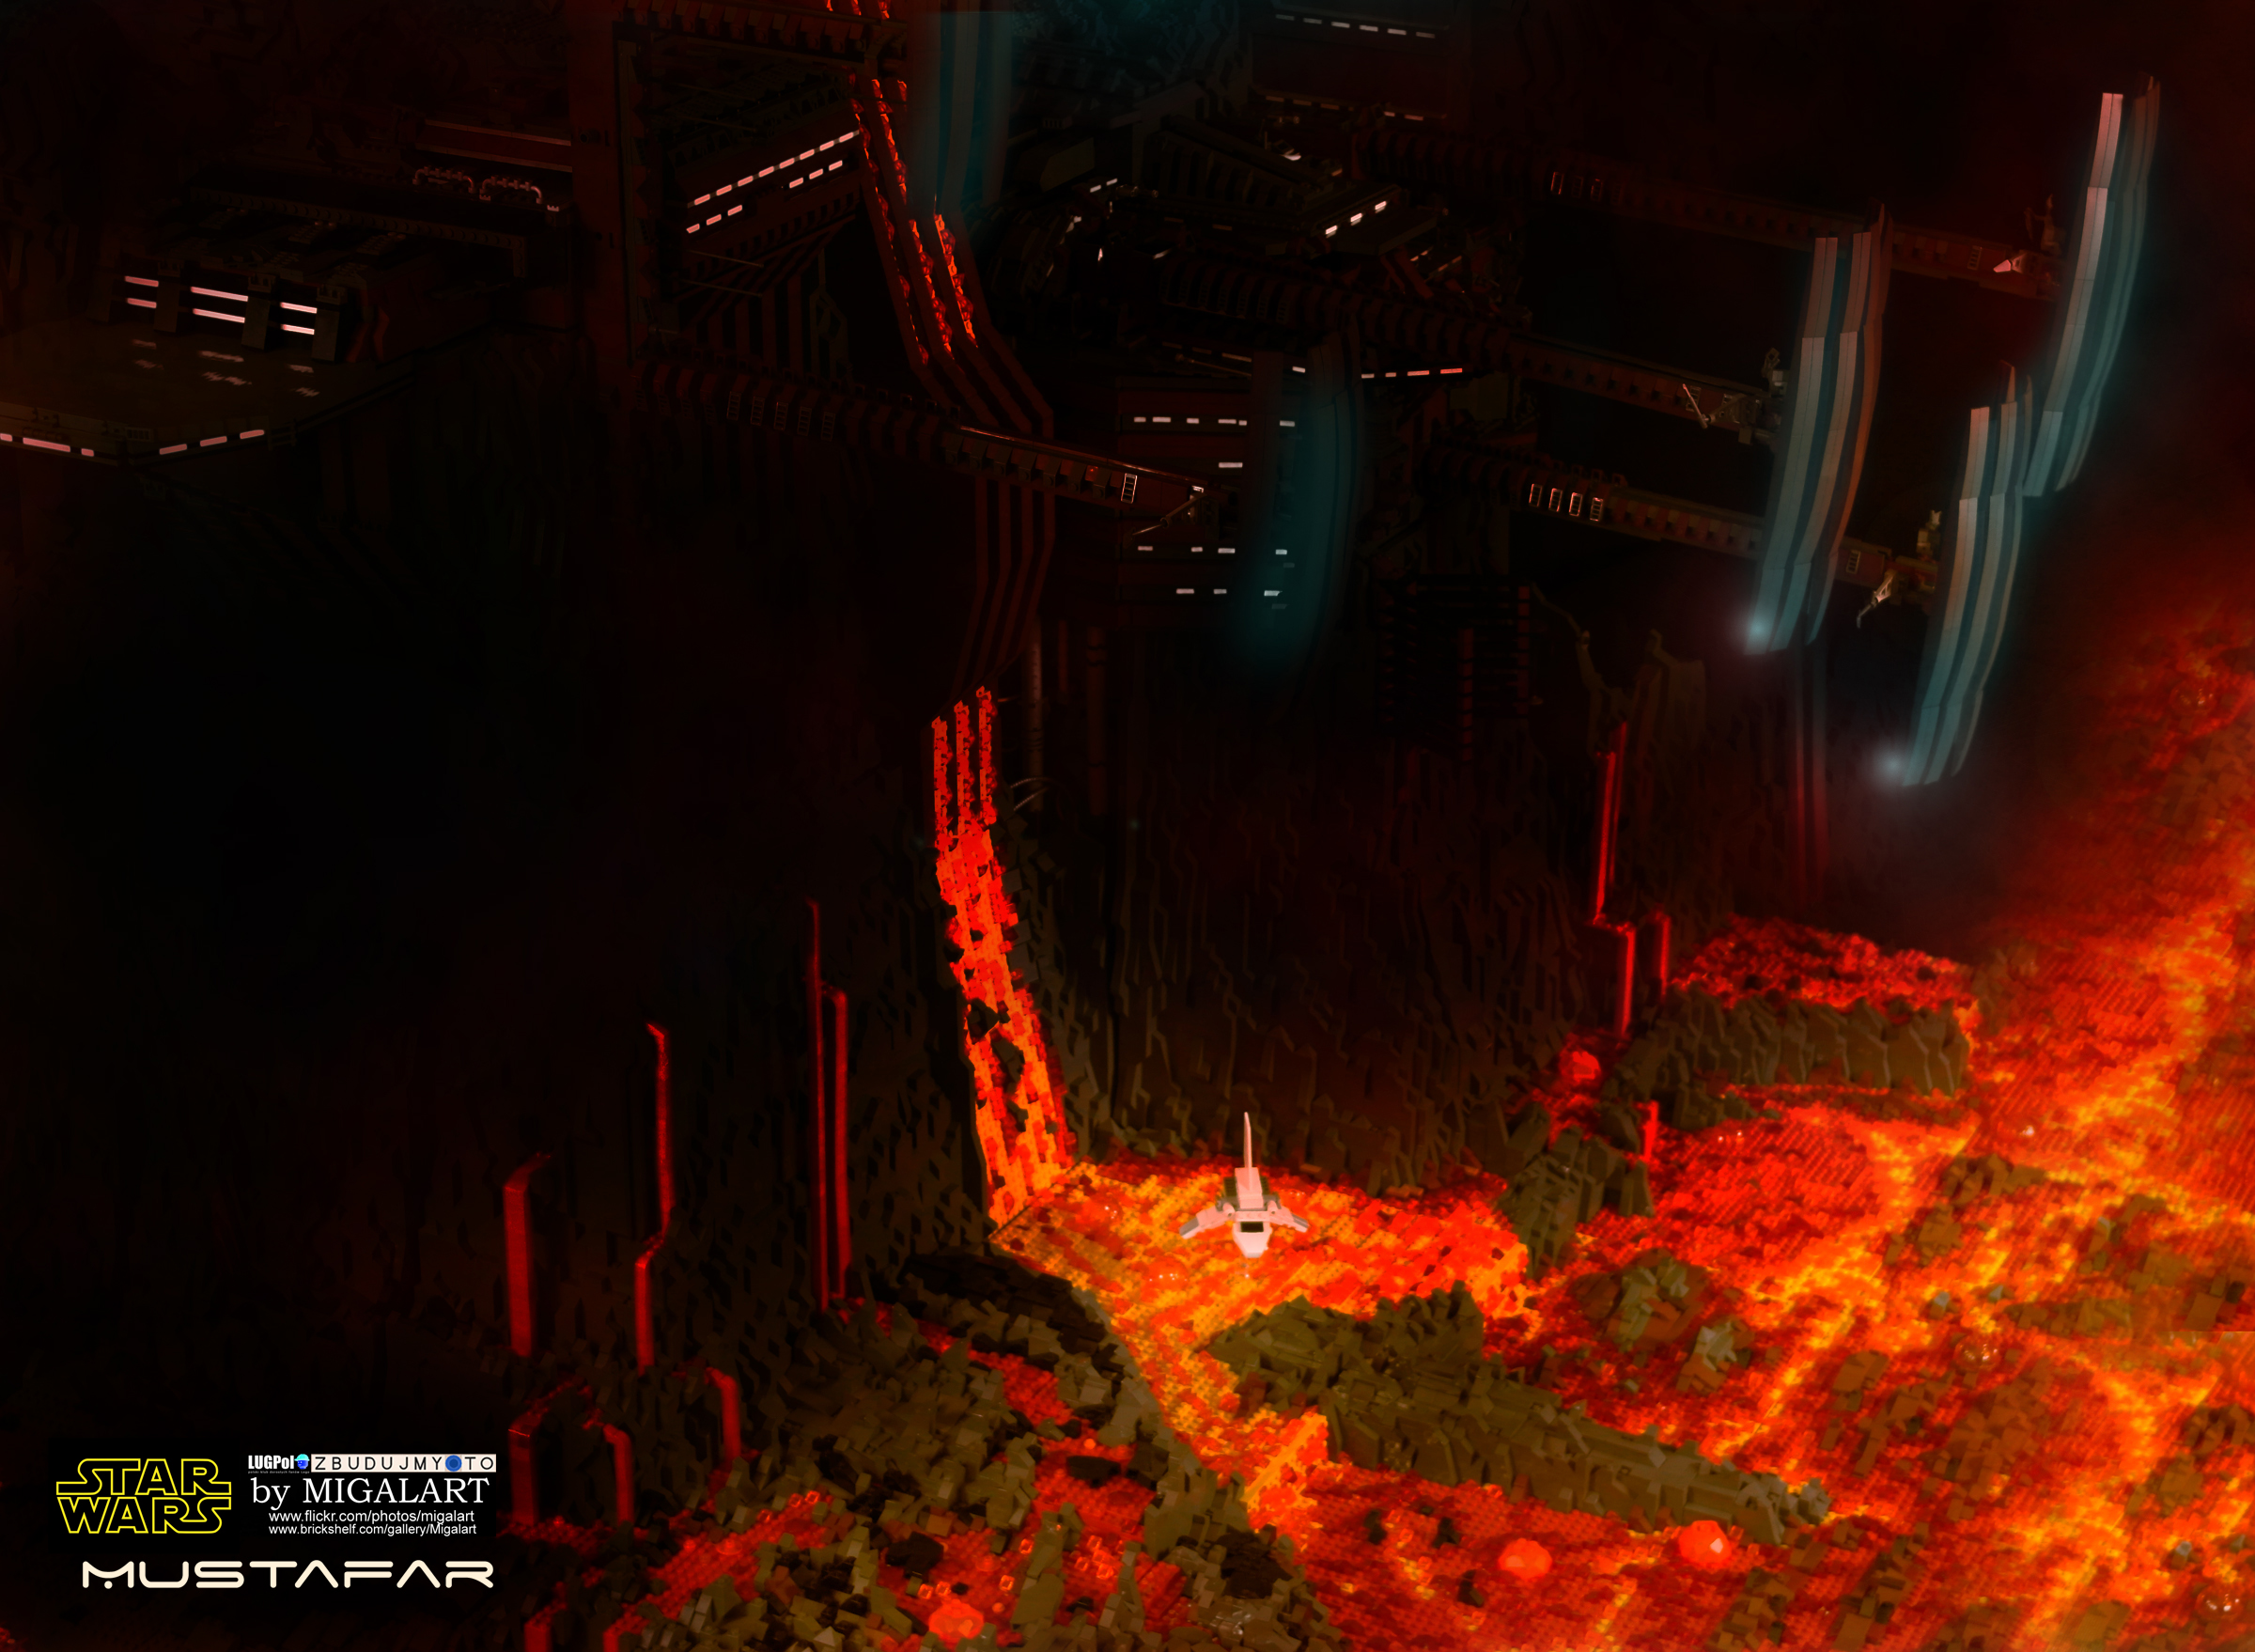
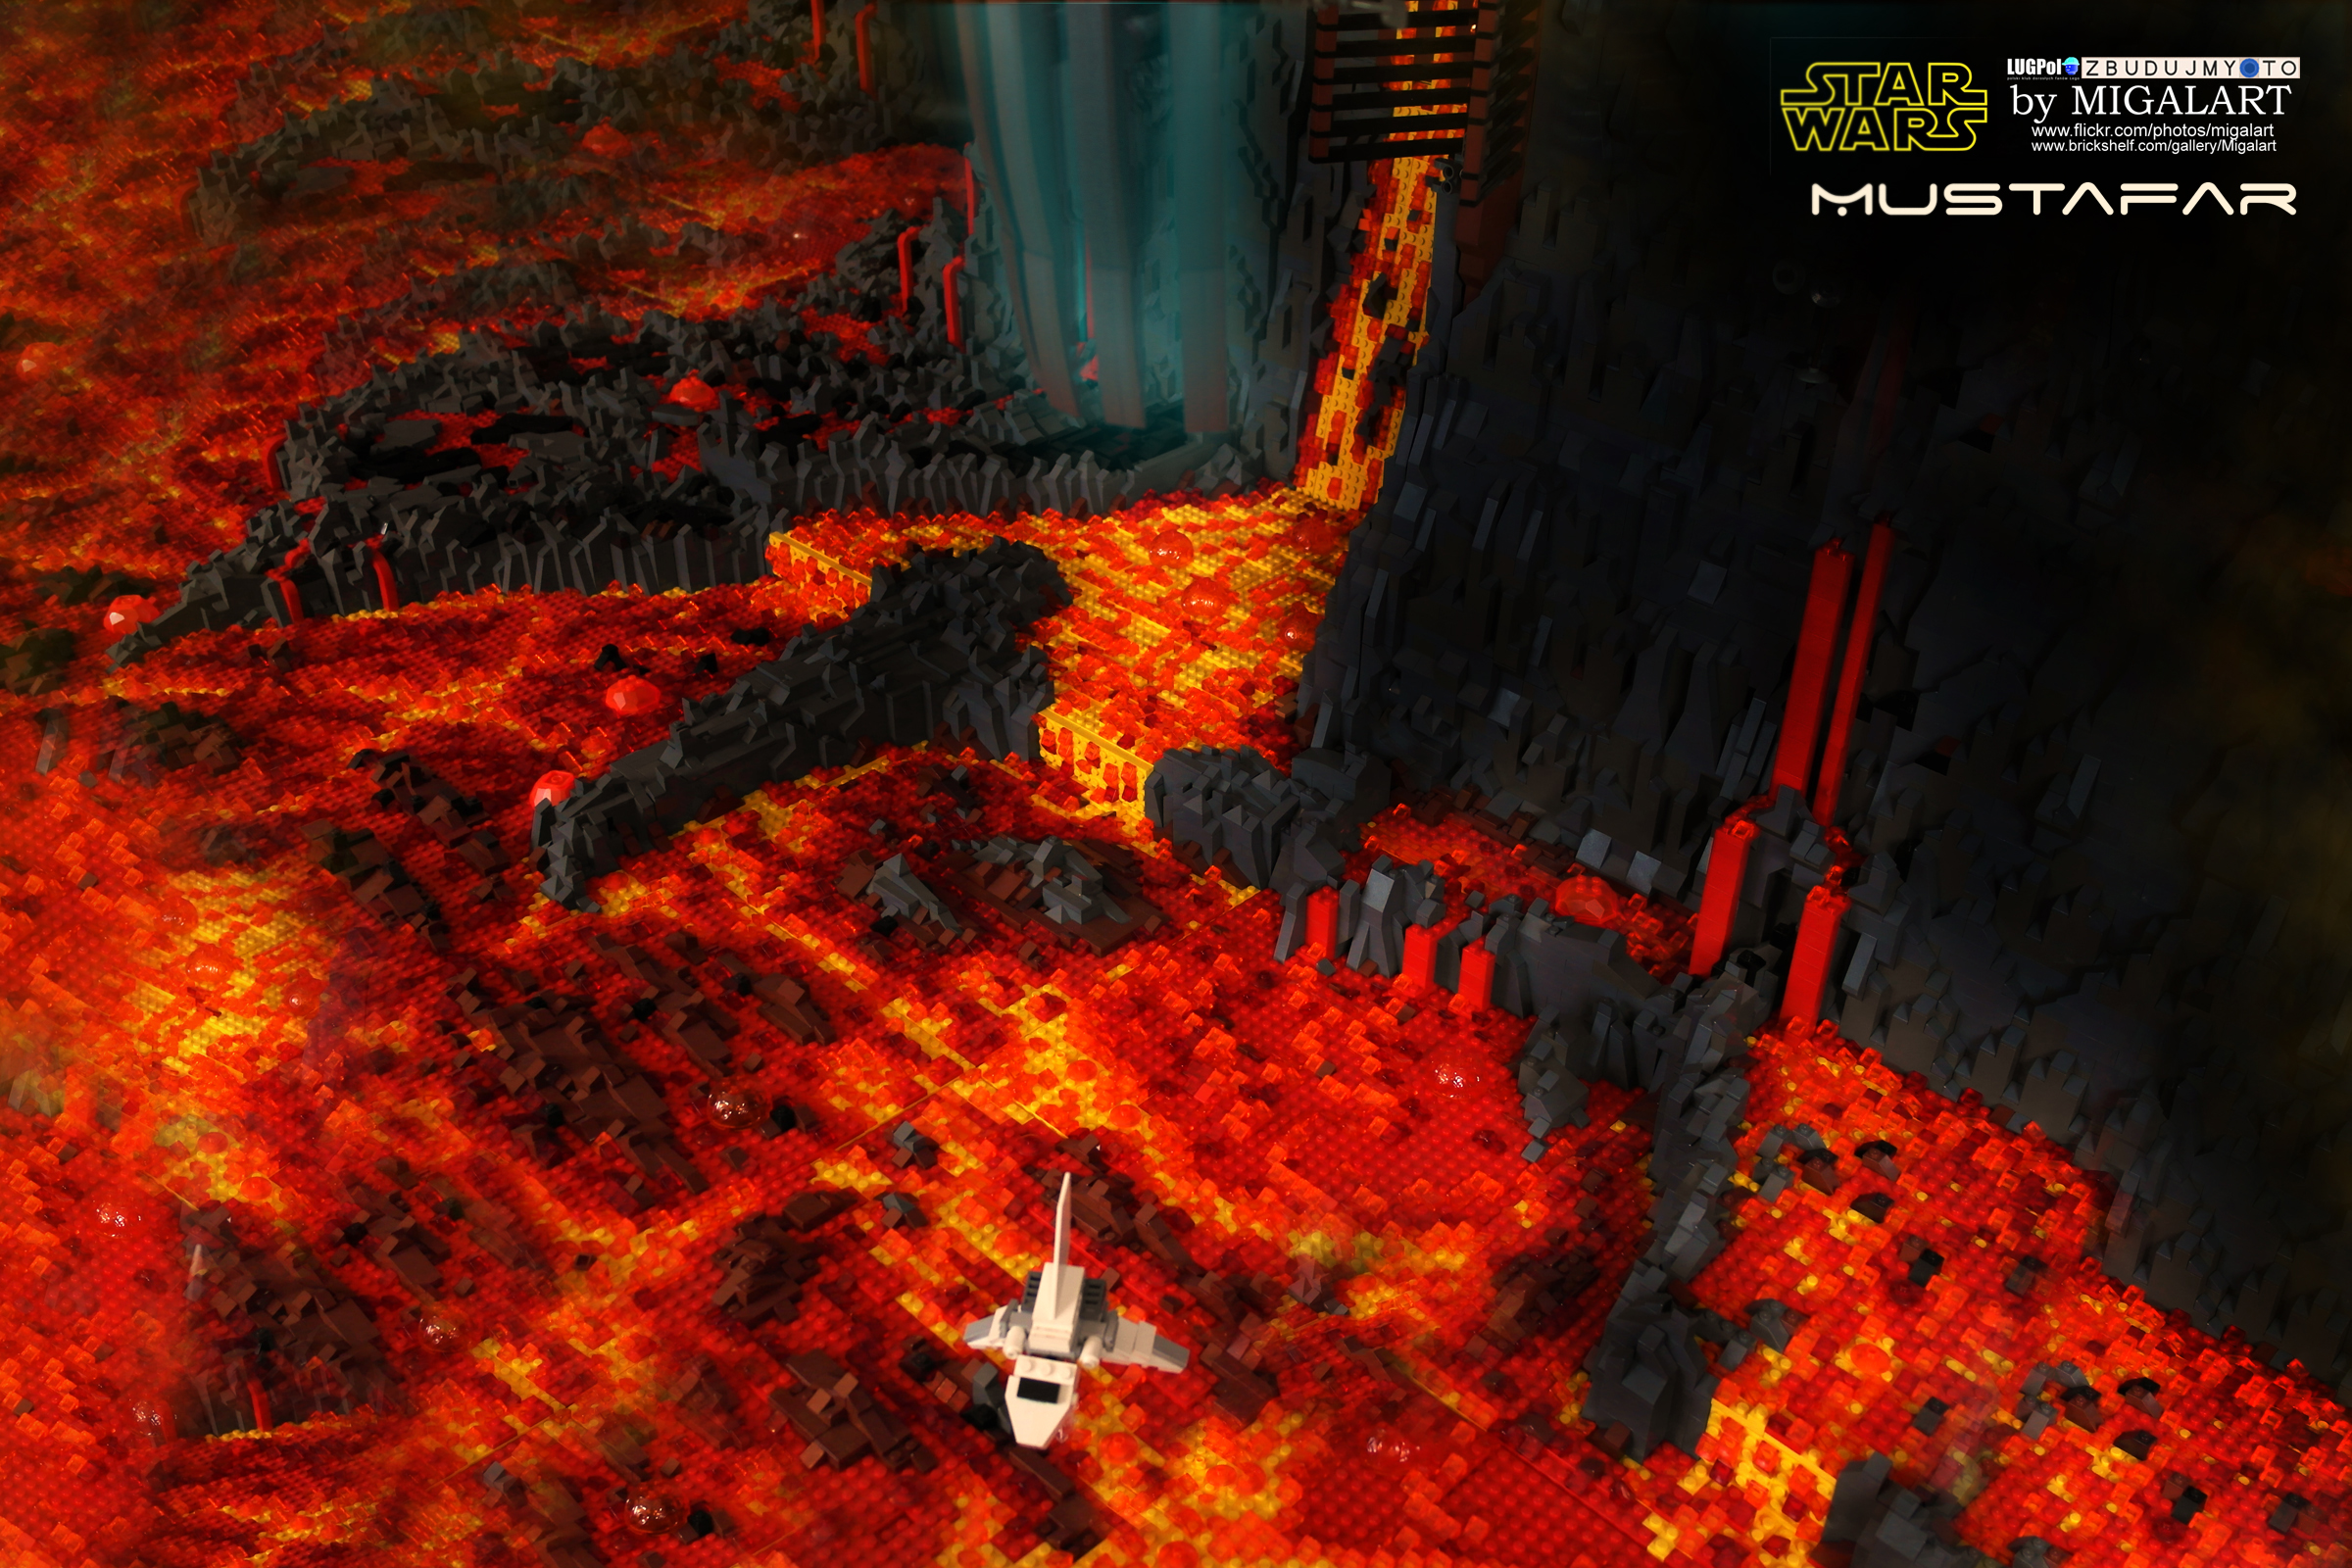
The idea of this construction came to my mind after my other build - The Inferno. I wanted to master " lava theme" and Mustafar was ideal scene for this.
.
Technical data:
width- 180 cm
deep-130cm
high-150cm
base 5x7 base plate
construction weight: 65 kg
number of parts - 60 000.
build time - 4 months


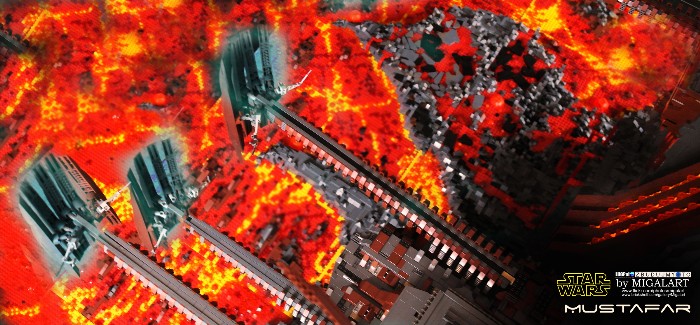
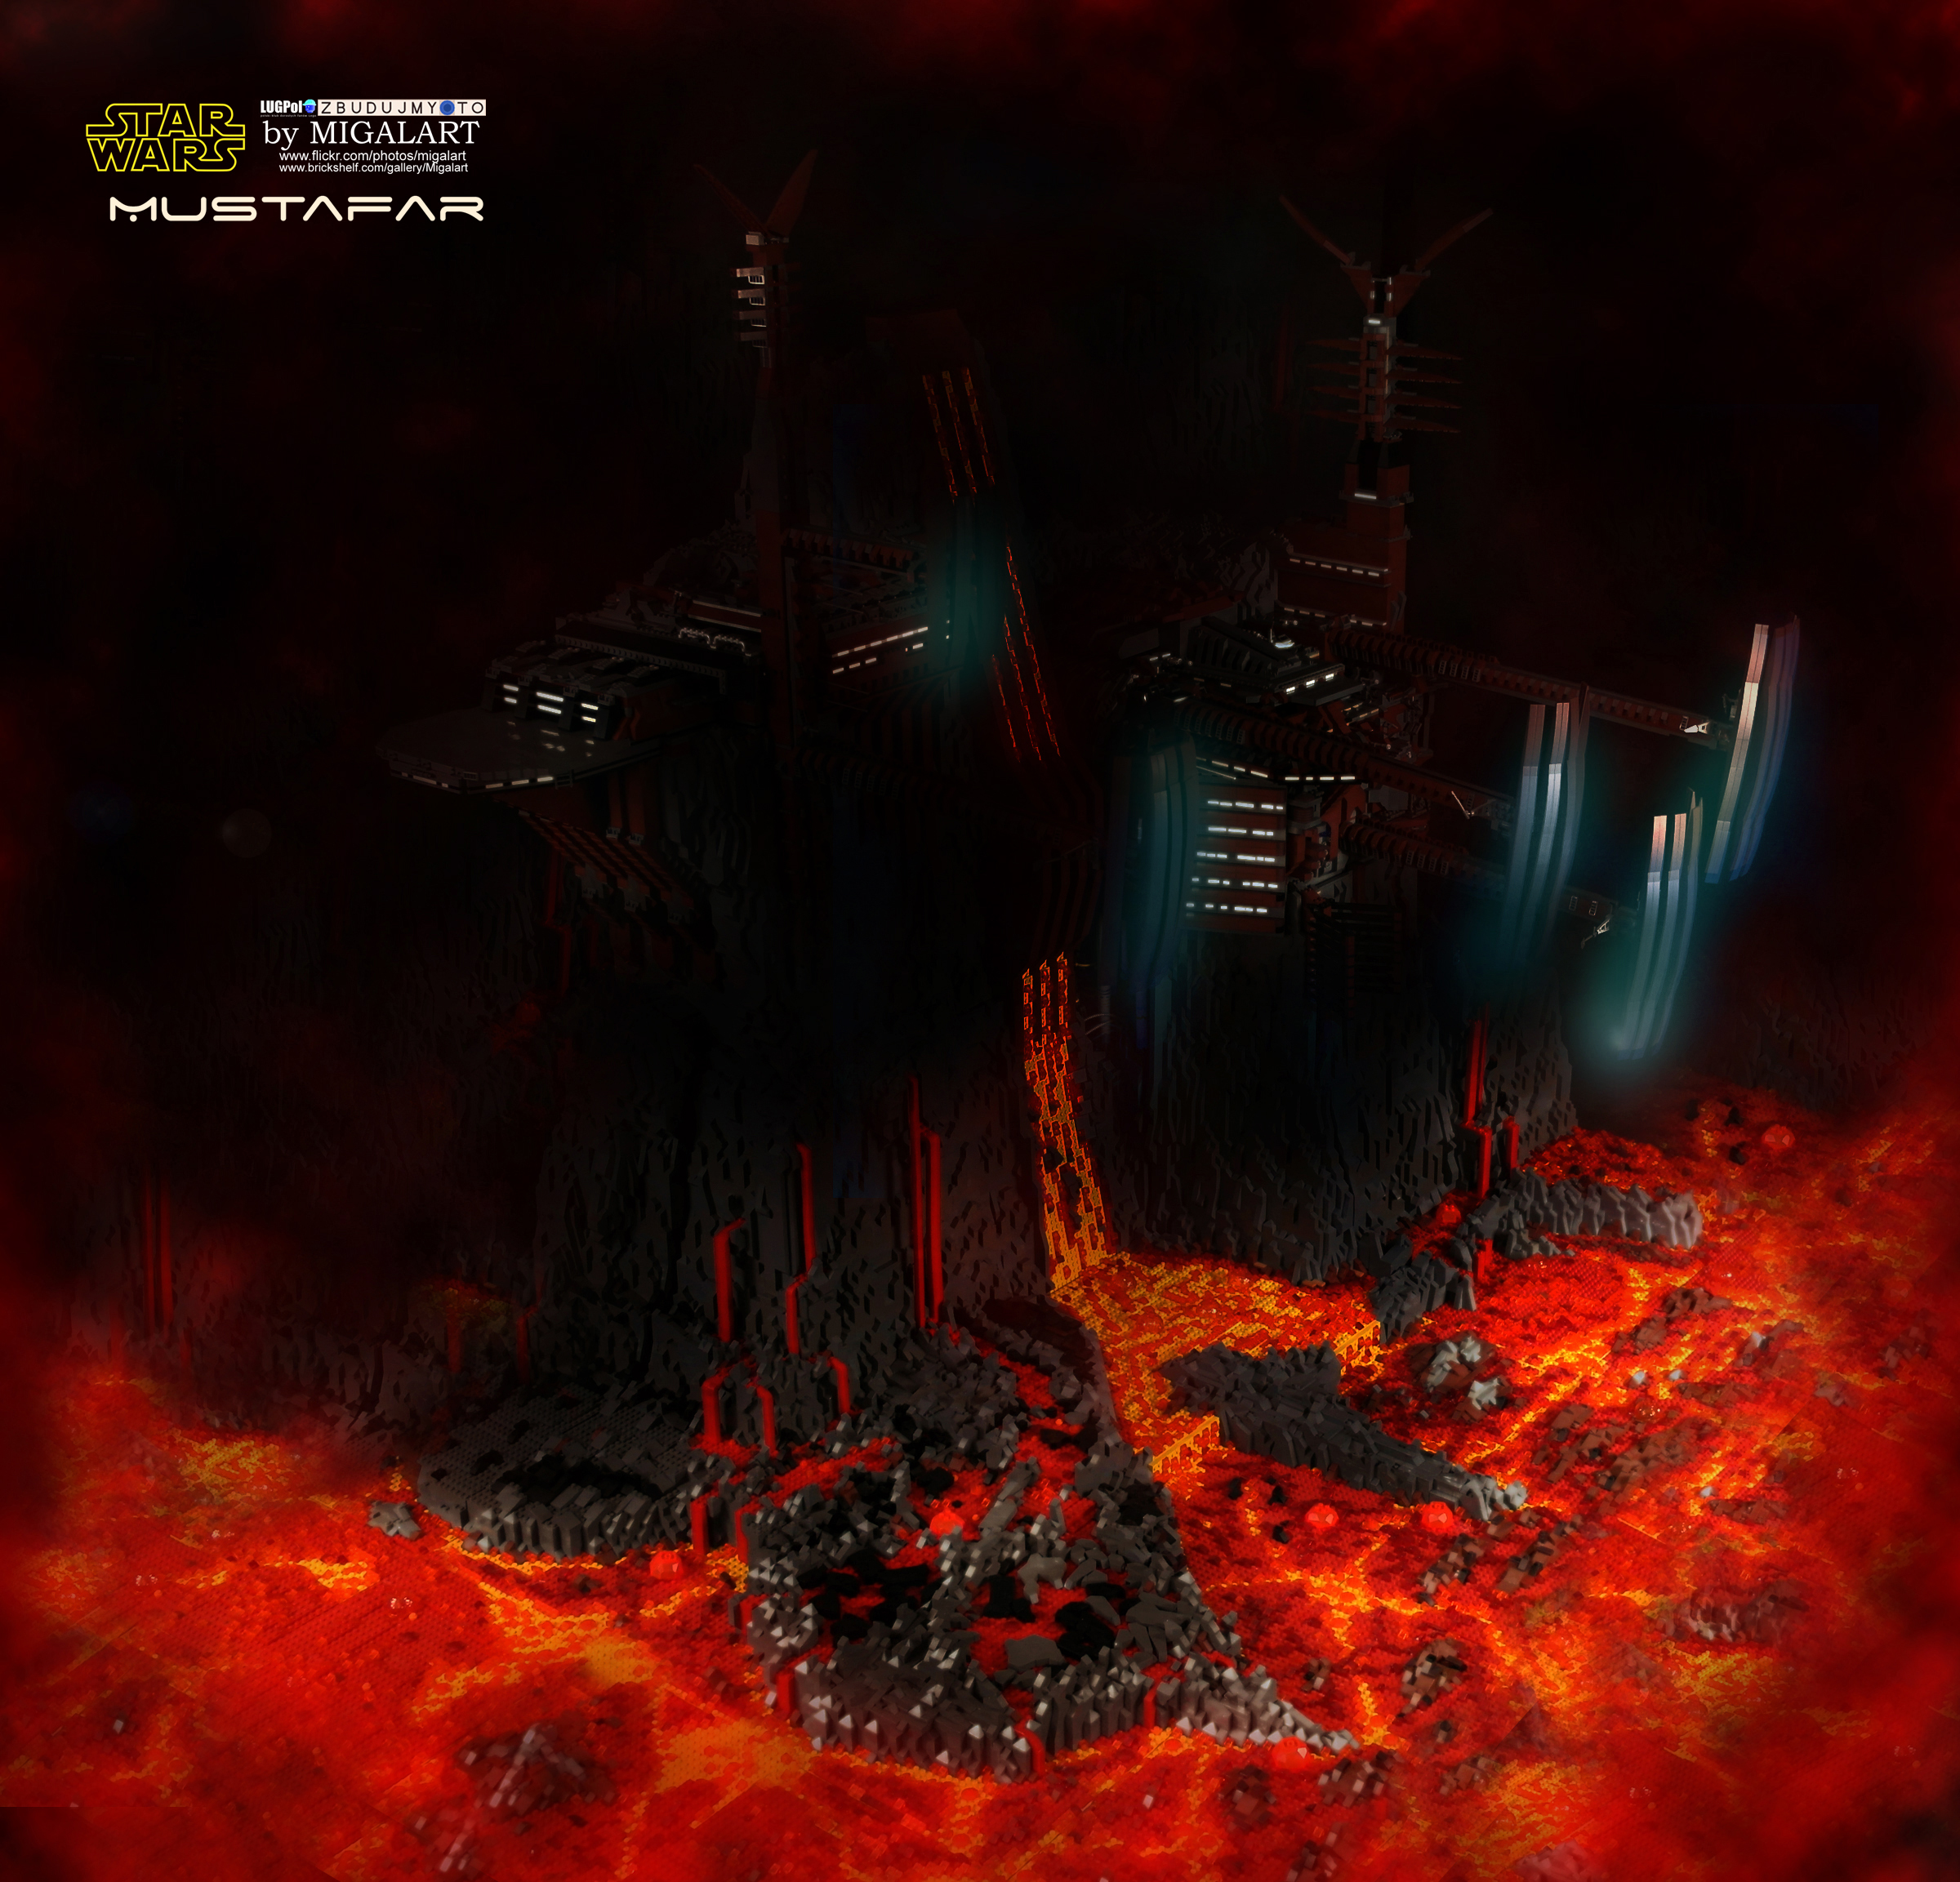
Photoshop in use...
Photo without any alteration:

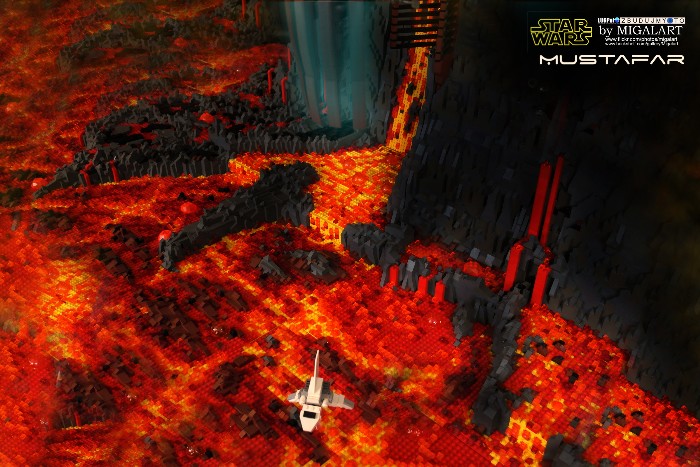
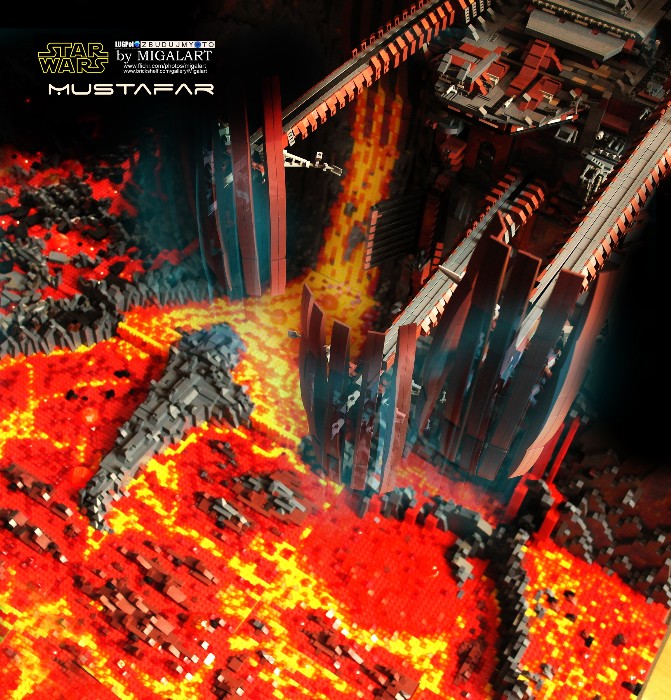
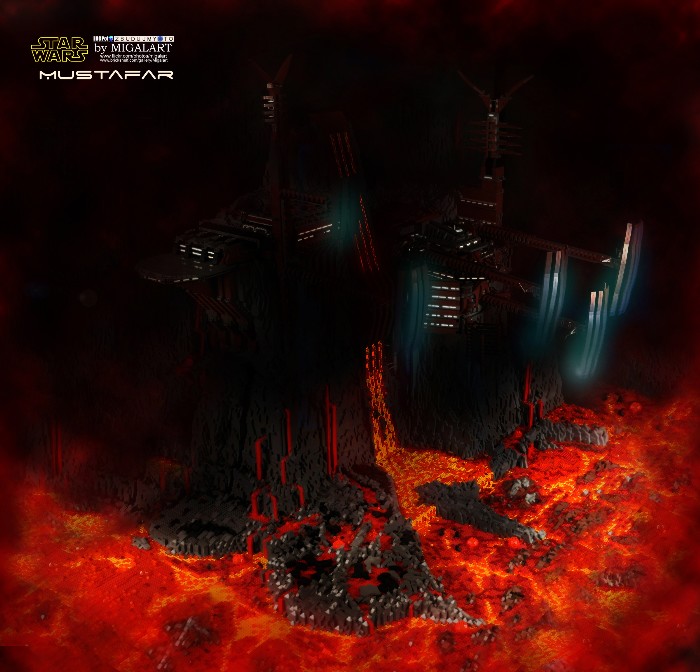
Basic alteration:
Intense alteration, lights, etc:
The Mustafar movie:
Source material.
To see more of my works please visit:
https://www.flickr.c...hotos/migalart/
In short - zero magic, lot of fun. Nothing new for experienced builders
Internet browning. Mustafar documentation was very weak. Just two 640-480 images.
It is not available in brown, so I had to look for proper paint.
30000 dots of yellow plates, any shape, as cheap as possible. 30000 dots of red plates, ETC.
I try to include two different work dimensions:
In paradox – this two dimensions work often against each other.
From the very beginning of each project I have in mind the position of camera …
This must be mobile construction which is the hardest point of all.
In the past I was dividing dioramas on eqal baseplate parts.
Now I try to divide the diorama on 5 types of modules:
I try to have most flat and high modules.
All to minimalize the enormous costs.
-
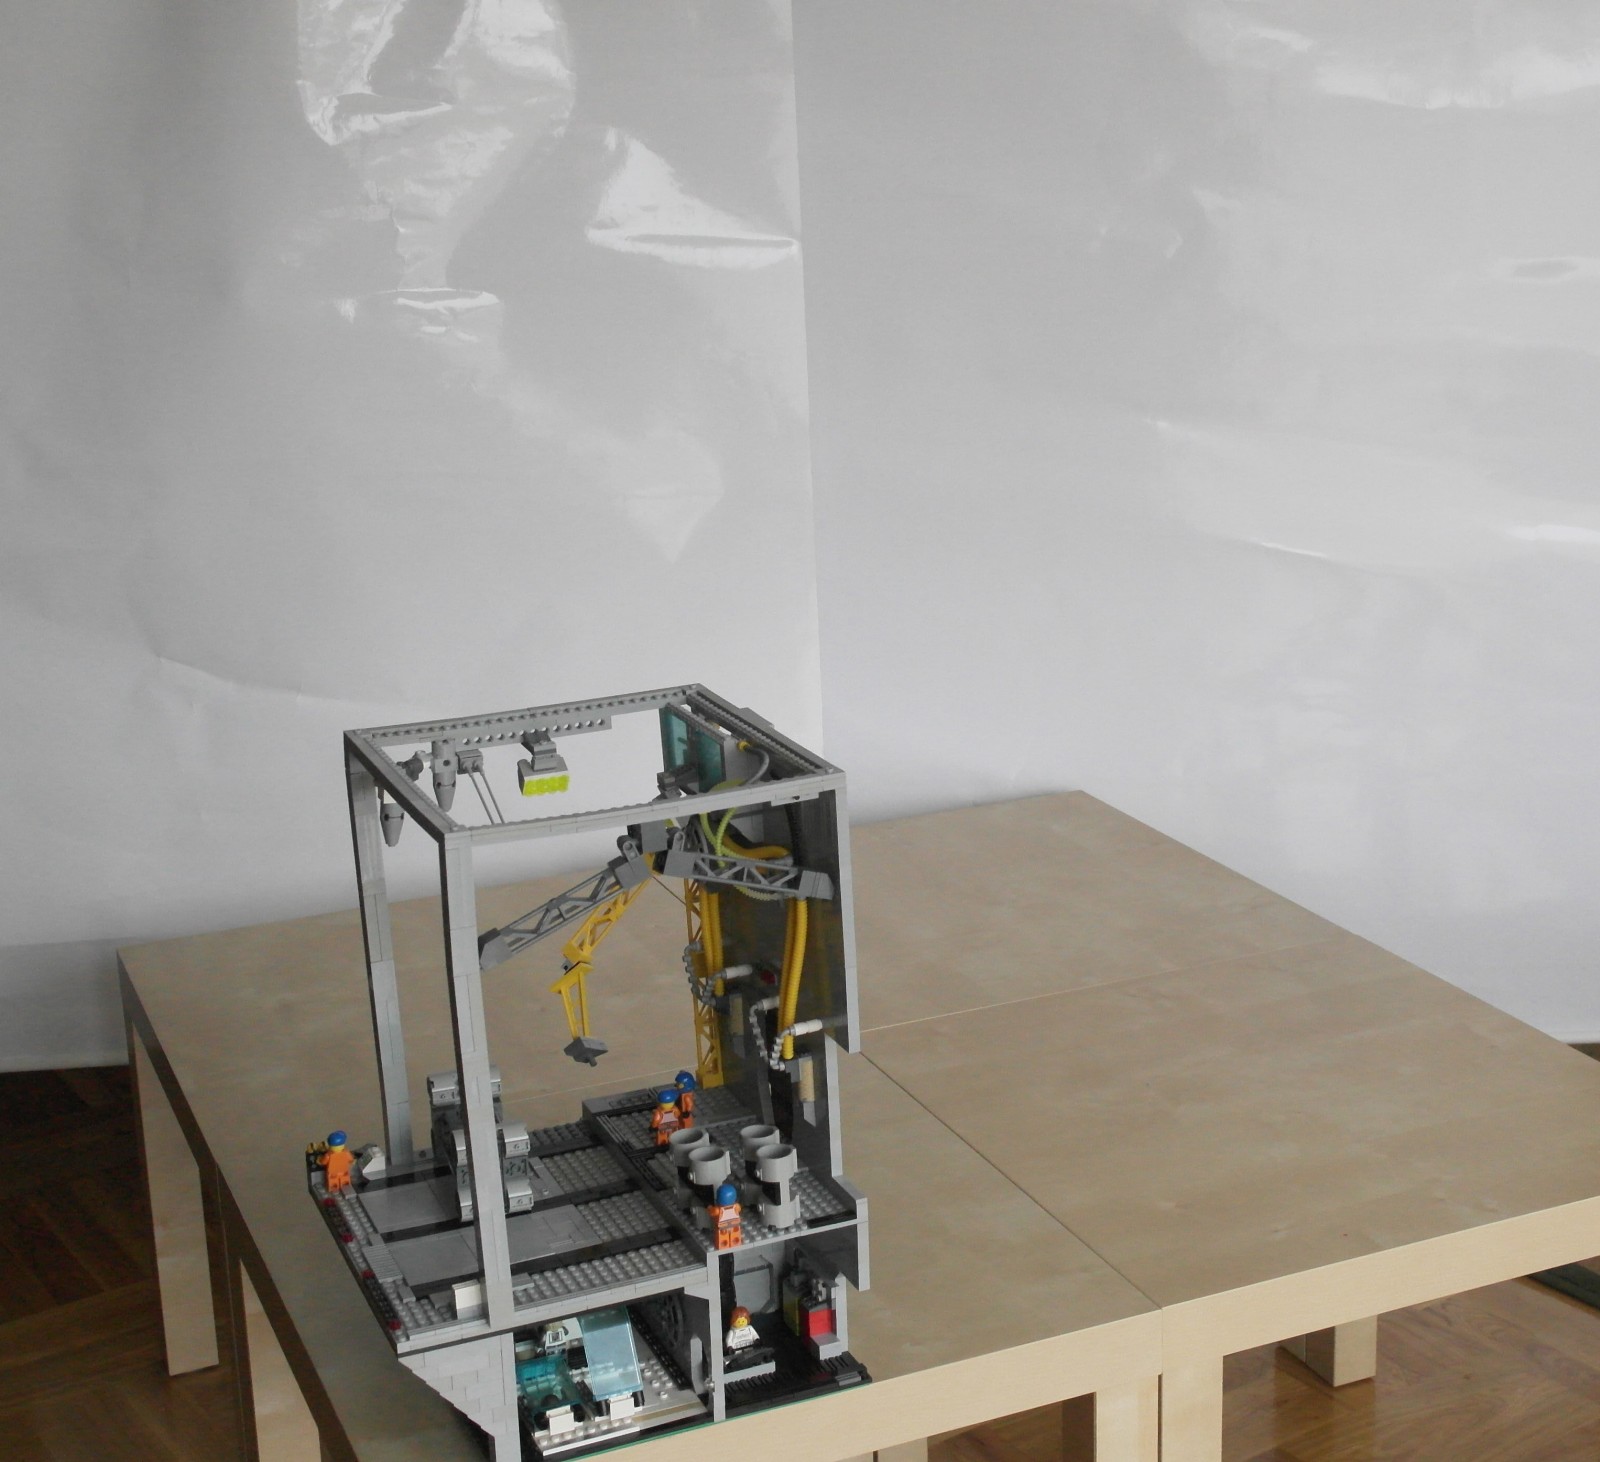
You built this before inferno, don't you?
Anyway it's really great, and so big!!

yes I did.
It was my first big project ever. Lots of experience. Many thinks i made completelty wrong.
For example the floor in main hangar is moving to open for lower levels. It was so complicated to execute this an took me 1 month of hard work. and you dont even see it on pictures :)
-
So awesome..... If you don't mind, I'd like to share this with the readers of my blog. Just an incredible build. Love all the little scenes going on.
go ahead :) thanks!
-
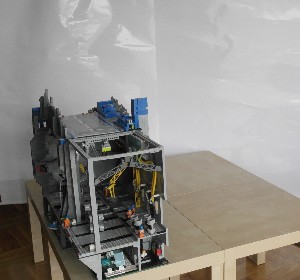
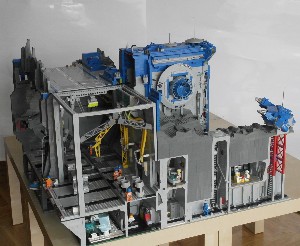
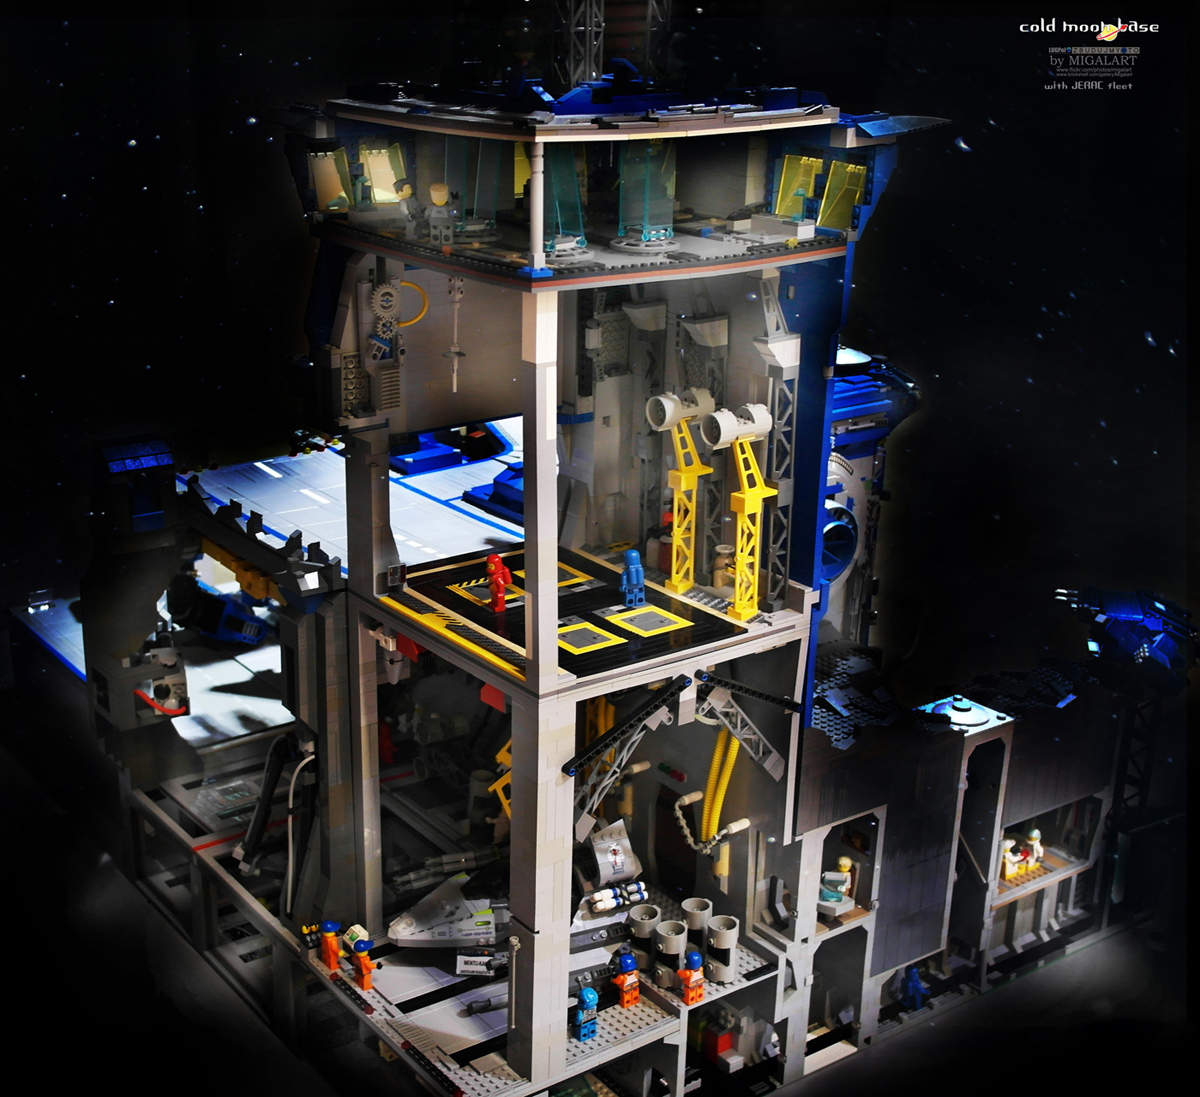
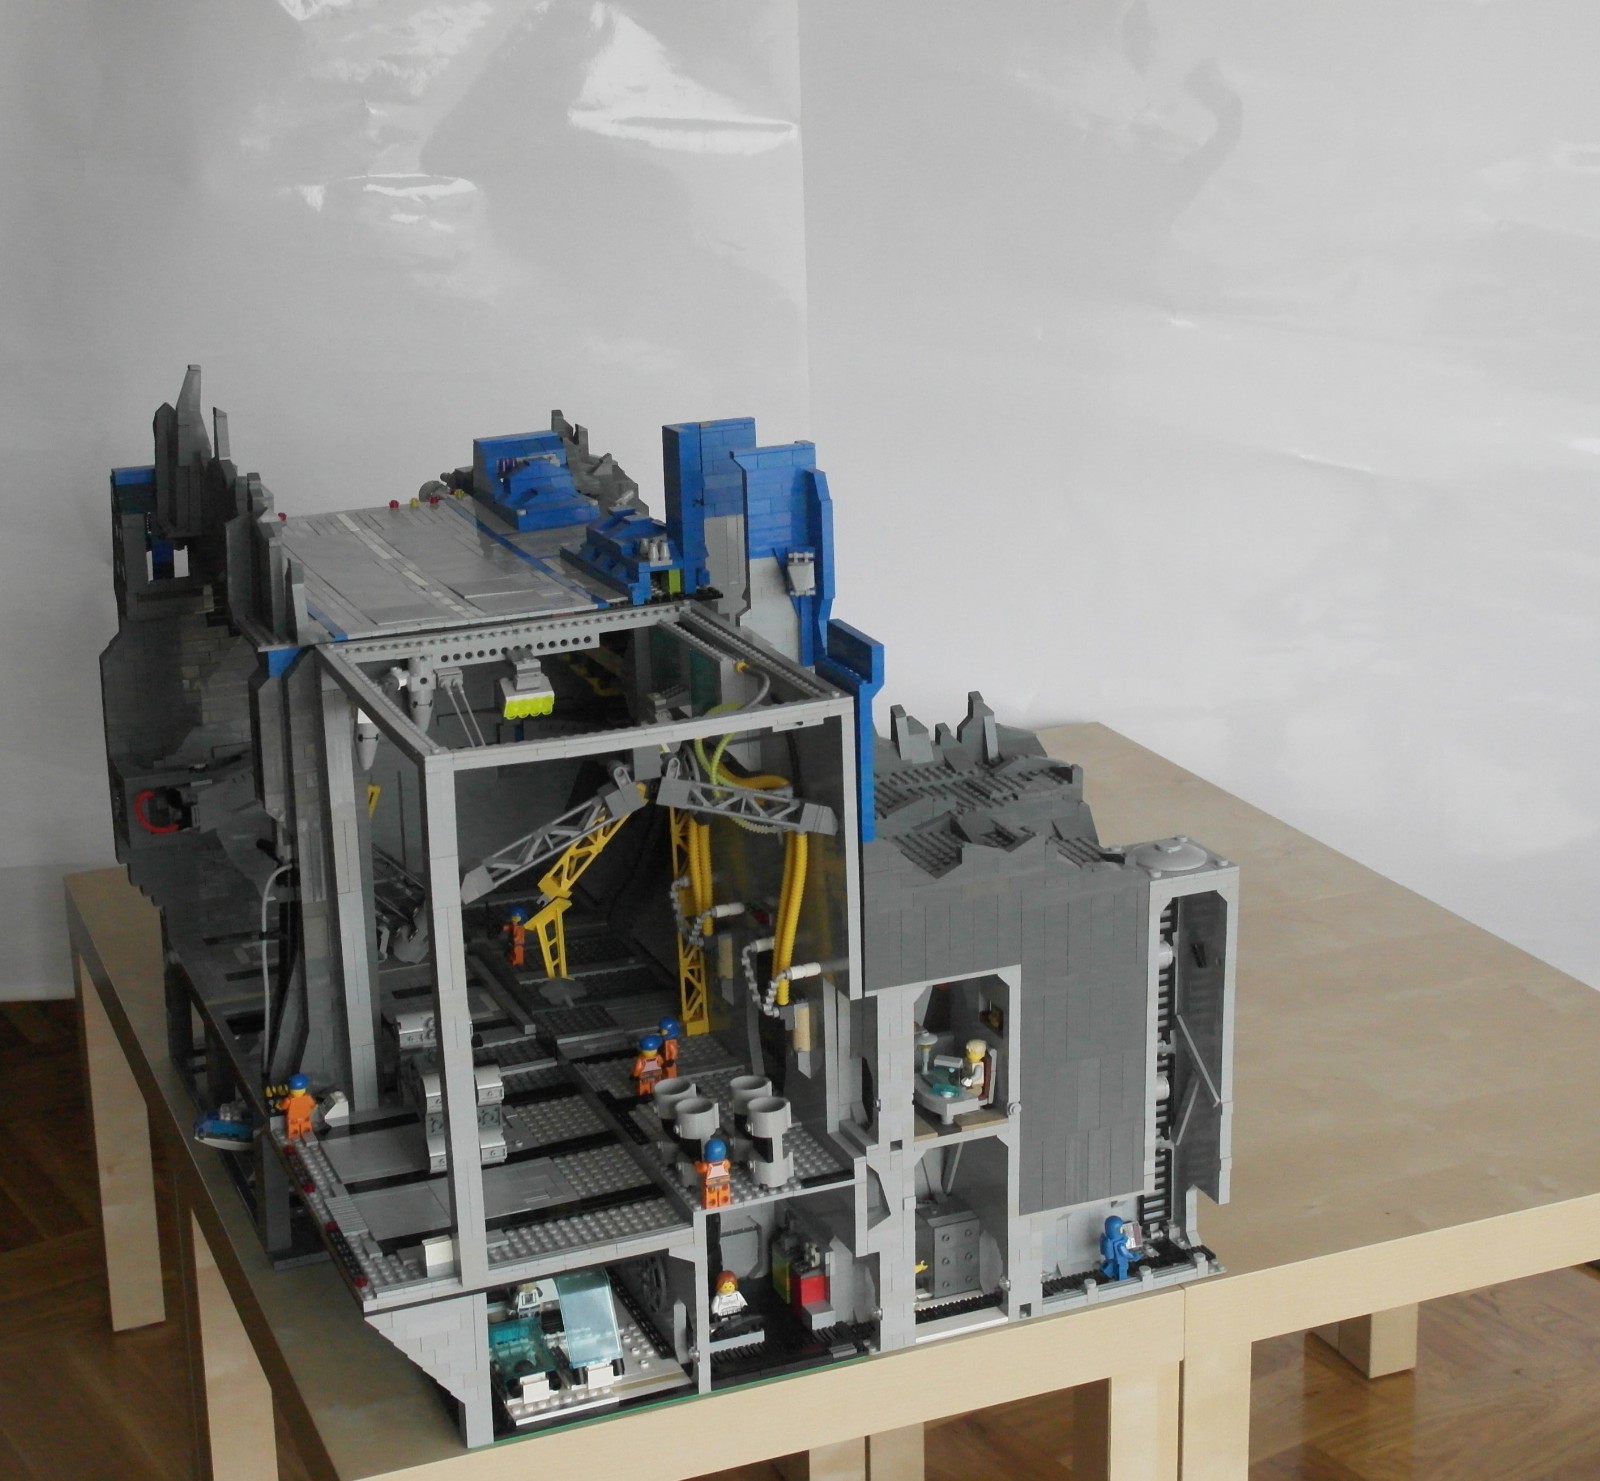
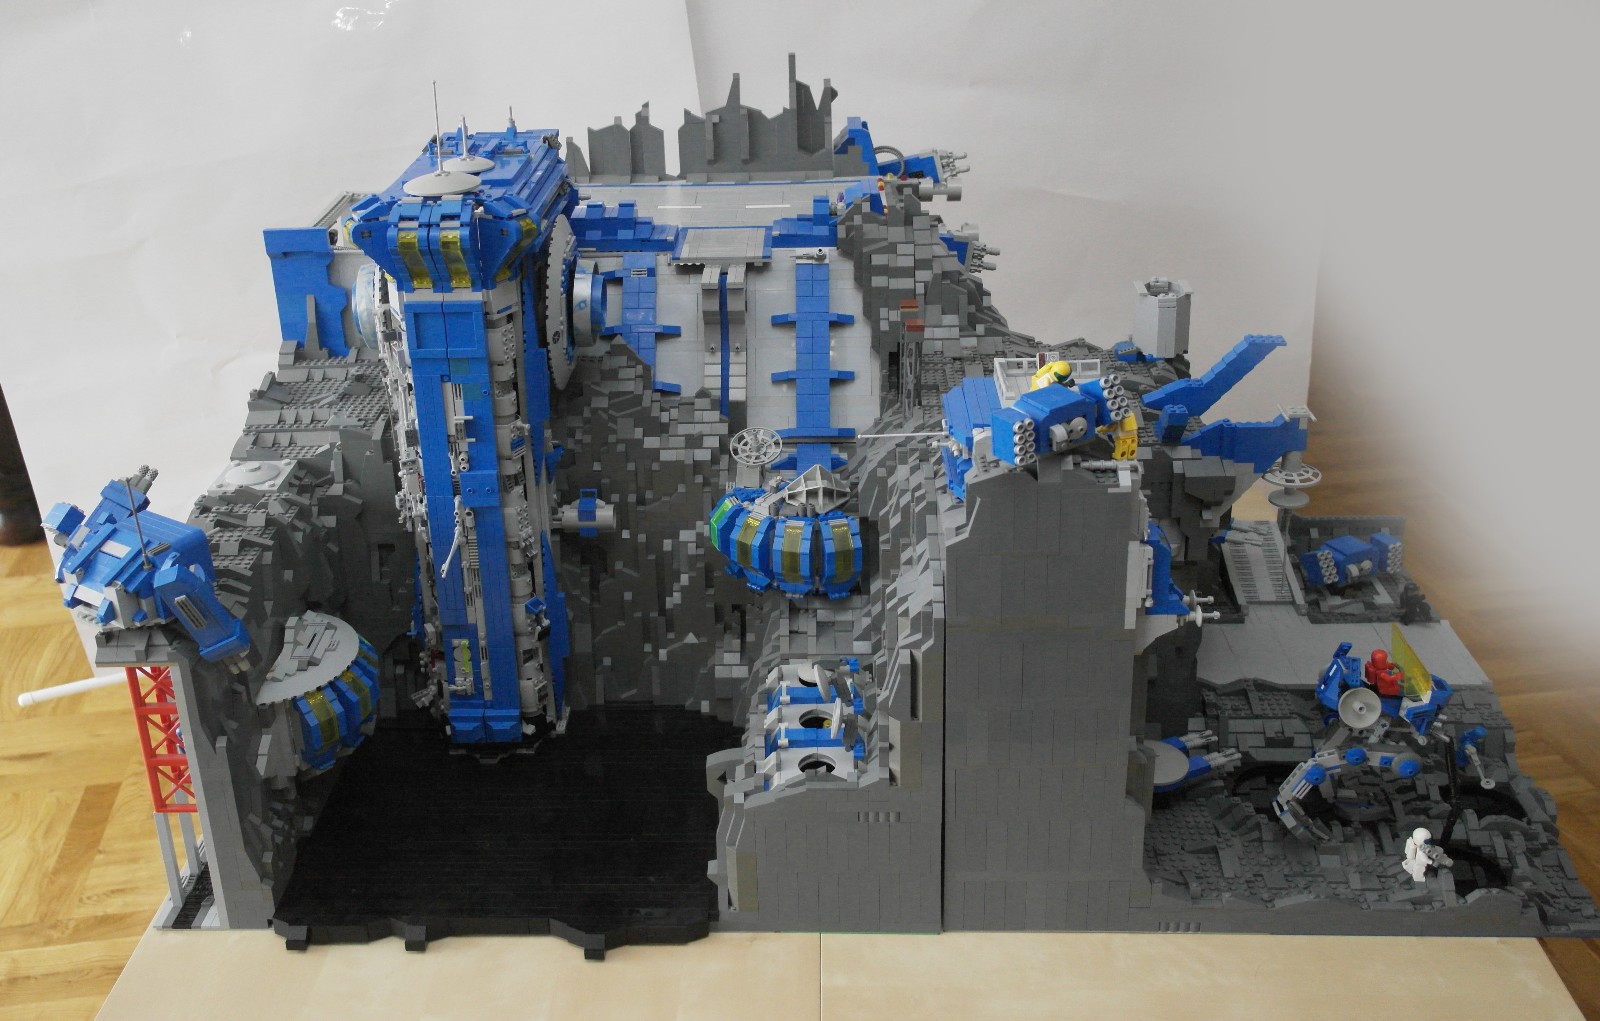
Here is the small show how it is joined together:


-
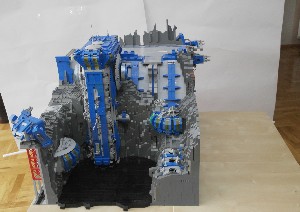
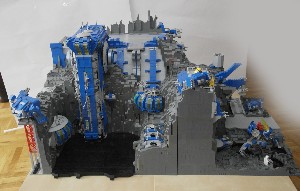
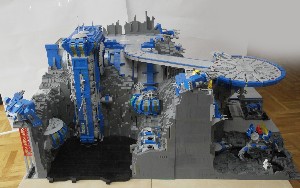
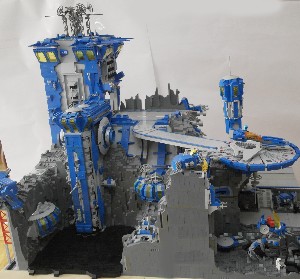
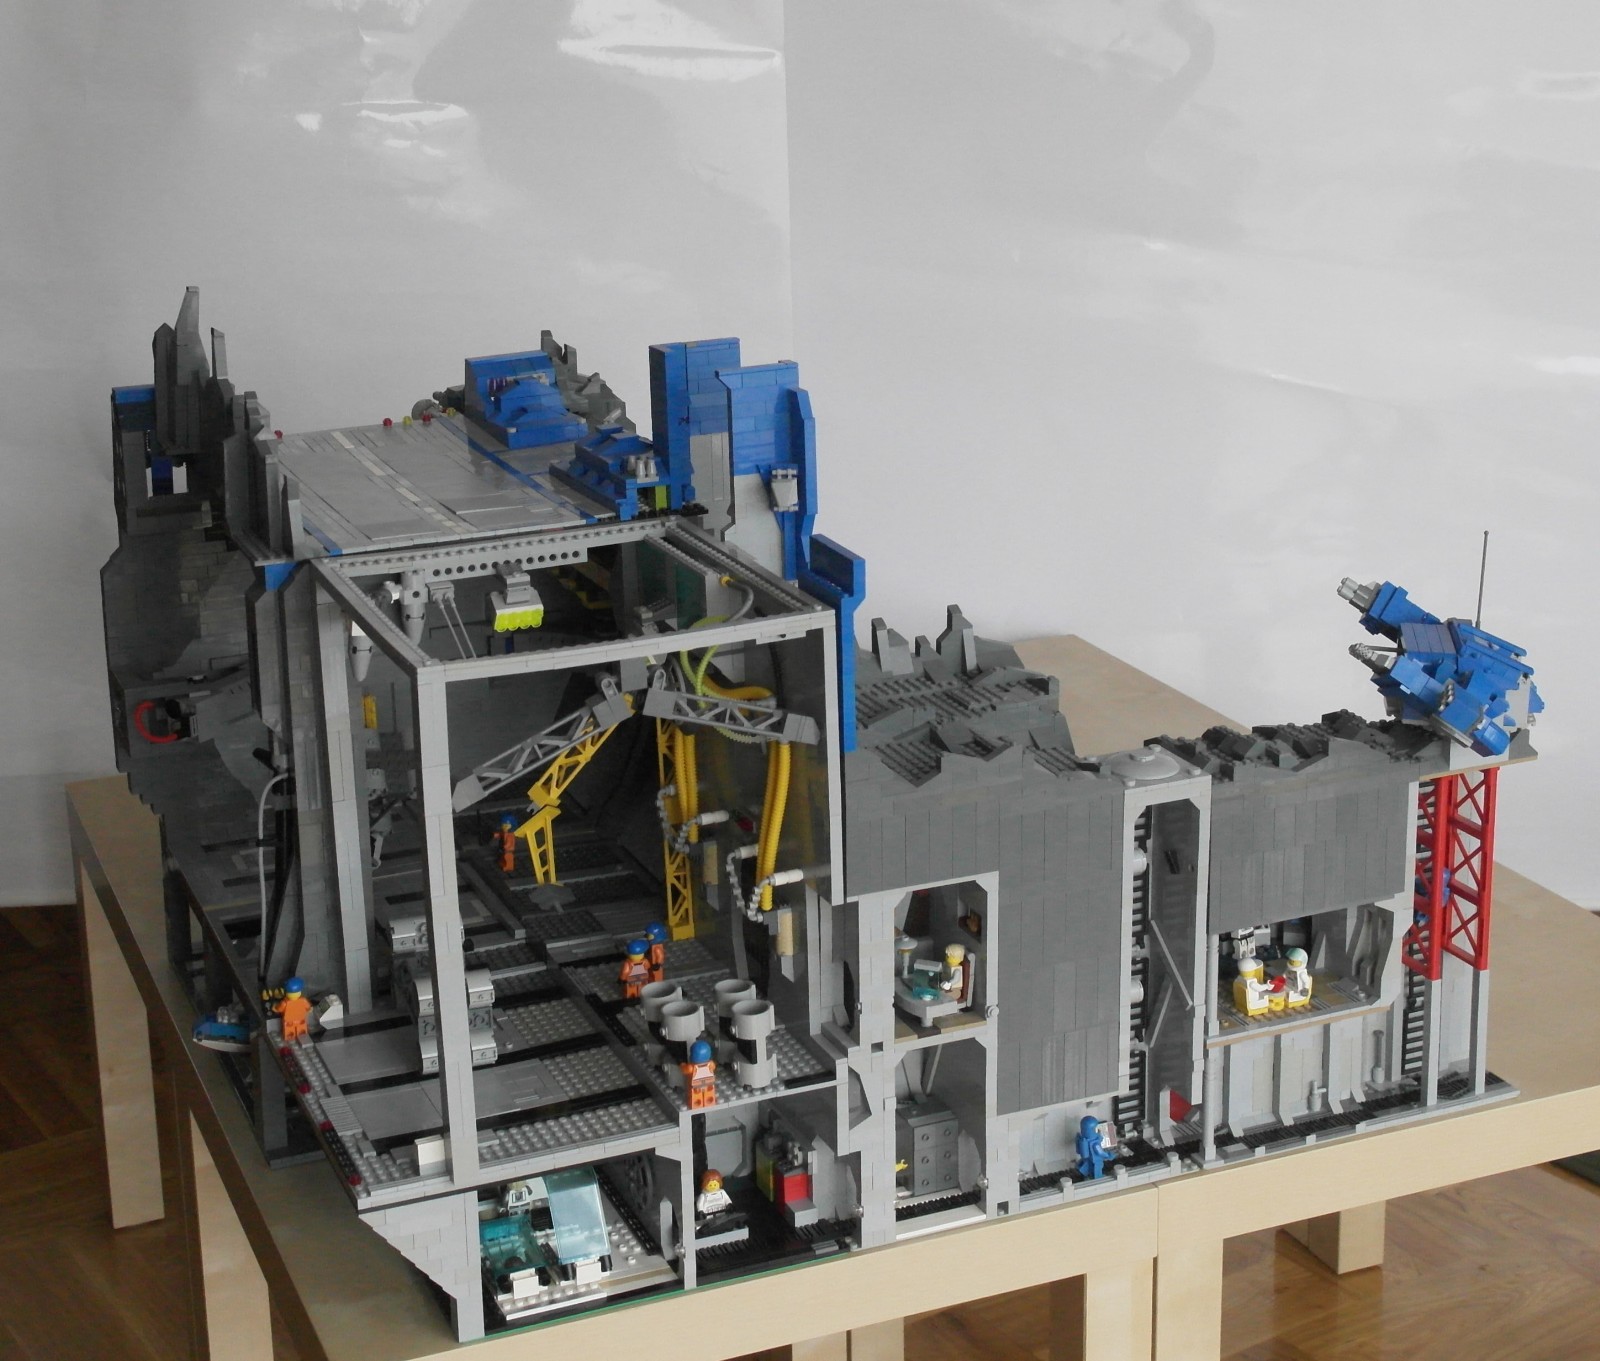
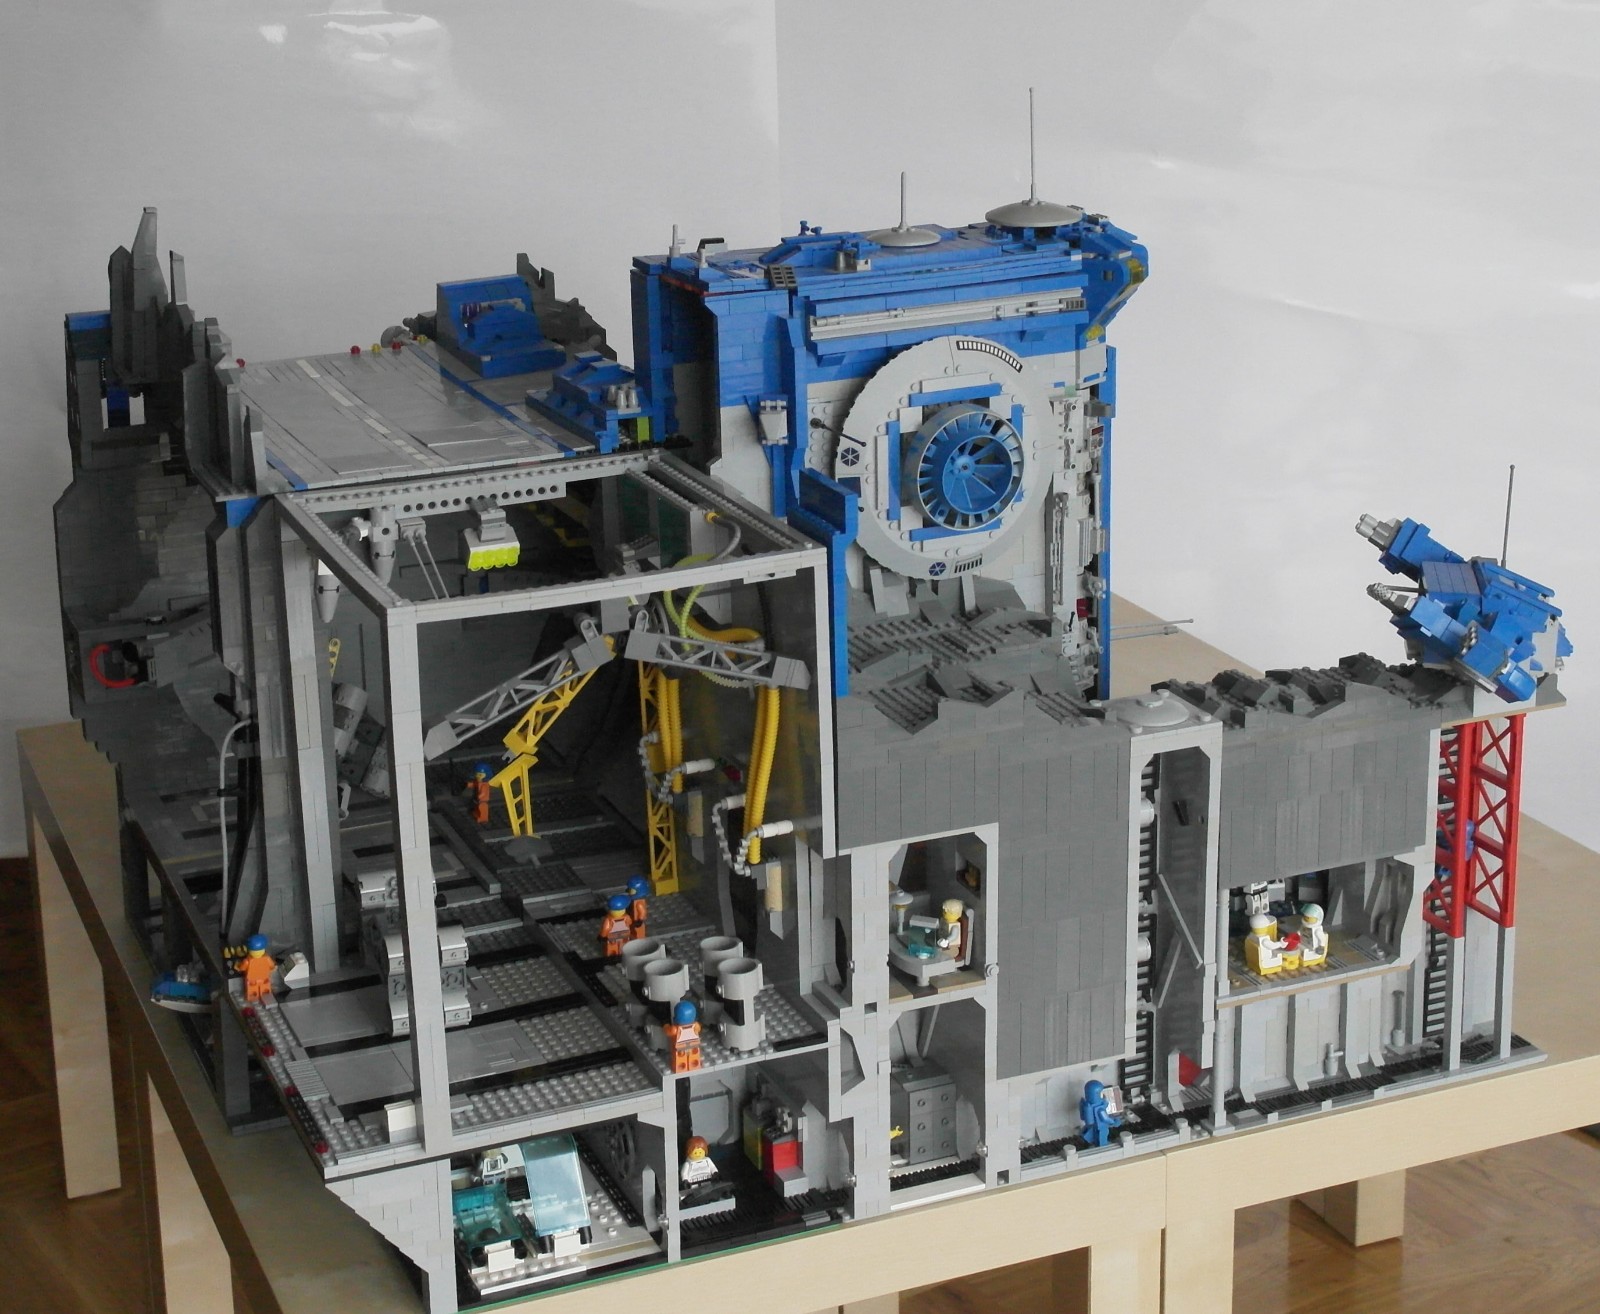
This is my older project never publicated on this forum.
It is classic space base with hangars, base facilities, defense systems, etc :)
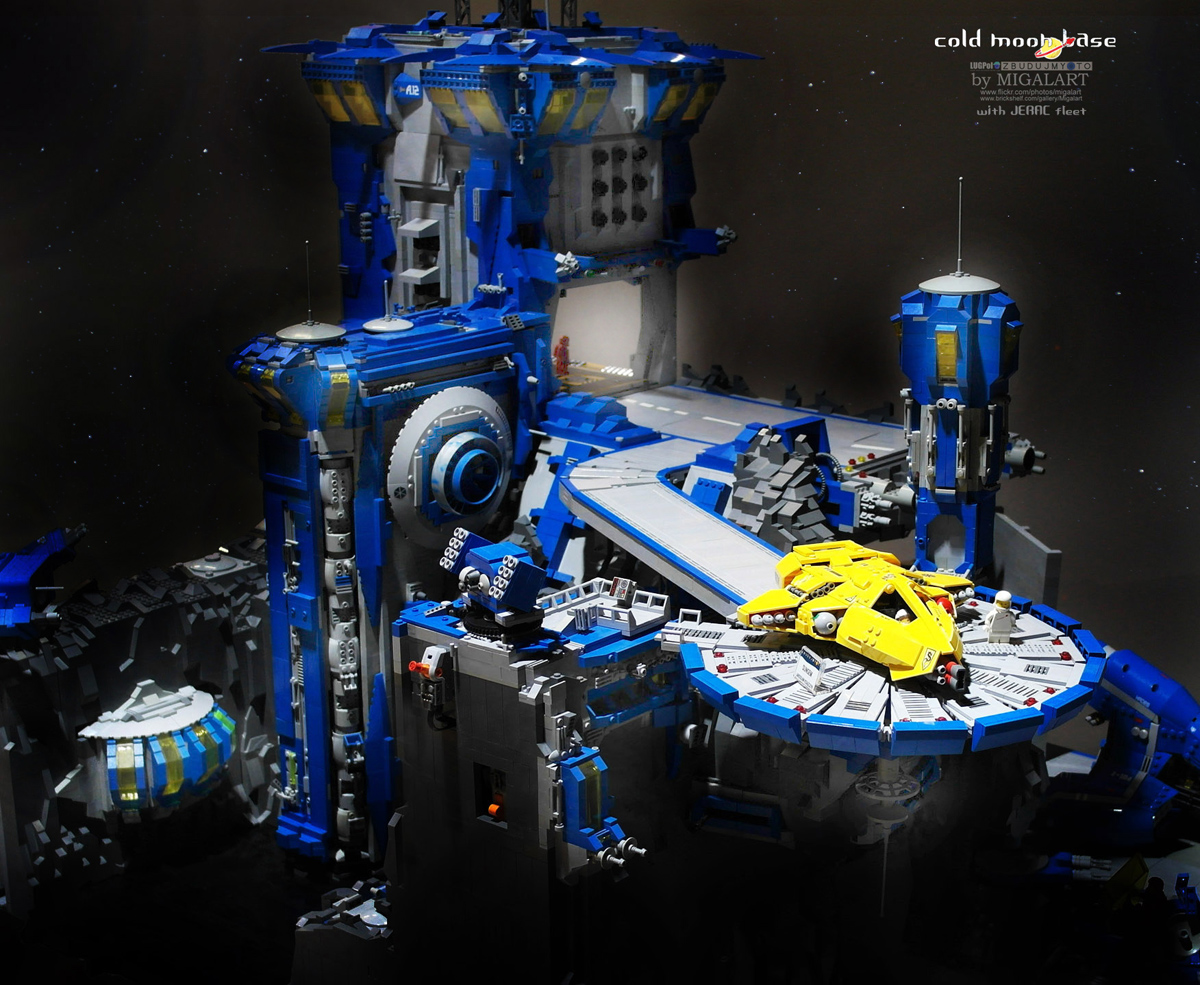
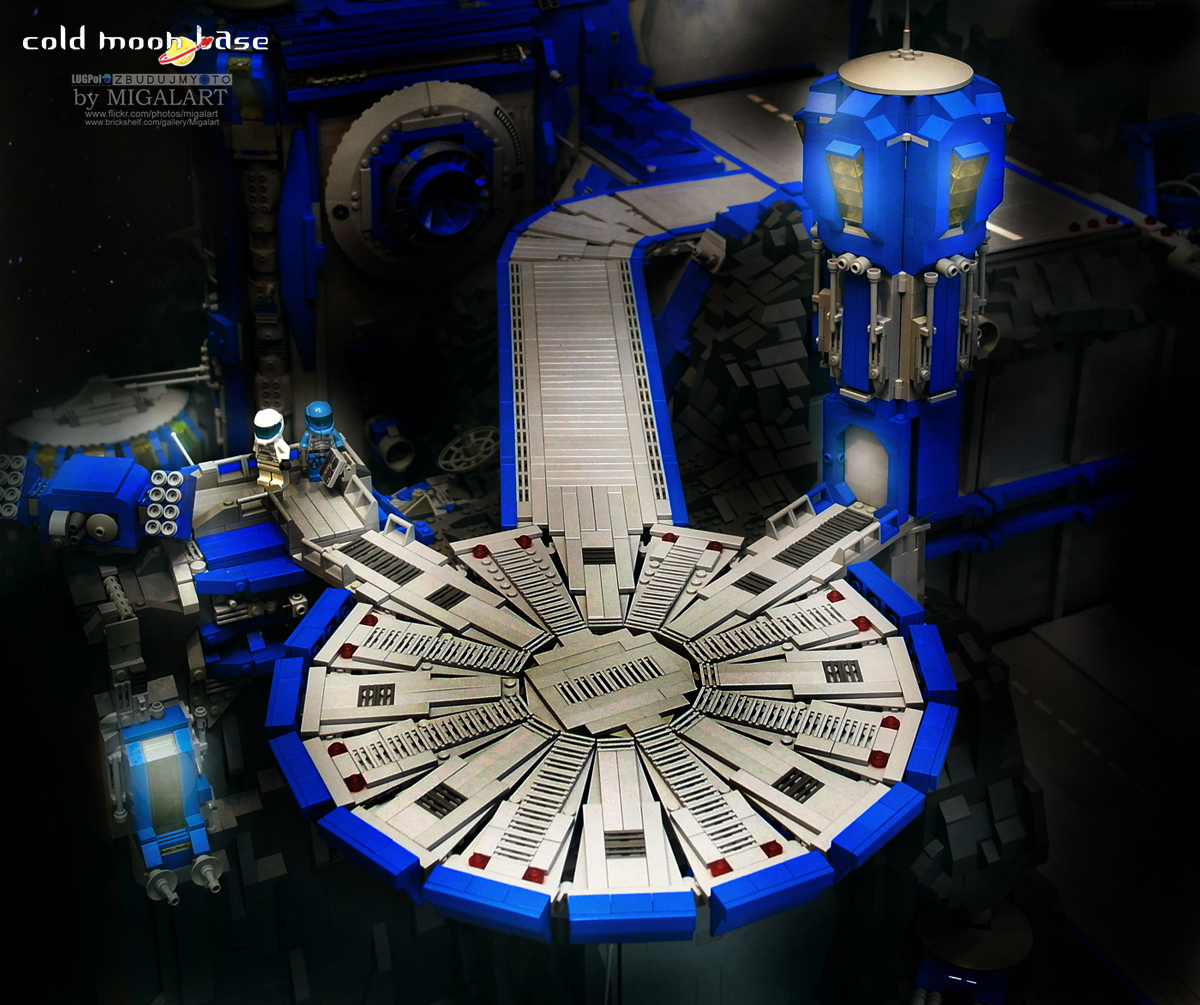
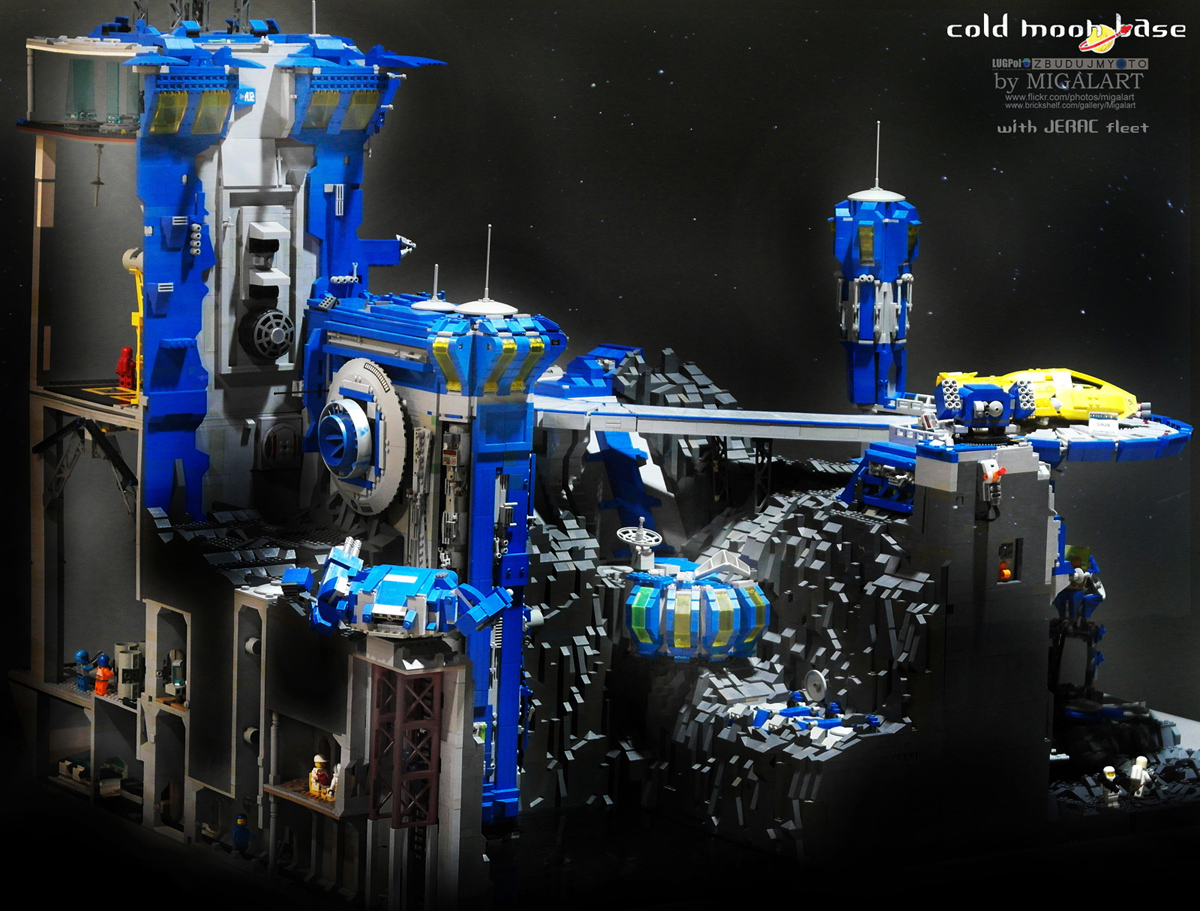
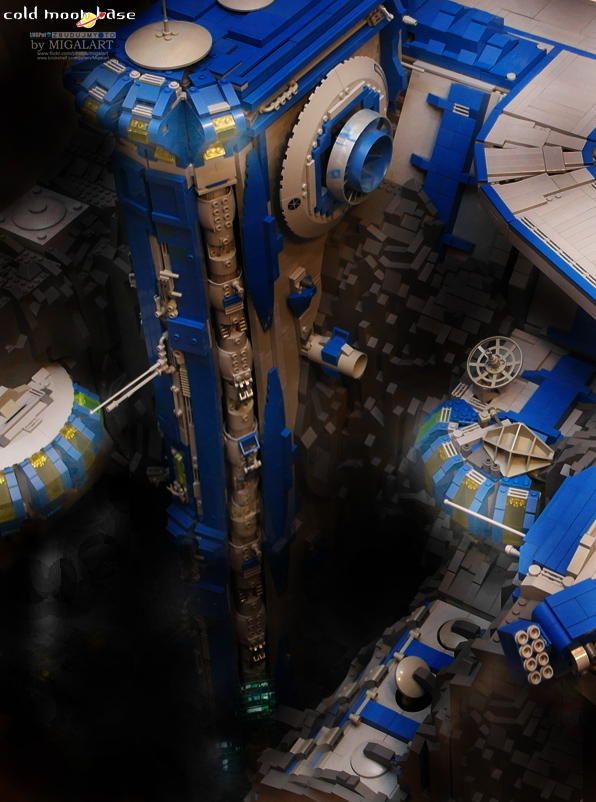
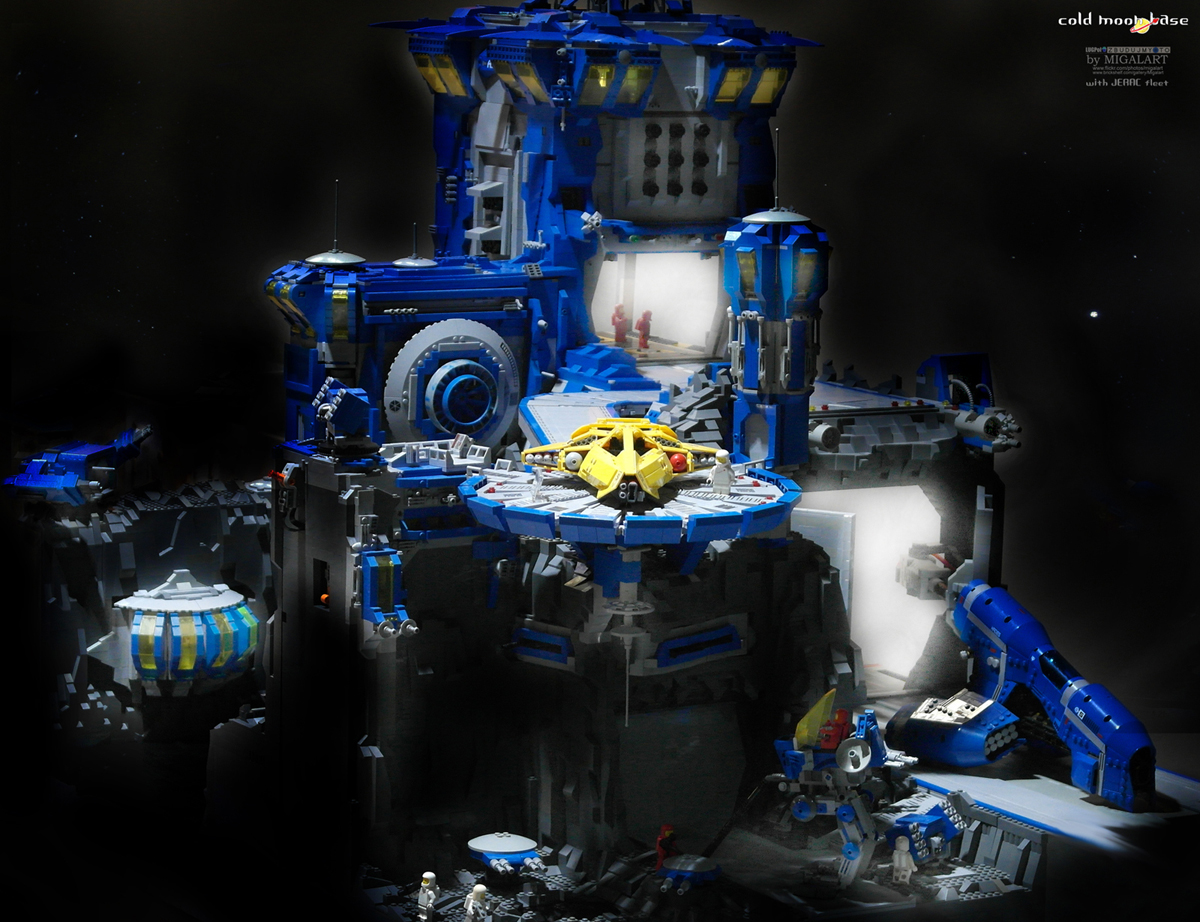
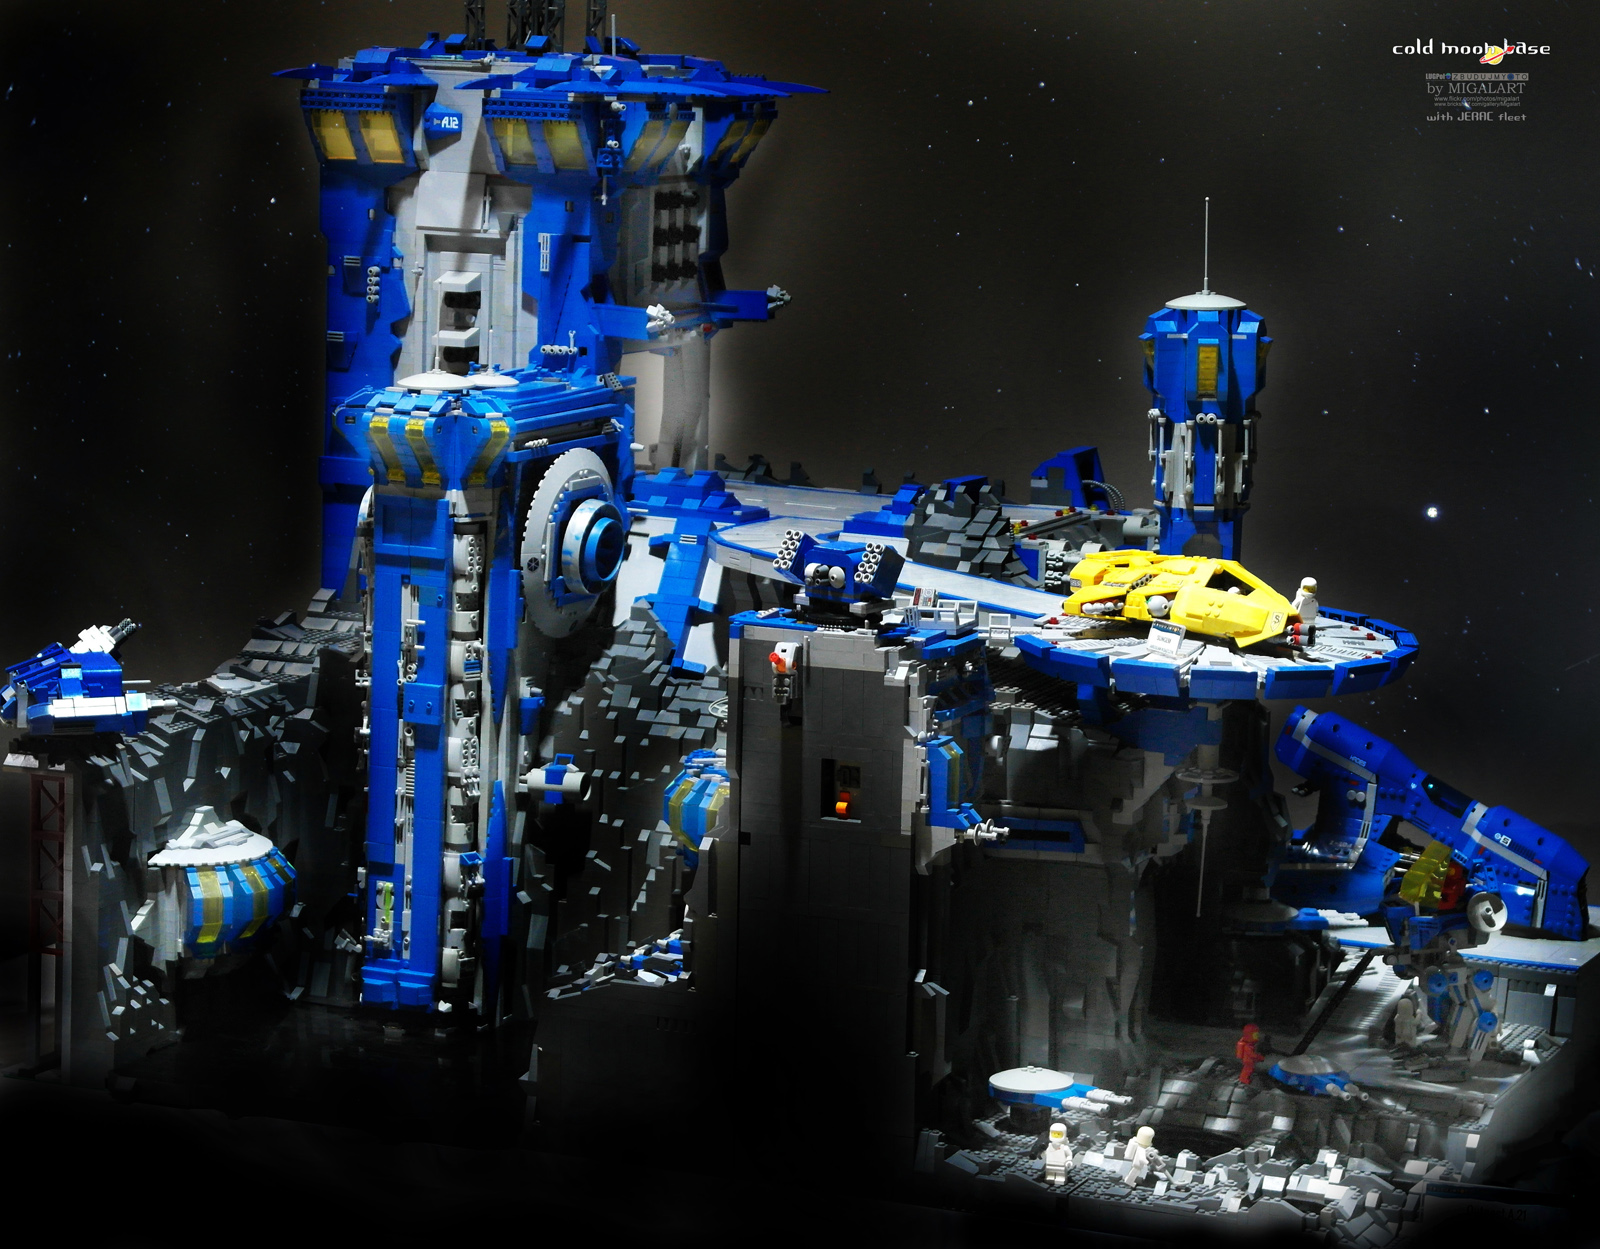
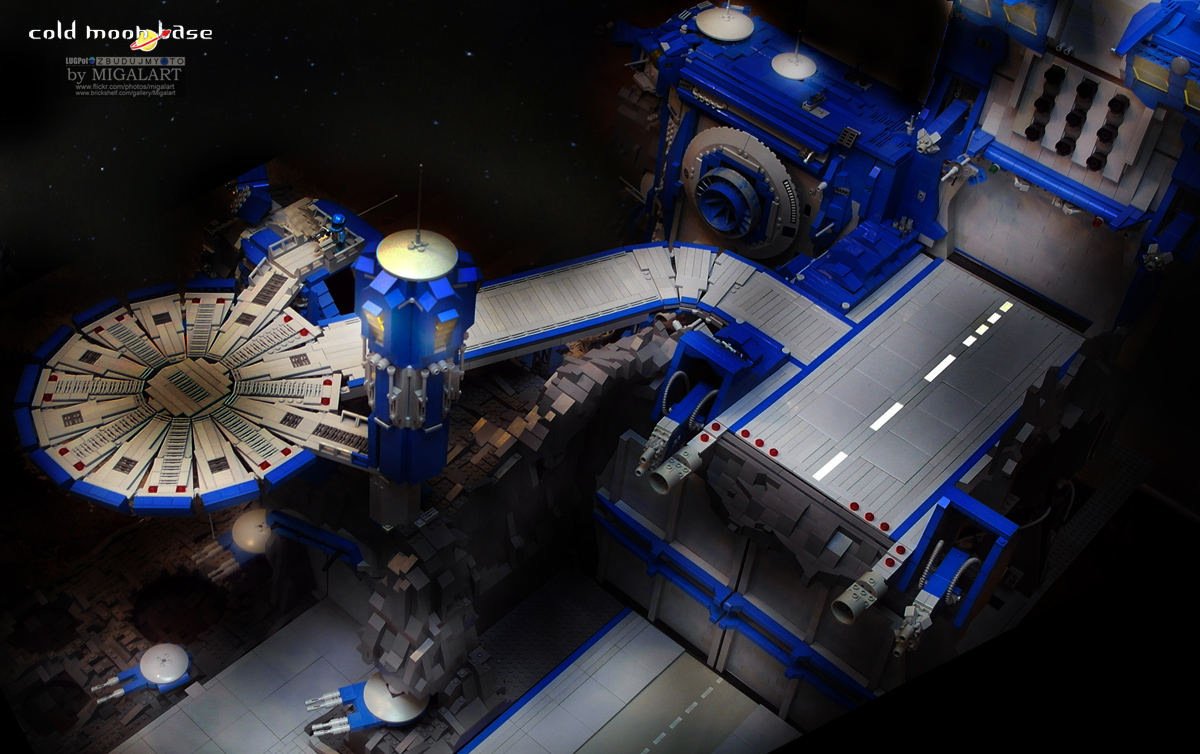
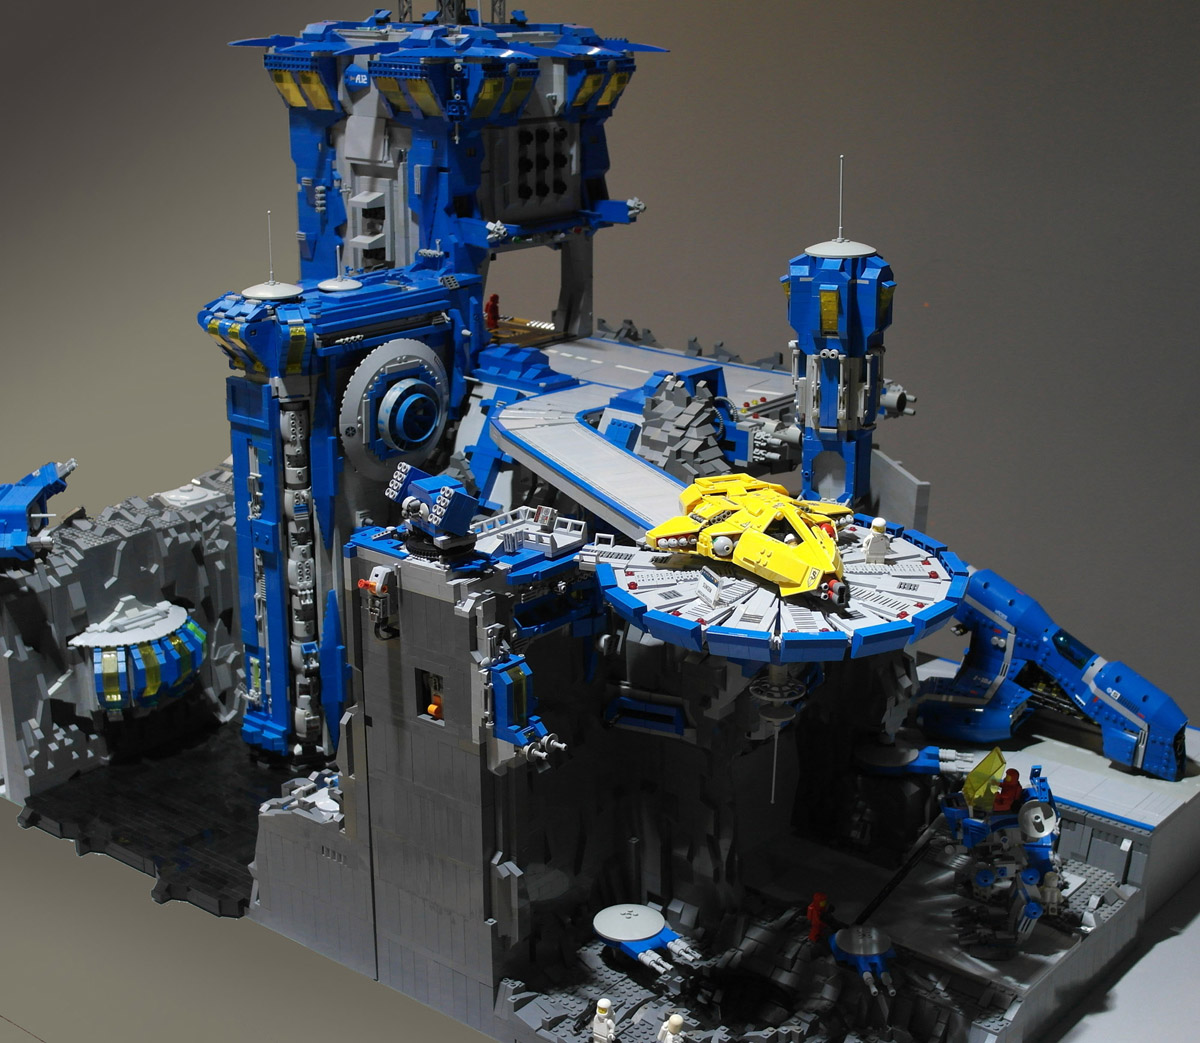
High resolution photos on my flickr


Hercules - heavy transport
in LEGO Sci-Fi
Posted
I continue gathering "objects" for my cartoon
The latest one is Hercules - heavy transport.
This is my first attempt to build someting bigger in micro scale, and learning ground for "Shiptemper" contest.
It is medium sized ship - arround 100 studs long. I took me 1 week to build it.
Small windows infront are made by transparent tile 1x1 divided by tape and ligthing from behind.
Red lights are photoshoped
Ship strucutre:
Space images: