

Breakdown
-
Content Count
221 -
Joined
-
Last visited
Posts posted by Breakdown
-
-
Hello everyone.
I've been wondering, are there any actually good uses for the flexible track that Lego seems to put in almost every set? I have over 200 pieces of the stuff and I have almost nothing to do with them.
I tried making a sort of large radius curve with them, but it twists so much because of the flexibility and isn't an exact curve.
If anyone has suggestions or ideas, please leave a comment below.
At first when I didn't have much track, but also hated the look of flextracks. I just buried them in train stations, like the 7937, the other thing and it doesn't look perfect . . . but you can put tiles or plates across them to keep them perfectly straight & rigid and use them in level crossings.
-
Return home from greater Pittsburgh area . . .
My friend let me lock myself out of his house as Monday was a Canadian holiday, but not a US one as he went to work.
The weather with one 10 mile stretch being the exception was spectacular on the way home, extremely hot & humid, but spectacular otherwise. Very blue skies. I turned a 5 hour trip into an 11.5 hour one, but stopping to smell the roses along the way.
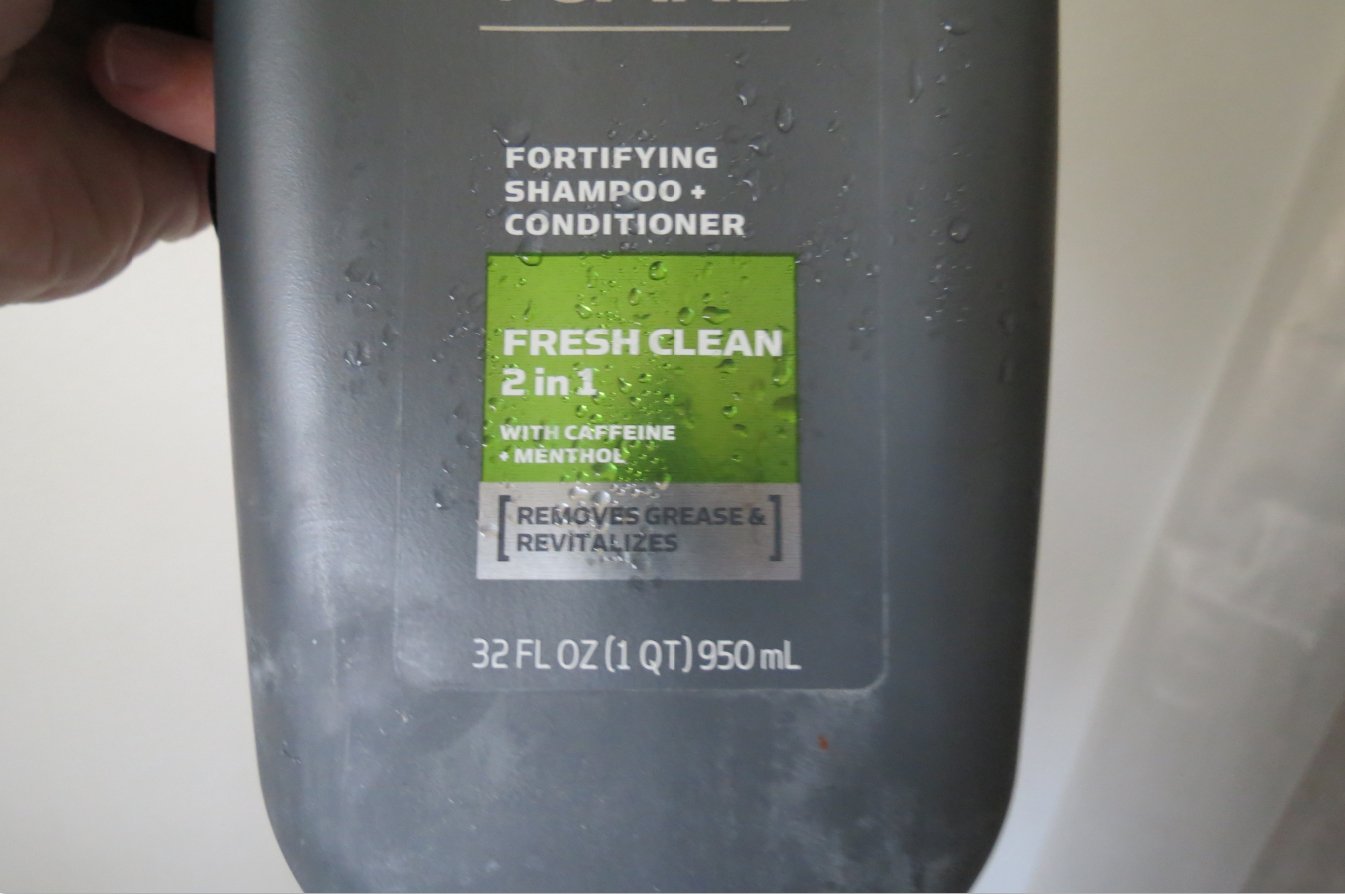
Had to take a picture of this, as it was the shampoo that I used during my morning shower. Not entirely sure how I feel about Caffine Menthol in my hair.
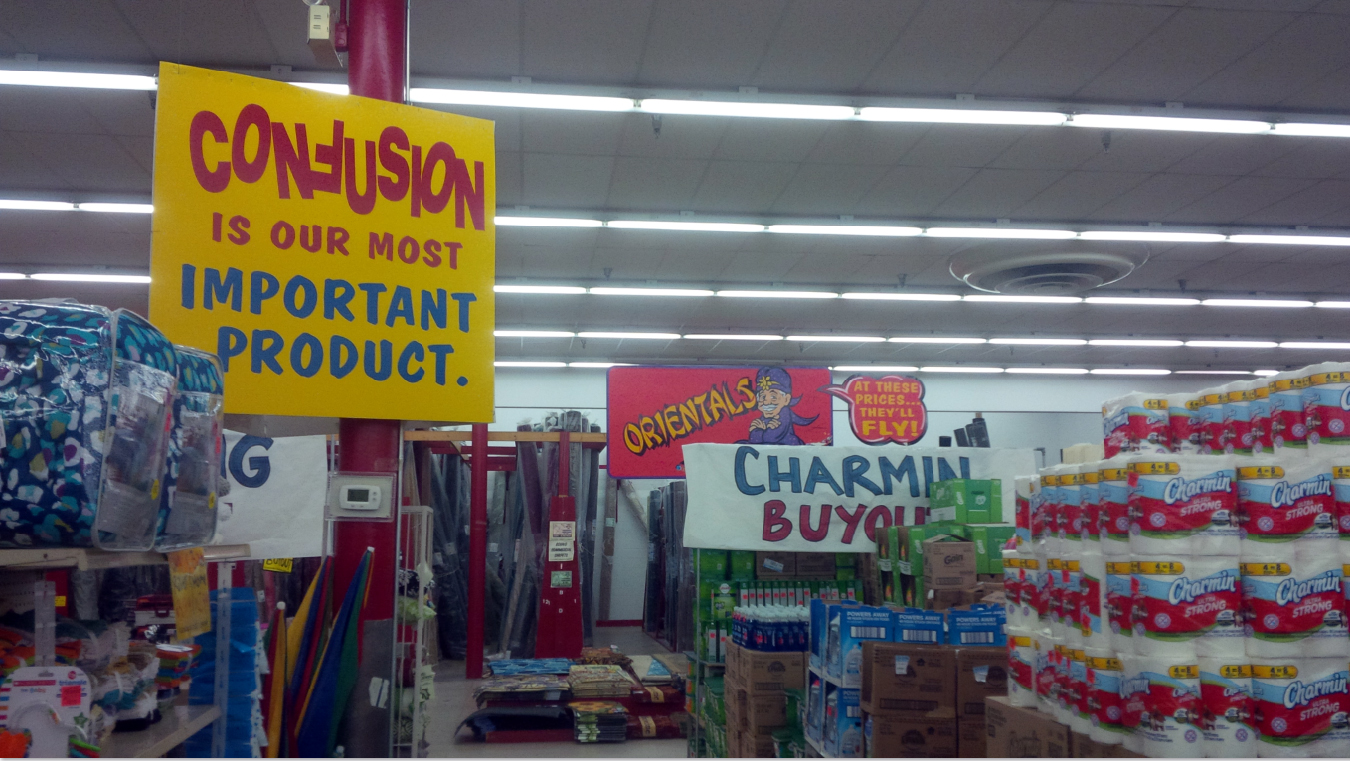
I made a quick stop at Ollies on my way out, this is honestly the most screwed up store that I've ever been to. Usually I go in there without an idea of what kind of junk I'm going to buy, but for whatever reason they had a bunch of books on a historical hotel that's close to my family Otherwise it is legitimately the most confusing story ever. If anyone is look for RUN DMC headphones, this is the place where you get them.
Now for the "real stops" on the way.
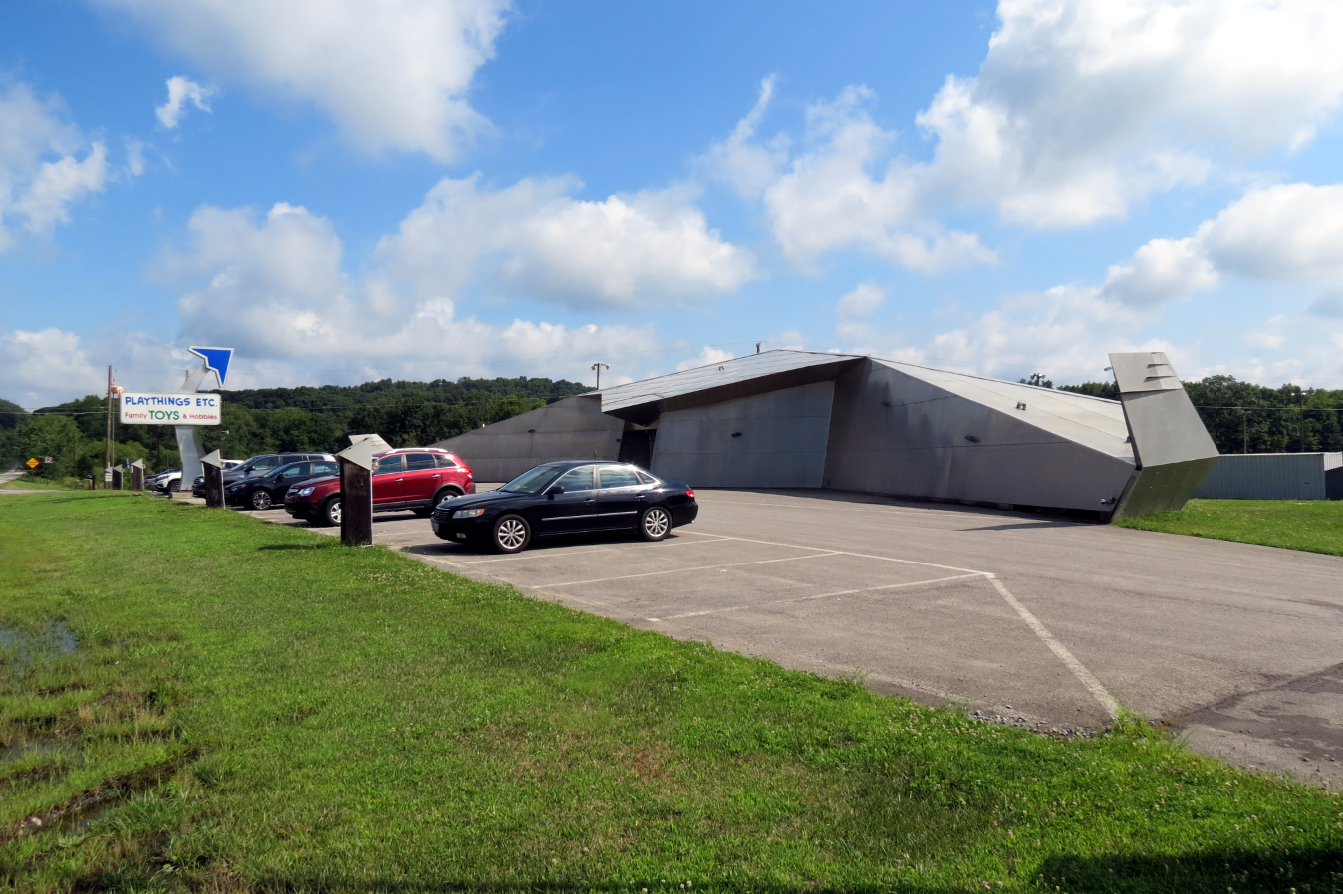
Stop #1 Playthings, etc
It's a flying saucer with toys . . . how can you not want to stop there!! If you like RC these guys have . . . EVERYTHING. They have lots of Lego, but it's mainly at MRSP, I looked lots but wasn't tempted enough to buy even more Lego that would further trouble my border crossing.
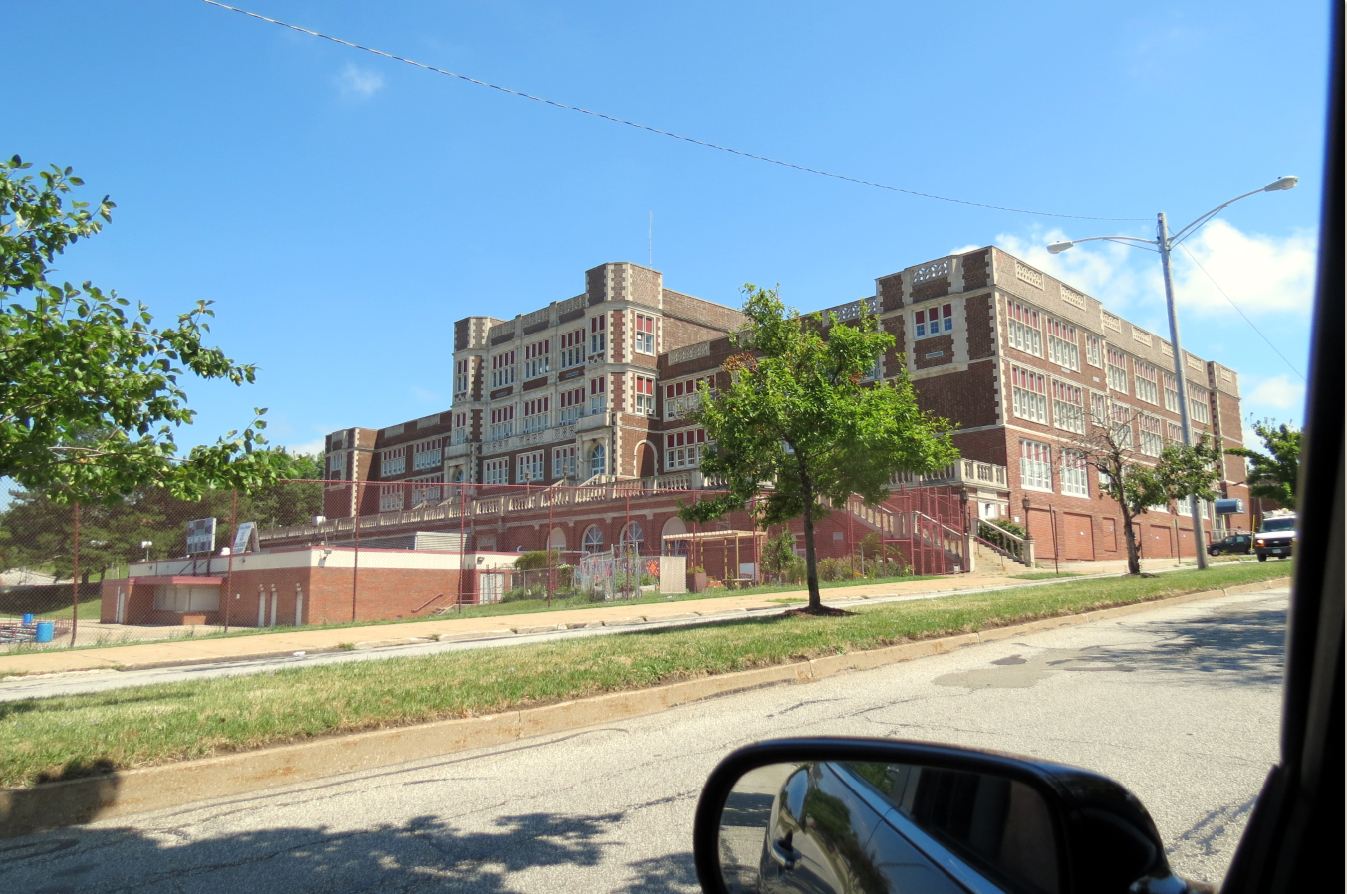
Stop #2 Erie, PA
I've always loved this highschool, the first time that I saw this place was in the middle of the night and I was mesmerized by the place, even without light just because of it's commanding position up on the hill, two roads intersect at a 30 degree angle at the bottom of the property.
My friend's shop just happens to be in the same neighbourhood as this place and we went downtown for lunch, pizza was delicious, it was cool just hanging out.
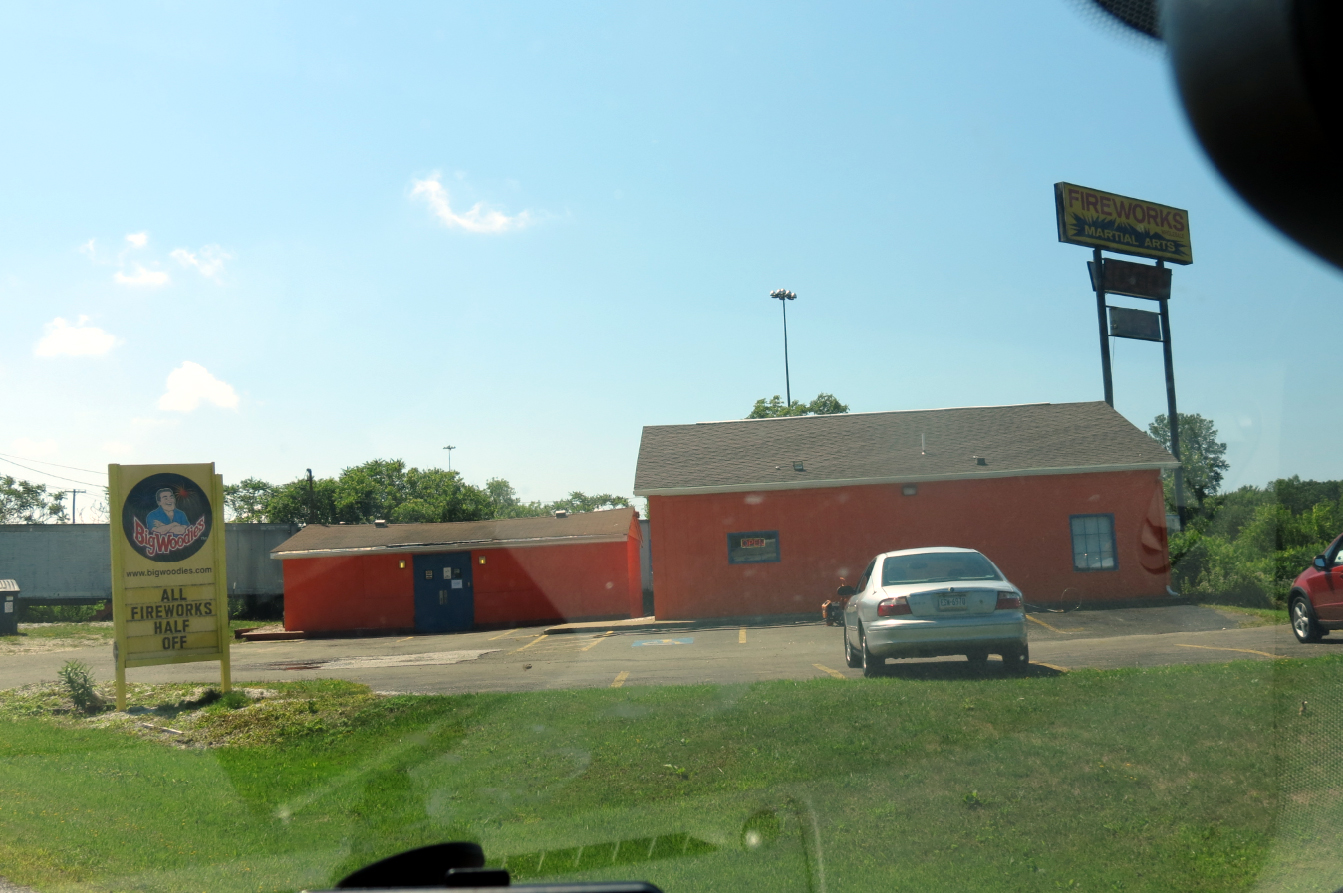
The Fireworks & Karate supply store!!! Believe it or not there's two of them, and even more other fireworks stores. The slogan for the store is: "The best times start with BIG WOODIES."
As a young child on trips to my grandparent's house, I honestly thought that the people from this city and area were mentally derranged. The reality of the situation is that they are on the NY/PA border and while it's illegal to sell Fireworks to PA residents, you can sell them to people out of state. It's kind of throw the contraband over the fence and it's their problem. They even have a room where the only way for entry is to show an out of state driver's license, it reminds of of the porn rooms that video stores had back in the day where kids weren't allowed.
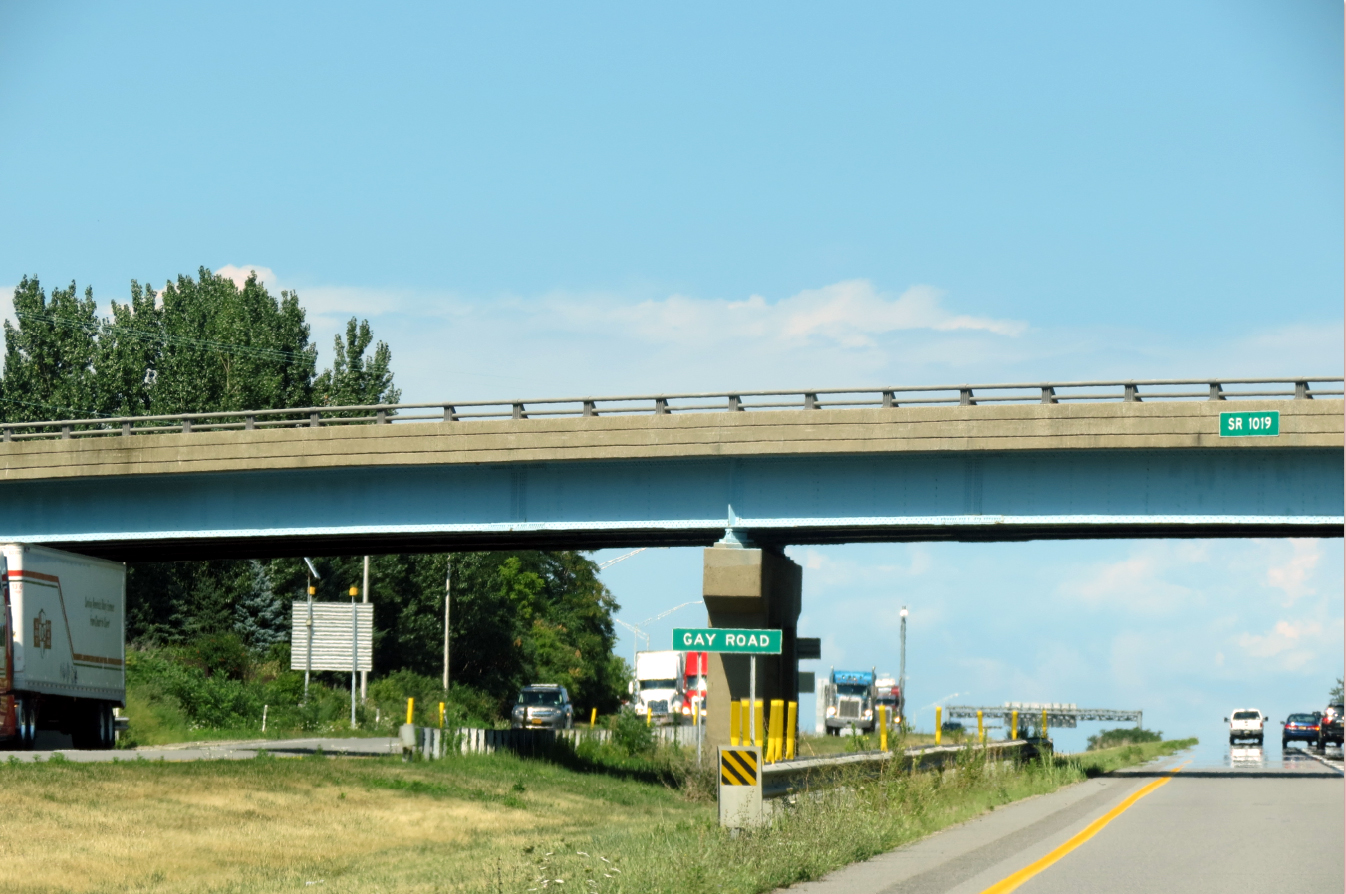
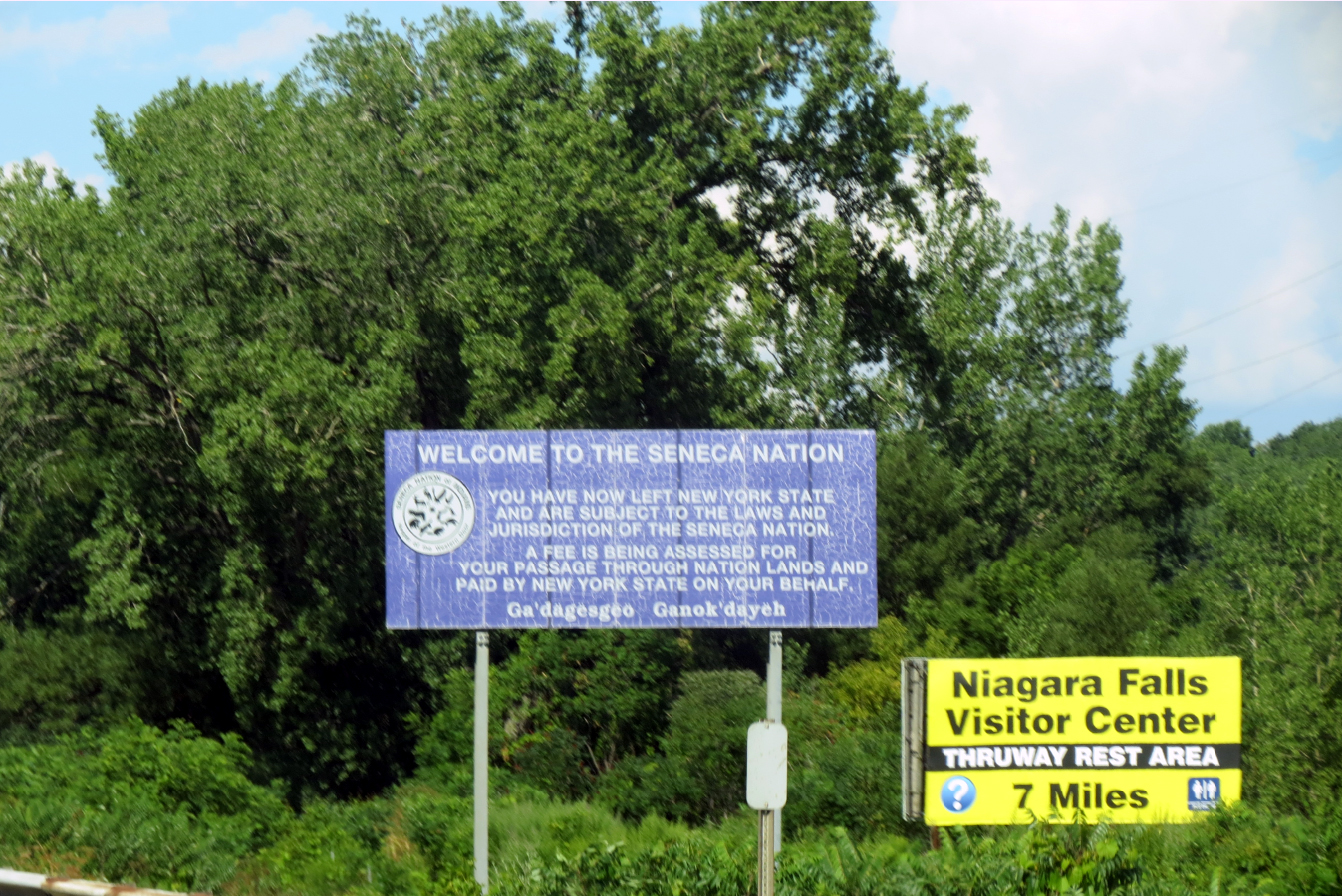
It's one of the very rare times that I've seen both of these sign intact, they're like the 420 mile markers that keep on going missing. Last bridge before New York.
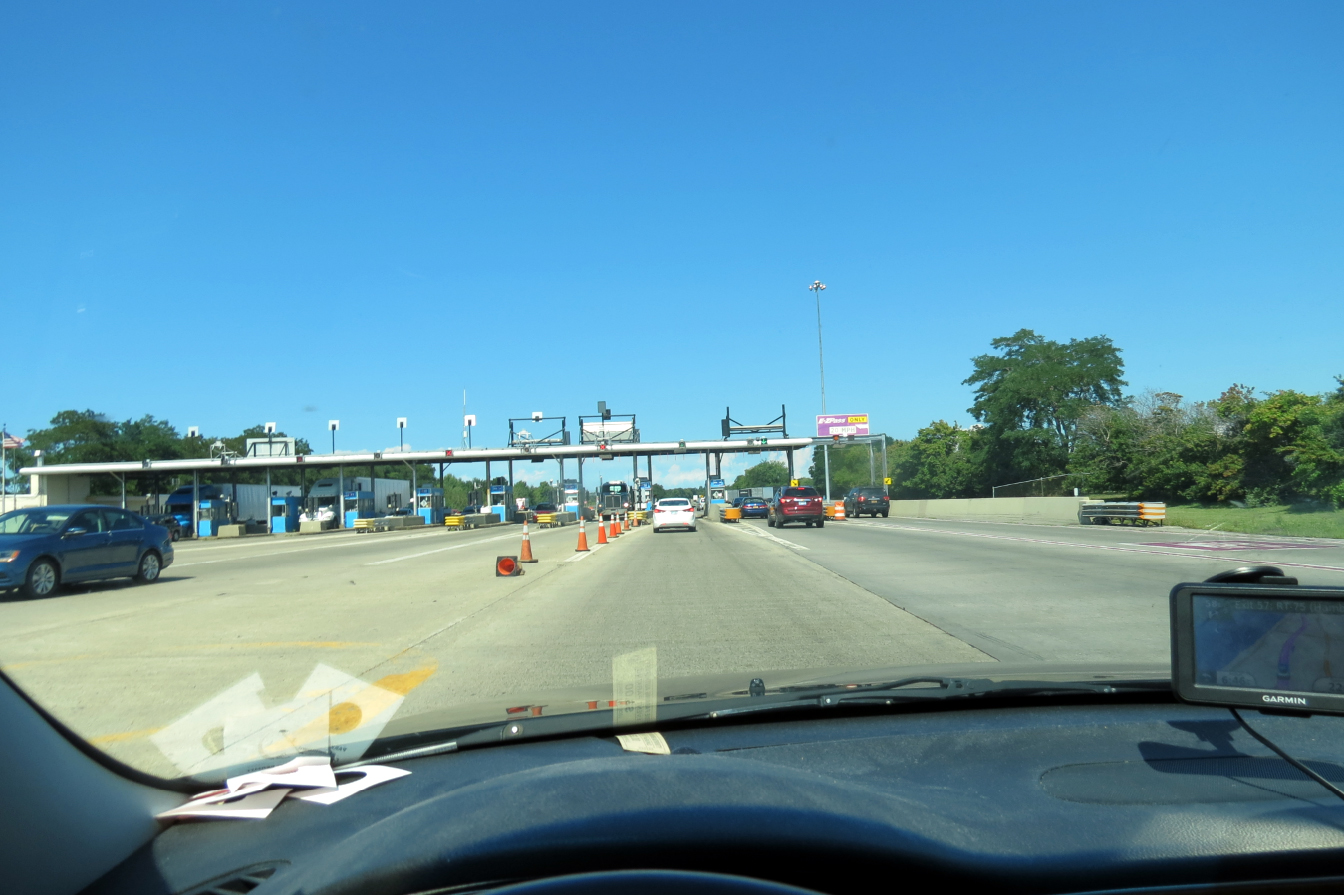
Toll Plaza!
The time during the trip where I left the US, but wasn't quite in Canada.
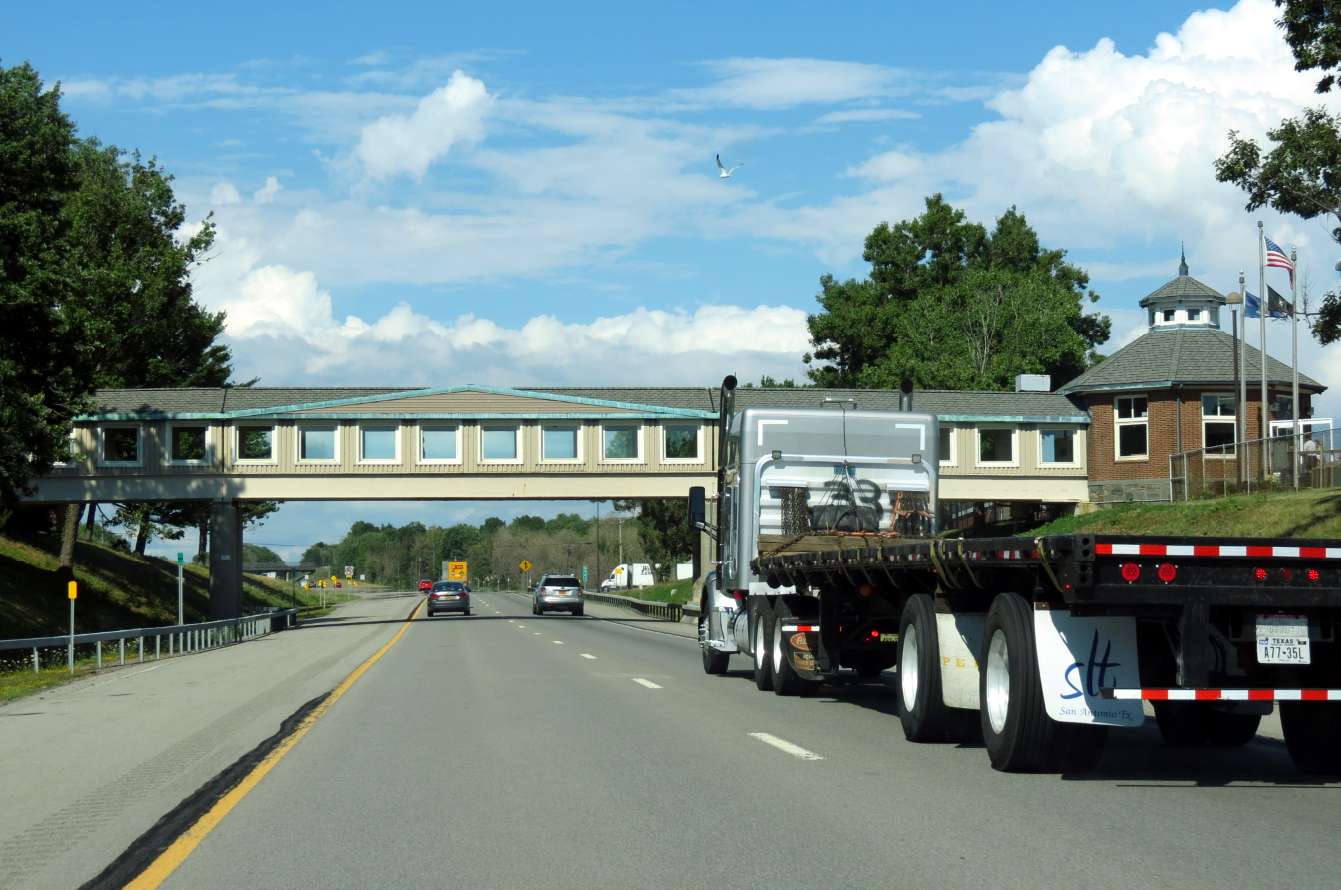
This is the Angola Service Center. There's twin gas stations on both sides, then a covered bridge that takes you to washrooms and piles of food options.
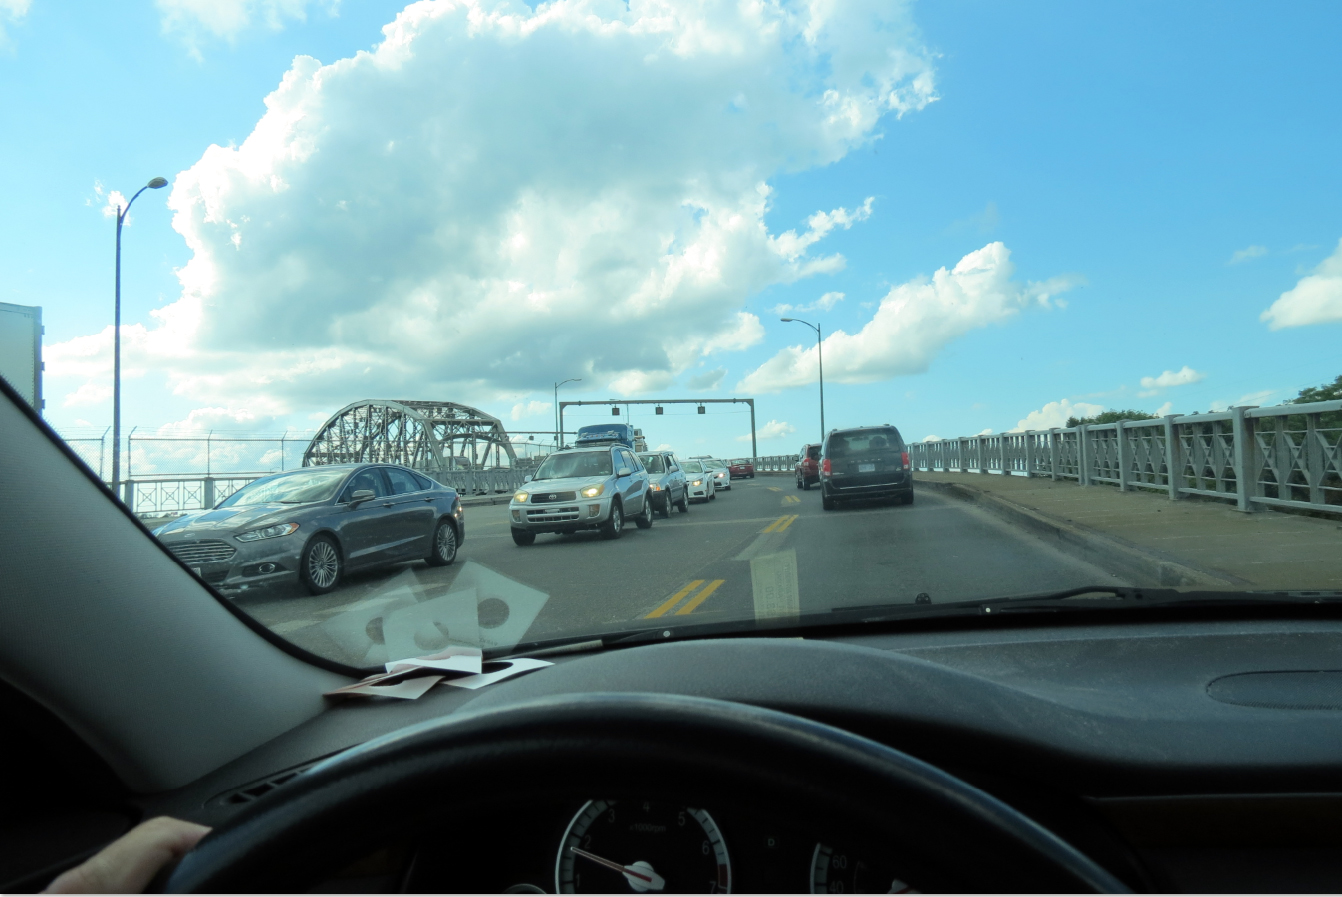
Peace Bridge just before crossing.
-
Would it be an option to paint the 9V motor wheels red like the way model railroaders paint their rolling stock wheels with rust colour?
Or make a round red glossy sticker to cover the black round part of the 9V motor wheels?
You can just buy red wheels. I already have mine for my upcoming creation. I just need some red axles.
-
The Exchange . . . . .
No pics of significance till the return trip.
Did I mention that I was collecting my E-bay winnings from what happened to be a wonderfully nice couple - at least one of German heritage (where the Lego came from).
They were kind enough, since they had a trip planned of their own, to meet part way, and cut roughly 150km off of our trip, which was very much appreciated.
Our trip from Breezewood to Fredrick wasn't so great, we ran into a 15 mile traffic jam which made our one hour trip, more like two hours. Despite our late arrival (we did text them, to warn while en route), they were incredibly nice. I have a big sedan with a very large trunk and the auction description did state disassembled, but their version of disassembled was . . . . we took the city apart and boxed the building's assembled so maybe a little bigger than I was planning for. Three huge boxes. There was a point when I thought I was going to be heading back to the Pittsburgh area (at least a three hour drive) sitting in the back of the car with a box on my lap as punishment for not cleaning out my trunk - there was a big cooler back there. But with their help completely re-organizing, we crammed everything inside. I felt bad not being able to talk with the couple more, they sounded incredibly nice. All I could do them was assure them that their Lego would have a new incredible home and would be cherished and shared online - as well as combined with my already massive collection.
I kind of wish that I wasn't driving, the views on the way home through Maryland in the mountains were spectacular, the highway had a commanding view down on wonderful rolling hills, and despite the earlier rain, it was quite clear up there. So no pics of that as the camera was so incredibly buried in the trunk.
On the way back it was dinner time and after hearing my friends talk about Roy Rogers I had to try it and their Gold Rush Chicken Sandwich - honey & bacon. I'm not a fan of honey, but threw caution into the wind and gave it a try, this stop and sight was unplanned.
Only pic of the return trip from my cellphone.
I had completely forgotten about the late takeoff of that flight. If it had not been late, this would have been one of the many planes that would have resulted in the death of far more people. We did not make the stop at the Memorial, but it was kind of one of those things that you see that makes you reflect, gives you pride and sadness all at the same time.
Between packing a couple flashlights and leaving them at my buddies' home, not ensuring that there would be lots of room in the trunk, and showing up about an hour late for our rendez-vous it was an embarrassing day certainly a far from spoiled one, and one that was only made that much better than great by meeting up with very understanding and friendly Lego fans, who even were kind enough to help try and load my trunk for me.
Next . . . . the trip home and it's 5 stops along the way.
-
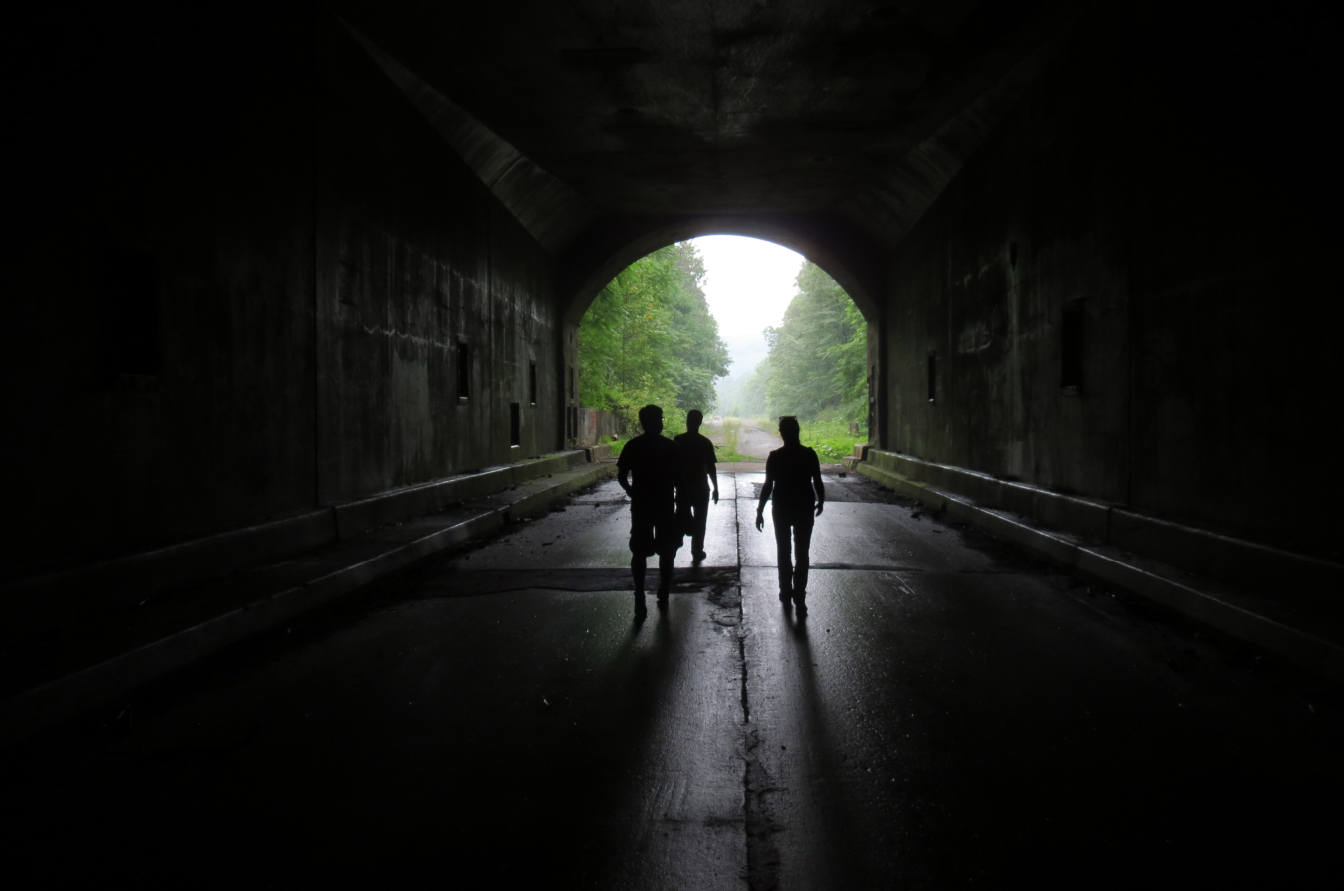
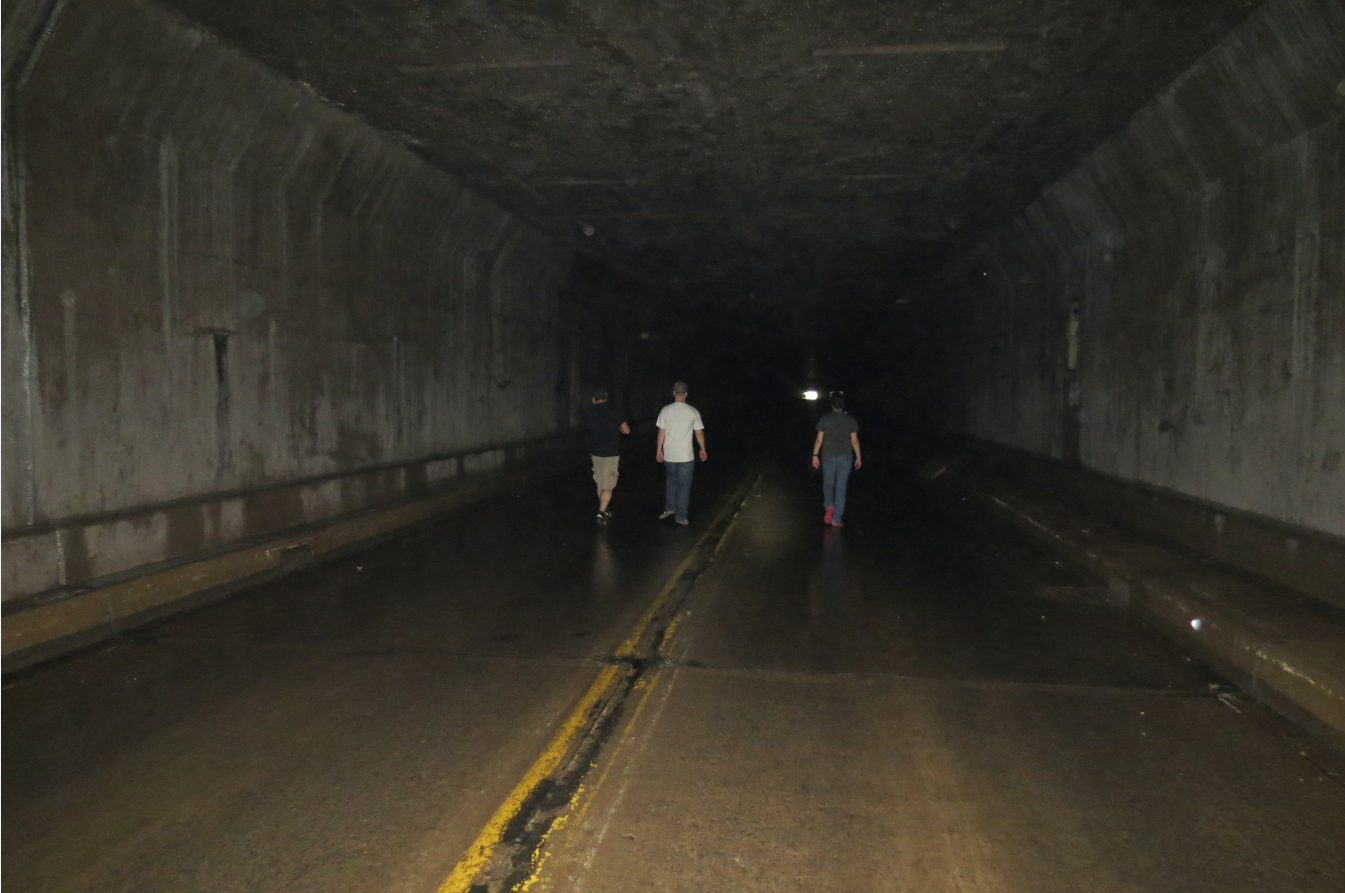
Congratulations on winning your eBay auction, and thanks for sharing the details of the road trip. The photo of 3 of your friends in the mouth of the tunnel is spectacular.
I never knew this piece of road existed, but it must be why the junction between the 70 and 76 at Breezewood is such a mess.
Thanks, in hindsight (and hindsight is always 20/20) I wish that I had a higher maximum bid because the Lego and the trip were totally worth it.
I appreciate the kudos on the pic, I'm a hack that takes loads of pictures, and sometimes the ones by accident are the ones that end up spectacular, but this was what I was aiming for while messing around in the tunnel.
To answer your question. Unfortunately no. To the absolute best of my knowledge this should have made the Breezewood interchange better not worse, it navigates the highway away from the city, I was miffed when returning up I-70 that this could be set up in such a way. I don't know if they just want to completely ruin their little crossroads of a city with snarled traffic and accidents, unless it's to have their economy supported by the Travel Center, gas stations and other such highway stops.
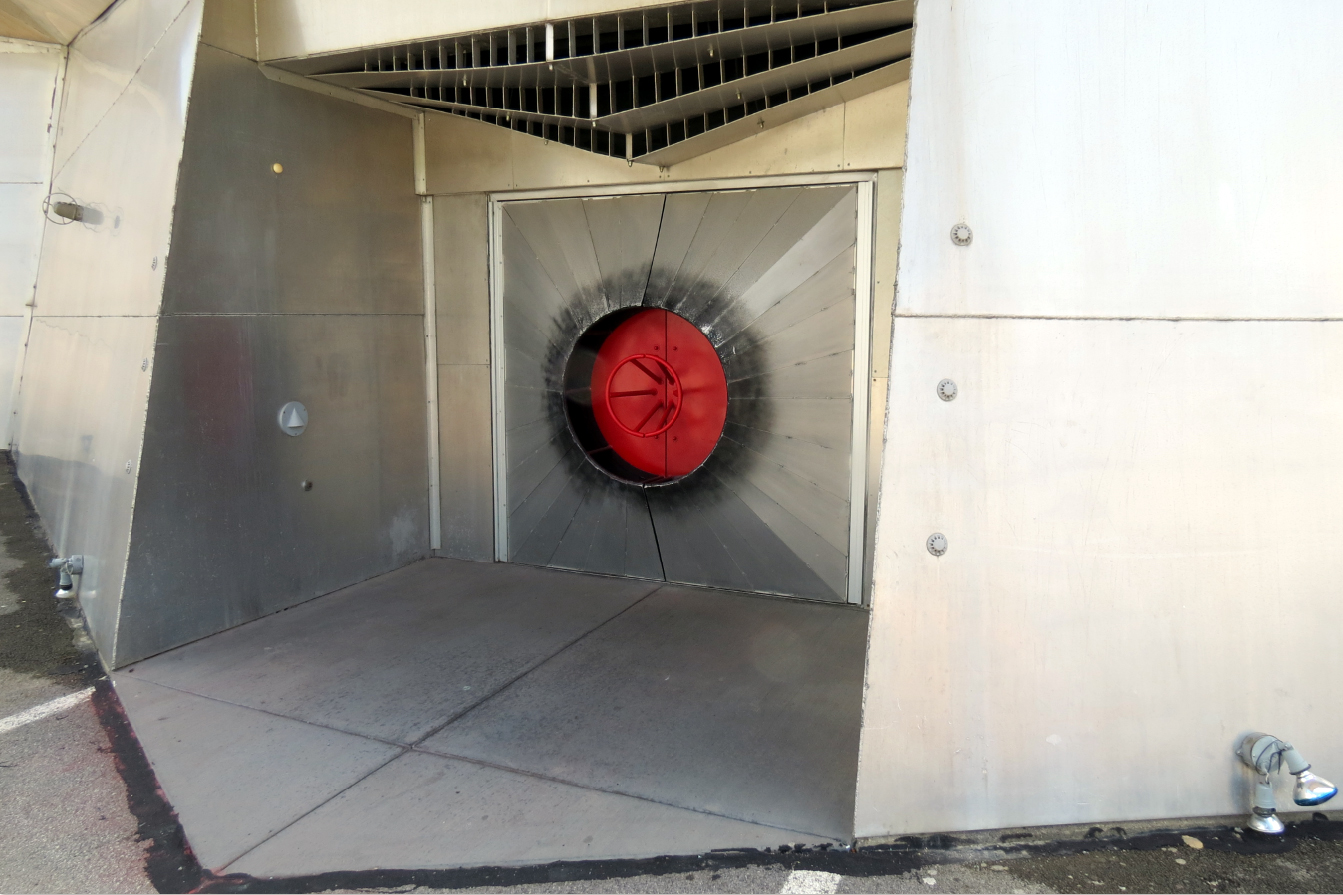
If you look on Googlemaps satellite view you can clearly see (it's also marked) where the Abandoned highway is, if you look carefully while on I-76, you can clearly see the exit and re-entry points, they are still paved. The third "abandoned tunnel" is Donegal Twp (find Laurel Hill Tunnel on the Map), there's another two-laned by-passed tunnel that is apparently in private hands as some kind of wind tunnel for aerodynamics or something. That bypass is obvious, but much lesser in length than the one in Breezewood, also about a 10th of the cost.
More pics & stories to come.
-
Day 2: On to Breezewood, then our final destination Fredrick, Maryland.
It's funny being Canadian, to me changing states isn't a big deal. To my entourage, it kinda was. One almost dropped out as he discovered that we'd be going into Maryland, where he wouldn't be permitted to have his piece. I'm not looking to create a political discussion, I just found it odd.
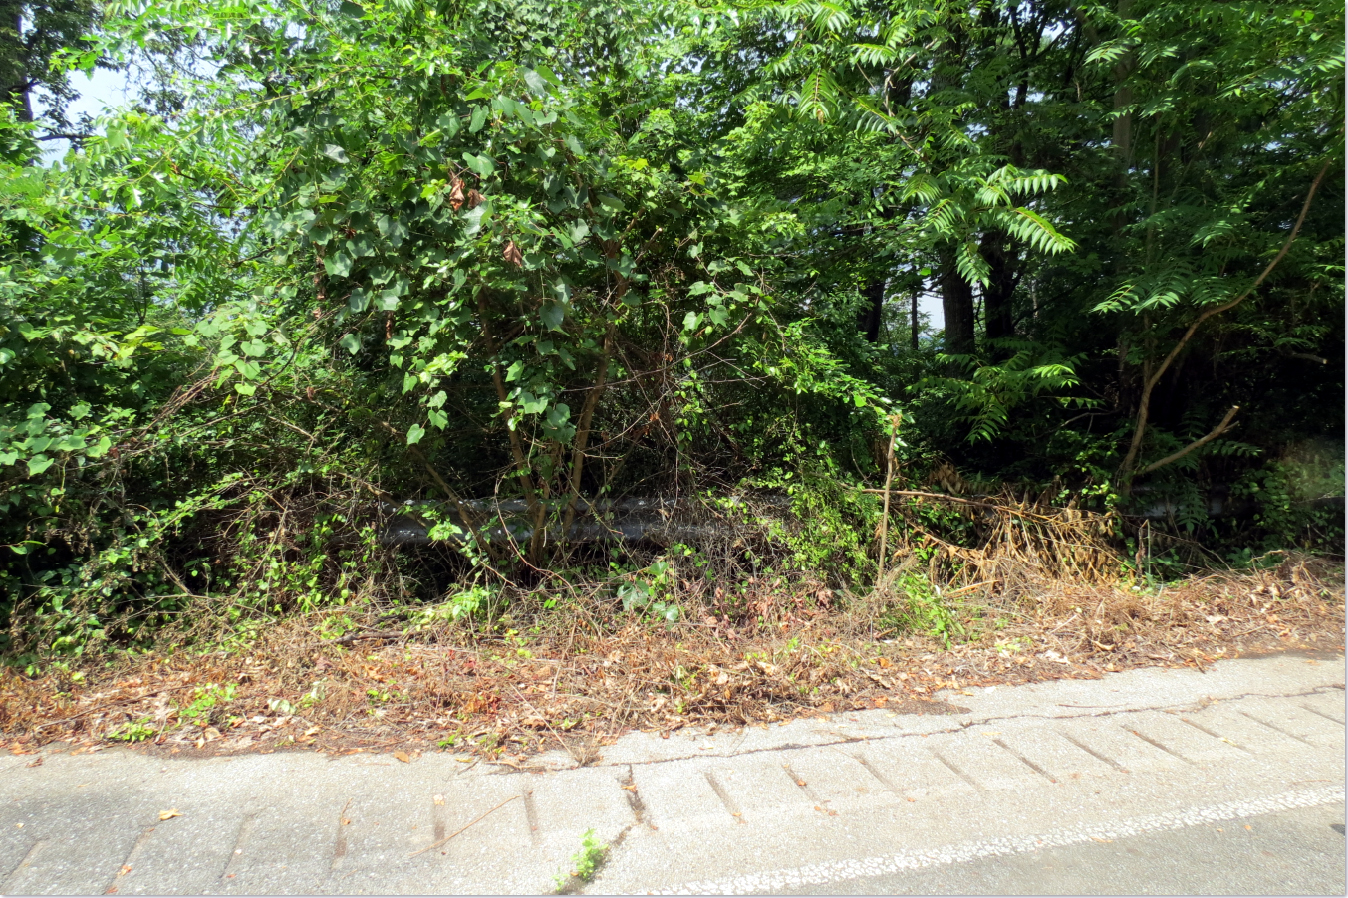
Breezewood is the the location of the 14 mile stretch of abandoned turnpike.
Some brief history. In the 40's the Turnpike was created to transverse most of PA, they used a series of train tunnels when making the Interstate. The highway itself was 4 lanes (two east, two west) and the tunnels would be only 2 lanes with 30MPH speed limits or less. Most of the tunnels weren't located near population, but as highway use increased the tunnel highway with it's 7 tunnels through the rugged mountain terrain were beginning to be more than an annoyance with lineups exceeding several miles at some of the tunnels. One tunnel was easily bypassed. 4 tunnels were twinned, but when it came to the two tunnels in the Breezewood area, twinning would have been cost prohibitive, there were two tunnels in very close proximity and one was nearly a mile and a half long. The decision was made to drive the highway over the mountains, and both the Sidling and Rays tunnels and their 14 mile stretch of highway were bypassed. The bypassed section even included a service center on the one side of the highway.
The pics below are as a result of abandonment since 1968. Somehow between four of us we forgot to bring a flashlight, but caught a huge break when Radio Shack had a mammoth one for half price.
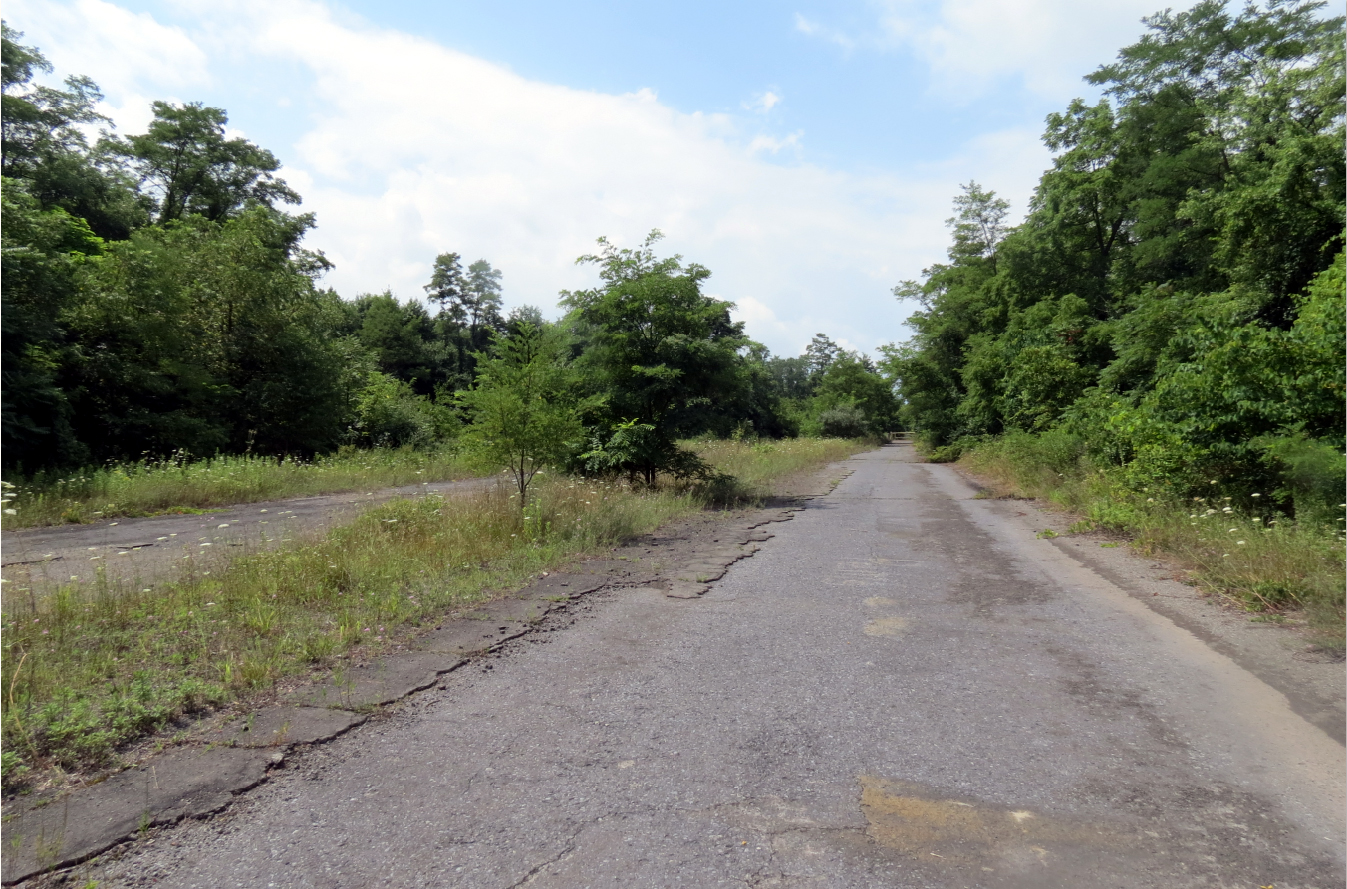
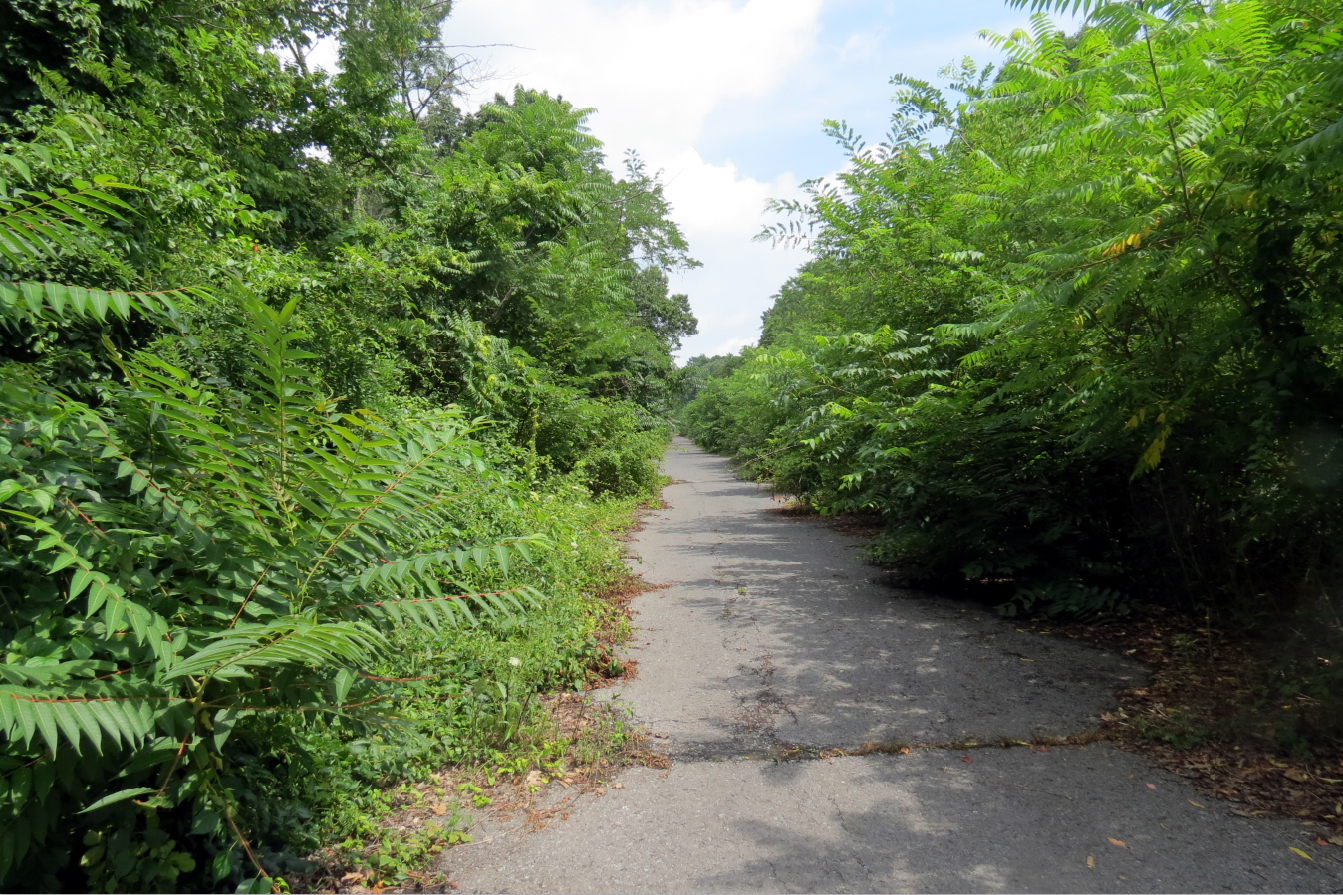
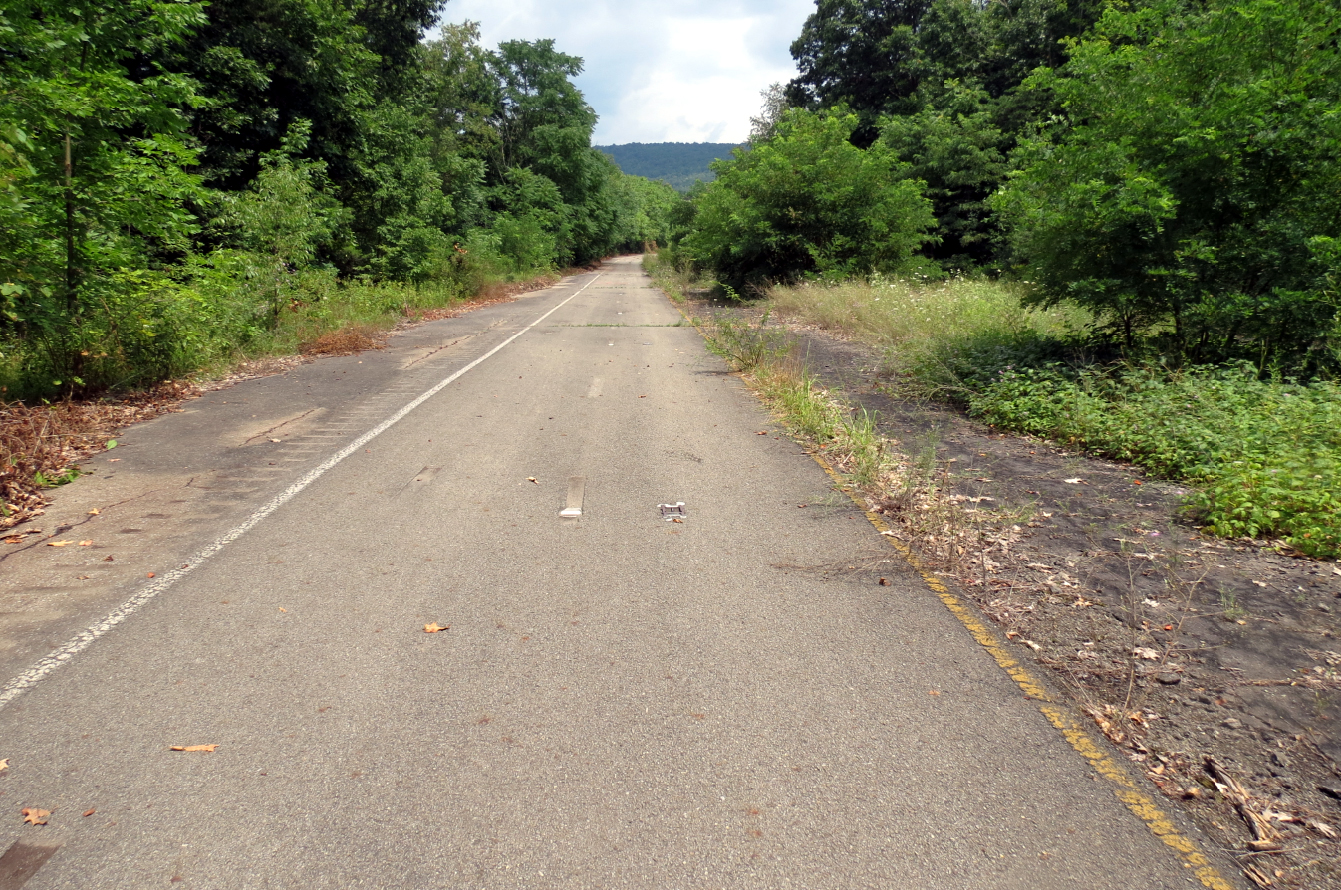
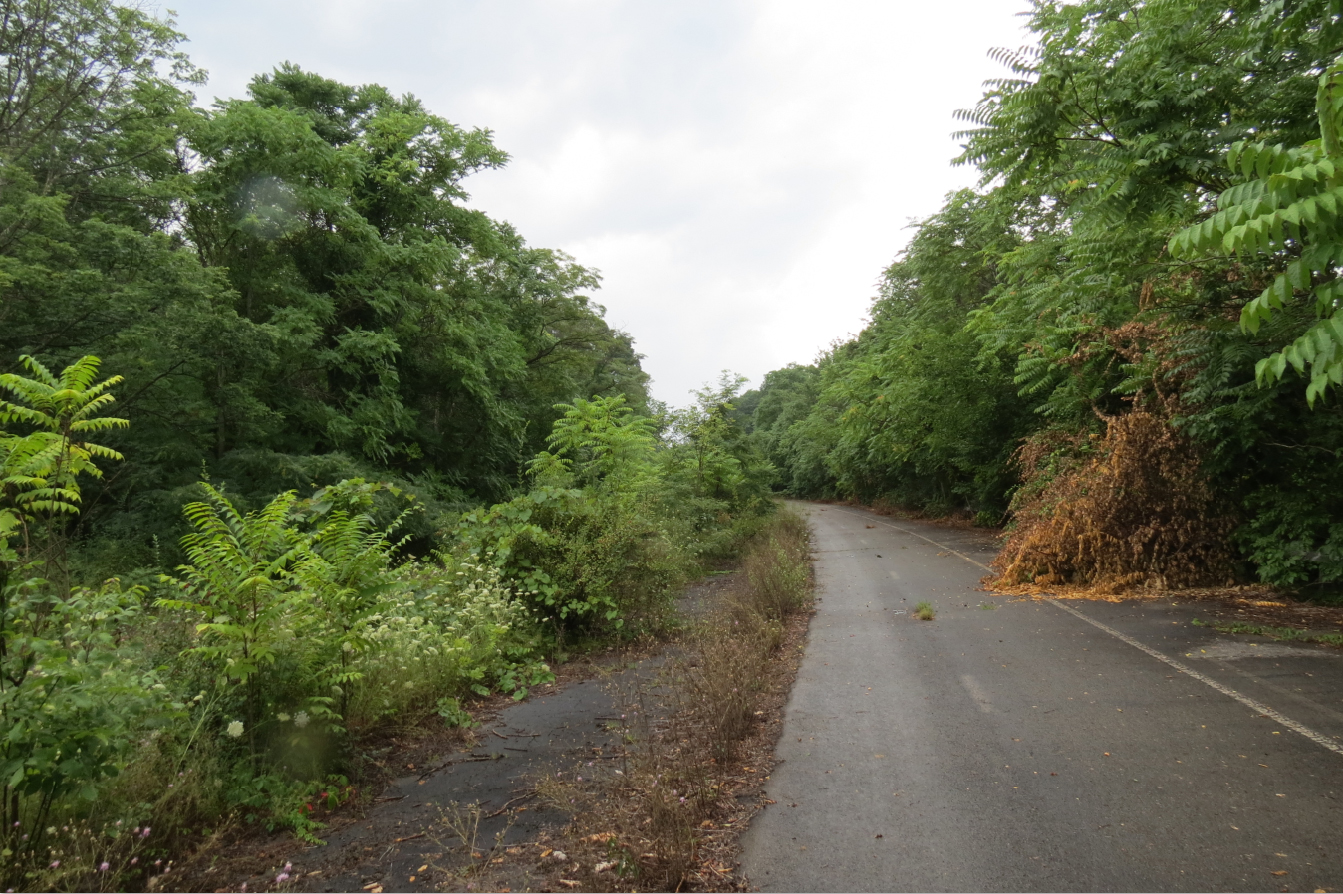
You can see some lights, and reflectors, along with rumble strips which generally are NOT consistent with a two lane section of highway, after the highway was decommissioned, PENNDOT started using the surface to experiment with reflectors, many different types, lane paint and rumble strips. It's hard to tell from some of these pics, but we're basically travelling on the left side of the road, there's a median and then another section beyond all of the weeds and trees to the right.
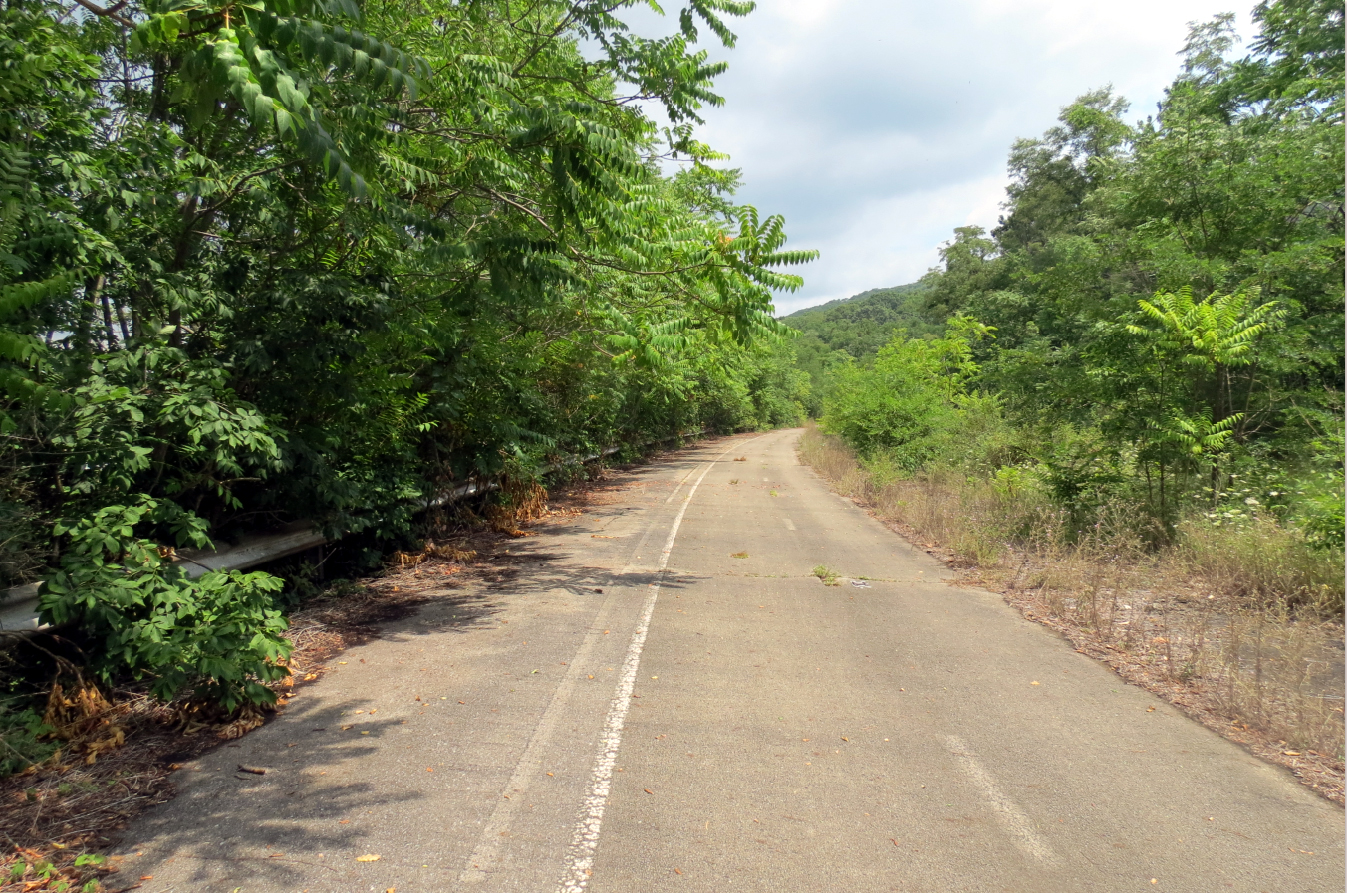

This is the first view of Rays Hill tunnel, off in the distance, it's the shorter of the two tunnels, here you can clearly see the other side of the highway. The highway is kinda sorta maintained by Pike2Bike - non profit, so you're not trespassing or anything by being on it. Even if we were trespassing I might have had to see this in person. Most of the bridges are out, but there is one that the abandoned highway has immediately prior to the tunnel that's pretty aged but still intact, it crosses a local road.
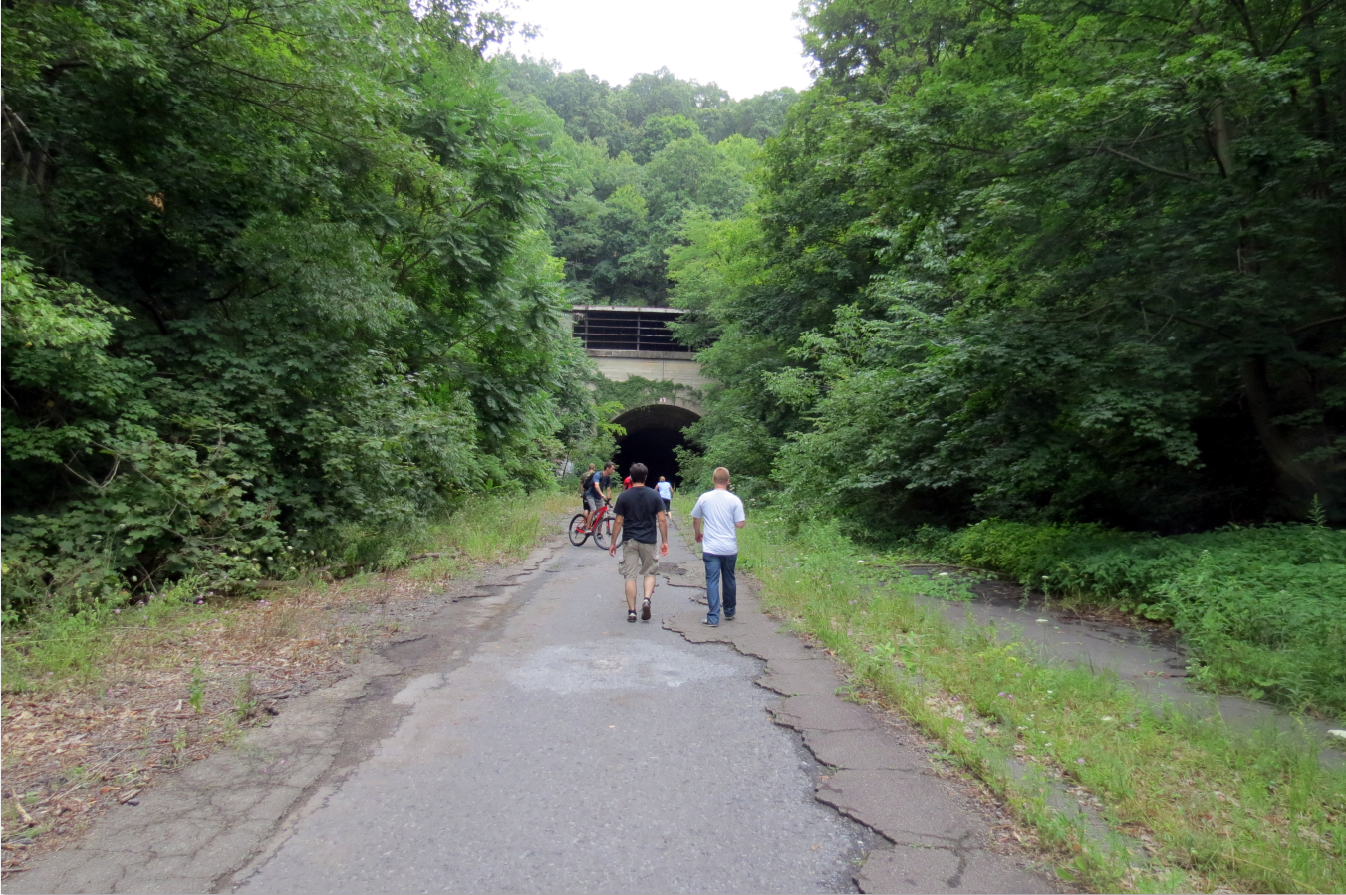
Two of my three travelling companions as we approach the entrance.
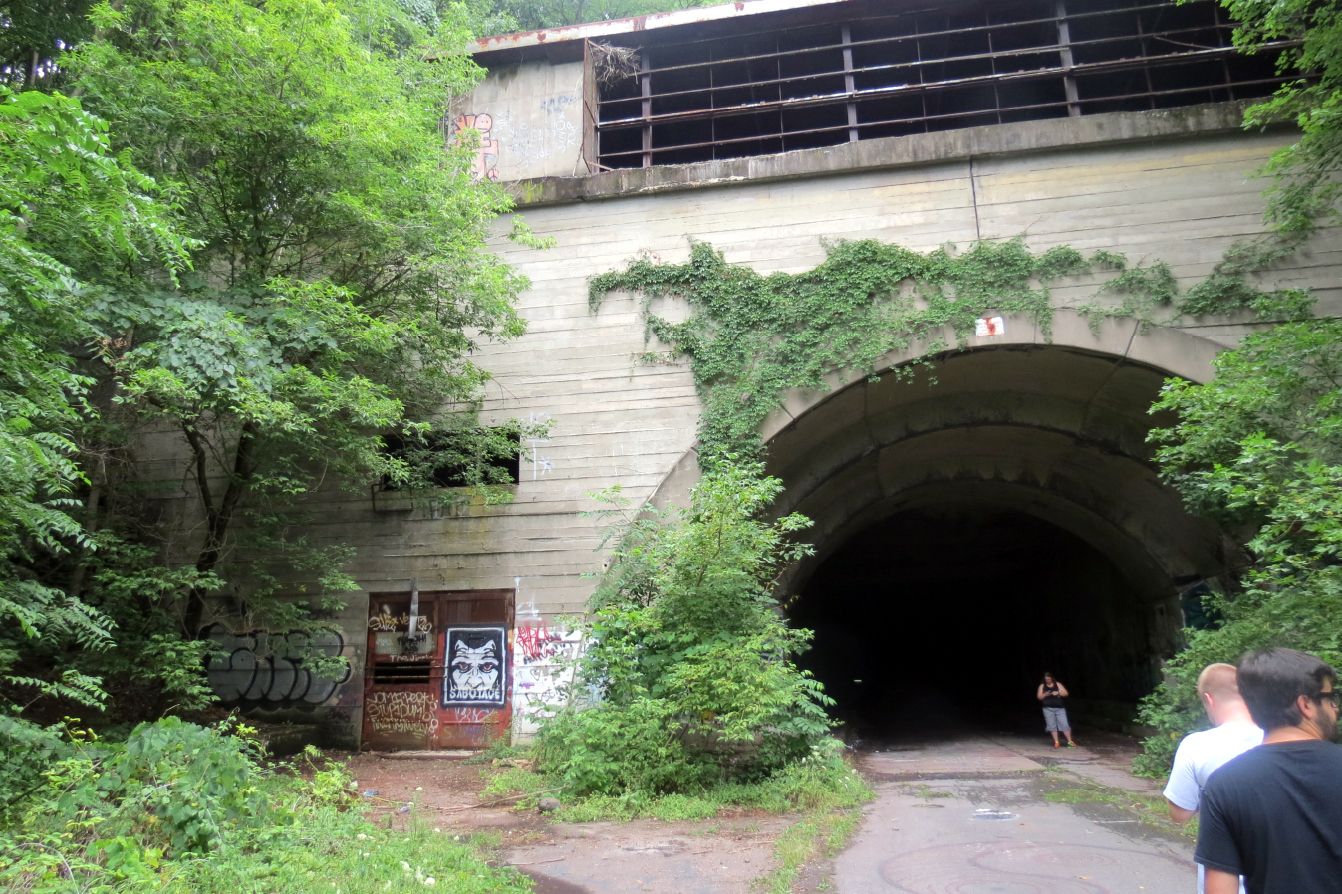
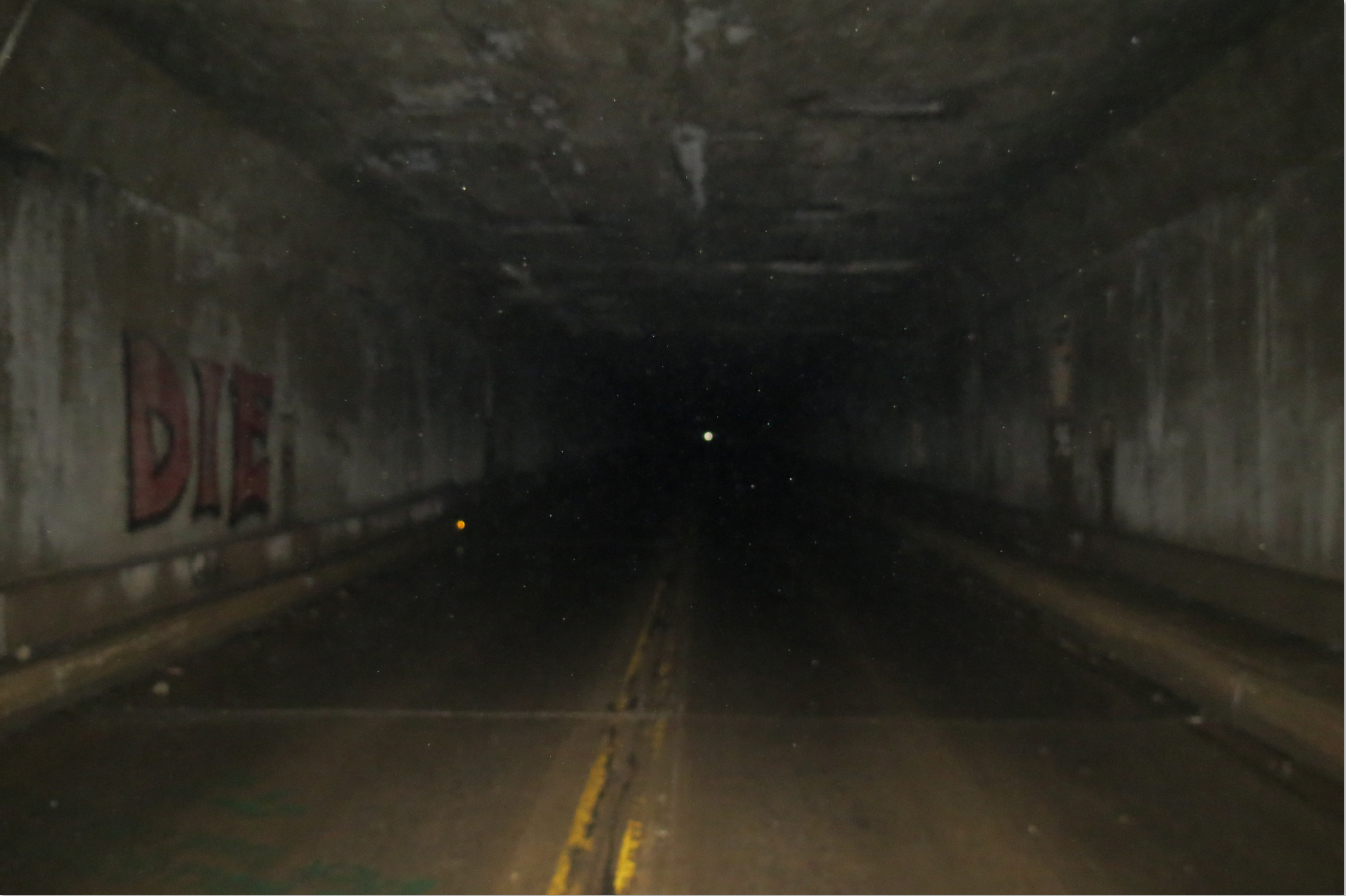
You'll probably recognize Nunzi. Graffiti is not just limited to the tunnel, but it's everywhere in and around the tunnel.
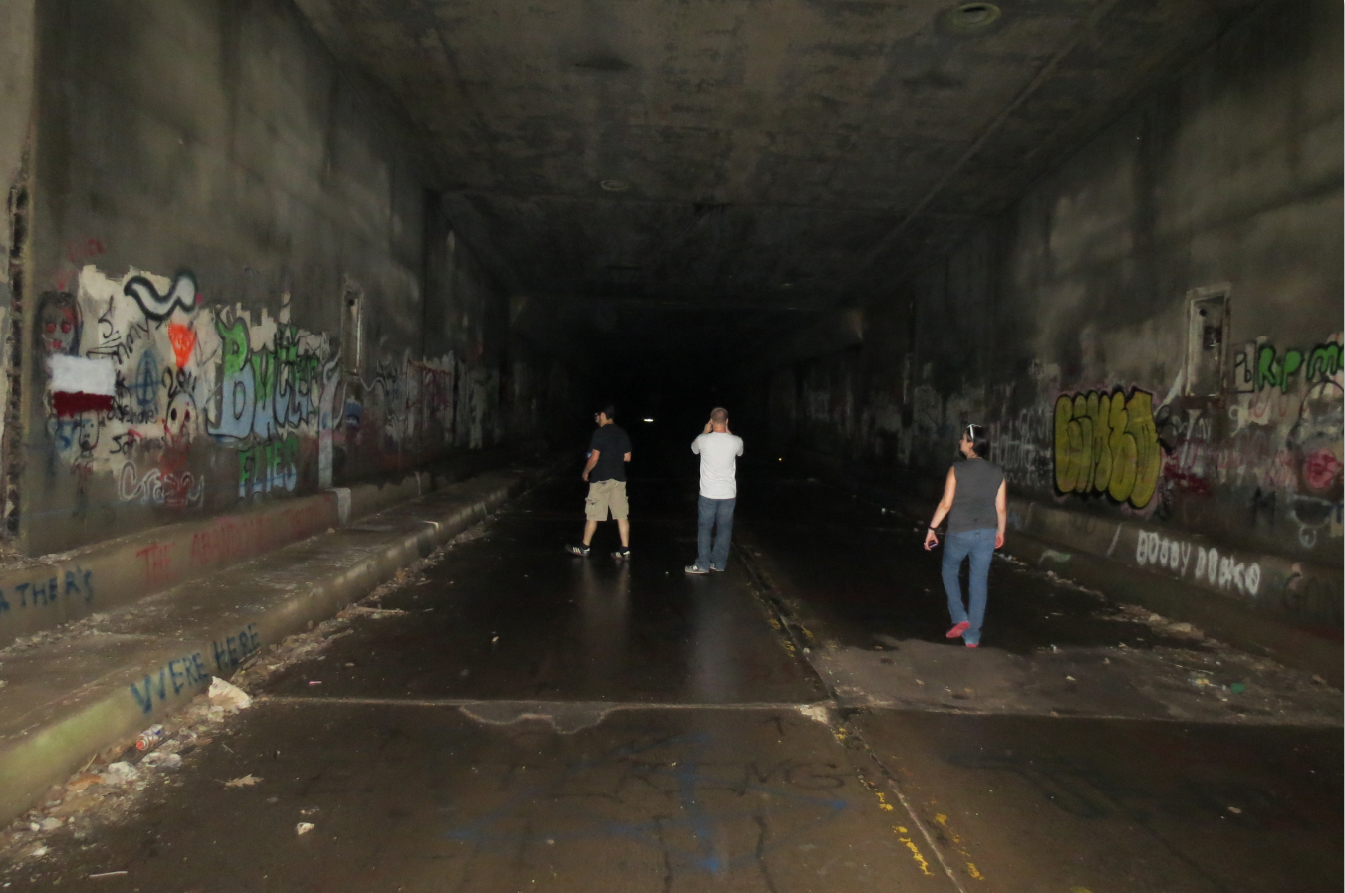
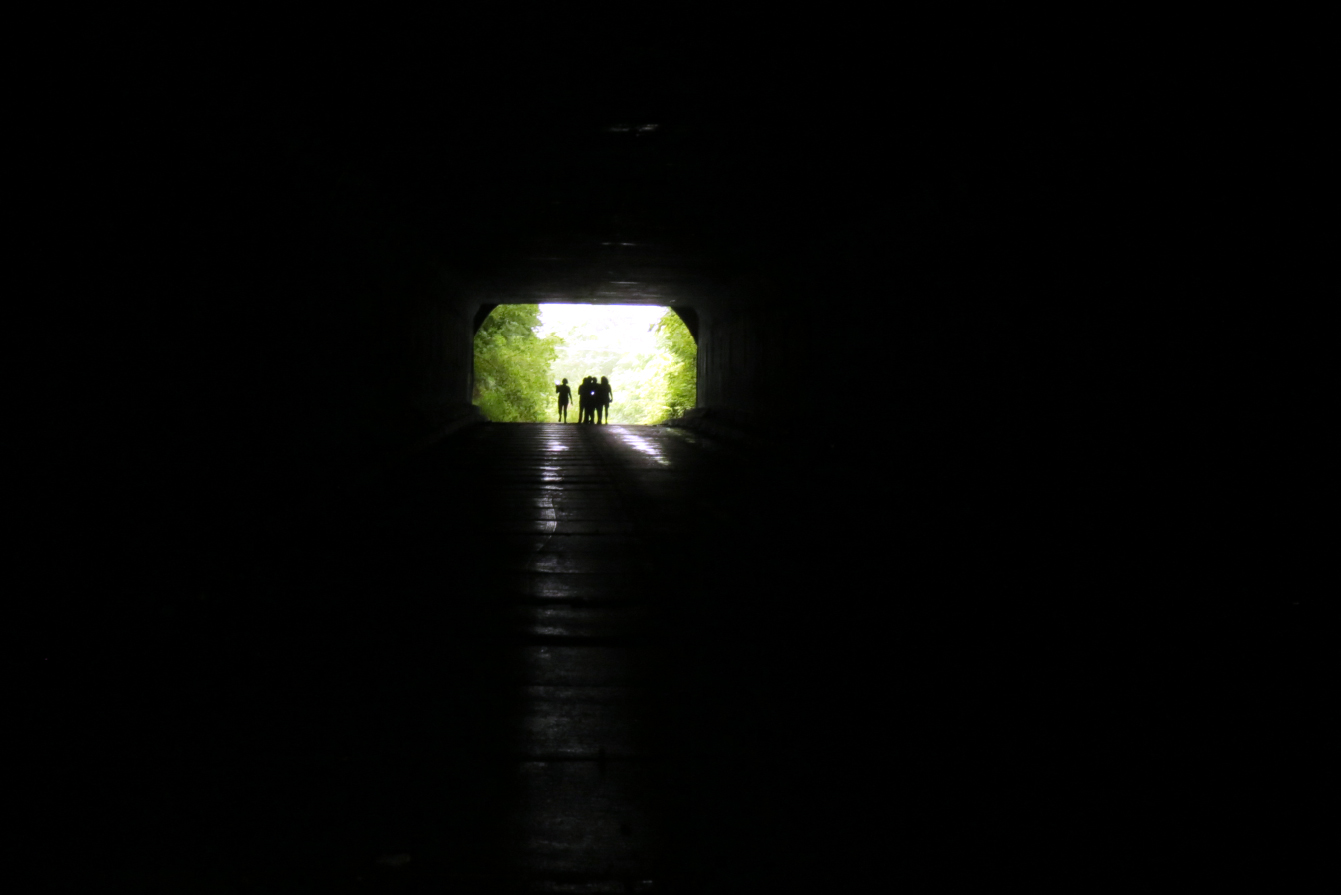
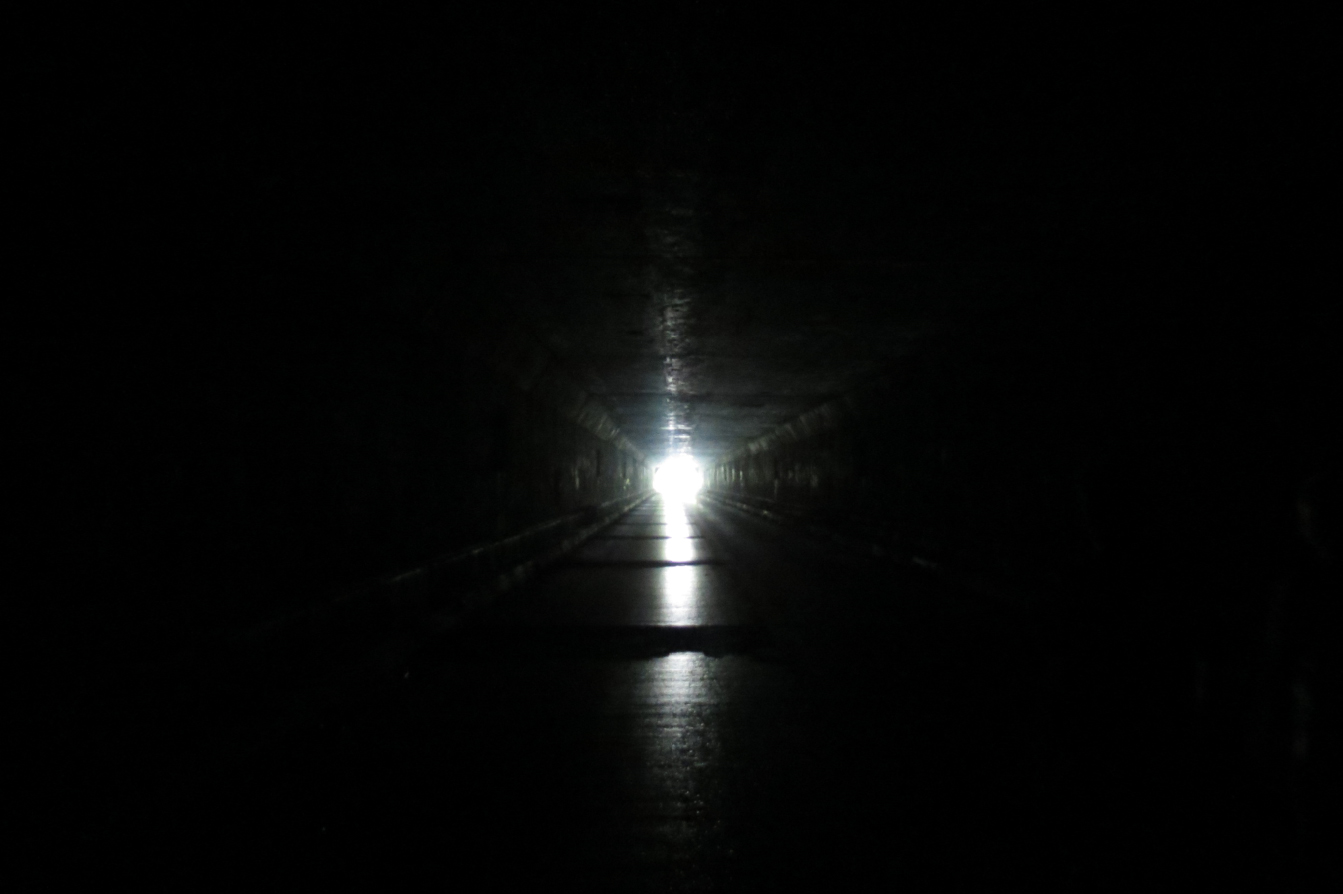
The tunnel is pitch black inside, once you're about 10-20 meters in you can't see a thing. The slit of light at the other end is the . . . . the end. Fortunately it's been a very dry year, so it wasn't moist and horrible smelling in there. My flashlight was very powerful, as is the strobe on my camera, but otherwise you'll just see black.
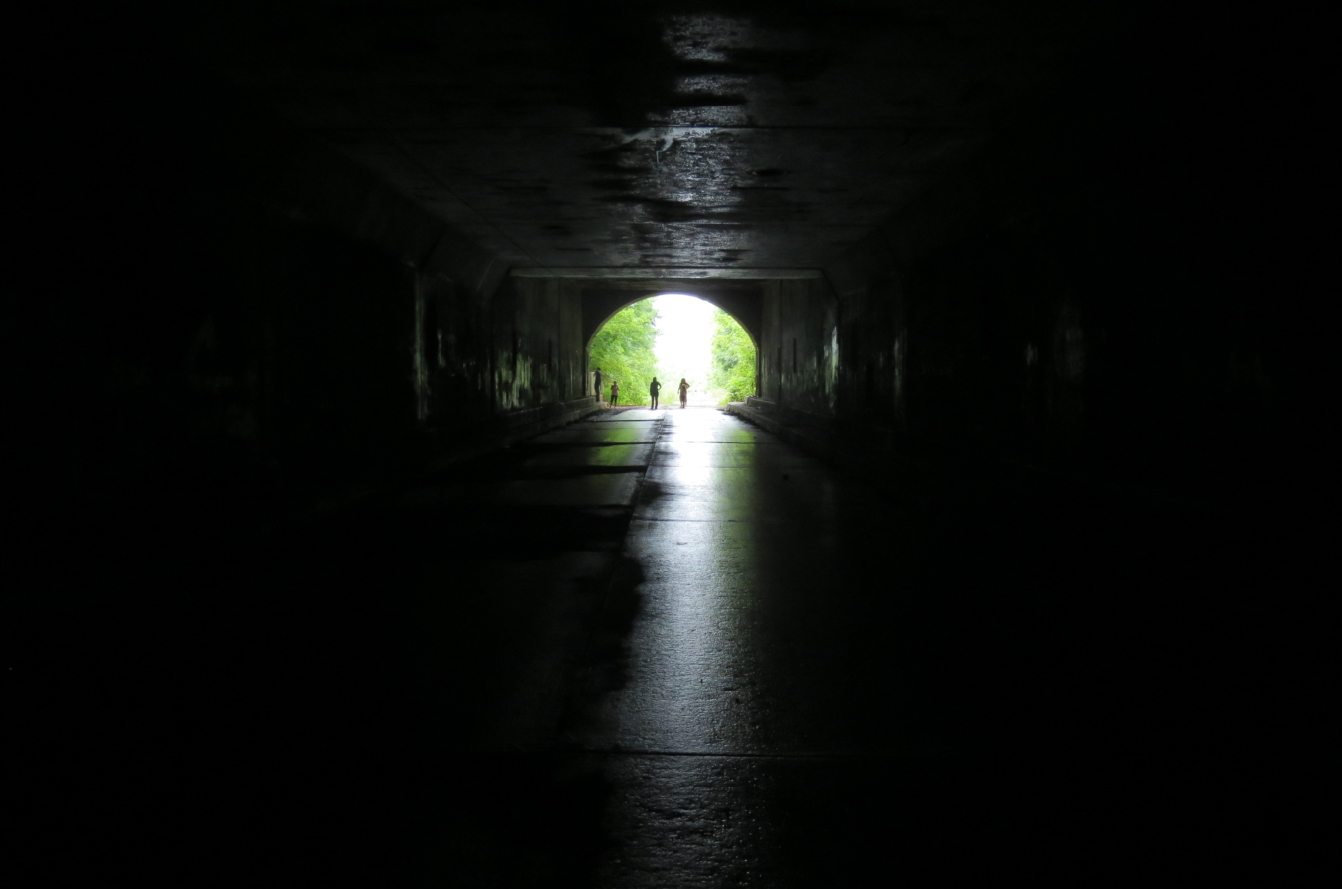
Finally light again. It was raining for almost the whole time we were in the tunnel. Both sides, its not infrequent to see completely different weather at the opposite end of a tunnel, this wasn't really the highest hill that this tunnel was built on. One of my friends is using this pic as their cover on facebook.

Not quite as much graffiti on the opposite entrance. There's some control booths at either ends, maintenance, the tunnels despite their age are in pretty good condition, you can see some concrete that has fallen around the vents on the ceiling. The highway & tunnel might have been abandoned by cars and the state, but not by Pokemon, there's lots of Pokemon there.

My friend found this on the highway . . . or what was the highway, no idea what the little dude is, sure was bright though!
-
There's probably a couple of you who saw just the 1500km round-trip part in the "Shameful Confessions" thread.
For those who don't know I'm from Canada. Tariffs are a pain here, and 12V lego is virtually non-existent anywhere in the Americas. If you spend 48 hours, you are permitted $800, so I managed to grab a few outer rails for my blue 12V stuff, a few cross overs and managed to snag a great deal on a pair of monorail points. Ever since seeing pictures on social media from a friend I've had the abandoned turnpike on my bucket-list. The key has been finding a legitimate reason to go there. An auction winning from just inside the Virginia border would finally be the catalyst - stated on E-bay local pickup only.
After much back-and-forth between the sellers and myself, along with a friend's house that I stayed at - around the Pittsburgh area. We settled on a date, and then it was just me my car, my friends and 1500km on the road. (For those with a keen eye for violations, my car was in park while taking pictures in juristrictions where there are laws against that kind of thing. I also had some help in the car.
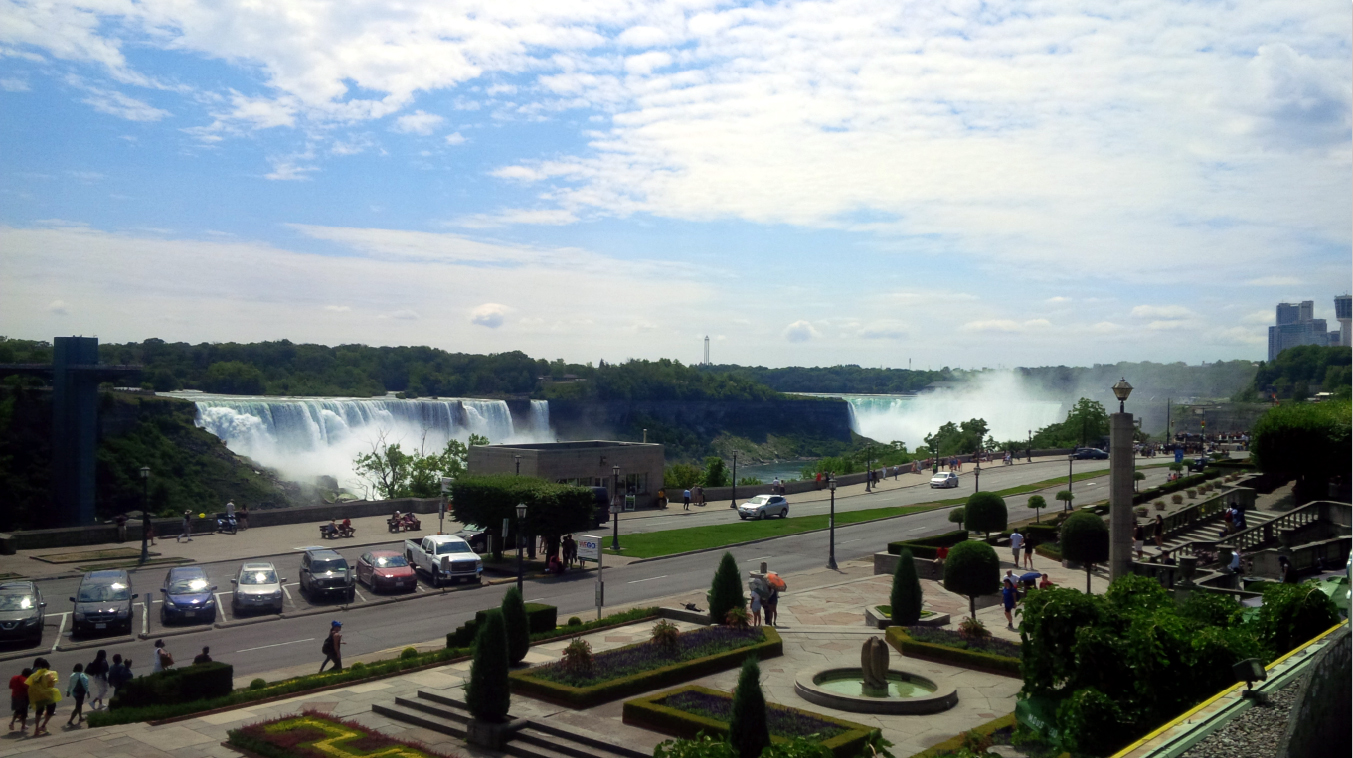
It's about an hour an a half to the US border. I selected the "Rainbow Bridge" because it was the long weekend. The picture, and by far the clearest I've ever seen in my lifetime at that location, is the duty free store, just prior to hoping on the bring. It's usually more time efficient to cross at the Peace Bridge, but inbound visiting the US, it's usually the worst or near worst of the three options. In all I spent about 30 minutes in queue awaiting customs. It's a pretty spectacular view.
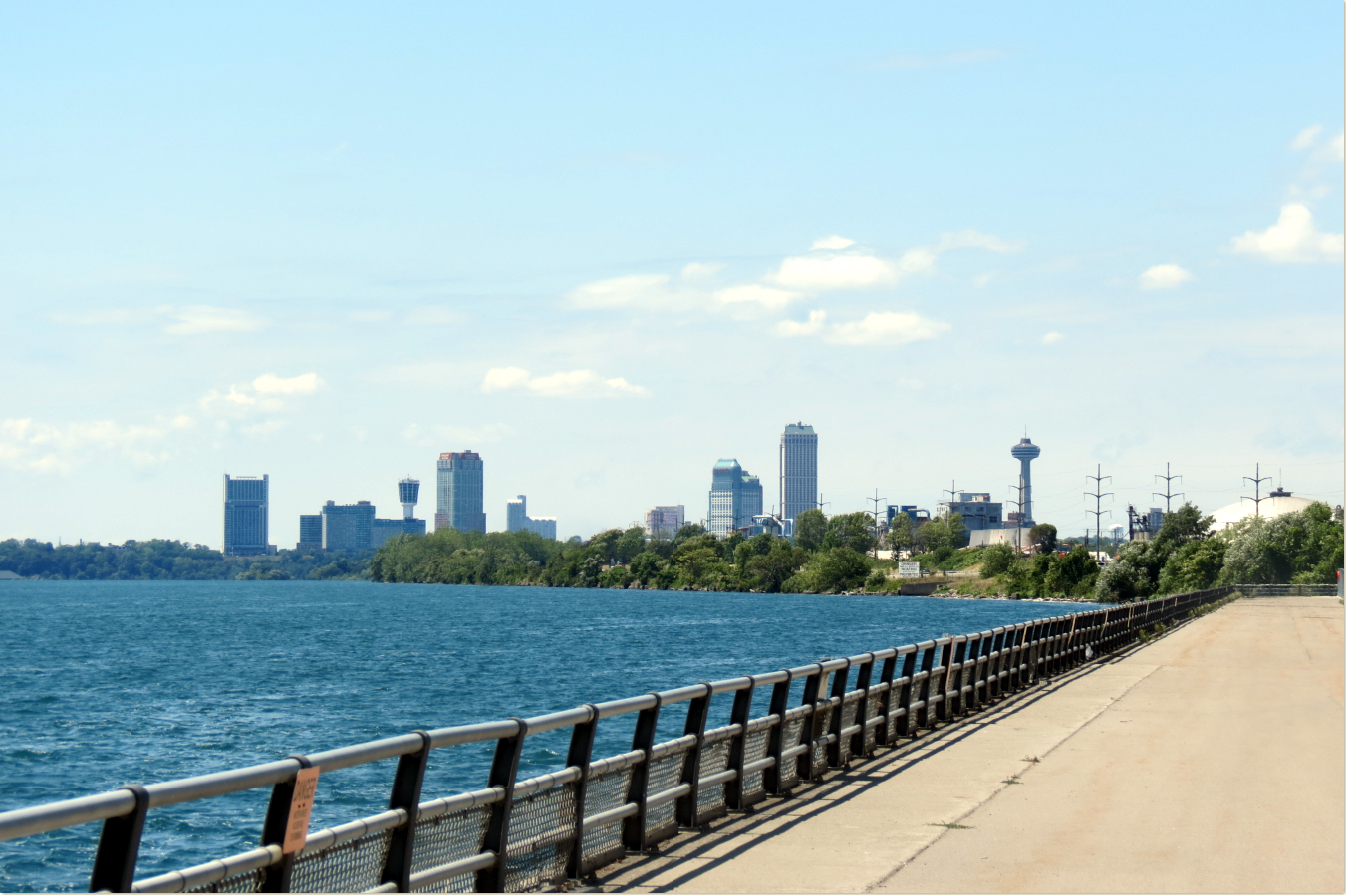
This is the view just prior to entering Grand Island. There's not much on the island, other than a small them park of sorts, which looks very dated. There's a $1 toll to cross into the island. This view, you can see the Skylon Tower, Minolta and the Casino down by the Falls.
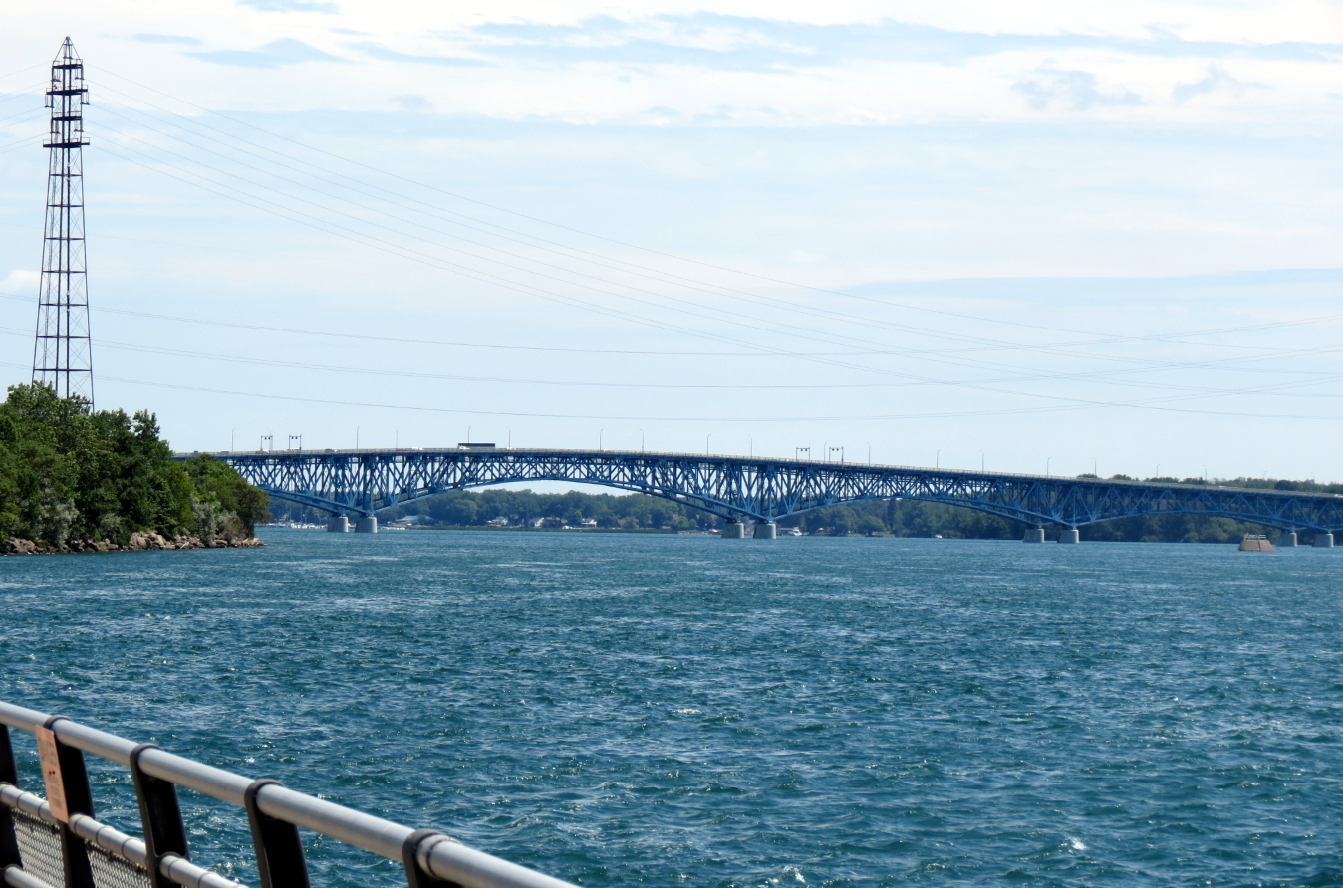
Obviously the bridge to the island. I look some Panoramas, and eventually I'll get around to processing some of those. I love the blue on these bridges.
I was just weirded out by these patterns, it's as if they wanted to prevent walking on grass at all costs. You can't really walk in a straight or perpendicular line at all, this is from the lookout, where the pic of the bridges was taken.

Bridges leaving the island are more attractive. But man are they skinny!!
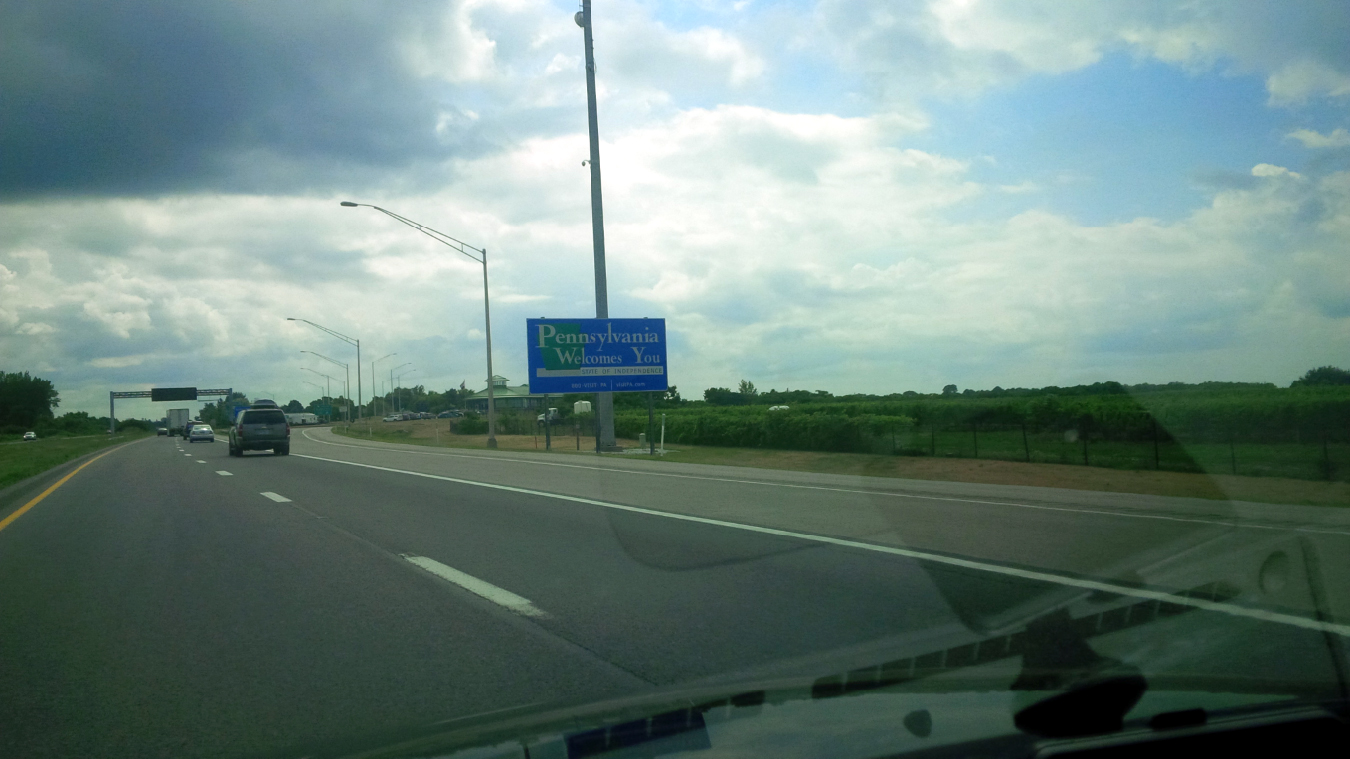
Welcome to PA!! This was the 10 minutes of driving on the way out where it rained, not hard, just just got a little rain.

PA is the northern border of where we can get this stuff and OMG!! That sweet, sweet nectar. I was so hungry but it was totally worth waiting for Pennsylvania for the Sweet Tea. I can't get this at home and every day without it I die a little inside.
-
Do I need all this power function parts (8879, 8884, 88000, 88002) to motorize it? Or maybe some of them aren't necessary?
The parts are:
8879: Remote control (not 100% necessary, and if you have another train set you can just use it's remote on a different channel)
8884: Receiver for the remote control (not 100% necessary, but close)
88000: Battery box - necessary
88002: Motor - necesssary
You can run the train with just the battery box and the motor, there's a reverse switch on the battery box to change the direction and the only pain in the . . . . thing would be that you'll have to chase the train catch if with your hand or press the button to stop it while it's in motion. I can't really say that I'd recommend that, but I also wouldn't recommend against it either. You can always add the other stuff late anyhow.
For the $7.99 that they are asking for LED lights, I'd add them to the train somehow.
-
I do love the idea of the San Fran cable cars, went out there and did that and man are they magical. I think that they said that it takes two years to replace each cable. And brakes are blocks of wood. Those things in free-fall are almost roller-coaster like.
I'm probably going to be in the minority being a GM guy, but I would love to see Vert-a-Pac train cars.
http://www.amusingplanet.com/2012/12/vert-pac-unusual-way-to-transport.html
Unlikely to ever happen since they are about half a century away from being at all relevant and were probably never used on the opposite side of the ocean, but would make a very interesting concept, and the "playability" of these things would be insanely good. Follow the link for some interesting stuff, that is probably beyond comprehension. All of the car's fluids had to keep in mind the 90 degree angles for the train rides as well. To be 100% clear, I absolutely would NOT want the trains full of Vega cars though.
-
You can usually tell who assembled the set once and who had their kids, dog and sunlight have fun ruining the pieces by the description. People who write things like: "Unfortunately this will be disassembled for shipping" Seem to think its a chore to make the lego creation, and aren't likely collectors. Look closely at close-ups of whites and they often tell a story. Will be completely disassembled for shipping is usually a hint that you're dealing with an adult lego fan, or collector.
I've purchased about 100 lots from Ebay. Honestly, the biggest fun is in the gamble sometimes. Recently I grabbed a monorail 6399, meticulously went through the pics and saw that every key part was there. Finally assembled at home and I'm missing about 10 common parts and a minifig, there's three extra minifigs and about half of 6396 (no baseplates) set inside the same box.
I recently grabbed a huge, mammoth 12V train lot and the lego was filthy dusty. I've been cleaning and drying for days. Negatives. 7740 train has one of the doors glued in!! Positives: For whatever reason there's 7760 trains and instructions when only one was advertised in the lot.
I can't really say that I've been overly surprised in a bad way, only positive surprises. The biggest nasty surprise that I've gotten was a recent bricklink order when I ordered some rare coloured plane windows and the bricklink dude sold them as double hole windows and they were single-hole and they refused to consider a partial refund. Was a store with 99.99% positive feedback - go figure!!
-
They are in the PAB sections of lots of stores, I just bought extras, they get plenty abuse in the pick-a-brick bins as well though.
-
HI, i'm new on here, i'm mainly interested in Technic but ive been reading through this train section and its got me thinking about buying some train parts and using my existing pf parts to build some trains. I know id need a train motor, tracks, buffers and bogies/axles. 'Ive been looking into it and i have enough money to buy these parts and a few more, so i was thinking about building a small 0-4-0 diesel shunter (i would only be able to have a small loop as i don't have loads of space) and having the shunter house only the train motor and the reciever which would be in the cab. To house the battery box i would have it in some kind of small 2-axle vent van/box car which would always be behind the shunter and then i would be able to add other cars later on behind the shunter and the vent van/box car. Would this be an effective way to start off in lego trains? I don't really want to start with a single engine and no rolling stock that's all.
Ive always been interested in trains since i was about 4 and with me living close to both Shildon and York (national railway museum, the Mallard and Flying Scotsman have always wowed me. I got to see the Flying Scotsman run last year btw) in the UK. I used to have a small hornby layout aswell which was mainly just small shunters so i kind of want to make it larger and more personal to me by building my own lego trains and having a lego version.
Anyway, im open to other suggestions,
Thanks in advance,
Joel
Just a couple of options for you, given that weight on top of the motor for traction is key (it's more key for longer trains)
1.) Move the receiver to the coal car or whatever you're putting behind the shunter.
2.) There's weight bricks the the early 12V trains used, they aren't too expensive, they also appeared on boats to keep them balanced in water for lego. You could add one or two of those to your train. The other advantage is that they come in black & blue and I think red, so that they could potentially be incorporated into your existing train.
3.) Use a 9V battery box from the 90's for the single 9V battery instead of 6 AAA batteries, far smaller, and again like the weight bricks you have a choice of white, red, and black. Can't recommend red too much since they are typically expensive since they are associated with the 6399 Monorail set, this would also have you splicing wires, and for those whom will point out that lego sells a 9V to PF wire - it won't work. It only allows you to add power to old motors and lights using PF, and NOT the other way around - I've tried - unless I was doing it wrong.
-
I just drove 15 hours and 1500km to acquire Lego, did other crap along the way, but yeah.
-
This weekend I'm making a trip to the US. I made some E-bay purchases to acquire the outer rails, and some crossovers, and one more manual switch to even out the bunch. My trip will involve visiting a mad scientist friend of mine. Since the one transformer has been hacked my mad scientist friend will be looking to convert to 110 for me (won't be done prior to me leaving the US, but I'll see him soon enough again).
The other purpose for my trip is to pick up a massive Ebay lot which is effectively a mini-city, with mainly grey era stuff (with some blue mixed in), with 7860, 7866, 7740 & 7760 with a bunch of extra rolling stock.
I believe that the blue stuff is more rare in working condition and obviously older, but the issue is that it's relatively ugly and that makes it worth far, far less. Expect to see a decent-sized blue layout on here with some old school lego surrounding it.
-
They aren't massive, but there is three of 'em.

-
Lego Historian Dude . . . . I feel bad because I've said nothing, but here goes:
I'm very interested in what you find, I think that when completed your train resource will impact and be used by thousands of people, despite the fact that only a couple dozen people on here will ever comment.
Some people have read my introductions here, but I'm from Canada, and made it my mission to acquire 12V train stuffs. I think that my first attempts to run 12V started with a 7745, and an oval of track, powered by wall adapter, and alligator clips attached to the 9V end, and then to 12V wires that went into the tracks (I never did figure out how to control speed and obviously direction was a matter of switching the polarity of the wires. I had to learn many things the hard way. Since then I've come a long way.
I fancy myself as the biggest 12V lego collector in my country. Some of my blue era stuff includes 721, 727 and 182. I really wish that I could help in some way with the project, as it sounds very interesting & fun, I just haven't really received many boxes over the years with my shipments. I think that I still have a virgin 12V straight rails box, and some 4.5 grey-era switch boxes. Nothing near the vintage that you've shown.
As a child, I demanded the 7715 train and a motor with 3 C-cell battery pack, over the 7722 train. I never comprehended how the 7722 train was so, so much better integrated with the stop signal and the direction switch for the end of track after a switch. I kinda wished that they had explained that better on the boxes.
Back then the 7715 train was $49.95 and the battery pack/motor was $49.95, you could have had the 7722 train for $89.95. What's scary is the pricing today. Today a battery pack is $17.99 CAD and motor is only $19.99. With inflation that's nearly a third and I guess you should be adding in a remote ($17.99) and IR receiver for another $18.99. But still it's much more affordable for something much better these days.
The thing that blows me away still to this date is just how amazing the 12V system was in the grey era with so many options. The other thing that knocks me off my seat is just how amazing things were prior to the grey era. I'm even more shocked at how amazing things were back in 1969 when they started with the 12V tracks. That, to me, was pretty amazing for that timeline as well.
-
A lego four studs 2 X 2 section makes one Duplo stud, unless you have those single stud Duplos. If I remember correctly, you can put lego on top of Duplo and it sticks, but not sure about the other way around. I would have to experiment with this, as I do not have any Duplo around the house.
-
Not sure if anyone else was in on the bidding for this (EBAY) it's a medium sized layout of 12V with a bunch of vintage city and road plates. HIghlights are 7740, 7760, and 7866.
http://www.ebay.ca/itm/331907122478?_trksid=p2057872.m2749.l2649&ssPageName=STRK%3AMEBIDX%3AIT
I have a very long road trip ahead of me (9 hours each way), but I'm thrilled to be picking this up. Also planning a side trip to the Abandoned Turnpike in Breezewood PA along the way. Getting excited just thinking about this!!
-
Saw this thread, visited last night.
For the second last day of shopping, there wasn't many really good deals to be had. City is 30%, Creator 20% off. They have a Mixer and a Ferris wheel IIRC. For city it's slim pickings, Fire Copter, Fire engine, Fire car, Swamp Police. Creator, there's none of the sets that retail for $30-150 that I can recall. No trains. There's some Star Wars and a bunch of odds 'n ends. My phone was out of battery so no pics.
I bought:
2 packs of 3 9V wires.
IR Receiver for $17
Fire Engine $22
Fire Car $10
2 packs of 10 blue train doors for $8 ea
1 pack of dogs (5 in a pack) for about $2.50 or something.
The up to 75% off claims are a little exaggerated in my opinion.
Disappointing to see them close up shop. It's so hard to operate as an independent selling Lego. They have incredible control and leverage on the market!
-
Recently I came across an interesting ad for some 12V odds 'n ends, and decided to travel 85km or so, to make a purchase for $50.
The person who sold this appeared to be a student, I was planning on asking how this ended up in Canada, as I cannot find any proof that any of the 12V stuff was ever sold here, but with her being younger I kinda gave up, she seemed eager to have her money and close to door transaction over before I could realize that some of the stuff wasn't in the best of condition.
Here's what I got:
- 90% of a 721 train (this is the engine only variant, and all of the unique parts) with a working 12V motor, and original instructions to build the train (I was missing much of the black section where the driver would go at the back).
- A bunch of other 1969 era original instructions.
- 2 transformers (one of the two had broken plugs wedged in it, the other had the european plug end cut off (I think that they were powering this with a car battery or other source)
- 7 12V track switches
- 8 Remotes for the 12V track switches.
- 2 Track power pickup (not sure of the technical name, but they power the tracks and go to the transformer).
- Random lego bricks that have nothing to do with this stuff, but are old
- One broken 12V motor with a pair of power pickups.
- 63 Straight 12V power rails
- 63 Curved 12V power rails
- 1 level road cross over piece that someone decided should match the track and coloured blue with a crayon or marker - It looks horrible!! Everything (aside from the wires) is in decent shape considering it's about a half century old.
Absolutely no blue outer rails, I happened to have some because I have a 182 kicking around that I had purchased mistakenly from a newspaper ad around 1992 or so - not knowing that there was even such a thing as blue-era trains (I was kind of confused and disappointed when I got to the door and saw the set, after being very excited over the phone about it at the time). So I was able to test the track and trains (I only have a full circle of blue curves). My first attempt was using my grey era 12V transformer, and then the Blue era one after using pliers and working the broken plugs out of the switch power area. I'm not sure if anyone else has tried this, but I didn't think that the switches worked as well using the grey era transformer, and the train was most definitely faster at top speed forwards and reverse using the Blue era transformer. I'm assuming that you were intended to put the switch remotes on the top of the Blue era transformer, not sure??? They look good up there & fit perfectly.
Definitely a purchase which has me scratching my head. I probably would have paid much more if they were asking it for this. It's very interesting to go back in time and try and work with this stuff, feel blessed to have gotten this lot.
-
I realized only within the last week or so that a minifigure's hand is a stud.
After a year of elves sets.
It's okay . . . .it took me roughly 20 years to realize that the universal cargo moving logo, or shipping center logo was that. I owned 6391 as a child and thought that the logos all over the set referred to the building's ability to separate and fold into itself.
-
I can never seem to build anything with what I have on-hand. Every design results in several orders from Bricklink to finish the project. And these are rarely anything larger than the equivalent of a $50 set.

Welcome to my life.
I still remember being a kid and just improvising. Bricklink is ruining my adaptability. Everything is perfectionist level. I'm also at the point where I'm beginning to be in desperate need of just plain bricks. Not special anything . . . just bricks!!
-
I should mention that the front end is close on the inclines/declines, but does clear, I did a mock-up to make sure. There's milimeters of clearance on the hills, and that's about it.
-
Just a quick intro . . . One of the idiot-proof things that I love about lego monorails (at least 6990 & 6991) is that they have lights so that you remember that have the battery pack on. It's on the same, but my PF trains all have lights in them for the same reason . . . and it looks cool.
At first I was stupid enough to buy the parts so allow for a light on the roof-top in place of one of the vents, then came up with something a little better.
The lego 6399 is the only monorail train that isn't equipped with a 9V light, so . . . . someone's probably done this about a billion times, but I've tried to make a mod to the train to get it lit up on the front end. It extends the length of the train car 2 studs and there's a one plate height increase. I've pictured it with the prior to updated rear car. Would love to hear opinions. I do wish that the front windows would line up perfectly, but I think that it's an improvement in appearance. With a proper length cord, there will be no loss in seating. The second car, would have a one seat increase in capacity potentially.
Just a few pics.


My 1500km road trip in the name of Lego . . . . some pics and commenta
in Community
Posted
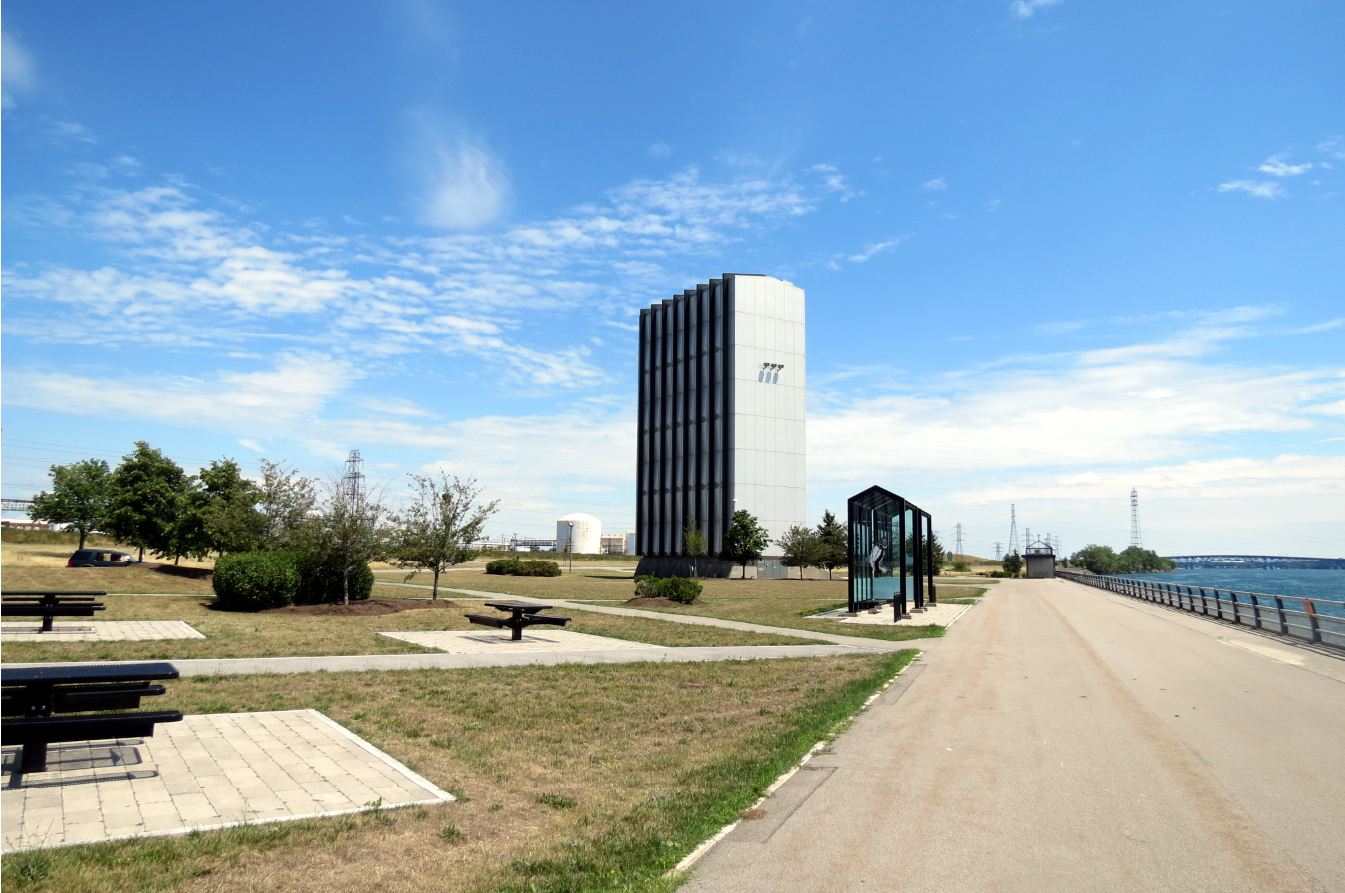
Stop #3 underneath Garden City Skyway . . .
There's two skyways that are about 100km apart on the way home, both pretty much on the same stretch of highway. The Garden City Skyway in St Catharines, and the Burlington Skyway, closer to Hamilton.
The Garden City skyway doesn't have the best access from and to the highway. If I've been there it was for a field trip back in grade 5. This Skyway is there crossing a river . . . the Welland Canal which is built to bypass Niagara Falls, with a series of locks that make up for the difference in heights of Lake Ontario and Lake Erie for commercial shipping traffic. A container ship can basically travel from the Atlantic Ocean and this would be its' only way to hit Windsor/Detroit.
Surprisingly . . . despite my love of all things Lego trains, I really don't care of trains much. But bridges, I love big structures, like bridges.
Welcome back to Canada, we've ensured that there's plenty of Geese for you, on your return. It's hard to see in the pics, but this Skyway has some chest hair it isn't straight at all. It also plunges down directly into the heart of St. Catherines, which makes some of the roads that access the highway extremely awkward.
Lift bridge on the local road below the skyway.
Remember what I was saying about how blue the sky was!!!
STOP #4: JORDAN HARBOR
Jordan Harbour isn't much of anything, there's a hotel there, and obviously a harbour, it's one of the points where the lake kisses the highway (which is named the QEW - Queen Elizabeth Way, it's pretty much the only 400-series highway that doesn't have a 400 number.
Jordan Harbour is known more for the curiousity of a ship that sits there.
The Grande Hermine . . . it's a former fairy, turned North America expedition replica ship, turned listed hulk. Back in the 90's someone brought the ship to the Niagara area with the intention to use it as a floating restuarant for parties etc, etc, etc.
He never really got the project off of the ground and later died. Leaving this ship kinda resting on the bottom of the lack close to shore and kind of half floating. Apparently, the owner of the harbour was requested to remove the eye sore and refused to noting that he didn't own it and on top of that, he was owed monies by the previous owner. In the early 2000's vandals got on board and lit the boat (formerly filled with wood cladding on fire), prior to the fire it had more of the appearance of a pirate ship. Now and presumably until the sea gradually claims her, she lies waiting. It's fresh water, so this won't be rapid procedure. I could see this ship standing throughout the rest of my life and I'm not 40 yet.
I honestly feel for the people who work at the nearby hotel, they've probably been asked about a thousand times, "what's up with the rusty boat over there?"
And for those interested, yes, yes, I am more interested in real boats over trains.