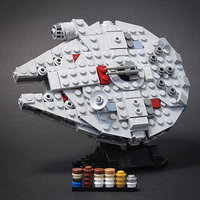
mcphatty Posted July 9, 2023 Posted July 9, 2023 Hi everyone, I've been playing with luminous materials in Studio and have tried to replicate the kind of basic global illumination style HDRI lighting I used to aim for in Cinema 4D. Below is the result, the first render is my lighting with Intensity in Studio's Render menu set to zero and for comparison below that is the standard Mechanic lighting with Intensity 2. I think that by getting rid of the default illumination and effectively turning off the HDR sky in Studio the model looks less overexposed, especially the upward facing surfaces which instantly lose the bright, sterile white reflection. The darker model means the highlights stand out a lot more, and since studs and edges are reflective there are plenty of nice highlights to look at! I also added some illumination in the scene, the white parts around the edge of the landing pad and in the upright light are luminous soft white and there is a bit of glow coming from the engines. I rendered these with transparent background and added a coloured backdrop and some noise in Photoshop. It's not a realistic image by any means but I think it'd a decent improvement, it's certainly helped my renders blend in with my photos on Instagram profile. Here's the Studio file of the lighting arrangement (_HDRI Lights by Ron_McPhatty.io) if you'd like to to give it a try, remember to turn the "Illumination" option in the Render window down to "0" before clicking render. To achieve the lighting effect I arranged a heap of large plate pieces into rings, angled them at downwards to aim at the subject positioned in the centre and positioned a few luminous panel spotlights directly above to give extra shadows and highlights. Other lights can be toggled on and off by Hiding/Showing the parts groups, so it's possible to light objects slightly differently for example all light from one side to give the impression of a bright planet. Here's how it all looks in Studio... Here's a few more examples with different models. I hope the idea is useful, any suggestions to help me improve the set up would be great, and feel free to use and abuse the lighting set up if you like it and I'd love to see other models rendered in this style. Quote
yoavelan Posted April 15, 2025 Posted April 15, 2025 These are wonderful images! I have been looking for examples of Studio renders using luminous bricks instead of the default light and am glad I came across this page. I have been posting some of my own images that use even more atmospheric lighting using a bit of luminous bricks and would be curious to know if anyone else has tried this? https://www.bricklink.com/v3/studio/public_gallery.page?idUser=119195 Quote
Hod Carrier Posted August 29, 2025 Posted August 29, 2025 I've done something along similar lines, although not exactly the same thing. Being primarily a builder of trains, I started off using luminous parts to replicate interior and exterior lighting, which has worked out quite well. With the basics covered, I moved on to using them to try and provide realistic lighting for enclosed spaces, much as as you might do for modulars and other similar builds. In my case, I applied the technique to underground and subway stations. One small innovation was to combine luminous parts with custom graphics to provide stencils to replicate illuminated signs. The closest that I have come to using luminous parts out-of-shot to provide a sort of lighting rig was when I fell down a bit of a 2001: A Space Odyssey rabbit-hole and created some artwork pastiches. Replicating some of the lighting effects from the original film poster (the lighting of the space station and the reflections on the helmet visor) required luminous parts in various configurations. As well as the original film poster pastiche, I recreated a couple of artworks released to commemorate the 50th anniversary of the release of the film that required the use of luminous parts. These included an alternative poster featuring the famous corridor scene in which the lighting is provided by luminous parts in-shot, and my version of the Dave O'Flanaghan Monolith scene on the lunar surface. One thing that I have struggled with is just how shiny the surface of regular parts are when rendered, forcing me to make heavy use of the rubber colours palette to create matt surfaces that wouldn't simply reflect everything like a mirror. Part of this might have been due to how close the parts were to the light source (e.g. in the London Underground scene) and also because I was trying to light a scene rather than a single MOC. Whatever the case, it looks as though you've not been hindered by any such problems enabling you to get some great results using this technique. Your renders certainly look a lot richer as a consequence of the interplay of light and shade that you've been able to achieve compared to the slightly less interesting results the standard lighting creates. I will certainly be looking into this a bit more as a result of your ideas. Thanks so much for sharing. Quote
Recommended Posts
Join the conversation
You can post now and register later. If you have an account, sign in now to post with your account.