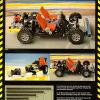
Leif Posted December 19, 2014 Posted December 19, 2014 Gents, I have build some strong machines, powerful, geared down, lots of motors coupled together. But the weakest link, and it is pretty weak, is always the perpendicular gear at the diff. Even though it is most of the time a 1:3 gear down in a portal hub after the diff, you will get gear grind.. "Funny" thing is I have noticed several times that the gear grind will appear even on only 1 XL PF motor, so the second motor really cannot do any good. Before we can use its power, perpendicular gear have given up... Any advices? Not happening to you...? revert to old style Diff? More complex gearing but sometimes that may be the best solution. see pic, Bracing is what it is so to speak.. Quote
DickesC Posted December 19, 2014 Posted December 19, 2014 You fan build your own diff with turntables, if you have enough space for it Quote
veryrusty Posted December 19, 2014 Posted December 19, 2014 I have been having the same problem. Any hints would be great. Quote
Paul Boratko Posted December 20, 2014 Posted December 20, 2014 (edited) The first thing to try is the obvious, which is to make sure that the axle that is supporting the tan bevel gear is solidly based and does not wobble at all.. The second thing is to try and add a second tan bevel gear on the other side of the differential to give the differential added support because it will also twist a bit, but the second added gear will balance it out.. Make sure the second bevel gear is also supported strongly and doesn't have any wobble...I had a similar problem when I tried to motorize my Phantasm TT model when I got the SBrick prototype... And adding the second gear fixed the problem...See the .25 second mark of this vid... And as you can see in the video, I am running the XL motor directly to the main tan bevel gear at the differential and I never had any grinding or skipping at all after the second bevel gear was added... Someone asked me on youtube about this same issue and I recommended this same method to them and they said that it fixed their issue as well, so maybe you can give it a try... Edit: Here is a pic of what I mean... Edited December 20, 2014 by Paul Boratko Quote
Doc_Brown Posted December 20, 2014 Posted December 20, 2014 (edited) If you don't mind making something that isn't Lego try my solution. cut a circle from an old container lid and make a hole in that and simple use like a washer. This stops the tan gear from pushing the diff away under load. Takes a bit of time sanding the washer till its the perfect thickness, but certainly helps save your diff from being chewed to pieces! haha Edited December 20, 2014 by Doc_Brown Quote
Zerobricks Posted December 20, 2014 Posted December 20, 2014 If all else fail simple dont use the diff Quote
jorgeopesi Posted December 20, 2014 Posted December 20, 2014 We use plastic after all non-optimum performance is assured . Quote
Leif Posted December 20, 2014 Author Posted December 20, 2014 The first thing to try is the obvious, which is to make sure that the axle that is supporting the tan bevel gear is solidly based and does not wobble at all.. The second thing is to try and add a second tan bevel gear on the other side of the differential to give the differential added support because it will also twist a bit, but the second added gear will balance it out.. Make sure the second bevel gear is also supported strongly and doesn't have any wobble...I had a similar problem when I tried to motorize my Phantasm TT model when I got the SBrick prototype... And adding the second gear fixed the problem...See the .25 second mark of this vid... Thank's a lot for good replies all of you. Yes Paul, I have been toying with that kind of solution and noticed some improvement. Would you recommend something like this (diff excluded..) or ever more solidly based? The tan pin without friction is a bit wobbly itself, maybe but a 3L axle on that side as well. Quote
Paul Boratko Posted December 20, 2014 Posted December 20, 2014 I think there is going to be too much play with just a tan axle pin... You are going to want to make that thing as sturdy as possible on both ends equally... I used a 4L axle with a stop... Quote
Zerobricks Posted December 20, 2014 Posted December 20, 2014 (edited) Or use a technic brick the way I used (attached picture). Edited December 20, 2014 by Zblj Quote
Leif Posted December 20, 2014 Author Posted December 20, 2014 If you don't mind making something that isn't Lego try my solution. cut a circle from an old container lid and make a hole in that and simple use like a washer. This stops the tan gear from pushing the diff away under load. Takes a bit of time sanding the washer till its the perfect thickness, but certainly helps save your diff from being chewed to pieces! haha Nice idea Doc, I will look into it! Or use a technic brick the way I used (attached picture). Seems to cause some friction? I think there is going to be too much play with just a tan axle pin... You are going to want to make that thing as sturdy as possible on both ends equally... I used a 4L axle with a stop... Yes you're right. Stop at gear end or other end? Quote
Paul Boratko Posted December 20, 2014 Posted December 20, 2014 I used the stop at the opposite side so that the axle doesn't move at all... Quote
Leif Posted December 20, 2014 Author Posted December 20, 2014 I used the stop at the opposite side so that the axle doesn't move at all... Ah, I thought the gear could slightly wander off the axle so the stop was preferred at that end. But maybe that's just a theoritical issue.. Quote
Dafgek81 Posted December 20, 2014 Posted December 20, 2014 (edited) X I have buildt the upgrade2 for the 8265 loader, but had a grinding beavel gear from the XL motor on the rear diff. Does anyone have a solution for this case? Posting the link with my IPhone does not work. If there is a good solution, I might rebuild it. Edited December 20, 2014 by Dafgek81 Quote
veryrusty Posted December 20, 2014 Posted December 20, 2014 Thanks for the ideas folks. I look forward to trying them out. Now to figure out where the other grinding is coming from. Quote
Paul Boratko Posted December 20, 2014 Posted December 20, 2014 (edited) Ah, I thought the gear could slightly wander off the axle so the stop was preferred at that end. But maybe that's just a theoritical issue.. That will work, but you have just as much a chance of the other gear doing the same thing... The differential should keep both of them in place though... It would be more of a concern with the axle working itself loose and pulling away from the gear, which with your way won't happen... I think in mine there is a liftarm behind the stop of the 4L axle preventing that from happening... Either way should work... Edited December 20, 2014 by Paul Boratko Quote
Leif Posted December 21, 2014 Author Posted December 21, 2014 If you have the space, this construction is almost foolproof. Apply sturdiness and bracing at your own convenience Only concept. But I have build it and engine stalled rather than gear grind What I actually solved was how to not change gear direction and keep it in three studs length. 16T with 20T did the trick, legal it is! I dare you to grind this Quote
Zerobricks Posted December 21, 2014 Posted December 21, 2014 If you have the space, this construction is almost foolproof. Apply sturdiness and bracing at your own convenience Only concept. But I have build it and engine stalled rather than gear grind What I actually solved was how to not change gear direction and keep it in three studs length. 16T with 20T did the trick, legal it is! I dare you to grind this Than why not just use 2XL motors, one on each side Quote
Leif Posted December 21, 2014 Author Posted December 21, 2014 (edited) Than why not just use 2XL motors, one on each side Yeah, well you got me there but I would prefer to see this as a part of a solution for, say, a 4WD or such where motor goes through center diff, sturdy gearboxes and all that you know Edited December 21, 2014 by Leif Quote
Dafgek81 Posted December 22, 2014 Posted December 22, 2014 Does nobody have an answer on the grindproblem of the backdiff frome the 8265 loader? Quote
Boxerlego Posted December 25, 2014 Posted December 25, 2014 The Differential Shim Idea came from me originally, While the shim idea ultimately came to me from working on real transmissions. I needed to come up with a way to shim the differential in order for my 18V motor to power the power puller wheels. I also implemented probably every kind of LEGO solutions to brace the differential and I still think the best thing to use for bracing the differential is using a shim. Quote
Gonkius Posted December 26, 2014 Posted December 26, 2014 I needed a differential that worked very smooth with a minimum of friction for high torque, so I had to design my own. It uses four (not three!) larger 20T gears to balance the side force on the axles better. (32198 and 87407) The large turntable is attached using four 1/2-pins. I guess you could make a version using the smaller type of turntables in a similar fashion. In my application I add the force on the turntable using two gears, one from each side to avoid bending of the structure, similar to what was shown by Leif. Quote
nicjasno Posted December 26, 2014 Posted December 26, 2014 Gonkius: that diff is not going to work. It'll desintegrate on the first sign of stress. I made many versions of the turntable diff, untill i found a good sollution that can take the stress. The main problem is the 90 degree transfer. I found that the only way to make this sturdy is to use 70s lego technic gears (the red and blue ones. Here's the dropbox gallery: https://db.tt/EvwsXhBL Quote
zux Posted December 27, 2014 Posted December 27, 2014 Gonkius: that diff is not going to work. It'll desintegrate on the first sign of stress. I made many versions of the turntable diff, untill i found a good sollution that can take the stress. The main problem is the 90 degree transfer. I found that the only way to make this sturdy is to use 70s lego technic gears (the red and blue ones. Here's the dropbox gallery: https://db.tt/EvwsXhBL You forgot to mention it is not possible to implement your solution without cutting and modifying parts. Quote
Gonkius Posted December 27, 2014 Posted December 27, 2014 I guess you're right, but I don't understand what you are referring to as a 90-degrees transfer... To the turntable gear? I don't have a 90-degree transfer that way, why should I? Quote
Recommended Posts
Join the conversation
You can post now and register later. If you have an account, sign in now to post with your account.