
fotoopa
-
Posts
42 -
Joined
-
Last visited
Content Type
Profiles
Forums
Gallery
Everything posted by fotoopa
-
 Lego hub to hub speed test with Pybricks beta software Boadcast. Here I made a short video to better see the results. The video show 6 hubs, 2x RI hub, 4x Technic hub. The master is the RI hub to broadcast a CMD to the 5 other Lego hubs. The LED 3x3 matrix is connected to the first TX RI hub, which lights up as soon as the command is passed on. Furthermore, 2 sensors with LEDs are connected, the distance sensor to an RI hub and the color sensor to a Technic hub. In most cases, the LEDs all go on and off at the same time. This means that there is only a very small time difference between the different LEDs. However, I have found another place where there is a clear difference. The video was recorded at 50 frames per second. Whenever there is a visible delay of an extra frame, this corresponds to a delay between 0 and 20 msec. For example, you sometimes see that the LEDs have not yet reached full brightness. This means that that frame was not exposed for the full 20 msec. To better visualize this sequence, I repeated the same frame 50x at that location. We now clearly see that the RI hub responds much faster than the Technic hub. I've rendered those special extended frames with a constant tone. hubtohub v6 by Frans, on Flickr I also made the test with the Technic hub as master but the results were not stable enough to use. It works best with the RI hub as master and even better with 2x RI hubs. I don't have any more RI hubs to expand the tests. The video is on my Flickr page. Frans.
 -
Here is the setup with 6 lego hubs to test the Bluetooth broadcast speed. DSC08315update by Frans, on Flickr The video has been recorded but still needs editing. Frans.
-
Thanks @Jurss and @Repkovsky I just finished a demo setup. A total of 6 hubs have been used and each hub has a motor. The aim is to start all motors synchronously. There is an LED3x3 matrix on the transmitter and on the receivers a Color sensor and the Distance sensor. With these LEDs together you can see how quickly everything reacts. 4 Technic hub and 2 RI hub have been used. One of the RI hubs is the transmitter, all 5 other hubs are receivers and the commands are broadcast via Bluetooth from the TX (RI) hub. I'm going to make a video and it will be online soon. Frans.
-
Bluetooth hub to hub speed test. The setup show 2 Lego RI 51515 hubs connected via bluetooth to transfer data. The setup uses the Maindstorms word blocks program to write both programs. I use a force sensor to forward a bluetooth command. Each time the push button level changes a 0 or 1 value is sent to the other hub. The picoscope is used to measure various signals from the sensors. This allows me to know exactly when a Bluetooth command will be sent. The RX hub uses a distance sensor whose 4 lights I turn on or off. To measure the signals, I cut the sensor cables and reconnected them via a connector PCB with measurement pins. The sensor signals are available on pins 5 and 6 of each port. These are ideal for real-time measurement. The Picoscope has 4 channels and has a large buffer memory. Thus, all data can be stored over several seconds. These are used for extensive analysis. Here you see both small programs, one for the RX side and one for the TX side. I would have liked to use the lego 3x3 led matrix along the TX side but Lego does not support this sensor in the Maindstorm program. Later I will be able to use it with the Pybricks Python software. With the led 3x3 matrix included, it becomes much easier to analyze scope signals. On ch-B you see the data from the force sensor. The first byte of the data is the CMD byte $D0 followed by 4 data bytes, then the checksum. The 3rd byte we see once 1 and then on the next string a 0. This is the point where the sensor will give a release action in the blocks program. The Bluetooth outout will change as a result. To this, the RX hub can respond by turning off the 4 LEDs on the distance sensor. You can see this LED value at ch-C in the data string. It is indicated on the drawing (4 bytes 00). We measure here a delay of 46.97 ms. By performing several measurements one after another, we see that this time can vary quite a bit. Sometimes this is around 25ms but it can also be above 100ms. Programming with Python is also not a solution because certain functions are not available with the Lego RI 515 software. If we use the new Spike 3.2.2 version, Python is not included, they might provide it in the near future, but after several months of waiting, our hopes are gone. With Lego's decision to no longer supply the RI 51515 kit it becomes completely hopeless. There is also no support for the technic hub version. You can only interchange between the RI hubs. Then let's see what we can do with Pybricks. Here you see both python programs, for the TX and RX sides. Since Pybricks supports many more hubs types, sensors and motors, I have now been able to add an led 3x3 matrix in the TX setup. The led 3x3 output allows additional measurement values to be added for the picoscope. This makes looking up the Bluetooth changes easier. These extra commands for the 3x3 LEDs do not directly affect the speed because the pressure sensor state will never change that fast. On the scope, that LED control is very clear. The light value of the distance sensor LEDs can also be set very precisely. I use a very low value of 5% here because the LED can be photographed better without overexposure. This value of 5 you see then also in the picoscope data value. You can use the same Python program both on the RI hub and on the Technic hub or even when combining both. I tested the 4 possibilities: RI - RI hub RI - Technic hub Technic hub - RI hub Technic hub - Technic hub. The results were really surprising. First, let's take the version Technic hub - Technic hub. This was not so good. The variation in delays are very large. Sometimes it is fast down to 15ms other times it can be very long to over 300ms. All tests were done with the program running in the hub and the online web version disabled. You can now also clearly see the LED 3x3 matrix data on ch-A of the picoscope and the 2 x consecutive output as a reference position where there is a change in the Bluetooth data. The next option was with an RI hub and a technic hub. The results were the same for: RI - Technic or Technic - RI Again the times could vary quite a bit but the max time was still quite low though, around the 65 ms while there were also very low times as low as 1 ms. Over several measurements the average value was around 30 ms. This is already a very good result. As soon as one of the hubs is an RI hub it becomes very reliable and the values are quite good. Now the RI-RI version: This combination works perfect. The max times are arround 6 ms, most of them just above the 2 ms, minimum 1 ms. The results are also very stable. You can see a total overview of a measurement above. Note: The Pybricks Python version is a test release. You must use these versions to program the hub. https://pybricks.com/projects/tutorials/wireless/hub-to-hub/broadcast/ fotoopa.
-
Pybricks Q&A
fotoopa replied to Pybricks's topic in LEGO Technic, Mindstorms, Model Team and Scale Modeling
I am trying to make a serial connection to the RI or the technic hub. Herewith a short program to activate it: from pybricks.hubs import InventorHub from pybricks.iodevices import UARTDevice serial = UARTDevice(Port.E, 115200, timeout= None) hub = InventorHub() ImportError: can't import name UARTDevice I would have liked to make a serial connection to one of the hubs (Inventor hub or poweredup hub). When I see this error I think this Class is not available yet. Such a serial connection would allow me to exchange data data between a Fischer technic application and a Lego hub. I suspect that the basis for a serial connection must exist but is not yet available in the latest beta version. I use the version: v3.2.0b5 (Pybricks Beta v2.0.0-beta.11) Is there any timing when approximately this would be available? Frans. -
Herewith a small test to enable the hub to hub in Pybricks Python while waiting for them to have the Pybricks hub to hub software available. This setup uses the internal hub1 color LED. This makes 4 commands available by using the colors Red, Green, Blue and None. Detection is done by a color sensor connected to hub2 and mounted on hub1. 2 Python programs are used. The communication is very fast. Technic-hub-to-hub_setup by Frans, on Flickr The 2 Pybricks Python programs: Technic-hub-to-hub by Frans, on Flickr Update: De typical delay between hub1 and hub2 is 25 msec, min 10msec max 50 msec. Frans.
-
Sending multiple commands from the Fischertechnic TXT to the Lego hubs. I use the color sensor on the Lego hub for this and the CMDs via the TXT PC screen buttons. The TXT sends the color data to the neo LEDs over an I2C connection. So with 1 color sensor, different commands can be recognized. With the scope I measured the delay. The scope is connected to the I2C line ( 2 channels) of the TXT and also to the Lego hub pin5 output (1 channel). A small Python program on the Lego side provides the feedback in this way. The delay is about 16 msec, values between 12 and 25 msec. The light pulse of the TXT is 25 to 30 msec. The TXT program is set to 25 msec. By reducing this value, you can easily see when the hub does not always respond to the narrow pulse. For the neoleds, I use a short string of 3 consecutive LEDs. The distance between the sensor and the neoleds is not critical. This measurement confirmed that the response times of the TXT and the Lego hub are quite small. Here in the example I use 3 different colors but you can use more. For the color value of the neo LEDs you may have to do some searching. But the basic colors red, blue and green always work. Also the brightness for this is not critical. The picture is a UHD image. So you can zoom in nicely to all the details. I2C-to-hub-delay by Frans, on Flickr Frans.
-
@DrJB Yes FT is of German origin. Well available in Europe. But no worries, it doesn't necessarily have to be FT to control servos. I use the FT program because it has a very nice and good GUI with windows. Also the Robopro software for the TXT is still super good. It supports multitasking very well. If you don't have all this then nothing stops you from using your own faforite hardware. This is mainly about using the different Lego type hubs with one type of software namely Pybricks. So all credits go to @Pybricks for their great contribution. With the servo remote control you send commands in one direction, to Lego. Now to obtain the other direction from the Lego to your own controller there are several possibilities. One of the most extensive commands you can process by monitoring at least 1 serial line of a powerup devices. The Lego master sends commands to the device if you change, for example, the LEDs of the distance sensor. You then have 4 values available between 0 and 100. Also the color sensor has 3 LEDs which can be read and processed in this way. The led matrix 3x3 has 9 values available. The beauty of this system is that it is extremely fast. There is no delay between the device receiving the data and your detection. In fact, I currently have 8 lines available that can listen in on serial lines. Since I use an FPGA module in my hardware, everything is handled in parallel, with no delays between them. On the FT side, via the FPGA I have a total of 12 controllable motors, 12 servo motors, 12 digital outputs, 120 digital inputs, 8 analog 12bit inputs and 4 extra scope outputs lines that can output any digital signal up to 50 MHz. On the TXT, 4 high-speed digital inputs, 8 analog inputs and 4 motor outputs and the I2C interface. The I2C interface goes to my FPGA but additional standard I2C modules can also be connected. And exactly all of these results are displayed on the PC screen. Thanks to Pybricks, all my hubs now have the same firmware. With the Lego 51515 RI and 3 technic powered up modules I have up to 18 hubs available. Frans.
-
Linking Fischertechnic and Lego. With FT I use the TXT controller, with Lego I use the Maindstorms inventor hub and the Techinc hub. To make them work together I use 2 Lego remote controllers. On each remote control there are 4 servos. This controls 4 buttons, the 3 remaining buttons can be operated manually. The servos are controlled by the TXT controller. The RoboPro program on the PC is used for this purpose. The servos themselves are controlled by my DE0 module but this can also be done with an I2C module on the TXT. All hubs use the Pybricks Python software: v3.2.0b4 Pybricks Beta v2.0.0-beta.9 There are 2 Pybricks programs running simultaneously, each controlling a different type of hub. It is now easy to send commands from the TXT to both hubs. This can be done simultaneously or separately. The big problem with Lego hubs is that they have almost no inputs. Thus, we lack the nice 8 channel digital inputs that are present with the TXT. Through my DEO module, I even have 120 digital inputs. Via the servo controlled remote I can now at least send multiple commands to the Lego modules. The large PC screen where the program can be displayed is also indispensable. Now to send commands from the Lego hubs to the TXT are a number of possibilities. I use a lot of hall sensors. Small magnets connected to Lego parts can send commands this way quickly and easily. I can also listen in on multiple serial lines from the hubs. That data can be used by the TXT. Thus, positions of the motors can be displayed, as well as other data from the hub. The TXT can display this data on the PC screen. Pybricks does not have a hub to hub at this time. Now, however, commands can be sent from one hub to the TXT which then forwards them to the 2nd hub. This photos shows the total test setup. remote-hubs-111305 by Frans, on Flickr servo-remote-test by Frans, on Flickr remote-detail_141406 by Frans, on Flickr remote-servo-20221101 by Frans, on Flickr Frans.
-
Pybricks Q&A
fotoopa replied to Pybricks's topic in LEGO Technic, Mindstorms, Model Team and Scale Modeling
Fine. I loaded the new beta version and reading and writing memory data works great. Thank you very much! I am still missing read and write serial data to and from a hub. With this I would like to link Fischertechnic and Lego to exchange commands between them. Is there any chance this would be available in a new beta version. Now I can do it via remote control on the Technichub. With FT I could do this with servos on the 7 buttons available on a remote. This would involve commands from FT to Lego. With Lego you have very few options for handling digital inputs. With FT this is standard on their TXT controller. Frans. -
Pybricks Q&A
fotoopa replied to Pybricks's topic in LEGO Technic, Mindstorms, Model Team and Scale Modeling
Very nice! I am running the beta version: ' technichub', ' '3.2.0b3', 'v3.2.0b3 on 2022-07-20') Will there be a new beta version soon where we can use this? Frans -
Finally I can continue working again. My eyes are seeing better again after some operations. I have now also bought the Lego technic hub ( €25) and the remote control (€17). They are quite cheap to find at the moment. The technic hub can only work with the battery box. You have to take the batteries out to recharge them. Very annoying especially if you just want to run tests. I now use Pybricks python for this. Now I replaced the battery box with a 3D printed box with an external connection plug for a 9V adaptor. If you want to go back to the battery box you just swap both. The basic cover plate remains the same. Some pictures give an overview of how I made this. technic hub powered by Frans, on Flickr powerbox-3D-view by Frans, on Flickr hub pcb by Frans, on Flickr hub pcb en wires by Frans, on Flickr hub input power side by Frans, on Flickr hub electodes by Frans, on Flickr As a power adaptor I use the Fischertechnic adaptor of 9V 2.5A Now I can quietly spend hours learning to work with python without worry. The hub indicates a voltage of 9.39V. To connect the external 9V plug, a small hole must be made in the hub box. If you don't want that, you can bring out both connecting wires on the side and fit a connector there as desired. Update: link to the .stl file: https://www.thingiverse.com/thing:5557377 Frans
-
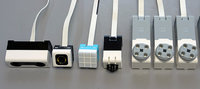
I use the "econ connect female header BLG1x3 at 2.54mm pitch" Connector, width is 8.15mm, thickness 2.54mm. The male pin connector are the regular pin headers at 2.54mm pitch. Disadvantage: they don't have a latch you have to be careful on the correct polarity connection. I also use the 3x0.14mm color servo cables for that.
-
Wonderful realization! I always make the neopixel led with small connections too. That way you can even make extension cables. The HMI interface is definitely a nice addition. I also see your possible planning for your events. Kortrijk and Harelbeke are very close for me. I would love to come and visit you. Frans.
-
Z axis with gripper for colored 14mm balls Version 2. In this version, the Z axis works much faster. It is now driven directly by the motor. foto: DSC08092-gripper-module by Frans, on Flickr video: Ball gripper module by Frans, on Flickr The gripper itself is 3D printed along with a small impact block for opening and closing. The rest are Lego technic blocks and the whole thing is mounted with Fischertechnik parts. Frans.
-
First small application of the Lego Mindstorms hub. I am also using parts from Fischertechnik for construction here. The base plate is a FT plate. To build FT and Lego parts together I made some adaptors via 3D printing. This way the grid problem between FT (15mm) and Lego (16mm) can be solved. You could also build this application with Lego parts only but that is not my intention. I was able to solve a number of problems during construction. To be able to use more FT modules I first have to cut the flat cables of all the motors and connect them via 6 pin connectors. This way I can increase the distance between hub and motor. Then I can also re-enable my interface which can listen to all Lego Uart signals. From that moment on I can let FT and Lego fully interact with each other. First the setup: DSC08056-sorting-balls by Frans, on Flickr Then the program: Sorting-colored-balls by Frans, on Flickr And the video: Lego Sorting 14mm balls by Frans, on Flickr The following application will use both hardware modules FT and Lego and the PC screen as the GUI. Frans.
-
Some additional 3D printed adaptors for Lego and Fischertechnik. The next step is a small application. I am in the process of preparing it. DSC08007 by Frans, on Flickr DSC07980 by Frans, on Flickr Both systems have certain advantages. It is now a matter of presenting these in a working solution. Frans.
-
Here is a new test today to link both systems. DSC07979-Lego-FT-set by Frans, on Flickr Via 3D printing, a number of additional blocks are being printed to connect the two systems. Now modules can be coupled in both directions. Because FT motors have no absolute encoder I use a proprietary encoder disc with hall detectors. Via quadrature decoding I have 32 pulses/revolution. On the Lego chain, I use small pins that are secured via a screw M2.5x8mm. They are now printed yellow but in the future I will print them black to work better together with the color sensor. Step by step we go through... Frans.
-
Some new images for the FT-Lego assembly: DSC07899 by Frans, on Flickr DSC07923-ketting by Frans, on Flickr DSC07899 by Frans, on Flick Parts I don't have are usually made via 3D printing. Frans
-
Adapters FT-Lego. To use both motors together, a number of adapters are needed. For example, a FT chain can be placed on a Lego motor and and a Lego chain can be placed on a FT motor. Now we can really start using both systems together. Attaching a Lego part to a Fischertechnik grid is also now possible. Adapters FT-Lego by Frans, on Flickr
-
Yes the value of the distance sensor is not clear to me either. The Lego status only gives cm as unit. Either the higher accuracy is just not usable. If I would display only cm everything is correct. The data measured with the real-time Picoscope is also the same. So the plot curve is not an incorrect representation . I would need to make measurements over a greater distance. For that I need to change the setup. I currently have very few Lego parts. The movement itself does proceed regularly. You can also see this in the video. If you watch the video frame by frame you can see the digital readout counter display the value. There too the jumps can be noticed. I will remake this movement with FT parts for displacement though. But first now vacation with the grandchildren. Frans.
-
Lego and Fischertechnik linked together. All 6 ports of the Lego hub are connected to the DE0-Nano-Soc module. This allows all data from Lego to be monitored. Many results can be displayed via the Fischer TXT controller. This is done via a simple program with the RoboPro software. The TXT Controller has a very nice feature where you can make a logging of the signals. This allows you to visualize the data in real time on the PC screen. All lego ports operate at 115200 baud rate. On the Lego side, you do not need to write a program for this because the data logging is done at low level. This is the same data the hub receives from the motors and sensors. I use the port hubE for serial data exchange between the two systems. Everything is written in Python because in blocks not everything is available. For this serial connection I do need to write a bit of software. A small problem is the configuration at the first startup of the program. Lego uses an auto config system so the port is not ready for serial connections. I need to place an additional delay. Once started up you would no longer need the delay. I now use a delay of 1sec for this. If nothing was found at startup Lego searches every 500 msec for a new configuration. Once you have configured the port as serial everything is solved. In the Python example, I sent some commands to the FPGA module ($D5). The Pico-scope 2406B is also always connected to the FPGA module. The 4 scope channels can be selected from 4x8 signal sources via the keyboard on the module. This scope thus also has real-time access to all Lego data. I use this mainly for time analysis and for testing the Python programs. In the video you can see how the data is displayed in real time by the TXT. You can see the motor displacement, the motor speed and direction, the sensor distance and the status of the 4 LEDs on the sensor. The leds are turned on and off at certain times. You can see that in the Python program and in the video itself. Lego and Fischertechnik by Frans, on Flickr Lego and Fischertechnik linked together. by Frans, on Flickr python-prog-distance-diagram by Frans, on Flickr Update: RoboPro program added: FT program for Lego interface by Frans, on Flickr Frans.
-
Thanks for the reply. Yes I need to be a little clearer. There are quite a few possibilities for naming Lego devices. With the 6 hubs, I mean the 6 ports of a unit. The Mindstorms 51515 software always shows the hubA to hubF numbering on their help page when formatting the configuration. Hence why I always spoke of the 6 hubs as well. The screendump is also a little clearer in that regard, I have drawn the 6 connections there with their hubA..hubF ports. Yes it is. Normally you only have 1 of the 2 lines that you have to listen to. That's where all the low level data come in. If you need a serial connection then you have to use the 2 lines and you only have 5 ports left for the Lego devices. The nice thing is that I now read all the data here without having to run a program. Just a powerup of the hub module is enough because Lego will scan all 6 hub ports to see what is connected. Normally after max 6 sec all ports are set to their default configuration and you can listen to and use that data. If you want to send commands from Lego to FT you can do so by driving the 4 LEDs on the distance sensor. Because you are listening you can see the data immediately and you can execute the commands with the FT RoboPro program. Now suppose for a moment that you wish to send a command from FT to Lego you can do that using either the distance sensor or the color sensor. An example: with a servo on FT you place a panel at a certain distance from the distance sensor. In the Lego program you can react to this. By placing different panels at different distances you can create more than 1 command. With the color sensor, it would also go by bringing a different color block in front of the sensor as a command. However, if you use a serial port then the commands are unlimited in both directions. You must then write the necessary software on both sides. With the Mindstorms 51515 word program a serial port is not provided, They have no blocks for this. A solution is to execute it via Python but also there you have to search for the necessary configuration yourself. They didn't provide it by default either! As you can see, there is quite a bit of work to do. The next 2 weeks I won't really be able to do much testing because the grandkids are coming on vacation. They would like to make one of the original robots version. Then I'll have to put my testing on hold for a while. Meanwhile, I can do some dreaming about how to make an FT-Lego practical implementation to make a video of it. After all, I need to be able to keep myself busy. Frans
-
Lego en Fischertechnik connected. Lego Mindstorms and Fischertechnik by Frans, on Flickr This is a screen dump of the data from Lego and Fischertechnik together. All values of the 6 hubs can be read out real time by listening on the serial communication lines. These results are stored in a register array in the FPGA. In this way, the results are available to the Fischertechnik TXT Controller via the RoboPro program. The results are displayed realtime on the PC screen. The motors, servos and analog values of the DE0-NanO-Soc module are also available in this way. The recording speed is the same as Lego's internal hub speed. The FPGA reads the data sent by the device on the hub at the same time. In this way the color that the color sensor reads can be displayed on the PC screen. Also the leds of the distance sensor are transmitted in this way. With these leds you can send commands to the FT-program. You can easily control these leds in a Lego program. The Fischertechnik program is here primarily as a GUI interface of all Lego hub values. But extending it further can make the working together of FT and Lego easy. If a lot of commands have to be used and in both directions then it is better with a serial line on one of the hubs. For this I will use HubE. This leaves only 5 hubs for the Lego devices. I have no Bluetooth available on my current FPGA code. Hence I have to extend via the serial line. Frans
-
Lego hub monitoring for the Mindstorms 51515. A brief update: Lego Hub monitoring for the PC. by Frans, on Flickr With this interface I can now intercept all 6 hub signals. The information obtained is the same as what Lego reads. It can't be done any faster. No program needs to be written. The hub itself looks at powerup to see what is connected. After auto configuration, the connected device transmits its data continuously. This happens upon request of the hub (every 100 msec) or upon internal change of the data values. The data transmission depends on the device type. This varies from 20 msec to every 1 msec. The FPGA can very quickly process all data from the 6 hubs and make it available in registers. Also, the FPGA can execute commands. For this I do need to use one of the hubs lines. Normally this will be hubE. Because the FPGA stores every data change in registers, they are also available to the TXT Controller of Fischertechnik. Results can now be displayed on a large monitor via the PC. If necessary, I can selectively turn the measurement leads on and off via a jumper. On the pcb there are also some resistors for impedance adjustment. I use twisted pair cable for the signals. The picoscope is connected via the FPGA module. Through the Picoscope, I can view up to 4 hub signals at any given time. There I see all the data appearing from the 115200 baud lines. On the FPGA keypad I can select which hub I want to monitor on the scope. All data up to 10 sec deep I can monitor this way. The problem of the extension cables I solved myself by cutting the flat cables of the devices in the middle and reconnecting them with 6-pin low-cost connectors. This way I can make extension cables myself. This was really necessary because with the 25cm of existing cables I could not work any further. The only drawback is that you have to check for yourself if the connectors are connected correctly. For this I have of each cable pin1 marked with a black stroke Now I can continue working on a practical application with Lego and Fischertechnik. You may expect new information from this soon. Frans.