

Tearloch33
-
Posts
68 -
Joined
-
Last visited
Content Type
Profiles
Forums
Gallery
Everything posted by Tearloch33
-
Philo has a nice article on this.....essentially shows that there are 4 wires....two for power and two for control (direction). He has schematics and torn apart connectors shown. It may be easier to take apart the connector plate instead of cutting the cable. http://www.philohome.com/pf/pf.htm If you reverse the connections for C1 and C2 in the schematic, between the motor and the IR controller (for the motor you want to reverse the direction of....front motor) it should do the trick.
-
I am fairly new here....any suggestions on how to just get this thread deleted and just start a new one?
-
Power Functions Extension Wire(8886) question
Tearloch33 replied to romdam's topic in LEGO Train Tech
That cable was also used for the RC train motor that LEGO made was a while. That motor (which had a red bar on it) was just like the 9V train motor without the 9V pickups on the wheels. The new PF train motor has taken its place, and comes with a built in wire that make the 8886 wire un needed for PF use. The RC train motor was also inferior compared to the new PF train motor, as it had less power, but drew more current, resulting in shorter battery life. -
Barman's Lego Power Functions-Controlled Train Switch
Tearloch33 replied to DLuders's topic in LEGO Train Tech
Sorry, I have not looked at his actual design file, but what I see in the picture looks like a rotational motor that drives a mechanical linkage system that acts as a linear actuator. What I was refering to about linear actuators is that you don't need the rotational motor. They have small, electric, linear actuators that do not have a seperate motor that would remove the need for the bulky homemade mechanisms to simply throw the switch. You need one with like a 1 inch "throw". I don't know what is commercially available right now, since I haven't bought any in like 10 years, but they are used all over the world in automated processing. And my point is LEGO, if they wanted to, could get these mass produced a ton cheaper than you or I can buy them commercially. Like I said, they could even have a AAA battery built in for power. I guess another option to simplify the LEGO built mechanism would be to use a worm gear attached directly to the shaft of the rotational motor, and that would move a rack that sits on top of the switch arm. That would eliminate the "4 bar" type mechanism needed, and not require the motor to be mounted perpendicular. I am just kicking around ideas, and haven't tried any of them yet. -
Barman's Lego Power Functions-Controlled Train Switch
Tearloch33 replied to DLuders's topic in LEGO Train Tech
What would be nice is if LEGO made this, because they could do it in such a smaller scale. Any of the motors available now are way overkill for what you would really need to move the switch. Also, all the bricks you need for the mechanism could be so simplified with a small change. If LEGO would take this on, I am pretty confident that could make it so its size would be consistent with the scale and how a real switch motor is sized. Heck, they could even build in a micro version of the IR controls, since the command signals would be minimal, and it could even be powered by 1 AAA battery, that way it is all built into one unit....no wires needed at all. IMO, hat would be a huge seller for LEGO train fans world wide. Why not use a linear actuator instead of a motor? That would save size and money. -
Thanks for that. I thank the movie industry for making most of us fearful of pushing red buttons. I have never even wondered what that button actually did. That seems so much better than using the speed control wheel since it is very easy to reverse the train accidentally (causing bad things when near a switch).
-
There was just enough room to get the battery box (as far aft as possible) and the lego polarity switch inside the body behind where the body has the 2X4 brick section that sticks out behind the cab. The IR receiver sits just in front of that section, with the wires connecting inside the cab. I did think about doing it like the Maersk, but I could not get the striping correct that way, either, without using decals (the yellow "1 plate" stripes). I'll try to post some pictures this weekend.
-
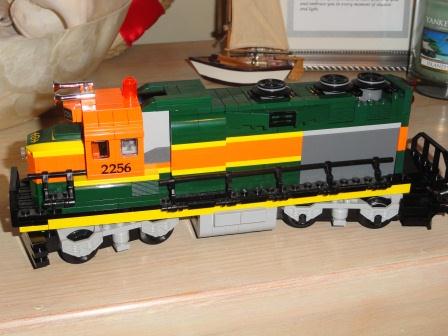
Makes sense. I don't have a Santa Fe myself, so I didn't realize the truck sizing. I am still working on a BNSF conversion to PF, and I have it completed with 2 motors (still have to make decals to cover battery box and IR reciever. The wiring barely fits inside, and I had to "alter" the couplers to mate up with the motors and added in steps. I also would be interested in seeing your designs for the passenger cars. I am thinking of making a BN E9 passenger train (green with the white hockey stick design). Still looking for good designs for the passenger cars, but what I saw on your Flickr looked very nice. I need to post my BNSF MOD pics, even though I haven't finished the decals (can't get the colors matched to my satisfaction yet). I second your opinion on putting motors in 2 seperate engines...too many possible problems.
-
Is there a reason you just didn't add the second motor to the A unit? Looks great though.
-
Thanks. The hardest part was making clearance for the hi-rails to tuck up inside when not being used....and I still don't really like how the hydraulic stabilizers turned out....but they do go up and and down, and are a lot more functional than the original RailBricks design...I just wish TLG would make some better hydraulic piston parts...I looked at the old pneumatic parts, but they were too big for what I wanted.... Any suggestions would be appreciated.
-
Thanks for the feedback. I just started this 2 days ago, and am now really interested in improving on the basic design. The OTMTracker itself (we called them Jimbo cranes at BN back in the day) will be a challenge to make it work right, but will be fun. The truck will be my first task. [Pictures updated at top of thread...this was version 1...still working on the crane] Hey, it worked!!! Here is the back view:
-
Thanks, I will give Flickr a try. How can I embedded images directly on here? Using Flickr somehow? [EDIT] Uploaded the photos to Flickr. It says "You are not aallowed to use that image extension on this board" when I try to insert the image from Flickr. Am I missing something? Anyway, here is the link to the Flickr page with pictures: And thanks for the pictures. I don't remember the coupler in the RailBricks photo, but looking back, it is there. It makes sense to have the hi-rail wheels closer to the front of the truck (though challenging design wise). Also, the crane is exactly what I thought...the cab can slide forward and back, not just rotate in the middle, and the "feet" didn't seem right in the RailBricks version....need to add the "feet" on the cab as well. It would be extra fun to make it so the Jimbo crane can actually sit on top of a rail car, like it is designed to do in real life. Looks like I have some more work on this one...but this will be a fun challenge. Again, thanks for the photos...perhaps I will make the cab white as well.
-
Again, sorry the pictures are not available yet. I didn't realize at first that MOC delays your first post. All my other work was never posted b/c I didn't have LDD Extended (or even know about it), so there was always issues with colors and missing bricks. I would have posted them directly here, but I am having issues with that...says I have a 100KB quota that is 80% used up....I guess b/c I am new here as well? Any help on that one? Thanks for the reminder....no, I did not...in my haste of getting LDD extended, I totally forgot. My knowledge is that it should only have a rear coupler, and that will require some work on the rear hi-rail orientation, but I will work on that and update when done. I wanted to rework the hi-rail system anyway, and still have to deal with the hydrualic support pylons on the rear (since to move the truck then you have to remove them or stick them straight out). I guess I also have to be careful of the height of the coupler (being on the hi-rails so that is matches the standard car height). More work...my wife will not be pleased
-
I never really experience 9V LEGO trains. I recently got back into LEGOs, and I have found PF quite enjoyable. I have the 7939 Cargo Train, and have yet to have any derailment issues, even at the top speed (I started with rechargable AAA, then moved to the LiPo battery). The one thing I can suggest on the speed control is to just be sensitive to the dial position. I think the method PF uses to transmit speed change signals makes the most sense from a design aspect. One thing they could do is change the controller, so instead of a dial (with no real meaning to the actual dial position), they could using a up/down push button. This would eliminate some of the "skipping" of speed change signals (if you turn it too fast). Every time you push the button, it sends the speed up/down signal to the train.
-
I am looking at making a MOC of the EMD E-9 engine (if you must know, based on the 1970s BN passenger trains....the "Hockey Stick" ones), which has 3 axel trucks. Looking at the train design, I quickly realized that the wheels are closer together than in a 2 axel truck, so using the PF train motor will not look realistic enough for me. So now I am at the point of using the PF XL motor with a geared truck, like I have seen many folks use. I know the real trick is making one of the axels so that it can move to prevent binding in corners. I found a nice design in RailBricks #6 that looks very doable. What I was looking for is if anyone else has other designs that work better than the RailBricks version, or have designs that simply look better while working well. Also looking for suggestions on what to put on the outside of the wheels to look realistic, since the common 2 axel truck "dress up" peice will not work with closer wheel spacing and one more axel.
-
Looks awesome. Just want to throw out an idea of using some 2x2x10 girders instead of the 2x2 brick pillars. I am not familiar with NYC transit, but it looks similar to what is around Chicago on the "L". Here is the link to BrickLink for what I was thinking. http://www.bricklink.com/catalogItem.asp?P=30517 Brick On!
-
No, not 12V Lego stuff, he is talking about any standard run of the mill 12 VDC transformer that you can get at Radio Shack or some other electronics store. Its a pretty standard device. Should cost about $10-$15 in the US.
-
Thanks for the tips. I did try out the grid method, and also have learn the type of paper lesson. I am going to try the method Aussie suggested to account for my printer/scanner characteristics, then will go back to the grid once I figure out the offset. Unfortunately, I only had 5 sheets of my decal paper, and 1 was already wasted on a previous attempt.
-
The LiPO (LEGO PF rechargable) battery is great. It does cost a bit, but it is well worth it. RailBricks #7 (page 46) has a good discussion of the battery and charging it. I think it is worth the price, especially after my first round of replacing the batteries in the 7939 cargo train. Having to remove the entire battery box is kind of ridiculous, IMO. The price of the charger also seems high, but the article I mentioned provides some cheaper alternatives. But if you have multiple rechargables, then the cost goes down since you only need one. The LiPO battery itself has some incredible performance characteristics, and from my experience, the LiPO battery should last well over 300 charge cycles if not misused.
-
As much as I love the EN, I really hate the wires between cars. I am still waiting to see if this new cargo train will actually have a red molded plastic battery box, or if they simply put red stickers on the side of the standard grey battery box. I really think it will be stickers, but who really knows. My preference has been to find a way to put the PF onto the train. The BNSF train is really the only one with significant challenges, since the body is the same width as the PF equipment. The picture I posted earlier on this tread (may have been under my other account "Tearloch") shows my 95% solution. Once I get the decal colors worked out, I think it will look just fine using decals to cover up the PF equipment, and the engine will be not be ever tied to a car. I'll repost my modification to the BNSF train using PF. It was the only way I could see to do this with severely altering the entire design of the engine. Here are some of my findings: 1. Placing the battery box as low and as far to the back as possible, you limit it being top heavy (prone to roll overs in high speed turns), you allow for fairly easy charging (remove back panel and the couple of bricks that attach it), you maintain maximum room for wires inside the body, and you can make a very simply mod to make an on/off switch out of the last fan blade. 2. Placing the IR receiver partially inside the cab and placed as high as possible, you can run wires under its base to allow for connections, the connections are all hidden inside the cab, and the IR receiver "window" is hidden as best as possible (directly behind the cab). 3. The arrangement actually has enough room left over inside for a LEGO polarity switch (to allow 2 motors to be used), and all the wires for 2 PF motors, and the IR receiver. 4. The only difficulty is making the decals to cover up the gray PF parts. I am working on that process now, and I am also exploring a guy in the Netherlands that makes custom LEGO stickers using commercial printing (they seem identical in quality to what comes with LEGO sets currently). I hope to be able to work it out on my own. I will keep you updated with my results.
-
Thats for the link. That was the one I was thinking of. An even better read the second time.
-
The PF controller (assume you mean IR receiver) as a 4x4 footprint.
-
I cannot find the original story on this, so I posted a new topic on the subject to see if anyone else has tried this or knows of the article I mentioned.
-
A few months back, I read an article about an interesting approach at using a 9V train motor with a PF system setup. The topic discussed using 9V powere sections of track (not the entire thing, but hidden sections) to provide a method to actually charge up the power function battery pack while the train was moving. Basically the 9V motor used its pick up to provide energy back into the system to charge the battery during operation, drastically extending the run time. The benefits are: Increased run time of PF trains (like for a train show) No worry about 9V polarity All the pluses of the PF system, with none of the draw backs At the time, I found it interesting, but since I do not own any 9V equipment, I left it at that. But on another thread, others seemed interested in the concept, but I am unable to find the original story. If anyone has tried this, or knows of the original (or comparable) stories on the web, please share or link here.
-
If you really want to get fancy, you can use an RC LiPO power pack in place of the LEGO LiPO battery or the 6 cell version. I found several options that were roughly equivalent to the LiPO battery in terms of Voltage and AH ratings, and that would fit inside the BNSF train without modification. The real caution to this approach is the LiPO packs themselves. The LEGO version has a circuit built in that prevents fulling draining the battery, which can result in a fire or explosion. The RC reversions require a seperate means to prevent this, in some cases.