
SavaTheAggie
-
Posts
858 -
Joined
-
Last visited
Content Type
Profiles
Forums
Gallery
Everything posted by SavaTheAggie
-
Some people are just too easily offended. Personally I find that offensive. --Tony
-
Just a few weeks shy of three years ago, I announced my MOC version of the Polar Express. Since then I've upgraded it many times, adding more and more detail. Tonight I sat down and photographed it. Flickr Gallery Brickshelf Gallery "Well, ya' comin'?" --Tony
-
I try to never, ever, ever, ever, ever use the flash. I recommend you never, ever, ever, ever, ever use the flash. Unless you have a secondary, removable flash with an adjustable head, you should never use the flash on your camera to take a picture of your LEGO. It's just about the worst mistake you can do. Rule #1: Do not use your onboard camera flash. The onboard flash removes shadows, which makes things look fake and odd, and washes out depth. I have NEVER seen a LEGO picture that looked better with an onboard flash than without (if you follow the rest of the rules). Rule #2: Use as much light as you can, either through multiple lamps or reflectors. Reflectors can be mirrors (though they'll make the light harsh), or homemade such as cardboard covered in aluminum foil. The more light, the clearer your pictures will be. Rule #3: Use natural or "natural" light when possible. Photograph in a room with many open windows, if you have one, but not in direct sunlight. Use ambient sunlight, like in an area of the room where all of the sunlight is being reflected off the other surfaces in the room, or using a reflector. If you don't have such a room, or you're photographing at night, you'll need to create "natural" light. This can be accomplished one of two ways: 1. For many many years artists have been using "artists lamps" which combine an incandescent blub (bulbs with glowing filaments) surrounded by a round fluorescent blub, this combination mimics natural light. Using a combination of these two light sources will do the same. 2. Use a "natural" light bulb. Most all "curly cue" fluorescent bulbs have a temperature rating measured in degrees Kelvin (K). Most incandescent bulbs are rated in the 2000K-3000K range which look red or pink (compared to white). Most all fluorescent bulbs are in the 6000-6500K range, which look blue. Bulbs in the 5000K-5500K range are the closest to pure white, and is what you want to look for, it'll be written on the bulb's plastic base. They're harder to find, but they're becoming more common. Rule #4: Always use a tripod. Or if you don't have a tripod, rest your camera on something sturdy. This will greatly improve your photos, especially close up shots. If you don't have a tripod, save your money, they aren't very expensive (some can be purchased for $10-$20), and you won't regret it. Rule #5: Choose your background! Don't take a picture of your MOC on a cluttered table (unless that's the look your going for or it's a throw away or work in progress picture). Either create a scene for your MOC, or use a solid color background. If you use a solid color background, use a sheet, large piece of paper, or even the side of a large box. Your background doesn't have to be all white, black can work well, too. Rule #6: Use zoom carefully. The more you zoom in, the more things in the background will look blurry. Conversely, the more you zoom out, the more of the surrounding objects will be in focus. This can be used to your advantage. If you camera has a "digital zoom" - NEVER use it. Digital zoom blows up pixels without adding detail. It's a horrible joke of a feature camera manufacturers include to improve the stats on the box of the camera. Rule #7: If your camera has a self timer, use it. Pressing the shutter button can cause your camera to shift slightly, blurring your picture. Rule #8: If your camera has image stabilization, use it. This will also reduce blur. Rule #9: Learn your camera's other features! Some cameras can adjust light balance which can make up for breaking rule #3. Longer exposures can help you if you are forced to break rule #2. --Tony
-
Sure, whatever floats your boat. A word of advice - if you're using a DSLR (which are probably some of the only digital cameras that have such capabilities as long exposures), be sure to zoom in a bit. This will help keep the amount of wash-out to a minimum. --Tony
-
For the recent article in Railbricks magazine, I spent a good few hours playing with the settings on my camera and was able to figure out that long exposures can give you some really awesome detail on all-black MOCs. In fact, a 30 second exposure made my Pere Marquette stand out in a way that I've never been able to achieve outside of LDraw. It worked out so well, I decided to continue with a few more. Only the green TSRR #500 had a shorter exposure time, 25 seconds, because its' high contrast was getting washed out. I only had to photoshop the background to get the clean white I was looking for. Could I use reflectors and different camera tricks to achieve the same result? Yeah, but I'm lazy, and my camera does good work. --Tony
-
Once its dry (and it dries reasonbly quick) it's permanent. It does not flake off, rub off, or fade. It becomes one with the plastic and does no harm to other pieces (though it does add a few microns of thickness so pieces do fit tighter than before). --Tony
-
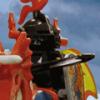
The gold knight used enamel based model paint, which didn't work out too well. Then again, I was 10 or 12 when I painted it the first time, so there you go. All of the other painted elements weren't actually painted, they were dyed. I used a spray can of vinyl dye which bonds to and is absorbed by the plastic, leaving a much cleaner, smoother finish than you ever could with any form of paint. --Tony
-
I was digging out some figs last night and found some of my old custom figs (well, two of the ones aren't actually "custom"), so I decided to take some pictures. Descriptions are on their respective Flickr photo pages. Ancient Knight Skull Knight The Oracle Vinyl Knight Old School Custom Accessories --Tony
-
Just a quick vignette I threw together. --Tony
-
2x2 turntables (in conjunction with tiles) work very well in attaching curved track to baseplates. --Tony
-
Interview about Eurobricks by Hinckley
SavaTheAggie replied to Bonaparte's topic in Forum Information and Help
Strange that the article about Eurobricks on TBB talks about the new policy against leaks when there's a (potential) leak right there on the main page. Hmm... --Tony -
Thanks much! She certainly is an odd one, which is part of what made me want to build her. The "2602" is a real life sticker, the printer I used this time really couldn't do a true "black" as well as I'd like. I'll either have to redo them or get one of the brick engravers to make me up a set of custom bricks. Thanks much! If it weren't for the folks over at Flickr giving me suggestions I don't think she would be as nice, having people comment on my WIP shots really helps my process. --Tony
-
Gallery Erie #2602 L-1 Camelback Angus class (0-8-8-0) Steam Locomotive. This is my version of the truly bizarre Erie L-1. Built by ALCO for the Erie in 1907, she was, at the time, the largest locomotive in the world, as well as the only articulated camelbacks ever built. Only three were ever built, I chose to number mine after the last of the three simply because most models I've seen are of the first two. A camelback locomotive is a locomotive which has it's cab located in the middle of the boiler, and it's a design that served a special purpose. Camelback locomotives were designed to burn anthracite coal, which burns longer but cooler than bituminous coal, requiring a larger firebox. So large, in fact, that it restricted the engineer's view around it, requiring the cab to be moved forward. It also meant the fireman was left alone on the back of the locomotive. This type of locomotive was eventually banned in the US due to safety concerns. The L-1s were designed for pusher service over the Allegheny Mountains, and served until 1921 when they were refitted with conventional cabs, and retired altogether in 1930. --Tony
-
I've had a few people comment over the years that my Dreyfuss Hudson's nose stuck out too far, and it's always looked a bit too short to me. So, among other changes, I pushed the boiler back one stud, pushing back the nose and extending the overall length. Here's the results: And a comparison: --Tony
-
The most recent TexLUG display installed this last week at the LEGO Brand Store in Baybrook Mall in Houston, Texas. More pictures can be found in My Flickr Gallery. The display was a combined effort by Matt Sailors and myself. Matt created the upper display with the parade, and then asked me to create a base for it. I, of course, added my own medieval twist on the whole thing. --Tony
-
If you feel like taking a gamble, the LEGO Brand stores (in the US, anyway) are having a Black Friday sale. At checkout on November 28th you'll be given a scratch off card. On that card is a discount of 10%, 20% or 50% off your entire purchase. Offer good while scratch off cards are in stock. --Tony
-
TexLUG at Maker Faire Austin 2008
SavaTheAggie replied to SavaTheAggie's topic in General LEGO Discussion
This was the second year in Austin, they've had other Maker Faires out in California, if I'm not mistaken. I believe it will be returning for a third year, time will tell if they want us back, too. --Tony -
TexLUG was invited to participate at Maker Faire 2008 in Austin, Texas this past weekend. We're not the first LUG to display at Maker Faire, but this was our first time, and we walked away with not one but two "Editor's Choice" awards for our display/booth. We were given a huge area to work with, which we filled with two displays - a Space/Moonbase and a Town/Train (with tall ships). We also had two areas for kids to come and build, one filled with Duplo, the other with regular System. My pictures can be found here: Gallery We had a lot of fun and we hope that we'll be invited back next year. --Tony
-
Nice review, pretty thorough. Just FYI, steam engines can technically run on anything that burns - from coal, to wood, to oil and natural gas. Many of the early steam engines ran on wood simply because wood is plentiful almost everywhere, so if you ran out of fuel it was easy to get more. Of course certain adjustments must be made to run on liquid or liquefied gas fuel, but the only thing that's important is that the water gets hot enough fast enough to turn to enough steam. --Tony
-
The locomotive is a bit small, I'll agree, but it's still an awesome set. My favorite part is the gondola car with all the presents, the passenger car looks little off, but I can't complain about much. --Tony
-
The product of too much time in Classic-Castle Chat. --Tony
-
Yes, it is reliable. If you click on the link to the discussion on Classic-Castle, you'll note that the information is confirmed by Steve Witt, community liason for the LEGO company. I, as an ambassador, can also confirm this, if Steve's word is not enough for you. --Tony
-
When Chris MacDougald and I put together the TexLUG display at the Healthy Baby and Child Expo back in the spring, we apparently had too much sugar, or maybe not enough sleep. We may never know the exact cause, but something happened that effected our judgment, and fortunately for you we caught it on film! The first (and much longer) video is more serious than the other, but there's plenty of goofiness to be seen: The second (and shorter) video is just pure goofiness. Be sure to watch for two deleted scenes after the credits: --Tony P.S. The videos were entirely put together by Chris MacDougald - I can only take credit for half the goofiness and the MOCs I supplied.
-
LEGO Video Game collectable item. --Tony
-
Thank you all for the kind words. Don't worry about the increase in the price of medium blue bricks - all the extra medium blue bricks I used to build up my Cinema, outside of a small handful of 1x1 bricks, came from my local PaB wall, where large quantities of 1x2, 1x4, and 2x4 medium blue bricks can still be found. --Tony