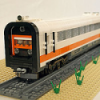
mtrkustoms Posted March 24, 2014 Posted March 24, 2014 (edited) Dear all, I just created a mini-tutorial to make custom and cheap electric power pickups to use 9v rails, and can be adapeted to everyone needs. The initial idea was to make a reliable and cheap alternative to 9v motors. My idea was to use the electrick pickups of the slot cars, a copper "cable". this solution is more simple and cheaper than the rairoad metal wheels. I am not responsible of any damages, burns, sticky fingers or lost of bricks.... Not do it without an adult supervision Electric power Pickups "Slot type" Material - Slot pickups - Electric cable - Soldering iron - Tin - Instant Glue - Electric clamps - 4 1N4001 Diodes - Welding Protoboard - Voltage regulator L780X - 4700uF Capacitor Total aprox 6€ / 7$ This can be cheaper without board, only using the diodes bridge. Diodes bridge This is a simple bridge with 4 diodes (1N4001 1Amp) and it is used to provide correct polarity to the system with any polarity of the rail. So no shortcircuit can be possible Voltage regulator L780X to prevent over voltage in the train, can be used 6v or 9v regulators. Capacitor 4700uF capacitor, as my experience i needed 2 of each capacitors to provide the necesary current to 20 high power leds in my 252 Locomotive + Bedcar with no turning off them in a 2 rails sections with no power (a lowering of the instensity is appreciated) or in the railcar to provide the necesary current to power the PF motor without stop the railcar in a rail section without power. Mount the components in the board according to the following scheme: Being patieng, mount the board, for me is the first board i solder, so everybody can do it, if all is ok, when we connect the board no white smoke appear Dissasemble the electric clamps, only a cutter is needed. Glue these clamps where we think is the better place, the optimus is to put them between 2 wheel axles, or near one wheel axle. Connect the Slot pickups to the electric clamp, and the input of the diodes bridge to the electric clamp I.E.: In 252 Loco, y put them after one axle In the railcar i put them directly to the PF motor between 2 wheel axles Put the board where possible Finally we have the final result: 252 Loco Railcar And now a couple of videos: Railcar, first it can be observed how it works with any polarity of the rails, there is a brown rail section in the right of the circuit with no electric power 252 Loco, first it can be observed how it works with any polarity of the rails, there is 2 brown rail sections in the leftof the circuit with no electric power Enjoy it Edited March 24, 2014 by mtrkustoms Quote
LEGO Train 12 Volts Posted March 24, 2014 Posted March 24, 2014 Nice video and good work ...only one question: this solution is already tested for the switches? Quote
mtrkustoms Posted March 24, 2014 Author Posted March 24, 2014 (edited) Not yet, i do not have any 9v switch to test the function, Testing the railcar with a PF switch works only in one way, only when it goes in the way 1 rail to 2 rails; when the railcar goes from the part of 2 rail to 1 rail, appear the problems The loco, works in both ways, except when comes by the exit rail to the main rail. Can be improved putting the pickups in the same line than the rail. Edited March 24, 2014 by mtrkustoms Quote
zephyr1934 Posted March 25, 2014 Posted March 25, 2014 Enjoy it Have done so. Looks like a great solution, though indeed, you would probably have to be careful of 9v switches or crossovers as the power pick ups could short the track on diverging directions. Since you are able to bridge nonpowered sections with this build, the solution is already included- just use plastic switches. Very nice Quote
Recommended Posts
Join the conversation
You can post now and register later. If you have an account, sign in now to post with your account.