Search the Community
Showing results for tags 'z-95 headhunter'.
Found 6 results
-
This is my UCS-like version of the Z-95 Headhunter from the Clone Wars. It is 937 pieces + 125 pieces for the stand. The Z-95 is a pretty sleek starfighter and I wanted to give it that clean look that it has in the Clone Wars show. I think I did a decent job at that - there are not many studs showing and the starfighter overall looks pretty sleek. I did also add in landing gear. There are 3 - one in the front and two towards the back. They can retract when you no longer need them. There is also a little slot in the bottom of the starfighter for the stand to go. There isn't actually a connection; you just place the starfighter right on top of the stand. Lego Z-95 Headhunter moc (Clone Wars) by Rendili Bricks, on Flickr z95 with stand_2 by Rendili Bricks, on Flickr UntitledModel by Rendili Bricks, on Flickr I did also make instructions/parts list if anyone was curious: https://rebrickable.com/mocs/MOC-88840/RendiliBricks/z-95-headhunter/#details
-

[REBRICK][MOD] Star Wars Z-95 Headhunter | conversion for display stand and landing skids
NerdYoda posted a topic in LEGO Star Wars
Hello everyone, some weeks ago I bought and downloaded the manual of the classic - and for me best - Z-95 Headhunter of the Designer Moppo (MOC-30461) from Rebrickable (link to the MOC: https://rebrickable.com/mocs/MOC-30461/Moppo/z95-headhunter/#parts). After I had all the parts together and could start building, I soon realized that the MOC was not suitable to be placed next to all the others in my showcase on an acrylic display stand, as the photo of the bottom side shows. In order to present it next to my other models and MOCs, I ordered a suitable Medium Angled Acrylic Display Stand with a 4x4 Top Plate from Wicked Bricks (https://www.wickedbrick.com/collections/vario-display-stands-1/products/small-angled-multi-use-display-stand-for-lego-vehicles), so that I could consider and implement the necessary modification of the original model after receiving it. The idea was to construct an additional carrier and to modify the bottom side of the Z-95 Headhunter accordingly, so that it will fit the model and the display stand at the end. To do this, a sketch had to be made to determine the parts to be ordered. Modification of the Z-95 Headhunter (bottom side). For the necessary modification you need the following parts: (Structure: Designation | part number | quantity | comment) Plate 1x4 2 Knobs | 4599498 | 2 Flat Tile 1x3 | 4558169 | 2 Flat Tile 1x2 | 4211414 | 1 Flat Tile 2x2 | 4211413 | 1 Once you have all the parts together, start by removing the three flat tiles 1x4 from the bottom of the Z-95. The same applies to the Flat Tiles 2x4. At the gained space you attach the above parts from the parts list in the arrangement shown on the photo. This way we realize a mounting possibility for the carrier, which will be built in the next step and serves as a bridge between Display Stand and Z-95 Headhunter. We need the dismantled Flat Tile 1x4 for the carrier, which we will focus on in the next step. The carrier. The carrier consists of two parts. We need the following parts for the carrier Plate 1x4 | 4211445 | 3 Flat Tile 1x4 | - | 1 | From the dismantled parts from above. Half Bow 1x2x2 Inv. | 6144138 | 2 | Half Bow 1x2x2 | 6028813 | 2 | Technic Brick 1x1 | 4211535 | 4 | Plate 1x2 | 4211398 | 2 Profiles Brick 1x2 | 4211383 | 2 | The construction is very simple and can be seen in the following picture. The result. The result is that the carrier sits very firmly on the display stand and the Z-95 Headhunter is also solidly attached to the carrier, so that nothing stands in the way of presenting the model on a shelf or in a showcase. The modification of the underside has been designed so that the hunter does not gain excess weight in one direction or the other to prevent accidental falling. So everyone can decide for himself whether the hunter tilts into a curve, rises steeply or descends. Besides the possibility to show the hunter on a display stand, I also implemented a modification for the attachment of landing supports. The realization is also very easy and fast with a little disassembly and assembly. Here you need - besides the above mentioned modification of the underside - the following components: Technic Lever 3M | 6331723 | 2 2M Cross Axle w. groove | 4142865 | 2 Fric/Stump with cross hole | 4158848 | 1 Fric/Forc with cross hole | 4210695 | 2 Plate 1x3 w/Stub/Along/U.P. | 4210882 | 1 Roof Brick 1x2/45° | 4211614 | 4 Flat Tile 1x2 | 4211414 | 2 Landing skid front. The assembly of the front landing skid is shown on the following photo. In addition, the two Technic Lever 2M, which were originally mounted, must be replaced by the Technic Lever 3M in order to attach the landing skid to the fighter. Landing struts underside. The landing skids of the underside are realized by two Roof Bricks each, which are connected by a 1x2 Flat Tile. Both are then attached to the 1x4 Plate with 2 Knobs on the underside (see above). Just align everything nicely and the Z-95 Headhunter is ready for presentation inside a hangar MOC, since it is now standing on its own landing struts: -

[Factions Ep. 4] [Incom - Z-95 Headhunter] [R16 - Tatooine - BS]
Rconn0 posted a topic in Factions Archive
Hello everyone, Today I present my first build back on the forums in a long time, my first factions build, and my first starship MOC, so hopefully it turned out alright. I haven't had time to get some decent editing on the photos, but I think they will work for now. My build is an Incom Z-95 Headhunter. Set after The Return of the Jedi, I was going for a look similar to the change from T-65 to T-70 X-wing, more refined and new looking than the usual model of the ship. This Headhunter is piloted by the black sun in their escapades, and it is currently docked at a small outpost, manned by old, re-purposed, battled droids, on Tatooine. Untitled by ryan connor, on Flickr Untitled by ryan connor, on Flickr Untitled by ryan connor, on Flickr Untitled by ryan connor, on Flickr Here are some Pics of just the Headhunter: Untitled by ryan connor, on Flickr Untitled by ryan connor, on Flickr Untitled by ryan connor, on Flickr Thanks for viewing, C&C appreciated, It's good to be back -
Since everyone is building X-wings, why not build something similar but less well known? The Z-95 Headhunter is one that has many variations both in Canon and Legends, the most notable ones being the "X-wing without the S-foils" and that really ugly one shown in The Clone Wars series. I was influenced by various maquettes and illustrations of a Z-95 with the big engines. My take on the starfighter is that it's a newer model produced in the post-ROTJ era, with influences from its distant cousin, the T-70 X-wing. I worked 3 weeks on this, and incorporates some crazy building techniques influenced by many people on this forum. I'm not to happy with some of the results, it's not as perfect as, say, Jerac's MOC, but then again I'm kinda new at this... There are more pics at the flickr album and may post more. Lastly, a small scene with an upcoming MOC...
-
Hi all For any of you that own the Z-95 headhunter there is a large spring loaded missile underneath and I have no idea if it is in the real ship from the clone wars. I'm thinking of removing it and turning it into a cargo hold or something else because I'm not a fan of any of the spring loaded missiles or darts and anything along that line. Any ideas on that?
-
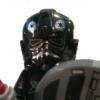
Made this for a freebuild for SoNE. The build won't be ready for about a week since I need some parts from Bricklink in order to finish this Headhunter as well as another (the other one will be smaller, have four engines, and be gray; in other words, a more "Rebel-like'" version), and improve my currently horrendously ugly Tie Fighter. The cockpit and the unnervingly cheerful pilot. A sight my TIE pilot will never get to see. The cones on the engines aren't canon, but I think it gives it a more clone-wars feel. The engines. When the BL order comes in, it'll have authentic pink exhaust. Until then, my camera is rebelling by taking blurry pictures of them. The wing-tip blaster. My second-most favorite part. Has anyone else wondered where the proton torpedo launchers were? I mean, Episode IV didn't show the X-Wing when the torpedoes were being launched, and there aren't any visible exit ports on the fighter to my knowledge. And here's my most favorite part: the back panel flips down to reveal the engine... ...which comes out for maintenance. Or, you know, if you need to jettison the engine so you can have less weight mid-flight That's it. Overall, I'm really pleased with how this turned out