Search the Community
Showing results for tags 'large'.
Found 22 results
-
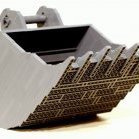
Today I started a new model. I'll build it mainly using light bluish grey Technic parts. Here's a first sketch to plan Bricklink order:
-
XL two track railway locomotive shed (finished in real bricks 10/4/23)
Murdoch17 posted a topic in LEGO Train Tech
This model was originally built by my father around 2005 / 2006 for an old 9v-style MOC steam engine we built together based off set 7722. It was three tracks long and one track wide at first, but I reworked it to be five tracks long and two tracks wide in late 2015. Both of these earlier models were almost totally black with a little splash of red. Fast forward to 2023: I have remodeled the MOC almost entirely. I've changed most of the black to tan, blocking up the lowest row of windows, and changing the red doors to light gray. The roof remains untouched except for twelve parts above the doors / back wall. The building is a little under 5 tracks long, or about 75 studs in length. The maximum side clearance is good enough for a 10 stud wide model (no overhang at that width) while the trains can be no more than 11 bricks tall. Here we see the rear of the MOC. The roof comes off and the inside has a new raised platform to allow for maintenance to the engines. (before it was just totally empty) This model can hold most of my steam engine designs (not all at once of course!), although it is probably too short in length for some of my diesel units. The dismantled 2015 version is in the spoiler tag. EDIT 10/4/23: Real pictures added, entire post restructured. Thoughts?- 12 replies
-
- large
- large model
-
(and 5 more)
Tagged with:
-
Ever wondered what a large scale caravan would look like? Here, I've made one that has pretty awesome features! Here's the interior! First, there's the kitchen with a cupboard, drawers, microwave oven, 2-burner cooktop and a radio! 2-person bed with quilt! I still need to know how I could make a fridge/freezer that can store a lot of food! Luxurious Dining Suite with 2 upholstered chairs, coffee mugs & fruit bowl! Folding Entry Steps! The drawbar. Here, there's 2 gas bottles, jockey wheel, safety chains and even a security lock on the coupler! The sunshade on the kitchen window can be closed for travel! The shutters on the front & back can be opened & closed too! The entry door can also be opened! Waste Water Pipe Interchangeable Number Plates, depending on which Australian state you live in! (I live in South Australia!) Stabilizer Jacks Those new 'Flat Tile 1x1 Half Circle' (Part #24246) pieces make nice trailer lights! Number Plate Light Here's the food! Additional Features: Two Spare Wheels Removable Roof Opening Side Windows Outside Light Now if only there was going to be a car that could go perfectly with the caravan... Maybe a Holden Kingswood or Belmont Wagon! Thanks for reading!
-
Hi all, I've started to use again the 3D printer after a big time it was unused (I had to re-align it and still has some work to do). Thinking about a model of @Evans (a large steamer in 12v style with old 12v medium size wheels - those of 7750 , but in black), I tried to recreate the original 12v medium wheels design and I also tried to go further, enlarging them to 37mm size. The new wheels feature 10 spokes as the original old wheels, angled at 36° each. I used Tinkercad since it is easy and more than sufficient for my projects. And this is the result ,printed both in black and red (red filament is new - I have to understand why there is black filament residual - I'm still a total noob on 3D printing ). I printed on a medium quality setting for the red ones. The black wheels were printed on draft setting. The filament I used is PLA - a medium cost one but it works fine. The red color is somewhat between the red one used for new Large wheels and the old red of the 80s. I think there are darker and lighter red filaments, but it's really difficult to tell if the printed result will be of the correct color (the raw filament color is quite the same as the original Lego wheels, but once printed...they are a bit brighter). I used a pair of normal red wheels (the ones used on wagons - like in 7720) I removed the original wheels, kept the "red axle" and used it with my 3d printed wheel. Then I locked again in place the red pin on the black wheel holder brick - and that's all. I'll post here all my experiments - there's a lot to improve! If you have any ideas or suggestions - feel free to comment! Ciao! Davide
-
[MOC] Liebherr R 9150 Excavator 1:13
Brickzone52 posted a topic in LEGO Technic, Mindstorms, Model Team and Scale Modeling
Hello Everybody My Name is Dani, im a 36 years old LEGO fanatic from Zürich Switzerland and im a brandnew eurobricks member. ;-) Im proud to introduce you my Liebherr R 9150 excavator in the scale 1:13. Yeah i know, the mining machines from Liebherr are white in real, but i like the yellow Liebherr color design much more. It is „only“ a scale model and has no functions, motors etc, cause the construction is just too heavy. I dont know the wheight exactly, but i think its about 40 pounds, this thing is HUGE. As you can see, i used alot parts, only for the black track-chains about 1200 pieces. I worked on this Monster since 3 years, of course with a lot breaks between. Effort in hours: i guess about 300. Please let me know what you think. If you have any questions, just ask. ;-)- 21 replies
-
- zürich
- switzerland
- (and 12 more)
-

[MOC] Tractor Trailer
Black_Belt_Titan posted a topic in LEGO Technic, Mindstorms, Model Team and Scale Modeling
Throughout 2017 I designed and built this massive 3000+ piece tractor trailer. This is by far my largest MOC and definitely my best work yet. This is not a recreation of any specific real life truck nor is it built to a set scale. Although the cab is mostly system bricks on the outside, the frame is largely Technic and the trailer is almost entirely Technic. Inspiration was drawn from Lego Technic 8285 and 42009 and Lego Creator 6753. I do have LDD files of both the truck and trailer. Feel free to leave a comment on what you think of my truck and any suggestions for improvement! https://www.youtube.com/watch?v=gLowjdwrGcU For all photos: https://www.flickr.com/photos/162858504@N05/with/28224805797/ -

[MOC] Giant LEGO F1 Car
TheMindGarage posted a topic in LEGO Technic, Mindstorms, Model Team and Scale Modeling
Yes, this is a giant F1 car. It's around 1.2 metres long and large enough to sit in. The main features: Pedal-driven rear wheels 8-speed sequential transmission shifted via paddles on steering wheel Rear disk brakes activated by button on steering wheel Electronically-controlled limited-slip differential Rack and pinion steering connected to steering wheel Display showing pedal RPM, gear and wheel speed The car uses MINDSTORMS EV3 to operate the functions. It uses one standard EV3 set's worth of electronics plus an additional Large motor. The gearbox is a 4-speed design expanded with a close-ratio 2-speed (ratios 1:1 and 1:1.2) giving 8 speeds in total. A single motor controls it - each gear requires 180 degrees of rotation. Rotating by 90 degrees puts the gearbox in neutral. A Geneva mechanism is used to control the 4-speed - when the 2-speed goes from the high gear to the low gear, the 4-speed is advanced one gear. This is how it shifts from gear 2 to gear 3. In order to reduce the amount of torque handled by the gearbox, it is geared up very highly. This increases friction and reduces efficiency, but there is no shortage of power (I calculated a human’s power output at over 100 EV3 Large motors!). The limiting factor here is how much torque the parts can handle. The disk brakes use a 49mm tyre as the disk and red rubber pads from the EV3 Expansion set. There are two sets of callipers on each wheel (4 pads per wheel in total) giving huge stopping power. A rather complex linkage allows a single input to control both sets of callipers at the same time. An EV3 Large motor pulls on the beam which activates the brakes via a bell-crank linkage. There are two brake motors so the EV3 can operate them independently - this is important for the next step. The differential is very ruggedly-built to prevent gear slippage or parts breaking. An extra small differential measures the speed difference between the two outputs - this goes to a Medium motor used as a rotation sensor. This allows the percentage differential slip to be calculated - if it exceeds a certain limit, the faster wheel is braked slightly (via the disk brakes) to give more torque to the slower one. The clutch ring is manually operated by a switch under the steering wheel- when engaged, it locks the output to zero, making the differential operate as a solid axle. This is a very similar system to the one used on the million-dollar McLaren P1 hypercar. The wheels are made from tank tread links bent backwards into a tight loop. Not sure if this is considered a "legal" solution, but it works very well. The front wheels have 42 links and the rears have 48. The rear wheels have very tight spokes in order to allow them to take the massive weight of the driver. The wheels started gaining camber (tilting) and falling off under load, so I added extra support on the other side of the wheel. The beams are set up to be under tension to push the wheel towards the axle and prevent it from falling off. The rear section uses many layers of beams and frames to make it strong enough to withstand the weight of the driver. Extra diagonal beams (the white ones) are added - they are positioned in a perfect 3:4:5 Pythagorean triple to avoid having them under compression or tension. I used a Warren truss for the central structure - that bit is virtually indestructible. The front section doesn’t look very strong, but the extra vertical beams allow it to withstand plenty of load. The chassis is very sturdy, but with a driver on board, it tends to bend quite a bit and suffers from some serious body roll issues. The steering uses a rack-and-pinion system with just over half a turn from lock-to-lock. This is similar to the steering ratio used on F1 cars. Two large custom-built universal joints are used for the steering shaft. The shaft is reinforced to prevent torsion - even a little twisting would result in inaccurate, floppy steering. The steering wheel is made to look like an F1 wheel. The two rear paddles are for the gears - right for shifting up, left for down. The front left paddle activates neutral gear when held - as soon as it is released, the transmission returns to the last gear selected. The front right paddle activates both brakes simultaneously. Each paddle presses a button on the EV3 infrared remote which is in the middle of the steering wheel. Its signal shines through the turntable and is captured by the IR receiver on the other side. This allows signals from the steering wheel to reach the EV3 brick wirelessly. The paddles have a very short throw and a crisp feel - they’re one of my favourite parts of the car. The car has a full display with features like an RPM bar and wheel speed shown (since the wheels have very little grip and are liable to doing burnouts, actual speed will be quite different). The gear number is also shown. The RPM is measured by a touch sensor and a cam connected to the pedals. The cam bumps the touch sensor every 1/7th turn of the pedals. I initially tried to use a Colour sensor to detect the black chain links against the greys but the difference in reflected light was insufficient for it to be reliable. Strength-wise, the chassis can easily deal with 20kg on the seat. Perhaps it would be ideal for a 6-year-old gearhead. Unfortunately, I'm a lot more than 20kg, so I kind of broke it. Here's the aftermath: Here's a video of me explaining and demonstrating the features of the car. You can also skip to 10:56 to see me try out the car... [All music is composed by me. My F1 V10 impression is not edited in any way!] In the end, I think it was a successful experiment. I intended this MOC to be a testbed for various ideas I had, and you might possibly see a scaled-down version of some of the mechanisms (such as the differential) in a normal-sized car of mine in the future. After all, that's why real-life car manufacturers build concepts and sell low-volume cars at a loss. If it wasn't for that, we wouldn't have the Bugatti Veyron, Pagani Zonda R, Lexus LFA and other amazing machines. -

What would be considered a "large" LEGO collection?
Brikkyy13 posted a topic in General LEGO Discussion
Whenever people see my collection they always comment on how large it is (even though I'll usually only have about 5% on display at any time due to space) and I'll usually correct them by saying that it's small compared to some people's. I have (as of right now) 466 sets and including lose pieces approximately 120,000 parts. I'd consider my collection to be small. I was just wondering what other people would consider to be a "large" collection?- 31 replies
-
- collection
- question
-
(and 1 more)
Tagged with:
-
After getting my third set i went on with the XXL version of the Assembly Square.. so far i ended up with this! The turret building is looking pretty good to me now!
-
Recently i made some expansions on my Modular Square. Within a few months, i have to fit in the Lego 10255 Assembly Square as well, but i'll find a way! I used 20 modular sets to create this square. For the square itself, i used over 16.000 parts for tiling, trees and benches! Enjoy my HD YouTube video, that i made last week and get inspired!:
-
Here's my Lego® Serenity. You can see the full build article and more pics here. Enjoy.
- 7 replies
-
- spaceship
- spacecraft
-
(and 6 more)
Tagged with:
-
With the 30th Anniversary of Space Shuttle Challenger's explosion this year, I've decided to put various sizes of the official Space Shuttle models in a row! From the left to right as follows: 1682 Space Shuttle (Small) 6339 Shuttle Launch Pad (Small) 60080 Spaceport (Medium) 10231 Shuttle Expedition/10213 Shuttle Adventure (Large) 7470 Space Shuttle Discovery (Large) 8480 FOS Light Space Shuttle (Extra Large) Which size do you prefer the most?
- 5 replies
-
- ldd
- space shuttle
-
(and 7 more)
Tagged with:
-
Hi! Instructions for my Snowspeeder model are now available at mocplans.com Instructions are made by Eric Albrecht (Blakbird) and have 125 pages. Model itself has 2191 parts. I'll update this post with rebrickable url later when it's online. Rebel Snowspeeder at mocplans.com
- 18 replies
-
- snowspeeder
- rebel
-
(and 6 more)
Tagged with:
-
Since two days i'm working on my latest project...a Modular City Square... or, a square for my modulars.....it is a rather large surface, so i had to do a few bricklink orders...but this is what i started with..updates will follow!!.
-
The circle goes around... Pirates decided to hide their newest loot. They rowed to the unknown island to find a place for their treasure. It was getting dark already, but they still managed to find a cave that looked like a perfect hiding place. But even for the stern pirates it was shocking to see what was going on inside... Islander Chief's Cave by Heikki Mattila, on Flickr In this creation I have used lighting kit made by a company called Brickstuff.
- 13 replies
-
- PTV 2015 Large
- Large
-
(and 4 more)
Tagged with:
-
A dwarven hammer I built out of LEGO-bricks. It has a width of ~39cm and a length of ~106,5cm. Some additional views (22nd March 2015): +++++][+][+][+][+][+][+][+][+][+][+][+][+][+][+][+][+][+][+][+][+++++ More pictures of my creations can be found on my homepage! +++++][+][+][+][+][+][+][+][+][+][+][+][+][+][+][+][+][+][+][+][+++++
-
I've been attending the BrickCon Public Expo in Seattle for years, but had never displayed my models before or participated in the longer 4-day Private Convention. I just completed an in-depth write-up that goes "behind the scenes" at one of the largest and oldest LEGO conventions for AFOL's. Some of my highlights: Seeing large LEGO models get re-assembled was really interesting. I loved playing the LEGO games like the "Blind Build" shown here. Displaying my models for the first time to the Public was really cool. As always, there were impressive new models on display at the Public Exhibition. LINK TO LONGER ARTICLE AND MORE PHOTOS: http://tomalphin.com/2014/10/brickcon_2014_behind_the_scenes.html I hope you find this behind the scenes look at BrickCon to be interesting. If you got to attend too, what was your highlight from the show? Sincerely, ---tom
- 9 replies
-
- BrickCon
- Convention
- (and 6 more)
-
Hello EB-members, i always only put original sets together, mostly City and Creator. I admire people who create their own Modular-like buildings... I do not have those building skills (yet) but with expanding the 10224 Town Hall by 2 x 12 studs i learned a bit about the way these buildings are made.. It was so much fun and i'm really proud of the result.. I know, it might not be too special for others, but for me it was the first step to more MOD's and hopefully, MOC's....!!! The building is made out of 2 sets, and is widened by 12 studs on both sides..so total wodth is 56 studs now! The building is also taller due to the longer and higher tiled roof on the 2 x 3 pillars. I created some extra rooms in the building and also the tower is a lot taller. I started with the first floor, and worked up. The extra pillars were the most difficult to integrate. You can find more pictures on my Flickr site. Greetz, LegoSjaak!
-

Release Date Question for Servo, L-Motor & V2 IR
750ACE posted a topic in LEGO Technic, Mindstorms, Model Team and Scale Modeling
Has anyone confirmed the actual release date to purchase these items direct from Lego, is it still March 2013? Was there an update to the remote that came with the 9398? The reason I ask, 1. I'm not buying another 9398, 2. I didn't want to pay overseas shipping costs. -

rc chassis for new hubs WIP
z3_2drive posted a topic in LEGO Technic, Mindstorms, Model Team and Scale Modeling
The previous attempt at a large scale car failed because it was not strong enough for the drivetrain, and my attempts to make a sturdy chassis around it were not so great because of the vertical placement of the buggy motors. I have sitting on my desk now, a 2nd attempt at a large scale rc, with a much more simple and robust suspension, which will eventually use the new f1 hubs, at the moment I used the dark bley mog hub because of it's dimensions. I placed the buggy motors in a clever fashion, so there are many bracing opportunities for the rest of the chassis and the rear axle. Because of the eventual weight of the vehicle I had to put a combination of various shocks to get a perfect balance between soft and stiff-soft enough that it will absorb bumps and jumps but stiff enough that it wont bottom out (hit the ground) because there is a lot of travel and not that much clearance, and I will use the same wheels/tires as on the 42000. Photos: Enjoy!- 35 replies
-
- two
- buggy motors
-
(and 2 more)
Tagged with:
-
Hello! Today I want to present you my Lego City. It is called Pasioland. I wish you will like it. Check out the video. Please say what do you think!


