Search the Community
Showing results for tags 'iron'.
Found 22 results
-

1950's Astro Bot 33 and retro style Classic Space car - real world (revised) MOC builds
Murdoch17 posted a topic in LEGO Sci-Fi
This Classic Space version of Build Better Bricks' Iron Giant with the head of the previous @hachiroku version of the Giant's head added on. (consider it a mashup of the two Iron Giant models!) The car was also inspired by this Hachiroku build here, and was originally made by me in September 2020. I have just now revised this early 1950's car for Benny with new mudguards that cover the (enlarged) two rear wheels. I made both MOC models into CS colors (black, both "new" grays, and blue, with white for the car roof) with red and green indicator light parts (on the robot only), and two yellow / black bumblebee stripe tiles with a printed 4 x 2 slopes on the arms / car trunk lid. (They aren't shown, but have this print) The gray jumpers near the robot's waist are for power conduits, so he can be recharged without consuming (costly!) metal products via his opening mouth. Speaking of which, the mouth now can open to allow for posing... but unfortunately, it doesn't play nice with the shoulders, so the mouth must remain closed until I can figure out a better solution. Another thing that didn't work well was the rotating waist: it operated too jerkily and was hard to operate, so I removed that feature. The rear of the robot. Not sure if it's a feature, but the arms won't go down any further to the sides... I tried everything I could think of, but no dice. This is because the arms can't be removed without destroying the awesome-looking - and very intricate - torso. Looks pretty classy, right? The two doors open, but the obligatory black space seat is missing, because any more height and Benny would not fit inside. The rear has a license plate, the classic space logo, and two coverings mostly obscuring the rear wheels. As a courtesy to the driver instead of the space seat, I have included a light bluish gray upholstery for the back of the seat. As usual, Thoughts, Suggestions, Comments, & Questions of any kind are always welcome! So, what do you think? -
The Brass Automaton (a steampunk style prototype of the Iron Giant) MOC
Murdoch17 posted a topic in LEGO Action and Adventure Themes
Long before the Iron Giant began hurtling towards Rockwell, there was a prototype model, which landed on Earth close to 64 years earlier than the Iron Giant's 1957 landing. They were very similar robots, made by an Ancient race of beings that wanted to gather as much information about the Universe as possible. They first created this prototype model which was made mostly of brass, copper, and iron, but was powered by a highly advanced Fusion reactor that was powered by metals the robot consumed, usually uninhabited asteroids floating through space. Unlike the Iron Giant, this prototype was not able to re-assemble itself as it had a error in it's programming. In the year 1893, the then un-named Brass Automaton landed in the Pacific Ocean near the long-forgotten Dino Island. It created a tsunami and unhinged the island from the Earth's crust and as such the land began to slowly sink. The robot was first sighted by nearby Australian military sailors, who upon seeing the giant being arise from the water, tried to describe the being the best way they could through their wireless telegraph: they named it the Brass Automaton. Johnny Thunder and his Adventurers crew would later go looking for this great metal being after saving as many dinosaurs as possible from the sinking primeval island in 1923, but never saw it, as it was hiding in South American coastline to gather information on the dominant beings of Earth, also known as Humans. After staying relatively hidden in various secluded ocean floor places around the globe for around thirty years, the Brass Automaton was finished reading the minds off people for information on humans as a species: Our past, our present as of 1924, our origin (as it was then known), and our many languages, along with defenses, politics, and technology. After gathering all that intelligence, the Brass Automaton headed to the North Pole along the sea floor to transmit the required information to it's home planet using a faster-than-light sub-dimensional beacon. (Basically, a fancy radio) That is just about when a major solar storm hit the Earth, with the radiation hitting the atmosphere of the Earth and scrambling the outgoing signal into nonsense. Now the garbled signal was received by the home base, and as a precaution, the Iron Giant version of the Brass Automaton was dispatched as fast as possible to earth. (That would take it nearly 35 years for it to get there at all possible speed, which would require it to refuel once arriving on Earth, which is why the Iron Giant was at the power plant at the beginning of the movie, whereupon it's memory was scrambled by the high-voltage electricity.) After sending the garbled message and being struck by a passing icebreaker-ship on his trip southwards, the Brass Automaton was temporarily incapacitated. It was then discovered washed ashore at the southern tip of Greenland by Dr. Harold Wormwood and brought back in pieces to his stately laboratory / mansion in Legorado, Colorado, where he ran test after test on the alien visitor. By 1926, the mad scientist-type Doctor Wormwood had the resembled robot nearly reassembled, and was preparing to restart it when a Lord Sam Sinister came upon rumors of the robot and wanted it for his own nefarious desires, with Johnny Thunder close on his heels... This steampunk version of the Brass Automaton a recolored and modified version of Build Better Bricks' Iron Giant with the head of my previous @hachiroku version of the model (seen above) of the same robot's head added on... I consider it a mashup of the two models. I made it into steampunk colors (black, brown and dark gray) with an exhaust steam pipe at the back of the neck, and yes, that is a monocle / targeting computer over the right eye for use with the gun arm (it was included in the Build Better Bricks instructions) that I'm still considering trying to use. You also may have noticed, the model is incomplete in places - some things just don't lineup properly in LDD like they do in real life. When fully assembled IRL, it should look much better though. Here is the Brass Automaton's laser gun... probably not going to build this, but I MIGHT place it on a tank or something. This is what I've found so far for this model.... 100 parts down, about 650 left to go. Comments Questions, Complaints are welcome! -
Not just trains, but train related. I built a big blast furnace with 13k bricks a while ago. It took several weeks to build it all in LDD. I tested the stability of the pipes i.r.l. with random bricks to be sure. When I posted those pictures, quite a few people asked for instructions so I decided to make a small blast furnace instead and enter it at Lego Ideas. It comes with all the main process features except the storage bunkers and crane. If you are interested in more pictures, please have a look at the linked page. https://ideas.lego.com/projects/7e689689-cd51-4f10-9e9f-ead01adae6b8 blast furnace by Yvonne Strijbos, on Flickr Blast furnace front by Yvonne Strijbos, on Flickr Blat furnace real built 2 by Yvonne Strijbos, on Flickr Blast furnace real built 1 by Yvonne Strijbos, on Flickr
-
Western-style wooden / iron truss bridge (nine tracks long- double tracked railroad trestle)
Murdoch17 posted a topic in LEGO Train Tech
One of the major problems of using my Eads bridge at shows is it's only one track wide.... so, I devised a western double-track wooden and iron structure using instructions from an old instruction I found on my hard-drive. (Originally from a defunct website / magazine called Railbricks and in a more modern concrete-looking format). This double structure is about 300 less parts than my single track Eads bridge and sits at the same height / length, so it can fit in the same spot. There are no bricks above track level at the beginning of the bridge so it works with even 10 wide trains or curves / switches immediately off the bridge! (This is unlike the Eads bridge, which cannot have turns right after it.) This trestle has about a track and a half of space between bridge end and truss section for an engine to straighten out on. The 10-wide BTTF time train fits easily though the bridge with room to spare! (time train not included in LDD file!) The new trestle is the same height and length as the Eads bridge, but with double the width for 300 less parts. The Eads bridge is also modular in construction, while the new one is not. (Eads bridge not included in LDD file!) LDD file for the wooden bridge (NO time train or Eads bridge in file!) is available at Brick-safe. Comments, Questions and complaints are always welcome! -
Cast iron is a valuable commodity in the islands. It's very expensive to ship iron from the mainland, so an iron foundry is an important part of a growing settlement. Here is the iron foundry in Weelond: The iron ore and charcoal needed for the blast furnace are kept in a storage house, near the furnace, but accessible from the street for easy delivery of the raw materials: The furnace is kept going for days on end without cooling down and reaches temperatures of nearly 2000 degrees (note the worker's protective facewear): When ready, a worker breaks the hole to allow the liquid iron to flow out: The molten iron flows into channels, where it cools... ... and is cast into ingots ("pigs") that can be used by blacksmiths to be formed into various items. Here piles of iron ingots can be seen in the background while a customer discusses delivery arrangements. A view from the street: Additional views: With the addition of this iron foundry, which will be licensed as a medium factory, Weelond is now a Large City! ---------- This was built and photographed by @Drunknok as my prize from his Merrynight challenge. I think he did an excellent job!
-

[TC13] Volvo Iron Knight
Jurss posted a topic in LEGO Technic, Mindstorms, Model Team and Scale Modeling
This is 3rd thing I tried to build for TC13. For my own surprise, this was very fast (started just yesterday afternoon). Volvo Iron Knight (if somebody here doesn't know) My model has two pullback motors working fake 4cyl engine it is almost in scale with tyres Some bad video -
type : lego gundam name : Gundam Bael - Base on the first from 72 demons of Solomon code : ASW-G-01 Pilot : McGillis Fareed, Agnika Kaieru series : Mobile Suit Gundam IRON-BLOODED ORPHANS / (機動戦士ガンダム 鉄血のオルフェンズ Kidō Senshi Gandamu Tekketsu no Orufenzu?) Youtube link : Non-weapon view : LEGO Gundam Bael ASW-G-01 1/60 by demon demon demon, trên Flickr LEGO Gundam Bael ASW-G-01 1/60 by demon demon demon, trên Flickr LEGO Gundam Bael ASW-G-01 1/60 by demon demon demon, trên Flickr LEGO Gundam Bael ASW-G-01 1/60 by demon demon demon, trên Flickr LEGO Gundam Bael ASW-G-01 1/60 by demon demon demon, trên Flickr LEGO Gundam Bael ASW-G-01 1/60 by demon demon demon, trên Flickr Weapon view: LEGO Gundam Bael ASW-G-01 1/60 by demon demon demon, trên Flickr LEGO Gundam Bael ASW-G-01 1/60 by demon demon demon, trên Flickr LEGO Gundam Bael ASW-G-01 1/60 by demon demon demon, trên Flickr LEGO Gundam Bael ASW-G-01 1/60 by demon demon demon, trên Flickr LEGO Gundam Bael ASW-G-01 1/60 by demon demon demon, trên Flickr LEGO Gundam Bael ASW-G-01 1/60 (pts just for fun) by demon demon demon, trên Flickr LEGO Gundam Bael & Gundam Kimaris Vidar by demon demon demon, trên Flickr LEGO Gundam Bael & Gundam Kimaris Vidar by demon demon demon, trên Flickr Some upgrade : Weapon set from RX-93 Nu Gundam LEGO Gundam Nu-Bael ASW-G-01-93 1/60 by demon demon demon, trên Flickr LEGO Gundam Nu-Bael ASW-G-01-93 1/60 by demon demon demon, trên Flickr LEGO Gundam Nu-Bael ASW-G-01-93 1/60 by demon demon demon, trên Flickr LEGO Gundam Nu-Bael and Gundam Kimaris Vidar Sazabi by demon demon demon, trên Flickr LEGO Gundam Nu-Bael and Gundam Kimaris Vidar Sazabi by demon demon demon, trên Flickr Thanks for visiting !
-
Hello gents, in this topic we would discuss modding options to redesign the avengers age of Ultron Hulkbuster, i would advise all those who have the model and have already modded it to thoroughly describe the process. We advide to only use pieces from the set, but if you do have to use another piece, please do specify the piece number and colour so the rest of us can then purchase it if we wish to follow your steps. Furthermore i advise please not to be greedy, this topic is about sharing, so we can all have a good definitive hulkbuster. So please if you have a good design then don't hog the design.
-
Volvo Truck - The Iron Knight
Lox Lego posted a topic in LEGO Technic, Mindstorms, Model Team and Scale Modeling
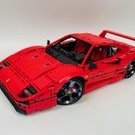
"Volvo Trucks reset its own two year-old record for heavy trucks with shockingly fast speed runs by its latest track-focused creation, the "Iron Knight." This big rig blasted to 60 mph in just 4.6 seconds thanks to its unbelievable 2,400 horsepower." iron knight by lachlan cameron, on Flickr Flicker: https://www.flickr.com/gp/139930963@N04/8xb6HX Video: Dugald has created a custom Iron Knight out of Technic Lego to pull my Ferrari FXX. (Unfortunately this MOC did not blast from 0-60mph in 4.6 seconds ) IMG_9090 by lachlan cameron, on Flickr This build is massive, 31 stud wide x 72 long x 35 tall. IMG_9127 by lachlan cameron, on Flickr The trailer can load and unload the 6 pound Ferrari with a winch and a clever sliding mechanism that slowly lowers the car down. IMG_9096 by lachlan cameron, on Flickr The trailer can switch from the winch to the lowering mechanism with a single switch powered by 1 XL motor. IMG_9100 by lachlan cameron, on Flickr The side panels flip up to reveal the battery packs. The Inline6 is located just behind the cabin. I've got to say, this truck has curves never seen before in Technic Lego truck. IMG_9092 by lachlan cameron, on Flickr This build took a month to create, some of the more difficult aspects to build was the tilt cabin with the working steering wheel and the 2wd - 4wd switch. IMG_9204 by lachlan cameron, on Flickr IMG_9206 by lachlan cameron, on Flickr IMG_9082 by lachlan cameron, on Flickr -
This is a mod of set 40128, as seen here: http://brickset.com/sets/40128-1/Robot Fictional background info: The NIFT-E robot was designed in 2015 to compliment the thousands of Sentry (4416) series robots produced in 2006 by the X-POD corporation for the original Nexus Force founders. However, the newer robots produced by Yesterday's Tomorrow Corporation are coated with a hard-to-find mineral called Retro-nite to better protect from Maelstrom corruption. As a side effect of this mineral makes use of a retro-futuristic design which won over Commander Bob of the Neo Nexus Force. (He is seen in the main pic alongside the first NIFT-E) Thirty-four of these robots were produced as a test batch, called the Nexus Iron Friendly Teammate - Engineer class (NIFT-E) for use as spaceship ground-crew and basic engineering duties, including fueling and maintenance, computer updating, and guiding ships into land. They work alongside human counterparts who work on the harder to reach areas of a ship's engine and take care of life support systems and crew comforts. Each human crewman is assigned an NIFT-E counterpart, in which they are partners working towards the same goal: keeping the ships flying and repair bay as empty as possible in case of emergency. This robot requires one part not in LDD, AKA this printed part ( http://www.bricklink...sp?P=15068pb004 ) goes on the center of his chest. The Rear of the NIFT-E.... nothing to see here! LDD file for the NIFT-E and Bob: http://www.moc-pages...1473453461m.lxf NOTE: The robot's head will not turn no matter what I do to the file, even though it's on a turn-plate. If you do need to turn his head, remove it, and then replace it when the turntable is placed int he correct position. (Name of the robot provided by a good friend of mine after looking for a neat 1950's sounding name) This robot will go alongside two more spaceships, an enlarged landing pad and a new car for Bob on my Nexus Force Ice Station Destiny space base when built in real life. Here's what the base looks back in late 2015. Any comments, questions and complaints are welcome.
-
Iron Man 3: Harbour Showdown by Sir Brickalot, on Flickr I'm on a MOC roll!
-
Ironman MK II (armor set) by Berakthrough Army With fine detailed armor, finished with silvery paint. Enjoy
-
A new build I made, depicting the Iron Throne from the HBO TV series 'Game of Thrones' This is based off of Cyol Ternyan's Iron Throne on Flickr. C&C welcome!
-
The Falworth Brothers have built their final entry to the Iron Builder match up. And we decided to finish with two entries to SHIPtember! The Doomsday by Mark of Falworth, on Flickr UNS Pollux by Brother Steven, on Flickr And now for the final battle! Galactic SHIP Battle! by Mark of Falworth, on Flickr Thanks for viewing and have a great day!
-
Yes another MOC and more CubeDudes. This time Tony Starks Hall Of Armor. Bottom Row: Mk 1, Mk 2, Mk 3, Mk 4, Mk 5. Middle Row: Mk 6, Mk 25, Mk 42,Mk 39, War Machine Top Row: Iron Patriot, Mk 33, Mk 35, Custom Stealth Armor, Mk 7. LDD file for download when Brickshelf folder is public ( http://www.brickshelf.com/cgi-bin/gallery.cgi?f=530394 ) Comments and Criticism welcome
-
So the Iron Builder rages on! Here's the latest from the Falworth bros. Venus Fly Trap by Mark of Falworth, on Flickr The secret part is the Green Flexible Spike. Thanks for viewing! Have a great day!
-

Purist Iron Patriot minifig - for those who can't get the official
KingPixels posted a topic in Minifig Customisation Workshop
Hi guys. I was playing around with some Marvel parts and made this purist Iron Patriot. I'm in NZ so the official one won't be possible for me to get/afford. Hope you guys find some use with it. Head: Rhodey head with Iron Man helmet and War Machine visor/mask. Torso: Captain America Torso. Wais/legst: Dark red waist with dark blue legs. Here are a couple of photos: -KingPixels -
After making my 15 Iron Man armors I decided to make a villain to fight them. LDD file available for download when Brickshelffolder public (but if you cant wait just PM me ) Comments and criticism welcome. Check Out My Other MOC's Here, Here and Here.
-
Review: 76007 Iron Man: Malibu Mansion Attack By Captain Nemo Name: Iron Man: Malibu Mansion Attack Set Number: 76007 Pieces: 364 Price: US $39.99 Ages: 6-12 Minifigures: 5 Theme: Superheroes Subtheme: Marvel, Iron Man 3 Year of Release: March 2013 Price per Piece: 10.986c Here we go! If you’re reading this then you’re now both looking at my first review on Eurobricks, or well anywhere, and looking at the culmination of two days work to bring you this extensive review on the new Iron Man set, 76007 Malibu Mansion attack! A rigorous voting process cut down the open casting call of 300 photos to these select 8 (Or Something?), photos for your pleasure, and hopefully they’ll give you all the views you need on the flagship set of this small Iron Man wave. Box: Size: 15 x 10.3 x 2.2 in If you’re looking down the isle like I was, it may take just a bit of work to spot this one out of the group. While having a box the same size as the recent “Bat &Tumbler” Batman set (Hulk is there to give a minifigure reference), the general dark image and the dark red boarders blend in the box with both the past waves and the newer sets; which while making it uniform, makes it actually stand out less (That and putting it on the top shelf midway inside the LotR theme for some reason; thanks Toy’s R Us). Featured on the cover is the image of immediate peril. Tony Stark is grasping for his life holding onto his collapsing cliff-side house; with Pepper Potts, donned in Mark 42 amour, flying to his rescue; opposite the Mandarin and an Extremis soldier blasting the building from their dark green helicopter. Overall, the image really depicts what the set is about and the reasoning for the specific play features on the back. The back of the box features a collage of comic like picture actions depicting everything in the set. Both the play features are shown (Top left), as is the…wait for it…Flick Fire missiles from the helicopter (Top right). Included are a few sound effect words, that I think somewhat takeaway from the seriousness of the situation (“Thunng” is not an explosion word, nor should it be used so lightly in reference to a house blowing up!). The sides of the box have all the standard information, and it uses the Mark 42 suit as the actual minifigure size reference. An image of the figure line up is also included, as is the image of the lettering on the box stating the set is for “Iron Man 3”. Contents: Upon opening the box, you’ll find three numbered bags, two instruction manuals of different sizes, one comic book, and one sticker sheet. I don’t know why the instruction booklets are different sizes, since there really does not seem to be a reason for it. Inside the instruction booklets however, are the watermark images of the Mark 42 Iron Man and the Mandarin in robes (Picture Featured further down this review). Also included is a nice comic book which I refuse to open—sorry readers, but want to be surprised when I see the film, and so I’m going to try and keep spoilers to a minimum. I’m sure the comic is really bad anyways…Anyways, also shown here is the infamous sticker sheet. Now I don’t hate stickers, and for the most part I think they’re ok, but later on in the build, those stickers on trans clear pieces really become a pain—at the start though, they’re ok. The back of the comic includes the standard minifigure line up, although this time it only includes Marvel sets. Images of the previous 2012 line figures are present, as are the Ultimate Spider-man figures, and the rest of the Iron Man 3 line up. Build (1-3): Bag 1: Ten Rings Helicopter, Mandarin, Extremis Solider The first bag creates and completes the villain’s helicopter, as well as includes the minifigures for the two villains of the set, the Mandarin and an Extremis Soldier (See Minifigures). You’ll first notice how the bag feels almost empty, and the pieces that are there are used up rather quickly—this is slightly disappointing as the helicopter could use some extra bulk when it’s completed. It’s a fast build on this helicopter section, and soon you’ll see a dark green chopper sitting on your table. The build is simple, and it offers little surprises, though I was interested in the build of the front section, which features a 1x2 external headlight brick which is new to me (See Interesting parts). The stickers on this early build are good, but generally unnecessary. I don’t know why Lego believes it’s best to put the symbol of the villain on their vehicle—do they want to be spotted and caught?! The Ten Rings sticker on this vehicle however blends far better than some other villains counter parts (Cough: Bane’s Tumbler), though they could be left off with out any major loss. In terms of the helicopter when it’s complete, you’ll immediately notice that it’s small and slim. Of the superhero helicopters we’ve seen so far, this is defiantly the sleekest one, though not in a good way. I’ve included a comparison to the Joker’s new helicopter, and intend to soon include a picture of it next to Deadpool’s helicopter, which is unfortunately out of my reach right now. This chopper is actually more similar to the Deadpool one., but I digress. A front view of the helicopter makes the vehicle appear somewhat bulky and stronger than it actually is; however any angle on the sides immediately shows you how low down and empty it is. To me, it actually almost looks like some force pushed down on the top of the vehicle and squished it. I think this is mostly because of the sleek low windshield, which gives the whole feeling of being low down. Again, like in the Deadpool helicopter (Which this one seems to almost copy), this chopper too includes an open section for storage (?), though this chopper’s storage space is far smaller and really seems like wasted space (Question to self: where are Lego Engines on Lego helicopters?). The missile hookups on the chopper are pretty standard, much like the Joker’s chopper. There is a small 2x3 stand for minifigures/Mandarin to stand/sit on, which is nice, but it’s almost too extreme to think of it actually being used. Because of the low helicopter height, there’s also little clearance for passengers who risk standing on the edge of the chopper with no constraints whatsoever. There’s also a small clip on each side of the chopper to hold the Mandarin’s ADU gun, which is nice since he’ll need both hands to hold on. Sadly the only function of this chopper is the Flick Fire missiles. Personally I don’t have a problem with Flick Fire missiles—as long as they make sense when being used. The missiles on this chopper make sense being there, but I wish there was perhaps a function that allowed them to appear or hide inside the chopper, much like the more civilian looking chopper which blows up the Malibu Mansion on the Iron Man 3 trailer. One last note on the chopper; while I can forgive the missiles, I cannot however forgive the lack of controls! There’s nothing inside the chopper for the pilot of use! There’s even a 2x2 slope in red which could have easily and effortlessly been replaced by as sloped control brick! Well I guess I now know why the Extremis Solider is so angry… Bag 2: Starting Malibu Mansion, Tony Stark, Pepper Potts, Mark 42, Mark 5 suitcase, Extinguisher Robot Bag 2 begins what will be the bulk of the set, the Mansion itself. It also surprisingly includes all the remaining minifigures, Tony Stark, Pepper Potts, the Mark 42 armor, and the Extinguisher Robot. Also included is a little nod to the second Iron Man film, is the suitcase (With the aid of builder applied stickers unfortunately) which contains the Mark 5 armor that was used to fight against Whiplash at the car race in Monte Carlo. Its a sweet nod, and a smart one too since it’s really only one piece and two stickers—though if there was one piece that should be printed in this set, it should be that. The Mark 42 helmet like all Iron Man ones, comes separately bagged. It’s also important to note that Bag 2 begins the use of the second slightly larger sized Instruction Booklet; an image of this is included above. The build of Bag 2 starts off quickly, and gets the functions placed down from the start. Beneath the “Hall of Armor” is a function built that allows the hall to explode, but more on that later. Once the floor is placed down, you build what perhaps maybe one of the best parts of the set, the small kitchenette. Next to the Hall of Armor is a small lime green and tan kitchen, which could be the gem of this set. It really makes the whole mansion feel more like a home than just a warehouse of Iron Men, which the rest of the set gives impressions of. Included is a very nicely built smoothie machine; and if I have any complaint it may just be that perhaps the shelves are a bit too high—though that’s more comical than anything. After building the kitchen, we move to the most dangerous part of the set (For builders that is!), the large trans-clear stickers! Dun, dun, dunnn! The Hall of Armor is mostly shown through two large blue windows which the builder must apply stickers to. Take note, it will be easier to apply the sticker with the glass panel not attached to the frame. When carefully applied, the end result is gorgeous! It makes the Hall look really high tech, and classy—the whole mansion in fact has that modern age looking “clean” and bright vibe. The Hall, while much smaller than many Eurobricks members wished for (Though I think they should be happy we get it!), is designed to hold the previously released Iron Man suits; as it has name places for Mark 6 and 7. While neither of those suits are included, it nonetheless is a great feature and encourages people to collect the suits (In contrast to Batman, where I guess he just leaves his excess suits lying around like I do). Granted these old suits then get blown up, but…you know… Anyways, it’s time to put in some of the scenic windows. You apply one of the three windows in Bag 2, which requires you to apply two stickers on two bricks. The first sticker goes simply on a white 1x6 brick for looks, which is nice, but the second sticker goes on the large trans-clear window. This is perhaps the most annoying sticker (Along with it’s window counterpart in Bag 3) because not only is the sticker clear—and prone to fingerprints—but it’s also small and not sized to perfectly fit straight on the window. This makes the sticker both hard to get straight and at the right height in regards to the other window which you’ll apply later (Which I badly applied as slightly higher than this one). The sticker on the window depicts Starks super-cool computer thing that can be viewed on various surfaces, this time being on a window, and is showing that an alert is going on off the cliff towards the air (Ergo the Ten Rings helicopter is coming). This sticker ends Bag 2! Bag 3: Finishing the Mansion The third and final bag is all about finishing the mansion, which happens faster then you might thing. The start of Bag 3 begins where the former ended, with you having to place a sticker on another large window panel. Surprise, it’s still challenging to do. This sticker depicts a screen that’s analyzing the helicopter that is coming. In my opinion however, from what we’ve seen in the easiest trailers, it seems like the helicopter is a surprise attack, so these stickers definatly go against that notion. Much like the stickers on the helicopter, these window ones are also not necessarily required, and so they can be left off without loss if the builder chooses to. Having constructed the small floor plate and attached the second window, the build moves to constructing the second main function, which will blow out the third window (See Functions). Also included in this area is the required doorway to nowhere. The roof is then built being composed mostly of two large curved slope pieces in white, as well as a few tiles. There is a small roof/balcony section which would allow someone to stand on the roof. The last section of the mansion is a control center/repair section. This is attached at the back of the main floor section, and helps fill out the mansion, if making it seem a bit cramped in the process. The final two stickers are used on trans-blue screens to depict a high-tech computer, and the large computer itself is on a rotating stand (Like the chopper, this too could use a control plate or two). The repair section is modest to say the least, and is really more like a wrench rack than anything. Attaching this section completes the build of Bag 3, as well as finishes off the build section of the set! But oh, there’s far more then that! Minifigures: Ah the minifigures, the main thing most people first look at reviews for! Notice I placed them further to the end of the review to force people to at least look at the rest of it—hahaha! I win! Anyways let’s get going. For each figures I’ve included multiple pictures, a small bio, their purpose in the set, and a critique of them, so let’s check out the figures! 76007 Characters: Extinguisher Robot, Pepper Potts, Tony Stark, Mark 42, the Mandarin, Extremis Soldier. Tony Stark: Genius, billionaire, playboy, philanthropist; superhero. The title character, owner of the Mansion, and the Iron Man armors; who needs to be saved himself in this set! This is the first time we get a minifigure of Tony Stark not in his Iron Man armor; and it’s a great addition. This “civilian” Stark is great, and a big draw for the set. He’s wearing his standard movie shirt in a very nice torso print, and it lightly depicts the arch-reactor in his chest (With a triangle symbol from the second film). His back printing is also very nice and simple, and this Stark includes the new Tony face print with a cocky/determined look and an “Oh s**t!” face. The short hair on his head is in dark brown, though I think black would have been better. Either way, a solid figure and a great draw for the set. Pepper Potts: Tony Stark’s girlfriend, associate, and assistant. In this set, she saves Tony from imminent doom by donning the Mark 42 armor. This is the first time we’ve seen Pepper in minifigure form, and the (Short) wait did not disappoint! She’s in a clean cut white suit, looking all classy, and is a great addition to the set. Pepper sports a long burnt orange ponytail hair, as well as duel faces of a sweet smile and mid-level shock; both of which have cute freckles. Her torso print is simple, but features a thin gold necklace and uses grey triangles to slim her figure. Overall, she’s perfect, and is an important awaited character. Mark 42 Armor: The latest armor constructed by Tony Stark, which features far more gold than the previous versions. Currently information on it is mostly unknown, but both Tony and Pepper don the suit in the set/movie. It’s first interesting to note that the suit in this set comes with a plain white head, and as indicated on pictures, other sets, and in the instruction booklet, both Tony Stark and Pepper Potts wear the suit at different times. Coincidentally, this means that there are many faces underneath the suit, as much as 5. Now to the outside of the suit, which most people are concerned with anyways. Immediately you’ll notice that there is far more gold on this suit then any other Iron Man suit. He has extensive glossy (Kinda like chrome but not that shiny) gold from his torso to his toes, and features the classic circle arch-reactor. The back print includes more gold along with higher levels of silver. The Mark 42 also has gold hands as opposed to dark red. The helmet mold is the same as the previous 2012 Iron Men; and the four pieces required to give him the look of flying are also included. Below are images of the Mark 42 standing next to the previously released Mark 6 and 7; which are not included in this set. The Mandarin: Arch-nemesis of Iron Man and self proclaimed “teacher”, the Mandarin is the leader of the international terrorist organization known as The Ten Rings. What is the Ten Rings? The Ten Rings in the Iron Man films is a terrorist organization led by Mandarin, and is the same organization who kidnapped Tony Stark at the start of the first film which led to the creation of Iron Man. Ah the Mandarin. I was so excited when waiting to see pictures of him…and then this…but then, once I acquired the figure in the set, he’s actually not too bad! I’ve been noticing a trend lately that I usually hate the superhero minifigures when I first see them, but once they’re in my hand they turn to gold—and appear much better in person. Mandarin is no exception, and while the initial pictures of him were mostly negative on account of the hair choices, in person he is so cool. The beard is still a bit off, and it’s a bit of a negative that it covers his nice torso print, but he’s a very nice figure. He has two face prints, one stern and the other angry, which both look great with or without the beard on. This version of Mandarin includes a dark green cape and leg printing, both of which are nice. His torso has the symbol of the Ten Rings, and he has minor/forgettable back printing. The more I look at this figure, the more I like it, and really that’s just an amazing bonus. However the more I look at ADU guns the more I hate it. I wish Lego would stop using the ADU gun—it’s everywhere all the time now. At least change the color to black which looks far better. I do understand that Lego is making this line more “kid friendly”, hence the lack of actual guns, but come on! Extremis Soldier: Unnamed henchmen whose been infected by the Extremis virus. What is Extremis? Extremis is a virus that basically works like a super-serum (Think Captain America). While it gives superhuman strength, it also greatly increases the infected person’s rage; and is so dangerous there’s only a small portion of the population who can take it without it killing them. The Extremis storyline is the main setting for Iron Man 3. In terms of henchmen (Whom I should know about!), the Extremis Soldier is top notch! First off, yes his head does glow in the dark, as the pictures indicate, but that’s not all! While his standard face shows a stern look, his alternative face is a rage fueled, red vein filled, horror show. His face prints are very, very, nice and he’s defiantly a great figure. While the head is a bit limited in use (Sick Superman anyone?), his torso could be used in many themes; it’s a dark bley muscular powerhouse with more red veins popping out. The Extremis Solider includes a nice back print and has dark brown hair with black hands and pants. I definitely want to pick up multiples of him. Functions: All of the functions of this set all revolve around destroying the Mansion…which you know is the first thing you want to do after spending so long building it. Hall of Armor Explosion: The first and most heart reaching function is the ability to destroy the Hall of Armor. This is done by pushing down with not much effort on a red lever at the back right wall of the mansion. Below is a picture of the process, which is rather quick. For the most part this is successful, though I’ve found that sometimes the Iron Men get stuck with their helmets hitting the roof when launched out, which is disappointing. I think that perhaps it would have been best to use a similar function that is next described. Scenic Glass Explosion The next function is the explosion of one of the three large glass panels, to which Tony then falls out of (According to logic or something). The panel flies out very well with almost no effort, and there’s a clip just below the frame that allows Tony to hang for dear life. The only disappointment being that unless the Mansion is hanging over like a table edge, he’ll just be laying there. And finally of course there’s those Flick Fire missiles on the chopper, though surprisingly there’s nothing for them to hit and nock down—bit of a disappointment there. Extras, Interesting pieces, and Extra Pictures : Here’s a picture of some of the more interesting parts of the set, as well as the extra pieces. An extra black lightsaber handle is included, which is the best of the leftovers. Conclusion: Hello? Still awake? I am…so let’s wrap this up! Minifigures: 9/10 The minifigures in this set are great, and really they’re a major draw for this set. No doubt people will buy this set just for Tony and Pepper or the unique variant Mandarin. Designs: 6/10 Overall this set is an ok design. The helicopter is easily the worst and most forgettable part of the set, with the cramped and small interior in close second. However, great choices like including a kitchen and the Extinguisher Robot with the Mark 5 greatly bring up this score. Parts: 10/10 All the parts are good and useful; I especially like the roof and the Hall of Armor stickers. The only parts that are a downer are some of the stickers and the ADU gun, but I don’t see them as a huge deal. Price: 9/10 For being a $40 set, this is very nice. Its price per piece is just over the golden range (10c < 10.986c) and what you get for that is nice. The minifigures themselves will be valuable, and overall it’s a great deal. Playability: 8/10 This has some good play features, especially in terms of functions such as explosions. I do think though that the Mansion is actually set up for play very well with the Kitchen and all for expanded play that’s not just related to the helicopter attack. Overall: 42/50 = B+ Overall, I have to say I like this set. It’s a nice build, if somewhat quick and short, and includes a list of characters I’m very happy to have. The helicopter is a disappointment, as is the somewhat cramped nature of the Mansion, but overall it’s good. I do feel however that if given a large price point, this set could he huge—if expanded, it could be a large selling set, something in the line of the Unexpected Gathering. Really this is a good flagship set for a small Iron Man wave, and it is the best of the three. So if you’re even the slightest fan of Iron Man, don’t let this set slip past you! Enjoy ~Nemo
-
A fun MOC I made with a friend
-
Iron Man vs. Mandarin The heroic Iron Man discovers the lair of the mystical terrorist the Mandarin, and prepares to enter into a duel to the death! Enjoy ~Nemo
-
Hey, Here's my first Iron Man MOC in LDD. It's Malibu Mansion from Marvel films. 473 pieces. Pictures: Front Back Side