Search the Community
Showing results for tags 'console'.
Found 4 results
-
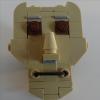
I have built a scale model of the Nintendo Switch video game console, featuring controllers that are detachable in a realistic manner, and the ability for the screen to be built in either direction. I have shown it at my local LEGO convention before, but have more recently built the red controllers and alternate tile screen option. Above is a version of the screen built with studs toward the top of the Switch, depicting Link climbing a mountain against a backdrop of a sunset over Hyrule, from The Legend of Zelda: Breath of the Wild. Below is a version of the screen built with studs toward the face of the Switch, but using 1x1 tiles to maintain a smooth pixelated surface for the screen, depicting the Master Sword in its pedestal in the Lost Woods, also from The Legend of Zelda. The controller attachment uses a combination of parts 30586 (Plate 2 x 8 with Door Rail) and 60478 (Plate 1 x 2 with Handle on End), which allows the controllers to slide unidirectionally in a method that I have not seen used in a set, though I have not verified that it has never been done before. Instead of the typical use as a hinge, I have used parts 3937 and 3938 for providing a slight indent to accommodate the rail, without the loss of structural stability that would occur from just having a gap or using a 1x2 panel. I have not yet built a controller grip for the "Joy-Con" controllers to attach to when separated from the screen, but the sliding mechanism is compact enough to not pose a problem. I have only built the controllers out of red and dark bluish gray / medium stone due to limited availability of the curved parts 30357, 30565, and 85080 (or 3063). To facilitate the screen being built at a consistent depth in either direction I have used 2x2 jumper plates, since the hollow studs provide a half-plate depth against the face of a plate or brick, but get covered by the tubes of 2x plates beneath the tiles. The console (excluding screen) contains 94 or 96 parts, depending on which screen style is attached. Each "Joy-Con" controller contains 47 parts, thus 94 parts for one pair of controllers. The screen with studs toward the top of the Switch contains 203 parts as shown, but is quite variable upon the design. The tile screen contains 180 tiles supported by 10 plates. Below are the separated sections of the build, for which the total part count of what is shown comes to 679 (92+2+4+94+94+203+180+10). I have submitted the idea on the LEGO Ideas website, and if anyone is inclined to support the product idea, that would be appreciated. If anyone has questions or feedback, feel free to comment below.
-
I've always wanted to make this classic console out of Lego, finally got around to it this past week. Lego NES by weltall1028, on Flickr It's very close to the real thing in size. The front has a power light, power and reset buttons, opening cartridge slot, and 2 controller ports. Lego NES by weltall1028, on Flickr The back has the power input (Technic brick with a harpoon gun inside), channel 3/4 switch, and the RF out (chrome 1x1 cone with a 1x1 stud with hole). Lego NES by weltall1028, on Flickr Real NES carts fit into the cartridge slot. Lego NES by weltall1028, on Flickr When pushed down all the way, the power light comes on. Lego NES by weltall1028, on Flickr Had some extra room on the inside, so I decided to add a random lightsaber duel. Lego NES by weltall1028, on Flickr The buttons have a rubber band behind them pushing out, and another rubber band going through them which pulls them inward. This enables the buttons to spring back into place. Lego NES by weltall1028, on Flickr The cartridge slot uses a hydraulic liftarm. You can view the entire photoset here. You can view a video of the MOC .
-
Hey y'all. I am sorry for being away from EB for this long. not posting MOCs up and all. I've been busy with other things besides LDD building. But for now, I am back with a new MOC. This time, it is my interpretation of the TARDIS interior from the Doctor Who 1996 TV film. More photos can be found on my Flick page (Flickshot30). Keep in mind, this is not 100% accurate to the prop or set seen in the movie, but as close as I could build. The TARDIS console part of the model is based on designs created by mpathg7380 and daleksec from LEGO Ideas. There is also a telescope within this model, which is based on one built by TD Bricks on Youtube. Comments/suggestions welcome. Hope you enjoy. LXF file: http://bricksafe.com...yman30/tardises
-
This set has only been publicly view-able for about 24 hours and I have already designed a 10th Doctor TARDIS Console. It can even hook into the TARDIS just like the set, though you will have to change out the two fold-out walls to match the tan and grays color scheme of Ten's TARDIS. (The outside portion was recreated by user CM4Sci and posted to the Dr. Who "Ideas" thread on Eurobricks.) This console has a big flip-able switch, a bunch of printed slopes and tiles, and even a Sonic Screwdriver holder, just in case they ever release an official sonic for the 10th Doctor. But for now I'll settle with my "gem and a light saber holder" screwdriver design. I am also including the Doctor in yellow skin form and K-9 (same design as the LEGO Dimensions one) By the way: The doctor's suit seen here is a stand-in for this dark blue one from Alien Conquest: http://alpha.brickli...b0899c01#T=S&O= The console features two staircases to access the floor of the TARDIS, and four chairs in corners spots. Here you can see how the console attaches to the exterior: a 1x4 Technic axle slides into a receiver on the TARDIS wall / front door. Here is the exterior of the TARDIS from Lego set 21304 (called Doctor Who), as reconstructed by Eurobricks user CM4Sci. When I get the set i'm going to remove one of the panels (the one with the St. Johns Ambulance cross) and replace it with a plain dark blue panel, as 10 didn't have that on his TARDIS. The Doctor in his 10th (11th in you count the War Doctor) regeneration. K-9 is from Dimensions LEGO set 71204, which was recreated in LDD by Facebook user Mike MacMillian. I'm going to use printed black 1 x 1 tiles to say "K9" instead of buying the LEGO Dimensions level pack and using the parts there. LDD file for K-9, the Doctor and the complete TARDIS and console: http://www.mocpages....1444163432m.lxf