Search the Community
Showing results for tags 'advanced'.
Found 10 results
-
Technic 24122 Compatability
SNIPE posted a topic in LEGO Technic, Mindstorms, Model Team and Scale Modeling
Hi, I have always wondered if this part is compatible with lego technic pin holes. I have a MOC situation where I need to have an axle thru-hole which also can be meshed with the pinholes of two beams which are 1L apart. I could use the new technic connector pinhole with 1L axle on opposite sides, placed sideways with a 3L pin connecting the beams but the connectors axles are too short, hence the need for an axle thru-hole. Can the sides of part 24122 be placed inside of pinholes? even if it means having to twist it in due to it being a tight fit. axle joiners or #2 connectors are too long also. Regards, snipe. -

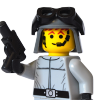
[MOC] TIE Advanced Prototype (aka Inquisitor's TIE) from SW Rebels
Bricks Feeder posted a topic in LEGO Star Wars
Hello from France Guys ! I'm Bricks Feeder and it's my first topic on Eurobricks! :) I show you my MOC of the TIE Advanced Prototype (aka The Sith Inquisitor's TIE) seen on the SW Rebels series. I will make some pictures of my advance in the future but for the moment, I give you some videos (of my YouTube Channel) of my prototype on LDD. This MOC is based on the original LEGO set 75082. The "wings" were directly inspired by this forum on Eurobricks (http://www.eurobricks.com/forum/index...). I'm trying to build a "cool" Interior of the cockpit. For that point, I'm inspired by the awesome TIE Fighters short film. I'm trying to be "accurate" but it's difficult when you found pictures of a subject with different "shapes" or variations of shape between them. So I based my model on the first appearance of this fighter in the Rebels Show... I made a second version with some upgrades of the articulations of the "wings" to get it stronger. Moreover, I change all the back! I'll continue to work on it. I am not satisfied yet ! I'll show you my advance and if I can, the real one! If you have some ideas or constructive criticisms, share with me please! I want to upgrade my skills! :) Enjoy and have a nice day! P.S. : If you have the time... Check my You Tube Channel! ;) -

[EV3] Advanced Programming
johannp02180 posted a topic in LEGO Technic, Mindstorms, Model Team and Scale Modeling
I am new to this blog and don't know how things work yet. I have a few questions about some programming I am having trouble with and wanted to see if the community can provide me with some programs they've built. 1. I want a program so that you can press the touch sensor ex. 2 times, it would run the 2nd program; press the touch sensor 4 times it would run the forth program etc. Or have a color sensor and I put a red brick in front of it and it runs a specific program. 2. I have a wall follower program and I am wondering if it can follow the wall for about 24in or so and then stop and do some other action. Does anyone have an idea on how to do this, and can you provide a program? I can't figure out how to program these. Any tips, programs, would help! -
The wings on the 9492 Tie Fighter were always excellent, but the cockpit let it down badly. The cockpit on the 75082 Tie Advanced was a big improvement, the canopy pieces were quality, but the wings sucked big time. So, I kinda combined the 2 designs and hopefully improved them by adding my own tweaks. Here you go. I willl post some images later on today (unfortunately I set my uploads off as I set off to work today and some of them failed).: All black Batman Tie Fighter! Yes you read it right
-
[MOD] Tie Advanced Prototype from Star Wars Rebels
DarthTwoShedsJackson posted a topic in LEGO Star Wars
I got set 75082 mainly for the Inquisitor and the Imperial Officer minifigs, but I decided to give the build a go today since I heard a lot of positive comments on it. I have to say that the build includes good ideas for the TIE fuselage that are definitive improvements to how other system scale TIEs have been built in the past. Once finished, I went in and modified the build quite a bit to get it closer to the proportions of the craft as seen in the show. This meant I had to get rid of the shooter play feature in order to remove a one plate wide section from the lower part of the fuselage. I also made sure the circular cockpit screen is centered and that the lower half of the fuselage mirrors the angled bricks of the top half. I also got rid of most dark bley bricks and replaced them with their light grey counterparts. Lastly, I made the four characteristic panels one stud higher and removed a one plate wide area from the center build that attaches the panels to the fuselage. I also built a stand for the model in the form of a mini-diorama that depicts the scene from the Rebels episode Empire Day in which the TIE Advanced Prototype was first presented as the climax of an imperial parade: Enjoy! -
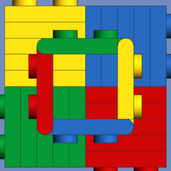
 I like building awd remote controlled cars in middle and small scale. Building big scale cars take much time and details. And the second problem of big scale - it cant drive duo to high weight. My Middle scaled mods/mocs of 9395 and 8081 have very simple transmission with diffs, that cannot be locked. Now i am going to make new middle-scale chassis using new 2xL motors with some advanced features: 1) live axles 2) possibilty to run fast or slow with more torque 3) lockable rear diff 4) awd/ rwd switcher (not realized yet) 5) wide of axles 13-15 studs max. In my mind middle scale is 62,20 wheels or 68,8 balloons. Iam going to build on my chassis scale model look cars. But first I want to develop strong and effective chassis. First I began from rear axle. As you can see diff can be locked. Next step was making middle part with motors and gearbox. After that front axle appeared. For now I have: Front axle suspension kinematics needs improvements Up p: motors work from 12 to 20 teeth At the bottom L shaped black liftarm - is gearbox gear holder. After previous gear (12:20 from motors) next gear can be manually selected again 12:20 or back 20:12. Low and high modes. Low gear mode for obstacles High gear mode for faster speed Changing gear stage: L liftarm is dismounted, after that I move 12 and 20 gears on the axle left or right for needed gear, and then fix gear by L liftarm. I have made some test with big (96's) and small (62 and 68) wheels. transmission is strong with such big tires, so I hope it will be strong enough for 1 kg weight (with body) with fsmaller tires. Dromt wheels dpfall down because U joint axles is too short to hold such big and heavy tires, but good for 62 and 68 [/img]
 -
Low Light Photography and Practical Light Effects Advanced Photography Lesson Warning, this is not for the faint of heart, many of these results can be done by simple photoshopping, and it might be much faster. But do you get a better result? That's up to you, but I'm believe if you can do it for real, it looks that much more real (or even surreal). Much like how Lord of the Rings looks so fantastic is cause so many of the grand shots of castles and landscape were just that - actual shots of (large) miniatures and real locations, not computer generated effects. This also probably doesn't apply much to stop motion films, as the normalization process to get all your shots to be consistent may make even the most patient film maker go crazy. So to you, the comic creator (or simply photographer), I write this tutorial. How to create cool looking pictures and effects by taking a really good photo. Background/Streetcred Let me preface and admit that I am not a photographer, I have never studied photography, and while I'm somewhat familiar with the concepts and science - I am by no means an expert. What I am is lazy - I know the bare minimum to get cool pictures. I have been told I have a great 'eye' for shots, I might not know the science behind why, but I know what's cool when I see it. I also used to spend a lot of time doing night photography - I used to love wandering around with a tripod taking random pictures at night. Especially during fog: So what does that make me? I would say I have practical experience. I have a bag of tried and true tricks that have historically worked for me. The object of this tutorial is not to talk about the theory of low light LEGO photography, but to share my practical tips and a layman's how-to guide to shoot in the dark. Lighting Overview Before going in depth different ways to light (or lack thereof) your build, there are roughly 5 types of lighting strategies I will cover: Ambient light - This is the amount of light in the room anywhere from bright, to low to even none. Embedded light - lights that originate within your actual build. Directional or Spotlight - using an additional light source to provide light to a specific area of the build Special lighting - using coloured lights to change the mood of the picture. Black Lighting - special case of special lighting, with glowing results! More on these later! Your Build Wait, build? I thought we were talking about how to shoot and using fancy light? Well we are, but before you photograph your build, you have to build it! And before you build it you have to PLAN on how to build it. This is probably one of the more important keys to low-light LEGO Photography. You have to build your MOC to suit what method you may use. If you're going to use embedded lights, well you have to put them in ahead of time! Do you have small lights? or big lights? You obviously can't put a massive light into a micro, but you could put in small lights with wires hanging out (to Photoshop out later). Or if you're going to use black-lights, well you need to use one of the LEGO elements that glow! Other things to think about when you're building - which angle(s) will you be shooting from? Do you need to hide wiring? or even where the lights will be. Do you want to actually see the LED/Light bulb? or do you want it hidden/away from view? Don't forget that if you're shooting at really low light, even the weakest light will wash out all your other details - so light placement will be key. As you start off, remember: patience. This will take time for you to set up, to photograph correctly, and often rebuilding to get things 'just right'. Required items. Before you start there are few things you need to have, and know how use. Mandatory: Patience This is the most important thing to have. It takes time to set up, it takes many shoots, and it can be frustrating. So have patience and just know that it will look cool in the end. Camera! Most cameras, even the smaller pocket cameras have the ability to set the shutter speed - which is the amount of time your camera 'takes a picture'. This will become important, as the darker the room, the longer picture you need to take. Some cameras will have a "M" or Manual setting that lets you configure the shutter speed, as well as FStop (or aperture and other fun things). Alternatively you might have a "S" (Shutter priority) setting that controls just that, and the rest are automatically. Note that the FStop is also useful for certain effects (see DoF tutorial). If your camera doesn't have a "M" setting or "S" setting your best bet is "night time" or "stars" setting - that's the camera's setting for low light, not the best, but it can do in a pinch. Tripod! If you have ever tried to take a picture without a flash in a dark place, you'll know why you need a tripod. Simply put, our hands aren't steady enough to hold a camera to take shots in the dark. Even braced against something we vibrate the camera too much and it becomes blurry (unless you're into that). Any tripod will do, it doesn't have to be super fancy, or honestly you could use a stack of books, it just makes it harder to reposition and set up. But for me, I have cheap ball joint tripod that lets me quickly rotating the camera and change angles. Optional Light sources Depending on how you're going to light your build, you may need external light sources, you can use your standard lights, LED's, flashlight, laser pointers, black-lights IR from remote controls, whatever creates light that is visible to a camera. Try different things for different effects! Light Tent Ironic eh? But a light tent is still useful. The purpose of a light tent is to disburse light over your build, this rule still applies, you're just not applying AS much light. Lighting Explained I will now go through each of the different lighting techniques. Of course for maximum fun you could apply several of these techniques together to create a master piece! Ambient light This is the easiest and most important trick that you need to master. Simply put: turn down/off the light. This by itself isn't usually overly useful - if you set your camera right it is almost the same as taking a picture with the lights on. The key hear is to change the shutter speed of your camera to take a longer exposure picture. A regular picture is around 1/60 of a second. If you dim the lights, your picture might be 1 second or longer. Why this is so important is when you start using the other lighting tricks. You do this to make the OTHER lights seem brighter than they really are. So a very dimly lit fireplace, using normal room lights is barely noticeable turn off the room lights and set the shutter for 5 seconds and it becomes a roaring fire. Knowing how to set the shutter speed is also useful for every day MOC taking pictures. Many people prefer to take the MOC's outside to shoot, the sun provides extremely bright light. But if you know how to set your shutter speed accordingly you don't need to wait for a sunny day! I routinely use long shutter speeds even when I have my large photography lights and light tent... Embedded light I hope you were paying attention to the build section. Cause if you've gotten here without adding lights inside, it maybe too late Generally there are two types of lights that can add within a build: Small LED's such as the Power Function lights or third party Lifelites. Larger less specialized lights can also be used - these are far cheaper than the above and work far better lighting up large areas - downside is you need a lot of space to hide these. An example of a build that uses a standard LEGO light brick (in the hallway): An example of a build using cheap LEDs: Of course you can start combining tricks - such as lowering the ambient light level so that we maximize the lighting effect, the same temple, with lowered ambient light: Note how changing the ambient light changes the entire image feel. In a large enough layout you could even use a combination of smaller specialize LED's and cheaper ones, like here: The inner ring of the station is lit up by LED light bars that from dollar store. The rest are light bricks, and Lifelites. The key to photographing embedded lights is to do a proper light balance - between the ambient light and the embedded light. Here is an example where the embedded light is actually TOO bright relative to the ambient condition: I turned down the embedded light (switched from wall mount to battery power): Better! Now you can see that if I retook the second picture with a longer exposure, it'd be just about right. But the first shot, if I decreased the shutter speed (faster picture) it would be too dark, and the light would still be too bright, so I would have to turn up the ambient light to compensate. Black-Light My favorite trick is probably the Black-Light, it gives such a fantastic glow to an otherwise flat picture. Though not all pieces glow - mainly the trans-neon colours. Some pieces that you wouldn't think glow, actually do, take a black-light and go over some of your pieces, you'd be surprised When you build a black-light MOC - you should think about where and how the black light will be situated and where the camera will be. Another fun trick is to build chunk of the build in a clear brick - so that the black light goes THROUGH your build (see title images), or alternatively situate the light UNDER your build: The black light is actually sitting under a glass table, and there are 8x8 grill plates under each vat and a pile of neon orange dots and pieces to create the glow. Pro Tip: Get a good black-light. Stay away from the ones that fit in the light bulbs, they're rubbish (usually), get a good old fashioned tube one, they're by far the best. Directional or Spotlight Another trick is to shine a light on specific parts of a build. This obviously should be done in conjunction with low ambient light. You can use this to flush out or highlight the subject of your build, while not not ruining the lighting effect behind it. Here, because I had the gate glowing from black light I didn't want to wreak the feel by lighting it up too much. But I wanted to make sure the ship is the subject. So I took a little LED flashlight and lit up the ship. Pro Tip: When you shine a spotlight, make sure the light doesn't hit anything else! light up and away from your build whenever possible. The other method is using harsh light in one direction to forcibly create shadows. Not overly useful, but it can create some stark pictures. This entire build is light-bley but you can clearly make out the details. Special lighting Last but not least you can use some special coloured lights - like black light, or simply coloured filtered in front of lights. In the past I have used trans coloured LEGO pieces in front of a flash light to add a glow to a build. Or you could even prop up a laser pointer to create some pew pew pew action! One of my most ambitious shoots include all of these: This shot included every trick here, except black-light. It took me several nights to get this particular picture, by the end there was a entire procedure that took 60 seconds per attempt to align all the tricks: Laser pointer (not too long otherwise it over-saturates), No ambient light - pure darkness. Spotlight - to shine the ship and highlight the space marines Special light- the background (white backdrop) was actually lit with a light trans red plates to create a sunset type feel. Pro Tip - another way to change up the feel of your picture without changing the actual light, is changing the "AWB" or Auto White Balance of your camera settings (what your camera 'thinks' is white. An incorrectly set AWB can be useful, but most of the time annoying Conclusion So there you have it. Every single one of my tricks. It's not the easiest thing to do, but it's not really that hard either. The key is patience. Take the time to experiment and try new things. Assignment Use the skills you have learned here to produce a low-light photograph of your scene. Size doesn't matter, but ambiance does. Create a new thread in the Academy titled Student Enrollment: Low Light Photography to post your work.
-
LEGO is a medium with which virtually anything can be built - oceans, landscapes, ships, castles, spacecraft and more. But now that you've created that great set for your brick flick or comic, you might be thinking, "What about the sky?". Yes, you could build a big blue wall and various clouds and celestial bodies to attach to it, but maybe you don't have enough bricks, or maybe you just don't like the way that looks, and you would prefer the simpler look of a sky and its atmospheric effects created in photo-editing. This will be done in this lesson using Adobe's Photoshop. Prerequisites: You'll need to know how to use your camera and how to take a crisp and well-composed photo with it. Photoshop is a terrific piece of software, but it can't completely fix an image that's out of focus, blurry, significantly grainy, poorly composed, or otherwise lacking. If you want to know, I shot my photos for this lesson with an entry-level DSLR, the Nikon D-3100, with a basic 18-55mm lens and an exposure time between two and six seconds and an aperture of f13. You will of course need Photoshop. This lesson was written using Photoshop CS5 Extended, but the techniques should work with other versions, though I have no experience with them. (I do know that the only features that CS5 Extended has and CS5 does not are 3D tools and image data analysis tools - you won't need them for the editing described in this lesson, so if regular CS5 is what you have, you're fine) Contents: Preparation: Setting up to take the Photo Daytime Effects Adding a Daytime Sky Adding a Sun Adding Daytime Clouds Nighttime Effects Adding a Nighttime Sky Adding Moon and Stars Adding a Starfield Adding Nighttime Clouds Adding a Sky to a White Background Assignment
-

Tutorial: Basic Editing using Windows Live Movie Maker
XimenaPaulina posted a topic in Brick Flicks & Comics
After you've completed the principal photography (taking the necessary photographs and/or videos), and doing some initial post-editing work (image enhancements, addition of graphic effects), it's now time for the last phase of your brickfilm/movie project - the post-production process of compiling and putting together all the movie elements to come up with the final movie/video product. To do this you will be needing a video-editing program, there are several dedicated high-end video-editing software around but these are usually costly since they are primarily catered to professionals. Good thing for aspiring beginner film-makers there are some free video-editing programs like Windows Live Movie Maker - which can be found in almost all Microsoft-based computers as part of Microsoft's Windows Essentials software suite (You can download Movie Maker here for free). Windows Live Movie Maker may not be as sophisticated as other professional programs like Adobe Media Pro or Avid Media Composer, but it is a good tool to learn the basics of video-editing in film-making. This tutorial will introduce you to the different features of this program with respect to the various aspects of post-production video-editing. Hopefully, by the end of this tutorial you'll be able to apply these to complete your movie project. Pre-organizing Files Before proceeding with the main post-editing work it is considered best practice to organize all the necessary files you'll be using for your movie project. It is recommended that you do the following: Identify, sort, and save all the files you'll be using in a single file folder, preferably with separate sub-folders for images, videos, sound effects, music, etc. If possible, re-name the individual files according to the order of their use in the project (eg. Scene 1-A, Scene 1-B, ...Scene 2-A, etc.) When the files have already been imported to a Movie Maker Project file (*.wlmp), DO NOT move these files to other locations. DO NOT move the main file folder (and sub-folders) of the imported files in the project. Avoid re-naming imported files. Doing these will not only make searching/locating of files faster and easier, but these will also be especially crucial in properly maintaining all the imported files in the project files. Movie Maker 'remembers' the last known location of all the imported files - so any changes with the file locations, or even file names would lead to missing files in a project. Importing Files After all the necessary project files have been properly organized, it is now time to import them into the Windows Live Movie Maker. The pictures and video clips can be imported by clicking either of the two Add videos and photos button (one at the Home tab and the other at the storyboard) > locate the file folder(s) > select all the files to be used for the project > click Open > the files will be imported in the storyboard/timeline. Below is the view of the imported images in the storyboard. Note that you have the option to change the sizes of the images in the timeline depending on your liking. To do this, just click on View and choose the size you want (I personally prefer the Extra-small icons thumbnail size since I could view the overall storyboard better). If you are making a music video-type project, you should import the music file this early since the music will dictate how the images/videos will be edited in the timeline. To import the music file just click the Add Music icon (you have the option to add your music at the start of the project or at specific parts of the timeline) > locate the file folder > select the music file > click Open. The imported music file will appear as a bar above the images, with its duration visually depicted by the length of the bar: As a good practice, it is recommended to save the project file this early: click the File Menu icon at the top-left corner > select Save Project As > choose the folder location to be saved (the same folder for the project files is recommended) > type in the File Name > click Save. Moving/Editing the Files Moving Files in the Timeline Move the image and movie files according to the order of appearance in the movie by manually dragging the thumbnails left/right/up/down. You could also use the Cut-and-Paste shortcut command by selecting and cutting (Ctrl+X) an image or a video and pasting it (Ctrl+V) to the desired point in the timeline. Note that this is where the pre-organization of files will prove to be beneficial - if you re-named your files in chronological order then they will be imported and placed in the timeline in the same order - so no need to move and arrange them one-by-one. Editing Photos There is only one editing option for images in Movie Maker (but a very important one) - adjusting the time duration of the image in the timeline - which will dictate how long would a certain image appear in the movie. To edit the time duration of images: select a particular image, click Edit below Video Tools (highlighted in yellow) in the Function Menu above and set the desired time duration (in seconds) either by: a) choosing one of the pre-set time durations in the drop-down list; or b) type in the exact time duration (allowable time duration can be as low as 0.03 sec. up to 84,000.00 sec. = 1,400 mins. = 23.33 hours = almost a whole day! ) Editing Videos Considering Movie Maker is a video-editing program, video files have understandably more editing options. These can be found in Video Tools > Edit (same as in editing images). The video-editing features include: Audio Settings Adjustments: includes Video volume adjustment (no sound to full sound) and Fade in and Fade out speed selection (none, slow, medium, fast) Video Speed Adjustment: create dramatic "slow-mo" effects as slow as 0.125x or create "high-speed, fast-paced" action scenes with playback speeds as high as 64x Split Tool: enables you to split your video into two or more segments by moving the vertical bar to the specific point/time you'd like the video to be split and clicking the Split icon. Trim Tool: allows you to remove certain parts of the video and/or to specify the starting and end points of the video. You could do this by following either of these two methods: Manually move/drag the vertical bar to the specific point/time you'd like the video to start, then click on Set start point to trim the video at the specified point. Do the same to set the end point, clicking Set end point this time; or Click on the Trim Tool icon > a new sub-toolbar will appear > set the Start point and End point by typing in the exact times or clicking the up and down arrows > click Save Trim. Editing Music Music files have editing options similar with those of videos. These can be found on Music Tools (highlighted in green) beside the Video Tools. The music-editing options include: Audio Settings Adjustments: includes Music volume adjustment (no sound to full sound) and Fade in and Fade out speed selection (none, slow, medium, fast) Split Tool: enables you to split your music file into two or more segments by moving the vertical bar to the specific point/time you'd like the music file to be split and clicking the Split icon. Set start time: allows you to set the point in the timeline when you'd like the music to start playing. You could do this by either typing in the exact start time or clicking the up and down arrows. Another alternative method is to manually drag the music bar to the point in the timeline you'd like the music to start playing. Set start/end point: an exact equivalent of the Video Tools Trim Tool, this enables trimming of the selected music so it starts/ends at the specified point in the timeline, which could also be done in two ways: Manually move/drag the vertical bar to the specific point int the timeline where you'd like the music to start, then click on Set start point to trim the music at the specified point. Do the same to set the end point, clicking Set end point this time; or Set the Start point and End point by typing in the exact times or clicking the up and down arrows. Miscellaneous File Tools There are other tools and commands that you may find useful when moving/editing files in your project: Duplicating Files: you may copy images/videos/music files by simply selecting the thumbnail/item > click the Copy icon or press Ctrl+C > paste it on the specified point in the timeline. Note that the copied file will have the same added effects (transitions, pan & zoom, etc.) as the original file. Removing Files: just select the file(s) you'd like to remove and click the Remove icon or simply press the Delete key. Selecting Files: you may select a single file (clicking on a thumbnail/item), multiple files (batch selection using Ctrl+mouse click or Shift+arrow keys), or all files (clicking the Select all icon or pressing Ctrl+A. Rotating Images/Videos: click on the Rotate Left or Rotate Right icon to change the orientation of your images or videos (useful if proper re-orientation of images was overlooked prior to post-editing in Movie Maker). Adding Animations & Visual Effects Movie Maker comes with several sets of special animation and visual effects that you could use to add more 'spice/flavor' to your movie. These include transition effects, pan and zoom effects, visual effects, and pre-set AutoMovie themes. Transition Effects Transition effects allow you to give a distinctive special effect on how your movie plays from one video clip or picture to the next. You can add a transition between two pictures or video clips in any combination on the storyboard/timeline. To do this: Transitions are added at the start of images/videos, so click on the particular item where you'd like the transition to start (i.e. the second of two images should be selected to add a transition between them) Click on the Animations tab > click the drop-down button > hover the cursor over the thumbnails to see the preview of each transition in the preview screen > select your chosen transition effect. Set the time duration of the transition either by typing in the exact time or choosing from the pre-set time durations (from as fast as 0.25 seconds to as slow as 2.00 seconds). An opaque triangle will appear on the side of the item thumbnail indicating the transition effect has been successfully applied Playback and review the transition effect in the preview screen. Adjust the time duration as needed. If you intend to use the exact same transition for all your pictures and video clips, just click the Apply to all icon to apply the selected transition to all images and videos in the timeline. If you want to only apply a certain transition effect to a select number of pictures and video clips, you can use the Ctrl+arrow key or Ctrl+Shift to batch select the items and then click the transition you'd like to use and set the time duration. The transition effect will be applied to all selected items in the timeline. To change or remove transitions, simply click on the image or video and choose No Transition or choose other transitions. REMINDERS: While adding transitions can be exciting in giving your movie a distinct professional look, bear in mind that these effects should be used wisely so as not to risk overdoing it. Use transition effects only when the change in scenes calls for it. For stop-motion films, obviously it does not make sense to apply transitions between small changes in action poses. The number and type of transitions to be used would depend on the type of project you're doing. For example, romantic music slide shows may require slow dramatic transitions (like Fade, Overlap, Blur) between images while an intense action-packed video with fast and abrupt changes in scenes might not require transitions at all. Timing is very important so transitions would have to be in-sync with the background music or sound effect (a slow 2 second transition would not go well with a fast-paced change in music). Complete set of transition effects: Pan & Zoom Effects Pan and zoom effects refer to the movement of the image or video within the viewing screen. Pan effects include movement in the horizontal (left/right), vertical (up/down), diagonal or even rotational directions, while Zoom effects are zooming in or zooming out of the screen (in combination with pan effects). To add these effects to your project: Select the picture or video clip you'd like to add an effect on. Click on the Animations tab > click the drop-down button > hover the cursor over the thumbnails to see the preview of each effect in the preview screen > select your chosen pan & zoom effect. A four-square icon will appear on the upper-left corner of the item thumbnail indicating the pan and zoom effect has been successfully applied Playback and review the zoom effect in the preview screen. Change or removeeffects if needed (click on the image or video and choose No pan and zoom or choose other effects). If you intend to use the exact same pan and zoom effect for all your pictures and video clips, just click the Apply to all icon to apply the selected effect to all images and videos in the timeline. If you want to only apply a certain pan and zoom effect to a select number of pictures and video clips, you can use the Ctrl+arrow key or Ctrl+Shift to batch select the items and then click the effect you'd like to use. The particular pan and zoom effect will be applied to all selected items in the timeline. REMINDERS: Much like with adding transitions, pan and zoom effects should also be used appropriately to yield good results for your project. Use pan and zoom effects only when they're applicable to the scene(s). Since the pre-set pan and zoom effects is not customizable (directions, speed cannot be changed), its use can be limited to music slide-shows or select portions within a movie project. In cases where pan and zoom effects are applicable to use, the number and type of effect to be chosen would depend on the type of project, but generally for music slide show videos it is recommended to use a 'good number' of pan and zoom effects - not sticking to one type to avoid visual redundancy nor too many effects to prevent an overdone look. Like transition effects, timing is also important and the pan and zoom effect should be in-sync with the background music or any accompanying sound effect. Complete set of pan & zoom effects: Visual Effects Movie Maker also has a host of visual effects that you could apply to your pictures and images to give them a distinct feel or atmospheric look - from a classic grey-scale monotone to artistic touches like posterize and threshold. Take a look and explore the various visual effects available and test what effect will they give your images and videos. While these are not commonly utilized, these can be extremely useful for special scenes where their effects are tailor-fitted for, like black and white for vintage scenes/flashbacks or spectrum colors for disco-type scenes. To use these effects: Select the image/video you'd like to give a visual effect > click the Visual Effects tab > choose your desired effect. There is also a brightness adjustment setting you could use for your images/videos. Like with the transitions and pan and zoom effects, you have the option to apply a certain visual effect to all of your images/videos by clicking the Apply to all button. There is also a special option where you could combine two or more visual effects together. You could access this by clicking the drop-down list > go to the bottom of the list > click on Multiple effects > select the visual effects you'd like to combine from the list of Available effects on the left to the list of Displayed effects on the right > click Add > click Apply. The resulting combined effects will depend on the chosen effects - some may work well together, some will result in one effect overpowering the other(s), etc. It would be up to you to explore and decide what's best for your movie. Much like the other animation effects, visual effects should only be used when they're deemed appropriate or depending on the artistic taste of the film-maker. Complete set of visual effects: AutoMovie Themes Movie Maker also offers AutoMovie themes which you could use to instantly give your project the necessary movie elements in just one-click of a button! Each AutoMovie theme comes with its own pre-defined set of animations and visual effects that serves as a guide/suggestion on what you could do with your set of images and video clips in your timeline. The AutoMovie themes can be accessed under the Home tab, and by clicking on a selected theme, its pre-defined animations and visual effects will automatically be applied to your images and video clips in your storyboard. You have the option to adjust your images and videos to fit the theme or adjust the theme settings to fit your set of images and videos. The AutoMovie themes are perfect for quick 'fun movie projects', but for more serious projects it is recommended to take the more tedious but more customizable route of post-editing individual movie elements. Adding Titles, Captions, Credits Text can also be added in your movie project in the form of titles, captions, and credits. These three differ in their locations within the timeline: titles are added at the start of the movie, captions added in the middle, while credits are added in the end. These can be added by clicking either the Title, Caption, or Credit icons in the Home tab > a text box will appear in the particular slide or image/video > type in the text > re-size the text box dimensions as needed > move by dragging the text box to the desired area in the screen. Texts appear as peach-colored bars at the bottom of the pictures and video clips in the timeline (see example below of the three text files within the timeline). Text-editing options are available via Text Tools (highlighted in peach). You can access these by simply clicking on a text bar in the timeline to open the Text Tools sub-menu. The text-formatting options include: Font Settings: enables you to change the font type, font size, font color, bold, italicize. Paragraph Settings: change the text alignment (left, center, right) and the transparency of the text. Edit Text: allows you change the text. Background Color: enables you to change the background color (whole screen) of titles and credits, but not of captions (since they are positioned over images and videos). Start Time: set the time when you want the text to start showing in the timeline by typing in the exact time (in seconds) or using the up/down buttons. Text Duration: like with images and video clips, you could set the length of time you'd like the text to appear in the movie (by typing in the exact time or selecting one of the pre-set time durations). Effects: text also have animation options like images and video clips. Simply hover into the thumbnails in the grid (more in the drop-down menu), choose and select the text animation you like. Adding Sound Effects and Voice Audio Sound Effects and Voice Recordings(voice-overs/narrations) can also be added to your project. As long as the files are in the acceptable formats (*.wma, *.mp3, *.wav, *.aif, *.aiff, *.m4a, *.ogg), they can be added to the timeline like normal music files (click the Add Music icon > locate the file folder > select the file > click Open). However, there is a significant limitation in this particular aspect in Movie Maker: music/audio files cannot be added over existing music/audio files in the timeline (no overlapping is allowed). So if there is already a music file in the timeline (like in music video type projects), sound effects or voice-overs cannot be added over the music file, doing so will instead abruptly cut the music file at the point where you added the new music/audio file. In short, there is only one room for a music/audio file at a specified time. Though fret not, as there is an alternative solution for adding another layer of sound effects in Movie Maker: For projects with existing music in the timeline: finish first your movie project without the sound effects/voice-overs and save your movie. Then open your movie file in Movie Maker > identify the exact point/time in the video where you'd like to add a sound effect or voice-over > add the sound effect/voice-over file via the Add music button > edit the sound settings in the Music Tools (start time, start/end points, fade in/out). You may also adjust the volume of the added audio file relative to the video music by clicking on Project > Audio Mix > adjust the volume to your liking (higher volume for the video music or the sound effect/voice-over). Other Project Options Under the Project tab are a few more options you could set for your project: Audio Options: Audio Mix - enables you to set the music and video to play at the same volume, or play one louder than the other. Fit to music - automatically adjusts the duration of photos so the movie and music end at the same time; this is primarily used for quick fun projects but not advisable for projects requiring proper timing of photos and music. [*]Aspect Ratio Options: use either the Standard (4:3) or the Widescreen (16:9) aspect ratio for your movie project. Reviewing & Finishing the Movie So you've arranged, compiled and edited the images and videos for your project and added the necessary animation, visual and sound effects, text captions and titles - now you're ready to complete your movie! But wait - there's more! Every film-maker, especially the perfectionist ones, always make it a point to review their work several times before 'calling it a wrap'. So here are a few key reminders for the final review of your project: TIMING IS EVERYTHING: Make one initial viewing of the whole movie and keenly observe for the timing of the minifig movements, scene transitions, visual effects, sound effects, and background music with respect to each other. Ideally, all the movie elements should be in-sync together overall. Record any off-timed elements and the exact times of occurrence so these could be corrected accordingly. Visual Quality: Check for any inconsistency in the quality of the images/videos in terms of brightness, contrast, lighting and correct these if possible. If animations were used, observe for any image/video which might've missed an important transition or visual effect. Do the same for text captions if they were used (check for proper spelling, visibility of text style, size, and color, etc.) Sound Quality: Listen for any issues in sound quality (abrupt changes in volume, presence of background noise, incompatible fade in/out, imbalanced sound of music/sound effect/voice-over, etc.) Correcting Issues: After gathering all the findings in the initial viewing, correct all issues observed (if any). Final Review: Make one last final viewing of the revised movie. If everything is ok, you can now save your movie. Otherwise, revise again until you're completely satisfied with the final product. Saving the Movie: In the Home tab, click on the down arrow in the Save movie icon > select the quality of the movie to be saved (either the recommended setting for the project, for high-definition display, burn for CD, for computer, email, mobile devices, or even set your own custom quality settings) > type in the file name > click Save. The movie will be saved in the default Windows Media Video File (*.wmv). You may need other video converter programs if you want to have your movie in other video file formats. Sharing your Movie: Movie Maker allows you to share your movie directly from your project file to online video-hosting sites like YouTube, flickr, Facebook, SkyDrive, and Windows Live Groups. Simply click the icon of the site you'd like to upload your movie to > choose the quality settings of the movie > Movie Maker will save it (again) and upload it to the specified site (you may need to log-in to the site and continue the uploading process online). Finished Product: Even if it was not originally part of the plan in making this tutorial, I went ahead and completed an impromptu comic-video out of the various movie elements I imported and compiled for the examples above, to show you how Movie Maker really works: Borrowing the wise words of Dr. Emmett Brown, "please excuse the crudity of this video, I didn't have time to come up with a brand new brickfilm material". I just used the images from my Superman vs. Power-Armour Lex Comic, and fortunately I found a suitable music that goes well with the flow of story of the comic. The features in Movie Maker that I prominently used in this project are: Transitions: No transitions were used for most of the images for them to be in-sync with the sudden changes in the beat of the background music. "Blur-through black" transition were specifically used for the scenes where Superman got struck by Lex's Kryptonite Blaster (at 1:29) to give the scenes a dramatic effect. [*]Pan & Zoom Transitions: I used several pan & zoom effects to depict the movement in the images (notable ones include Superman flying at 0:48 and Superman falling at 1:32) [*]Timing with the Music: Note how the transition of images are in-sync with the sudden changes in beat of the music. I used the beat of the music to define where I'd set the starting time of an image and how long will its duration be (it took a few trial and errors to get the timing right) [*]Use of Text: I used a Credits to add the text caption in the end to ask a hanging question. Other Examples Here are a couple of examples to illustrate how the various features of Movie Maker can be used effectively in a movie project. Even if there are a lot of great brickfilms around, I specifically chose these two videos as examples for their simple yet effective and noticeable use of video-editing elements. Example #1 This is a video slide show I made for my wife, again using Movie Maker. The subject might not be LEGO but I'd just like to highlight the various Movie Maker effects I used (so pls. excuse if you have to bear seeing my unsightly mug throughout the video ) Transitions: I prominently used a combination of "Overlapping" and "Blur-through black" transitions for almost all the slide transitions to produce a dramatic (and hopefully romantic) reminiscing effect. Pan & Zoom Transitions: I used mostly "Zoom In" and "Zoom Out" effects, with several pan & zoom effects (the ones that I liked the most are at 1:10 and 3:14) Use of Text Captions: I highlighted some lyrics of the song (with some slightly tweaked) in the form of Captions (mostly using the "Zoom In-small" effect plus the snazzy "Cinematic Burst" effect in the end). Timing with the Music: As always, I made it a point to time the transitions and text captions to be in-sync not only with the beat of the music but the exact lyrics of the song for the text captions. Example #2 by hinckley39 (YouTube) This is a stop-motion video made by fellow BFC Academy Teacher Hinckley for his Forest II mafia game. Note that this was not made by Movie Maker but its iOS counterpart, iMovie. Nonetheless, the video depicts features that can be done using Movie Maker, and some of the effects used in this video are good examples which we could learn from. The things that I really liked about this video are: Minimalistic Movement: The movements may be minimal but they fit well with the simplicity of classic 70s/80s music videos, particularly the music in this video, Queen's Bohemian Rhapsody. Moreover, the subtle movements are perfectly timed with the music and visualizes the lyrics accurately. Timing with the Music: Here are some examples of very good timing of the images with the music: Piano at 0:49 - Nice! "Scaramouch, scaramouch will you do the fandango" scene at 2:04 - Very nice! "I'm just a poor boy..." at 2:24 - then the group singing at 2:24 - then back being alone at 2:32 - Wow! The "Let him go" scene at 2:41 with the "appearing-disappearing act" the trio of Pancho Parrot, Gilda Goat, and Edgar Elephant - EPIC!!! [*]Visual Effects: The negative polaroid effect for the "Thunderbolt and lightning" scene at 2:14 is just spot-on! Now that you know the basics of video-editing using Windows Movie Maker, you can now start embarking on this exciting and rewarding task of completing your movie project! As always, this tutorial serves as a general guide but ultimately the choice of the visual effects, animation, etc. would depend on the type of project and of course, the personal creative taste of the film-maker. For any questions, clarifications, comments, and suggestions feel free to post in the Questions & Answers Thread. Sources: 1. Windows Movie Maker, (http://windows.micro...ker-get-started) -
Controlling Depth of Field What is Depth Of Field? Depth of Field (DOF) is the depth in front of and behind your focus target that is also in acceptable focus. A shallow DOF means that there is very little distance in front or behind the target that is in focus, deep DOF means there is a lot of distance in front and behind the target that is also in focus. Another thing to keep in mind is that DOF is slightly shallower in front of the target (toward the camera) then it is behind the target (away from the camera). For some real in-depth information, see the entry on Wikipedia. Prerequisites (things we will not be covering) Know how to use your camera and it's available manual settings. Know how to choose what you want to focus on or use manual focus. Know how to set up your lighting for the effect you want. Why should I care about DOF in my comic or film? Controlling the DOF is controlling what is in focus in your photo. The items that are in focus are the ones the viewer will (obviously) focus on. Keeping unimportant items blurred will keep your frame cleaner and less confusing for the viewer. All images shot with Canon G9 on manual, macro mode, no flash, ISO 80. Focus point is always the face of the motorcycle cop-zombie. Camera was not moved between shots, but the first two shots were cropped to match the general field-of-view of the third photo. Aperture: f/8 Shutter: 1/10 second Aperture: f/2.8 Shutter: 1/60 second Aperture: f/3.2 Shutter: 1/60 second Additionally, the background zombies were moved back (~3 inches) and the zoom was used. How do I control the DOF? What does Aperture have to do with it? Not only the depth of field, but also the amount of blurring your out of focus areas will have can both be controlled by adjusting the aperture or f/stop of your lens. The wider open your aperture is, the shallower the depth of field will become, and also the more blurred the out-of-focus areas will be. What does Focal Length have to do with it? The more you magnify your subject, the shallower your depth of field will be. What this means is that the longer your lens' focal length, the shallower your depth of field. It is very difficult, for example, to get a deep DOF using a 100mm lens and, inversely, to get a shallow DOF using a 24mm lens. Of course, it is all relative to the actual magnification of your subject and the distance between the lens and the subject. What does Shutter Speed and ISO have to do with it? Absolutely nothing. Shutter speed is the amount of time the shutter is open and letting light hit the sensor. ISO is the light sensitivity setting of the sensor. Can I fake DOF control? As great as DOF control is, we are limited by the gear we have available. Luckily there are ways to "cheat" so that our end product comes out looking the way we want. Blurring in post production One of the most common solutions suggested is to blur areas you want blurred after you take the photo, using software such as Gimp or Photoshop. This can be an effective solution, but it is not something I recommend. For most folks, the image will end up looking edited and unnatural (because it is). Another reason to avoid this method is the time involved. If it takes you an hour to edit one photo, how long does that add up to when you are working on a film? Hint: there are 15 to 30 images per second for a film. Stretching the set With a lot of small cameras, the problem we run into most is that everything is in focus. For most scenes we want shallow DOF but these small lenses don't do it so well. We can fake it by expanding the set and then zooming in. The lengthening of the set will mean that even with a deep DOF we can have our background out of focus. Utilizing the optical effect of zoom compression, by zooming in, can in turn compress the set so that it appears to be not so stretched out. This is the method I recommend because you only need to set it up once for each scene and shoot as many photos as you want to, no extra editing time in post. Assignments For these assignments you will be posting images. Be sure to keep your images at or below the 800x600 pixels limit, I'd like them all to be at least 640x480 though. Assignment 1 Create a small scene with foreground, middle-ground, and background. Your focus target will be an item in the middle-ground. Keep the same target and angle for each photo, preferably the same focal length too, if this is possible with your camera. If you are having trouble with this, take an overhead photo of your set and post it in your student thread, I will help you out with some tips. Submit three images for grading: 1. ONLY your target in focus (shallow DOF) 2. Foreground AND Middle-ground in focus (mid DOF) 3. Everything in focus (deep DOF) Once this assignment is passed, move on to Assignment 2 for final grading. Example Assignment 2 (final) Using the skills learned above, create a 4 to 6 panel comic that imparts a story to the reader WITHOUT using any text call-outs or speech bubbles. Use post-production techniques sparingly, this assignment is about controlling the Depth-of-Field to convey the message, not about text and special effects. You can move the camera and objects in the scene just like any comic production. In your submission, use the spoiler tag to describe what is going on in the comic. If the idea came across in the photos you pass, otherwise you'll be given changes and information as to why the task didn't quite work. Example Image is a link to a super-sized version. More sizes on Flickr You can see the actual stage setup on Flickr