Search the Community
Showing results for tags 'Republic'.
Found 26 results
-
My first ever true Minifig-scale ship is finally here, and what better model to start with than the sleek BTL-B Y-Wing from The Clone Wars series. Being 23 meters long in universe, this accurately Minifig-scaled MOC is quite a unit: 57 cm long, 1,6 kg, 2,954 pieces. It can accommodate two clone pilots - one in the cockpit, the other in the turret. The model is available in three versions: classic (yellow), Rex's (blue), and red. With a spaceship of this kind, the main challenge is to achieve a level of smoothness and fluidity that gets as close to the original as possible. Using the Battlefront II model as a reference, my goal here was to closely match all key features of the ship: the subtle downwards angle on each side of the body, the curvy and tapered front section, the continuous yellow stripes that run across the entire fuselage, the intricate middle-section... and for such a smooth ship, going full SNOT (from top to bottom!) goes without saying. The T-shaped body of Y-Wings usually allow for simplistic structures, but in this case, figuring out the internals was one of the truly head-scratching parts of the build, since I had to properly incorporate angled fuselage assemblies and make a proper interior for Minifigs. Even so, the model is very swhooshable and can be grabbed from the underside, from the rear or even from both wings. Each color variant is accompanied by its specific set of instructions and parts list, giving you the freedom to build the one you prefer. The ship has two display modes, "in-flight" with its fully removable stand, and "landed" with retractable and easy-to-connect landing gear. The swooshing can begin. ► Instructions for the BTL-B Y-Wing are available at BrickVault! More pictures on my Flickr page.
-
"We're clones! We're all clones!" Umbara 20 BBY "We're clones! We're all clones!" Umbara 20 BBY by Nicholas Goodman, on Flickr "We're clones! We're all clones!" Umbara 20 BBY by Nicholas Goodman, on Flickr
-

[MOC] [UCS] [Instructions] MC75 "Profundity" Star Cruiser
JorstadDesigns posted a topic in LEGO Star Wars
Hey everyone! Just posting an update on my MC75 Profundity. My original version used some technic liftarm supports at the front of the ship that obscured the lower command fin and wasn't as attractive. After trying a bunch of options, I've settled on this design as a balance of structural support and appearance. It's probably slightly less stable than the first version due to having one fewer support point over a smaller base surface area, but the ship isn't really designed for swooshing anyway, so I'm pretty satisfied! I additionally made some parts changes to reduce rare part usage; the new version also cut maybe 150 bricks overall. I hope you like the changes! Although there are a few different variants of the ship that showed up in Rise of Skywalker, this is the base design as seen on-screen in Rogue One, commanded by Admiral Raddus during the Battle of Scarif. Although Rogue One and some online images were used occasionally for scale/size reference, I mostly used the MC75 model from the board game Star Wars Armada for the design (a fantastic board game for anyone interested in strategy games). Part count: 3,294 LEGO bricks Dimensions: 32 in. L x 7 in. W x 15 in. H The original version took about six months of off-and-on design work to finish in LDD. I spent another four months testing the new stand for the update. Stud.Io was resisting while the PDF instructions manual was generating, but it got there eventually. The Profundity is designed to-scale with LEGO's new ISD (#75252) as well as most other JD MOCs, including the MC80a Home One, MC80b Liberty, and MC30c. The height of the ship was a bit of a challenge, but in the end the tall stand turned out to be an advantage for mounting other Rebel ships. Both the Tantive IV and the Ghost are designs by LEGO (the Tantive from the new ISD, and the Ghost from the Star Wars advent calendar) modded only for attaching to the model. The Tantive can be placed docked inside the hangar bay, escaping the Profundity, or on it's own independent stand. The MC75 star cruiser is a Mon Calamari city ship repurposed for combat with battleship-grade heavy armor and a large weapons collar encircling the main body of the ship. The most well-known MC75 was the Profundity, commanded by Admiral Raddus during the pivotal Battle of Scarif. Boasting twenty point-defense laser cannons, twelve broadside turbolasers, four heavy ion cannons, twelve proton torpedo launchers, and six tractor beam projectors, the MC75 was more versatile than the MC80 and easily adapted to varying engagement styles. The most notable feature of the MC75 is an armored outrigger fin extending the bridge command pod below the ship, a design choice intended to evoke the appearance of predatory fish feared among the Mon Calamari. A smaller fin above the ship housed the transmission array and primary sensor clusters. The large docking bay within the ship's nose was capable of docking ships up to the size of small corvettes (notably the Tantive IV). Although the MC75 lacked prominently displayed engine housings, twelve Kuat Drive Yards Gemon-15 sublight ion drives hidden beneath the rear armor plating allowed the MC75 to match the cruising speed of starfighter escorts. I tried to be as accurate as possible to the on-screen appearance of the MC75, but decided to sacrifice the grills in the sides of the forward weapons collar. Unfortunately the scale also prohibited adding the 8 smaller sublight engines in the rear of the ship. Clearly the model isn't a 'swoosher,' but overall it's remarkably sturdy! Honestly the test build went much smoother than expected, given the complex angles and the continued presence of gravity (haha). It took about twelve hours to assemble using Stud.Io and making corrections/fixing errors; should be significantly less using the manual. Thanks for looking - hope you like the design! -
I created the 501st Legion version last week. Now I created another one in the Republic scheme. More detail and building instruction in the video:
-
I am proud to introduce myself with my Republic Gunship.
-
Stormtrooper on 24 hour leave. Republic Party by Terry Akuna, on Flickr 1) This is a republic party ... no Jedi scum allowed. Republic Party by Terry Akuna, on Flickr 2) Bartender! OJ ... straight up! Republic_Party_006 by Terry Akuna, on Flickr 3) Your'e a Stormtrooper? ... You're a Jedi? ... Putz! Republic Party by Terry Akuna, on Flickr 4) Movies are not the only people who can do product placement. Got Milk? Republic Party by Terry Akuna, on Flickr 5) Whats your ID trooper? Take a hike Jedi scum! And don't even think about taking that bottle of grape juice! Republic Party by Terry Akuna, on Flickr 6) I'm on 24 hour leave ... can't a girl have a glass of OJ in peace ... I thought Lord Vader killed off all these flashlight swingin' fools!
-
Hello, this is Thranta class corvette from star wars the old republic. Lenght: 75 cm
-
Hi guys! I searching a long time for the Republic Cruiser 7665. When I gave up the search it came to my mind to build my own vision of this ship with some parts of the city set 60125. A little later, when the model was finished, I managed to get 7665 ;) However, I do not want to withhold my version of the Consular-Class Cruiser. So I share it with you: RC1 by IRONDUCK, auf Flickr RC_7 RC_5 RC2 RC_3 RC_6
-

[MOC] Microscale Republic Gunship with Video and Instructions
Guy smiley posted a topic in LEGO Star Wars
Hey guys! You may have seen this build on my photostream, or The Brothers Brick, but I thought I would post it here as well so the Eurobricks exclusive crowd would get to see it as well! I want to be more active on other forums besides Flickr this summer too. The nose decals are by Tbone_tbl on Flickr, I found them on MOCpages here: http://www.moc-pages.com/moc.php/72865 I added the door designs and sized them correctly. I made a YouTube video on my channel that showcases the models and shows how to build them check it out here: Thanks for looking! -
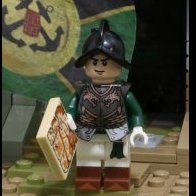
Ive been working on a stop motion lego movie since last years august, which heavily features this republic clone base. This is my first ever attempt at a clone base, using no brick linked ordered pieces, instead only using pieces from my own brick collection and my destroyed (2008) deathstar. These were taken 5 months ago, and i cant take any more pictures of the base because i destroyed it when i finished filming all of its scenes. The turret is an old moc of mine of the "75088 senate commando battlepack" turret.
-
Here's a MOD of captain Rex's AT TE. I removed the platforms and added as well as modding the turrets The main turret. I will be building this soon in real life.
-
Hi everyone, today we have a MOC on a rarely seen planet when it comes to both Star Wars Lore and Lego. This MOC takes place during the final hours of the clone wars and was more of a MOC where I could test some building techniques. Any constructive criticism and a rating would be appreciated. Thanks
-
To celebrate the release of Rogue One: A Star Wars Story today, I decided to build a 786-piece model of the ARC-170 Starfighter. While it does not actually appear in the movie, it was the Republic's precursor to the iconic X-Wing Starfighter that the Rebel Alliance used in their fleet. It includes three clone pilots and an R4-D5 astromech droid. I used 8088 as a skeleton, but did some major modifications as I will detail throughout the post. Here you can see the model as a whole. At first glance you may not see that much different from 8088 (apart from the engines), but I altered many minor aesthetic and functional components of the ship to make it more accurate and give better play features. The original model had 396 pieces. I almost doubled the part count of the original. Here's a front view. One of my main priorities with this model was to bring the s-foils in closer to the main wing. In the movie, they're flush against it when closed, but 8088 had an unsightly gap between everything. This was as close as I was able to get the s-foils to the main wings. In this side view you can see some of the tapering I attempted to do near the nose. I wanted the dark red to flush better with the stripe that goes back towards the cockpit. You can also see my addition of spring-loaded missiles to the main guns, of which there are also faux blaster tips to try to mask some of the spring missiles' prominence. I also tried to extend part of the underbelly to better connect with the nose as seen on the movie model. Nothing too much back here. Just a knob that when turned opens and closes the s-foils, similar to 8088, however pulling and pushing it operates a different function... In 8088, pushing the knob activated a series of flick-fire missiles. Here, pulling it releases a latch that drops down this gun caddy which is currently holding the pilots's personal weapons. This is securely held in the ship so it doesn't fall out while swooshing. Top-down view. I changed the shaping of the wing-tips to make them more symmetrical as they should be. Here's my personal favorite enhancement. I modified the engines based on thire5's UCS ARC-170 model, but scaled down appropriately. It was a nightmare getting each tile to line up properly and not give me a collision error. I spent a good few hours or so on this part alone. They're slightly larger than the turbines on 8088, but I don't think they're oversized. The internal skeleton of the turbines for those wondering how I did it. If you have any comments or suggestions for how my model could be improved, please share! I'm always looking for constructive criticism! May the Force be with you!
-
Hey guys im new here and i was looking a old/new lego sets - This is my moc/build of the republic speeder bike , there is no minifigers includes just the speeder bikes its self because of digital designer you can't get the decals on the minifigures Republic-speed_Bike-J_C.lxf
-
Hello, here is another small build from me, BARC Speeder. There is a Lego spring-loaded shooter under the nose of it. -Samppu
-

[MOC] Midi-scale Republic Cruiser (Jedi Consular Class Cruiser)
JaydenIrwin posted a topic in LEGO Star Wars
This ship is one of my favourite ships from Star Wars, it's the first ship you'll ever see while watching the saga! It's 292 pieces and comes with 4 stickers on the front area. The escape pod below the cockpit will detach, and the landing gear can be tilted up or down. Overall it's quite a beautiful ship! LEGO Ideas Page Please feel free to comment, and give me some feedback, and if you really like it, support it on LEGO Ideas! -
Hey Eurobricks! Here is my newest creation, the All Terrain Recon Transport. I was unsatisfied with all of Lego's versions, so I made my own. Enjoy! Gree would be proud! by Sir Nagol, on Flickr Here is an updated version that allows the rider to sit down. Someone suggested that I replace the blaster with an antenna, which I think is a great idea! At-rt Version 2 by Sir Nagol, on Flickr (Please let me know if the pics are too large. I can replace them with smaller ones if necessary)
-
Hey there, it's me again with the next one of my MOC's, created a few weeks ago. It's my mocced LEGO version of the X-83 TwinTail Starfighter, known from the legacy era of the Expanded Universe. It's a part of the X-Wing starfighter series, and is used about 130 Years ABY by the New Jedi Order. The X-83 is a single-pilot Starfighter, with support from an Astromech-droid, which has manufactured into the ship. This Starfighter is equipped with a Shield-generator, a strong armour and armed with four enhanced heavy laser-cannons and a proton-torpedo launcher. In atmospheric, as in space flight, the X-83 is a particularly maneuverable fighter. Like the T-65 X-Wing, the X-83 has S-foils too. This shown model is created out of 437 bricks, including the Pilot. It's build in minifigure-scale and fits in it's size to the third generation (2012) x-wing. Created as a concept model in LDD . X-83 TwinTail Starfighter, Mocced in LDD, rendered in Pov-Ray X-83 TwinTail with reference Picture Rearview of X-83 TwinTail X-83 TwinTail with landinggear and closed S-foils. I have uploaded it on Cuusoo too, so maybe, you would support me. It would be great.. ;) Altough, take a look at my other MOC here on Eurobricks: E-Wing Escort Starfighter Best Regards $leeper
-
Hello again everyone! Continuing to review the sets I bought during the May the Fourth sale. This is my last review of the 2015 winter wave as I don't have the other sets that still need a review and I don't plan buying them. They are: 75081 T-16 Skyhopper 75084: Wookiee Gunship 75086: Battle Droid Troop Carrier 75087: Anakin's Custom Jedi Starfighter 75090: Ezra's Speeder Bike If anyone could review these. Thanks! So now on to the review This is my third review : 75089 Geonosis Troopers Name: Geonosis Troopers Theme: Star Wars / Expended universe / The Clone Wars Year: 2015 Pieces: 105 Minifigures: 4 Price: USA 12.99$, ENG 11.99£, CAN 15.99$, EUR 16.99€ Ressources: Brickset Lego store description The front of the box with the new 2015 art: A stormtrooper helmet tagged with a rebel alliance crest. Your standard box art for 2015. On the back of the box, we see the play features and the number os stud shooter and the number of spare studs. Also shown is the clone troopers and the walker's features. In the box, the pieces come in 2 bags and with the instruction booklet. The instruction booklet with the same image as the box on the cover. The back with the win minifigure. Spare parts: mainly spare studs. It's a battlepack! The completed model. The walker with the new stud "gatlin" gun ready to fire! Side view 1 Side view 2 Top view Back view With the legs posed like it's recommended in the manual The walker as 3 features: movable legs, the "gatlin gun" and the opening cockpit. Here is the cockpit opened and closed. Closed The walker is unstable if both legs aren't placed the same way And now what you were all waiting for: The Minifigures! We get 4 of them; 2 Geonosis airborne troopers and 2 Geonosis troopers. The battlepacks comes with 2 different heads: the standard clone trooper face and another one with a different facial expression. The Geonosis trooper compared to the to the Kashyyyk trooper and Utapau trooper. We can see that the camo pattern is different then the Kashyyyk trooper. It has the same back printing as the one from the Utapau BP. Back view The airborne trooper compared to the Utapau BP one. Back view Rating ------ These three points are not included in final score. Price: 6/10 – 105 pieces for 12.99$ is above the 10 cents per piece ration. Also like other battlepacks with the gatlin gun, 20 of those piece are studs for the guns and the canon. Still we get 4 amazing minifigures and a small vehicule. Parts: 7.5/10 – Many of the pieces are studs but we get a nice assortement of pieces in geonosian tan that could be usefull for any desert moc. You love or you don't the new gatlin gun. Build 7/10 – The build takes around 10 minutes. No special technic are involved in the build. Battlepacks are about minifigures and not the building experience, so no surprise here ------ Design 5/10 – This walker is not based on any source material but we have seen enough walkers that we know how it should look or not look like. From the front and from the side the model does look good but looks bad from behind because of a complete lack of detail. There is only so much you can do with 50-60 pieces. You can fit 2 minifigures and their guns on the walker. The legs are movable, the cockpit can be opened and closed and the gatlin gun does shoot fast and far. Still it's a little hard to place the legs in display mode. (refer to image legs posed like it's recommended in the manual) If both legs aren't place the same way, the walker will be very unstable or it will fall. Besides, the walker can't stand on 1 leg and thus it limits the different poses it can take. It's an average build. Nothing amazing. Still it might bring some memories to some of the first walker of the very first battlepack released: the clone walkers BP. Minifigures: 10/10 – The minifigures are outstanding. The camo printing on both troopers is very detailled and beautifull. Printed legs, and backprint on all 4 minifigures. The airborne trooper helmet is also very well made and looks just like the source material. Troopers from a new clone legion is always welcome for MOCs and dioramas. Also we get 2 different faces wich is good for an all clone battlepack. Playability: 6/10 – Not much play features except for the gatlin canon and the opening cockpit. It's hard to set the legs in display mode and both legs must be placed the same way if not the model will be unstable or it won't even stand. The movable legs can't really considered a play feature in this case. Still the shooter is fun to use and so are the minifigure's guns. This is a one faction battlepacks. It's meant to be played with other sets so you can have targets to shoot at! OVERALL 7/10 – A good battlepack. The minifigure are definitively the highlight of the set as you would expect. Adding a new clone legion to your collection is always nice even tho some would have prefered a more "famous" legion like the Galactic Marines or the 501th. Seeing another variant of the airborne trooper is also very nice because the mold for the helmet is amazing. The vehicule included could have been better. In the end this is an above average battlepack with outsanding minifigures that carry a rather average walker. Thoughts and critiques welcomes! Also if there is any grammar mistake burning your eyes, please PM me and I will edit. Thanks for reading!
-
Hello again everyone! Continuing to review the sets I bought during the May the Fourth sale. So here is my second review : 75088 Senate Commando Troopers Name: Senate Commando Troopers Theme: Star Wars / The Clone Wars Year: 2015 Pieces: 106 Minifigures: 4 Price: USA 12.99$, ENG 11.99£, CAN 15.99$, EUR 16.99€ Resource: Brickset Lego store description The front of the box with the new 2015 art: A stormtrooper helmet tagged with a rebel alliance crest. Same as the other sets of the winter wave. On the back, we see the troopers in action, the number of spare studs included and the play features of the canon. In the box, the pieces come in 2 bags and there is also the instruction booklet. The instruction booklet has the same image as the box on the cover. The back with the win minifigure. Spare parts. Mainly spare studs for the guns as you can expect from a battlepack. The completed model. The canon is equiped with the new stud "gatlin" gun. Side view 1 Side view 2 Back view Top view The legs can be adjusted Legs down Legs up The canon can be aimed up and down. This is the lowest angle it can be placed in. We now move to the minifigures: the highlight and purpose of the battlepack. We get 4 of them. Three senate commando troopers and one senate commando captain. The captain as a different face from the 3 other troopers. The 3 troopers have the clone face from other clone battlepacks. The captain as some white painting on his helmet, torso and leg. The back printing is similar. Rating ------ These three points are not included in final score. Price: 6/10 – 106 pieces for 12.99$ is above the 10 cents per piece ration. Also 20 of those piece are studs for the guns and the canon. Still we get 4 great minifigures that were really expensive on the aftermarket because they were released in only 2 sets years ago. Plus the canon is a nice little build. We are use by now to this kind of pricing for battlepacks. Parts: 7/10 – 20 of the pieces are studs but we get 7 pieces in republic red and only 2-3 technic pieces. The "gatlin" canon is a really nice piece. Build 7/10 – Nothing fancy here. The building process will take you no longer then 10 minutes. No special technic are involved in the build. ------ Design 7.5/10 – Since the canon is not based on any source material it's difficult to compare it. Still, with the colors and style we have no problems imagining this canon as an anti aircraft gun that would be around the senate protecting it from attacks. The canon looks great overall, but the side of the barrel (Image: side view 1) could have been better. Also, some might find it too "bulky". It looks more like a mortar then a canon. Minifigures: 9/10 – The 4 minifigures are amazing. Printed legs and printed back torso. The fact that we get a captain and 3 troopers is great. Its nice to have a captain. It adds diversity to the battleback but they still look good displayed together. Only complaint: we should have goten 4 different faces since the senate commando troopers are not clones. Playability: 7.5/10 – Like other one faction only battlepacks, it complement other sets really well. By itself you can shoots the canon and play with the troopers but you will defenetly need bad guy to shoot at. The shooter on the canon rotates on the sides and up and down. It works really well and shoots far. Kids should have a blast using it. OVERALL 8/10 – A nice little battlepack. The minifigures are great and so is the canon. Its not everyday we get a senate related sets and non clones troopers of the prequel era. In fact this is the first prequel battlepack wich does not contain any clones. They look great standing next to Palpatine in his office and you can make an Emperor arrival moc PT style. This is an above average set that you should pick up if you would like to add to your republic force with non clone elements and a neat canon. Thoughts and critiques welcomes! Also if there is any grammar mistake burning your eyes, please PM me and I will edit. Thanks for reading!
-
This is my first Star wars moc- the first of many I hope! The idea for this started with my purchase of the geonosis troopers set (75089), modifying the walkers and it went on from there.
-
Hi, I just wanted to share my K-Wing with you. If you want this to become an official LEGO set, please support this project on LEGO Ideas (formerly LEGO Cuusoo). History The K-Wing was a heavy starfighter in the Star Wars universe. It was developed for the New Republic during the Yevethan crisis, replacing the B-Wing. In the Second Galactic Civil War, Commenor deployed K-wings for defense during the Battle of Commenor. (→ read more on Wookieepedia) The LEGO set The set I'm thinking of includes 3 rebel pilot minifigs and a R2-series astromech droid. It would fit perfectly to the other already released starfighters, like the official X- or Y-Wing sets. I created the model using Lego Digital Designer. My construction consists of 1020 pieces, the price would probably be around $100.00, but please consider that the final set design by LEGO could be different. Please support this project Again, please cast your supporting vote and spread the word, inform your family, your friends, and anyone you know who could be interested in supporting this LEGO set idea - the path to 10,000 supports is a long one and this mission needs any help it can get! ;) PS: I’m going to build one when reaching 1,000 supporters
-
I am not a big fan of the prequel trilogy but I couldnt resist to give a try on the brick masters mini builds, however due to the unavailability of some bricks and esthetical purposes, I made several improvements over the oficial design. P1010058 por Nom Carver, en Flickr P1010079 por Nom Carver, en Flickr And here is a mini version of my LAAT/s which you can see over here: http://www.eurobricks.com/forum/index.php?showtopic=87241&hl=laat P1010075 por Nom Carver, en Flickr P1010069 por Nom Carver, en Flickr
-

Working Republic Gunship 75021 Lights (No Modding required!)
joev14 posted a topic in LEGO Star Wars
Hey there everyone, I'm Joev14, a new guy on the forums. I got myself pretty much all the fall 2013 star wars sets, and have been experimenting with an idea I had, what if it were possible to put working lego electronic lights into a Republic Gunship and AT-TE, without using any modified parts. After much work, I have finally found a way to do lights in both the AT-TE and the Gunship. So without further ado, I present to you, building steps for how to install working unmodified lights into your Republic Gunship. Click the photos to be linked to larger versions of the images. Sorry for the change in lighting throughout the pictures, sometimes the flash from my camera makes it hard to see the separate white parts, so I don't always use it. Step 1: Begin with a standard 75021 Republic Gunship (Mine is slightly modded with orange accents and a few other things, but the base design is still the same) Step 2: Absolutely necessary parts. You will also need a wire of whatever desired length (I recommend the 15-stud long ones), and two of these lights. Step 3: Recommended parts Step 4: Remove any parts that may get in your way, including minifigs inside the hangar. I also recommend removing the wings, although you don't absolutely need to. Step 5: Remove this chunk of the ship. Step 6: Remove the two sides of the upper section of the ship. Step 7: Continue by removing all the above-shown parts. Step 8: Remove the 4 containers. It is your choice whether or not you want to keep them. I chose to turn them into a crate as shown below. Step 9: Canister pod Step 10: Remove these two pieces Step 11: Replace the four openings where the canisters used to be with these four bricks. Also, run a wire from the hanger roof through the opening in front of the handle as shown. Step 12: Place these three plates on the bottom of the battery box. Make sure to put in a 9V battery first, so you don't have to go back and do it later! Step 13: Place the battery box in the space shown. Attach the lead of wire to the battery box (make sure to skip one set of studs, this is crucial). Step 14: Place two of the slopes in front of the wire end, and two small cheese slopes behind the co-pilot. Place 2 L-shaped plates around the wire opening. Step 15: Place two 1x2 plates ontop of the L-shaped ones, then another two L-shaped plates facing in the opposite direction atop those. Finally, place two 1x3 plates ontop, bridging the battery box to the L-shaped plates. Step 16: Place two more 1x3 plates on both sides of the end of the wire. Place two rounded slopes atop them, and finally, place a 2x4 tile on top of the wire end. Step 17: Place two more rounded slopes to cover the wiring. Step 18: Reattach the remaining large sections of the upper part of the ship, excluding the wings. You may fill in the gaps as desired. I intentionally left the 1x4 block area behind the co-pilot exposed so you can still press the button on the battery box. Step 19: Next comes the lights. There is no specific way you have to place them, but I chose to do it in this configuration. With a few red studs, as well as two round trans-orange bricks, I can get the two lamps to light up the whole hangar. Step 20: Above are the parts you should still have remaining, assuming you used the same method I did. Step 21: Reattach the wings and put all your figs back in, your done! Step 22: And boy does it look sweet! What are everyone's thoughts/suggestions for this? The only thing that really seemed to have me stumped was the rounded slopes in front of the handle, I couldn't figure out a sturdier design. While it does hold up, it looks a little awkward with all the obvious spaces between the bricks. I can't figure out a better looking way to do it and still have room for the wire though. Ideas? Facecast Episode discussing these modifications: (skip to 15:20) I will be posting the guide for how to put lights into a 75019 AT-TE soon! -
So I finally got my hands on the new RGS and I must say it looks amazing, but is waaaay to big and with all its battle stations I would need at least 5 Clone Troopers vs Droidekas battlepacks (?) to fill it properly, and in some aspects I feel it a little flimsy and that handle feels a little stressed while moving it, since I ran out of dust-safe shelving space, I had to alter it to fill the next requirements: Be smaller (no shelf space) Have one seater cockpit (I have only one pilot) Have no bubble turrets (they make no sence to me) Tight close side doors (if the doors are not going to close why the need of them) Minimal play features (I simply display and swosh around a little) Be strong and sturdy like a brick (a real brick) Be aesthetically sleek Now the backstory: During the clone wars, the LAAT/i was one of the fastest and most effective ways to deploy troops into the battlefield, however many were downed by the CIS during deployments behind the enemy lines, and the crescent need of sending troops from onboard of the cruisers straight to the ground required of a vehicle capable of traveling on the limits of a planet´s orbit, for those reasons Rothana Heavy Engineering developed a new variant: the LAAT/s fast enough to outmaneuver a heavy bomber/fighter thanks to its higher maneuverability due to its smaller size and aerodynamics, travel through hostile enviroments without further modifications thanks to it air lock pressurized side doors, and quick land/take off capacities to deploy and extract safely troops behind hostile ground, all this characteristics combined with the strength and fire power of the regular LAAT/i make it the ideal vehicle for elite troops and support personnel. P2180634 por Nom Carver, en Flickr P2110792 por Nom Carver, en Flickr P2110780 por Nom Carver, en Flickr P2110773 por Nom Carver, en Flickr P2110756 por Nom Carver, en Flickr P2110738 por Nom Carver, en Flickr P2110732 por Nom Carver, en Flickr P2110726 por Nom Carver, en Flickr I know you are not big fans of set modding, but I hope you liked it, comments and criticism are welcome.