Search the Community
Showing results for tags 'Mindstorm'.
Found 17 results
-

[MOC] Dragonfly dune buggy
Daniel-99 posted a topic in LEGO Technic, Mindstorms, Model Team and Scale Modeling
DRAGONFLY Dune Buggy Hello everyone! For a very long time I had a dream to build a dune buggy, and finally, my dream come true! The main goal was to use a C+ electrics instead of Buwizz unit. Of course, I am not the first who attempted to build a buggy. I take an inspiration in Madoca`s Blue Lightning buggy. Technical specifications: - Light and ridged tubular bodywork - electrics form 42099 set (controlled with C+ app for 42099) - Long-travel independent suspension - positive caster angle on the front wheels - Long wheel for stability on the straigt lines - Double steering rack and steering arms reduce wobbling of the steering system - understeering feature (rear wheels get more grip) - RC tires 90 mm Buggy performed well, comparing to the 42124 set. It appears to be a car that is very comfortable to play with. The speed of the buggy allows you to walk with your normal speed in the park driving it at the same time! Here is a small video of my first tests: As I said, the main goal of this project was to use C+ electrics. But after that I decided to boost it with buggy motors! The overview of the car does not change much. Rear wheels get a positive caster angle, and wheel size was reduced from 90 mm to 85 mm (for reducing speed and increasing torque). Here is a short video with Buwizz-powered Dragonfly. I will definitely make another video about this car then the summer comes. -

[EV3] Slot Machine
dr_spock posted a topic in LEGO Technic, Mindstorms, Model Team and Scale Modeling
A Russian roulette style slot machine. Match three colours to win. Play by yourself or with friends. LEGO Mindstorm EV3 Slot Machine by dr_spock_888, on Flickr I made this for the local LEGO Discovery Centre's Adult Night's casino theme night. Originally, it was running on the NXT with limited function. The NXT didn't have the modulus function in the math block. I needed it to calculate where the colors are. I wasn't looking forward to writing my own modulo function then I got lucky and won an EV3 at a silent charity auction. Lo and behold, EV3 math block has a modulo function. I am saved! We also planned to build a working roulette table for the event but that fell through. So I added a "roulette" feature to my MOC. VIDEO: V -

[MOC] Self Constructing Mindstorms Space Elevator
hknssn posted a topic in LEGO Technic, Mindstorms, Model Team and Scale Modeling
Hello, I have been lurking around here on the technic/mindstorm forum for some time now and i figured i might aswell start posting my own creations here. This is my latest mindstorm project. It is simply a machine that builds a tower. It pick up modules at ground level and then brings them up to the top of the tower and then snaps them into place with 4 technic pins. And then it repeats that over and over again. Can it go all the way up to space? Only in my dreams. :) Even if we ignore the problems with wind, weight, wear of the plastic and battery life it would take 7432 years to reach space since it moves at a speed of 0,5cm/s (hence the fast forwarding in the video). I hope you enjoyed it. :) //Hknssn -
Is there a way to not display certain programs and especially MyBlocks on the EV3 Brick Menu under a Project? The Kids have a project called CityShaper and it has 2 programs and about 10 MyBlocks. They only need to see the 2 programs and not all the MyBlocks listed so it is easier to select during the FLL Competition.
-
Hi Eurobrick folks, I would like to present my first Mindstorm Ev3 creation: a combine harvester, which I named C-HARV3ST3R, following the Ev3 terminology. It is more than a year that the project was completed, and it stood for some time on a shelf before I finally made instructions (soon on Rebrickable). I then take the opportunity to present it here: It is remote controlled with the IR beacon, including steering and raising the unloader using the middle button. The header can be raised using a lever on the right side. There are two positions: when down (harvesting mode), the small wheels drive the reel. When up (driving mode), the reel does not turn anymore, and a lever push the touch sensor. The program can therefore "know" whether we are in driving or harvesting mode, based on the state of the touch sensor. The two modes differer by the following: in harvesting mode, the combine harvester drives more slowly and no reverse driving is allowed. In addition, a counter records how much we have harvested, a gauge (in %) is displayed on the screen at the top of the machine (where the actual tank is on real machines). When the tank is full, no further move is allowed and a "bip" is emitted. One need to either go in driving mode, or to unload the harvest by raising the unloader. In driving mode, the combine harvester moves faster and can move reverse (slow speed, emitting a warning "bip"). But a video is maybe better than words: Finally, just a few more pics: Hope you like it!
-

Wine pourer for alcoholic people lego mindstorm ev3
pasquentmax posted a topic in LEGO Technic, Mindstorms, Model Team and Scale Modeling
Hello ! Here a little video of my new project, a wine pourer for alcoholic people , the software is not operationnal today. i will post a new video when the project will be finished ! see the famous domestic robots: Light a candle, Open a yogurt, cut a cake -

[WIP] B4TTL3ST0RM - A Two-Player Battle Game!
M1dn1ghtN1nj4 posted a topic in LEGO Technic, Mindstorms, Model Team and Scale Modeling
This is my first fighting game for the EV3. Going to completely remake the one I started a couple years ago. New programming, movements, sounds, build, etc. I will update this thread as often as I can, although subscribing to my new YouTube channel would be much easier. :D Support me on Patreon! https://www.patreon.com/M1dn1ghtN1nj4 New channel, LegoRoboGo: https://www.youtube.com/channel/UCfj_fY7gc3rqKueez_H76vQ New videos will be posted above the old ones, so you don't have to scroll down for ages looking for the most recent video. Version 1 Final: Update 2. Making progress Starting out: Original version, which has since been recreated in the videos above: -
Colour balls tracker
pasquentmax posted a topic in LEGO Technic, Mindstorms, Model Team and Scale Modeling
Hello I'd like to share with you my last model, the colour ball tracker. This robot is able to track and catch a colour ball in a room without any border. The choice of the colour is made at the beginning and you can choose several colours. All the problems are managed, like mistakes, wrong things and so on technologies used are lego mindstorm and pixy cam thanks for you comments and requests !!! -

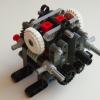
Mindstorms Sensor Problems
phoenixugur posted a topic in LEGO Technic, Mindstorms, Model Team and Scale Modeling
Hello, I have a problem with my NXT 2.0, My colour, supersonic and light sensors are not working however, touch sensors are working, Even there is no light at my sensors. Is there anything for me to solve this problem. Is the problem on my sensors or on brick ? -

6 Li-PO AA to be used in Ev3 Mindstorms
Serg posted a topic in LEGO Technic, Mindstorms, Model Team and Scale Modeling
Hello All Sorry if this question was already raised! As you all know Lego Rechargeable Battery for ev3 is expensive. May I ask you if anyone tried to use 6 Li-Po 1.5v rechargeable batteries there instead of regular lithium Batteries? Ni-MH are all 1.2v , and will not work as needed but maybe 1.5 li-po would be Ok ? Brand, let say : ZNTER They can be found on ebay for $40 for 6 batteries ... http://www.ebay.com/itm/6pcs-ZNTER-1-5V-AAA-400mAh-LiPo-rechargeable-lithium-battery-USB-charging-line-/272099707530?hash=item3f5a680a8a:g:RQ8AAOSwX~dWkQt- or http://www.bestbuy.com/site/eco-cell-usb-cell-rechargeable-aa-batteries-4-pack-white-green/4471800.p?skuId=4471800 Thank you !!! -
Hi, i've been working on this platform for a while, now it's basically ready. It's a tank with 6 indepentent suspension (3 per side), remotely controllable with quite a powerful climb :) It has space to put something else on it such as a weapon or a crane or such. Here's some pictures (sorry for the blurrines): The shell without threads and EV3: I've also attached a webcam to it, i was able to stream a 160x120 live video and drive it around the garden remotely, pretty awesome if a bit blurry :P Unfortunately i had to use an USB hub which have a huge plug, i had to put the EV3 brick vertically or it wouln't fit. At least there's just the right space to put the hub :) Here's some render too:
-
Hi, Here is my latest project that i have been working on the past 2 months. It's only function is to keep on rotating a platform or sphere. So it doesn't really have any purpose besides looking kinda cool. It can be used as a MOC display stand, but it has it's weight limit. I tried to have Gyroboy(from Ev3 education set) balancing on the platform but it was to heavy and it didn't really like the unstable platform. So it ended up with a borring box on top instaid. Lego Axis by Andreas Håkansson, on Flickr The build was inspired by a robot/machine i saw on the new season of battlebots. It's the one holding the trophy. After some research i found out that it was created by Mark Setrakian. I also found a video of his machine. (see below) You might notice that his moves alot more smoother. And that i stole the name becouse i couldn't come up with something myself. So this project was kinda software heavy compared to my other mocs so i figured i might aswell share i little about what makes it tick. For those that don't care how it works or just hate math should probably skip the rest. First off, what is the problem? The problem is to get the arm to follow i curved line at a specific height in space so that the 5 arms together makes a circular motion. What I need for this is a way to convert X,Y,Z coordinates into angles for the diffrent joint in the arm and then a way to plot a curved path in the X,Y,Z coordinate system. Converting X,Y,Z coordinates into angles (for 3 joints) The way i did this was to create two 2-dimensional views of the arm, X-Y and Z-Ys (not same as Y). YX by Andreas Håkansson, on Flickr So first of i calculate the value of Ys. This is done with the X Y positions that would be part of our desired position. Ys = sqrt(X^2 + Y^2) Now it is possible to get the angle between Ys and X. Angle Radians_YsX = arccos(X/Ys) (arccos = inverted cos = cos-1) Some calculators/softwares (EV3 original software) would directly give you the value in degrees. In labview you get the value in radians instaid of degrees so you have to convert it into degrees youself. The diffrence between radians and degrees is basically that for degrees 360 = full circle and for radians 6,28(Pi x 2) = full circle. I used labview so i had to add this. Degrees_YsX = Radians_YsX x 180 / Pi Now i have the calculated angle for the first joint. YsZ by Andreas Håkansson, on Flickr B and C is fixed distances in the mechanical design so they will be constants in this case. Ys i got from the calculations above and Z is part of our desired position so i know that value aswell. To get the angle for bc (third joint) i first need to know the lenght of V. V = sqrt(Z^2 + Ys^2) To get the angle for bc. Radians_bc = arccos((B^2 + C^2 - V^2) / (2 x B x C)) Degrees_bc = Radians_bc x 180 / Pi Now i just need the angle between B and Z (bz) for the second joint. First i calculate the angle between B and V (bv) Radians_bv = arccos((B^2 + C^2 - V^2) / (2 x B x C)) Degrees_bv = Radians_bc x 180 / Pi Then i calculate the angle between V and Z (vz) Radians_vz = arccos(Z/V) Degrees_vz = Radians_vz x 180 / Pi Add them together Degrees_bz = Degrees_bv + Degrees_vz Now i am able to generate the degree values for the 3 joint in the arm based on the XYZ coordinates. However the degree values of the joint is not the same as the degree value for the motors so i will have to account for that with some gear ratio calculations. (I have a feeling most people here in the technic forum knows the basics of gear ratio so i'll skip explaining that.) In the calibration sequence of the machine i then match the starting position for the motors with the appropriate degree value. Creating a curved path. The curved path is based of a circle that has it center in the middel of the machine. Each arm will move along 64 degrees of the circle. I used 64 degree instaid of 72 (1/5 of 360 degree) to avoid collisions of the arms when they do the transition. I had to use a separate coordinate system for the path based of the center of the machine, in the new coordinate system i use Xc and Yc. Path by Andreas Håkansson, on Flickr As you can see in the image above the path starts at 328 degree and moves to 392 degree. I keep going above 359 (instaid of starting over at 0) to avoid having make special code that would have to hadle the jump as it moves along the path. To get Xc and Yc coordinates for the path (based of th center of the machine). Yc = cos(v) x r (v = angle, r = radius) Xc = sin(v) x r Ex: 1/ (Yc) 127,2mm = cos(328) x 150mm (Xc) -79,5mm = sin(328) x 150mm 2/ (Yc) 150mm = cos(360) x 150mm (Xc) 0mm = sin(360) x 150mm 3/ (Yc) 127,2mm = cos(392) x 150mm (Xc) 79,5mm = sin(392) x 150mm Now i just need to get the path based in the center coordinate system to the coordinate system for the arm. The distance between the two coordninate systems is know (just measure). To get the Z and X positions. Z = P - Yc (P = distance between the two coordinate systems) X = 0 - Xc Ex: (Z) 122,8mm = 250mm - 127,2mm (Yc) (X) 79,5mm = 0 - -79,5mm (Xc) The Y value for the arm does not need to be calculated, it can be what ever i set it at as long as the arms can reach it. So that is basically the math for the machine. I use the same calucaltions for all 5 arms. To get it to move in the path i start at 328 degree and then every 100ms i add 1 degree until i get to 392. Then i lower the Y value to lower the arm and then start to subtract 4 degree every 100ms until it reach 328 again. Then change back the Y value to make to arm go up again then it kinda repeats that. Each arm starts at 5 diffrents points in this cycle so that when the first arm starts moving forward the last arm will start moving revers. This way there will always be 4 arms holding the plate. There is probably more efficent ways to solve this, but this is what i could come up with. :) Most of the equations could be used for a walking robot as long as its only has 3 joints / leg if you want all legs to pull in the same directions. But i have a feeling there might be some weight issue. Hopefully the explinations was understandable and not too boring. :) /Hknssn
-
...hello out there... this past weekend, I was able to buy an opened/used Mindstorm EV3... some of the baggy parts were open, while some were not... I did check the big and important pieces by looking at the parts list at the back of the manual... although it wasn't listed, I've been told prior that there was a CD that comes with it... the one I bought did not... My questions are: (1) how important is this CD to the overall functionality of the EV3, (2) where can I get a hold of one without going through TLC and Bricklink and (3) can the content of the CD be copied for personal use? Any help is much appreciated.
-
[MOC] Copper Penny Sorter
landoandrews posted a topic in LEGO Technic, Mindstorms, Model Team and Scale Modeling
Lately I've been in the mood to make MOCs that haven't ever been done before, or improve upon unique ones. I haven't seen any descent penny sorters,so if any of you guys know of any please let me know. Copper Pennies are worth 230% of their face value just because of the metal contained in them. Some people hoard the pennies so that if they're ever taken out of circulation they could melt them down and sell the metal. I'm not one of these people, but I this would be a fun and challenging moc. There's two ways to sort copper pennies from the zinc ones without any special equipment: 1)Date: Copper pennies were made from 1909 to 1982. 2)Weight: Copper pennies weigh 3.11 grams, while zinc ones weigh just 2.5 grams. Naturally I used the weight to determine what kind of penny it is. There are two scales in the machine, each one being identical. When the penny is dispensed onto the scale if it is copper it will fall off, if it is zinc it will stay on top of the scale and will be pushed off by a fork into a different direction than the copper pennies. The entire thing is mechanical, all driven by a single NXT motor. -
Hi, I am new to Eurobricks so hi :) I am in the process of building an ATM machine, the bit I am struggling with is how to only dispense one coin (e.g. 10p or 20p) at a time, 2 x 20p's are equivalent to 1/3 of a brick high. Does anyone have any suggestions for techniques to use please? Thank you in advanced :) Swatcat
-

Supercar Lamborghini SV
spiderbrick posted a topic in LEGO Technic, Mindstorms, Model Team and Scale Modeling
Hi I am new here, this is my first post this is my latest supercar, Lamborghini SV powerfunctions + technic + + mindstorm pneomatic 50 % Software 50 % Hardware complete gallery http://www.brickshel...ry.cgi?f=534033 or Lego Technic Site http://www.us.lego.com/en-us/technic/gallery/3029be09-c662-4ee2-9d8d-f41cd4f84a93?index=1 -
Ford F-150 pickup truck
landoandrews posted a topic in LEGO Technic, Mindstorms, Model Team and Scale Modeling
Good day, I'm new here at Eurobricks, but I've been building with technic for a couple of years now. Here is a preview of my latest moc that I've been working on. Once I complete it I will post a video and more pictures. If you want to see other mocs I've built in the past they are mostly here. http://www.youtube.com/user/landonsnxtnstuff Oh yeah... I'm not really a huge fan of ford, but nobody else has really built this truck so I thought I would give it a shot. Four Speed Gearbox! (controlled by 2 pf large motors, and driven by 2 NXT motors) Realistic Pneumatic power steering. And last of all a cool little ford emblem I came up with.