Search the Community
Showing results for tags 'Crocodile'.
Found 22 results
-
Hello! I'm running out of sets (especially since there's more than one that someone else has already made and I don't think I could create a better one) that I'd like to revisit, but this one is still here. And this is the 6246 Crocodile Cage remake. I increased the set dimensions a bit to get the detail I had in my head. I added one more native, because I think there's plenty of room for it in this area. The top of the set is modular and there are also some movable parts, like the rock that hides a golden trophy or the secret door at the back of the cave. In the cave are the skeletons of a couple of stranded pirates and the skulls of two natives who died in battle. Instagram Flickr
-
Hello everybody, After thinking about it for a couple of months, I've decided to invest in the new PoweredUp tech and bought Hub and L-motor for my Crocodile locomotive.< So far the process of using the new tech has been.. terrible. The hub, when turned on, shows a blinking pink light (firmware update needed). The app finds the hub (from the app, I choose the Croc, shows the interface to run the train, and the BLE icon shows a few colors) - I suppose it starts the download of the firmware: it shows full screen a picture of the Hub with a big 0% - I suppose that it is meant to show progress and go to 100%.. except it doesn't. It stays at 0% for a few seconds, then it shows a list of connected hubs. The list has only one element "Lego bootloader", the app is frozen, the hub is "off", meaning it shows no light, and pressing its green button does nothing. The only way out is to restart the app, restart the hub (open and close the lid, disconnecting power). Nothing changed after repeated attempts, I tried on two different smartphones, one Android, one Apple, in case it was a phone problem - it isn't. I don't know what to do. Calling Lego is an option, but their traffic volume is high, I am not expected to speak to any human for hours... Any useful suggestion?
-
https://ideas.lego.com/projects/8cd93420-171c-4ae2-b5a2-0c9d7bbd7412 Hi, please check out my new entry for LEGO IDEAS. I mixed up my latest DB E94/194 version with the coloursceme of one of the greatest LEGO locos. If you like my rendition please support my idea and check out my other entry: https://ideas.lego.com/projects/5c87154b-3396-4343-ac5e-42a5f10bd988 DB BR 194 LEGO IDEAS 4551 SIMON JAKOBI #01 by Simon Jakobi, auf Flickr
-
Just another crocodile - SBB Ce 6/8 II "14253" with historical wagons and coaches
Ts__ posted a topic in LEGO Train Tech
Hello together Who does not know it? The Swiss Crocodile. An icon for a long time and has been on my "want to have" list for quite some time. Then Lego made us happy last year with the set 10277 Crocodile. That was the starting signal for the realization of my dream crocodile. The Lego version has strengths and weaknesses. But it has made the locomotive better known in Lego circles and generally the praise for the set prevails. I also praise it, but the weaknesses had to be eliminated. Main criticisms from me were the wrong running gear and the huge gap between the stems. But I didn't want to hide only the weaknesses and so it became a complete redesign. A few ideas from the Lego Crocodile have certainly survived, also there are general similarities. It would be funny if there weren't, because then Lego or I would have done something completely wrong. SBB Ce 6/8 II "14253": This locomotive is the oldest surviving crocodile of the class. The "14253" was built in 1919 by the Schweizerische Lokomotiv- und Maschinenfabrik (SLM, mechanical part) and the Maschinenfabrik Oerlikon (MFO, electrical part). Thought and used the locomotive for freight train traffic among others on the Gotthard railroad (1920 - 1924, 1943 - 1976). Technical data: Length over buffers: 19.4 m Service weight: 126 t Friction weight: 103 t Driving wheel diameter: 1350 mm Power: 2688 kW / 3650 hp (rebuild Be 6/8 II) Speed: 65 km/h In 1943 it was rebuilt to Be 6/8 II "13253". The rebuild included more powerful engines, so that the top speed was increased to 75 km/h. This was followed by the change to the new engine. This was also followed by the change to the dark green paint scheme. After the rebuild, the locomotive was again stationed and in service at Erstfeld on the Gotthard. In 1976, the locomotive was handed over to SBB Historic for maintenance. It was refurbished as a ready-to-run museum locomotive "14253" and the original red-brown paint scheme was restored. The locomotive was also reclassified as a Ce 6/8 II, although the more powerful engines of the Be 6/8 II remained installed. To this day, the locomotive is in service and on display at Erstfeld as a museum locomotive ready to run. Main goals of my version: - correct running gear - all wheels equipped with flanges, because the "flying" flangeless wheels usually look unattractive. Consequence was, that the middle axle has to be mounted laterally shiftable (like in the prototype). - functioning linkage with counterweight - working lighting with correct light in both directions - usable power to be able to pull a nice train sometimes - prototypical details as far as possible and reasonable - prototypical lettering - a driver (ok, only 1/4 driver, there was only space for head and hair...) I invested a lot of time in the prototypical linkage. I couldn't realize my idea with Lego parts, nor with ready-made 3D parts off the shelf, so I designed a rather complex part for the triangular rod and a simpler one for the counterweight: I was able to find a small space for Urs: Lego version: - approx. 1830 Lego parts - 4 BigBenWheels S for the leading axle, because the wheels are free to see, I decided against the Lego train wheels for optical reasons - 8 3D-printed parts for the rods - 1x BuWizz 2.0 as battery and controller - Lighting brand "Self-Made" with PF connector - sticker brand "Self-Made" no other foreign parts and no machined or glued Lego parts. weight: ca 1050 gram length: approx 48 cm width from the model: 8 knobs with slight protrusions from individual details To switch on the transformer can be removed upwards and so you can get to the BuWizz. The BuWizz is charged in the same way. This is also an advantage of the BuWizz. SBB Ce 6/8 II "14253" in service with contemporary freight cars: All wagons have a concrete prototype with formerly existing numbers SBB J2D 22179: Vegetable and fruit wagon J2D with ventilation, color scheme 1950-1965. SBB K3 43105: Standard freight wagon of the SBB, color scheme period ca. 1913 - 1935 SBB J2D 22715 Express freight wagon of the SBB, period ca. 1912 - 1935 SBB K3 44738: modernized standard freight wagon K3 of the SBB, color scheme period ca. 1958 - 1968 this wagon has got the tail light attached The freight wagons are mostly identical, but always differ in details and in the color scheme. Differences are e.g. sometimes with brakeman's cab, sometimes without, number of windows on the brakeman's cab. In the case of the refrigerator car, there is also the ventilation. Each car weighs about 510-520 grams and requires just over 1100 Lego parts. The high number of parts comes from the elaborate sidewall structure with jumper plates (almost 200 per car) and the higher roof. To keep the rolling resistance low, I equipped the Lego metal axles with ball bearings again (analogous to the rest of my car fleet). SBB Ce 6/8 II "14253" in its current state as a museum train: SBB C4 5301: 3rd class coaches with 72 seats of the SBB, built in 1937 SBB AB4 3721: Built in 1951, 1st/2nd class coaches, 24 seats in 1st class, 32 seats in 2nd class. This car is equipped with the final signal and therefore runs at the end of the train. Details were hinted at on the underbody: detailed bogies were of course a "must" again: both cars have an interior with seats (most of them also suitable for figures) and toilets in the ends of the coaches. The middle roof part is removable for playing: Car crossover: The passenger coaches consist of about 1550 Lego parts each. The decals are again self-made and all metal axles were equipped with ball bearings. The weight of one of this coaches is almost 1Kg, the length 66 studs. I think the passenger coaches also cut a good figure behind the crocodile: Special thanks to Ronny. The freight cars are based on a design by Ronny, but built from scratch with many changes. For some details for the locomotive there was also good advice from Ronny. As bonus: Have fun watching. Thomas -

Crocodile – ESP32 – Legoino – Thank you all: TLG and EB members – Espressif - Cornelius!
Toastie posted a topic in LEGO Train Tech
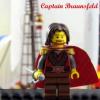
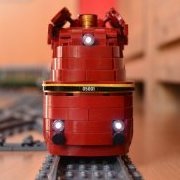
Dear All, the Crocodile (#10277) made me change my mind: Before knowing about the set, “no more trains” due to “no more space” on my layout was directing me to other LEGO related activities – mostly concerned with improving things on the layout. Which is – hmmm – nice but … So 10277 was announced and it was 2 minutes after it appeared on the German S@H website that I ordered it. It arrived 2 days later and was built the very evening. Folks on EB and elsewhere reported way earlier on improvements – I copied that and added my own ideas. So the Croc was there, now it needed an appropriate display – with no space on the layout … Solution: Mount some track to the wall (https://www.eurobricks.com/forum/index.php?/forums/topic/179240-mod-10277-and-on-and-on-another-crocodile-mod-%E2%80%A6/). Used my cell phone to make it go back and forth, thought about automation. And then Cornelius Munz’ Legoino software, which allows connecting to and control PoweredUp (PUp) servers (my understanding is: currently the 2I/O and the Boost hub) got me all excited. The hardware platform supported is the ESP32 line of devices. Several solutions have been already presented here on EB in the Mindstorms forum and elsewhere, sorry for not providing references here. My take on learning that ESP32 boards can connect and control PUp hubs was: They cost less than 10 € a piece, have ample of memory and – coming from the “3(+) inputs/3(+) outputs” world of LEGO intelligent bricks (RCX, SCOUT, NXT, EV3) as well as PUp (4 Control+/6 Spike) – there are almost “uncountable” I/O pins on these boards. Make it 20+, depending on the board. In conclusion: One dedicated ESP32 board for one single PUp hub is hardly affecting my LEGO budget … and no cell phone or tablet device is required at all. And here we go. The idea is: The Crocodile goes back and forth on elevated track mounted to the sloped ceiling of my room. See above link. The endpoints are defined using sensors, otherwise timing errors may add up – and a crash at about 1.5 m height may result in severe damage … There should be a defined acceleration and deceleration phase – and not just full blast ahead and full stop at the distant and close terminal. One possible solution is: 4 sensors are detecting the position of the Croc: Endpoint right, endpoint left, deceleration points in between. This is what I have implemented in terms of a stretch of track consisting of curved and straight tracks to show the Croc’s abilities, and a C/C++ program using a jOYiT ESP32 nodeMCU (with 30 pin GPIO exposure), four line-tracking TCRT5000 based sensors from keyes; looking upward from the track sleepers, the Arduino IDE, the ESP32 libraries/programmers for the IDE, Cornelius’ Legoino libraries to access the 2I/O hub of the Croc, a small 128x64 OLED display from jOYiT to show the status and what is happening, the Adafruit libraries for the display, and four push buttons: Go left, go right, start/stop, emergency. Solution/workflow: Power-up ESP32. Wait for Croc’s 2I/O hub to be turned on. When not at “initial” Start/Stop position (i.e. at right sensor), use the Left/Right buttons to locate the Start/Stop position; pressing the buttons move the Crocodile at low speed as long as they are pressed. When the Start/Stop position is reached (i.e., the right detector fires), both buttons are disabled and only the Start/Stop button is enabled – the Emergency Stop button remains always enabled. Press Start/Stop once: Make one return trip. Press twice: Do that indefinitely. The button “surface” shown on the display lets you know the mode: Open circle around Start/Stop: Loop forever; inverse colors (white background/black letters): Loop only once. Emergency button: Full stop (issued 4 times to be sure) and return control to Left/Right manual control buttons until Start/Stop position is reached again. The OLED display further always shows the battery level and the BLE signal strength. That’s it. Here are a couple of photographs (video may follow – but I guess you guys are getting the idea from the images). Crocodile and Controller … it says “Turn on Crocodile” and scans the 2.4GHz radio signals in the room – when pushing the PUp hub’s on/off button, Legoino connects to the hub with the correct ID. The controller’s front panel. Left to right: 128x64 OLED display using I2C communication using only 2 GPIOs of the ESP32 board!), button “Go left”, button “Go right”, button “Emergency”, button “Start/Stop”. The LEDs below the buttons, left to right: “PWM applied when going left”, “PWM applied when going right”, “Emergency (or attention)”, “Running”. The brightness of the left/right LEDs are controlled by GPIOs configured for PWM mode. Top left: Display shows “Locate Start Position”, this means Crocodile’s right rail guard is not aligned with the right stop sensor. Pressing the button "Left" or "Right" slowly move the Crocodile. Top right: Rail guard aligned with the left stop sensor: The display changes to “Start/Stop”. The red “ramp” is for safety reasons only; so far not used once. Upon letting the Crocodile moving onto the ramp at full speed, it slides up and the driving wheel lose contact with the rails. Bottom left: Pressing "Start/Stop" fires the run sequence: Accelerate to max speed with given time intervals, when the left "slow down sensor" fires, decelerate to minimum speed and then stop when the left stop sensor fires. Wait for two seconds, accelerate and do the same thing with the right sensors. Stop at right stop sensor when Start/Stop button is pressed only once, repeat the sequence indefinitely when pressed twice. Bottom right: The LEDs brightness as well as the display values show the current PWM power applied to the motor. Close-up of the sensors used (top) and the Croc's rail guard triggering the sensor. Couple of images showing the brick-built case. Bottom right: I glued a 2x2 tile onto the ESP32 – this secures its position when assembled. Some soldering and mounting details. The sensors need 3 wires: 3.3V, ground, and signal. There is an 8 wire cable hiding behind the track: An USB power supply delivers 5V/GND to the ESP’s "Vin" pin. The ESP in turn delivers 3.3V/GND to the sensors. 4 wires are used for the 4 sensor signal lines. TO-DO: The acceleration and deceleration phases are programmed as a “ramping” routine with defined power step size (5% PWM) and dwell time per step (300 ms). Minimum "moving" power is 25% PWM as the Croc stalls otherwise. Maximum power is 80% PWM. This is OK but not “cool”. Cool would be to program the 2I/O hub upon startup with acceleration and deceleration profiles. The firmware/LWP3.0 protocol allows to do that – but this feature is currently not implemented in Legoino. Secondly, using the LPW “speed” instead of “power” LPW commands would invoke the PID controlled motor operation. I did that already with my VB6 code – works beautifully well: At speed “5” the Croc negotiates the curves and straights at almost constant – well – speed. This is not possible with “power 5” – it just does not move at all. This works of course only with PUp motors with internal rotation sensor – the PUp L-motor in the Croc features that. But again: This is not implemented in Legoino yet. Will be available at some time in the future though! Happy to share code, but this is a (very) “tailored” project. Best wishes, Thorsten. -
Hi all, My croc arrived a couple of weeks ago and got built last week. I put one of the 12v Technic motors (image below) in it and improvised a working, albeit imperfect, power pickup for the 12v centre rail. When I apply power I can hear the motor is wanting to work, and when I lift the centre unit (I haven't attached the end units in tests yet) off the tracks and supply power directly to the motor, it works fine and the wheels turn. Put it on the tracks, with power directly from the 12v power supply and it won't move, so my guess is that the rather old motor just doesn't have the power to get this wonderful loco moving.... Any insights or suggestions would be welcome. Thanks, Andy
-
Dear All, after so many modding activities regarding the Crocodile it is hard to believe to be able to add something new to it. Don’t know whether this is any “new” – if not, moderators please remove this thread. (Also, please excuse my crappy photography - I am not good at this nor I believe is that tiny camera I have. Also, the LDView screenshots were made without much passion ...) Here it is though: I don’t like blind drivers. (I know that in many cases they are simply mandatory – steamers with more than four driving wheels attached via connecting rods and there we are, particularly on TLG's original curved track. I know only one exception from that: Ben Beneke’s BR23 LEGO replica: This one features 6 driving wheels; they are all flanged and each pair of three wheels is connected using LEGO Flex system parts. In addition, a split center axis is used so that the corresponding center driver is moving inward when going through curves – it is a brilliant solution) With the Crocodile though, the “noses” feature only two drivers connecting via one rod that in addition allows some articulation at the wheel - rod joint. So all-flanged drivers could have worked – unfortunately though, the pivot point of the bogie is not in the center but far out between cab and nose. Blind drivers are thus used accordingly for the pair of drivers closer to the pivot point. And I don’t like them. Particularly because my LEGO layout is rather crowded. So I decided to put some track up the sloped wall – with some curves to see the crocodile meander about – I mean this is what crocodiles do when preying … and then you just see it all the time: The blind drivers are “leaving” the track. Solution: Moving axles, as has been demonstrated in countless contributions here on EB and elsewhere. I decided to articulate the axle close to the cab, which requires narrowing the 4 wide frame – I used a two wide base (three would work as well, but I simply could not figure it out). (Note the red drivers on the side facing away from my chair - will try to get the black ones some other time - do they exist as separate part at all? Need to check) Here are some LDraw screenshots: Also, as friction leading to upward pointing forces goes up quite a bit, I made some room for some "weights", which are required to counter these additional forces. So there are 10 x 1 Euro cent and 4 x 50 cent Euro pieces in each nose, considerably increasing the value of my croc. Without the extra money, each nose weighs about 145 g (not including the pony truck) – with modifications plus the money 210 g. The values of my crocodile is thus retails price + 4 Euros and 20 cents. (Well, I had only 7 50 cent coins that day - the one in the photo is a Swiss coin of almost the same size ...) Further modifications: I simply did not like the coupling offset between noses and cab, tilting the nose downward to the front. This maybe intentionally. But when you look directly at the Crocodile's noses in front of your own nose all day – I had serious sleeping problems. Solution: Not using the 4x4 Technic brick + pin (popping off all the time drove me crazy as well …), but 1x2 plates with tow ball, which conveniently came with the extra 40411 set. That required some modding of the cab frame as well – in addition to the flanges of the new drives close to the cab needing more space for pivoting. So the slopes had to be changed. The color of the axle pins (whatever that color is - sand something) of the pony truck wheels also got me mad. They are partly hidden by the bley 1x2 plates with ladder, but again my eyes are level with the Crocodile … plus I also noticed that on most pictures I found on the web of the II version the “ladder” is missing at all. So I redesigned the truck as well, now featuring a 6L black axle and no ladder. And in addition many of the implementation of previously reported mods: @Sérgio's greebling (soo nice!!!) very slightly modified, and @Sérgio's solution for closing the gap between cab and nose (plus some very minor additions, see pictures above and LDraw files, link below). Want to add the wheel guards as well, as @Sérgio and @Duq have demonstrated. What is that "plate"/slope called, you are using? What else? Ahh – changed the frames to black, as suggested by others. Not entirely because the contrast between the black wheels and greebling is then gone. So I left a few parts in dark bley – simply to show (and: because I did not have them in black). And: I removed all but 2 rubber bands on the cab. None on the wheel of the noses. So here she is: That was it. As usual, I really learned a lot from you guys. Thank you all very much for letting me again dive into the LEGO world of bricks! Forgot: Yes, it negotiates curves (S type) very well. No idea about switches, but my crocodile will only drive back and forth "on the wall", disappearing behind books and magically reappearing … that needs some BLE programming – we will see. In that regard, a lot is going on in the Mindstorms Forum! (Here are the links to the LDraw files (really very rudimentary, just for my documentation. Deep linked - as the folder is not moderated yet http://www.brickshelf.com/gallery/ThorstenB/9VTrain/Crocodile/LDraw/nose_bogie.ldr http://www.brickshelf.com/gallery/ThorstenB/9VTrain/Crocodile/LDraw/ponytruck.ldr) All the best Thorsten
-
I wrote a review of the set on 1000steine.de: https://www.1000steine.de/de/gemeinschaft/forum/?entry=1&id=439107#id439107 This is in German but you can use an online translator: https://translate.google.com/translate?sl=auto&tl=en&u=https%3A%2F%2Fwww.1000steine.de%2Fde%2Fgemeinschaft%2Fforum%2F%3Fentry%3D1%26id%3D439107%23id439107 Link to some videos from the train in motion:
-

[TC17] Gator Mayhem
braker23 posted a topic in LEGO Technic, Mindstorms, Model Team and Scale Modeling
Howdy folks! Now this one has been a very fun build for me, as I never attempted to build a vehicle inspired by the Mad Max movie series, although I always wanted to. This was also a hell of an opportunity to use many of the odd parts that you simply cannot put on a normal vehicle, so I am thrilled to present to you, the frightening Gator Mayhem! As you can see, it's and odd blend between and alligator and a trial truck, thus it has 2 animal-specific functions (biting and hitting with the tail), 2 car-specific functions (driving and steering) and of course, 2 tank-specific functions (rotating and firing the turret). What I can tell you is that my two boys just love to play with it, shoot minifigures and eat them all, so I suppose my goal was reached. Functions-wise, I think it's pretty packed, as I managed to squeeze 6 motorized functions, a working V24 fake engine (two connected V12, placed diagonally), working steering wheel and fully openable doors, so you can exit the truck in a flash. This MOC took around 3 weeks to build, almost every day for 2-3 hours, so I can assure you that my dedication has grown a lot, but my wife's patience also reached a new level Technical specs & functions: - 4x4 Drive (XL motor) - Steering (L motor) - Open/close gator mouth (M motor) - Swipe gator tail left/right (M motor) - Rotating turret (M motor) - Firing the turret (M motor) - Turret capacity: 5 missiles - controlled by: 2 BuWizz bricks - a functional V24 fake engine - working steering wheel - openable doors - Length: 72 cm - Width: 30 cm - Height: 30 cm - Weight: 2.8 kg Official YouTube video, made for the [TC17] competition: First batch of photos I took in my kitchen/studio, enjoy the show! Second batch of photos were taken outside, in the most post-apocalyptic environment I could find nearby: As usual, for more detailed photos and many others, please check my Flickr album, below: https://www.flickr.com/photos/braker23/albums/72157713228122532/ Cheers and best of luck to all competitors! -
Been having fun with my Nexo Knights, some knock-off Dinosaurs and Legend Beasts, some real Lego Legend Beasts and a random Mixel. I thought it'd be fun for each knight to have an animal steed instead of vehicles. What kind of things would you like to see in Nexo Knights? Anybody else found any cool knock offs online that you wish were part of the franchise?
-
So I've decided to take advantage of the instructions provided by his book, but I've run into a colour issue. Which brown is it? I had assumed Reddish Brown, but the finger joint hinges simply do not exist in that colour (at least according to Bricklink). Is it meant to be the old Brown (which they do exist in, but I'd suspect some of the more modern parts don't)? Is there a suitable alternative to this without completely redesigning the ends (the modern ratcheted ones are too tall)? As is usually the case, I'm finding the building a parts wanted list on Bricklink frustrating as all hell (I'm not sure why the hell we need to identify what kind of piece we're looking for when we have the number already), and I want to get this parts list *right* so I can share it, meaning everyone else who has the book doesn't have to go through the same fart on.
-
When I saw the pictures of this train in @HoMa:s Lego Trains Book. I simply couldn't resist the temptation (particularly not after having seen TLGs miserable train news for 2018 ...) So I built it myself. A true pleasure with a very high degree of satisfaction. And another beautiful contribution to my train collection: A big praise to Holger for this very nice MOC which wakes many train memories back in the years when I grew up in Switzerland. This train is a 9V version with a total of four 9V motors mounted on the first two coaches. The interiors of the locomotive are therefore empty, i.e. no PF stuff. The Be 6/8 is built in Reddish Brown to match the colours of the Swedish iron ore train with the Dm3 and the Da locomotives. In addition, it is adapted to the challenges of the 9V Extreme layout, in particular the humps at the level transitions. And the rods by Trained Bricks really put the dot over the i ... PS: Imagine - a Swedish iron ore train together with a Swiss Crocodile in the midst of the Swiss Alps - goose bumps all over again ...
-

[MOC] High move ability crocodile with building instruction
Legofunbuild posted a topic in Special LEGO Themes
Hi everyone! I am a new member here, recently I decided to make a lego building channel for my kids and anyone who love lego free style building. Here is the very first one that I made, please comments and tell me should I keep doing this...please like my video and feel free to subscribe my channel. Thanks a lot!! more stuff to be found at my channels :) https://www.youtube.com/channel/UCyyzwE_zBeyJGvVym4kWC1g sorry I just found out I post it in the wrong place, please help me to deleted, thanks! -
[MOC] High moving ability crocodile (with instructions)
Legofunbuild posted a topic in Special LEGO Themes
Hi everyone! I am a new member here, recently I decided to make a lego building channel for my kids and anyone who love lego free style building. Here is the very first one that I made, please comments and tell me should I keep doing this...please like my video and feel free to subscribe my channel. Thanks a lot!! my channel for more stuff:https://www.youtube.com/channel/UCyyzwE_zBeyJGvVym4kWC1g -
John (LittleJohn) and I decided to do a collab series based around re-imagining old set themes. Adventurers is a theme we’ve liked for years, though we never had any of the sets. After getting some of the original figs at Brickfair, Virginia, we wanted to put them to good use. The landscape and temple were inspired by Grant Davis and Mark of Falworth. Johnny Thunder and his team of Adventurers have discovered an uncharted jungle island. Within the dense vegetation they find the entrance to a ruined temple! After leaping from pillar to pillar, over the crocodile swamp, Johnny reaches the gateway. They’re not the first ones there though, as the treasure-seeking gang boss, G.R. Edy is there with some henchmen. Will Johnny be able to prevail, and will Dr. Kilroy fall to the alligators? We hope you enjoy, and you can see plenty more pictures on our website
-
I've been meaning, since the Disney minifigures were first revealed, to make a few builds to go with them. Here is my first: The ticking crocodile. Never Smile At A Crocodile by Kodiak Sanders, on Flickr More details on my Flickr page. Let me know what you think!
-
Hi everyone. This is my version of the SBB CE 6/8 Electric Locomotive, called the Swiss Crocodile. Swiss Electric Crocodile Locomotive by Cristiano Grassi, su Flickr I try to represent it as much realistic and detailed as i can. It is also a Lego Ideas project, so if you really like it you can support following the link. https://ideas.lego.com/projects/97696 Your support on this project and your comments would be greatly appreciated. Thanks to all.
-
The little Bricks Family is going Camping! Let see what happens... (Movie based on the Set 60117 Van & Caravan Lego City) Enjoy!
-

Johnny Thunder and The Sunshine Scepter
Gary The Procrastinator posted a topic in LEGO Action and Adventure Themes
Here's a quick build as a "Birthday Card" and gift for my son Daniel. Click on the picture for more detail: The warriors of the Mighty Amazon Tribe of the Sunshine Scepter are not fans of Johnny Thunder. They don't want his autograph. They wouldn't want to take a selfie with him (though they would want to take one with his head. Just his head. For Johnny has stolen their Sunshine Scepter, which many years ago they themselves had rightfully stolen from another tribe after wiping them out (but that was OK, because that tribe had wiped another tribe out for it as well). No one knew where that tribe had gotten it from...but Johnny knew where it was now going! Now the poor Amazon Tribe of the Sushine Scepter, no longer the rightful possessors of The Shiny Thing, have been forced to rename themselves. They are now known as the Mighty Amazon Tribe of the Moldy Tunafish Sandwich Left Behind By Lord Sam Sinister. Happy Birthday son! Comments welcome, Cheers! -
Living in Phoenix now make me miss grass and breeze very much. Thus, I built these animals to accompany me, to free me from the freaking hot weather. I also put this creation on the LEGO IDEAS If you like these cute animals, please give me some support!!! https://ideas.lego.com/projects/115018 ======================================================================
-
Ahoy, I am still struggling to keep up to the goal of "one MOC per week", but I have something which is somewhat presentable: A Walk in the Park The Jungle Adventure! This is actually a part of the storyline I am working on. I fear I need to retake the pictures for that purpose - the lighting has not worked out as intended (and I probably shouldn't mention this not to spoil it for everyone... ) It has been quiet comment-wise on this forum, so I will be happy to read your comments! --- update ---
-
Hey guys, I recently bought all 5 Legend Beasts and discovered cards to unlock each beast in Legends of Chima Online (iOS). Does anyone know what button I need to press to scan them? Please post a screenshot... Thanks! legozebra


-Mini.thumb.jpg.03594ed3626ab4a4b625a32af4d03d5f.jpg)