Search the Community
Showing results for tags '8865'.
Found 7 results
-

8865 Test Car Redux 2020 With Instructions
Cardboy posted a topic in LEGO Technic, Mindstorms, Model Team and Scale Modeling
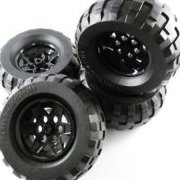
I have made a stud less version of the classic 8865 Test Car Instructions can now be downloaded free here I would like some feedback and your opinions. I have tried to keep as many features from the original as possible including the clunky 3 speed gear box. The parts I'm least sure on is the engine also the front grill I have only used parts which have been produced by Lego in those colours which limits some design choices. I would love to have 63869 in red seeing as the Lamborghini got some in lime hoping there may be some in the new Ferrari. The front wishbones are only in grey now and you cant place the shocks in the same place so it now has a more positive rake. The original had more off road tiers and there rims are hard to get in white but it looked closer to the original than the the new ones for the current 1:8 scale cars. Some of the Blue parts are very expensive so i don't know if i should include some alternative colour schemes or can AFOLs figure it out themselves . (i don't have all the needed colour parts to build it but i substituted some of the blue for dark grey whilst working on it) One thing i have noticed building it from new beams compared to my original its a lot lighter but has more flex in the chassis the suspension is still light enough that its not to much of an issue. Here are some close ups of the engine -

[TC18] half-scale 8865
gwenhael posted a topic in LEGO Technic, Mindstorms, Model Team and Scale Modeling
Designed to fit the 42098 Car Transporter here's my revival of the 8865 Test Car. Steering, rear suspension, fake v4, foldable front lights. More pictures: https://imgur.com/a/KMhFvpv -
2019 8865 B Model Homage
Legotyres posted a topic in LEGO Technic, Mindstorms, Model Team and Scale Modeling
Here is another variation of my long endeavour to create proper homage to the b-model of 8865 which has to be my most favourite technic model. Even this model has gone through a few changes, although I feel Its complete. This model has an identical wheelbase and track as the original, the seating area is a little larger to fit in the 5+r gearbox in plus its a proper 4x4 model unlike the original. It has a fake V8 plus a tiny fan at the front taken from Legos boat propeller. The live axle at the rear is both compact and has a larger movement than the original. I'm still using a macpherson struts at the front which seem to work very well. Enjoy the photos anyway -

Super Size Me - Building Instructions
arvo posted a topic in LEGO Technic, Mindstorms, Model Team and Scale Modeling
Hi there! :) Seven years ago, my brother and I decided to build the miniature of the classic 8865 Test Car, as this particular set was always one of our favorites. As many of you, we have a very special connection with this set. When we were kids, we tried to replicate the front/middle section of the car -with the only reference of the LEGO® catalog from 1989- dozens of times...unsuccessfully! Our collection was small at that time, and our only dream was to have enough red technic bricks to build the red beast... ...we only have to look at this picture to remember why we're into LEGO®. The people behind these images -designers, photographers- were truly artists. Probably, some of you remember our "Super Size Me #8865" from 2007: ...the thing is we had a lot of fun with this little model so we couldn't stop building more and more...! Recently we decided to make building instructions of these old models, working in chronological order. We have just released the first set of instructions on MOCplans, the replica of the legendary 853 Super Car Chassis, released in 1977. This is how the cover looks: We hope to release the other four "Super Size Me" instructions in the next weeks, we'll keep you updated on this. If you're interested, you can find them following the link: http://mocplans.com/...ize-me-853.html ...next one: #8860! See ya soon! :) Regards, Amador & Ramón (arvo) -
Lego Test car 8865 revival
Joelle Cox posted a topic in LEGO Technic, Mindstorms, Model Team and Scale Modeling
Me and my husband made this car, it is a studless Test car 8865. We call it Test car 8865 Revival. Me and my husband have the same hobby. It has 746 parts. We made instructions. Here they are and they are free: http://rebrickable.com/mocs/MOC-8231/Helgejohan3/test-car-8865-revival/ UNPAINTED MOTOR AND RIMS: -
 After seeing Lego's 8860 modern version from 3 sets of 2017, I liked it alot, but I have no nostalgia otherwise for the 8860, while I do for the 8865. This was the first Lego "supercar" I build when I was about 8 years old. Alot of people find it ugly, but I can never hate on this model. So it felt perfect for my "tribute" to 40 years of Technic. I tried to copy as much functions from the original, I decided not to add any new functions that the original didn't have (wether I had room for that in the first place is another thing). The functions are: - 2 speed gearbox (first gear 2:1 and second gear is 1:1, of course like the original: linear) - Full independent suspension - 4 cylinder engine - Working steering wheel (sorry no HOG Lipko ) - Folding headlights - Adjustable seats Features I could not get into a model of this size were a neutral+third speed for the gearbox and a differential at the rear. I could have probably made a rear diff work, but it would mean I'd have to sacrifice the rear independent suspension and build a live axle. I decided the value of having independent suspension at the rear was of greater importance as a tribute to this model than a diff. LDD available for download here (Thanks @LvdH and @Didumos69 for the help on the LDD and the 9L liftarm in front of the model is for dash, supposed to be placed behind the steering wheel) A couple of more images: If you wonder why I didn't use the 2017 part of pinhoel with 2 axle ends on the driveshaft towards the gearbox. That was my intention, but I don't own the part yet and after mounting the gearbox on top I couldn't detect any play in that part anymore, so instead of breaking down the model to get that new part in there I decided to leave it as this. I tried to copy as many details of the engine as possible. A custom V4 engine worked best instead of the standard Lego engine parts, because I could mount the exhausts better and have the transparent red in the centre of the engine (4L lightsaber) where the original had 1x2 transparent red bricks. For the centre console I tried to mimic the original as well. I used a 3L blue liftarm as gearstick because his big brother has it too, same goes for the antenna being red for the headlights. The reason why that isn't simply an axle with a red bush is because from the front view that is visible above the dash and I don't like that. Also, when the headlights are up a bush in that position makes it harder to steer. While I can perfectly fit the mechanism on the passengers side, that felt out of place, so this looked best to me. Folding headlight, simple but effective Adjustable seat's maximum laid back position to keep a seat in its adjusted position I decided to use rubber 2L liftarms below the seats (behind the LBG bush). A little turn of that LBG bush and the seat won't move. Of course I made pictures with its big brother: Which brings me to a problem of this tribute: scale. I originally wanted to use 30.5mm tires, but that mean I'd have to make a suspension that was about 9 studs wide, 10 studs wide if I decide to ignore the fact the 30.5mm tires are far too wide to be in scale. However, I couldn't make a 10 stud wide front suspension that felt strong enough to mount the rest of the car to. While I managed a rear suspension in 10 studs, it looked very flimsy So I decided to slightly scale up my model with the use of these 37mm tires. The end result was a scale of 1 : 0.48 (sorry engineers for this crappy notation ). However where the 30.5mm were far too wide (2studs) for scale, these were a tad worse . To compensate for this I decided to make the suspension smaller in width, so that the total width with tires included would be in scale (edit: and this width is what I based the "1 : 0.48 scale" on, the tires actually needed to be 39mm to be in scale for that ratio and not 37mm, but those don't exist in any way from Lego, the next is 43mm which would be such a significant upscaling that I didn't want to do, 2mm is barely visible I think and allowed me to create a smaller model /end edit). That resulted in this 11 stud wide suspension, which was alot better to work with for mounting a body to it. Also the rear got some much needed inforcement to remove the flimsy look of the 10 stud wide suspension. So with having a scale that basically meant 2:1 it was easy to work with, for bigger sizes I used the 0.48 and for small stuff (4 studs or lower) I used 2:1. The engine is 1 stud too high in scale, but this I could not combine lower with the suspension. I am glad it it's still (just barely) under the "rear window". Thanks for your time looking at my little model.
 -

Stripped Test Car
Grosse Kind posted a topic in LEGO Technic, Mindstorms, Model Team and Scale Modeling
Was discussing with a mate the other day of maybe doing a naked version of 8880. No body, mirrors, lights, spoiler, frippery and so on. Just let the tech stuff show itself. Not done it yet, but thought as it was quick and easy to do i'd rip off the basics from 8865 to get it a little more 8860 like and see what i came up with. Sadly, i don't think they did too bad a job with the oft maligned standard panelwork. Not quite to my tastes but has me wondering, rather than adding bodies to 8860 and 853 as most seem to, has anyone built a stripped down 8880 and a 8448? Be keen to see if somebody had please. Ta muchly, glen