Search the Community
Showing results for tags '8043'.
Found 13 results
-
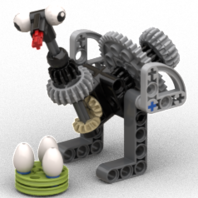
[MOC] Excavator. Single motor, fully functional.
McMarky posted a topic in LEGO Technic, Mindstorms, Model Team and Scale Modeling
Hello guys, Do you like oldschool Lego Technic with a single motor and many functions? I hope you would like my excavator. It has only a single PF L motor and is fully functional. It can drive and dig. Enjoy the show 😀 -
This Posting is dedicated to - the TLG which offers this great set - Juergen who has build the ultimate 8043 and also has posted some small improvements to the original design - all of you who are somehow disappointed by the original design (out of sync LAs, hard moveable boom etc.) IMHO the original design is awesome and needs only very few (and cheap!) and punctal improvements to work like a charm. Remark: some of the mentioned improvements come from this vey helpful posting from Juergen (http://www.eurobrick...showtopic=45133), but i have not installed all of them. well, here is the list of improvements i have installed: 1. Switching driving-rings (from Juergens post, s.a.) Juergen: The first time I built the 8043, it had some trouble switching the driving rings. Most of the time, the motor had to run twice to completely flip the switch. So I geared down the motor by replacing the 2 16-tooth gears with a 12-20-bevel-gear setup. I also replaced the blue axle-pin with friction (step 35, book 1) with a tan axle-pin without friction. 2. Rubber belts to help the boom (from Juergens post too) Juergen: To get some weight from the boom, I added rubber-bands. They reduce the friction the LA's which is caused by the weight of the boom. I didn't think of this myself but read it in this eurobricks-thread. (I have choosen 6 black rubberbands ("Black Rubber Belt Medium (Round Cross Section)", part-no x37 at Bricklink), which work very well and look IMO better than the blue ones). But this doesn't destroy the very good aestetic of the model and make the operation of the main boom very good - also with the standard batteries! This MOD can be also applied very easy after finishing the build - so you can compare the effect. 3. Improving the rotation point ot the original bucket (Stolen from barman) (in both pictures: left the original, right the improved version of barman) It improves bucket operation a lot and is very cheap and simply to build from the pictures in its brickshelf folder: http://www.brickshel...ry.cgi?f=432777 - very recommended. 4. Making the left track running smoothly This is done by replacing the 4L with stop axle in step 36 (book 1) with an axle 6L - this prevents that driving axle from canting under load 5. That's it. With all this small and cheap improvements i must state: i overall prefer the "original" 8043 over the ultimate of Juergen, though the latter one is an outstanding mod and very well done - chapeau Juergen! But why i prefer the original: simply because of the cleverness of the mode-switching between arm-operations and propulsion/slewing - which allows 6 functions with just 4 motors. Well, of course the Ultimate of Juergen is a "cost no object" excavator and is a little bit more realistic to operate because all can be done simulaneously, BUT: this is not really necessary - the playability of the original design (with the improvements listed above) is also very high and has only very small restrictions - quite ignorable IMHO. But this mode-switching design is really clever and makes more fun to build and view and operate as the 6-motor-version - at least in my personal opinion ;-) Or let me cite Juergen: "One of the reasons for me to make this topic (Kumbbl: see link above) and video is to show that this model, when constructed correctly & precisely, operates quite well" SO: IMHO its is not really necessary to spend a lot of money for additional motors, receivers, controllers to make this model work well, some bucks for some cheap parts are sufficient. But of course there is one basic and important requirement: it is essential to build this model perfectly, means controlling after each step if all(!) gears and axles are running perfect and smooth - and "perfect" means perfect!! and the main boom LAs must be installed in perfect sync (but then IMHO it is not necessary to switch some gears or something else...just build as in the instructions) Finally: chapeau to the designer of this set - on of the best in the studdless aera! BTW: this praising is from a man who normally prefers pneumatic over LAs ;-) Just my 2 cts.
-

Chassis for excavators
qwest70 posted a topic in LEGO Technic, Mindstorms, Model Team and Scale Modeling
Hello! Not so long ago, I became interested Lego technic and decided to assemble my own excavator based on 8043. I began to design a chassis on Lego Disigner. And now I present to your attention a new chassis. I made it completely independent on radio control with two M motors that can be changed to L motors, and a two-speed transmission, for better cross-country ability, which is switched manually. The gear ratio is 1 : 1 and 1.5 : 1. The chassis has become 3 cm longer - it is 20 studs and 20 cm, faster and more passable than 8043. I want to know your opinions, ideas and suggestions for improvement. https://photos.app.goo.gl/pLWJAhrkLgbQsicx9 https://photos.app.goo.gl/u9BBHzmuTSy9ownA7 https://photos.app.goo.gl/UtGjoYUEW6Aj4gzc6 https://photos.app.goo.gl/pD2fxTxMAZBFhk9b6 https://photos.app.goo.gl/vCrHdsWXX5dWx3pQ8 https://photos.app.goo.gl/xFhtM5JCXkzqVDfw7 https://photos.app.goo.gl/ViqR7qVG8FfWWggM6 https://photos.app.goo.gl/TVUwKgE8TWrpRN2R8 https://photos.app.goo.gl/JFmRJjed1vA3BnP4A https://photos.app.goo.gl/AXv7u1MQ4RnDmCDV9 https://photos.app.goo.gl/HVCucWCKUY3Gae8U8 -

[ Movie ] "Excavengers" battle (PF vs Control+)
cyberdyne systems posted a topic in LEGO Technic, Mindstorms, Model Team and Scale Modeling
Soon after I've got my 42100, I decided to use it for making something epic and funny. So, after a month of work I've made this "movie" which tells a story about the last battle between old and new. Don't take it too serious, just have fun! P.S. Moral of the story is that the winner hasn't won at all. Cos' all the fallen gained an ability to be revived into different models and live forever, but the winner will stay useless and untouched. :) -

10.000 Subsribers special - Mashup
Zerobricks posted a topic in LEGO Technic, Mindstorms, Model Team and Scale Modeling
First if all I totally forgot to post this model here on the forum, guess better late than never Now to explain a bit about the motives behind this model before I go into specific details. Counter on my youtube channel was nearing 10.000 so I wanted to make something trully special. I was not sure what kind of a model I want to make, a sportscar, offroader, construction machine, so the decision came to MAKE ALL AT ONCE. The model would also incoporate ideas from the last decade of Lego technic product to go along with my 10 years on youtube. Starting with the design, the front end is heavily inspired by 42083 and 41999. Notice the front wheels are from 42056. The first motorized function is adjustable front suspension inspired by 8297: The front end can raise by 3 centiemetrs to allow the model to negotiate rough terrain. Continuing towards the cab, which was inspired by 41999, we can pop up the hood to find a green colored 10 cylinder engine inspred by 42030: Cab doors are inspired by the doors from 42069, which open at the angle. Opening the doors you can find a full interrior with two adjustable seats andworking steering wheel: In the center of the cab there is a gearbox which movel lineary to switch between 3+R gears using a special mechanism. This emchanisem translates the sliding action into usable inputs for the gearbox: Going further back, there is a section holding the battery box and, orange lever and utensils on the left side. I will explain the function of the orange lever later. On the opposite, right side there are 2 M motors powering all the motorized functions. Notice the mysterious red lever which is used for switching motorized functions. Notice the pump used to power the pneumatic functions. There are also two electric switches to reverse the two driving M motors. If we continue towards the back, we can see there is a pair of linear actuators used to manipulate the container. The red lever switches power from one of the M motor between the adjustable front suspension and linear actuators. But not only can the linear actuators tilt the container, but they can also pick up and load the entire thing. To switch between tilting or picking up, the orange lever is used to lock the individual segments of the lifting arm. This function is inspired by 8052. The arm can reach out and pick up the container with ease: If we continue and look at the photo of the back side you may notice a PTO output along with a strange mechanism with rubber bands: Same motor that powers adjustable front suspension, linear actuators also powers the PTO output via 24 tooth clutch gear. Notice that the PTO output uses a CV joint in order to slide the axles into it without friction. The rubber band mechanism is used to hold the rear attachment. This was inspired by 8110 and 42054. Here is a sum up the functions of the model so far: 1. Motorized functions Adjustable font suspension Tilting of the container Picking up and lifting of the container Pneumatic compressor and storage provided by two air tanks powered rear PTO 2. Manual functions: 10 cylinder engine powered via rear wheels through a 3+R gearbox 3+R gearbox Steering controlled by steering wheels inside the cab AND the light on the right side of the roof Openable doors Openable hood Adjutstable seats Independent front suspension Solid live axle assembly in the rear - inspired by 42043 Features: Both front axles are at a positive cats angle, allwing the fat Porsche wheels to self-center Due to the immense weight, each rear solid axle is supported by 4 yellow very hard springs The 3+R gearbox is derived from my diagonal gearbox featured in the Dominator TRS Due to its framed design the gearbox provides a very rigid backbone to the model A 5 tubed exhaust seemed appropriate for the 10 cylinder engine I hope this photo helps you understand all the functions and features a bit better. Each color of the model's chassis represents a different module. Next we will look at the rear attachment built for this model. The attachment is multifunctional, combining linear actuators, pneumatics and 4-way switchbox to actuate all the functions: In total the attachemnt features following functions powered by a PTO via 4-way switchbox: Extension of the control arms via small actuators and a lever mechanism Lowering of the control arms via large actuators - inspried by 42009 Rotation of the arm Spooling up a winch which allows the arm to be used as a crane arm - inspired by 8258 Additionally there are 4 pneumatic function powered by the compressor and air stored in the two pneumatic tanks on the truck itself: Raising of the primary arm joint Raising of the secondary arm joint Tilting of the showel - inspired by 8043 Closure of the blue pneumatic claws - inspired by 8110 Some intersting facts about this attachment module: All of the penumatic functions + rope of the winch pass through the turntable. Rotation of the turntable is limited to some 350 degrees to avoid all those tubes and rope tangling up The structure of the arm with diagonal arms is inspired by crane arms Frictionless 8 tooth gears allow the white 16L axles to slide with ease while powering the two large actuators used for support legs The 4-way switchbox is one of my most complex and sense assemblies and it took me 2 days to design with support of LDD. Winch uses a friction pin to keep the rope from unloading when the winch function is off. The blue claw uses rubber bricks for better grip Combining the main model with the atatchment resluts in a model which weighs around 5 kilograms and is over a meter long! Some facts about the design, and build of the model: The whole model took me over 2 months to design and built, biggest challenging being the gearbox, container arm and rear attachment switchbox. A lot of care was placed into keeping all the functions working reliably with a limited power source (M motor) and safely with no gears skipping or breaking. The model uses around 16 universal and 3 CV joints to transfer the power to the suspension lifting mechanism, PTO, both steering sytsems and drive axles. Each rear axle is capable of supporting the whole model's weight, the weak point are the Power Puller tyres which sag quite a lot, especially on the third axle. Thanks to it's stiff gearbox, this model has one of the stiffest central frames I ever built allowing the model to be easily picked up by diagonal front and rear wheel without excessive flex. Gas canisters and first aid from 42069 are featured on this model The hood ornament is a bunny from a Lego Friends set This is my first model to use the white pneumatic air tanks for it's intended purpose. The model is covered with glow in the dark parts close to its edges, so its visible at night - useful when you are wandering around your building area at night A photo of the mashup's total of 8 glow in the dark bionicle claw/eye pieces: You can see the model in action in the following feature video: Finally I would like to thank you for reading through this massive post and for helping me reach 10.000 subscribers. -
I got some rubber tracks from BrickLink here the other day, and to my pleasant surprise they fitted nicely over the Wheel 30.4mm D. x 20mm ! As I am waiting for the last parts for my Container Stacker MOC, I thought I'd make something else in the meantime, and decided to try to make something like a smaller edition of the 8043 B-model tracked loader, using these new rubber tracks. Although it is somewhat similar to the aforementioned 8043 B-model, it is built from the bottom up using just my imagination, in the course of a couple of days. (My girlfriend is celebrating easter abroad with her family, so I have plenty of time to be creative ) This is the first time I've used studded construction in a MOC since I came out of my dark ages (Albeit just in the lower chassis), and a lot of memories came back to me from doing that! Anyway; this is the result: The yellow bucket is from my old 8862 Backhoe from way back in the day. Both the driving and the other functions are quite quick, and a lot of fun to play with. It uses PF-M motors for all four functions, and PF LED lights for playing at night when the power is out, The construction is very sturdy, if you for instance push down on the bucket, the mini LA wil start to slip before the rest will start to wobble or bend noticably. The back end comes off easily, and hides a lot of the wiring. The battery box can be removed after pulling out two Axle 4 with stop from below. I "cheated" a little with the digger apparatus, by making the entire arm a sort of four bar linkage (or whatever it's called), so the geometry (and thereby the bucket) stays the same for the entire travel of the LAs. This is probably not very true to real life, but it is a lot easier to create. When I made my Swingloader, I think 50 % of the time I used building that thing, was figuring out a good linkage for the tipping function. As you can see, the tipping works really well. A view from the bottom. You can see the axles for removing the battery box, as well as the gear train. Different speeds can be achieved by using different gear ratios. I spent a couple of hours yesterday to build the entire model in LDD, and it turned out 99,9% accurate, I used "illegal" building techniques on two occasions. One you can see in the above two pictures (attachment of the rear mudguards. The other is where the IR Receivers are attached (I had to use one of these in LDD, instead of one ot these , which is used in the real life model. If anyoneone wants to build this, just shoot me a PM with your e-mail, and I will send you the .lxf file. The model has just over 600 pieces. And here is a video of it in action:
-
Hi guys, 8043 was THE SET that ended my dark ages and, until now, I was very reluctant to make any modifications to it. But, like many of you, I’ve just received my BuWizz and decided to use 8043 to get my first impressions of BuWizz:
- 5 replies
-
- modification
- 8043
-
(and 1 more)
Tagged with:
-

Technic Lego models + instructions
jono rocky posted a topic in LEGO Technic, Mindstorms, Model Team and Scale Modeling
G'day all. I have over the years done a couple of alternate models and attempted to make instructions for them, some better than others. All of them can be downloaded here or from my mocpages signature link below but I'll add an individual link with each one. My first attempt was a bulldozer from set 8043 quite some time ago. Argof made a topic here about it and I just stumbled upon an old bad quality vid and this is it. Instructions: Freespace or Bricksafe I was driving Hooklift trucks for a while and the Lego set 8052 came out so I had to RC one version and a full RC overkill another. This one I over did but didn't make instructions for it. I added an extra exhaust for duals to the instructions. Instructions are done by LDD here or the lxf is attached. So being a truck freak person I pulled out an old set 5580 Highway rig and jammed in an XL and M motor to RC it but keeping it looking as close to the original as possible. Instructions: Dropbox or Bricksafe. Next one is an alternate model of the set 8297 into a tow truck. I put he M motor on top of the fake V8 to look like a supercharger but its gear driven to the winch and bypasses the V8. Instructions: Freespace or Bricksafe I got the lego set 9398 and turned it into an RC quadbike. nato8181 (Renato) made a topic here on Eurobrics about it. Instructions: Freespace or Bricksafe My next was for a competition here (a while ago) and I used the Lego set 9394 jet plane and turned it into a helicopter. Here is the thread for it. The goal was to have a pull and release trigger to spin the rotars and still have them to be able to spin freely. Instructions: Bricksafe This one I did for fun, I call it the lowrider logger. The idea was to make two versions of logging trucks from one set and no motors. The first was a truck and dog, the second was a folding B double with a loader. A model B model Instructions: Bricksafe 8052 RC.lxf -

42006 remake into 8043 B-model?
Commander Smith posted a topic in LEGO Technic, Mindstorms, Model Team and Scale Modeling
I'm wondering if 42006 has the right parts to build the 8043 B-model. I'm not including the PF and two missing LA's or the bucket in this assessment. -
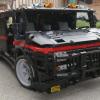
8043 mod 6 motors
bmollema posted a topic in LEGO Technic, Mindstorms, Model Team and Scale Modeling
Anybody ever created this modification? I was amazed that it fits so well. More pics on :http://www.brickshel...ry.cgi?f=528844 Transport combination: -

Failing m-motor
Alternator posted a topic in LEGO Technic, Mindstorms, Model Team and Scale Modeling
Hi, I've just tried demonstrating my 8043 excavator to a friend and found that one of the m-motors has failed (it was the centre motor in the model that powered one of the tracks and also the two synced la's). I pulled it out of the model and attached it straight to a power source and found it wouldn't go... But playing around a bit I found that if I have an axel attached and spin it around fast with my fingers for a bit that then the motor will go when I switch it on, but when switched off and back on it doesn't work again (I have to spin the axel again some more). So it appears the cable is fine and that it is something in the motor. I'm just about to place a Lego order so will get a new m-motor... But I'm wondering if anyone else has had experience with this? should I be trying to get lego to replace the motor (it's a couple of years old now)? is it something I could perhaps fix myself? (bearing in mind that while I do have a soldering iron I don't use it very often at all ) -

LEGO 8043 - Battery Improvement Mod
teleing posted a topic in LEGO Technic, Mindstorms, Model Team and Scale Modeling
Hello everyone at eurobricks! I'm new in this forum. I decided to open an account, so I can share my simple mod. About two years ago I got the Motorized Excavator 8043. The model is awesome, I think it has been one of the most beautiful and complete sets. Since the model needs 6 batteries, I decided to use Ni-MH rechargeable batteries. The only problem is that this kind of batteries provide only 1.2 Volts, therefore, the PF battery pack only achieves 7.2 volts with 6 batteries, instead of the 9 required (and provided by 6 alcaline batteries). I don't want to spend money on disposable expensive batteries. I decided to look for a way to use 8 batteries and provide 9.6 Volts Long ago I found a mod where the user used a standard battery pack. I can't found the post to thank the guy who did it. Here's what I used: 2x Battery Holder 4xAA 2x 9V Battery Clip 8x 1.2 Volt Rechargeable Batteries 1x Switch (I didnt connected it, but you can) Wiring: -You can use a PF cable to do this (Search in the forum/web there are lots of tutorials). -OR you can canibalize the original battery box (PF extension wire is not available in my country D: ) I won't write, since the images explain it clearly: Wiring Diagram por Teleing, en Flickr Connection diagram por Teleing, en Flickr Use a bit of glue por Teleing, en Flickr Overview por Teleing, en Flickr Modifications on the Excavator: From book 1, page 61: Replace Steps 4~8 For the following: New Step por Teleing, en Flickr (You can take the black piece from the spare parts included in the model) With this we can allow the battery pack to have enough space in the excavator. Now it's pretty simple, you connect the battery box and take it in place: I used the grey part to hold the wires in place I also did a little review of the improvements between 7.2 and 9.6 V: 8043test.txt The general improvement was about 30%, You can see immediately the excavator is faster, lifting the boom, rotating, etc. AND, the gear switch moves smoothly. FULL GALLERY http://www.flickr.com/photos/teleing/ Thanks for reading, hope my work is useful to you. -

8043 Excavator - Gear Interference with Boom
qwertytam posted a topic in LEGO Technic, Mindstorms, Model Team and Scale Modeling
Hi guys, I've just brought the great 8043 and really enjoyed building it. However, I'm sure I've made a newbie error somewhere along the line as when I lower the boom it starts to have interference with the black 12T double bevel gear before the LA's have completely retracted (there's still about ~10mm of movement left on the LAs). I've posted a picture below which shows the grey hinge about to start hitting the gear. Has anyone come across this issue before? Note: in the picture below I've put the LA's out of the way to make the picture clearer

