Search the Community
Showing results for tags 'vehicle'.
Found 434 results
-
Okay, so what the heck exactly the Hard Truck Apocalypse? Well, it's a videogame. A Russian videogame. Brought by Targem Studios, here in my country it was known as Ex Machina, but you guys probably know it as Hard Truck Apocalypse. And honestly, I like that name better. No reason to be mysterious. So HTA is about you being a post-apocalyptic truck driver and gives you a reasonable amount of a pseudo open-world to explore. To do so, you need to have a truck, and that's where HTA shines. It has five classes of trucks with a great amount of cabins and cargo holds to install, plus a wide variety of weapons. I love HTA for it's atmosphere and it's trucks. And I want to share my love with you by presenting to you these MOCs. Van Hard Truck Apocalypse - Van by The Mugbearer, on Flickr Van is a starter truck that is a gift to main protagonist from his father. This default Van configuration contains a simple cargo bay and Hornet-class machine gun mounted on the cabin. Reference Image Lorry Hard Truck Apocalypse - Lorry by The Mugbearer, on Flickr Lorry is a reliable truck that features high suspension and 4x4 drive. Although it's vastly used by traders, Lorry is still not really that well-equipped for lone trips and requires protection. The default Lorry configuration includes a basic cabin and cargo hold with a weapon mount. The weapon equipped is a general-purpose machine gun based on Russian PKT. Reference Image Ural Hard Truck Apocalypse - Ural by The Mugbearer, on Flickr You know that when you sit behind the steering wheel of this monster, things just got far more serious. Those who succeed, choose Ural for balance of it's carrying capacity and weapon customization. Big enough to get off-road if needed, Ural is the best choice for a post-apocalyptic trucker. This is the default and most common configuration of Ural, featuring a standard weapon mount on the hood and a medium weapon mount on the cargo hold. Featured weapons - a general-purpose machine gun based on Russian PKT (hood) and four-barreled heavy machine gun based on KPVT (body). Reference image Comments and critiques are always welcome, safe road to you, and play well!
- 3 replies
-
- crashsanders
- microfig
- (and 8 more)
-
From wiki : The four bays of balcony type tenement buildings form a continuous facade verandah facing Johnston Road. It is quite likely that certain parts of the buildings could date from around 1888.The buildings lie on land reclaimed before 1887.In 1966, the Yu Clan purchased the building at 64, Johnston Road and inscribed the Chinese name of The Hong Kong Yu Clansmen Association on the top verandah facade. Woo Cheong Pawn Shop at 66, Johnston Road was originally owned by the Lo family, a well-known local pawnshop trader for over a century. It is my recently MOC historical architecture and join ¡§Build a Wonderful Hong Kong¡¨ Bricks Building contest. I designed it with serveral rooms with the traditional HK scene. The classic HK vehicle and Tram is placed for the decoration. And I got the LEGO and dinner buffet prize from the contest! Luck and Happy! It is the video created by the visitors : Here is the real pawn in HK. You can find more : http://zh.wikipedia.org/wiki/和昌大押 http://www.discoverhongkong.com/tc/see-do/culture-heritage/historical-sites/colonial/the-pawn.jsp http://www.thepawn.com.hk/
-
Hi, I just wanted to share my K-Wing with you. If you want this to become an official LEGO set, please support this project on LEGO Ideas (formerly LEGO Cuusoo). History The K-Wing was a heavy starfighter in the Star Wars universe. It was developed for the New Republic during the Yevethan crisis, replacing the B-Wing. In the Second Galactic Civil War, Commenor deployed K-wings for defense during the Battle of Commenor. (→ read more on Wookieepedia) The LEGO set The set I'm thinking of includes 3 rebel pilot minifigs and a R2-series astromech droid. It would fit perfectly to the other already released starfighters, like the official X- or Y-Wing sets. I created the model using Lego Digital Designer. My construction consists of 1020 pieces, the price would probably be around $100.00, but please consider that the final set design by LEGO could be different. Please support this project Again, please cast your supporting vote and spread the word, inform your family, your friends, and anyone you know who could be interested in supporting this LEGO set idea - the path to 10,000 supports is a long one and this mission needs any help it can get! ;) PS: I’m going to build one when reaching 1,000 supporters
- 4 replies
-
- star wars
- starfighter
- (and 8 more)
-
Well, as if the title didn't make it obvious, what is your favourite Super Heroes set? Not sure about mine-I really like the newer Arkham Asylum, so that may be it. Please note this does not include the old Spiderman or Batman themes, but only the DC and Marvel themes from 2012 onwards.
-
^ Here's my interpretation of the 1966 Batmobile. As you see the contrasting color is limegreen. That's because of my lack of new bricks in red. Maybe I'll change the green to a dark red in the future, but for now the green is cool enough for me. ;) ^ The car is based on the MonsterFighters Hearse. I used that headlight treatment, minifig placement, and overall build-up as a base and went from there. Made it longer, lower, and added some more Batmobile characteristics. I've tried to make it meaner and leaner, lower and slower. Kind of a hotrod rod/custom attitude. Hope you'll like it. So, there you have it. My first official MOC, in my first official Forum-post. (besides my introduction ;) Feel free to comment and critisise.
-
Your vehicle MOC planning / building process
Hrafn posted a topic in LEGO Technic, Mindstorms, Model Team and Scale Modeling
After seeing the comments here, I wondered what process others follow in building cars and other vehicles. My approach thus far has been: 1) determine what vehicle to model 2) figure out the scale 3) determine the wheels and tires used, to match the intended scale [this may actually come before 2) - in my current effort I picked the tires first, then determined the scale] 4) figure out roughly what features I want: suspension type (if any) per axle, which axles are driven, which ones are steered, whether there will be a gearbox, whether it will be motorized, etc. 5) build the axles 6) build a chassis and fit in the other features (gearbox, motors, etc.) desired 7) bodywork (not that I've gotten quite to this step yet...) So far I've had to go back and revisit earlier steps a number of times - for example, I thought I was done with my axle designs but then found out that the motors I wanted to use were so strong they were tearing the rear axle assembly apart. Preliminary bodywork showed me that the shock towers were too high, so I had to redesign the front axle. And so on... Is this similar to what you do? I was surprised to see Doc_Brown say he started with the bodywork (gorgeous though it is!) for his GTHO. -

[MOC] 4×4 4-link Offroader GEN2
HorcikDesigns posted a topic in LEGO Technic, Mindstorms, Model Team and Scale Modeling
Hi, few months ago I've submitted here GEN1 offroader, and I promised the second generation with many improvements - so, here it is ;) (GEN1 topic: http://www.eurobrick...52#entry1806014) 1+1XL (independent propulsion for each axle, 2*M, 1*V1 reciever, 1*V2 reciever, 1*Li-Po Battery. Youtube: Flickr (model): http://flic.kr/s/aHsjUeaFrB Flickr (disassembling): http://flic.kr/s/aHsjUetNAQ LDD of chassis is also availible. -
Hi This are my new Armored vehicles very easy to build and with capacity for 3 to 6 troops So few pieces and also have a very good stability on the weels hosting imagenes Here is mi Flickr
-
Hi there! We'd like to show you our last "work", based in one of our favorite models, the Kaneda's Bike. It's just a revision of the bike built 7 or 8 years ago but, also represents our new way to feel this hobby...we need to extend and to complete the experience. Not only we want/need to play, also we want to explain and show all the details of the process...and pay tribute to the creator of AKIRA, Katsuhiro Ōtomo. The best way we know...a Book! It's rare, we feel that we need more and more...but, at the same time, less and less... ...ummm, well...so-so-sorry!!!, we mean more and more...BRICKSSSS!!!!! We hope you like it: More pictures here: http://www.flickr.co...s/arvobrothers/ Cheers, Arvo
- 11 replies
-
- arvo brothers
- vehicle
- (and 8 more)
-
The Batman Tumbler is the Batmobile so far and also one of the best cinematic vehicles. I made a Lego version since there had been many othet MOCs done of it, but I wanted to make one myself. I also made a few Dark Knight Trilogy minifigures. Please tell me what you think of the model and what I can improve on. Sorry; due to technical difficulties I have to upload Photos tomorrow.
-
For a long time, I've had half a fire engine sitting on the shelf. Finally, after finding (and buying.... ) the Lego Fire Station 60004 on sale, I got around to finishing it. (Pardon the quality of the pics) Its taken quite a few iterations to reach the end result, and I quite like it. Its a typical main fire engine - the backstay of any modern fire department. It carries pumps, ladders and breathing apparatuses, as well as its own water tank, used for first efforts until a fire hydrant or similar water supply can be hooked up. Front left view: Rear-right view: Cab: The cab easily seats three, and has rear sliding-doors for easier access. (Or alternatively, just a gimmick from the builders side... ). Fire-chiefs sedan and hose tender trailer: Originally, I wanted to include the hoses on the fire engine itself, but I found it took too much room. Therefore, I decided to design a small hose tender trailer. As the fire engine is already by far the largest truck in the city, adding a trailer seemed a bit over the top. Therefore, I quickly put together a small fire-chief's sedan to pull the trailer. And, for all its simplicity, I quite like it. The tender trailer has a diesel pump, to allow it to pump water from for instance a pond, over longer distances to the scene of the fire. Front-left view: Rear-right view: Comparison with the 60004 turntable ladder truck And a small "action-shot": Thank you all for watching. C&C are welcome, of course. On a side note, I am planning to convert the 60004 building to some sort of modular standard. /Bregir out
-
I have recently been working on a collection of larger scale vehicles for an upcoming LEGO show here in Adelaide, and thought I would share one of my creations. It is a 1925 Rolls Royce with coachwork by Van Vooren. The actual car this is based on has recently been donated to the National Motor Museum in Birdwood, South Australia. I came across the vehicle during a recent visit and through the wonderful world of the internet got in touch with the amazing LEGO vehicle designer Lego911, who graciously worked out how to make the vehicle come to life. He worked out a design for me to work from, but also included many working features from the real vehicle, such as pillar-less suicide doors and opening bonnets. I would like to publicly thank Lego911, for all his amazing help with this project. This model will be on display at the National Motor Museum in January next year from the 4th to the 31st, if you want to come and see it and the rest of the collection.
-
Hi everyone! I haven't built much lately, but this is a 7-stud wide sports car that I built back in March, and I just re-found the pictures and decided to crop, 'shop, and upload! Thanks for viewing :) The car isn't based on anything in real life, it's just a vehicle from my imagination. License plate number blurred out, as all proper photographers know. True - there are no doors, but I suppose that makes riding in it even more fun! As you can plainly see here, the car is 7 studs wide. Why 7-studs wide, you might ask? Well, first off, it enables the cool red stripe to be done easier. Secondly, in my humble opinion it fits two minifigures much more accurately than any other scale. 8-wide also is acceptable, but a little wide in my opinion, for the average car. The steering wheel and related stuff that allow you to drive all proper like. The underneath. (oh, the suspense!) No suspension, sorry. And yes that 2x3 plate is sort of pointless, I'm not sure why I threw it on. I suppose it helped it to be sturdier. In the end it was a pretty sturdy little car. THIS IS SPARTA!!! This wasn't actually intended to be a joke or something (it's not punny, anyways), I just wanted to demonstrate how nicely a LEGO fig fits inside the car. (and show off one of my mint Spartans... ) Another shot with the spartan to show how nicely the fig fits in. I should've taken a photo or two with 2 figures, but I didn't think about it, and this creation is from March as I already said, so oh well. Thanks for viewing my creation! I hope to have uploaded a few more creations from this year, before the year of twenty-thirteen ends :) Constructive criticism and pure praise appreciated ;) You can also view this at: The brickshelf folder (when moderated) MOCpages Flickr!
-
For those of you who do not know, Pingu is a clay-animated TV series created by Otmar Gutmann in 1986. It is about a little penguin named Pingu and his family and friends, that all work and live in igloos on the South Pole. Pingu often goes on adventure with his little sister Pinga and his seal friend Robby. As a kid Pingu was one of my favourite shows on TV, and still today I love the humour and the unique style of it. In the scene below you see Pingu's father, mother and little sister Pinga, and Pingu himself. Pingu is sitting on his fathers "mail snowscooter". I have created custom stickers for their chests and their eyes. I have also created a Cuusoo project out of it, which you can check out here. Larger image can be seen on my flickr.
-
After having recreated several TMNT 80s toys in LEGO, I wanted to try and take the colorful and a bit wacky style of those toys and make up my own design. So here is Leos Slimobile! Its primary weapon is the orange canon that fires slime. But there are also other weapons, such as the yellow cannons. And Leonardo's katanas of course! Comments are welcomed! Cowabunga!
- 13 replies
-
- TMNT
- Teenage Mutant Ninja Turtles
- (and 4 more)
-
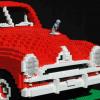
A while back I built a replica of a FJ Holden, and after destroying him just after Brickvention this year and promising myself I would not build another, I have. Mostly due to entering a Toy Building Blocks competition over on the Instructables website and also just to try out a few new ideas that when in the first build I did not know how to achieve. So here he is, 32 Stud Racing's FJ Holden. I have added a few more features to this model, such as a semi-opening door, race stripes, roll frame etc. Some of the photo's are from a recent trip the National Motor Museum, in Birdwood South Australia. He is in front of a real FJ Holden, to give you all an idea of the original car and the scale of mine. Enjoy.
- 3 replies
-
- large scale
- vehicle
-
(and 2 more)
Tagged with:
-
What the heck, Lego? Give us less ships and vehicles in the Star Wars line! I understand it might be so they can sell better, because kids like to swoosh around spaceships. But think of us TFOLs and AFOLs! Besides, what kid wouldn't want to buy a (much much larger) remake of the Mos Eisley Cantina with Doctor Evazan, the Bith band players, and a new Greedo! Let's start a riot!! We want Kamino, we want Geonosis Arena, we want Droid Factory, we want a new Cloud City and Cantina, we want Jedi Council room, you name it! Now who's with me!
-
Hello The two classics from Volkswagen: Camper and Beetle All Details on MOCpages Which one would you choose? Jonas.
- 16 replies
-
- Volkswagen
- Beetle
-
(and 7 more)
Tagged with:
-
Eightball Why have one vehicle when you can have eight? The Eightball is a specially designed vehicle perfect for long-haul trucking, ocean voyages, mountain travel, construction, urban transportation, and space travel. Stats: Length: 108 studs Width (widest points): 78 studs Weight: 9.8 lbs. Build time: 2.5 months Pieces: ~4000 High resolution and additional pictures on flickr. Come see it in person at Brickfête this year.
-
So I was bored the other night and decided to dismantle Joker's Helicopter from set 6863 to convert it into a Bat-Copter. This is my first time doing a vehicle MOC so CnCs are welcome! On to the pictures. I might need to reshoot some angles though. Batcopter MOC by Clement Soh, on Flickr Vehicle Profile: Batcopter MOC by Clement Soh, on Flickr Batcopter MOC by Clement Soh, on Flickr Batcopter MOC by Clement Soh, on Flickr Batcopter MOC by Clement Soh, on Flickr Batcopter MOC by Clement Soh, on Flickr Batman can sit comfortably in the cockpit: Batcopter MOC by Clement Soh, on Flickr Batcopter MOC by Clement Soh, on Flickr Some details: Rotor Engine Batcopter MOC by Clement Soh, on Flickr Flick Missles on each wing Batcopter MOC by Clement Soh, on Flickr Trying to emulate an elongated bat symbol Batcopter MOC by Clement Soh, on Flickr Hope you guys like it. Comments greatly appreciated.
-
I love LEGO® trucks. I just can't help myself when a new civilian range comes out; last year's range was great, and this year's looks set to continue the current trend. My love of, specifically, petrol tankers can be traced back directly to this set - one of the first sets I remember owning, and ground-breaking for its time. But time has moved on, and LEGO sets have become far more intricate. The release of an Octan tanker relatively soon after 2010's 3180 Tank Truck is rather surprising; in this review I'll check out the latest offering and see how it compares to its (slightly) older sibling. Incidentally, 3180 was one of the first sets I reviewed early in my EB Reviewers Academy career. If you compare to my earlier review, you can see how I've (hopefully) improved! Review: 60016 Tanker Truck Set Information Name: Tanker Truck Number: 60016 Theme: CITY Release: 2013 January Wave Parts: 191 Figs: 1 Price: GB £17.99 | US $19.99 | EUR 19.99 - 22.99 | AU $29.99 | CA $24.99 | DKK 179.95 Links Brickset ... Shop@Home ... Bricklink ... Peeron (not yet listed) The Box Click for a full-frontal view in various sizes Once again, Orthanc dominates the LEGO CITY skyline, while our Tanker breaks the fourth wall into the familiar blue CITY livery. It's a tried and tested formula, dating back a full ten years to the advent of World City in 2003, but still looks fresh. The box is deep, measuring 260 x 188 x 70 mm (W x H x D); it's the same height as 3180 but considerably narrower and shallower. This set is GB £3 pricier than 3180, which had 30 more pieces; the smaller box size therefore represents an environmentally-conscious move by TLG (or, for the cynics among you, a cost-saving in logistics ). HEY! Look at these features! Ladder, gun-on-a-hose, coffee mug replete with petrol fumes, ladder again, and cab the dude can sit in! What more could you want? We'll examine these features in depth in due course. Click for larger sizes The usual CITY modular build is alluded to, rather than demonstrated this time: we are shown two bags falling from the box but not what they build. However, LEGO's new subversive 'Pokemon' Collect Them All! strategy once again appears, but there are only two other civvy sets this year, so you'll have to go back and complete your collection with last year's. And you should - they're good! The little petrol pump that accompanies the tanker gets its moment in the limelight on the top of the box: Quite why it's isolated in a field on the City outskirts is anyone's guess, and I'm still uncomfortable with the driver's delight at drinking coffee in the close proximity of flammable liquids, particularly as it occurs to me now that the black tubing might well represent Diesel. At least he isn't smoking! Apologies, by the way, to Americans: please substitute 'gas' for any appearance of the word 'petrol'. Contents The thumb-tab box opens to reveal two polybags, instructions, and sticker sheet fitting quite snugly inside. They are accompanied by two loose parts: the hose-and-gun combo. Only one is required in the set; whether the second will appear in everyone's, or I've just been lucky, remains to be seen. Decal Sticker Sheet Oooh, shiny! The sticker sheet is printed on white material that is rather reflective, and required careful photography to remain clear. As has been the trend of late, the front of the cab is stickered, but as we shall see it doesn't entirely replace the usual grille tiles. There's a sticker for the petrol pump (top left); the rest go on the truck. The Instructions The single booklet is of good quality, and features a display very similar to the box front, but with a slightly broader panorama. The Gagne Kid guards the rear, presumably to deter people from sneaking a look at the inventory. The Modular Build is demonstrated on the inside front cover: Bag Two's cab and tank builds don't connect directly without Bag One's chassis; obviously the disembodied wheels don't. Having looked at this page, naturally by now you would have poured all the parts onto the carpet, albeit in separate piles. Too late, the opposite page warns us not to do this. Winding the hose onto the reel could prove challenging to younger kids; or at least doing it neatly (it's tricky enough for adults). Maybe I'm underestimating the capabilities of the average 6-year-old. I should remember that programming the VHS caused young Rufus far less trouble than his elders! [VHS = archaic system for recording moving pictures onto magnetic tape, for those interested in ancient history.] You might have noticed the part call-outs on the previous picture. Yes, they are present throughout: This surprised me, in such a small set. With typically only 1-3 parts per step, it isn't strictly necessary, but I for one won't complain. Towards the rear we find the latest CITY range diorama, showcasing the new yellow cement mixer , and the strange 1950s-throwback recovery truck : The two sets from 2012 promoted in the 'Collect Them All!' series also feature here: 4433 Garbage Truck and 4432 Dirt Bike Transporter . The latter is a great set! I'm secretly hoping the garage at the left appears as a set soon. The set inventory is found on the last two pages: you can see them here and here. The Parts Bag One builds the chassis, along with the petrol pump and solitary figure: There isn't a huge amount of interest here. Most of the incongruous blues and browns will be buried in the final model. I'm pleased to see the black flexible tube make another appearance here; it was in 3180 too. The yellow taps, not surprisingly, are the modern variety, without the little hole at the end; one of them is spare. I have a sudden inexplicable desire for spaghetti carbonara followed by biscotti with Vin Santo: Opening bag two, I was momentarily alarmed at the prospect of flick-fire missiles appearing in CITY sets. Fortunately, that is not their use here, though the cynic in me wonders whether TLG is trying to demonstrate alternative uses for these ubiquitous pieces. Otherwise, there isn't really anything of note here, with the possible exception of ... ... this piece, which is found once in both bags: It's a 2x2 brick with studs on one side. It's new to me, but I note that it first appeared in Bag End at the end of last year, and in several sets this year. It's potentially very useful for SNOT work. The Figure The sole figure included in this set wears blue overalls, unlike the 'Oil' jacketed figure from 3180. Let's call him Diesel Dave. He has a rather bland, amiable countenance; I'd rather he had an unshaven scowl. The torso is nice, with some lovely detailing; the black vest under a medium blue shirt, all surmounted by the darker blue (presumably denim) overalls with wrenches and a pencil in the pocket. But it's nothing new: this torso first appeared in 2006. The back is featureless. The Build The first thing built is the little free-standing petrol pump. We'll see it complete later; here I've part-disassembled it to show a simple but nice technique: Three 2x2 white jumpers are used to centre the upper part, and allow attachment of the bluish-grey wheel. The 2x2 black tile is attached to the two white 1x1 bricks with stud on one side; I had wondered why one of the new 1x2 bricks with side studs wasn't used, but you can see that another of these white 1x1 bricks is used in the model, and it makes economic sense to use as small a part variety as possible. The black tile itself will be stickered, and represents the pump's display; the whole is capped by a 2x4 tile offset via its centre anti-studs. The black tube is a little too rigid to allow posing of the figure holding the pump unless both are connected to a baseplate or other studded surface, unfortunately; about the only viable pose on a smooth surface is shown here. Building the chassis will be a familiar routine to anyone who has experience of LEGO's trucks. Long plates form the spine; 2x2 axle plates are separated by either 1x2 tiles or plates; I'm not sure why the tiles were used rather than the 1x2 green plates along the length. Note the black 2x6 modified SNOT plate at the end: this is surmounted by a 1x4 SNOT brick, forming a 2x4 grid of studs for the secure attachment of the rear SNOT panel. The spine is strengthened with more long plates and the rather incongrous brown bricks, which don't show in the final model. I didn't think the 'mustard dispenser' would fit into the cupboard, but it does! Getting it out again requires nimble fingers or vigorous shaking. The front-end SNOT panel has a green modified 2x6 SNOT plate; the top studs mesh with the black 2x4 tiles for extra strength. There's a lot of tiling (or part-tiled plates) on the upper surface here; this allows the cab section to be removed easily should you wish too. The rear end is topped by a 4x10 plate; this leaves a gap underneath which would indeed be found on many trucks, but there's a visible red plate under there. In the final inset you can see the rear-end SNOT panel; the grille-tiled area is a plate lower, which looked a little odd, but there's a good reason for this, as we shall see. I took a lot of extra pictures; if you want to see more steps, check out the pseudo-timelapse in the Flickr display in the spoilers: Bag Two starts with the cab, which is based on a green 6x6 plate. Two friction cylinders form the exhausts; it is into these that the flick-fires will go. I remember a lot of complaints from about three years ago about the lack of doors on LEGO CITY vehicles; it's good to see that TLG has listened and they appear to have returned to stay. The rear of the cab is formed from large wall panels; this leaves a couple of gaps but they aren't too obvious on the finished set. Note the use of the 1x2 SNOT brick here, allowing placement of the steering wheel, and permitting easy reconfiguration to right hand drive for those parts of the world where British influence persists. Yet another of those rather useful modified SNOT plates allows a strong attachment of the windscreen: The obligatory coffee mug takes pride of place, and the whole is capped by the usual 4x6 wedge panel. I like the new wing mirror technique; it means the mirrors can't be adjusted, but this also means they're unlikely to get knocked out of place when you're posing for display or photos. The tank itself is an Octan-themed sandwich which will be familiar to owners of 3180. There is a slight difference: the red plates are the same length as the big green bicurved slopes, meaning that the front and back halves can be separated until the top 1x8 tiles are applied. The two bluish-grey wheels on the top are an aesthetic improvement over the 2x2 round plates on 3180. Cab and tank are applied to the chassis, the wheels are attached ... ... and the truck is complete! We'll look at the overall appearance in the next section. The Complete Set Look! I put the stickers on! Actually, I enlisted the help of a passing monkey who did a demonstrably better job than I'd have done. Let's take a look around, starting with the sides. Both sides are similar; the right side has the 2x3 cupboard and a dark bley grille brick in place of the reel and clip found on the other side: The lines are smart; there are a few exposed studs above the reel/cupboard sections, but at least they are a consistent colour unlike the rear section of 3180. I particularly like the step in the red stripe from the cab to tank sections. The back end is a little 'square': made more apparent by the slight inward slope of the ladder. This can of course be corrected, but as we shall see the ladder tends to prefer this position. The cab looks quite imposing from the front, and is very realistic. It's helped by the sticker over the white 2x4 tile; if you look back to the first picture in this section, you can see how the sticker continues neatly the red and green stripes from the sides. From the back, you can see how the recessed grille tiles of the lower SNOT panel accept the end of the ladder. This is the cause of the inward-sloping ladder; if you don't like this, you can easily insert a 1x4 plate under those tiles, but this will cause the ladder to slope slightly the other way. You might prefer this. The exposed Technic holes of the large green and white curve-slope blocks are a little ugly - a fault carried over from 3180 - but it isn't too obvious. Features Now we can analyse how the features so proudly espoused by the box rear stand up to scutiny. Dude sits in cab, and doors open. As is frequently the case with LEGO trucks, getting the dude into the cab takes a little work - often you have to remove the windscreen as well as the white roof panel, which means the doors will come off too. In this shot, the gap in the black layer between the front headlights is a little obvious, but it isn't the end of the world. [There should be a little recess under between the two sets of headlights, caused by the cab suspension in this type of vehicle, but it's more pronounced because the black plates at the sides are set a stud back from the tiles; I don't think it would be possible to correct this. - Thanks Phazon for pointing this out.] Dave climbs the ladder in the second shot. I don't have much else to say about this. The hose-reel is really the centre-piece of Tanker sets. I remember being amazed by the hose in 1978's 671 Shell Tanker. As I recall, that one was simply a length of hose that you had to stuff into the cupboard - no winch mechanism there - but it was an awesome feature. Here, as in 3180, the reel winch is super. Dave's got a bit tangled here. Fancy a hot dog? Dave has mustard if you need it. Yes, I know, it's a fire extinguisher. As I mentioned before, it can be a little tricky to remove. It's not really an intentional feature, but the flick-fire parts atop the exhausts can be extended slightly for that 'RC' look, should that take your fancy. The bley parts on top of the black exhausts look a little odd. This is a good angle to admire the roof on the tank: the wheels are a smart improvement over 3180. Again not a feature, but it needs pointing out: The rear axles have an open space above, which exposes a red plate from the chassis. On the plus side, with the white 2x2 jumper and green 1x2 plates, this continues the Octan theme; I'd expect a real truck not to be painted in this area, and you can easily substitute these parts for bley or dark bley if the exposed colours bother you. Comparison I never applied the stickers to 3180, so in the interest of fairness I've made the comparison with the 'bare' 60016. To see the stickers on 3180, there's an official picture on Brickset. I actually prefer the newer cab front - even without the sticker, it's neater and more imposing than the heavily-grilled 3180. Here you can see the difference in the wing mirrors; each method has its advantages: 3180's mirrors are adjustable, but more fragile and prone to getting knocked; 60016's are longer, which may be more realistic, and rigid. Obviously, 3180 is a tractor-trailer (semi-container) arrangement compared to 60016's single chassis. 3180 is therefore longer, and more manouverable; in addition, it is perhaps a little more realistic: while examples of both types exist in real life, in the UK at least most tanker trucks you'll see on the road have a tractor-trailer configuration. The single-chassis tankers might be found more commonly at airports, for example. Less obvious is that 60016 is a taller model. It's also neater: a complaint of mine about 3180 was the exposed studs at the rear (see this picture from my rather embarrassing early review). As I've mentioned previously, the white tiles and bley wheels on top of the tank are smarter than 3180's studded round plates. Sadly, the little pump from 3180 has done a runner so I can't compare those. The difference in height is made clear in this front-to-front comparison: 3180's cab livery is a little fussy. I prefer the staggered red stripe on 60016; the red stripe on 3180 is absent at the front. 3180 gets a point for having a footplate enabling easier access to the cab; 60016's dark bley wheel arches are arguably less jarring than 3180's white ones. I'm not really sure about the necessity of orange beacons on the cab roofs of either; however, the rounded lights on 60016 are more realistic - and less obtrusive - than 3180's cones. Visible here are 3180's gearstick, and the provision of both mustard and ketchup! Conclusion 'Here - that'll be £2.98 for your five millilitres of petrol, sir.' Tanker trucks are a staple - a necessity - of the LEGO Town/CITY range and have been since 1978. 2013's latest addition provides a smart, attractive addition to the range, and its Octan livery is compatible with other fuel-carrying vehicles or features from the CITY and even Trains lines; it will even sit quite happily alongside the earlier 3180. As a standalone set, it's a little lacking in play features, though perhaps there is no less than we should expect; it is crying out for a new Octan petrol station to be added to the CITY range - we haven't seen one since 2007. I hope you'll agree 60016's tanker is a beautiful truck - the livery is clean and flatters the shape of the vehicle; its lines are smart and a definite improvement over some of 3180's rough edges; even the stickers look great! My only real criticism, aside from the somewhat lacklustre figure, are that as an single-chassis vehicle it lacks a degree of realism compared to most articulated tanker trucks that I see on a typical British road. Scores Design: 10 I think this is a beautiful truck. I simply love the colour scheme, which is brought to life by carefully-designed stickers, and which flatters the clean lines of the truck. The cab's front is tastefully rendered, and the whole very realistic - you could almost imagine you were looking at a scale model. Build: 8 Never repetitive, and with a few interesting techniques, it's a fun build, albeit perhaps better suited to a younger builder if you prefer a challenge. There are a good few tricks in SNOTting to be admired, and a minor lesson in offsetting in the build of the pump. Parts: 6 There really isn't much you probably don't already have in your collection, especially if you own 3180. The figure is rather old-hat and a little disappointing if you're on the lookout for new faces or torsos; I'd have preferred a quirkier set of facial features, for a start - as he is, Dave is a little devoid of personality. Playability: 7 Compared to some other CITY vehicles, there isn't much to do with this set on its own. It comes into life as a service vehicle for a larger town, and would be particularly happy accompanying the recent Airport set... but most of all, it's pining for a new Petrol Station. Please! Value: 7 £17.99 represents a significant hike of this price niche. The similarly-sized 'Collect them all!' sets from 2012 were all £14.99, as indeed was the 30-piece larger 3180. Inflation sucks, and I'm sure TLG knows what it's doing, but it's a little pricey for the collection of parts. The whole, however, is a thing of beauty, and I for one won't regret the outlay. Overall: 75% My score: 9/10 Aesthetics wins over arithmetic here - I love this. I think you will too. Thanks for reading - I hope you enjoyed the review! Please leave comments. Rufus Compare the evolution of the Octan tanker and my reviewing skills in my 3180 review! My flickr set If you like my reviews, and would like to learn how it's done, please consider joining the Reviewers Academy:
-
Hi, I finished this a while ago but never posted it here. It's big and chunky. All five doors open and close. I haven't included a detailed engine-bay as I am intending on putting some LEDs in to light up the front and back lights and the engine-bay is where the battery box will go. Enjoy.
-
Not many people like 8-wide, but I'll keep making them anyway lol Here's not just a Super Duty, but Ultra Duty truck! I wanted to make more big 6x6 vehicles (like wreckers) but didn't want to keep buying bricks for all of them. So, the next best thing was to make this base truck and only build different modules for the bed. I kept the construction simple to maximize customizability. Notes -Going to add fender flares, I just need some 1x2 cheese slopes to stick on there -Can easily add extra axles, extend cab or bed, etc. -Can easily swap out modules to put on the bed -Can easily attach other things to front bumper by removing a few pieces -Roomy engine compartment This is a 6x6 version Here's the underside, very simple. Just use technic beams of a suitable size and reinforce them where needed. Use long 3L technic pins (I think they're only made in blue) to connect the wheels/chassis/axle together. Here's a shot with my Vactor 2100 and Wildland Ultra XT 6x6
-
This car kinda reminds me of a spider on the prowl, so Spider Roadster it is. I'm out of my comfort zone building in this scale, hope it doesn't show haha -Can probably easily convert this to a hot rod with the engine exposed. Dark Red and Dark Blue with Lightning Streak variants -Crash bar to protect the gas tank And here's Mr. Frankensquid riding the roadster while making Vroom! Vroom! noises because this is just a showroom car, it doesn't have any gas. Comment/enjoy/berate!


