Search the Community
Showing results for tags 'technic'.
Found 1584 results
-

42026 White Champion Rac3r (Clone Model)
DamonMM2000 posted a topic in LEGO Technic, Mindstorms, Model Team and Scale Modeling
42026 Lego Technic Black Champion Racer clone, kept as close to the original model as possible. Different color scheme, uses pieces mostly from 31313 Mindstorms Ev3 Retail Set and 42000 Technic Grand Prix Racer. NOTE: Tires have a slightly larger diameter. -

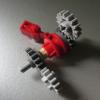
[HELP] Differential 3M Z 28 NO: 4525
Brick buster posted a topic in LEGO Technic, Mindstorms, Model Team and Scale Modeling
I am looking for this part on brick link , i was hoping to find it for less then a dollar {1.00}. but all i could find on brick link was 1 for 1.57, i think thats a little over priced. LEGO pick a brick dose not carry it. and eBay wants over 5 dollars for it +shipping/handling. Is there any sites i can buy it for less then a dollar? {no: 4525184} -
Hi! Today i'd like to show you my first moc on this forum I wanted to build sometching without remote control and with maximum number of functions Functions: -Openable doors and hood -"Hand of god" steering -sreading crane -boom extending -winch Two functions conected to gears box: rotating crane and two steps spreading outriggers The front grill was based on damjan's truck Thanks For wathing !
-
 So, I wanted to have a display model in a shelf, and I asked myself; "what is the best looking set I have that is not too large?" The answer was obviously 8240 8420 Street Motorcycle However, as i finished building the model, I must admit I wasn't as impressed as the last time I built it. Some things had to be improved.. I'll just show the pictures of my modded model, and list the changes at the bottom. Hope you like it! Pictures are clickable for much higher resolution, or you can check out the Bricksafe gallery As was the case with the original; this is IMO the far worst angle to view it from So the most obvious visual changes I made were the following: -Sprung suspension on front wheel, while maintaining the dimensions of the original -Radiator in front of the engine -Some more panelling for the body, filling in the huge gaps there -Long, sleek panels along the seat area -Gas tank that doesn't leak as bad as the original -Large rear chain sprocket -More realistic and better looking exhaust (at least IMO) -Filled in the seat with some tiles -Reorganized the rear lights
 -

[TC6] Dump Bed Pickup Truck
lindr6 posted a topic in LEGO Technic, Mindstorms, Model Team and Scale Modeling
Here is my work in progress entry for tc6. I just want to start by saying that I have recently resurrected my old technic collection and looking to get back into the hobby. I saw this contest, so ordered up some pf parts, and the fun began. All my sets are the old studded sets, so I hope this does not hurt my chances! Back when I did MOCs (20 years ago) similar models to this were my favorite, but I was never able to motorized till now! Functions: - 1 Servo Motor: Steering - 1 Large Motor: Rear Wheels - 1 Medium Motor: Dump Bed (small LA) - 1 Medium Motor: Switch Headlights On/Off (a wimpy function, but my kids love it) - 2 IR receivers as I do not have an s-brick. Other Features - Limited slip rear differential - Live rear axle suspension - Perpendicular front axle with steering - Steering wheel turns with servo motor - Hopefully more to come! Looking to add some doors, but not sure how to best do this using my old parts, which I am almost out of. Any suggestions on this would be welcome. Also, please share any improvements and or features I should add, as comments are welcome, especially since I have not done a MOC in many years so my techniques are probably out of date. -
Black Champion Off-Roader | Modified 42026 Pullback Racer
DamonMM2000 posted a topic in LEGO Technic, Mindstorms, Model Team and Scale Modeling
Just a short, little video showcasing my modified 42026 Lego Technic Black Champion Racer. I replaced the street tires with balloon tires to convert it into an off road version, and I had to reposition the panels to fit the larger tires (look closely on the front and sides). In my opinion, it looks better with the panels relocated anyhow. And sorry to those who like the original model with stickers… this has no stickers. Acceleration is a little slower than the original, but top speed is a plus! Here's a little closeup of the differences. Compare: -
I apologize if this has foung the forum before, I searched for "minds-i" and although a billion posts came up none that I could find had anything to do with what I am about to post. ANyways, I found this site and was astounded with the similarity of this company's product with TLG. How are they getting away with this? Has anyone on the forum any experience with these products? Good? Bad? Are they an alternative to Technic and PF? http://mindsirobotics.com/
-
Hi, I am new in the forum!! I have already built quite a lot of Lego Technic sets, but never done something from my ideas. I would love to build a very big crane starting from the new set 42042. Could you please some advise on how to proceed ( my idea was to dissasemble some sets and simpy enlarge starting from the instruction, also adding some parts to it in order to make it usable ). Thank you, Davide
-
You all know LEGO Clikits in beautfifull girlie colours. But what about some cooler wearables for LEGO Technic fans? So now to something completely different : BrickBracelet W3 and W4 "Volvo Edition" Parking Position: Start your Engines: W3 Black/Yellow: W4 Yellow/Black: W4 connection: W3 parts: Please let me know if you like it, build it or have any comment about it Thnx.
-

[TC5] Yellow Mars Rover
deehtha posted a topic in LEGO Technic, Mindstorms, Model Team and Scale Modeling
I hope this isn't too late, as I am in the Eastern Time Zone, and there was no mention about what time zone the contest uses for ending. For this contest I chose to use sets 8047 and 8067. I don't own either set, so I got all the pieces that I had for both sets. I made a Mars rover, not modeled after any particular one. This model features full pendular suspension, moveable satelite dish, moveable tool arm, and a panoramic camera controlled by black gear in back. Profile picture with tool arm folded up and satelite dish pointed down. Picture from the top And my leftover pieces -
Hi my name i s Marcin i build with lego (especially technic ) I also play computer games (like everyone ) . and like cats
-
[TC7] Bandits - Firehawk
lindr6 posted a topic in LEGO Technic, Mindstorms, Model Team and Scale Modeling
Here is my work in progress entry for [TC7]. Normal Mode: Bandit Mode: Story: The bandits were looking to develop a new vehicle utilizing a new engine prototype that allowed for huge amounts of torque and speed. This new vehicle, named Firehawk, would be lightweight and fast built for those missions that required the bandits to get in and out of a situation quickly. This new photon rotary engine pushes the limits on speed allowing the Firehawk to outrun pretty much everything of the known enforcers line of vehicles. Unfortunately, to keep the weight down, the Firehawk is not loaded down with big weapons, but just some basic weapons to get the job done. Naturally, a sports car body would be the normal mode powered by a conventional V12 piston engine, with the ability to transform into a supersonic plane powered by the photon rotary engine. Normal mode features: - Fully Independent Suspension. - Working Front Steering Using Steering Wheel. - Working V12 Powering Rear Wheels, with differential. - Special Gearbox/Transmission That Couples Two Separate Engines To Rear Wheels. - 3 Forward Gears + Reverse For The V12 - 2 High Speed Forward Gears For The Photon Rotary Engine (Car Mode When Transformed). - Working Headlights - Working Doors Bandit Mode (Still working on this) - Transform To Plane - Doors Turn Into Main Wings (Manual) - Rear Air Intake Into Rear Wings (Manual) - Photon Rotary Engine Extends, Lights Rotate With Wheels (Pneumatic Switch On Dash) - 2 Front Large Caliber Guns (Hidden Behind Headlights That Manually Fold Down) - 2 Rear Mini Missile Launchers (Launch Via Pneumatic Switch On Dash) Other: - Pneumatics powered by manual pump and air tank. - Front Headlights Powered By 9v Battery Box. - Photon Rotary Engine Light Powered By 9v Battery Box. I'm still tweaking a few things on this model yet, but wanted to share to gather any additional insights to potentially make it better prior to the contest deadline. Once I get the tweaks complete, I will shoot and post a video. -
[TC7] Enforcers - Van Helising
D3K posted a topic in LEGO Technic, Mindstorms, Model Team and Scale Modeling
UPDATE 13/8-2015: I present to you my finished entry for the TC7 contest, the Van Heli-sing armored van/assault helicopter. I will take you through the transformation process as I show pictures of the various stages of transformation. At first it might look like an ordinary armored van (you know, the ones you see in all the Hollywood movies). Nothing fancy, it has a bull bar up front with some powerful lights, and it features a double bottom with angled armour panels (grey) to help deflect landmines and IEDs it might drive over. And now the show starts: First thing it does is to deploy a tricycle landing gear detup, similar to what you see on larger transport helicopters like the Sikorsky CH-53 etc. At the same time, the car's wheels are retracted and hidden inside the body of the van. Also, the long white axle poking out the front is supposed to be for aerial refueling (no function from that axle, except to give it a more helicopter-y look): Next, a ramp opens in the rear, to fasilitate the deployment of the tail boom assembly: As this is deployed, the roof can be opened as well And the main rotor is deployed upwards and rearwards by about seven studs. Also inside the front roof hatches are two large missiles. Both sides of the vehicle have doors that open towards the back, revealing crew served M134 Miniguns: Inside you can see a red 2L axle peeking out. That is supposed to hold a sniper's rifle (that I of course forgot to fit for the photo). It can be used by hand, or it can take the place of one of the Miniguns: The helicopter can also quickly be configured for a gunship role, by closing the doors and lowering and angling the guns forward: The functions are a good mix of manual and mechanical solutions. A lot of worm gears have been used, and things work satisfactory, as you can see in the video Here be a video of the whole transformation. Proper video, not stop motion . Original post: I've had an idea forthis contest for a long time, but only yesterday got around to put that idea down in some bricks! So far I only have the size and a couple of functions nailed, but I hope to finish it in time for the deadline. The above picture shows the model setup in "civilian".. It is duspposed to be a van of some sorts. Not many features except for steering, and perhaps some opening doors when I get around to start on the bodywork. Next picture shows the model in "battle" mode: As you can see the idea is to turn it into a helicopter. The shape of the thing is loosely inspired by an Sikorsky CH-53 (or at least that was what I had in my mind designing it), but of course at a much smaller scale. The front wheels turn 90 degrees upward and smaller landing wheels are deployed on the underside (not visible on this pic). Making the front wheel mechanism was a real pain, as I really wanted them to have steering when in "civilian". Maybe half the total time building this yesterday was used to figure out a suitable solution there, and I ended up with the worm-drive system you can see in front of the wheels. The rear wheels rotate down under and through 180 degrees, as more helicopter-like are being deployed where the car-wheels were. This was the first thing I designed, and decided the overall scale of the model. It uses a worm-drive system similar to the front wheels. The tail boom extends some 18 studs out to the rear (through the yet-to-be-built rear doors) much the same way crane booms do. The rear part is then manually turned up 180 degrees and the tail rotor blades are manually deployed. The main rotor is lifted up and aft roughly six studs (through the yet-to-be-built roof), and the rotor blades are automatically deployed onece you turn the power on due to centrifugal force. Both main- and tail rotors are powered. I plan to either have deployable stub wings with an assortment of missiles/rockets/guns on each side, or possibly openable doors with deployable crew operated miniguns or something on each side. Will have to wait and see what there's room for Of course the body still remains, as well as some technical issues, but so far most things are working satisfactory. As for the name, I was planning to use Van Damme, or possible Damned Van, but piterx beat me to it. However I am satisfied with the current Van Helising, as it is a double wordplay Hope you like it, and hope to have some more work done by tonight -
[TC7] Bandits - Lights Out
jono rocky posted a topic in LEGO Technic, Mindstorms, Model Team and Scale Modeling
G'day all. I"m all for the bandits. Sometime you need to haul a lot of stolen stuff like pursuit vehicles for scrapp'n and to provide help in the heat of a chase and battle. "Its a truck" you say, "there slow" you say well 'Lights out' is a little different and this is why. Normal truck Nothing special. HOG steering. Battle mode Fold down rear guards to protect wheels and for side swiping. Extending front chassis to reveal second supercharged methanol drinking V8. You can never have to many V8's with that much power. Fold over half bonnet to become a car scoop. Fold down front grill for spikes. Gull wing doors with missiles on the ends. Pop out or off ( I'm undecided on which one ) battering ram fuel tanks....KaBoooooooom to the vehicle beside you. Possible sleeper box with fold over roof machine gun. Some sort of suspension. Trailer (may be) Push out rim spikes on second axle. Crane with harpoon gun, winch and claw grab. Saw blades, gotta have saw blades somewhere. Side car flipper arm/panel. Front compartment will house a massive jet engine. When in trouble the trailer will break off to reveal the jet turbine which stays on the back of the truck for an instant get away and fry the pursuit car behind you. I maybe a little too ambitious but the only thing stopping me is the hatted colors off all time Cursed black and clean White ( half of my Lego pieces). Here is what I have done so far. Lights Out by Jono Mckinlay, on Flickr -
Hi guys, Salut tout le monde, I'de like to share here some links to The NXT Step blog where is presented the ROBOT REMIX #1 challenge, where the MINDSTORMS team challenged some of the MCP (MINDSTORMS Community Partners) to come up with creative ways to remix a given Technic set and the Home edition of the EV3 set. for ROBOT REMIX #1 the Technic set is the brand new Sea Plane, a great Technic set that happens to be in the same color scheme ;) In this first post, is explained in a bit more details what is ROBOT REMIX http://www.thenxtstep.com/2015/08/robot-remix-1.html Then this week was presented the first of 4 remix, this one from master Isogawa http://www.thenxtstep.com/2015/08/robot-remix-1-exhibit-helicopt3r.html Stay tune for the presentation of the other 3 remix in the coming weeks. : . . baz
-

42009 Crane, questions and doubts...
Quaxo76 posted a topic in LEGO Technic, Mindstorms, Model Team and Scale Modeling
Hello, I just completed the 42009 crane, it took me about 12 hours spread over a week. I'm quite "rusty" with Technic but I used to play with them a lot as a kid, so I encountered no major problems during the build, just 2-3 small mistakes, easy to fix, especially because I always check for functionality as I build, so I can detect problems soon after making the mistake... :P Anyway, the crane is finished and looks wonderful, it's by far the best and most complex set I've ever built, but I have a couple of doubts. All the functions work, including the outriggers (which I hear are a common problem), albeit quite slow. Here's what I'm not so sure about: 1) When fully lowered and retracted, the boom does not contact the roof of the cabin, so the crane body has to constantly support the weight of the boom. I think it should be allowed to "rest" on the roof, so that the strain on the structure and LA's can be relieved. Did I do something wrong or is it supposed to be like this? 2) Whenever the motor is on, both with the clutch disengaged, and with whatever function is selected, the wheel train for the boom extension moves. Not very fast, and with not much torque - I just have to touch the wheels and they stop, without stalling the motor - but the torque is enough to actually retract or extend the boom, very slowly, if it's not loaded. Any idea where the problem might be, without having to disassemble all the crane body? 3) When the large LA's reach the end points, both raised and lowered, they start making a scary clicking sound. I suppose it's the internal clutch, but it's not as graceful as the white clutch wheels: when this happens, the whole structure actually shakes, and the wheels driving the LA almost seem to skip (but they don't). Again, is this normal? Is it going to damage some wheels, or something? 4) The knot to secure the winch cable to the pulley... If I leave the knot outside, it rubs with the gear and stops the movement. If I leave it inside, it messes up the winding of the thread. How did you secure/tie it? I think that's it for now... thanks in advance for any reply! :) Cristian -

[HELP] Storing Parts
murtaughf3 posted a topic in LEGO Technic, Mindstorms, Model Team and Scale Modeling
Apologies is this is a silly question but I'm extremely limited on space in my current home. Once I move back to my house in Tx I'll have plenty of display room, but util then it's the closet. At the same time I can no longer suppress the urge to build and collect. My plan is to start piecing some of my favorite sets together. With that in mind I'm curious if sets like the 8110 Unimog set and sets of similar size would fit into those $0.97 plastic shoe boxes from walmart. I'm afraid if I go to a container any bigger I'm going to have to fit multiple sets into once container, perhaps separate by zip lock bags. Or if anyone has suggestions for storing sets with minimal space it would greatly appreciated. I am not concerned with with keeping the original boxes. One last note, I've even considered getting plastic file folder type box and just dumping all the pieces in there, but then once I go to build all the sets I'm sure I'll regret that due to all the sorting involved. -

[MOC] RC Credo Econell 12
Gabor posted a topic in LEGO Technic, Mindstorms, Model Team and Scale Modeling
Hi! Sometimes we can hear in different Lego communities, that it's an exciting activity to build out of our comfort zone. And it's completely true! Well, it's my second creation at this scale, but the first one, which is a model of a real vehicle. (My Johnny English Truck was a replica of the functions only.) I'm very curious, what you think about it. The bus is a completely remote controlled 1:24 model. (length: 64 studs, width: 14 studs, height: 17 studs, approx 2050 elements) It's possible to drive it, to steer it, and to open and close the doors separately. You can find the technical detailes and a short text about Credo buses below, after the video. Nowadays Credo buses are well-known in Hungary. They are produced by the Kravtex-Kühne group. At the beginning, the group used a Czech license, but the Econell 12 (presented at the end of 2011) is completely Hungarian development. I often travel by Credo buses between the place where I live and the university. Unfortunately, they are usually older types. But I have already travelled by the Econell 12, its very comfortable. Picture of the real: If you search on Google for Credo buses, you may notice, that the wheels look very small. Its the speciality of Kravtex-Kühne group, some of their buses are produced with smaller wheels, so they are lighter and they dont need so much gas. Big buses with small wheels looked a little bit strange, but I think the Econell 12 looks great with the big black mudguards/fenders. I think the new front and rear panels with the black frames around the lights are fantastic, too. Behind this link you can find a lot of pictures about the real Econell 12 and other Credo models, too. Choose option 'Galéria'! And now pictures: The most tricky part of the bus was the front. It's only 3 stud long, but contains as many crazy building techniques as possible, and one more! I'm really proud of it. I will show you later, how I built it. I think it's the minimum. Technical details: The driving mechanism contains two L motors, both motors drive one axle and this axle drives the differential. I used a servo motor for the steering. The doors are opened and closed by two M motors. The chassis is very long, but I had to put two holes in it, because the doors need space. Due to the holes it was impossible to find place for everything at this level. But there are a lot of space under the roof, so the really interesting things are under and around the air conditioner. The spinning of the motors is slowed down by worm screws. The 1x3 technic half liftarms convert the spinning to horizontal motion. The video shows how it works, these pictures below show how it looks like. More pictures on Mocpages, as always! If you visit Hungary, don't forget to try to travel by old Ikarus buses and new Credo buses! Thanks for watching! -
[REVIEW] 42026 Black Champion Racer + Unboxing + Speed Build
DamonMM2000 posted a topic in LEGO Technic, Mindstorms, Model Team and Scale Modeling
My first Technic review of set 42026 Black Champion Racer with Pullback motor. 138 pieces. Includes unboxing and speed build! How do you like my new video editing style? Comment below! -
Could someone please tell me step by step how this is done. I opened one part of my model then imported another and was able to build what I wanted. But, in LPUB and LDVIEW only the building steps for the original part were there. When I do Mutlipart, then new, and repeat, nothing shows up in the edit panes. I'm 99% done with this first attempt at making building instructions.
-

[MOC]Tow Truck
legosamigos posted a topic in LEGO Technic, Mindstorms, Model Team and Scale Modeling
Hello Eurobrickers! Today I would like to show you a tow truck. Few months ago I`ve started to build my tow truck and finally I finished it, does it mean, I finished earlier, but I had to prepare a video. I wanted to use the in my tow truck, but unfortunately, I had to resign. The tow truck is full motorized and it has 3 lockers for equipment on each side, working fake 8 V engine and above all, the main functions of the tug, and so drive, steering, outriggers, winch, towing arm with folding and rotating fork and a tower with a sliding and lifting the boom. In the lockers there are some tools, spare wheel, 2 battery boxes, 2 fire extinguishers and arrows warning. I built also a Hot Rod, so will be 2 MOCes in one. And then I had to rebuild the tow truck, does it mean, I added a fairing and... ...I extended forks. before and after Dimensions: Length: 75 cm Width: 20 cm Height: 22 cm Max. heigt with with extended boom: 77 cm Weight: but I think it is heavier Face to face with 8285 set and compare with 8285 i MOD 9397 set Power Functions: drive - XL motor steering - M motor outriggers - M motor lifting boom - L motor extension boom - M motor towing arm - M motor wheel lift - M motor winch - M motor 4 x IR remote control 4 x IR receiver 2 x battery box 3 x extension wire (20 cm) Full Brickshelf gallery, Bricksafe gallery Sorry for a long video ;) -
[MOC]Lego Mosaic With Ghostbusters And Lego Technic Tow Truck
legosamigos posted a topic in Special LEGO Themes
My MOC tow truck together with mosaic with Ghostbusters and -

[MOC] 10x6 Foden Crane Truck W. Extending Trailer
Kiwi_Builder posted a topic in LEGO Technic, Mindstorms, Model Team and Scale Modeling
Hey all, My latest MOC is modeled off of a 10x6 Foden S108 crane truck tractor unit run by Mackenzie Transport of Auckland. There are some differences between the real truck and my MOC such as their trucks are white but mine was made in red due to parts constraints and the other difference being that the original Palfinger truck mounted crane on the truck has a five-stage extension on it but my version only has two-stage extension because that was the most I could have before the crane arm became too large and out of proportion. Photos of the original truck can be found here: https://www.flickr.c...ith/6161598123/ MOC's Features: HOG steering Live axle suspension on the rear axles Pneumatically controlled pendular suspension on the front axles Stabilizers Locking turntable Tilting cab with straight six piston engine under the cab Full interior of cab with suspended seats Motorized truck mounted crane with two-stage extension Custom stickers LED running lights The combination with everything expanded This photo is one of my favourites and shows the custom stickers of badging and the original number plate from the truck The truck on its own Everyone's favourite photo, the under shot This photo shows the controls for the crane (the PF switches) along with the switch and pump for the front air suspension The engine without the cab attached The interior The mechanism for seat suspension LED running lights Now for the trailer, a three axle extending trombone trailer. It has full independent suspension, landing gear and of course an extending deck. The trailer extends 29 studs, bringing it to a total deck length of 122 studs/97.6CM. Trailer when extended with lattice boom load Trailer when retracted Trailer suspension system Underside when extended Underside when retracted Another photo of the combination Statistics: Total length with trailer extended: 173 studs/138CM Length of truck: 77 studs/61.6CM Width: 19 studs/15.2CM Height: Truck weight: 2.4KG Trailer weight: 0.8KG Load weight: 0.2KG Pieces count: 4000 +/- Time to build: 60+ hours This is the first time I have used a white background instead of no background and I am very pleased with the results and will definitely do it again. As always more photos can be found on my Bricksafe and for the first time, a video can be found on my YouTube channel! I hope you enjoy my MOC as much as I do Bricksafe: http://bricksafe.com...e/completed-moc YouTube: https://www.youtube....876u7IUZPRGhwrQ -
Hello Eurobrickers! Simply a Hot Rod without Power Functions. The Hot Rod has steering, folding roof and opening doors, hood and trunk, and working piston engine length: 36 studs width: 17 studs height: 15 studs weight: 531 grams BS gallery (after public)
-
Hello! This is my first message on eurobricks and i'm glad to present you my latest creation - manual model of Hummer H2 in 1:19 scale. Number of parts: 815 Features: - RWD (unfortunately, not 4WD), working mini V8 piston engine under the hood - "Hand of God" steering with working steering wheel - Openable doors, hood and trunk - Model can be easily modified into SUT version Video: Instruction for this MOC: - LDD file with exploded view http://bricksafe.com...Instruction.lxf (model does not include 2 parts in front lights shown below)