Search the Community
Showing results for tags 'power functions'.
Found 368 results
-

[MOC] Spinning Gimbals
sheo posted a topic in LEGO Technic, Mindstorms, Model Team and Scale Modeling
The origins of the idea: The core of this model consists of three rings which can independently rotate around three perpendicular axes. These pivoted rings are called gimbals. Gimbals have been used in a wide variety of engineering applications since ancient times till modern days. Gimbal suspension is used to provide stability to objects inside unstable environment, e.g. compasses on ships and gyroscopes on planes. Furthermore, the simplicity and effectiveness of gimbals often attracted artists' attention. In science fiction and fantasy, gimbals have been used to represent complex contraptions capable of creating new physical effects and even manipulating the very fabric of reality. Some of the examples include the machine from the 1997 movie Contact, the gravity drive from the movie Event Horizon, mass relays from the video game series Mass Effect and even the Time-Turner from the movie Harry Potter and the Prisoner of Azkaban. LEGO implementation: The idea of this model is to set gimbals in motion. Complex transmission allows each of the three motors to independently operate one of the three rings. Therefore the contraption is very easy to control. The rings and the frame are perfectly rigid and secure. The design of the model is intentionally minimalistic so that it could be used as a part of larger models. Video demonstration: Simple version: There is also a simplified version of the model with only two rotating rings and one motor. It may be also actuated by hand. Video demonstration and speed test of this version: Afterword: If you like this idea, please support my project on LEGO Ideas and share it with your friends! Thank you for your attention! -
.thumb.gif.ad7c8d88b264ee812194946c07404504.gif)
[MOC] Automatic Motorized Compressor
mocbuild101 posted a topic in LEGO Technic, Mindstorms, Model Team and Scale Modeling
This MOC came about from my wanting of a super compact all-in-one Lego compressor, and after trying many different auto valve designs (and about a week of building), this is what I came up with: Video: Features: Air tank Automatic pressure switch M motor and 6L mini pump compressor Very compact 15 x 11 x 7 stud size Easy removal of battery box Pneumatic tube lengths: 1x 3L (2.4cm) 2x 10L (8cm) 1x 14L (11.2cm) All the pneumatic tube lengths listed above (and most of the other parts) are available in 8110-1 Unimog U400. Instructions are available on Rebrickable. The compressor uses a single 6L mini pneumatic pump, but can easily be modified for two pumps. The automatic cut-off pressure can easily be adjusted by changing the strength of the rubber bands attached to the pneumatic cylinder. -
Finally getting around to posting some of these... I've been doing a bunch of small projects this year that I don't feel warranty their own thread, so this thread is going to be a home for said small projects. PRR MP54 Some years ago I built a set of PRR P54 coaches to go with my PRR T1. At the time I thought a fun future project would be to convert the cars to MP54 spec - the EMU version of the same car. Well, the future is now! Over the past few years I've been trying to build trains using all of various the LEGO motors, and the PF train motor was still on my hit list. I don't like the PF train motor that much because it doesn't have any low-speed torque, and the wheel spacing hasn't been correct for anything I've made so far. Recently I remembered about the MP54, and I thought it would be the perfect application - fast and doesn't need a lot of torque. Here is one of the original P54s as built: And here is the MP54 conversion: Of course the main difference is that there is a battery box, receiver, and motor in the MP54, but I've also updated the original model over the years, most noticeably by slowly collecting all the frames and glass. Other minor changes include the addition of headlights and a more vanilla bogie design to match the PF motor frames. Of course you want to see it go: I was really entertained by how fast it goes! Usually I prefer gearing down such that you get more torque and less speed, but watching this zip along is a fun change of pace. The pulling power isn't actually all that bad either, but as expected, you need to be going pretty fast before the PF train motor is generating any torque. One more interesting thing is that I'm actually using BBB wheels on the PF motor instead of the usual tyred wheels. I originally tried with the official wheels, but I due to the low torque I felt like it was really bogging down in the corners, so I tried the BBBs. This is a much smoother configuration, and it doesn't feel like I'm losing all that much grip. It can definitely pull at least the other two P54s and maybe another car or two. Okay, more to come soon. Hopefully.
-
.thumb.jpg.050f28ccd893f68d8416233f594d9f3d.jpg)
LEGO Power Functions Electromagnet
shadow_elenter posted a topic in LEGO Technic, Mindstorms, Model Team and Scale Modeling
Hey builders! Recently I made a LEGO power functions laser (topic can be found here), and it got me thinking... what els can I build? That's how I came to the idea of making a LEGO electromagnet! Making it was actually a whole lot easier than making the LEGO laser. The LEGO laser required a 9 volt to 5 volt converter and reversed -polarity protection. The electromagnet was already made for 9 volt and it does not care about polarity. I just got the motor out and unhooked the 2 wires, then connected those 2 wires to the electromagnet and... it worked! I'm amazed by the strength of this small thing, under good conditions (unpainted, flat metal) it can lift up to 6 kilo's! I have no specific idea of how to use it in MOC but I'm sure I'll think of a good application for it. All suggestions are welcome by the way Tell me what you think ------------------------------------------------------------------------------------------------------------------------------------------------------------ BUILDING LOG weight: 78 gramscapacity: 6 kilo+ To make one yourself you need: PARTS: - a 9 volt electromagnet (ebay is a good source, I bought mine for 5.46$). - some glue (I used hot glue) - soldering tin & shrink tube TOOLS: - flathead screwdriver or prying tool - soldering iron -lighter (for shrink tube) First you need to open up the PF XL motor housing, this is quite hard. I found the best way is to squeeze it just a bit in a vice so the outer shell becomes oval and you can stick a small thin screwdriver in the gap to open it(mind the position in the vice!). This is what you will find on the inside: Disconnect the 2 wires attached to the motor, put the top half of the casing is a vice and dremel out the center rougly to the size of you electromagnet: Then make everything perfectly round with a small file untill the electromagnet fit's snug in the housing: After pressing it in the housing, get 2 lego beams and attach them to the 2 forward facing holes. this way you can make the magnet perfectly flush when mounted in a MOC: Then seal the electromagnet firmly in place using glue (I used hot glue). Next you solder the 2 wires coming from your electromagnet to the 2 wires that were attached to the motor (the inner 2 strands of the 4 strand LEGO wire, polarity does not matter). Make sure you use shrink tube to isolate both wires! Then glue the motor plate (holding the LEGO wire) in place and test the magnet! If it works close it up and you're done!! I hope you enjoined this build log, if you have any questions just let me know! -

[TC15[ Motorized BiCopter
Zerobricks posted a topic in LEGO Technic, Mindstorms, Model Team and Scale Modeling
I started working on this model many weeks ago in Lego Digital Designer first. The whole concept started with the quarter circles from BWE, which are able to perfectly accomodate the small rotors. I was heavily inspired by the (movie) Avatar's rendition of helicopters. After a lot of tinkering in LDD, it was time to start building in real life: It was here I discovered I made a big mistake. The control stick located in the cab used to tilt the rotors was reversed! I had to go back to the drawing board and correct the control mechanism. Few days, fixes and improvements later, this is what the final model looks like: I wanted the colors to randomly switch from yellow to make it look more eye-striking. Where possible I used black 2L pins instead of the blue ones. As stated in the topic name, this is a motorized model, powered by the small LiPo battery box which is hidden in the tail, next to a single M motor: The single M motor powers a total of 3 functions: - Drive rotors (always engaged, spinning in one direction only) - Opening cargo doors and rear ramp (powered by a gearbox) - Working winch (powered by a gearbox) You can see the driveline of all the motorized functions here: The red mechanism at closest to the M motor makes sure rotors are spinning in one direction only, irrelevant of which direction M motor spins. This way changing direction of the gearbox does not change in which direction rotors spin. Gearboy in front switches between openining doors+ramp and a winch. The doors and ramp are actuated by a single actuator located right behind the cockpit: The rear of the cargo doors is connected to the ramp via bewel gears, so both open at once: I also bult a small container which can be easily lifted by the motorized winch: The container can easily fit inside the cargo bay area: You can see the finished model's video below: -
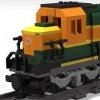
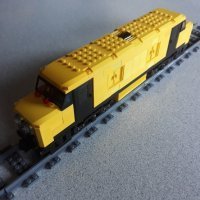
I created this boxcar to push my unpowered locomotives. It has all necessary Power Functions equipment with 2 train motors. It allows me to create locomotives without having to incorporate power. The IR receiver is mounted sideways because I run my trains on a wall mounted track about close to the ceiling (see picture). In the future I hope to add a rechargeable battery and power pickups (for a hybrid 9v/Power Functions system). Thanks for looking! Unfinished_Projects Designed using Stud.io 2.0 and rendered with POV-RAY
-

MOD - 8416 Fork-lift Motorized & RC
Chilekesh posted a topic in LEGO Technic, Mindstorms, Model Team and Scale Modeling
Hi everyone, Here's my modification of 8416, fully motorized and remote controlled. An additional function is the working & tilting steering wheel. The PF elements used are: - 1 M-motor for driving - 1 Servo motor for steering - 1 M-motor for lifting - 1 M-motor for tilting the lifting assembly. - 2 IR receivers - 1 Rechargeable battery box Rebrickable: http://rebrickable.com/mocs/Chilekesh/8416-fork-lift-motorized-rc Bricksafe: http://bricksafe.com/pages/Chilekesh/8416-motorized (*.lxf file can be downloaded here). Any suggestions on improvements are very welcome. Happy building! -

Review: Powered Up! 88006, 88007, 88008, 88009, 88010, 88011
mostlytechnic posted a topic in Special LEGO Themes
Lego 88006, 88007, 88008, 88009, 88010, 88011 Powered Up! components Thanks to Lego and EuroBricks for making this review possible! Since Lego is switching to a new system instead of Power Functions, they wanted people to check out the new parts. Name: Powered Up Set Number: 88006, 88007, 88008, 88009, 88010, 88011 Pieces: n/a Price: varies, see below Minifigs: 0 Theme: Technic, Train, Boost, and Creator Year of Release: 2019 These sets are technically new, but the parts aren't. They've been available in the Boost and Train sets for a while now, so lots of people have already looked at them. Sariel did x-rays of all the PF and PUP devices (and older too!) JopieK did a teardown of the PUP parts and posted it here on EB. treczoks is putting together documentation on the protocols and others are doing similar. This review will be different than my normal ones, since it's not a standard set. It's not really a "set" at all. I want to compare the new parts to the old PF system, both in function and design. So first, here's all the PF and PUP sets: A couple of them don't have any prices that I've seen online yet. The highlighted prices are ones that I saw listed on the Lego US site, but they're not online now (12/20/2018). Obviously, all the Lego electronics are pricey. But for comparison, to get a full train setup (speed remote, battery box, motor, IR receiver) you'd be at $55. The equivalent PUP setup (motor, remote, hub) would be around $90 (guessing at the train motor price). The bluetooth electronics are much more complicated and expensive than infrared is. A simple motorized set (something like the new Vestas windmill, or the Roller Coaster, or similar) would be very expensive in the PUP ecosystem, since there is no "dumb" battery box. It's possible that Lego will add one at some point for those set types, or they'd need to keep PF alive. There's also a few gaps in the lineup. The WeDo motor, which is PUP compatible since it's in the Batmobile set, is not available standalone. I'm actually really curious why they used that motor in that set instead of the "PUP Medium" motor. Also, there's only the one motor so far. There's no XL or other "big" motor, so we'll have to see if the PUP Medium motor is powerful enough to handle the XL's loads. The switch is not really needed anymore, since the hub has controls built in. I can see extension wires coming - I'm sure builders will want them, and it'd be simple enough. As for the much-desired adapter wires, that's a bit tougher. It'd be great to control PF motors from a PUP hub. However, the PUP system identifies the motors, so the adapter cable would have to identify to the hub that it's a PF motor. The hub would not know which motor it was. Enough of the talk, let's look at the parts. The Box Bags IMG_4289 by mostlytechnic, on Flickr These parts come in individual bags. Anyone who's ordered PF components individually will be familiar with them. These aren't sets that you'll find on a store shelf (except maybe a Lego store), so the outward appearance and extra space taken up isn't worth the cost to box them. The Contents IMG_4291 by mostlytechnic, on Flickr Here are the parts themselves. The Interesting Parts IMG_4291 by mostlytechnic, on Flickr I always have an "interesting part" section in my reviews to highlight new molds, colors, rare parts, etc. But here, they're all interesting so I just repeated the photo. If that annoys you, just keep scrolling and see new images below. The Manual IMG_4290 by mostlytechnic, on Flickr For a company that normally has zero text in their manuals, wow. Here's some of the paperwork that comes with these, because they have electronic parts. Each document is in THIRTY FIVE different languages, so each paper is only a couple sentences. Each of the battery-powered parts has a "how to put the batteries in" flyer. Every item had a paper saying "Protect the environment by not disposing of this product with your household waste. Check with your local authority for recycling advice and facilities." Yes, every single item had that included. Battery Boxes IMG_4307 by mostlytechnic, on Flickr Here are the current Lego battery boxes. From left to right is the 6 AA box, mostly used in Technic, then the Boost Hub, currently only used in the Boost robotic set which holds 6 AAA batteries, then the PUP Hub, also holding 6 AAA batteries, and finally the PF 6 AAA battery box, commonly used in trains. The new hub is the exact same size as the 6 AAA box, and it has the green power button in the same location. However, the new one has the connections on the end instead of on top. The Hub IMG_4302 by mostlytechnic, on Flickr First, we have the basic Powered Up hub. This is the 6 AAA box, which is 3 parts. The batteries go into a "cartridge" which snaps into the base. It might be possible for a rechargeable module to become available at some point, but there's no external charging port like the PF rechargeable box, so it'd require taking the box apart still. The Boost Hub IMG_4293 by mostlytechnic, on Flickr Likewise, the Boost Hub uses a battery "cartridge." However, it's part of the base so it would be possible to have a rechargeable battery module with a port in the bottom. The Motor Lineup IMG_4295 by mostlytechnic, on Flickr The new PUP motor (sometimes called the Boost motor since that's where it's currently available) is almost as large as the PF XL motor, but it's studded. The only pin connections are on the face of it. The PUP motors do have a big feature that the PF ones don't. They have built in rotary encoders, like the Mindstorm motors do, so programmable systems can see how much they've turned. The motor can actually be used as an input sensor too - put a tire on it and have a dial control! This only works with the Boost hub though since you need the programming capability to do anything with the information. The Train Motors IMG_4308 by mostlytechnic, on Flickr The new train motor is identical in shape and size to the PF one. The only outward difference is the cable- it's shorter and wider. The Plug IMG_4298 by mostlytechnic, on Flickr As you can see, the new plug is smaller, but the cable is wider. Overall it takes up less space, since once it's plugged in, the hard plastic sticks out one stud. The old connector was fully exposed all the time. It'll take a little different building design though, since the new plug sticks out from the battery box. The Sensor IMG_4300 by mostlytechnic, on Flickr This, to me, is the oddest part of the inclusion in this shipment. This sensor comes with the Boost robotics set. In that setting, it makes sense, and I understand why people would want to buy it alone (to add more sensors to their design). However, without the Boost set, it's usefulness is limited. It does nothing useful when connected to the regular Hub. When it's connected to the Boost Hub, it's a great color and distance sensor with lots of usage. I'm actually now trying to piece together a Boost set out of my parts collection to try all the Boost designs, since I have the Hub, Sensor, and Motor here. But to the majority of people using the new PUP system, they won't see any use for the sensor. Yet. What if, down the road, Lego sells a train set that includes the sensor and some software updates to the basic Hub? It'd be trivial then to have some colored tiles on the train tracks so that the train could be programmed. Make noises at certain locations, stop, etc. The current Duplo trains do that! So why not bring that functionality to the older kids and AFOLs? This DOES need a software update from Lego though, since like I said, the smaller Hub does not allow any programming or recognize the sensor, as far as I can tell. And the Boost Hub is too big for a standard 6 wide Lego train. The Remote IMG_4304 by mostlytechnic, on Flickr Speaking of trains and controlling them, here's the new remote. It is TINY! Granted, I'm a big guy (6 foot 3) with big hands, but this is small. It's certainly smaller than the PF speed remote. And personally, I'm torn on the functionality. If you're not aware, the Hub can detect what motor is connected and act differently based on that. If you connect the Medium motor, this remote acts like the old small PF remote - the buttons give you 100% power for as long as you hold them. Release the button, and the motor stops. If you connect the train motor, this remote acts like the PF speed remote. The + and - buttons step through speeds and it keeps running. The red button stops it. This makes sense for kids and keeps the line of parts simpler, but it removes advanced functionality. What if I want to run the medium motor at lower speed? I can't. The top center of the remote is an RGB LED. It lights up the same color as the hub to show what units are paired together. The PF system allowed 4 "frequencies" with 2 channels each. The PUP system has 5 "frequencies" with 2 channels each. This remote also removes the need for the PF switch. You can turn the button sections of this remote. So if you want one motor running reversed, just turn that set of buttons upside down. If you want to steer left and right, you can turn the buttons sideways. One thing you cannot do is modify the remote, the way the PF remotes would be modified, with addon parts. Lego themselves has done this - like the 9398 Crawler set: The new remote has some pin holes on the sides, but no way to attach to the buttons. The App IMG_4311 by mostlytechnic, on Flickr The big new function with the new system is the app. There's the Boost app, which allows programming the Boost Hub, and the PUP app, which controls the basic Hub. This app is very limited. You pick which set (currently the Batmobile, Freight Train, and Passenger Train), and then appropriate controls appear. It's all preconfigured and not modifiable. It doesn't allow you to design your own controls the way SBrick and others do, so if you want to make a new vehicle, you have to control it like it's a train or Batmobile (using those particular motors, since the hub knows what is connected!) I strongly suspect Lego will come out with another app (or a major update to this one) to control custom builds, and frankly, I don't know why they haven't yet. The Performance, Speed IMG_4573 by mostlytechnic, on Flickr I mounted a tire on each motor (both PUP and PF) and checked the RPM at full speed. Here's the results: As you can see, the PUP M motor is closer in speed to the XL than the other PF motors. The PUP train goes slightly faster at full speed than the PF train motor. I checked all the speeds, and it ranges from about 500 to 1800. The Performance, Power IMG_4574 by mostlytechnic, on Flickr I also checked the force each motor can generate. As I don't have a proper torque meter, I made my own rig. In the photo, it was trying to lift a heatsink from a computer. That was too easy, so I moved on to a heavier weight. The XL motor was still able to lift that, but none of the other motors could. The measurements on the train motors were at full speed. One thing I noticed - the PUP train motor would cut out after a few seconds at a stall. When I hit stop, it would be immediately ready to run again, so I don't think this was the internal thermistor cutting it out. I think the hub is monitoring the speed and shutting it off when it wasn't rotating. I should try having an actual train drag a load and see what happens... The Conclusion So, what's my conclusion? Overall, I see what Lego wanted to do with the new PUP system. It eliminates the IR weakness, removes the need for a separate receiver, and updates the system to be "app-enabled" like all the cool toys are now. I think that also brought some new limitations that Lego CAN remove, but hasn't yet. I'm looking forward to seeing the PUP system appear in Technic sets to see how Lego handles that. That will be a while though, since the only motorized Technic set in the first half of 2019 is the Stunt Racer, and it still uses the PF system. That COULD have been a great set to use PUP in, similar to the Batmobile, but for some reason they chose not to. I'm guessing the M motor doesn't have the speed for the stunt racer and they didn't want to put the WeDo motors in? That doesn't seem like great logic to me, and I really hope there's more motor options to come. The PUP M motor is too big and too slow for a lot of Technic applications. Right now we're in the transition phase and I hope Lego is listening to the various categories of users. AFOL train users want to connect multiple motors on the same channel to run big trains. Technic users need smaller motors. Creator needs a simpler, cheaper system. And almost everyone needs customizable app interfaces -
Hi! As a new member of our large society I'd like to present you one of (as I humbly think) my greatest models so far - the humanoid's arm. Creation has been building by mine for January and February this year. In April it has taken a third place in local competition for students and, as if that wasn't enough, in June I was also presented it at Warsaw, Polish capital. Here's also a humorous entry featured it at Brother's Brick blog: https://www.brothers-brick.com/2018/04/17/judgment-day-starts-with-a-technic-arm/?fbclid=IwAR1f4tKQdujN5YtRemM4K3OmIlpCGO6GcdgWRsEgeJDDWpn7Ayb3K4tl-hs#more-107955 The arm itself is a combination of pneumatic and electric (Power Functions) componenets controlled remotely or by panel with system of valves. It's quite large, even slighty more than actual human's arm. It includes a total of 6 motors, 2 IR receivers, 7 pneumatic cylinders and 4 linear actuators. Features prehensile palm with tendon-like controlled fingers, natural range of thumb's movement, fingers abduction, movable forwards and backwards wrist axis, rotated and elevated forearm. Just look: Also let's see some photos: If you liked it, I'll try to upload some photos and videos of my robots soon! Sorry for my poor English :/
-
Like many others, I felt the latest release of the Hogwarts Express was lacking. In turn, I have stuffed an M motor in the boiler, radically altered the rods (based on the Emerald Night), put the PF receiver and battery box in the tender, and added doors to the carriage (Again, a la EM). The overall effect I think is much better visually and because I can run it at events now. I've included an internals picture so anybody wishing to see how it was done and get ideas is more than welcome to. The last one links to a video of the train in action. I can't remember how to link a Flickr video right...
-
42095 RC Tracked Racer replica
Zerobricks posted a topic in LEGO Technic, Mindstorms, Model Team and Scale Modeling
I spent the whole night building the replica of ucoming 42095 42095 RC Tracked Racer and here are the results: Of course there are some minor differences compared to the upcoming set, mainly in the lack of correct rear sprocket wheels and mirror elements, but I think you can get a basic idea of what to expect from the set. -

[MOC] Tracked Loader
Superkoala posted a topic in LEGO Technic, Mindstorms, Model Team and Scale Modeling
Hello Eurobrick. Let me introduce you my "holidays' MOC" : the tracked loader. It is the merging of a traditionnal articulated wheel loader and the tracks I build few months ago for the Cossack. In the main lines: it is a 4x4 vehicle with a steering by articulation and a rear pendular axle. The bucket is elevated by a pair of linear actuator and tilted by a single actuator. The rear hood is openable and reveals a functionnal mini V6 engine and an easy access to the BuWizz. The loader is equipped with a minimalistic cabin (seat and fake steering wheel) and has access ladder and platform with handrail. All the images are available on FlickR There is 4 PF-M motor used in this MOC, one for each function: – Propulsion – Steering through two mini-LA – Elevation of the bucket through two LA – Tilting of the bucket through on LA All the functions are controlled through a single BuWizz. Special note regarding the engine : The V6 engine has been designed once all the motor and Buwizz were installed. As a consequence, only a 5×8 studs hole was available. The V6 engine fits in this space and is functional. See the video here below for more detail. Thank you for reading ! If you're interested, the complete review of this MOC is available on Superk-Technic.com -

MOD - 12 volt wheels with axle hole for Power Functions motor
Paperinik77pk posted a topic in LEGO Train Tech
Hi all, since 7777 book came out, I've always wanted to integrate Trains and Technic worlds. Back in the 80's the problem was the complete lack of train wheels with a Technic axle hole. It was solved with RC trains a lot of years later. Therefore, I can convert a 9v train to PF without too many problems (aesthetically speaking). But for 12V trains it is different. Wheels are made in a specific way, they have the hole for connecting rods, they're more "fat" than RC/PF wheels. Frankly, I do not like 12V trains converted to 9V/PF standard bogies. But I like the PF motor, its speed, the possibility to increase speed gradually...and the fact it keeps the central hole for third wheel. So, in these years I repaired a lot of 12V motors...and some were really in bad shape. Look at the right wheel, it is completely destroyed inside. So I decided to try to implement my solution to connect standard, intact 12V wheels to technic axleholes (which I do not list here, since it was not satisfying). First, I got a standard Technic bush, and cut it a bit. Then I put it inside the damaged wheel hole. It fits fine, but needs to be glued. Once glued, it is time for some testing. The 6-long axle goes right in - but the red ring coming out from the wheel is too thick. So I prepared another wheel (gray bush). This time I cut the bush a bit shorter and fits right. The 5.5 axle is perfect , so I'll need to cut two 6-long axles to the right lenght. And this is the result - this is my 7740 no°3, totally converted to PF. It works fine, but as you all can imagine, it is all made by hand and bushes are not machinery-centered. Therefore the locomotive is not stable as I would like. For the moment, better than nothing! -
First off, I would like to say that, no, I am not terrible at maths! All shall be explained! (Sorry, this may be quite a lot of reading!) The Back Story: First aspect: Some weeks ago, I was having a general look for sets that might be of interest to me. I stumbled upon a very good deal on the Lego City Bus Station (Set no. 60154). I decided in a spur of the moment purchase to pick up 2 sets, with no real plan… That’s what sowed the seed! Second aspect: In the not so distant past, I had purchased a huge Lego haul from eBay containing many train set items and accessories. In amongst this, was an incomplete copy of the Lego Freight Rail Runner (Set no. 4564) – (maybe 80% complete) – at the time I didn’t really know what to do with it. Over time I harvested the 9V motor, wheels, couplings, bogie plates, wagon parts and straight track – basically all the good stuff! Now, I’m a big fan of seeing people doing set combining! I have never seen anyone attempt something like this! (Correct me if I’m wrong!) The Hypothesis: “Is it feasible to make a decent looking locomotive of any kind, combining Sets 60154 and 4564? – Using minimal significant other parts, but in cases where necessary only using parts I currently have, and not resorting to ordering things. The locomotive should ideally use Power Functions with 2 motors, lights are not necessary. Also, the finished model should be sturdy, strong, and able to be played with by children.” Answer, Was It Possible? Yes, and in my opinion, it turned out rather well. What I attempted to build was a massively simplified Class 37, with much artistic licence! Here is the finished product: Thus, the idea for “60154 + 4564 = 37?” was born! What do you think? Any questions, thoughts, or criticism will be much appreciated. Regards, James :)
-
[AMS-2][MOD] Lego 9394 RC Dragster - Powered by a buggy motor!
mocbuild101 posted a topic in LEGO Technic, Mindstorms, Model Team and Scale Modeling
Yes, it's an airplane that can drift! (or rather do doughnuts) But first, I think the video is the best introduction: Cool, isn't it? I was actually very surprised how well it worked when I first tested it - especially considering how bad my previous MODs were.. (in fact, it's probably the only RC set MOD that I've done that worked at all!) It was quite a challenge to fit all the electrics in such a small body, and was actually the main reason why I only kept one of the original functions... Features: Steering - powered by PF servo. Drive - geared down 3:5 from fast output of buggy motor. Motorized wings (not RC) - powered by PF M-motor. Easy to remove battery box - if not using rechargeable battery. Other Specs: Weight: 650g (with rechargeable battery) Original functions kept: 1 (out of 3) Theoretical top speed: 14km/h (at least) Links: YouTube: https://www.youtube.com/watch?v=6pTW9vclg0c Bricksafe: https://www.bricksafe.com/pages/mocbuild101/9394-rc-dragster-mod Contest voting: https://www.eurobricks.com/forum/index.php?/forums/topic/162664-ams-2-dragify-your-set-voting More photos: Enjoy! And don't forget to vote! -
 I finally had time to play with the Powered Up elements from the new Train sets. They surely don't represent the complete PU system yet, but we can draw a lot of conclusions from them:
 -

[MOC] - Power Functions Joystick
Scorpion posted a topic in LEGO Technic, Mindstorms, Model Team and Scale Modeling
I was playing around with power functions remotes, trying to bash out a joystick-style remote control for my latest project, but all my efforts were unsatisfying to me. So I searched around for some designs and I came upon Technic Dragon's excellent design. Having found it to my liking, shamelessly ripped it off drew inspiration from it to make this remote. The design is practically the same, I only made small improvements to decrease the part count. I hope you all find it to your liking as well. Here's the LDD file. Hope you enjoy it! -

Dual PF Battery Box Power Tutorial
Boxerlego posted a topic in LEGO Technic, Mindstorms, Model Team and Scale Modeling
Hello fellow LEGO enthusiasts, I am Boxerlego. I want to Introduce myself along with this technical tutorial on a dual PF battery box setup. This no hack, this is science and knowledge along with real experience with each of the devices and their respective function. I will explain thoroughly why this works and why it is absolutely safe for the IR receivers and motors. First thing is some battery safety. It is very Important that you are using the same type of batteries for both the battery boxes. Never connect up two dissimilar types of batteries together. Connecting two 9 volt battery boxes together is very safe to do, nothing is going to "burn up" on you when connected together as mentioned. Each of the electrical connections are made entirely out of Lego and combines both style of electrical connections to get working. There will be a simple alternative method to hook up the dual battery setup only requiring the PF extension wires. Moving to motors. I suggest on using the PF L or XL motor or a 5292 buggy motor with this battery setup. This is not for powering servo motors or micro motors old the old 9V motors. It is important to know that there is a resettable fuse protecting each of the suggested motors along with the battery boxes and IR receivers. I do not recommend putting the voltage over 16 volts on the Lego motors. Most motors typically can handle 12 volts. There are many things to understand about the electrical function that is at work here. I have created Two simple pictures detailing the two electrical functions and how they both end up at 18 volts. I will start with the #2 picture. The #2 picture represents when the battery boxes are connected together in series providing you with a +18 volt power. Understand that all the electrical wires are connected together to establish a electrical path, directly connecting both the battery boxes together to function as one combined battery box for the motor. The #1 picture represents using the dual IR receiver connection and how you can safely create a voltage gap between a positive(+) and a negative(-). Neither of the IR receivers is ever exposed to the same load the motor is receiving. Instead, each of the IR receivers is carrying the load of their perspective battery box. This voltage gap creates the theoretical 18 volt supply for the motor. You will need 2x 9V PF battery box 2x IR receiver 3x PF extension wire 2x 9V Motor Wire 1x IR switch remote 1x of the suggested motors I will start with the two 9V motor wires... Connect the two 9V motor wires on a 2x6 plate like so... Look carefully at the short wire and how the electrical contacts are Aline... Connect two of the PF extension wires together with a 2x2 plate... Put a red and blue 1x2 plate on to the PF extension wires... Connect the PF extension wire setup to the 9V motor wire setup... This is what is should look like... Hook up your battery boxes with the IR receivers... (Important Note: If you are doing this with NO IR receivers, the switches on the battery boxes should be turned on opposite directions of each other when connected with the motor.) Make sure both IR receivers are set on the same channel... Connect the blue PF cable to the blue terminal on one of the IR receiver And then On the other IR receiver connect the red PF cable to the red terminal... (Note: If your doing this with out the IR receivers. Connect each of the cable to a separate battery box. Remember to switch the battery boxes on in opposite directions) Connect both the switches on the IR remote together as one and set on the same channel as the two IR receivers... It is very Important that the two polarity switches on the IR remote are switched opposite of each other... The 9V motor wire is where you will connect your motor to... When connecting up a PF motor simply connect the PF extension wire on top of the 9V motor wire and the PF motor on top of that and you ready to go. Here is a test to see if this increased voltage will cause any kind of damage to the motor when pulling up this 7.5 lb weight. The first test shows the safety fuse in action. Next I put the M motor to the 16 volt power pull test. The final video is a demonstration that no matter how big or small the battery is, a motor will behave the same as long the volts are the same. Edit: The information in this tutorial will be improved upon periodically. -

Lego Technic 9397 Logging Truck RC Mod with Sbrick
TmoneyTechnic posted a topic in LEGO Technic, Mindstorms, Model Team and Scale Modeling
Hey guys, sorry I haven't posted in a while. I've had the clips to make this video for 2 months now, but not enough time to edit. Anyhow, with that said, here's what I have done. I have rebuilt both of the rear axles so they can be driven by 2 L-Motors, and rebuilt the front axle so that it can be steered by a servo, and still be able to fit an engine and have room in the cab for other motors. I also rebuilt the front of the truck since it seemed too sparse to me, but I've left the rest of the truck (besides some of the internals) original. I decided I only wanted to use a single Sbrick, and I had only one port left, since there was already an M-Motor in the model to drive the functions connected to the distribution gearbox, so I built a custom sequential shifter that I could fit in the cab, and access the axles of the changeover catches in the gearbox, and thus shift through the functions sequentially. This is done with one M-Motor. All of the internal mechanics of the gearbox were left stock, besides the elimination of any white 24 tooth clutch gears. I did not change the rest of the model that much, though I did think having an inline-4 seemed kind of lame, so I put in a V8 instead. i will not release any instructions due to the extense of the modifications. Please enjoy the video and photos below, and feel free to leave a reply! -
Found this Polish Pm36-1 on Youtube, think its worth looking at!
JEB314 (James) posted a topic in LEGO Train Tech
Just found this new video of a Polish Pm36-1 steam locomotive by Fasolic ( @solic ). I've not seen any coverage given to it, and it is a marvellous model, very much got LNER A4 vibes! Love the Dark Blue colour and the integration of full PF in the loco! Anyone know its history? -
MOD 42062 container yard (only truck with trailer Fuly RC)
9 fingers posted a topic in LEGO Technic, Mindstorms, Model Team and Scale Modeling
Hello everyone. This is my modification of the truck vith container trailer. It is RC with power functions. 1 servo motor for steering 1 M motor for driving it is simply very cute to me and just fantastic to drive with this litle cute truck. and one simple video That's all for now. Best regards, Valter -

Difference in PF battery boxes?
Terrasher posted a topic in LEGO Technic, Mindstorms, Model Team and Scale Modeling
Hello, Technic, Mindstorms & Model Team people. I asked this question over at the Town forum (I'm trying to motorize some Fairground sets), but I think it might be better suited for his forum. Is there a difference between the technic-styled battery box (the one with the two sliding DBG panels for the battries) and the system-styled one? I only own technic-styled battery boxes, and I don't know if the system boxes give the motors different speeds or what. I already know there's an expensive system battery box that lets you regulate the speed, but I'd rather regulate the speed by using different cog sizes than shell out around 70CAD for a battery box. -
Hi, I don't own any of the fairground sets, but I'll be adding a couple to my collection pretty soon and want to motorize them. I own the power functions battery boxes that are better suited for Technic sets. Is there a difference between this battery box and the system one that shows up in the new Rollercoaster video? I don't know if the speed of the motors will be different depending on what battery box is used.
-
Here is a sneak peak of one of my biggest projects up to date: Project started with a new type of a gearbox, which uses only two toothgears at any time in order to transfer power from motors efficient to the wheels: Here are a few specs of the model: Length cca. 80cm when folded Width cca. 30cm Height cca. 25cm Weight cca. 4,5 cm Dual rear live axles in the back independent suspension in front 4 electrically controlled gears + 1 additional electro-pneumatically controlled gear Working towing arm in the back capable of lifting weights of over 1kg Dynamic lights All functions controlled by 3 Sbricks Currently we have snow here and I can't shoot a video as planned I will post more info as soon as I manage to take more photos and a video.
-
 A wifi remote control for Lego is coming soon...