Search the Community
Showing results for tags 'outriggers'.
Found 10 results
-

Lego Technic 42070 Tow Truck - outriggers issue?
Duaner posted a topic in LEGO Technic, Mindstorms, Model Team and Scale Modeling
Hello, I just finished assembling the set. However, when lowering / raising the outriggers, I notice that they are not deploying at the same speed. The rear one moving faster than the lateral ones. Consequently, it reaches its low and high positions quicker and stops while the two others are still moving. I can then hear a distinctive "clicking sound" of the rear gear set since the axis is still rotating to fully deploy the lateral pieces. It does sound that it is forcing on the gear teeth and make them "skip". Is this normal? If not, any clue on possible assembly mistake or workaround? Thank you for the feedback! -
[MOC] Motorized Cherry Picker
Anto posted a topic in LEGO Technic, Mindstorms, Model Team and Scale Modeling
Hi! Two years ago, I did a motorizable cherry picker for a contest on the french forum TechLUG. So, I used the comments I had, and I decided to : - Use a more little scale - Better proportions - I did a better cab. In the first MOC, it was too heavy because of the battery box inside it. - The first cherry picker was motorizable by a M motor ; this one is only motorized, more simple and efficient. To summararise : Better proportions (I hope ^^) Only motorized I use inverted gearboxes for : - Outriggers - Arm - Turn table And the manual functions : - The steering (of course) - Extension of the arm So, here's the result: The simplest function is the steering. But there is the L motor over it. So, I used three 16t gears to turn the wheels directly by their axle of rotation. And now, the gearbox. It's an inverted gearbox : the "out gears" turn in the opposite sense. So, when you invert the position of the driving ring, you invert the rotation of a function. Here are screenshots: The outriggers can up the truck: the wheels don't touch the floor. To finish, the arm. It has a triple deformable quadrilateral. I needed so much time to do it, but it's nice to see in action. And the video : -

(Help) Extendable Outriggers Without Gear rack
Kmuffin posted a topic in LEGO Technic, Mindstorms, Model Team and Scale Modeling
Hi all. I'm currently making a moc with some small sets. But I wanted to make some extended outriggers but the parts in the sets I'm using don't have 1x13 gear racks and the 1x7 gear racks are already used (which are anyways a bit too short). Is there an good way of making extendable outriggers without a gear rack? -
[MOD] Technic Mercedes Arocs
SNIPE posted a topic in LEGO Technic, Mindstorms, Model Team and Scale Modeling
Hi, I modded the mercadees benz arocs so that it has steering and suspention and drive on the two front axles as well as acenter diff between the two, RC steering, and a drive motor for the wheels. The flat 6 is in the same place roughly and the gearbox motor is roughly in the sam place too. Now I'm trying to add the same sort of outriggers that the 42009 has, but to the mercadees benz arocs, I ALSO am trying to have the steering axle going through this assembly to the rear wheels as well as a centre differential underneath. the outriggers. This sounds like a lot yes but the pnumatic pump can be moved to the back and there is new connectors now to make more compact assemblies. The gearbox would still have two clutches, the only difference, is the pnumatic pump is connected to the same output as the turntable, which frees up one output for the small linear actuators of the outriggers. Does anybody have any ideas on building this? I have been trying but I cannot seem to put my ideas into actual assemblies. I think it is a good idea to use the black 12tooth 13L gear strips like in the 42009 because the arocs outriggers are much too cumbersome. I did manage to fit a centre differential under the original arocs outriggers which is good. The purple axle is for the tipper, the green axle is for the turntable , the orange and brown axle are for the outrigers. -
MOC Mercedes Dump Truck
roppie11 posted a topic in LEGO Technic, Mindstorms, Model Team and Scale Modeling
[MOC] [WIP] Mercedes-Benz dump truck. Hello, I decided to go make a moc. I bought the arocs last november and i was like:"hmm, i have enough stuff to build a good moc." so i started to make a plan. A simple painting in word 2013 and i made some challenges and requirements for myself. Here is a list: RC functions: Driving Steering Outtrigger Sideway Tipping(which side is not decided yet.) Manual functions: Openable doors Switch rc/handdrive HoG steering Other specs: Suspended, driven tracks Suspended steering frontwheels Outrigger will have 2 stages, driven by one motor with the use of a differential. There will only be one outrigger on one side, depends on what side the truck is gonna dump. 19 studs wide (made the tracks and they turned out te be 19 studs wide) PF stuff 1x XL motor for driving 2x L- motor for outtriggers and tipping 1x M- motor for steering Will probably use the cabin of the arocs (42043) 2 receivers batterybox Challenges: Driven tracks(first time i work with tracks) 2 staged outriggers will be difficult. Unusual way to dump. Find a way to switch from handdrive/steer to RC. Advanced gearbox to make all this possible here is a rough sketch i made in word. i know this is gonna be a weird non-existing truck. but my goal is to make a really advanced truck and to learn things from it. i'm sure i'll do. 1. i only play with lego on sundays so don't expect to see updates midweek. 2. i also have no idea how it's gonna go and i don't know if I'm able to do all this. this is my first moc and this not a technical easy one. 3. another thing i wanna tell you is that i don't have receivers now. I had 2 from 8043 but the are both broken. 4. i ordered 2 by the customerservice broken bricks, but they were not available so i don't know when the moc will be finished. i also made no deadline for myself. the tracks now about the tracks, it was pretty difficult for me to build proper tracks, since i have never build one. the first problem i ran into was the good length. i built a track, all pretty well, but when i put on the actual trackpieces, it turned out that they were a half track too long. it just didn't fit. i also could not remove a piece because otherwise it would be too short. i experimented a bit with it but i wasn't able to get it right. Then i got the idea to look in the building instructions. so i did and i had a nice fitting track. i have to say, it is still a little bit loose, but that's probably supossed to. but then another problem came along. on a 5*7 bracket i put a small turntable to have a sort of suspension. but when i made my fitting track and put it on, the thing was waay to wide. (note: the photo's are taken with my smartphone. I don't have a normal camera so quality is pretty bad. sorry for that.) that's the reason i had to make a whole gear system in the tracks. you can see them on the picture above. the gears are coming out of the turntable right in the middle of the track. it took quite a while to lead the axle to the actual wheel. but that's done and i am satisfied wih the result. the black line shows how the axles and gears are going here are some more pictures. on the picture above you see how you can detach a track. it's pretty simple. i put 4 of these pieces(I don't know how to describe them) on the turntable with 3l pins. i now have 4 cross hole to attach to another piece. i just put 2 4l axles with stop in it as you can see. the axles go through 5*7 bracket and i put a half yellow bush on the underside. as written earlier the total width is 19 studs. the tracks are 5studs and i have 2 of them. i have a 5*7 bracket. with two beams and the 2 small turntables which are 1 stud. the tracks are each 37 pieces long which brings it in total to 74 pieces. I was happy to find out that it was as wide as the arocs because i'm going to use the cabin. Here is a picture. this is the result. ------------------------------------------------------------------------------------------------------------- the outrigger I just finished the outtrigger. I wanted an outrigger with 2 stages like 42009 which could be expanded with one motor. i used a differential for that this is the first stage. you see that i used 2 bevel gears to drive 2 gearracks to expand outwards. then i used a u-bracket to transfer it down. the outtrigger is laying upside down, so the axle is going down, not up. this is the whole thing(not finished) you see that i used a small LA to do the downward movement. this means it can go down 4 studs. the LA is sticking out but i don't care about that since 42043 has that as well and that's a official lego set. here is the finished one: as you can see, it can expand 7 studs sideways and 4 studs downwards. if it is retracted, the thing is 22 studs wide which is a little bit wider than the tracks. it is 8 studs hight and 9 studs wide. 22*8*9. i used 26 gears in total. it took me a day to build and i'm pretty ok with it. below is a picture from the outrigger as seen from the bottom. you see the differential.you turn the differential with the big black bevel gear, the right side goes to the ----------------------------------------------------------------------- front wheels today i moved on the front suspension. i disassembled the 42043 B-model and i only left the cabin+grille. when nothing was left but the pieces, i began building. i had a great idea(i thought) my idea was this: i attached those black pieces and a ball joint. then i use some liftarms and attached it to a frame. it worked pretty well and i was happy, yeah this is going so well!! look under here, full independent, it can steer, no problem. yeah!!! then i saw something horrible, it was a 'little bit' too wide. i experimented a bit but i found out, that those wheelhubs combined with liftarms are too wide. look at the second picture: luckily, i remebered a topic about suspended axles, so i looked throug my history and fount this topic. i looked for a while and build this axle: (finally good quality ) i used the road wheels, not the balloon ones. the building instructions on LDD are 'great'. #not. but i managed to build it. i ran into a few problems. 1. i don't have a powerjoint. so i had to use a normal 5x7 bracket for the differential. a 2. another problem. if i don't use the powerjoint, how am i gonna attach the axle to the chassis. i used a sort of life axle idea. or is it a real life axle? 3. to drive the differential,i had to use a half thick 20z bevel gear. i first did that but it was not sturdy enough. the gear slipped out several times. after messing with it for a while, i came up with the idea to just turn the axle around and use a double bevel gear. 4. the steering didn't work at first because, it could not move forward to the axle, if you know what i mean. if you steer a wheel, the gear racks moves a bit forward, but the bracket was in it's way so that didn't work. i put the gear rack on the upside and it had space to move, but the gears slipped. i placed just two blue 5x3 L-beams to fix that. all in all, i changed quite a bit of the axle and only 50% of so is from the original building instructions. check it out below. it can steer very well and has a bit ackerman geometry. it works fine though. i attached the spring to the liftarm so i don't have to make a whole structure to attach it to the truck. it has a travel of 2 studs. that is not much but it works, and i'm fine. it was not my goal to have as much travel as possible. i'm pretty satisfied with it, it works fine. the next step is attaching the arocs grille and cabin. i think, i'm gonna use the 6l fake motor as well. the axle is 19 studs wide, just like the tracks and the cabin summary: i am building a non existing truck with driven and suspende. tracks and steered, driven, suspended frontwheels. it will have a sideway dumping and an outtrigger to that side with two stages like 42009. it will be rc and have a switch so you can drive manually. i'm gonna use the arocs cabin because it's a wonderful piece of lego. this is my fist moc so i don't know how it will turn out. for details and building process, check out the whole first post. if have now build: - tracks - front wheels - cabin and grille - outrigger i have to build: - nice frame to put on the cabin and grille. - gearbox for all functions and motors and a switch : manual-->rc. - a mechanism to dump sideways. - a bed, you know, where you put in the stuff to dump. -

[WIP] [TC8] 8x8 off road crane
Zerobricks posted a topic in LEGO Technic, Mindstorms, Model Team and Scale Modeling
So as soon as I heard about the new contest, I knew I wanted a different crane as the normal mobile ones... A quick google search for off road crane inspired me as soon as I saw this picture: More info here: http://www.ww.mainpu...ifting/6196.htm Yes, its an 8x8 off road crane with massive tyres, suspension and what-not. After fiddling in LDD and real life I came up with front suspension: As you can see, its inspired by 42043's rear axle assemby, but upgraded: - with all wheel drive - portal axles, - improved steering system - longer, harder shock absorbers - can carry A LOT of weight The steering system is my own idea (as far as i know), by using different handle and steering arms length I get different steering angles: Another thing I built are the outriggers. Because this is an off road truck, the outriggers need to be high enough not to bump into terrain, yet they have to lower enough to do their job. This is why they extend at an angle: The outriggers may look rather thin and weak, but the fact is the 13L beam and 13L rack are in a sandwich which cannot be seperated, so they can carry lot of weight, as long as you dont bend them sideways too much. Here is how the front suspension and outriggers look like together: And I already started working on the rear axle... You can see its simpler than front axle, it has more support, and its very solid. There are a total of 10 points holding the rear axle assembly: - 4x Springs - 4x Longitudal links with rubber bricks with limited longitudal movement (you need a bit of movement in order for axles to flex sideways) - 2x Panhard links which keep the axles from loosely moving sideways Also notice the drive axle on the left, thats for the fake motor drive. More info soon... -
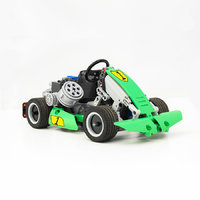
Hello Eurobrickers! For a long time, walked behind me the idea to build a tow truck, the more so that more and more the tow truck appears in the BS gallery, so I decided to build it myself. However, my favorite version, americkan style. I long it goes down, but overall I'm happy with the results of their work. Of course, the tow truck will be fully motorized. I told myself that the car will be after 3 lockers for equipment on each side, flashing light beacons of his own design, active fake 8 V engine and, above all, the main functions of the tug, and so drive, steering, outriggers, winch, towing arm with folding and rotating fork and a tower with a sliding and lifting the boom, which is still under construction all the time. For photos I used so far, the boom of a set of 42009, although I admit that even quite well with the tow truck. The outriggers for now can lift a model, but as it's ready, I suppose it will be too heavy to support the tow truck. We will see in the future. Initially, it was the drive on 2 axles, but changed it to 3. The lifting arm of the towing I wanted to use a large Linear Actuator, but it took too much space, so it is on a small Linear Actuator. And so far it looks the effect of my building.
-

[MOC] Truck, WIP in some way forever
HorcikDesigns posted a topic in LEGO Technic, Mindstorms, Model Team and Scale Modeling
Hi, Well, this is my first try to assemble truck with theese wheels (I finally bought them enough to make this ;) ) It features HOG steering that must be disassembled (axle-connector) when you want to pneumatically lift the cabin to see the fake motor, or do something with front independent suspension. It also features manually controlled outriggers with pneumatic cylinders on their end. It is also well (and it wasn't planned equipped for placing small PF BBs (Li-Po or AAA). However, I have not enough space in it and bricks and idea to finish the superstructure on the M-motor powered turntable. Non-working elements disassembled and more working showed: Two rear "axles", if I can call them so, are simple - rigid to support the rear of the truck, and in combination with the front soft and heavy-loaded front suspension, to tilt the whole truck in weird way... FULL ALBUM: https://www.flickr.c...57649089686517/ It has many bugs, it is not perfect, but it was fun to build, and I think I have learned a lot ;) (And I think that motorised version without many features (outriggers, etc.) is going to come in next weeks or years (? ), but I do not make promises ;)) Enjoy, and please comment to tell me what you think about it ;) -
RC Liebherr LTM 1090 mobile crane (62 mm wheels)
Tamas Juhasz posted a topic in LEGO Technic, Mindstorms, Model Team and Scale Modeling
Hello! I'm finished with uploading and lot of work, you can see one of my biggest and most complex moc. I always loved mobile cranes, so I decided to make a Liebherr LTM 1090 with medium sized (62,4 mm) wheels: folder with bigger pictures: http://www.brickshel...ry.cgi?f=533546 big montage: http://www.brickshel...90-62mm/002.jpg boom: http://www.brickshel...ry.cgi?f=533548 details: http://www.brickshel...ry.cgi?f=533547 About the mobile crane: Every function is remote controlled: - driving (1 XL motor) - steering (1 M motor) - outriggers outcoming and legs moving (1 pneumatic circuit with rubber band "control", 1 M motor for pneu switch) - upper structure rotating - boom raising - boom extension - winch (hook) - compressor for making pressure - front lights (together with driving (and steering with "turn signals") ) After outriggers, these functions are working also with one M motor, or directly from the receiver's output. Dimensions: Length: 610 mm Width: 135 mm Height: 211 mm Scale: 1:20,5 Dimensions with raised and extended boom: Length: 1235 mm Height: 1260 mm Other dates: Number of pieces: 3433 Weight: 3460 g Building time: 23 days Speed: first gear: 0,14 km/h second gear: 0,23 km/h third gear: 0,38 km/h fourth gear: 0,55 km/h Maximum boom extension: DETAILS: Flashing light in the back (made with two light brick, but one is covered with that black piece): Lights: Exhaust: Instrument panel: Manometer (for seeing the outrigger's pressure) and gearbox (manual) cover (the dkbluishgray one): You can use the airtnak in the pneumatic system, or not, depends on these two pneu valves: http://www.brickshel...90-62mm/024.jpg Truck The truck part is an 8x8x8 driven construction ( http://www.brickshel...y.cgi?i=5936235 ), with a manual gearbox and One Xl motor for drive. The outriggers are working with pneumatic, as can be seen in the pictures, one motor with pneu valve is enough for control, because the backward movement is done with rubber bands. The pneumatic system is enough strong to pull out the rubber bands and lift the mobile crane's own weight. http://www.brickshel...y.cgi?i=5936260 - I simply wanted to try out this solution (the original also has also a clyinder to push out the legs). It doesn't works 100%, sometimes a little help is needed to came back. The motorized pneu valve isn't my idea, I saearched a lot to find the designer, but it wasn't success. A compressor makes pressure in the aritank (or directly to the legs, see the description above), then the valves can be opened or closed. The PF system has 8 channels overall, so some functions are together with other ones, like the front lights with steering. One PF led is for light. Crane part (upper structure) The most important in this part is the strenghtening in the turntable, I made it with 4 pulleys, and 2 mm width rubber bands (O rings): http://www.brickshel...y.cgi?i=5936256 Works, well, in extended state the boom doesn't deforms the structure. The 4 pneumatic cylinder can raise the quite heavy (3 section) boom, but not in extended state (as most of the originals). The whole boom can be extended up to 1260 mm height. The backward movement is done with strings, not with gravity, it's more reliable. One small Li-Po battery can power the machine, this black button is for power on/off: http://www.brickshel...y.cgi?i=5936219 http://www.brickshel...90-62mm/004.jpg - you can switch after the operator's cabin with the dkblgray pneu switch to raise the cabin in angle or not (done with one little pneu cylinder). This video can tell more than me, it took me a time to make it, but it's necessary for this model: Hope you like it. Maybe I didn't write everything, feel free to ask, if something isn't clear. -

Lego Technic Mobile Crane
legosamigos posted a topic in LEGO Technic, Mindstorms, Model Team and Scale Modeling
Hello Eurobricks members! Today I would like to show you my mobile crane. I didn`t know, that mobile crane is very difficult model to build. I had about 3 months a chassis to my mobile crane, but I spent a lot of time to bulid a tower to this crane. I am glad that I managed to finish my model before the official release of a new set 42009. My mobile crane is full remoted control Specifications of mobile crane: Length: 57 cm Width:19 cm / with the outriggers 33 cm Height: 25 cm / after lifting boom 58 cm / after extension boom 84 cm Length of boom 46 cm / after extension 74 cm Weight: 3130 grams Power Functions: 7 x PF M motor 1 x PF XL motor 4 x PF IR receiver 3 x PF IR remote control 2 x PF battery box Functions: drive for 4 wheels steering outriggiers rotation 360 degrees Functions of tower: lifting boom extension boom, 2 sections winch operator`s cab Lifting weights: BS Gallery Lego site