Search the Community
Showing results for tags 'off-roader'.
Found 13 results
-
 Hello Eurobrickers, Finally I am ready to present my latest MOC, the so called Bruiser Conversion of the 4-door Jeep Wrangler. The real thing is done by JK Crew, it looks like this (more awesome pictures here): The conversion includes pimped up suspension, a longer body on the rear part, turned into a pickup, and larger wheels. As for the scale, the real Jeep Wrangler has around 80 cm wheels, and the conversion has around 110 cm wheels. I thought this would be an excellent material for an alternate build from the 42110 Land Rover set because of the color match and the available parts (like those rear mudguards), and the 80 mm wheels of the Defender, and the 107 mm Lego tractor tires result in a good 1:10 scale match. I thought it would deserve the large tires and a motorization, all available in the set 42099. So I ended up with two versions: - Manual version, pure alternate build from 42110, with an optional raised geometry and large tires - RC version that is a dual alternate with 42099 I will present both versions below. They are identical on the outside, they differ in the chassis build and the gearbox / drivetrain. Manual version (42110 alternate) I wanted to build something from the Land Rover that has a more aggressive suspension with large articulation. I have been playing with the idea of 4-link suspensions on both axles, and the 8 A-arms in the set are just enough for that. However, I had to do it with short springs only, so I used similar geometry as the rear axle of Grohl's stadium truck, but with longer lower links on both axles. Furthermore, I wanted to build it in a way that works both with the stock Defender wheels, and with larger ones. So I built a chassis in a way that the springs can be positioned in two places, and the suspension geometry becomes lower or higher. Along with this, the front axle is also moved one stud to the front, to make space for the steering of the front wheel (just like in the real version). As such a suspension requires a lot of space (if you want large articulation), the actual useful space in the middle of the model becomes relatively short. I wanted to preserve the same functions of the gearbox as in the Defender, so I had to compact it. Taking ideas from the Pimp my Land Rover project I managed to create a version of it that fits into the available space, keeping the same layout of the controls. Furthermore, I have included a functional V8 engine (the real one has a V8 Corvette engine). One part that I struggled with a lot was the HoG steering, as it was quite hard to bypass the gearbox and the front seats as well. Finally I managed to do it under the seats, but I could not fit a functional steering wheel as the chassis structure that holds the front suspension was just in the middle of its way. The interior came out quite clean and also replicates the real one quite well I think. The seats are similar to those of the Defender, but I had to make them shorter, as the roof is also shorter: On the outside one key point is that the real thing (at least this version) has its doors made of steel bars (which gives it a great look I think). This is good as the Defender would not have enough green panels to build 4 doors, but the bar doors could be built (at first I did not think I could get such a clean look, but I am quite happy with the result). On the front, I reused some ideas from my Willys Jeep, but changed it to a bit more modern look. On the rear part, the fender piece was an obvious fit, and I wanted to emphasize the bed with system parts, which also came out nicely I think. At first the A and B pillars and the roof was tricky to make solid, as it is only built from a few liftarms. But the final assembly is super strong, thanks to the column in the middle that goes through the gearbox (that was a key structural element to make). The model can be lifted safely with the roof. Some side panelling was also tricky to get into place, but I am satisfied with the overall looks. The doors, the hood and the tailgate are openable. The spare wheel fits nicely in the bed. One last feature I could add thanks to the Defender parts is the front bullbar with a compact functional winch (with rachet mechanism). Here are some side-by-side images for a comparison. I think it works well with both wheel options. More info, pictures and building instructions are available on Rebrickable. RC version (42110 + 42099 alternate) For the RC version I decided to use components from set 42099 as it has everything required: XL motors for torque, heavy-duty CV joints, planetary hubs, more A-arms and hard springs for suspension and the few extra parts in black color. First of all, I wanted to motorize it in a way that I keep the interior and the functional fake engine as well. Second, I wanted to add a simplified gearbox. The placement of the battery was obvious in the bed, the steering motor would go onto the front axle, but the space required for the two (coupled) XL motors was less obvious. Finally, I could squeeze them under the rear seats, and place the gearbox in front of them into the drivetrain. As for the gearbox, incorporating a 2-speed one (hi/lo gear) was simple, but I wanted to do something more with the available parts. Finally, I managed to add an RWD/AWD switch. For this, gearbox routing is a bit tricky, going through itself through idler clutch gears, and returning later. Furthermore, the front and rear parts of the driveshaft rotate in opposing directions, which is resolved later by the proper placement of the differentials on the axles. It was really challenging to brace the whole gearbox properly so that the gears cannot skip anywhere, I had to rebuild and test it several times (those two coupled XLs have a lot of power). On the downside, I suspect the relative complexity of the gearbox add some friction to the system. As I wanted to maximize ground clearance, the front axle was tricky to build, since the planetary hubs can only be connected with ball joints when steered. For this, I applied the trick used by other as well, that slants the lower A-arms a bit, resulting in very slightly non-vertical front wheels, but it is so negligible I bet you'd never notice. The resulting axle is fairly slick, I am happy with the result. As the steering motor made the front axle higher, the functional piston engine had to be minimized as well, and I could only do a mini V6 with the available parts. Unfortunately, this small construction does not run super smooth in a V configuration (sometimes the 2L liftarms in the main shaft kind of collide into the half pins that make up the pistons for a moment, instead of smoothly pushing them up; the inline configuration with the same technique works smoother). For this reason, there is some friction resulting from driving the fake engine as well. Here is the final chassis, and one more image about the ground clearance at the rear: Although the final gearbox construction is strong enough not to let the gears skip, there is one weak link: the driving ring can move out of the clutch gear under very high torque (although in my tests the model sooner went up the wall if not blocked). This is because the gear stick does not firmly hold it in place. However, it can be solved by fixing it into one position with a linkage coming out of the center column. This issue made me think how much more powerful it could be if the gearbox and the fake piston engine was bypassed, and eventually led to the construction of a heavy-duty variant (in which the gearbox is still kept, but instead controls the speed of the fake engine, when not in neutral). The heavy-duty variant is further geared down a bit to have even more torque. It can climb almost everything if the ground clearance permits, as you can see quite a few cases in the video. A few more images about the whole model: More info, images and building instructions are available on Rebrickable. Let me know how you like it! Cheers, Viktor
 -
[MOC] RC Jeep Wrangler - 42129 alternate
gyenesvi posted a topic in LEGO Technic, Mindstorms, Model Team and Scale Modeling
Hey Guys, I'm back with my second alternate model of the Zetros set (42129). As you might remember from the presentation of my Unimog alternate, I was originally entertaining the thought of rebuilding the Zetros into a Jeep, but I passed since Tim has already built one. However, as I kept thinking of how I would do it, it became clear that I had quite different ideas in mind, and it was just too tempting to do it, so I gave it a go. Here I will write down the design process as that seemed to be something interesting for you guys in case of the Unimog as well, and I also prefer such presentations. Features - 3-link floating axle suspension with Panhard rod at the front - simplified rear floating axle suspension with 2 links of limited degrees of freedom and a Panhard rod - 2-speed gearbox with coupled RWD/AWD selector (hi gear is RWD, lo gear is AWD) - smooth and highly colour consistent bodywork - openable doors, bonnet and trunk - detachable hardtop - detailed interior with green accents, built seats - detailed engine, snorkel, minor extras (roof rack, jerry can, fire extinguishers) Here's a real 2-door model in dark grey color which I used as a visual reference: I also used a blue print to roughly set the proportions in a 1:10 scale. Bodywork Interestingly, this model started out from the bodywork, which I don't do often. As a fan of Jeeps, I have long been wondering what the best ways are for replicating its characteristic details, such as the hood and the grill with Lego parts. My Willys Jeep (alternate of the Defender) uses system parts for the (flat) hood and a simple vertical grill, but I wanted to build one with technic panels as well, replicating the slanted surfaces. I have seen two major techniques, one with the long wing-shaped panels (such as the models of @Madoca 1977 and @rm8), and the other with the long curved panel, mainly the classic model of @Sheepo. Since this set has those curved panels in DBG, and the wheels are about the same size as on Sheepo's model, I was wondering if a similar front could be built from the set, especially the angled placement of the curved part, along with the downward slanting of the whole hood, which also needed to be openable. It turned out that with quite a few alterations here and there, the hood could be built, and even better, they could be built using a few large panels only, which makes it look more clean and uniform.. Some arches needed to be redesigned, and the whole became 2 studs narrower, but the proportions worked fine. Then I moved on to the front and the grill, where much more redesign was needed due to different parts available, but after a few iterations with increasing the width and height of the vertical 'bars', I found the one that fit nicely with the smaller lights in the set and the newer curved small panel extenders (and as far as I can tell, newer Jeeps has such bigger grill, so it seemed fine). From there, I moved on to the sides. I knew it was critical to use the BDG panels carefully, because otherwise there would not be enough DBG beams to build the whole body, and I wanted a clean and colour consistent body. I quickly concluded that the doors can easily be built with the large panels, and the windows can also be built with the DBG connectors. The next critical point was to use the thinner long DBG panels in the rear part above the fenders. The difficulty was that they only left one possibility to mount the pieces of the fenders, so I had to use all those black angled beams there, and I had to build the fenders a bit wider so that I can actually connect the two ends to make it a stable piece. Fortunately, the wider fenders also made it possible to build the front ones from black beams at the same angle, even without more available angled beams using triangulation. The last critical piece was to use the small BDG panels in front of the doors, which just fit there tight. If I had to build that section from beams (as I started out), it would have cost too many beams and connecting them to the chassis would have been difficult as well, but the panel solved both problems (unfortunately, it has a drawback as well, which I will cover later). The remaining DBG panels were used in the back, also allowing for an opening trunk. The last tricky part was the rear corners with the lights. I wanted to make them more rounded with the curved panel extenders, but they would have screwed up the proportions, so I just used a slightly curved system brick to give it some curvature. Also I managed to use the black arched beams to replicate the characteristic rear roll bars, and the black tubular parts to build the roll cage, along with the 15L flip-flop beams, which proved to be critical for mounting the roof. The many flat black panels of the set were enough to build the whole roof, along with the side windows in a way that the whole hardtop is detachable from the roll cage as a single piece. Later, when it was more clear what parts remain, I also added the two bumpers, and even a nice snorkel and minimalistic roof racks were doable to give it more interesting details. Gearbox After being satisfied with the rough bodywork, I started designing the functional parts, which I also wanted to put emphasis on, since that's what technic is all about. However, since my Unimog alternate was about the suspension, this time I wanted to focus more on the RC gearbox and build a less articulated suspension which takes less space. I have been tinkering with the idea of a coupled 2-speed gearbox and a central diff-lock for a while (and @Pattspatt also teased me about it), but I never managed to design a compact one, where the drive motors are also placed conveniently. When I looked up a Jeep Wrangler drivetrain, I found this image, which was particularly interesting for me because of the front wheel drive that can be decoupled. Being offset to the side, I thought this could actually be nicely reproduced with lego clutch gears (something similar I already did with my Willys Jeep alternate, not knowing that it's done similarly in real life). After a lot of juggling with the placement of the motors and the gearbox components, I came up with this quite compact drivetrain setup with the gearbox inside the 11x7 frames, which not only includes the drive motors, but the steering motor too (later on that as well). The key ideas regarding the overall chassis structure are the following. First, I use a simplified (limited degrees of freedom) rear suspension, which requires only one CV joint, which makes the rear part of the drivetrain shorter, making more space for the gearbox, which is placed a bit to the back. Second, I placed the motors to the front of the middle section, and use the back of the motors as the mounting point for the front lower suspension links. Thus, the motors play a major structural role in the chassis. Here is the central part: And here is the whole drivetrain without the motors and the frames: As you can see, the rear part is short, and the front is offset to the side, and can just be routed between the drive motors, under the steering motor. Another interesting thing about it, is that it actually has two shafts (yellow axles at the front) coming from the two drive motors (but they are coupled by the red gear in the middle), and one of the shafts powers the 2-speed gearbox, that then goes to the rear axle, and the other shaft powers the the front axle, so the front axle drive does not pass through the gearbox, as it's only active in low gear. The orange selector switches both the gearbox and the RWD/AWD switch at the same time, activating the front of the drive train when low gear is selected. As with my Unimog, the placement of the gearbox motor was again difficult, as a lot of additional elements (end stoppers, clutch gear protection, down-gearing) need to be placed, so the gearbox motor had to be routed out to the trunk. Suspension As I outlined above, the rear suspension is a somewhat simplified live axle. I saw this trick first in @nico71's Ford F150 alternate, but builds of @rm8 use it as well. It is like a ball-joint based suspension, but without the ball-joint as support that prevents the axle from rotating forward/backward. In case of non-motorized models or smaller RC ones with less powerful motors, the joint itself is enough to keep the axle from rotating, but it was not enough in this case (the coupled motors could just rip apart the driveshaft), so I had to fix it explicitly. I opted for a suspension link that does not let the axle rotate forward on the far end, only tilt sideways (not using towball pins, just regular axles). This setup provides strong enough support to prevent the torque from ripping the driveshaft apart. A Panhard rod further stabilizes the axle to prevent sideways movement. Unfortunately, it's still not as solid as a ball-joint would be, and does not relieve all friction from the driveshaft. On the front, I used a similar 3-link suspension as the Unimog, but I had to move the Panhard rod behind the axle as the space was even less in the front, and managed to move the springs further in, giving it a softer and longer travel. It actually came out too articulated and had to be limited, as the wheels hit the fenders. Also, I used a better steering geometry than the Unimog (no anti-Ackermann geometry), and the max steering angle became very good, too good actually, as the wheels hit the bodywork at max angle, and can get stuck in it, so I limited the angle a bit, but is still better than the Zetros (the limiters are just half pins, which can be taken out to get a lot of steering angle, at the cost of risking the front wheel getting stuck in the body at max angle and max articulation, but work pretty good on flat surface). So the suspension is not bad actually, limited a bit by the bodywork, but the model still drives around quite okay on real terrain. Also, I wanted to experiment with a different steering setup, not placing the steering motor onto the axle. As said above, I found it a nice place between the drive motors, and using the CV joints there was just enough space to route it to the axle. It works okay, however, the two joints already introduce some lag in the steering, which is most noticeable when trying to automatically return to center, it does not center totally. But it's still okay and can be controlled with fine adjustments. Interior As the seats in the Zetros set were too small for this scale I needed to build bigger ones. Since I did not want to use the green beams on the outside, I used them as accents on the inside, they were enough to build seats and to be used in the middle console. I entertained the idea of making the steering wheel functional, since the steering motor is not on the axle, but there was not enough space to route it to the steering wheel, and furthermore, the curved panels used as a dashboard just block the way, and otherwise they are important structural elements that hold the front and the sides, so I did not want to alter them. The battery is placed between the B columns, as there was no other convenient place, and there it's easily accessible. The seats can be folded forward, to give room for replacing the batteries. The engine details are just some imaginary ones built from the remaining parts (nothing working). But the snorkel tubing continues on the inside :) Here is the whole chassis with the interior: And here are a few more renders and photos of the complete model, but much more is available on Bricksafe. Building instructions are available on Rebrickable. Let me know how you like it! Cheers, Viktor -

[MOC] Ghostbusters Afterlife R.T.V alt-built for 42099
ninoguba posted a topic in LEGO Technic, Mindstorms, Model Team and Scale Modeling
Here’s my alt-build for 42099. It’s the new deployable remote trap vehicle from the upcoming Ghostbusters 3 movie. It’s the big version of the one included in the Ecto 1 Creator set. I’m also working on the MOD so the ghost trap door will have the correct hazard stripes and open at the center. Feedback welcome. Build instructions and custom programming will be available on Rebrickable when ready. -
[MOC] Epic Alternate Pack for 42099
gyenesvi posted a topic in LEGO Technic, Mindstorms, Model Team and Scale Modeling
Hi, I think 42099 is a nice starter RC set of the PU line, so I set out to test what else can be brought out of all its parts. I'd like to share with you my set of 5 alternate builds from it. It has been a great exercise for experimenting with different options for suspensions, drivetrains and bodyworks, testing the versatility of this medium-sized set. In the end, all of the alternate models came out with quite different shapes, suspension techniques and motor/gearing setups, and I think I even managed to use those large turntables in some interesting ways. During my builds, I found that the set has a good array of structural elements, of course good drivetrain components, but is a bit limited on gears, axles and body panels. Nevertheless, once you get used to it, more configurations are possible than you would think :) Here are my builds in chronological order. Much more design details and images of each are accessible on the link behind each name. Here I shortly summarize the features and the differentiating factors of them.1) JeepyThis model was inspired by the release of the Jeep Wrangler set and its pendular suspension using the small turntables. - Pendular suspension using large turntables, both front and rear- 4WD slow drivetrain for good climbing, separate front and rear drive- Jeep-like exterior, focusing on the shape of the hood and the grill, plus the roll-cage 2) BuggyInspired by the release of the RC Buggy set, with this model the goal was to test how fast the the two XL motors can be geared up, along with creating a slick bodywork. - Independent long travel suspension with longer swing-arms both front and rear, high ground clearance- Fast up-geared rear wheel drive, independent for left and right wheel without differential- Positive caster angle at the front axle- Light-weight curvy bodywork, custom built seat 3) BeastyThis model aimed to test the possibility of building a live axle rear suspension using the large turntable, along with coupled motors for a stronger drivetrain. - Live axle rear suspension with push-rods for extreme articulation, independent front suspension- 4WD drivetrain with coupled motors driving both front and rear axles, adjustable gearing- Rough exterior, minimalistic interior 4) QuadroThe goal of this model was to build something other than a car, and to experiment with an unconventional motor setup. - Independent front suspension with positive caster angle, trailing arm rear suspension- V-engine built out of the joined drive motors, rear wheel drive- Functional steering rod- Chubby bulldog-like quad shape, bullbar 5) TrophyWith this model, I wanted to push the live axle possibilities further, creating long soft travel using only the short springs, and to find a sweet-spot in the up-gearing of the motors. At the same time aiming to create a larger-looking bodywork with the limited array of panels. - Long soft travel live axle rear suspension, independent front suspension- Rear wheel drive with motors built into the rear axle, independent left and right drivetrain without differential, faster gearing- Trophy-truck like exterior with curved front and long tail, imitated spare wheel All models can be controlled with the stock Control+ App, and the batteries can either be directly accessed from the bottom, or can be removed after detaching a few panels. All models are available separately or in a 5-in-1 pack on Rebrickable. I hope this makes you value your 42099 sets even more :) Let me know what you think! -
[MOC] 42099 alternate 'Jeepy'
gyenesvi posted a topic in LEGO Technic, Mindstorms, Model Team and Scale Modeling
Hi All, I'd like to introduce my alternate model for 42099. It was inspired by the recently released Jeep Wrangler, in that it has a small turntable based suspension on both wheels. Since 42099 has the two large turntables, I thought I'd try and build a similar suspension. Also, since it has yellow-ish parts, I thought I'd build a body with Jeep-like features. Of course, not enough yellow parts for a full body, so I focused on the front (hood and the grill to be somewhat Jeep-like) and used to rest to make a consistent body at least. Building instructions are available from Rebrickable: https://rebrickable.com/mocs/MOC-62435/gyenesvi/42099-c-model-jeepy Some details I have opted for a simple suspension design by moving the turntables as close to the two axles as possible. The drivetrain is also very simple, putting the drive immediately to the differentials, resulting in slow speed but high torque on the wheels. The left and right arms holding the wheels are fixed, the whole front and rear axles are rotating and are damped by the springs. Due to the large turntables, a single pivot point is enough to hold the axles at both ends. Naturally, the size of the turntables is a bit of a problem for ground clearance (about 3.5 studs in the front and 4 studs in the back), but not as much as I expected (see below).A major challenge was to mount the steering motor on the front axle in a small space under the hood and to create a strong enough steering rig using only one side on the front of the axle (as opposed to the two-sided rig in the original model). The next challenge was to create a chassis rigid enough to hold the end points of the springs in a small pivoting mount to enable the lengthening of one side when the other one shrinks. Naturally, the arched pieces available in the model are useful for this purpose, with further reinforcements later on. The battery is placed in the middle of the chassis, providing a low center of gravity with easy access to turn it on. It is not a structural part of the model, so it can be taken out easily after removing a few body panels. Also, there's plenty of empty space inside the chassis to hide the cables.On the outside, I wanted to replicate some Jeep-like features with the few available yellow-ish panels. I decided to focus on the front, creating an arched hood with a massive front grill and lights. I wanted a consistent yellow body, so I used all yellow pieces for doors and hoods, and none were left for a roof, so I decided to build just a frame. Luckily, the curved corner pieces and the long black axles available could be pieced together for a consistent frame, that matches the style of the front grill. I think the overall proportions of the model came out quite well. I was also able to include a quite clean interior. As for actual performance on real terrain, see the video for my own off-road tests. Surprisingly, the large turntables are less often a problem in terms of ground clearance as I expected. I suspect it might be because with the fixed-arm pendular suspension, as one wheel is lifted, it also lifts the turntable half-way, so it is less likely to hit something on the ground. Also, with locked differentials it can climb quite well. Be careful however, on real rocks, it is possible to scratch the bottom of it, including the motors.The model can be controlled with the Control+ App just like to original model. More pictures Let me know what you think! Cheers -
 REVIEW - 42099 - 4X4 X-TREME OFF-ROADER INTRODUCTION First of all, I like to thank the wonderful Eurobricks community for reinvigorating my interest in doing reviews. My motivation slowly dwindled up to a point where I considered quitting writing reviews altogether. But here we are again, with a lengthy review of the 4x4 X-Treme Off-Roader with the new PoweredUp elements and Control+ app. As a bonus I have added a section where I show you the unofficial B-Model made by @Didumos69. When it comes to PoweredUp/Control+ I am a bit late to the party, because upon opening the box, it was literally the first time I laid eyes on the new PoweredUp parts. I haven't had the chance to test or even see these new parts. Therefore, it's exciting for me to write this review and see what the fuss is all about. Of course, I have seen several video reviews, and some of them were very entertaining. RacingBrick made one of my favorites. I recommend checking it out. You can't go wrong with Sariel's review either, and his comparison with the 9398 - 4x4 Crawler from 2012. And if you haven't had enough of the videos, make sure to watch Zerobrick's review. Before we continue, I need to state that I like progress. I love new technologies. I'm not the kind of guy who wants to keep watching movies on VHS and rocking the good old TDK's. However, when a new technology emerges, most of the time, it's because the new technology offers a significant improvement over the soon-to-be-obsolete technology. In this case, the latter is the Power Functions system, first released in the 8275 - Motorized Bulldozer set from 2007. The main question of this review is whether the new PoweredUp/Control+ system is worth the money and offers a significant improvement over Power Functions. For this review, I used an iPhone 8 running iOS 13 something. PICTURES Pictures can be clicked to view hi-res versions. My Flickr album contains all the photos taken for this review. DISCLAIMER The CEE Team of TLG has provided this set. It's not my goal to promote this set. It's my goal to give you an honest opinion about it. Therefore, the opinion in this review is my own and is in no way linked to TLG. SET INFORMATION Number: 42099 Title: 4x4 X-Treme Off-Roader Theme: Technic Released: 2019 Part Count: 958 Box Dimensions: 52,8 cm x 48,0 cm x 12,4 cm Weight: 2156 gr Set Price (RRP): £ 199.99 / $ 249.99 / € 229,99 Price per Part: £ 0.209 / $ 0.261 / € 0.240 Links: Brickset, Bricklink THE BOX The limited part count results in the box being reasonably small. The bottom right corner of the box shows the new LEGO Technic Control+ logo and smart device. There is a message stating that a smart device is required, but I wonder if this message should have been somewhat more prominent. Or is it safe to assume that people scrutinize the box before forking out this amount of cash? On the other hand, people easily paying this amount of money will most likely have a smart device anyway. The back of the box shows the standard driving functions, together with a summary of what the Control+ app can do. Compared to the Land Rover, the box is quite a bit smaller. Yet the price is higher. Those PoweredUp parts don't come cheap. The Land Rover costs 180 euros, while the Off-Roader costs 230 euros, with a respective part count of 2573 and 958. For 50 euros less, you get around 1500 parts more, but you don't get the PoweredUp elements. Comparing these sets is comparing apples and oranges, so I'm not sure whether we need to draw conclusions based on this comparison. What I do find odd is that the Liebherr costs around 450 euros, but it does have 4108 parts and 7 PoweredUp motors and 2 Technic hubs. When you look at the price of the Off-Roader, it's safe to assume that the PoweredUp elements add around 100 euros. The Liebherr has over twice the PoweredUp elements, which results in approximately 200 euros of PoweredUp in that set. That almost makes up half of the set price. Even though the Liebherr is quite expensive, you do seem to get more value for money. CONTENTS OF THE BOX Opening the box and throwing the content on the table has seldom felt more underwhelming. Only six bags comprising the parts for this set, not counting the bag with rims. The box contains: 1x Instruction manual 1x Sticker sheet 4x Tire 1x Bag with 4 rims 6x Numbered bag with parts 1x Box with PoweredUp parts INSTRUCTION MANUAL RIMS Four commonly found rims. TIRES Four "Claas" tires to match the four rims, what a coincidence. This set is already the fifth set containing these tires. Your mileage may vary, but I am still deeply in love with these tires. TLG nailed this tire. Let's hope the rumored Mini Xerion will use a smaller version of this tire (edit: unfortunately, it does not). POWEREDUP The smaller inner box contains the Technic hub and motors. The box did take some damage in transit. This set contains the mandatory hub and three motors, one L and two XL. The two designations make you wonder whether we will get different versions in the future. Looking at the L motor, I can't imagine getting a smaller M version. It could be shorter than the L, but I don't see that happening. BAGS Six numbered bags and a bag with rims. HIGHLIGHTED PARTS This section describes interesting parts, and it won't come as a surprise that I will start with the PoweredUp parts. POWERED UP BLUETOOTH HUB According to Bricklink the name of the hub is Powered Up Bluetooth Hub, which confirms that this element is part of the Powered Up family. TLG calls it the "Bluetooth controlled smart hub". There's no denying that the hub is rather big. I have seen numerous complaints about the size, but the unit does pack the batteries, motor inputs and the electronics for extra functionality. The number of attachment points is limited, which might be more limiting than the size. Size: 9 x 9 x 5 XL MOTOR The XL Motor looks like a low-resolution pixelated version of the PF XL motor. If I recall correctly, lots of Technic fans were surprised by this sudden change in shape. I will discuss the form factor in more detail later in this review, but I can already reveal that I am a big fan, and that's an understatement. Comparing this XL motor with the PF version, the sheer number of attachment points is incredible. Size: 8 x 5 x 5 L MOTOR The L Motor is what it is. A motor with a slightly smaller footprint, but with less torque and a higher RPM. For more details about torque or RPM, I recommend visiting Philo's excellent page about LEGO motors. A limited number of pinholes, but enough to be able to mount it easily. Size: 8 x 3 x 3 (top and bottom are slightly larger than 3 units in the center) BRIGHT LIGHT ORANGE Out of the blue, TLG introduced a new shade of orange. And by out of the blue I mean that there is no obvious reason for this color, unlike the green variant for the Land Rover Defender. The only reason I can imagine is that regular yellow is too bright and orange is too....orange. I really like this new shade and I assume we will see more of it in the near future. Will this be the new dark azure? :wink: CONNECTOR BLOCK When we saw this new part most of us were convinced it was an April Fool's joke. It turned out to be a legit part. After that, I wondered whether we needed this part. Having used it a couple of times, this part is turning out to be one of my new favorites. CV JOINTS The new CV Joint Ball and CV Joint Axle are compatible with the new planetary gear hubs. I'm not sure whether these new designs will entirely replace the old CV Joint Axle and CV Joint, but I reckon they will be used in new heavier RC models. I' wonder if these will be used in the new Lamborghini, most likely with new hubs. PLANETARY GEAR HUBS The new Planetary Gear Hub is something AFOLs have been asking for, for quite some time. And TLG finally released them. They are not really suited for regular cars, but they are perfect for crawlers or heavy machinery. Here's a picture of the "complete assembly". WIRE CONNECTORS These new Wire Connectors are used to indicated which wire needs to be attached to a certain port on the hub. These little babies are nothing short of spectacular. So simple, yet so effective. I love 'em. TURNTABLES These turntables are definitely not new, but I felt like highlighting them anyway. This design is way better than the old one. COLORED PARTS If you don't need color in your life, or in the chassis for that matter, these are the parts you need to swap. Please, be aware that I missed a blue Pin with Pin Hole, so you need to swap four instead of three. And you need to swap the 3L Perpendicular Connector for a light bluish grey one. Not that's it is necessary, but if you want to get rid of the white parts too, these are the ones you need to replace. PART LIST A total of 958 parts. CONTROL+ Before I started the build, I tested the new PoweredUp elements. Please make sure to use six AA-batteries. It's quite easy to make the mistake of only using three batteries. You need to pull out the inner section so you can put in three batteries on the opposite side of the first three. Hook up the two XL motors to port A and B and attach the L motor to port C. Turn on the unit, fire up the Control+ app, and you are good to go. A simple wizard will take you through some simple introductory steps to get you started. Turning the Technic hub results in changing values in the corresponding tilt/pitch and roll meters. While there isn't much more to it (yet), it is a cool feature. The app also registers the "yaw" by the way. THE BUILD When I started the build, I planned on swapping the colored parts for black and grey elements. I even started the build with replacement parts. However, this being a review for an official set, it didn't feel right to start modding right away. Some members confirmed this, so I decided to start over, using the original parts. Since I already had built the front suspension, I can show you a comparison. In the left picture, you see the version with replaced parts. The right picture shows the original version. The picture below shows the front suspension with gray and black replacements. The original front suspension contains a lot more color. While some consider this color vomit, which it basically is, I do appreciate color in the chassis. It makes the chassis look less dull. That being said, I don't think that using orange was the right choice. Orange doesn't work well with bright light orange. Adding some more red, or blue for that matter, would have worked better in my opinion. TLG uses these orange 2L liftarms fairly regular, so it's not a big surprise though. This step ignited my love for the new motors. The new form factor of this motor is so much better than its Power Function counterpart. Not only does this version have more pinholes, but it can also be used to enhance structural integrity. The 5x5 total width and height and the 3x3 "protrusion" allow for perfect integration in a Technic chassis. With all the talk about the new PoweredUp parts, one would almost forget to mention another special part in this set, the new planetary hub. This new hub is roughly geared down 1:5. So for five rotations of the powering axle, the wheel will do a single full rotation. It's very cool that TLG is actually releasing these kinds of parts. It shows that they are constantly improving and maturing the Technic product line. The smaller of the two motors can also be mounted perfectly, even in smaller cars. These new motors are shaped to perfection. It almost makes you wonder why TLG chose round ones when they released the Power Functions system. Attaching the two sub-assemblies results in the, more or less, completed front suspension. The two motors fit in nicely and they both add rigidity to the model. The shape of the chassis doesn't need alteration to accommodate the motors. The big turntable mounted at the front allows the front suspension to rotate freely. The bodywork will be attached at a later stage. The rear suspension doesn't have steering, so it's built differently. This sub-assembly doesn't contain as much color as the front one, but you can still see some yellow and orange. The other XL-motor is mounted the same way as in the front suspension. Due to the lack of steering, there's no L-motor and the rear suspension is a bit shorter than the front one. The turntable is placed inside, instead of outside. The chassis is almost complete after combining the front and rear suspension. And yes, I forgot to mount the shock absorbers. I was too busy with routing the wires that I didn't even notice this when I took the picture. The smart hub is mounted behind the seats. The wire connectors are a welcome addition. Not only do they provide a way to attach the wires to the chassis, but the color-coding allows for easy identification. Job well done! Building the chassis was fun and the final assembly feels rigid enough to take some beating. It's hard to resist mounting the wheels before the end of the build, so that's what I did. Eager to try out the new Control+ app, I turned on the smart hub and everything worked smoothly. The suspension test also turned out the be successful. Even though the same shock absorbers are used, the front suspension feels less stiff than the rear one. Time to build the bodywork. Aaaaaand it's done! Usually, I always apply the stickers when I review a set. This time I decided to omit the stickers to see how the model looks. And you know what, it looks awesome. The bodywork looks phenomenal and doesn't need stickers at all. Being able to easily attach and detach the bodywork is a big plus. If you don't like it, it's very easy to create your own version. Or the same body, using a different color, which I will show you in a bit. The on/off button can easily be reached and the wires are routed nicely behind the liftarms. Maybe I missed two black pins, but these look like the usual leftover parts. COMPLETED MODEL I absolutely love the though look of this crawler and I like the fact that this model doesn't need stickers for its appeal. I have said it before, but TLG hit it out of the park when they designed these tires. Various bars protect the car from being damaged when it rolls over. The bed of the crawler has ample space to place the battery box. It's very easy to replace the batteries. The front and rear view don't look particularly appealing, but being a crawler, that's what you expect. Another front view pic from a different angle. And a rear view one. The bottom view shows the suspension and motor placement. ALTERNATE BODYWORK Since it's very easy to swap the bodywork, I decided to create a white-and-black version. The original colors works very well for me, but this combination isn't too shabby either. Maybe we can reinvigorate the Eurobricks Car Chassis project and design some cool detacheable bodyworks like this one. Here are some pictures with the white body attached to the chassis. POWEREDUP/CONTROL+ VS POWER FUNCTIONS The main question we need to address is the new PoweredUp system. How does the new kid on the block stand up to good old Power Functions. HUB The hub is rather bulky, but it does include all the batteries. Since PoweredUp isn't using IR to communicate, you can place the hub somewhere in the chassis. Of course, you do need to think about an option to detach the hub from the chassis to replace the batteries. Unfortunately, the Technic hub still uses batteries, instead of an internal rechargeable battery. For all my EV3 units I purchased the rechargeable battery, which makes it very convenient to simply plug in a USB cable and charge the unit. I sure hope TLG will provide options for this in the future. Of course there are (and will be more) third party solutions, but I'm talking about a solution for the purists. MOTORS I cannot express enough love for the form factor of the motors. I highly doubt TLG will ever top this design (we will read this statement in ten years and laugh out loud). Using the motors to provide extra structural rigidity is very convenient. And the motors do nicely fit in a 5x5 chassis assembly. I was hoping for a bit more torque and speed. In other words; I was hoping that PoweredUp would bring a significant performance upgrade compared to PF, but unfortunately that is not the case. CONNECTIVITY Using Bluetooth over Infrared does provide a wider range of options. And it's less prone to communication issues (like IR has in the sun). That feels like a step forward. "But what happens when TLG doesn't support the apps anymore?" and "I don't like to give my kids a smart device to control LEGO sets. Can't I use a regular remote?" These are very valid questions. I am not opposed to using a smart phone to control these vehicles, but I would love to be able to choose between a smart phone and a regular remote, like the PF one. Hopefully TLG will provide better support for physical remotes, like the one used in the new train sets. And for TLG not supporting the apps anymore; by the time TLG drops support for the Control+ app there will be loads of third party alternatives. Therefore, I am not afraid that we can't use PoweredUp anymore in a decade or two. MOCs For now, I do think that PoweredUp and the Control+ app lack in one department and that's the MOC-ing department. When you design your own creation, you aren't very flexible when it comes to controlling the model. You basically need to use an existing profile in the app. I started creating a PoweredUp chassis for the 42039 and I soon found out that one of my motors needed to turn counter-clock-wise. There is no way I can change this in the app. This will hopefully change in the future, when TLG releases an SBrick like profile creator. But for now, I consider this a major downside! BRICKCONTROLLER2 Lucky for us, there will always be people like @imurvai who invest their time to create cool project like BrickController2, which allows you to control all kinds of LEGO hubs, and thus motors. Check out this informative video made by @kbalage aka RacingBrick. All in all I am very happy with PoweredUp and I am looking forward to what the future will bring, but I do need to address that Power Functions still offers more usability and flexibility at the moment. B-MODEL - ROCKY Remember the good old days when TLG designed B-models to provide some added value. Those days have been few an far between. Again, lucky for us, we do have an awesome community with awesome members. In this case Eurobricks member @Didumos69 created a remarkable B-model, which I will be reviewing as well. Thanks to Diederik for providing me with instructions. In case you like to build it yourself, the instructions can be found on Rebrickable. We even have a dedicated topic if you like to discuss this model. As usual, I had my lovely wife Kitty disassemble the A-model. She knows I hate, or rather not like, disassembling models. Thanks babe! You start by building the middle section, which is kind of the pivot point of the model. The basic setup is more or less the same as the original crawler, which is not surprising at all. The front suspension contains the L and XL motor, for steering and driving. The front wheels don't have independent suspension. Instead, the entire front carriage is suspended. Since the front suspension is attached to the turntable, it is able to rotate as well. The rear suspension is also attached to a turntable, but it only has a single motor, since the rear wheels don't steer. The picture below shows the finished chassis. The smart hub slides into the middle section, where the wires are attached. The color coded wire clips are well thought out and they are properly used in this model as well. Due to the limited availability of certain parts, some very minor concessions have been made. But overall, it's a great build and a great chassis! The bodywork is very limited, but this B-model is not about the bodywork. It's about performance of the chassis. That being said, the bodywork has been designed elegantly. Both sides are detachable to access the battery box. Detaching, and especially attaching, the sides is somewhat cumbersome because there a lot of pins which need to be attached at the same time. But practice makes perfect so it gets easier over time. The collection of leftover parts. This model definitely looks like a proper B-model. Without the limited part restriction, this could easily be turned into an A-model. As it is, it's somewhere in the middle between an A-model and a B-model. Please bear in mind that I am talking about the looks, not the performance. It's worth mentioning that when you test the suspension, the axles going into the motors will slightly rotate. This results in the model not fully returning to its original position. When you drive the car this will automatically be corrected to return to 40% compression again. The side view shows what a proper crawler looks like, lean and mean! TLG has released several 4x4 off roaders. None of them are officially called crawlers, because they aren't actually crawlers. This is one of the best renditions made with parts from an official set. Like the A-model I won't be providing a video of the B-model. I can recommend watching two cool videos, one by Diederik himself and one by RacingBrick. Of course, I did test the performance of this model. It's impressive to say the least. It could actually drive up the back of my couch, before it fell over hehe. I definitely recommend getting the instructions and build this B-model. You will have tons of fun with it. Probably more than with the official model SUMMARY I am glad to see TLG constantly improving and maturing the Technic product line. The popularity of SBrick and Buwizz made going down the smart hub road a no-brainer. And I am glad the TLG thinks the same way, and that they are not ignoring RC products. However, I do hope that we will still get big models with manual controls instead of an elaborate line of PoweredUp/Control+ sets. Hopefully, TLG will find the right balance to keep pleasing AFOLs as well. PoweredUp needs to mature before being able to fully compete with third party controllers. The lack of custom profile creation is a major drawback. Comparing PoweredUp with Power Functions, the form factor of the new motors is stellar, but the lack of custom profiles makes it very hard to use PoweredUp in a MOC. And the need for a smart device is limiting as well. PoweredUp is a very cool product line and I am looking forward to what the future brings, but at the moment Power Functions are more versatile. Overall I like this set, but I do think it's better to fork out some extra cash and get the Liebherr. PROS Cool design, even without stickers Body can be easily attached and detached PoweredUp motor form factor is out of this world Wire connectors are spot on New bright light orange New planetary hubs (and new CV Joints) CONS Performance is so so PoweredUp performance isn't significantly better than PF No custom profiles for Technic hub No additional features, besides its off-road capabilities No official B-model Value for money feels off SCORE SCORE How do I rate this set? 9 DESIGN Cool design, even without stickers. 7 BUILDING EXPERIENCE Decent build, but no gearbox or other Technic assemblies. 7 FEATURES No additional features, besides its (limited) off-road capabilities. 7 PLAYABILITY Can be fun when creating an off-road track. 7 PARTS New bright light orange parts, CV joints, hubs and PoweredUp elements. 6 VALUE FOR MONEY The value for money feels off, compared to the Liebherr 7,2 HOPED FOR BETTER PERFORMANCE
 -
How about that little cross between mud and go on the rocks? Crawler 4x4 always ready for it! Still would! Its wheels are shod with tires RC Rock Crusher X/T 1.9, coupled with portal axles and two motors running by SBrick and LiPo battery box - we have an off-roader with excellent maneuverability, suspension geometry and a low center of gravity due to the unsprung axles. Crawler 4x4 built under the rules of the forthcoming Off-road trial competition in Moscow, at the same time. I tried to build the chassis in such a way as to achieve maximum throughput and maximum flexibility - namely, so this chassis can set the wheels of virtually any size from 62 to 108 mm. The body of the model removable. This allows the chassis to this every body, even though the truck, even an SUV. Get more photos on my blog of flickr
-

[MOD] Dodge T-Rex 6x6 Friends Edition
KirTech LAB posted a topic in LEGO Technic, Mindstorms, Model Team and Scale Modeling
Hello! The topic is updated with new video: I’d like to show my Dodge T-Rex off-roader in new style. I call it Friends edition :) Its main feature is a turtle on the hood. Also the model has AWD and all-wheel steering. One XL for drive and two M-motors for independent steering. Photos: https://flickr.com/photos/141718063@N06/albums/72157669654826226 Thanks for watching! I hope you like it ) -
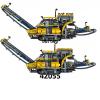
[REVIEW] - 42037 Formula off-roader
roppie11 posted a topic in LEGO Technic, Mindstorms, Model Team and Scale Modeling
The set 1.Introduction Hello, welcome to the review of 42037 by roppie11! I don’t buy much sets, so I miss a lot of parts. I wanted the 42000 hubs and some more useful suspension parts were very welcome. So I searched on Bricklink and the best option to get all the parts was buying 42037. I was lucky because some LEGO sets were on sale at wehkamp.nl. Of course I bought it immediately. I looked for reviews but there was no 42037-review on EB so I decided to do it myself. Enjoy and let me know what you think! Note: Go to my Flickr page for higher resolution pictures. 2.Set Information Let’s start with the set’s information. Set-number: 42037 Set-name: Formula Off-Roader Parts: 494 Price: €54,99 is advised by TLG, I paid €40,49 and it is €39,99 at Bricklink. Building time: + 1h Price per Part: 5499/494 = 11,13ct per part Power-functions: No, not upgradable either Box-weight: 152g Box-dimensions: LxBxH=36x26x7 A-Model-weight: 513g A-Model-Dimensions:LxBxH = 36x26x21 B-model-weight: 502g B-model-Dimension: LxBxH = 36x26x16 Link: bricklink 3.The box The box is a pretty standard one. In the left-corner is a logo and beneath that is some information. This set is dedicated to kids from 9-16 years. The front shows the main model with (right-corner) its functions. These are steering, moving pistons and an opening safety-cage. It also tells that there is a B-model which brings us to the other side. On the other side, we find the b-model. It is also some sort of race car. You also see a shipping sticker. The box came loose like this, without another box or something else around it. It is luckily not damaged. On the side, you will find a 1:1 picture of the lime rim to give you an imagination how big (or small) it is. 4. Content of the box The box is pretty full. About ¾. It contains the following: 5 unnumbered bags with pieces. 2 instruction booklets, one for the A-model and one for the B-model. A sticker sheet. 4 loose tires. (Not on picture.) a. The bags There are 5 bags, they are unnumbered. Not surprising for a medium set. The biggest bag, contains beams, some panels and other big parts. It also contains 2 small bags with pins etc. Another pretty big bag, contains the lime parts, the shock absorbers and some more stuff. There are three more bags, containing the other parts. b. The instruction booklets The sets contains 2 booklets. They were loose in the box but they didn’t got damaged. I like it that the b-model is included as well. I’m therefore going to review that as well. The front shows the model itself that will be build. The back on no.1 shows some more 2015h1 models and the bag on no.2 asks for feedback. If you do so, you make chance to win ‘a cool LEGO prize’. c. The sticker sheet The sticker sheet is really cool. It has a metallic layer and it’s shiny like a mirror. (Can you see me with the camera ;) ? The quality is as usual very high. I recently washed my LEGO bricks in hot water in a tub, and none of the stickers got loose. TLG knows how to make stickers. The stickers itself on the panels don’t have much metallic on them. I suspect that stickers are made from a shiny sheet and not that a metallic layer is added later. Because the underside of the sticker is also shiny and it’s shiny all around the stickers. The stickers are numbered so you can’t go wrong when applying the stickers. d. The tires The tires are 81,8x36R balloon tires. It’s written on the tires itself. I forgot to lay them on the table when I took a picture of all the content so here is a picture with the rims fitted inside it. They are pretty big. They are bigger than the 42043 tires but these can get very flat whereas the 42043 tires are pretty sturdy. I like them because it are my first balloon tires. I don’t know if it are my rims or the tires, but they tend to slide of the rims when playing with it. I don’t have this problem with the wheels from 42008 and 42043. 5. Parts. Ahh, my favourite section: The parts. I bought this set specifically for the parts. This set does not contain many new parts, by which I mean, this set does contain just a few new parts, that weren’t already available at that time but it does have a lot of parts that are new to me. The new part is a pin with pinhole. You get only two, but it’s better than none. This set has also a lot of suspension parts. You can see them at the picture. 4x: 6x2 A-suspension arms 2x: Front and rear wheel hubs 4x: Inner part of a wheel hub 1x: Differential 2x: 6l links 2x: female CV-joint 4x: male CV-joint 2x: H beams 2x: 5x11 Frames 1x: 5x7 Frame 4x:Yellow, hard shock absorbers 10x: 2l pin+1l axle 2x: Pin+pinhole I forgot to put the last part on the picture, but it can be very useful. It looks like this: The part was new, when the set came out. If you want some suspension parts, this is probably a good set for you. I don’t have to tell you that a lot of those parts are specifically for suspension. It also has 2 H-beams and some frames. These are far from rare, but I find them very useful so I decided to include them as well. I didn’t put this part on the pictures as well , but this little guy is very useful. It contains 10 of these. It does not include its counterpart: . A-model 6. The build Let’s build it! I was curious how long it would take me to build this one, so I had a stopwatch running. I paused it when I took a picture, so the time should be fairly accurate. I took a picture every time I finished a stage/module and sometimes in between. I build pretty slowly and carefully and I don’t assemble big sets at this speed. It took me 5 quarters but if you build at a normal speed, you can easily finish it in 1 hour. If you’re interested, this was my working space: a. Front-suspension We begin with the front suspension. It’s just a pretty standard suspension but the first one for me. It’s unusual how you have to attach the 5x7-frame. You have to slide it one stud upwards, so that it is locked in place. That is a nice one! After a few steps you have to put in the gear-rack. I was genuinely amazed how solid and sturdy the build was. There is really no way out for the gear rack and the whole build is held together with axles and pins, all around. After that it is just a case of putting wishbones and wheel hubs to finish the front –axle. The wheel has a travel of 2 studs from the neutral position. So it has a total travel of 4 studs. you add the shock absorbers you find out that they are placed just right. It uses full travel of the wishbones but the spring is not compressed. (In contrast to the rear axles where this is the case.) I didn’t expect the wheelhubs to have so much backlash. It works fine anyways. Time: 12:47 b. The motor The motor is a pretty standard inline 4. It goes right before the front wheels and it really shows itself. A few weeks ago I read in a topic(42056-porsche topic) that the crankshaft configuration on LEGO motors is wrong. On LEGO motors, the configuration is: up-down-up-down. In reality the configuration is: down-up-up-down. So I changed the crankshaft a bit and now it’s more realistic. A few more parts are installed https://c5.staticflickr.com/8/7786/27104071652_204e2bed4b.jpg[/img] Time: 18:22 c. The body After that you are building the body. The driving- and steering-axle go all the way to the back of the car and they are ready for the front axle. Also the exhausts are added. The lowest point is at that the moment the suspension-arm. Its 2 studs lower than the body. Time: 26:10 d. The rear axle The rear axle is also very predictable. This is what I have in my head when I think about suspension. The build is really study. The black pin on the wishbone limits the down-movement to 1,5 stud. If I place it on 2 frames, I can exactly lay a thin part under it. The up-movement is also a bit limited by the lime L-beams. When the shock absorbers are attached, it doesn’t go further than horizontally. The suspension works great btw. The shock absorbers should have been attached somewhere else because they are constantly compressed. Time: 36:10 e. The rest of the body After that, some work needs to be done before you add it to the body. First the steering axle is build and firmly attached. Here you can see that the spring is compressed. The black pin is slided a bit upwards. On the 3rd picture you see a loose shock absorber, to see how it should be. The axle gets added to the body and some beams lock it in place. Now, only the cabin and the panels need to be done. Time: 48:05 f. The chair This one does not really deserve a chapter but I took a picture so I did it anyways. I like the chair. It is blue as usual. It is made out of 4 beams. It looks pretty well as a chair but I don’t like the gap in the middle. They should have made a beam in the middle as well, but that is luckily easy to modify. 51:08 g. The panels This set includes 10 panels. 2x panel #5 2x panel #6 2x panel #4 2x panel #3 1 mudguard right 1 mudguard left They all get a sticker. The panels are placed very well and give a nice shape to the body. The stickers should already be added, but I was curious how heavy the look relies on the stickers. So I added them after. Time: 58:40 h. The cage The last step is the cage. It consists of several connectors and axles and 2 lights are added. On the rear, 2 bent beams are added upside down. If the long end points downwards, the beams is just perfectly vertical/horizontal. I’m glad the designer didn’t do that because this looks way cooler. The last step is adding the wheels, and it is finished. img]https://c7.staticflickr.com/8/7223/27103932942_f343f58c92_n.jpg[/img] Time: 1:05:51 i. The stickers I added stickers later. It took me a good 7 minutes because I also had to remove the panels before I could apply the stickers. I like the model both, with and without it, but it looks cooler with. I think that the sticker sheet is made from a shiny material. The back of the sticker is so shiny as well, and the area around the stickers as well. The final time ended up being 1:12:05. j. The spare parts This set has a staggering 6 spare pieces. Nothing unusual, you can see them at the picture. 7. Functions This set is medium so it does not have a lot of functions. All functions are manual because this set does not contain Power-Functions. HoG Steering Driven inline-4 motor. Openable safety cage. 4 wheel independent suspension. 8. Impressions ‘Hmm, I recognize that.’ is someone probably thinking. That’s right Sariel. I took it straight from you because otherwise I didn’t know how to call this chapter. I look at things I noticed when building. This is comparable to the ‘impressions’ in Sariel’s reviews. a. Reality I was wondering whether the model was based on an existing car or not. So I googled for: ‘formula offroader’. The most matching car I could find was this one: This one does not have the springs on the front and I have not seen any who do have it. I think they couldn’t find a better place for it and I can’t either. b. Stickers Here is the stickerless version compared to the stickered version. I like them both but the stickers make it look cooler. The shiny part was a good idea but it is not very good visible. That could also have been gray. You’re left with an empty stickersheet. c. Dimensions And what about dimension. I built a box for it. I build it as wide as the widest point and as long as the most out sticking point and as high as the highest point. The highest point is the steering wheel. I’s a pity that it is a small knob. Big ones are more pleasant. It is not held in place by (a half) bush but it just sits on the axle. The front-wheels and the bent-beams on the back are furthest from each other apart. All in all the dimensions are: LxBxH = 36x26x21. d. Just something As you can see, the body leans a bit forward. This is because the front-axle is higher than the rear axle, if you look at the chassis. The rear axle is 2 studs lower. The front axle however, has more travel and when taking everything into account, the body is at the front 1,5 studs lower. I like it. It looks a bit more aggressive which is what you want for such an off-roader. e. The suspension It is very nice that this model is fully suspended, but how good does it work? My camera has a slow-motion modus, so I filmed it. Sariel did it also, but I wanted to do it by myself as well. I looked at the front suspension first. It turns out to work very well, but I have to say I threw it pretty hard. For the rear suspension I have 2 videos. On one of the video’s you see that a wheel is getting loose. I have that problem constantly. I am almost thinking about not throwing it anymore :p The suspension is quite good. I could have let it jump on a ramp, but if you want to see that, you should look at Sariel’s review. 9. Rating Ok, the final decisive rating is finally here. Right now I am typing for 2,5 hours already so I’m glad I can give my rating. I will look at the same things as Jim in his review, but only on things which are relevant. Design: 7/10 Not bad, the springs on the front are ugly, cabin is well shaped. I’s missing the details. Building experience: 9/10 My first full-suspended set. Everything is new to me so I like it more automatically. It is very well constructed and this build will not fall apart easily. No loose parts. Playability: 9/10 Suspension is great, functions work like they should so it is fun to play with it. Parts: 8/10 Many suspension parts, and interesting parts. Few gears. Value for money: 9/10 Many great parts, and big wheels. 11ct per piece is not bad. Total score: 7+9+9+8+9 = 42 à 42/5 = 8,4 à 8,4/10! B-model 10. The build I first had to disassemble the A-model. When doing that, I realised that I did not have to disassemble every piece. A part of the rear suspension is the same and lots of other things. After half an hour of disassembling, I ended up like this and was ready to build the model. I didn’t use a timer this time because some parts were already assembled, I didn’t have to put on stickers, and I was building a lot faster than with the A-model. It took me a good 30 minutes to complete it. a. The front axle The build starts with the front axle. It is pretty similar to the one of the A-model except that it is not suspended. It is still steered. The way it is build, isn’t much different either. On the picture you see how the wheel hubs are attached. In the holes go 3l axles with stop, just like the A-model. Here you see the finished front axle. The suspension arms are attached the same way as in the A-model and the model has therefore the same width. (picture didn’t want to work. It’s still on my laptop) b. The inline-4 motor After that, you have to build the motor. I kept it assembled so, that didn’t take a long time. It still has the crankshaft-mod. A few more parts are added the body in this stage, exactly the same as in the A-model. c.The rear axle On the first picture, you see the part that I led assembled. Until this step (actually a little further) the rear axle is identical to the A-model. The difference comes when the steering knob gets added. It is much lower than on the A-model. This part, you have to attach to the rest. d. The body When the rear axle is attached, the beams come in to make it one solid piece of LEGO. At the sides, you have to attach a bent beam. In the A-model the bent beam is used in the front axle and the straight beam here. Since there is no need to attach a SA, the beams changed places with each other. This is great in my eyes because the beams on the front were very ugly. In this stage the Shock absorbers are added. They do nothing because the front axle is not suspended. The SA’s give a cool look to the car. It is a good place to add though. At first I was disappointed that they don’t do anything, but it would have been worse if they placed it on the suspension arms to fake the suspension. To cover the front, a panel is added. The rest of the panels comes in later. e. The cabin Then the middle part is very empty, so a cabin gets built. I like the cabin less than the one on the A-model. It looks very unfinished and it does not have a chair. Take a look for example at the blue 3l pins sticking out. There is also no chair included because it does not fit. The scale however is not changed. I don’t blame them however, because the parts are pretty limited. I am sorry to only have one picture of this stage. f. The panels From the last picture to this one, only the panels are added. I forgot to take pictures of those but it should be quite easy to see the changes. I like how the panelling is done. The roof is curved and all stickers are upright. ‘Oh, wait…. They are actually upside down. I did something wrong I think. Hmm, let’s look at the building instructions. Ohh look! The stickers are upside down on the panels!!” That literally went through my head when I saw it. I think they wanted the metalized part on the front to represent the motor, but that had a price of stickers being upside down. It is a choice they made. Luckily, you can make the panels right if you want by changing their places. The most obvious sticker however (with 65) is not upside down. g. Finished And there is the finished product. I can’t make the comparison, with and without stickers because they are already applied. There are quite a lot of pieces left as you can see. 27 to be precise. 11.Functions The functions are less, than on the A-model. Driven inline-4 motor Suspended rear axle HoG steering 12.Impressions a. Reality What were they trying to recreate? Is the model based on something? I don’t know but it looks like a beast. b. Dimensions I used the same box to measure the dimensions, because it has the same width. I can change the length and for the height I just have to move the red 3l pins. It turns out, that it is exactly as long as the A-model. It is a tiny bit wider because the suspension arms are not diagonal anymore but I decided to leave it like this. I had to change the height. If you are going to count the studs, don’t mislead yourself, you should count the space under the ‘roof beams’ and between the side beams. I made that mistake myself so I thought, it might be not a bad idea to warn you. If I did everything right, the dimensions are: LxBxH = 36x26x16 c. Comparison to the A-model I don’t know if this is fair to do, because building a B-model is pretty limited for the designer. There are a few things I want to have said about it. First of all, this is very similar to the A-model. The front-suspension is a bit different because it is not suspended. The rear axle is to a certain point exactly the same, and the way the motor is attached as well. The cabin and the panels are different which gives it another look. I am disappointed that the front axle is not suspended, but I understand it. It would make the model even more similar to its brother, the A-model. I like how the SA’s are placed now. The cabin is uglier, but of course it is difficult to construct it. The most obvious thing is the pins sticking out, on the green beam. You can even see it on the box. (no I’m not gonna post another image here, scroll back, you retard The model is leaning a bit more forward and I like that. It is constantly saying: “c’mon lets fight, or race!!” The panelling is more creative and looks really good. I only have doubts about the stickers but that’s a choice TLG made. All in all, I like this less than the A-model, but you can’t expect too much from a B-model. d. Just something again It is leaning forward more than on the A-model and that is the only thing I like more about this one than on the other one. The front is about 3,5 studs lower. On the picture of the dimensions, it looks a bit too much but it really isn’t. it looks quite good. e. Suspension I tested the rear suspension of course. I was also wondering if the tires are a good suspension because they can be pretty easily deformed. When looking at the video, you can see that the back is bouncier than the front. The suspension clearly does its work. The bent beams are not a good idea. If the suspension goes to deep, it touches the ground and the beams get loose. That’s what you see here: 13.Rating I’m going to rate this, the same way as the A-model. Design: 7/10 Not bad, cabin is ugly, front looks great. I don’t like the upside-down stickers. The leaning forward is great. Building experience: 8/10 I learned not how to make suspended axles, but how to make solid unsuspended ones. That is also quite useful. I only am less exited because I build it for a second time. I consider giving it 9 stars. Playability: 7/10 Suspension on front axles gives a better playability. Parts: 8/10 Idem ditto to the A-model. No special/useful parts are unused. Many suspension parts, and interesting parts. Few gears. Value for money: 9/10 Many great parts, very much, and big wheels. Uses quite a lot of parts from the A-model. The review 14.The making of the review This is my first review. I first typed some text in word, then copy-paste to EB. In word you can already add hyperlinks(to bricklink etc.) and add pictures by putting a link between img tags. It looks like this: http://..[/img] at the end, I only had to make some corrections. The review without this chapter had 4057 at his final version on word. The pictures and slow-motion vids are all taken with the Panasonic DMC-tz20 which has a 24mm lens from Leica. It costs lots and lots of time to make a proper review. More time than I thought. Even a set this small takes a lot of time. I can only imagine how much time it costed jim to make the 42043 review. To give you an insight I made a list how long it took me to make this review: Preparing and research about review: 0,5h Unboxing, pictures: 0,5h Unboxing, Writing 1,5h A-model, building 1,25h A-model, pictures 0,75h A-model, writing 2,0h A-model, disassembling 0,5h B-model, building 0,5h B-model, pictures 0,5h B-model, writing 2,5h The slow-motion video 0,5h Pictures: computeràFlickràWord 1,5h Links to text (for parts etc.) 1,5h Writing this chapter 1,0h ------------------------------------------------------------------------------------------------------------------------- Total: 16,0 hours I didn’t follow the reviewers academy. To make a good review, I took the 42043 review from jim as an example. I don’t think I’m gonna do another review because I don’t buy so much sets. Let me know what you think about it. Have a nice day! -
[MOC] Off-Roader: Dodge T-Rex 6x6 style
KirTech LAB posted a topic in LEGO Technic, Mindstorms, Model Team and Scale Modeling
Hello all! Today I want to show you my new MOC. I’ve started to construct this off-roader after trial competition in Moscow. It’s stylized as Dodge T-Rex 6x6 but it wasn’t a target to create precise copy. It was not too simple to create bright-green body :) There is one XL-motor for propulsion and two M-motors for steering (independent steering for front and rear wheels). I hope I’ll test it on the real track in the next competition and now let’s watch test-drive: More photos: Thanks for watching! -
[REVIEW] 42001 - Mini Off-roader
Jim posted a topic in LEGO Technic, Mindstorms, Model Team and Scale Modeling
REVIEW - 42001 - MINI OFF-ROADER INTRODUCTION Technic Mini models are sometimes regarded as models not worth buying. I don't agree with this opinion. Whether it's a special part or innovative building technique, almost every Mini model has something that makes the set worthwhile. This time I will be reviewing the 42001 Mini Off-Roader. This model is not a smaller version of an existing model, so there's no real comparison with a bigger brother, or sister if you will. Nor does the model resemble a real life brand or vehicle, so it is what it is, a Mini Off-Roader. Note: All images can be clicked for hi-res versions. SET INFORMATION Number: 42001 Title: Mini Off-Roader Theme: Technic Released: 2013 Part Count: 100 Box Weight: 165 gr Box Dimensions: 15,5 x 14,0 x 4,2 cm Set Price (MSRP): 9.99 EUR DE / 7.99 GBP / 12.99 USD Price per Part: DE 0.100 EUR / UK 0.080 GBP / USA 0.130 USD Links: Brickset, Bricklink THE BOX The box measures 15,5 x 14,0 x 4,2 cm which is obviously not very big. The weight of the box is approximately 165 grams. FRONTSIDE The front of the box shows a though four wheel drive off-roader challenging a fierce rocky mountain trail...now does it?! What the box actually shows is Mini Off-Roader challenging a small foam rock formation, much like rocks used in Star Trek The Original Series, yet smaller The box also states that this model is for the age of 7 till 14. More importantly, the 2-models in-1 logo is clearly visible, which means this set can be used to build two different models. BACKSIDE The backside shows a picture of the alternate model and a smaller version of the original model. The conversion arrow and the 2-in-1 are printed to clarify that the main model can be converted into a secondary model. SIDES One of the sides shows the 2-in-1 logo and a picture of the main model. Another side shows a picture of one of the wheels in actual size and again, a picture of the main model. CONTENTS OF THE BOX The box contains: 2 Booklets 2 Bags 4 Tires BOOKLETS This set contains two booklets which is not very common for a set this size. Both models share the same chassis, which is why the build has been divided over two booklets, one for the chassis (8 pages with 10 steps) and one for the bodywork (34 pages with 23 steps for the main model and 20 steps for the alternate model). BAGS The box contains only 2 bags which is to be expected from a set consisting of 100 parts. One of the bags is filled with liftarms, panels, rims and two elastic bands. The other bags contains all the other parts, like pins, axles, connectors, etc. Opening the bags results in the following collection of parts, with the exception of the tires. No abundant number parts that will add real value to your collection. Nevertheless, there are some interesting orange parts and elastic bands. TIRES The tires are provided seperately (i.e. not contained in the bags). From the picture you can see that these tires have a front and a back side, so you should pay attention when fitting them to the rims, which have two different sides as well. HIGHLIGHTED PARTS This section describes the unique and/or highlighted parts. VERY SMALL SMOOTH TECHNIC PANEL (#21 AND #22) These two small Technic were new at the time of release and this set was only one of two sets containing them in orange. The other set is the 42007 - Moto Cross Bike. At the moment of writing there's a third set containing these parts, the Black Champion Racer. Side A Side B SMALL RUBBER BAND I was under the impression that these White Rubber Bands weren't that common, but it seems that these bands are as common as dirt. But hey, you can't have enough rubber bands! THIN LIFTARM 1x5 WITH AXLE HOLES Like the panels, these Liftarms were also new at the time of release. Looking at the the frequent usage in other sets, this part has proven to be a most useful mammal. THIN LIFTARM 1x3 Not a very rare piece per se, but if you are not into Bionicle, this liftarm part can be hard to find. Your other option would be to buy the 9390 - Mini Tow Truck, or the 8305 - Dual Bikes from a while ago (2000). LONG PIN WITH CENTER PIN HOLE This relatively new kid on the block is currently used in many Technic and non-Technic sets and has well proven it's worth. AXLE PIN CONNECTOR HUB WITH 2 AXLES Like the previous part this newish part is also quite helpful in certain situations. PART LIST Here's the complete list for all 100 parts. BUILDING EXPERIENCE The build starts with the chassis of the Off-Roader. After connecting some liftarms two elastic bands, one on each side, are attached to the towball pins. This is all there is to the suspension, plain and simple. The two elastic bands contract the L-shaped liftarms, which results in the long ends swiveling downwards. The video below demonstrates the suspension. The simplicity doesn't do it justice, because it works like a charm. The suspension is very smooth with the right amount of stretch and resistance. This great working suspension adds a lot of value to this set. To quote John Hurt in the movie Contact: "Why build one when you can have two at twice the price?". I have purchased two sets so we can simultaneously see both models and make a proper comparison. Below you can see two identical chassis which will be used for both versions of the build. At this stage we have arrived at the end of the first booklet, which only took about ten minutes. Not surprising, since the first booklet only has 10 building steps. Progressing to the second booklet, you need to choose between building the main and alternative model. That's a choice I don't need to make for this review, so let's start with the main model. MAIN MODEL When building the bodywork there's a rather peculiar building technique, which you wouldn't expect in an official LEGO set. The Axle and Pin Connector Hub with 2 Axles only protrudes halfway into the Double Bent Liftarm. The Thin 1x4 Liftarm which is added in one of the following steps makes sure the hubs stay perfectly in place, but I was still surprised to see this technique. The finished bodywork for the main model looks like....uhh...well.....I don't know exactly. It doesn't bear any resemblance to a real life model, which makes it hard to judge. One thing's for sure; it's not the best looking Technic Mini Model. The bodywork can be attached to the chassis by using a 7L axle and two bushes, one on each side of the chassis. ALTERNATE MODEL Unfortunately the alternate model doesn't look much better than the main model. It's even a stud less wide, while you would like to see slightly more body, matching the size of the tires and chassis. Attached to the chassis the body is even more out of proportion. It's not really ugly and the color scheme is great (obviously this goes for the main model as well), but the body simply doesn't match the chassis. I can only imagine that this model is supposed to have a chibi look, much like the Microfighter Star Wars models. COMPARISON The following section shows a selection of images from different angles to compare the main and secondary model. The main model has a bit more volume, while the alternate model has a more sporty look. FRONT VIEW The main model has headlights which are attached at a higher point, while the alternate model has headlights which are placed more closely next to each other. REAR VIEW A slightly different setup in both models, where the main model again has higher placed rear lights. SIDE VIEW The side view shows that the panels are used differently in both models. The main models uses them as doors, while the alternate model uses them as engine cover (bonnet). TOP VIEW The top view reveals that the main model might have room for a minifig PARTS LEFT The left image shows the parts which are left after building the main model, while the second image shows the parts left after building the alternate model. As you can see, the main model uses slightly more parts than the alternate model. FEATURES Besides the awesome suspension, which we already have discussed, there aren't a lot of features in this set. There's actually a single feature, which is only present in the main model....opening doors! Wow, impressive! Well, maybe we can't expect too much functionality in such a small model. SUMMARY The Off-Roader is a fun model which is fairly easy to build. The suspension is simple, yet very effective. The model could do better in the design department, but the suspension offers great playability and that is what this set is all about. The orange parts are not very common so they are an added bonus. All things considered this set is definitely worth the few bucks you need to spend on it. PROS Great suspension Fun to play with Some (semi) rare orange parts Great color scheme CONS No resemblence to an actual off-roader Not the best looking model SCORE Below are my scores based on different categories. 6 DESIGN Not the best looking Technic model. 7 BUILDING EXPERIENCE The suspension makes it fun to build. 7 FEATURES The suspension makes up for the lack of functionality. 8 PLAYABILITY The model has Car-Swooshability. 7 PARTS Some interesting orange parts. 8 VALUE FOR MONEY Great present for the younger builders. 7,1 ELASTIC Hope you enjoyed it! Thanks for reading and please rate this set at the top of this topic! -
 Hello, Did not planned to take part in Mini, but idea was born in 1 evening after playing with 42001 set , which was built for my 4 years old son. As for 42001 - great idea of interchangeable bodies on simple frame. I am wondering why LEGO did not ask communities to do a contest like with 9398's chassis. But both A and B bodies of this set are ugly. I understand part limit for this cheap set for beginners, but they are ugly - thats fact) So, after some trying with 42001's chassis I have to make it longer, but main idea of rubber band suspension was saved. First version was built in ldd Functions: - suspension - openable doors and bonnet - detachable hard top And here is first real prototypes. This WIP, not final version. May be this MOC is a bad idea, that was born in the head of toyota fan:))) Anyways, glad to listen your critics and advices.
 -
Finally, after a long wait the required parts, I still finished this model. This is still my first model of Technic. And now look at this the same detail. Off-Roader functions: 1. Independent front suspension. 2. Rear dependent suspension. 3. Turning the wheels. 4. Controlled winch. 5. Glow in the dark extra lights. 6. Tilting cab driver, dummy engine. First, the general form: In front Back Laterally Now functions of the model. The first of these is the independent front suspension. Rear suspension dependent. Now, about the turn of the wheels. He performed with the gear on the hood. Model has a high ground clearance. Additional parking lights. The following function-winch. It's controlled by gear. Now about the cabin. You can either just open the driver's cab ... Or you can open it to the end, opening views to the motor. The machine has a 10-cylinder, V-twin engine with a large displacement. Headlights Roof Work of the entire suspension And finally, some good photos Thanks for wanching, good luck! P.S. I apologize for my English